
DIY- Shift Knob finisher (Ballcok shank washer shaping) for Nismo GT Ti Knob.
 04-03-2008, 06:42 PM
#1
Registered User
Thread Starter
iTrader: (9)

Join Date: Dec 2003
Location: Waipahu HI; Phoenix AZ
Posts: 2,069
Likes: 0
Received 1 Like
on
1 Post
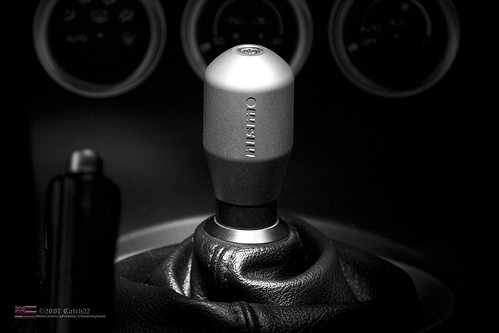
Every once in a while I get PM'ed about my shift **** finisher. It's just the infamous Ballcock shank wahser. Unfortunately, if you use the washer out of the box with the Nismo GT Ti ****, it's too big and looks ugly.
Here's the how to to pretty it up, and to extend the **** just a little to make it more comfortable.
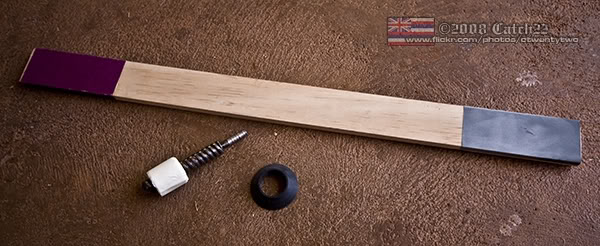
Here's what you need:
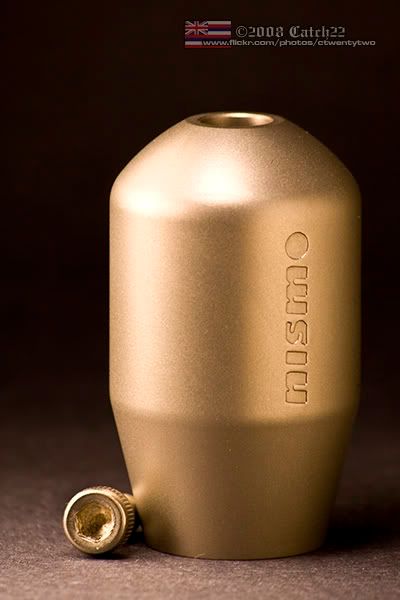
- Nismo GT Ti ****. Obviously.

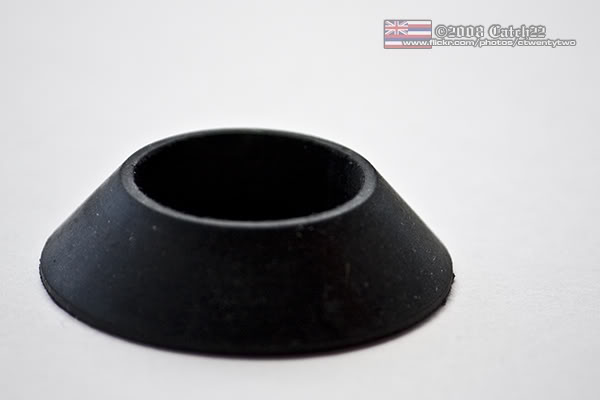
- Ballcock Shank Washer from Lowes. All the info you need is in the pic.
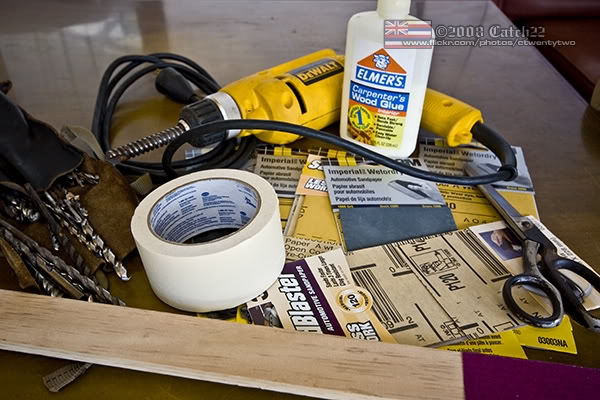
- Drill
- Masking Tape
- Rough and Smooth sandpaper.
- Elmers glue (wood glue, carpenters glue, school glue)
- Scissors
- Drill Bit (the bigger the better)
- Wooden Stick
- 1" Diameter Plastic Pipe
- Permatex Blue Thread Lock
The Work:
Cut the sandpaper to size and glue to the wooden stick as shown above. Wait to dry (5-10min.)
If you want to shorten the size of the washer, just rub the washer on the sandpaper and size to your liking. Keep the washer as flat to the surface of the sandpaper as possible. You don't want it to be lopsided. Keep turning the washer as you're sanding occasionally to keep things even.
If you want to taper the washer, wrap the masking tape around the drill bit so that it's fat enough to fit the washer on.
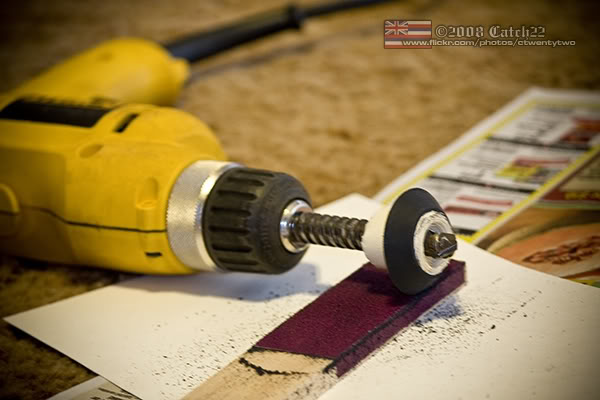
I would clamp the sandpaper stick to a table instead of holding it with your feet like me. Put the washer on the modified drill bit making sure it's tight, and use it like a lathe. You might want to put on some eye protection. Use the drill's highest speed and CAREFULLY press the washer against the sandpaper in the angle shown above.
- How you shape it is up to you. Just be careful. BTW, it's not as dangerous as it looks. Just don't make it too short or else it'll be loose.
Taking it a step above. Adding the extension.
- Take the plastic pipe and shape it like this:

Use the same drill bit with the tape on and tape until the pipe fits tight. Use the sandpaper stick or file and grind the tips down to form a notch. Make sure you don't grind too much or else it will be loose. Keep test fitting on both the **** and washer. It should fit like this:
In the end, you control how high you want the extension to extend... but you may need some other hardware, which I'll bring up later. 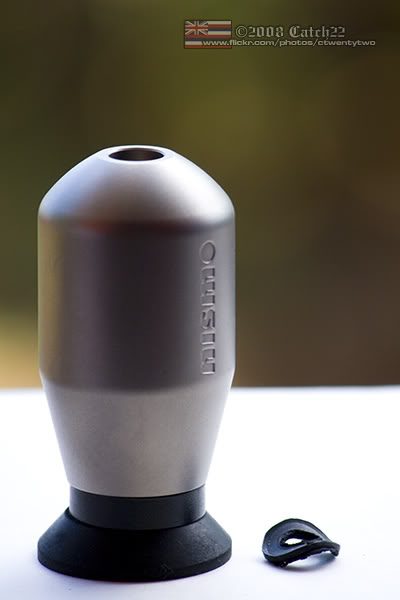
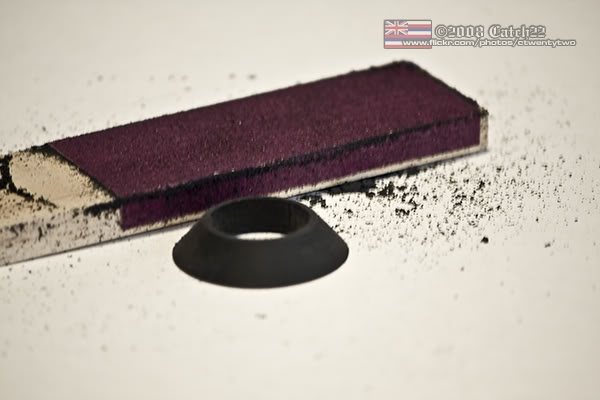
The final product. A little shorter and less wide.
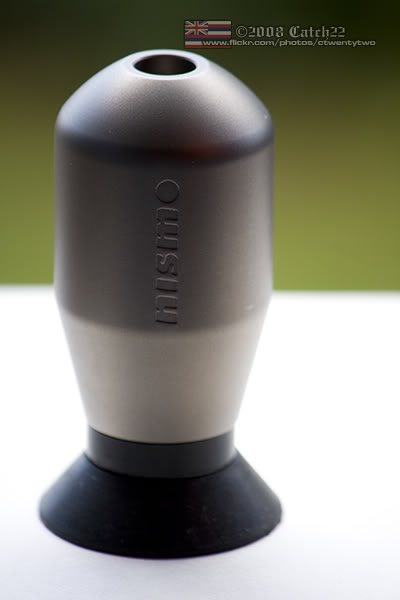
Compare the shaped one, to the unmolested washer.
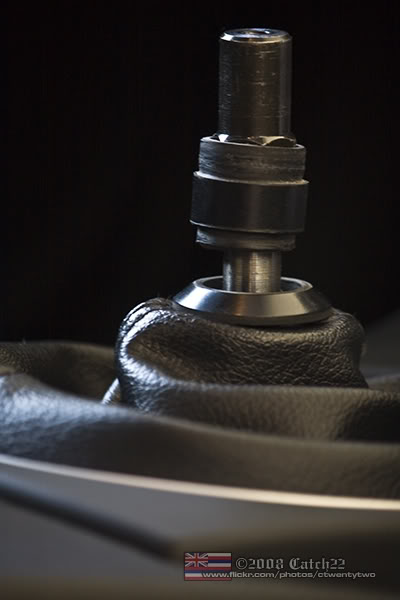
If you do decide to go higher, you'll need washers to fill the void between the inner piece of the **** (shown above threaded on top of the shifter shaft) and the **** itself. How much washers you'll need depends on how high you went. Sorry, forgot the size of the washers)
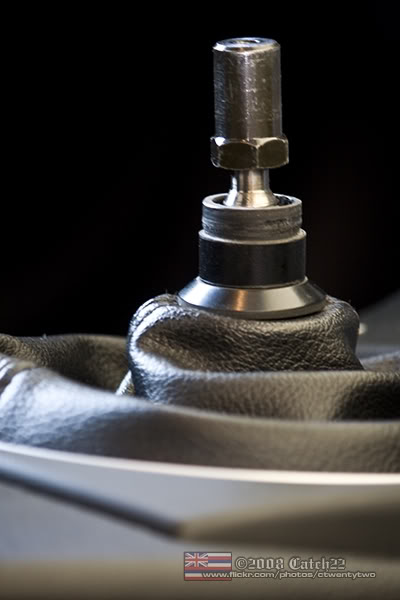
Here you can see the washer in the ****. Mine does not need washers as I decided to keep the **** in the stock position.

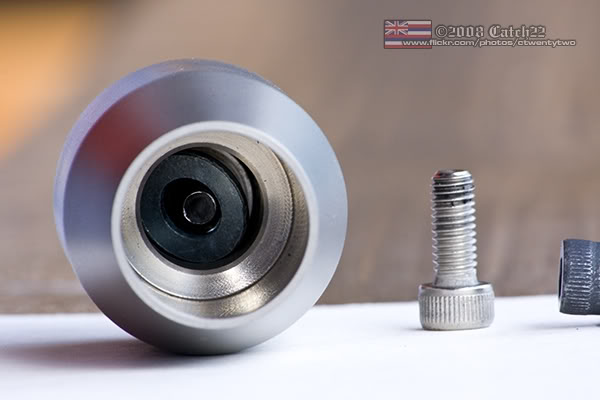
You'll also need a longer top screw. You can find longer screws with the hex heads at Lowes (the shortest screw on the right is the original.) I forgot the size of the pitch, but they are in metric sizes. Just bring your original to Lowes.
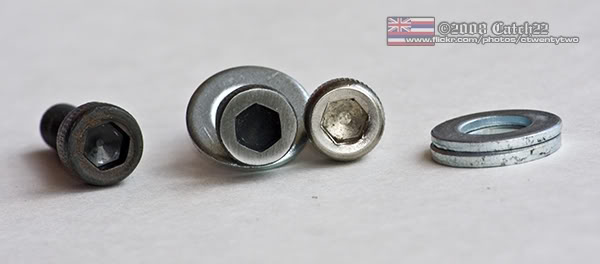
You can sand the top of the head to make it shiny instead of keeping it black. Lowe's only has black screws.
I also used a rubber gasket (show above to the right of the ****... deformed from the pressure) to keep the top screw tight, avoiding the metal to metal contact of the **** and the inner piece of the **** which may loosen later.
Just make sure you use the permatex blue thread lock when putting on the inner piece (shown on top of the shifter shaft above.) BTW, this is why it's such a PITA to take your stock one off... and is why many complain that their **** is loose. You can also use it on the top screw, but I decided against it, hence the rubber gasket.

A shot comparing an unshaped washer to a shaped one.

Last edited by ctwentytwo; 04-03-2008 at 06:46 PM.

 04-04-2008, 08:32 AM
#5
Administrator

iTrader: (25)
Nice write-up. I'd love to see what the 1" diameter pipe looked like before you shaped it...
04-04-2008, 08:40 AM
#6
Registered User
Thread Starter
iTrader: (9)
Join Date: Dec 2003
Location: Waipahu HI; Phoenix AZ
Posts: 2,069
Likes: 0
Received 1 Like
on
1 Post
Originally Posted by vo7848
Nice write-up. I'd love to see what the 1" diameter pipe looked like before you shaped it...
I was too lazy to call the worker to cut a piece off in the plumbing section.
Just look for regular plumbing pipe that's 1" in diameter, as they are thick enough and you won't get all funky looking like this:
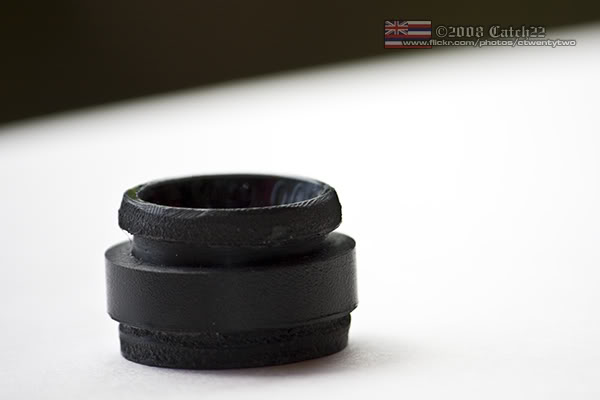
You just need to get the top and bottom skinner to fit into the **** and Ballcock washer. Yeah, ballcock, ballcock, ba...

Also, for those looking to make the **** sit higher... you don't need the washers. Just don't tighten the inner piece too far down on the shifter shaft... shaft... shaft
Although I'd give it at least 5 full turns to grab enough threads. And again, use the Permatex Thread Lock... blue is enough, red if you're paranoid.
04-04-2008, 09:21 AM
#7
Administrator
iTrader: (25)
Originally Posted by ctwentytwo
Just look for regular plumbing pipe that's 1" in diameter, as they are thick enough and you won't get all funky looking like this:

Here's my write-up:https://my350z.com/forum/exterior-and-interior/318963-shift-knob-finisher-adapter-zeetoys-stainless-steal-vs-rubber-shank-pics.html
Trending Topics


Thread
Thread Starter
Forum
Replies
Last Post
ars88
Zs & Gs For Sale
18
04-04-2016 07:52 AM