
DIY - Cooling fan assembly replacement from top


2003 350Z
Sharing this since many posts state that it can only be pulled from the bottom. I've performed this twice since my first replacement assembly had to be warrantied so the second time I documented the process. Perform at your own vehicles risk and know that fluid will be spilled.
Tools needed:
1. Socket wrench & extension
2. 10mm, 12mm, & 14mm sockets
3. 10mm wrench
4. Flathead screwdriver
5. Pliars
6. Panel popper (not required)
7. Ziploc bags or empty storage cabinet
8. Bottle of 50/50 mix antifreeze
9. Disposable gloves
10. Tape
11. Cut milk carton or similar to catch coolant
12. Oil drain pan or similar (spilling coolant is inevitable)
Instructions
1. Disconnect battery
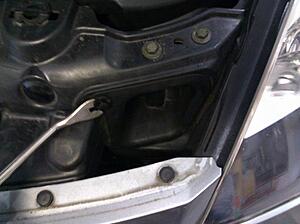
2. Remove bolts from strut bar on drivers side and the clips attached to it (14mm)

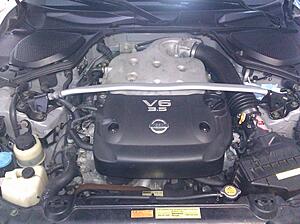
3. Lift strut bar an inch to get access to plastic engine cover with wrench
4. Remove engine cover (10mm)
5. Disconnect MAF sensor harness, loosen intake duct, and then remove intake airbox (12mm)
6. Remove bolt from A/C bracket underneath intake airbox and remove bracket (10mm)
7. Removed plastic clip holding down A/C line (white)

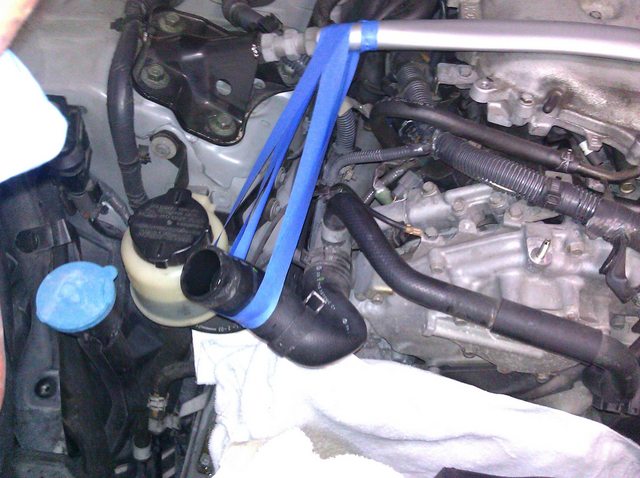
8. Remove bolt holding down coolant overflow tank (10mm) and disconnect the rubber hose at the radiator cap. Remove from engine bay. Keep end of hose elevated to prevent spillage
9. Place rag underneath radiator cap nipple to catch any overrun
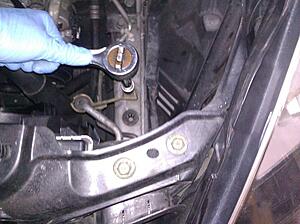
10. Remove two bolts at top of fan assembly (10mm)
11. Jack car up on front passenger side, support with jack stand, and remove plastic shroud to gain access to fan assembly wire harness (10mm)
12. Disconnect wire harnesses and push aside so they�re not directly underneath coolant hose
13. Cover pulleys with a rag and have another rag on hand
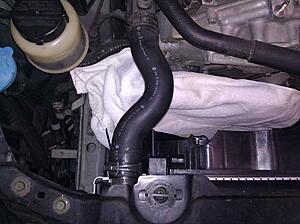
14. Disconnect upper radiator hose from radiator and immediately stuff radiator with rag
15. Dump the fluid in the hose into the milk carton and then tape-off, out of the way, to the strut bar

16. Place milk carton underneath radiator and remove rag. Let drain

17. Now the fun part, removing the radiator. It may take some wiggling, but it will come out. Begin by pulling it straight up and pay attention to what it hits.
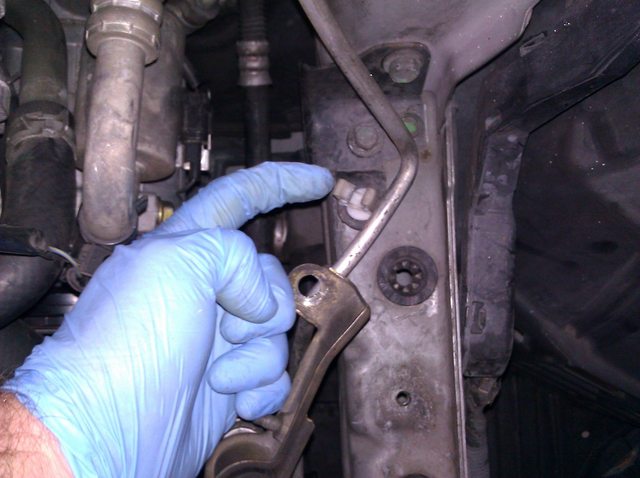
18. For a little extra room, remove the coolant overflow bracket held in place with 2x 10mm bolts. You won�t have much room to get a decent amount of torque or revolutions, but stop what you�re doing and take the time to remove it if you cannot manage to get the fan assembly out.
19. Once you have it out, LOOK AT ALL THE ROOM!
20. Consider replacing your belts and/or that bad pulley you�ve been putting off. Check the grounds and wire harnesses.
21. Reinstall in reverse order
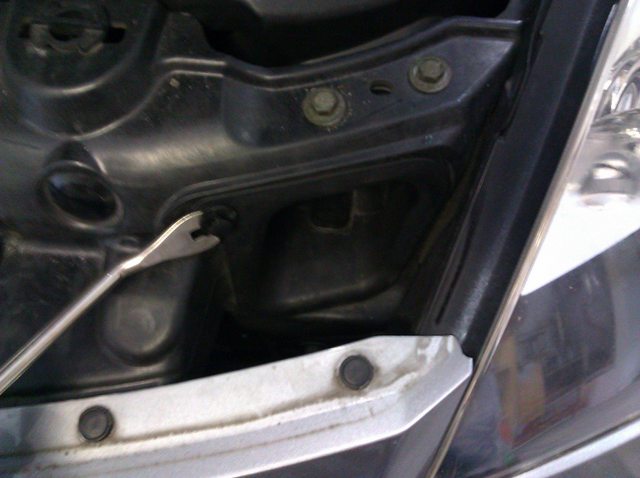
22. Once everything is put back together and the car level on the ground, open the coolant bleeder valve located directly in front of firewall beside the battery.
23. Fill radiator at the cap and bleed the air out.
24. Voila! You�re done.
Notes:
1. I prefer to use the storage cabinet bin to store small parts removed placing them in the top left corner in order of removal going side to side. You can use Ziploc bags as well. Just make sure you maintain some form of order so you know the order in which they go back in.
2. Before performing this DIY, consider replacing your belts while you have the extra room. If you have a leak somewhere, add some UV dye and drive for 20 minutes before working on the car. The extra room with the fan assembly removed will allow you a better chance of pin-pointing that leak.
3. Print these directions out
4. I assume no liability and cannot guarantee this will work for your car. I have a 2003 so there you go.
Sharing this since many posts state that it can only be pulled from the bottom. I've performed this twice since my first replacement assembly had to be warrantied so the second time I documented the process. Perform at your own vehicles risk and know that fluid will be spilled.
Tools needed:
1. Socket wrench & extension
2. 10mm, 12mm, & 14mm sockets
3. 10mm wrench
4. Flathead screwdriver
5. Pliars
6. Panel popper (not required)
7. Ziploc bags or empty storage cabinet
8. Bottle of 50/50 mix antifreeze
9. Disposable gloves
10. Tape
11. Cut milk carton or similar to catch coolant
12. Oil drain pan or similar (spilling coolant is inevitable)

Instructions
1. Disconnect battery
2. Remove bolts from strut bar on drivers side and the clips attached to it (14mm)

3. Lift strut bar an inch to get access to plastic engine cover with wrench
4. Remove engine cover (10mm)
5. Disconnect MAF sensor harness, loosen intake duct, and then remove intake airbox (12mm)
6. Remove bolt from A/C bracket underneath intake airbox and remove bracket (10mm)

7. Removed plastic clip holding down A/C line (white)
8. Remove bolt holding down coolant overflow tank (10mm) and disconnect the rubber hose at the radiator cap. Remove from engine bay. Keep end of hose elevated to prevent spillage
9. Place rag underneath radiator cap nipple to catch any overrun
10. Remove two bolts at top of fan assembly (10mm)
11. Jack car up on front passenger side, support with jack stand, and remove plastic shroud to gain access to fan assembly wire harness (10mm)
12. Disconnect wire harnesses and push aside so they�re not directly underneath coolant hose
13. Cover pulleys with a rag and have another rag on hand
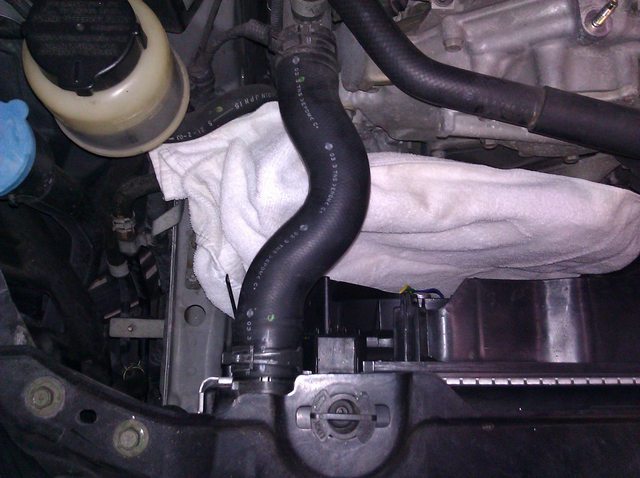
14. Disconnect upper radiator hose from radiator and immediately stuff radiator with rag
15. Dump the fluid in the hose into the milk carton and then tape-off, out of the way, to the strut bar
16. Place milk carton underneath radiator and remove rag. Let drain

17. Now the fun part, removing the radiator. It may take some wiggling, but it will come out. Begin by pulling it straight up and pay attention to what it hits.
18. For a little extra room, remove the coolant overflow bracket held in place with 2x 10mm bolts. You won�t have much room to get a decent amount of torque or revolutions, but stop what you�re doing and take the time to remove it if you cannot manage to get the fan assembly out.
19. Once you have it out, LOOK AT ALL THE ROOM!

20. Consider replacing your belts and/or that bad pulley you�ve been putting off. Check the grounds and wire harnesses.
21. Reinstall in reverse order
22. Once everything is put back together and the car level on the ground, open the coolant bleeder valve located directly in front of firewall beside the battery.
23. Fill radiator at the cap and bleed the air out.
24. Voila! You�re done.
Notes:
1. I prefer to use the storage cabinet bin to store small parts removed placing them in the top left corner in order of removal going side to side. You can use Ziploc bags as well. Just make sure you maintain some form of order so you know the order in which they go back in.
2. Before performing this DIY, consider replacing your belts while you have the extra room. If you have a leak somewhere, add some UV dye and drive for 20 minutes before working on the car. The extra room with the fan assembly removed will allow you a better chance of pin-pointing that leak.
3. Print these directions out
4. I assume no liability and cannot guarantee this will work for your car. I have a 2003 so there you go.


Registered User
Joined: Sep 2012
Posts: 245
Likes: 1
From: Tampa, FL
Great write-up. I just acquired a 2005 350Z 6MT.......and it overheated on day two. Diagnosed the failure at the radiator fans. I'm assuming that one of the fans failed some time ago, and the second one just went out, leaving me with an overheated car. Makes me wonder how many others are limping along on one fan.
I installed my new fan assembly exactly as you did. I read some other write-ups which suggested everything from draining the radiator to removing the front bumper. Looking at it, it just didn't seem that all that trouble should be necessary.
Let me add this: The two wiring connections can be accessed from up top (disconnect is harder than the reconnect)......but I scraped my arms up a bit in the process.
Also, I'd recommend cutting a piece of cardboard to fit over the inside face of the radiator to protect it from any dings to the cooling fins while lowering in the fan assembly.
I came here to write it up, but I see you've covered it. Thanks.


Registered User
Joined: Aug 2014
Posts: 1
Likes: 0
From: Knoxville TN
Hoping someone will respond to this old thread.
I got the estimate from a good mechanic to replace my non-functioning radiator cooling fans. Over $300 for the Nissan parts, $200 in labor. Yikes! It's just a fan (2) on the outside of the engine. C'mon! Anyway I'm diving in to do it myself and save $400. The DIY post in this thread will be my guide. Bless you!
While this is probably at the limits of my automotive DIY skills, I think I can do it. I certainly hope so! Any new advice to tackle this? Any recommended brand for that replacement unit?

Trending Topics


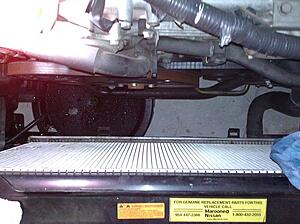
Ahh. I figured it out that same day but forgot to take a picture.in the picture I posted there are 2 radiators stuck together. one which is located towards the front of the car and that's connected to the a/c lines. the other is the one that carries the coolant which is the one located close sts to the engine. They are both connected by two 10 mm bolts located on the top front of the a/c radiator. I couldn't see it before because otherwise the plastic frame structure was covering it. Remove those 2 bolts and it will separate both radiators.
I hope this post is of help for those whom are stuck like I was.
I hope this post is of help for those whom are stuck like I was.


Anyone have a fan unit they wanna gimme they aren't using? 
My unit cracked fans are great just the bracket and structure needs replacing.
I'll take donations and help someone clean up their garage parts bin
My unit cracked fans are great just the bracket and structure needs replacing.
I'll take donations and help someone clean up their garage parts bin

I have one too bad you live on the other side of the country. How do you disconnect those AC lines? I couldn't figure them out and just cut them in half...