
My SIKKY LS2 install thread


UPS just dropped off the driveshaft!! 
I have one of my guys from work coming over Thursday this week to push hard on the install. I PM'd SIKKY like 6 questions and they answered none of them and PM'd me that the driveshaft is on the way... FAIL
To be fair, I've started drinking now
Before I began imbibing, I started the prep work for the oil pan. One of the questions I asked SIKKY was if any RTV was used in the install? The gasket has a rubber component to it, but I don't know if that is enough or not.
The SIKKY kit has upgraded to -10AN lines and fittings, except the fittings on the pan, so I don't know if that really matters since there is still a -8AN bottleneck in the loop. Hardware:
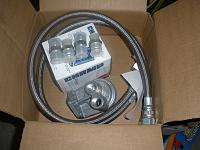
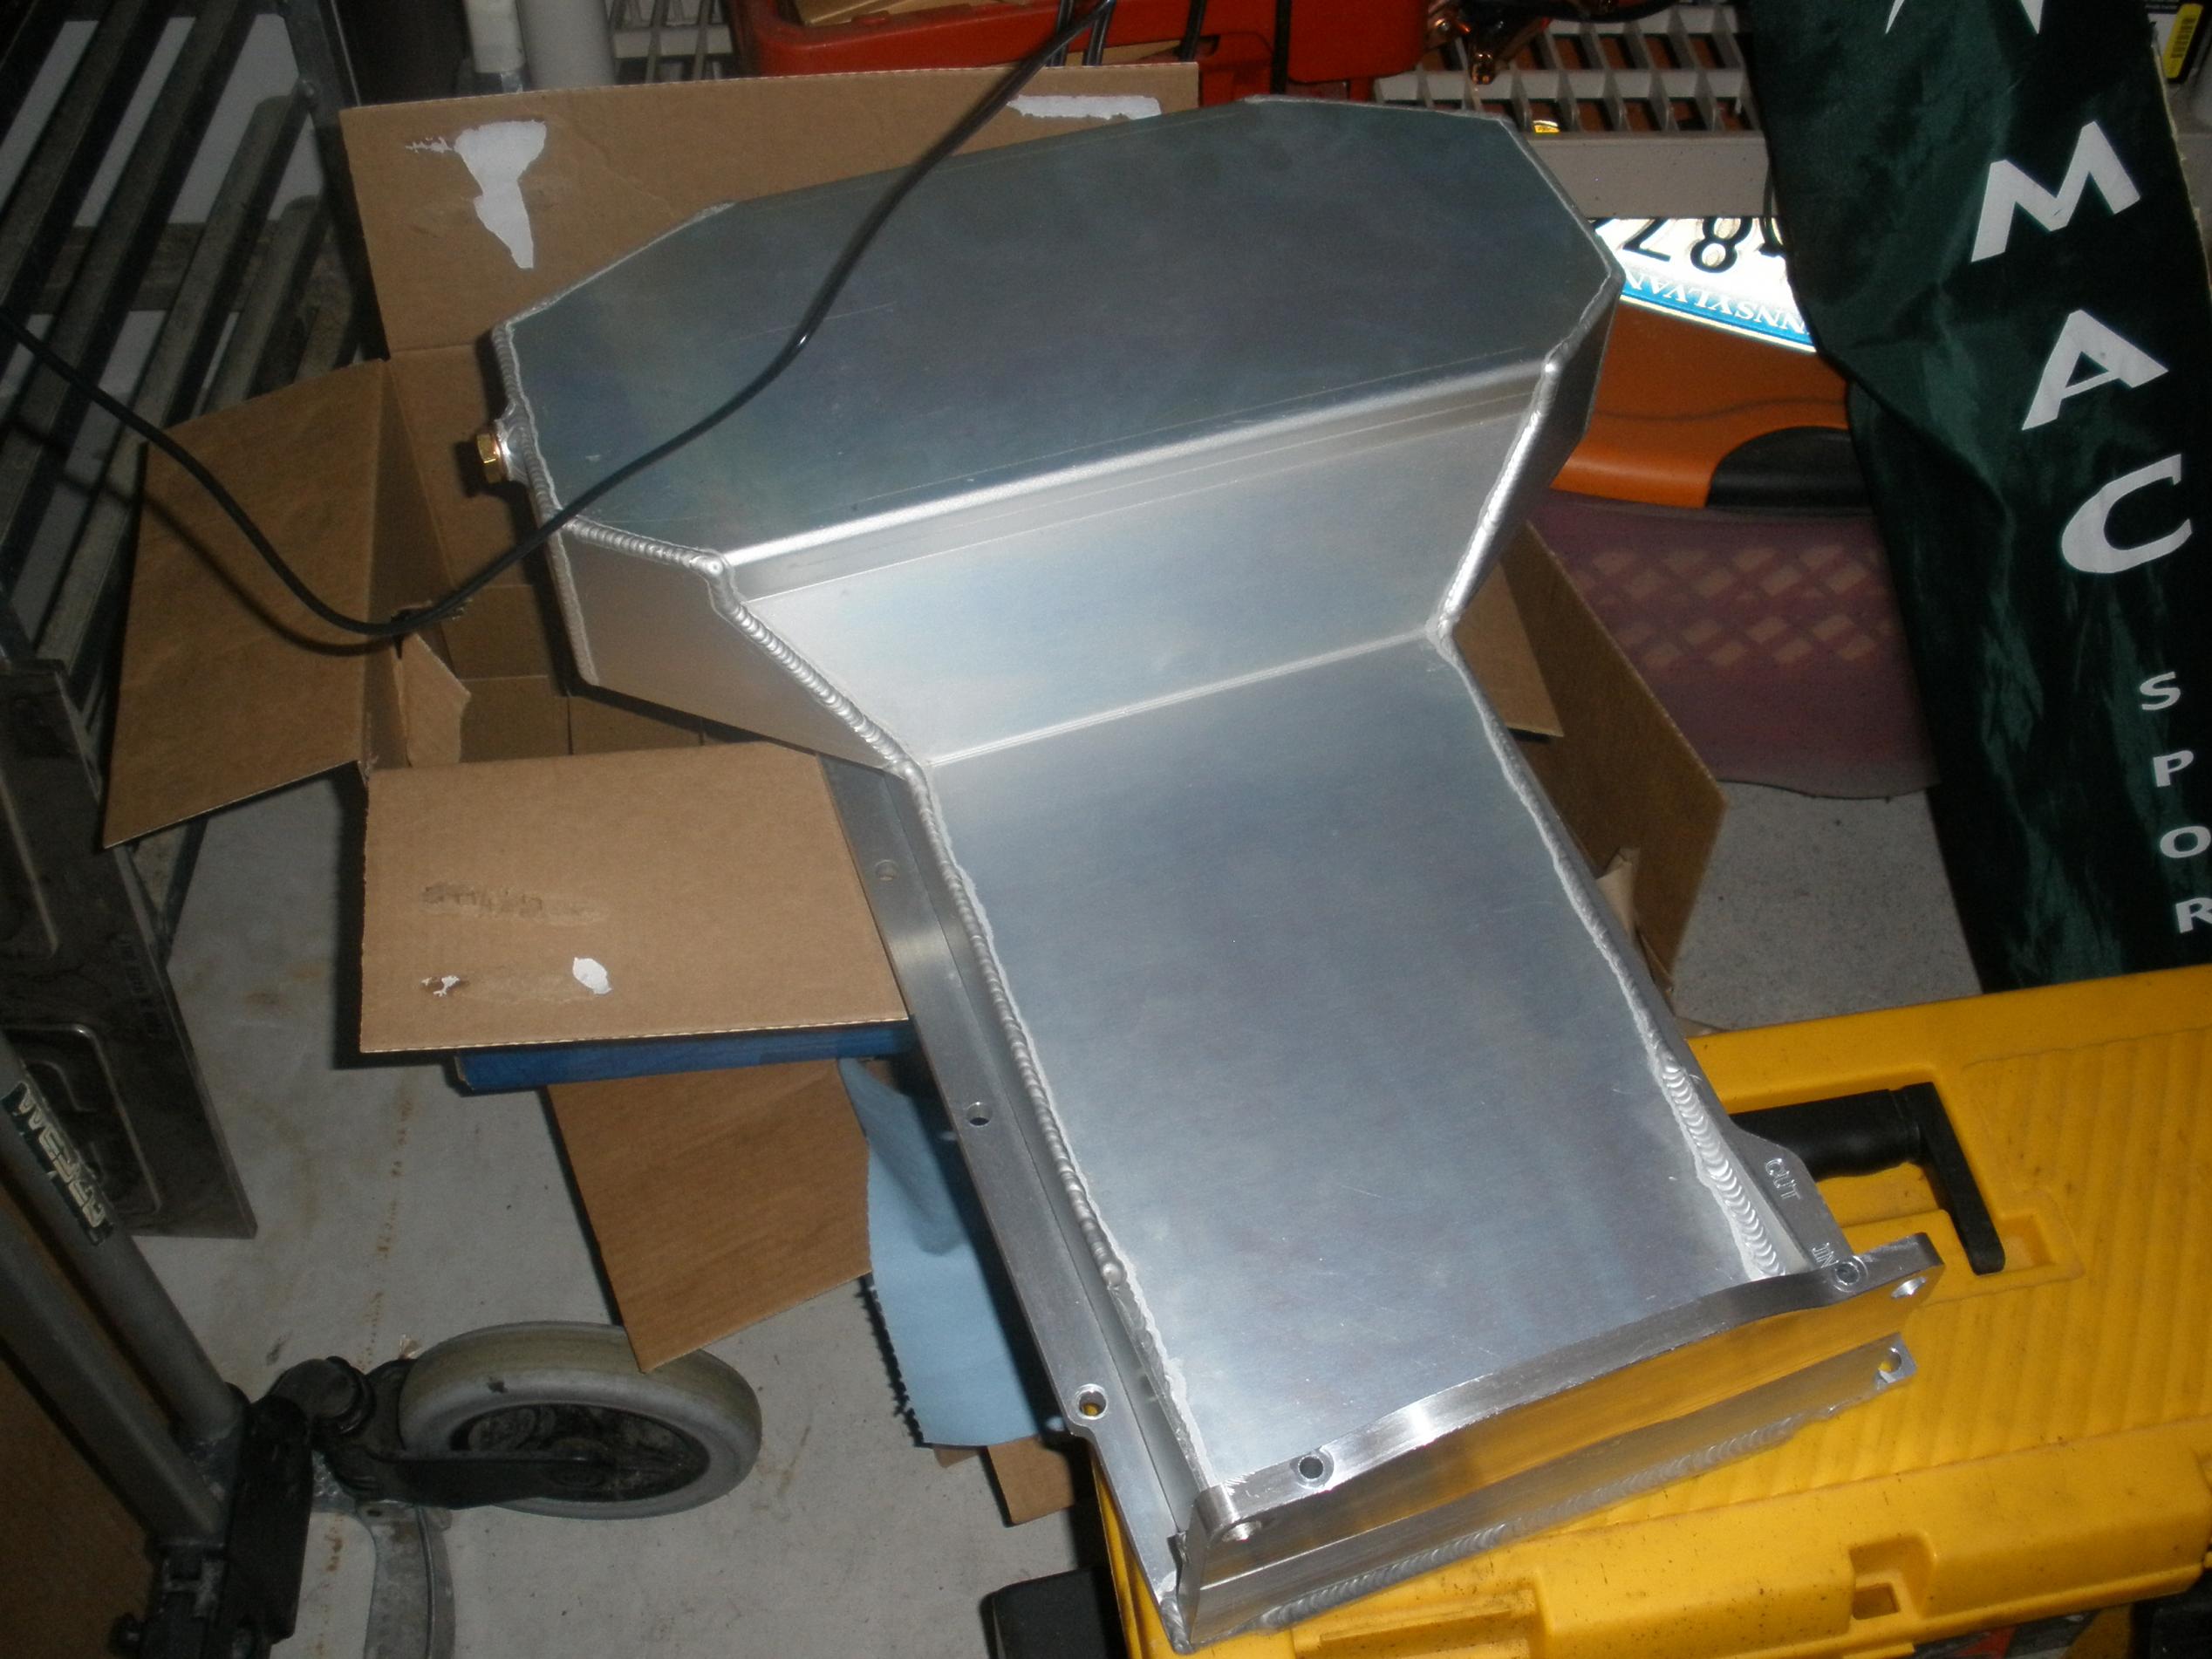
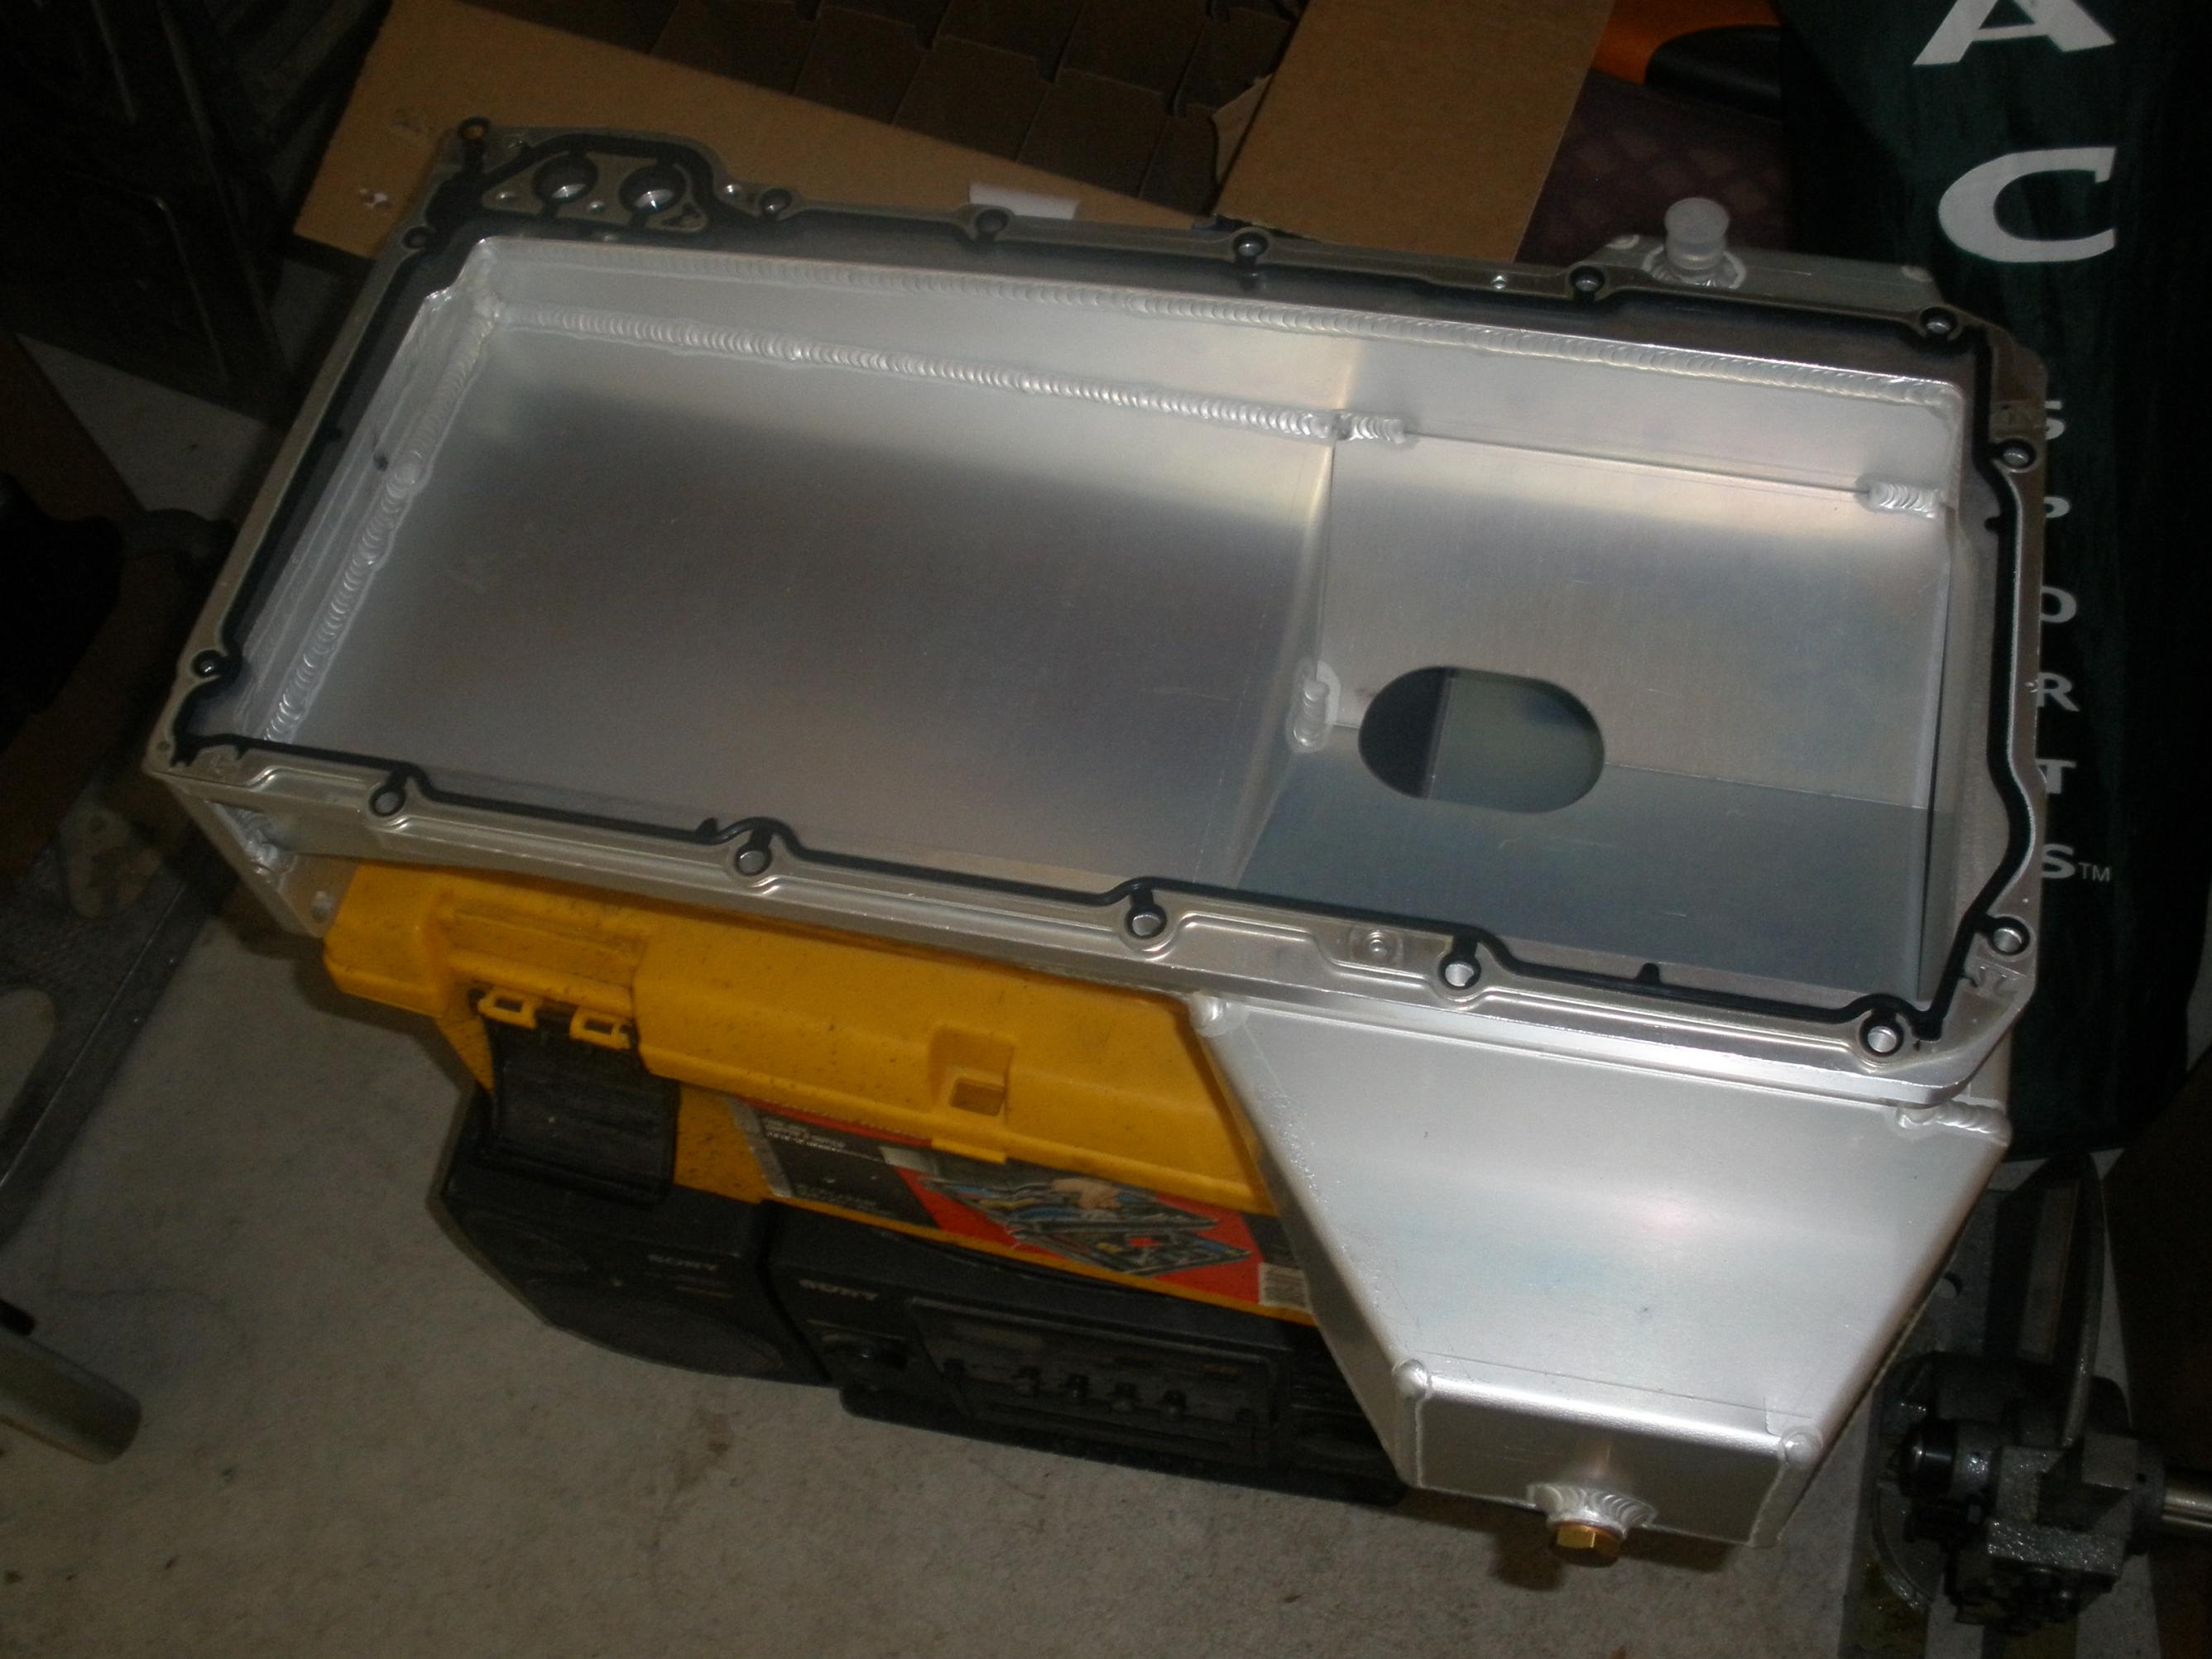
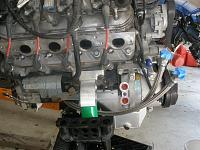
The pan is just BALLER... period:

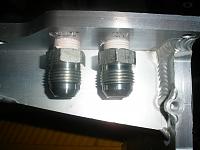
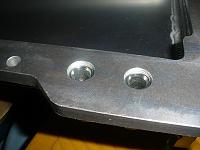
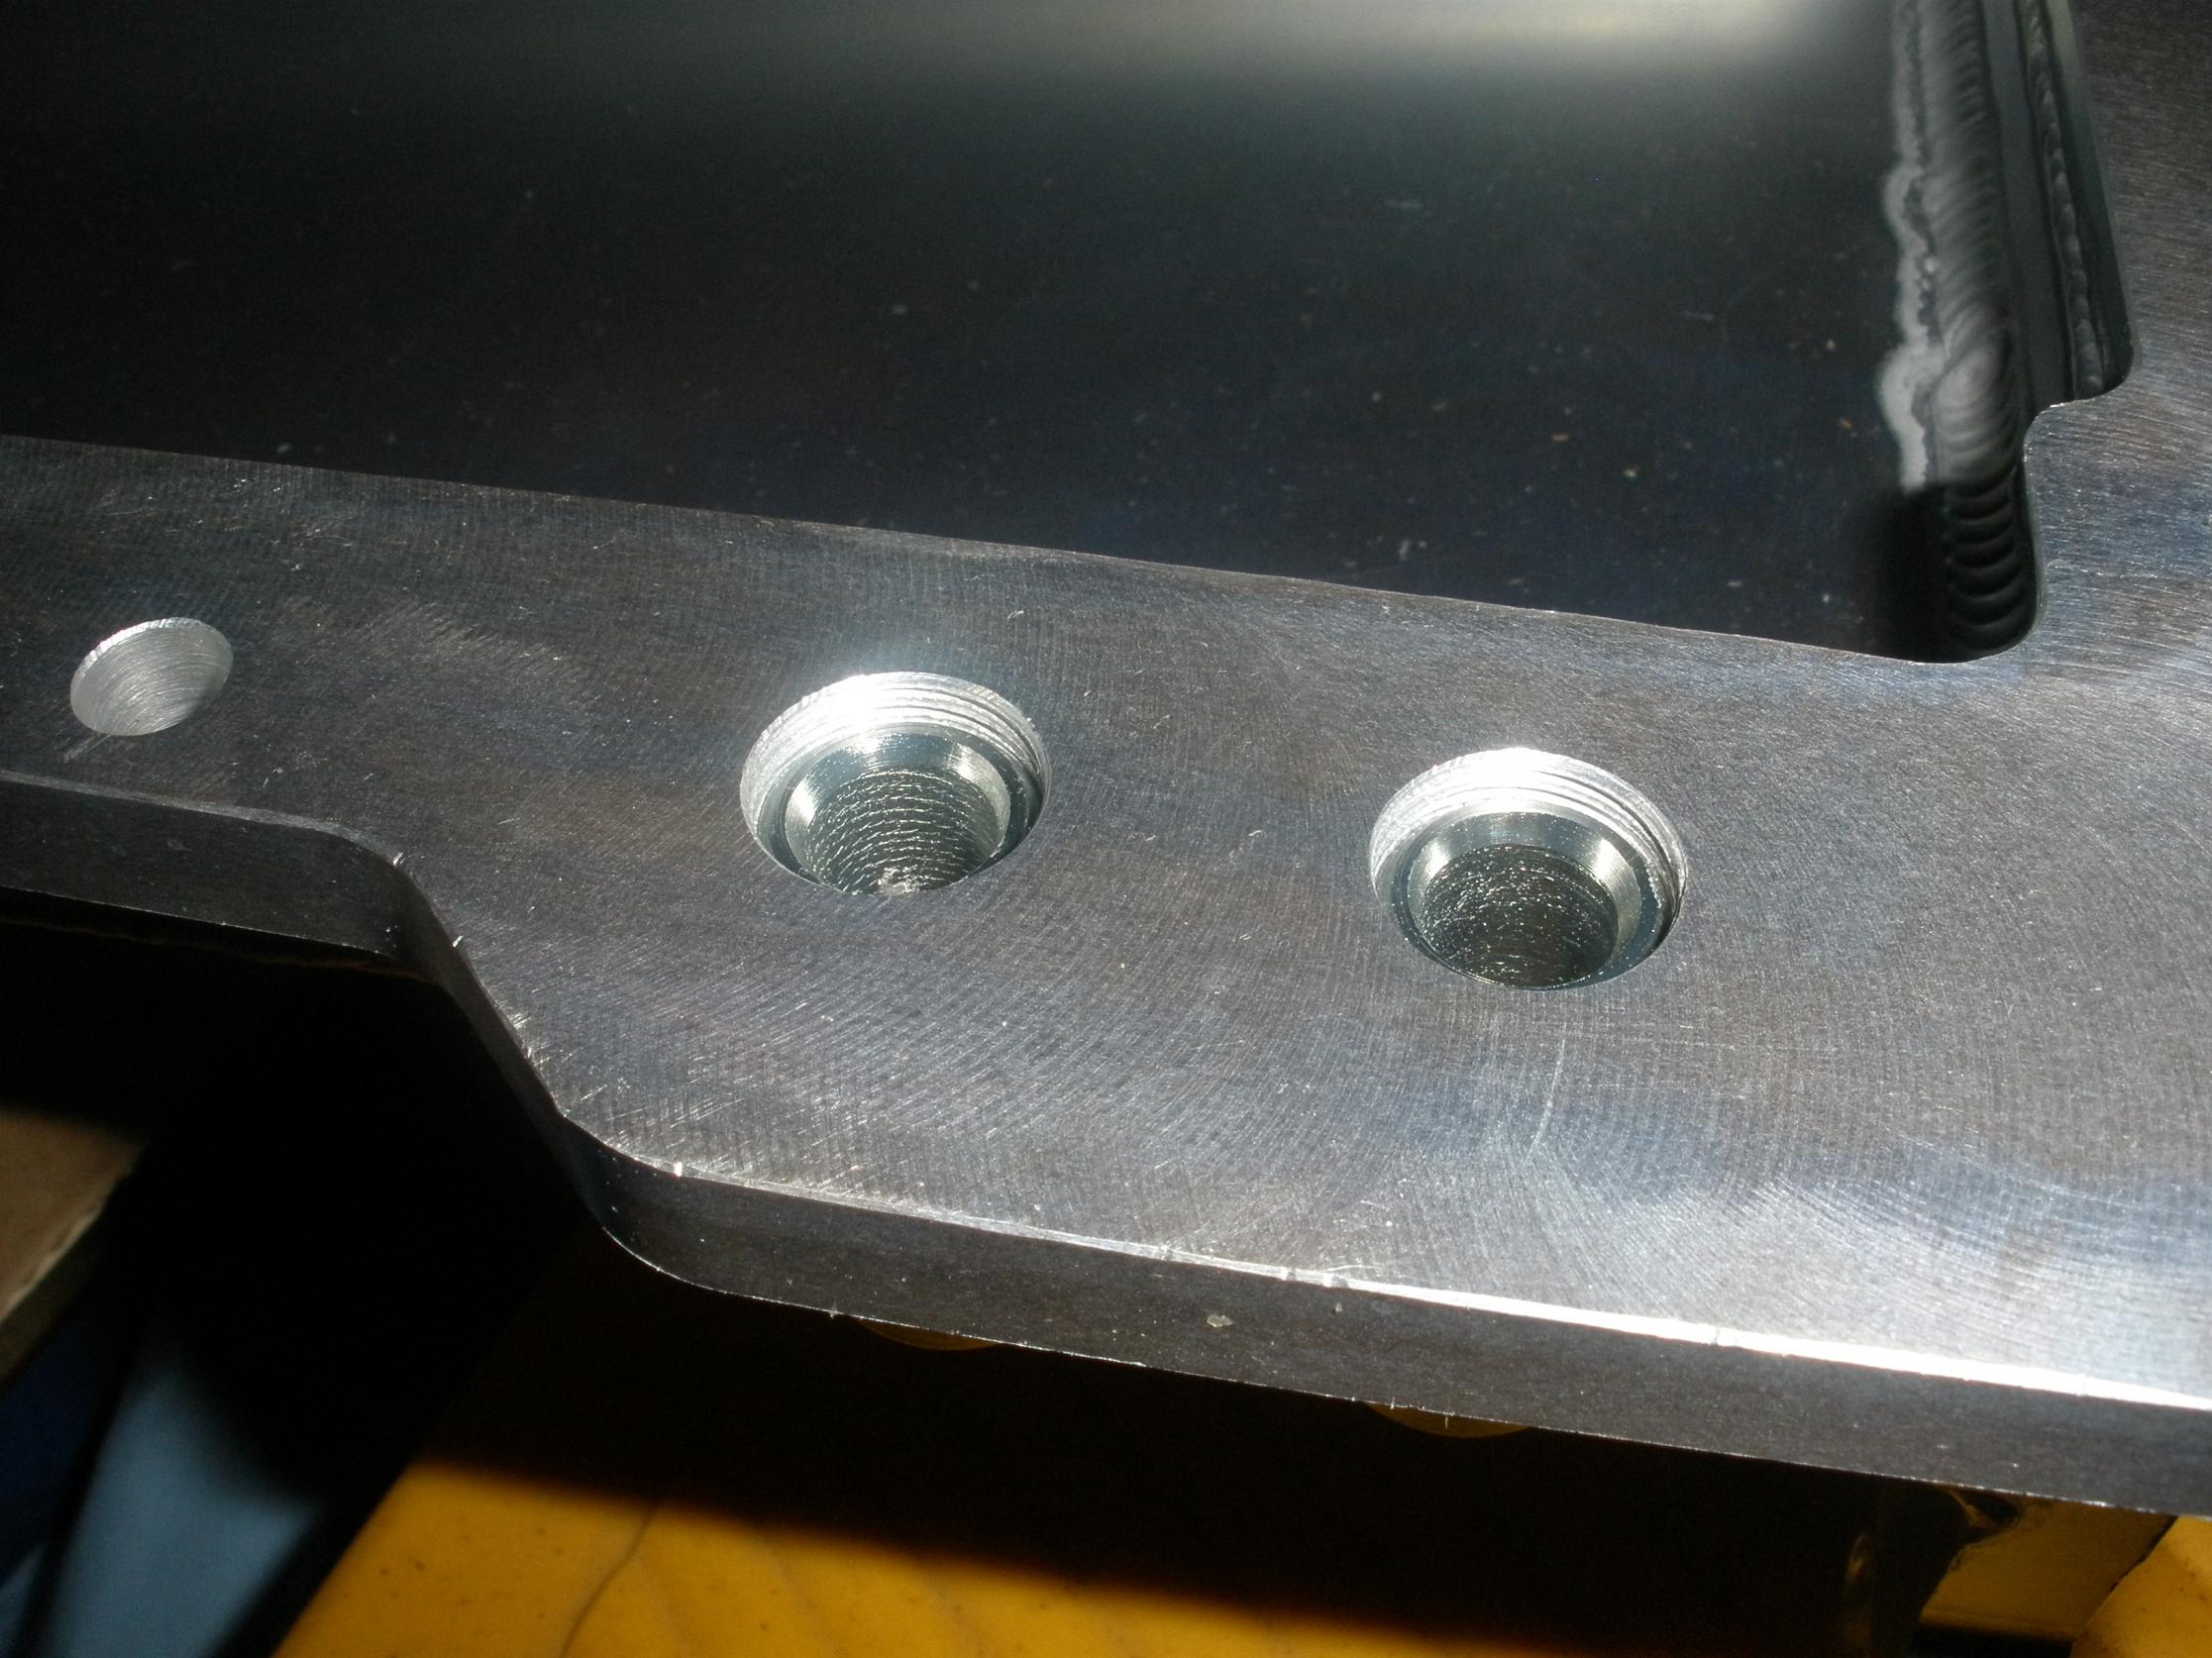
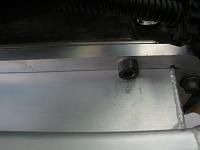
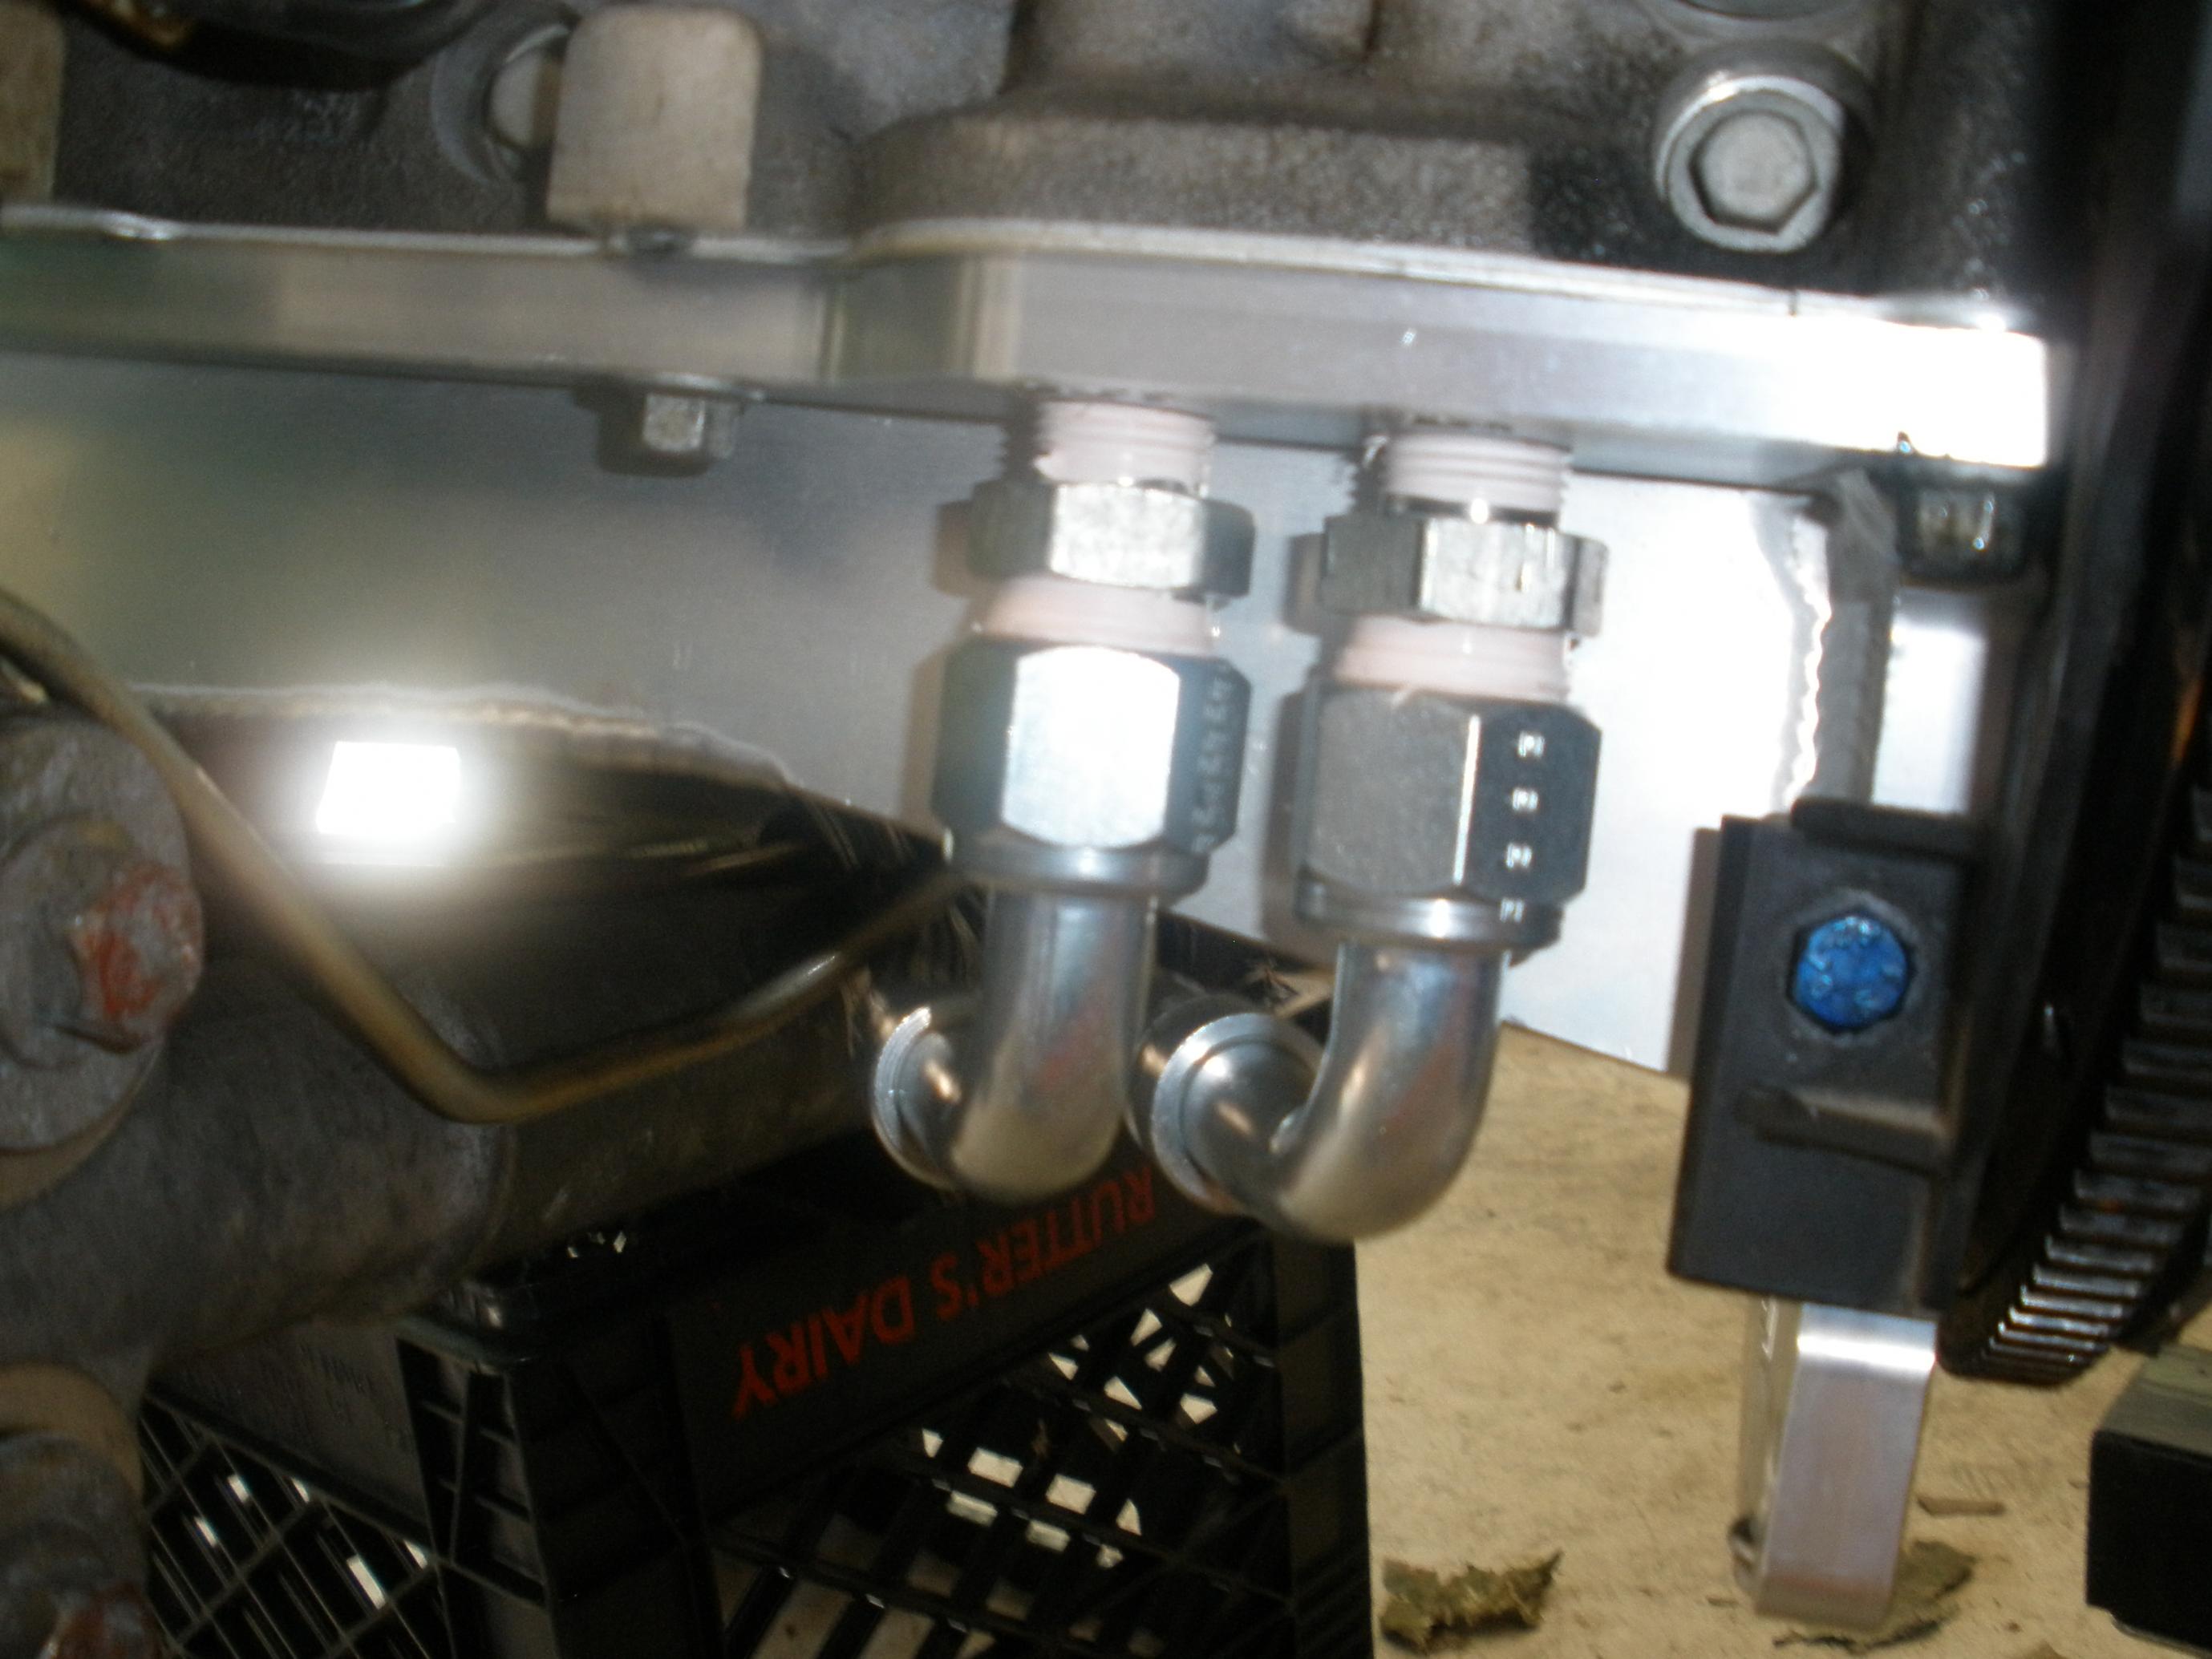
I plumbed the fittings for the relocator kit into the pan, I think it was a 21mm or 22mm wrench for that. I teflon taped them cause I saw it in the SIKKY thread and guess what... THERE ARE NO F'ING INSTRUCTIONS FOR THIS EITHER!!
The more I drink, the more this upsets me . Moving on.. the fittings do NOT screw all the way down flush, it you do this you will most likely ruin the pan. The upside is you could redrill and tap it for the -10AN fittings an eliminate the restriction.
Thats it for today. Next is getting the block in the air and removing the stock pan and pickup and preparing the SIKKY install. That being said I have two questions there, does the SIKKY pickup require RTV (there is a rubber o-ring already) and does the oil pan gasket require RTV (there is a rubber seal there as well)?
I have one of my guys from work coming over Thursday this week to push hard on the install. I PM'd SIKKY like 6 questions and they answered none of them and PM'd me that the driveshaft is on the way... FAIL
To be fair, I've started drinking now
Before I began imbibing, I started the prep work for the oil pan. One of the questions I asked SIKKY was if any RTV was used in the install? The gasket has a rubber component to it, but I don't know if that is enough or not.
The SIKKY kit has upgraded to -10AN lines and fittings, except the fittings on the pan, so I don't know if that really matters since there is still a -8AN bottleneck in the loop. Hardware:

The pan is just BALLER... period:
I plumbed the fittings for the relocator kit into the pan, I think it was a 21mm or 22mm wrench for that. I teflon taped them cause I saw it in the SIKKY thread and guess what... THERE ARE NO F'ING INSTRUCTIONS FOR THIS EITHER!!
The more I drink, the more this upsets me
. Moving on.. the fittings do NOT screw all the way down flush, it you do this you will most likely ruin the pan. The upside is you could redrill and tap it for the -10AN fittings an eliminate the restriction.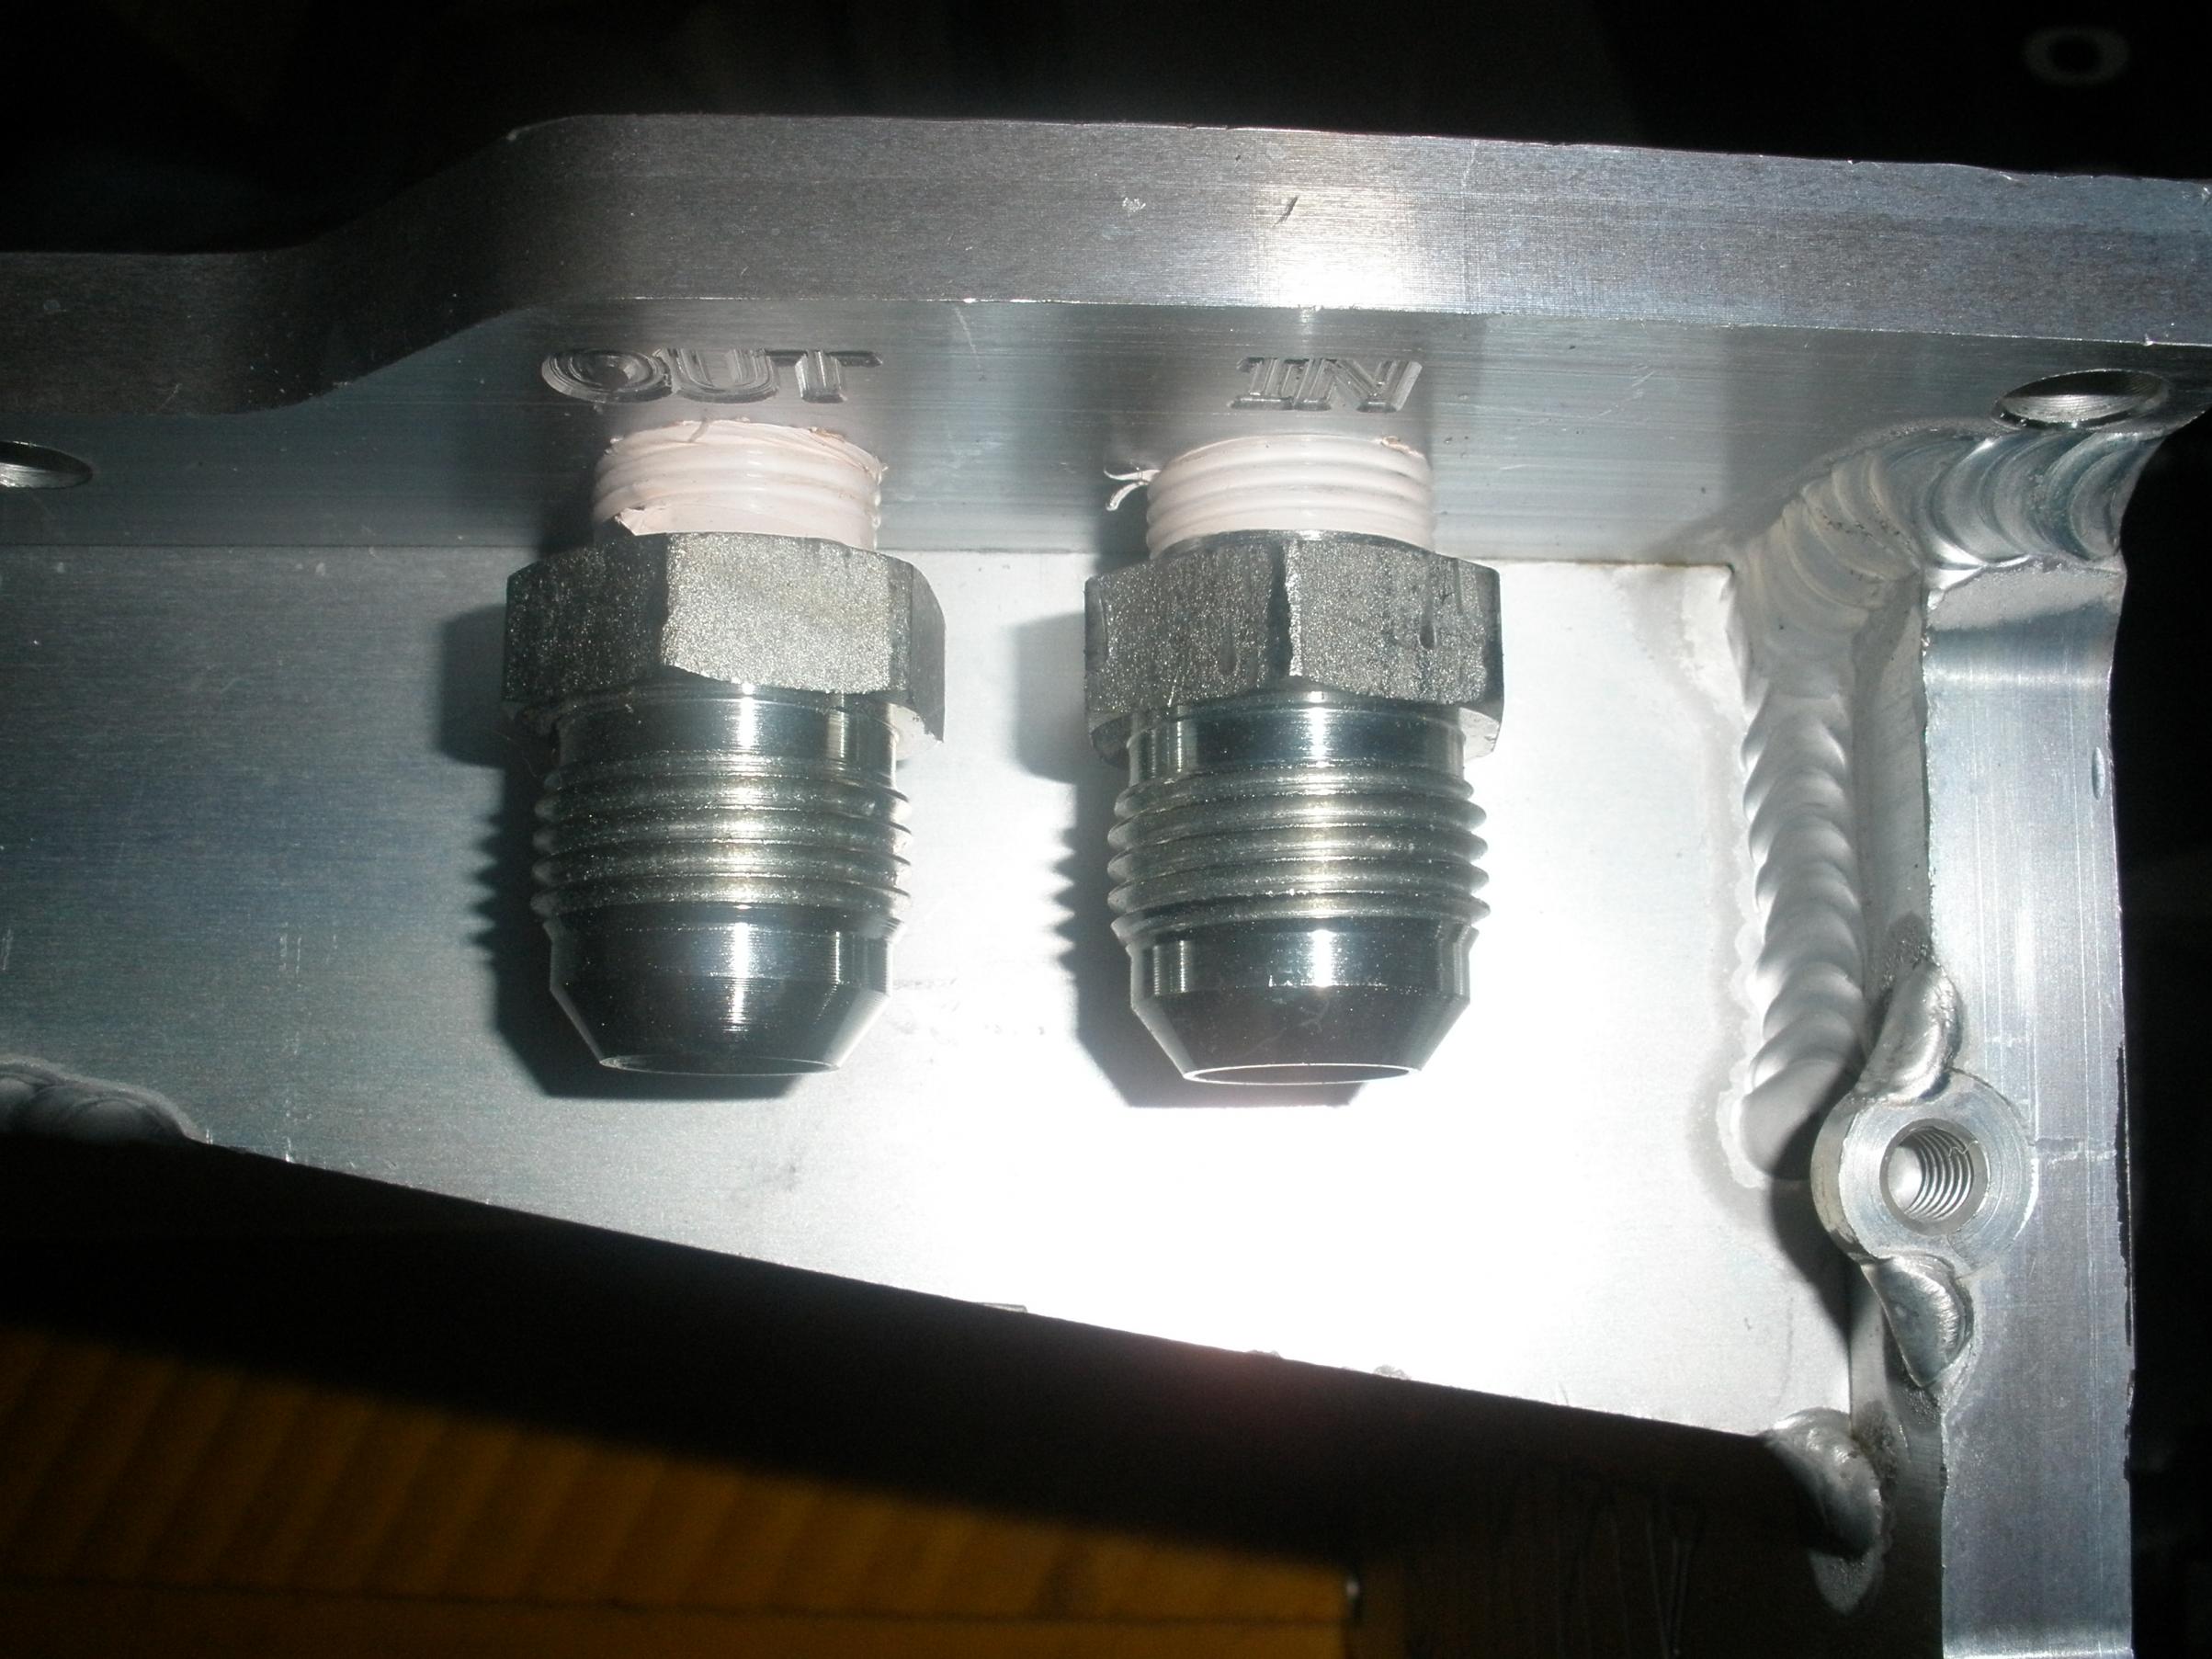
Thats it for today. Next is getting the block in the air and removing the stock pan and pickup and preparing the SIKKY install. That being said I have two questions there, does the SIKKY pickup require RTV (there is a rubber o-ring already) and does the oil pan gasket require RTV (there is a rubber seal there as well)?
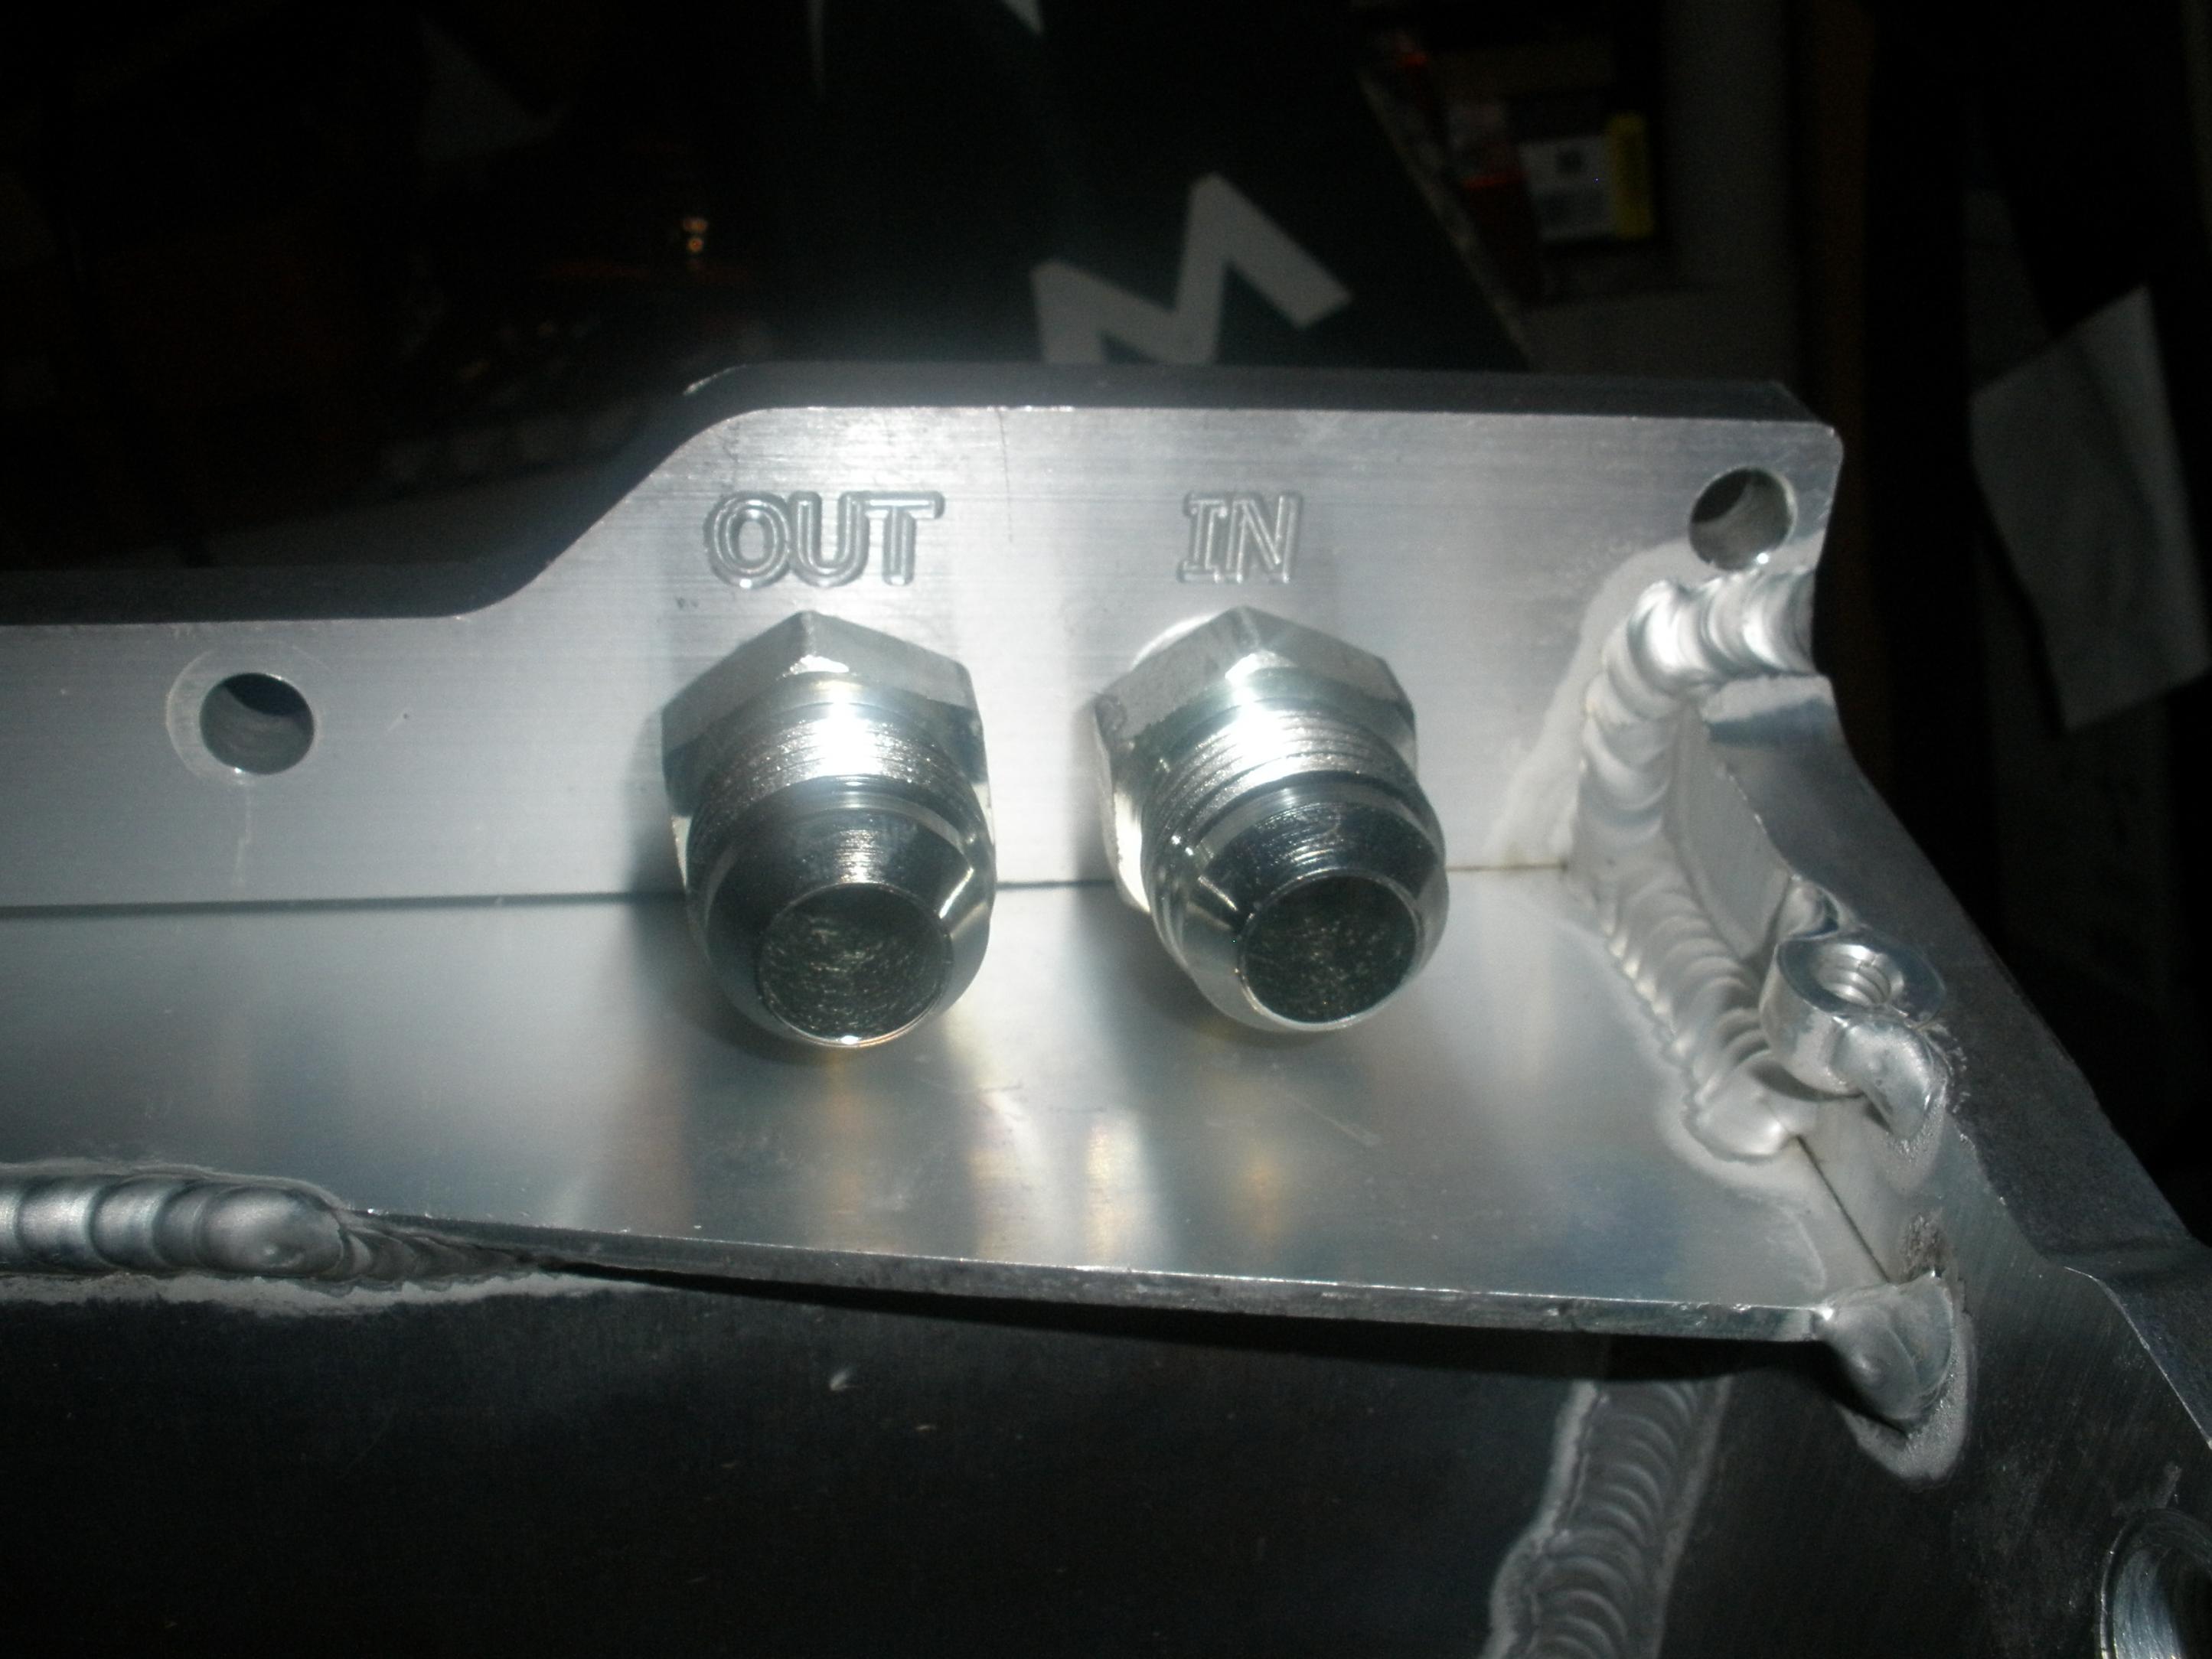
A couple more pics of the fittings in the pan:

Thanks to everyone wishing me well and such. My F/I experience just about sucked the life out of me, but I am reborn in this project. I am thanksful that I have the opportunity to give something back to the community that has been so supportive of me over the past 3 years.
Vas... lets see some pics of that harness
I'm honestly moving slowly, most of what I've done could be done in a solid day. Plus, I'm not Quamen, I have mild DIY skills. I just have good tools, lots of spare time and no fear of this blue paperweight that is already broken and sitting in my garage
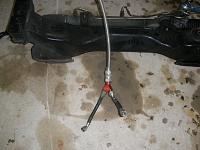
Oh, to address the fuel issue mentioned before, here is the fuel line:
Thanks to everyone wishing me well and such. My F/I experience just about sucked the life out of me, but I am reborn in this project. I am thanksful that I have the opportunity to give something back to the community that has been so supportive of me over the past 3 years.
Vas... lets see some pics of that harness
I'm honestly moving slowly, most of what I've done could be done in a solid day. Plus, I'm not Quamen, I have mild DIY skills. I just have good tools, lots of spare time and no fear of this blue paperweight that is already broken and sitting in my garage
Oh, to address the fuel issue mentioned before, here is the fuel line:

Registered User
Joined: Apr 2011
Posts: 35
Likes: 0
From: California
You'd have to contact SIKKY and ask them about the fluid flow in their master cylinder line. I have no idea about SIKKY's lines, maybe they're good enough that you don't need to do that mod. Ask if their lines are an exact replica of the OEM GM lines for the LS1 motors or not. If they are, then this mod is probably a good idea.
Last edited by N35.7; Jul 12, 2011 at 03:46 PM.
^definitely looking into that. cass, your comin along pretty well!! making more progress than me i feel, and the motors been in the car for over a month lol.
quamens working on my turbo piping and getting ready to set it all up. im having my tuner come to my place, flash the vats system off and help me get the car started on speed density and 96lb injectors. contemplating using e85 only. i want this silverback bittch driving around damnit
quamens working on my turbo piping and getting ready to set it all up. im having my tuner come to my place, flash the vats system off and help me get the car started on speed density and 96lb injectors. contemplating using e85 only. i want this silverback bittch driving around damnit

Registered User
Joined: Mar 2011
Posts: 32
Likes: 0
From: walker,la
Drill Mod is a must even with the Sikky Kit. I drilled the slave adapter to 1/8 and used 3an-4an adapter to 4an lines with 10mm banjo also 1/8 drilled. Since you have you trans out I would also change slave, clutch and. flywheel. The wiring I got pissed about from sikky. I had to redo all connections. None of them were soldered and they didn't wire Evap or leave A/C wire open. I had already had my harness wired correctly for pedal and power to start, I only sent it off thinking they would do the A/C pressure, Evap and so on. I was wrong. The wiring harness is very simple. Run a heat sleeve on the stainless clutch line as well, after running your car for a while it will cause the fluid to lose Visc. which leads to pressure loss. If you don't do all I've included most likely you will lose pressure shifting from 2-3. For the Evap i tapped into it from under the car and ran it directly into the intake manifold. DO NOT CAP OFF. the evap line relieves
gas tank pressure. Def do not drive car without it hooked up and open headers. You will catch on fire.LOL For the fans I went with 2-14" 2500cfm slim fans and moto radiator 2" core. I used 1 1/8 copper fittings to run the radiator lines and powder coated them Black to blend in. Don't forget to tap the steam line into the water pump or top radiator line. I would also heat wrap the headers. For the intake I used a Spectra 6.0 truck kit and had to customize it to run out of the engine bay into the front bumper window. i also heat wraped the PS line that runs so closely to the header. For the A/C get a custom brack made to fit stock G35/350 compressor inline with the LS2 and that's a wrap. I could go on for hours with other little things to do but, just let me know if you run into any problems. Good Luck
gas tank pressure. Def do not drive car without it hooked up and open headers. You will catch on fire.LOL For the fans I went with 2-14" 2500cfm slim fans and moto radiator 2" core. I used 1 1/8 copper fittings to run the radiator lines and powder coated them Black to blend in. Don't forget to tap the steam line into the water pump or top radiator line. I would also heat wrap the headers. For the intake I used a Spectra 6.0 truck kit and had to customize it to run out of the engine bay into the front bumper window. i also heat wraped the PS line that runs so closely to the header. For the A/C get a custom brack made to fit stock G35/350 compressor inline with the LS2 and that's a wrap. I could go on for hours with other little things to do but, just let me know if you run into any problems. Good Luck


Drill Mod is a must even with the Sikky Kit. I drilled the slave adapter to 1/8 and used 3an-4an adapter to 4an lines with 10mm banjo also 1/8 drilled. For the Evap i tapped into it from under the car and ran it directly into the intake manifold. DO NOT CAP OFF. the evap line relieves gas tank pressure. Def do not drive car without it hooked up and open headers. You will catch on fire.
so to correctly do the drill mod id have to take the trans off again??
and what if im running no evap setup? can i leave the rear ports that go to the evap canister unplugged? my lines up front are cut just behind the fender liner. seeing as im not running a stock fuel pump bucket at all will i still be ok??
I have a TON of pics and info to share. Several highs and lows of the SIKKY kit to share as well... the kit is good, but not really complete with all the hardware you need.
I will have a ton of posts Monday or Tuesday. Leaving to take the wife on a tour of wine country in the Fingerlakes, NY.
I will have a ton of posts Monday or Tuesday. Leaving to take the wife on a tour of wine country in the Fingerlakes, NY.

OK, vacation is over, back to the write-up.
Remove the stock oil pan and pickup, Its very easy since there is no RTV on the gasket, it will fall right off. The pickup comes off with two bolts... simple.

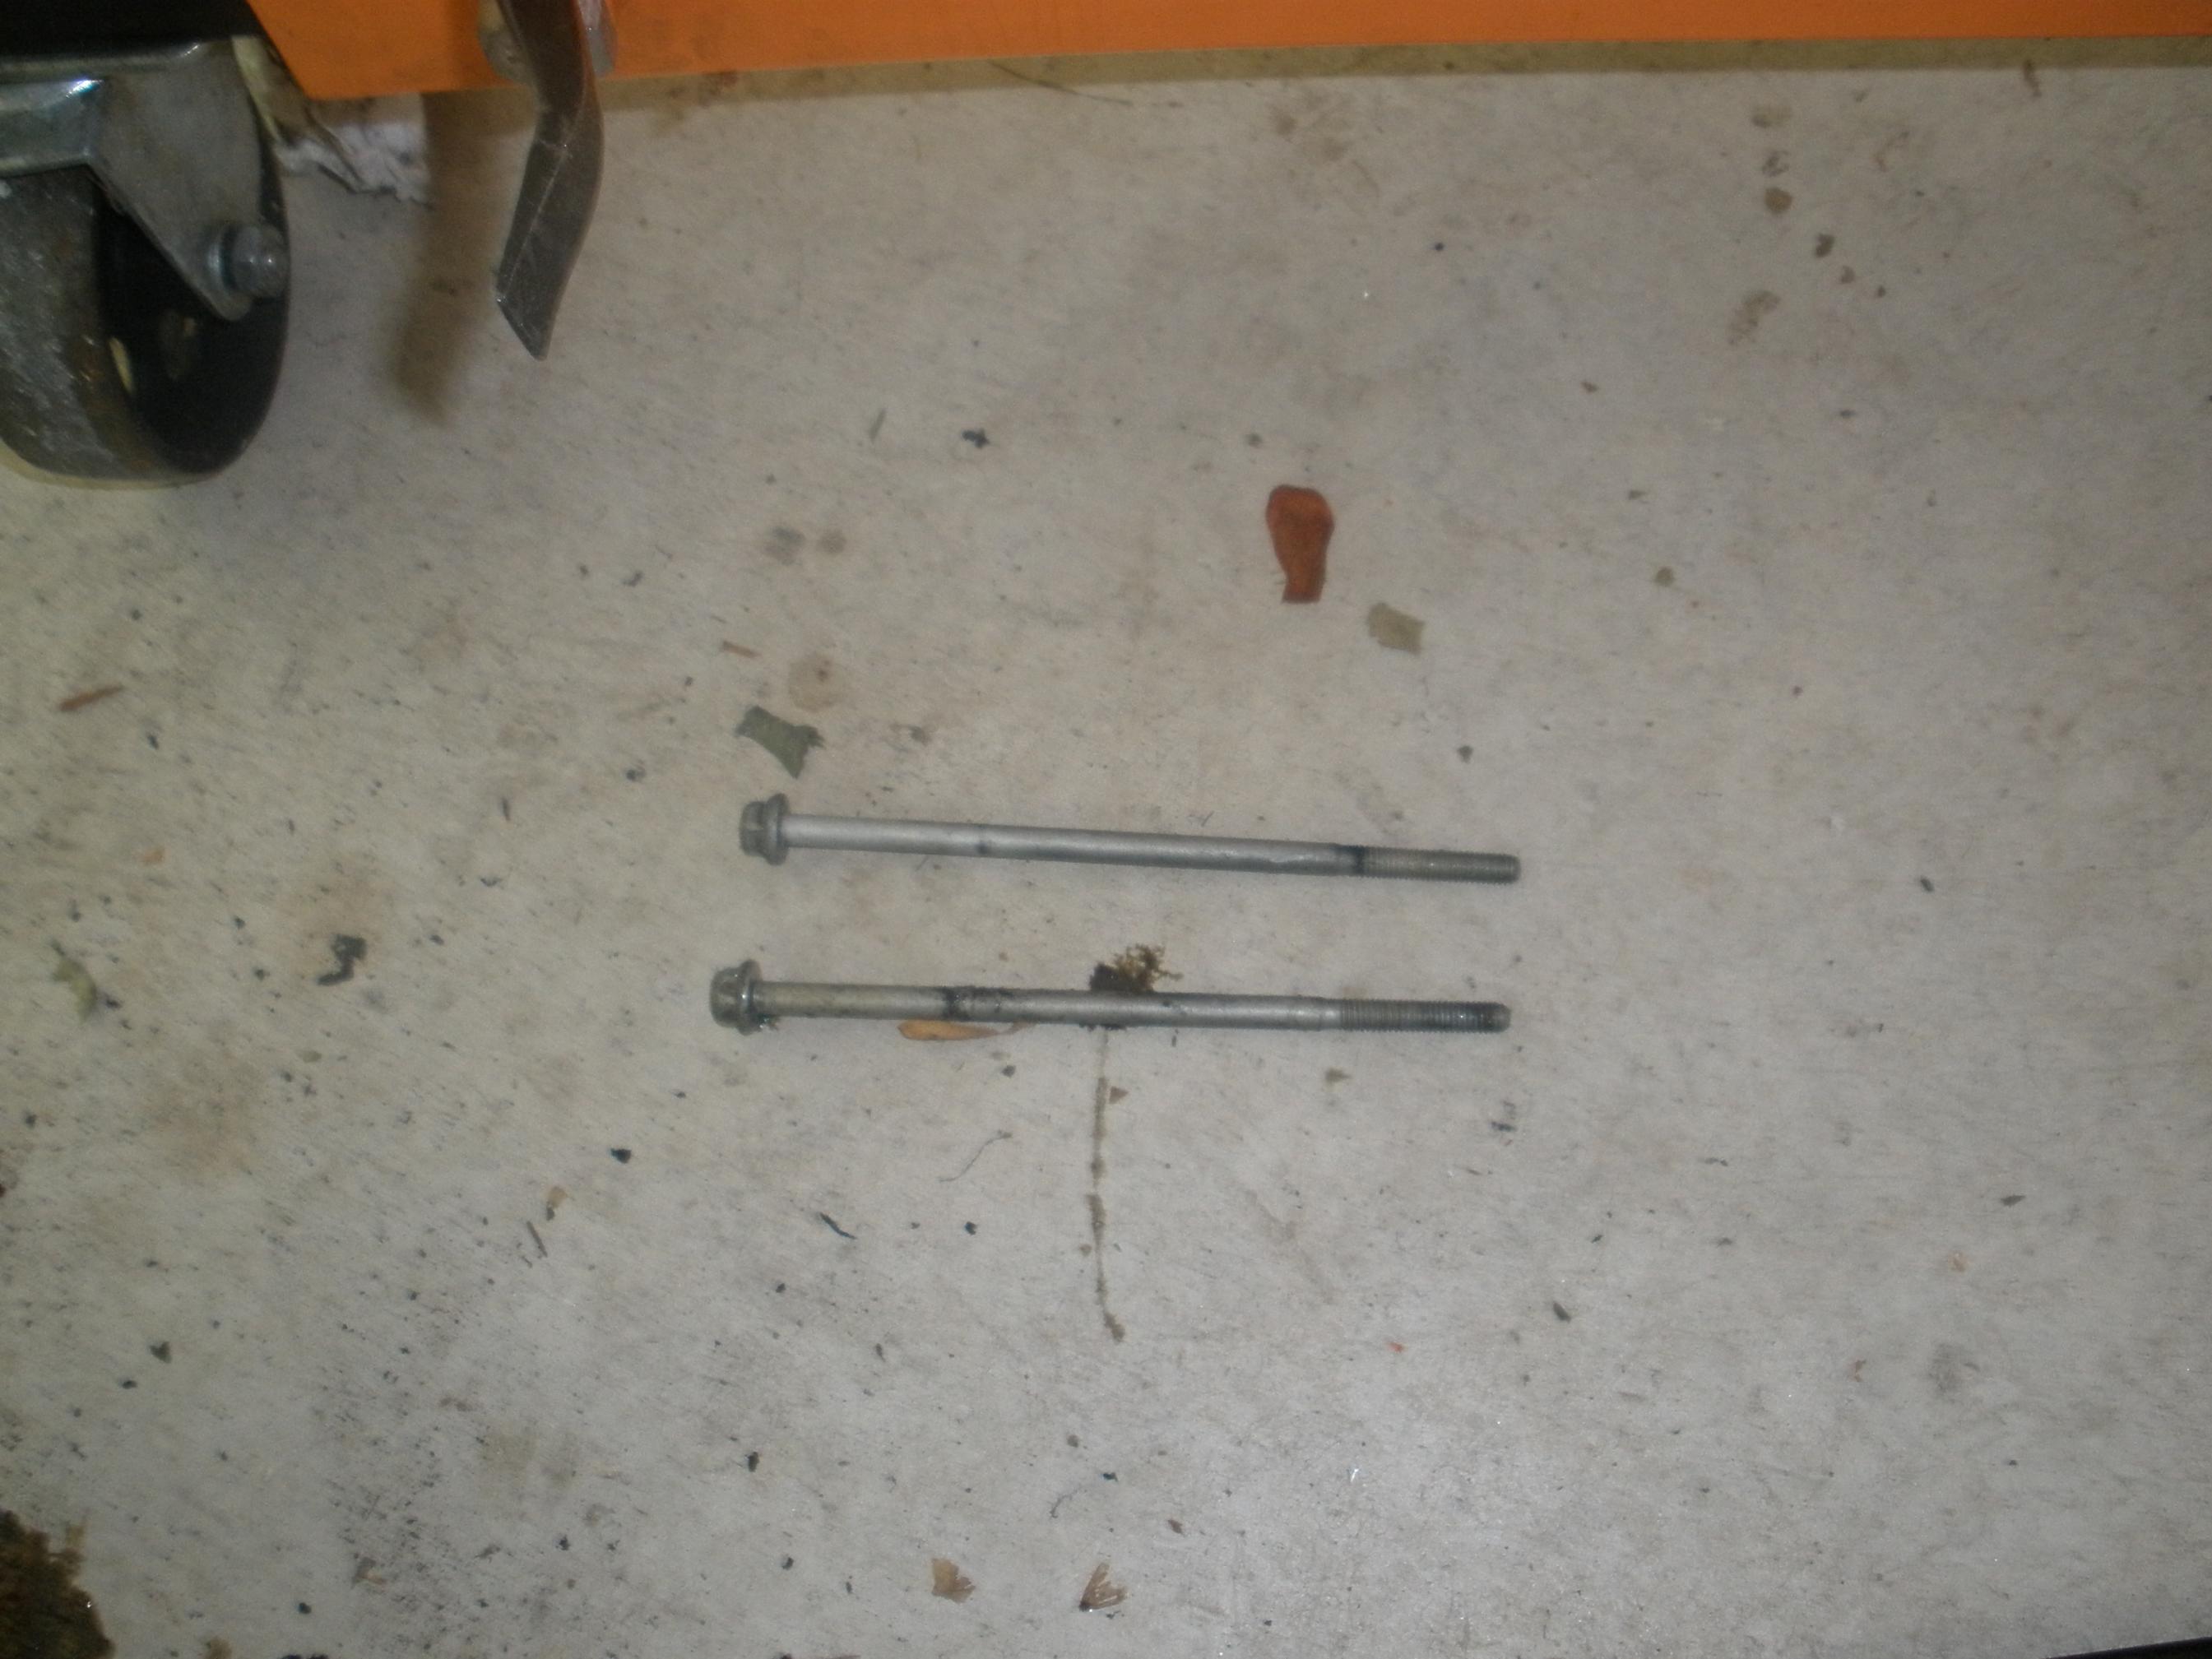
Don't forget to remove the two mega long bolts by the trans, they are underneath. You should have 14 bolts total.
Put the SIKKY pickup in place, make sure you push the o-ring into place all the way or the bolt will be crooked.

The stock gasket didn't have any RTV on it and the SIKKY gasket is similar, rubber on both sides of a metal gasket, so we didn't put any RTV on the SIKKY gasket either. I called SIKKY and they suggested some RTV on the front corners, probably because the front cover joins there, but we cut the RTV from that cover off nice and flush. I guess we will see if it leaks

Remove the stock oil pan and pickup, Its very easy since there is no RTV on the gasket, it will fall right off. The pickup comes off with two bolts... simple.
Don't forget to remove the two mega long bolts by the trans, they are underneath. You should have 14 bolts total.
Put the SIKKY pickup in place, make sure you push the o-ring into place all the way or the bolt will be crooked.
The stock gasket didn't have any RTV on it and the SIKKY gasket is similar, rubber on both sides of a metal gasket, so we didn't put any RTV on the SIKKY gasket either. I called SIKKY and they suggested some RTV on the front corners, probably because the front cover joins there, but we cut the RTV from that cover off nice and flush. I guess we will see if it leaks
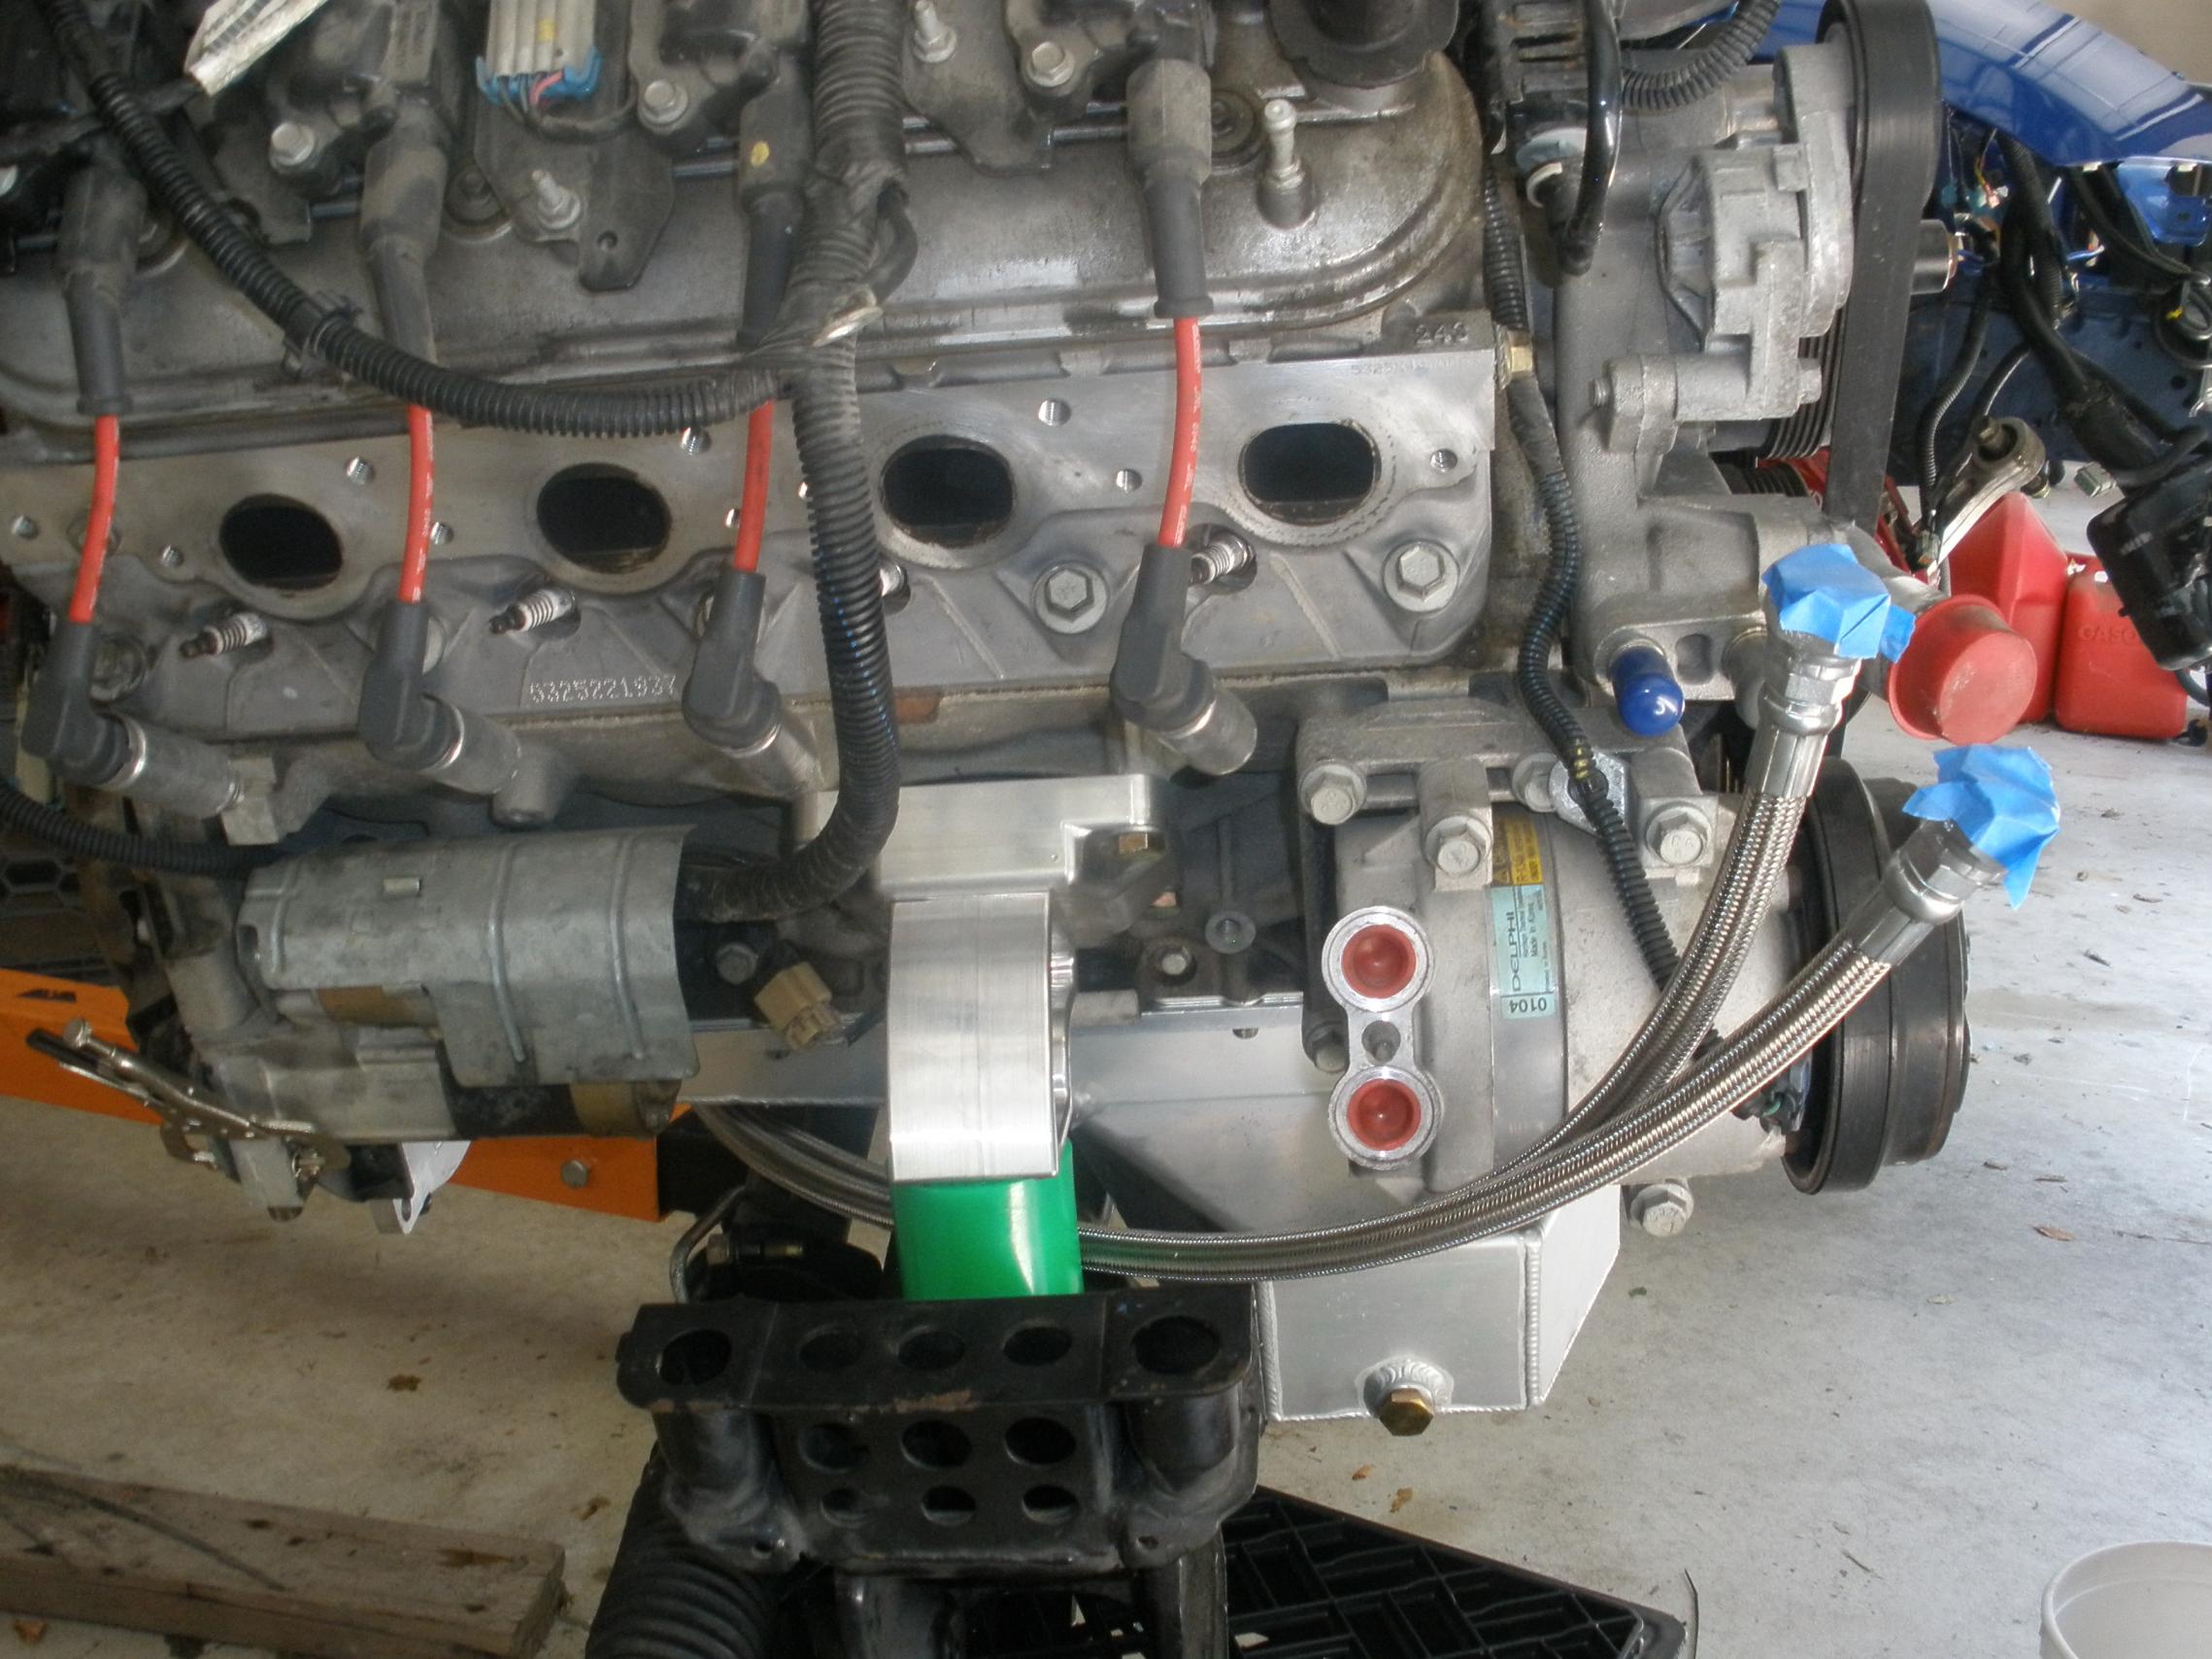
Two bits of SIKKY fail on the oil pan:
1. The mount for the trans dust cover on the passenger side just fell off at the weld. We hadn't even touched it yet and I saw it fall off while we were tightening the pan down
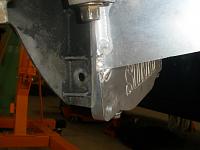

We used some RTV to hold the cover in place on the oil pan and trans. Also, when doing the drivers side we noticed that the stock bolt for the cover on that side bottomed out against the oil pan before it secured the cover. We replaced that bolt with a shorter one.
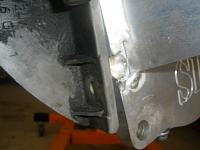
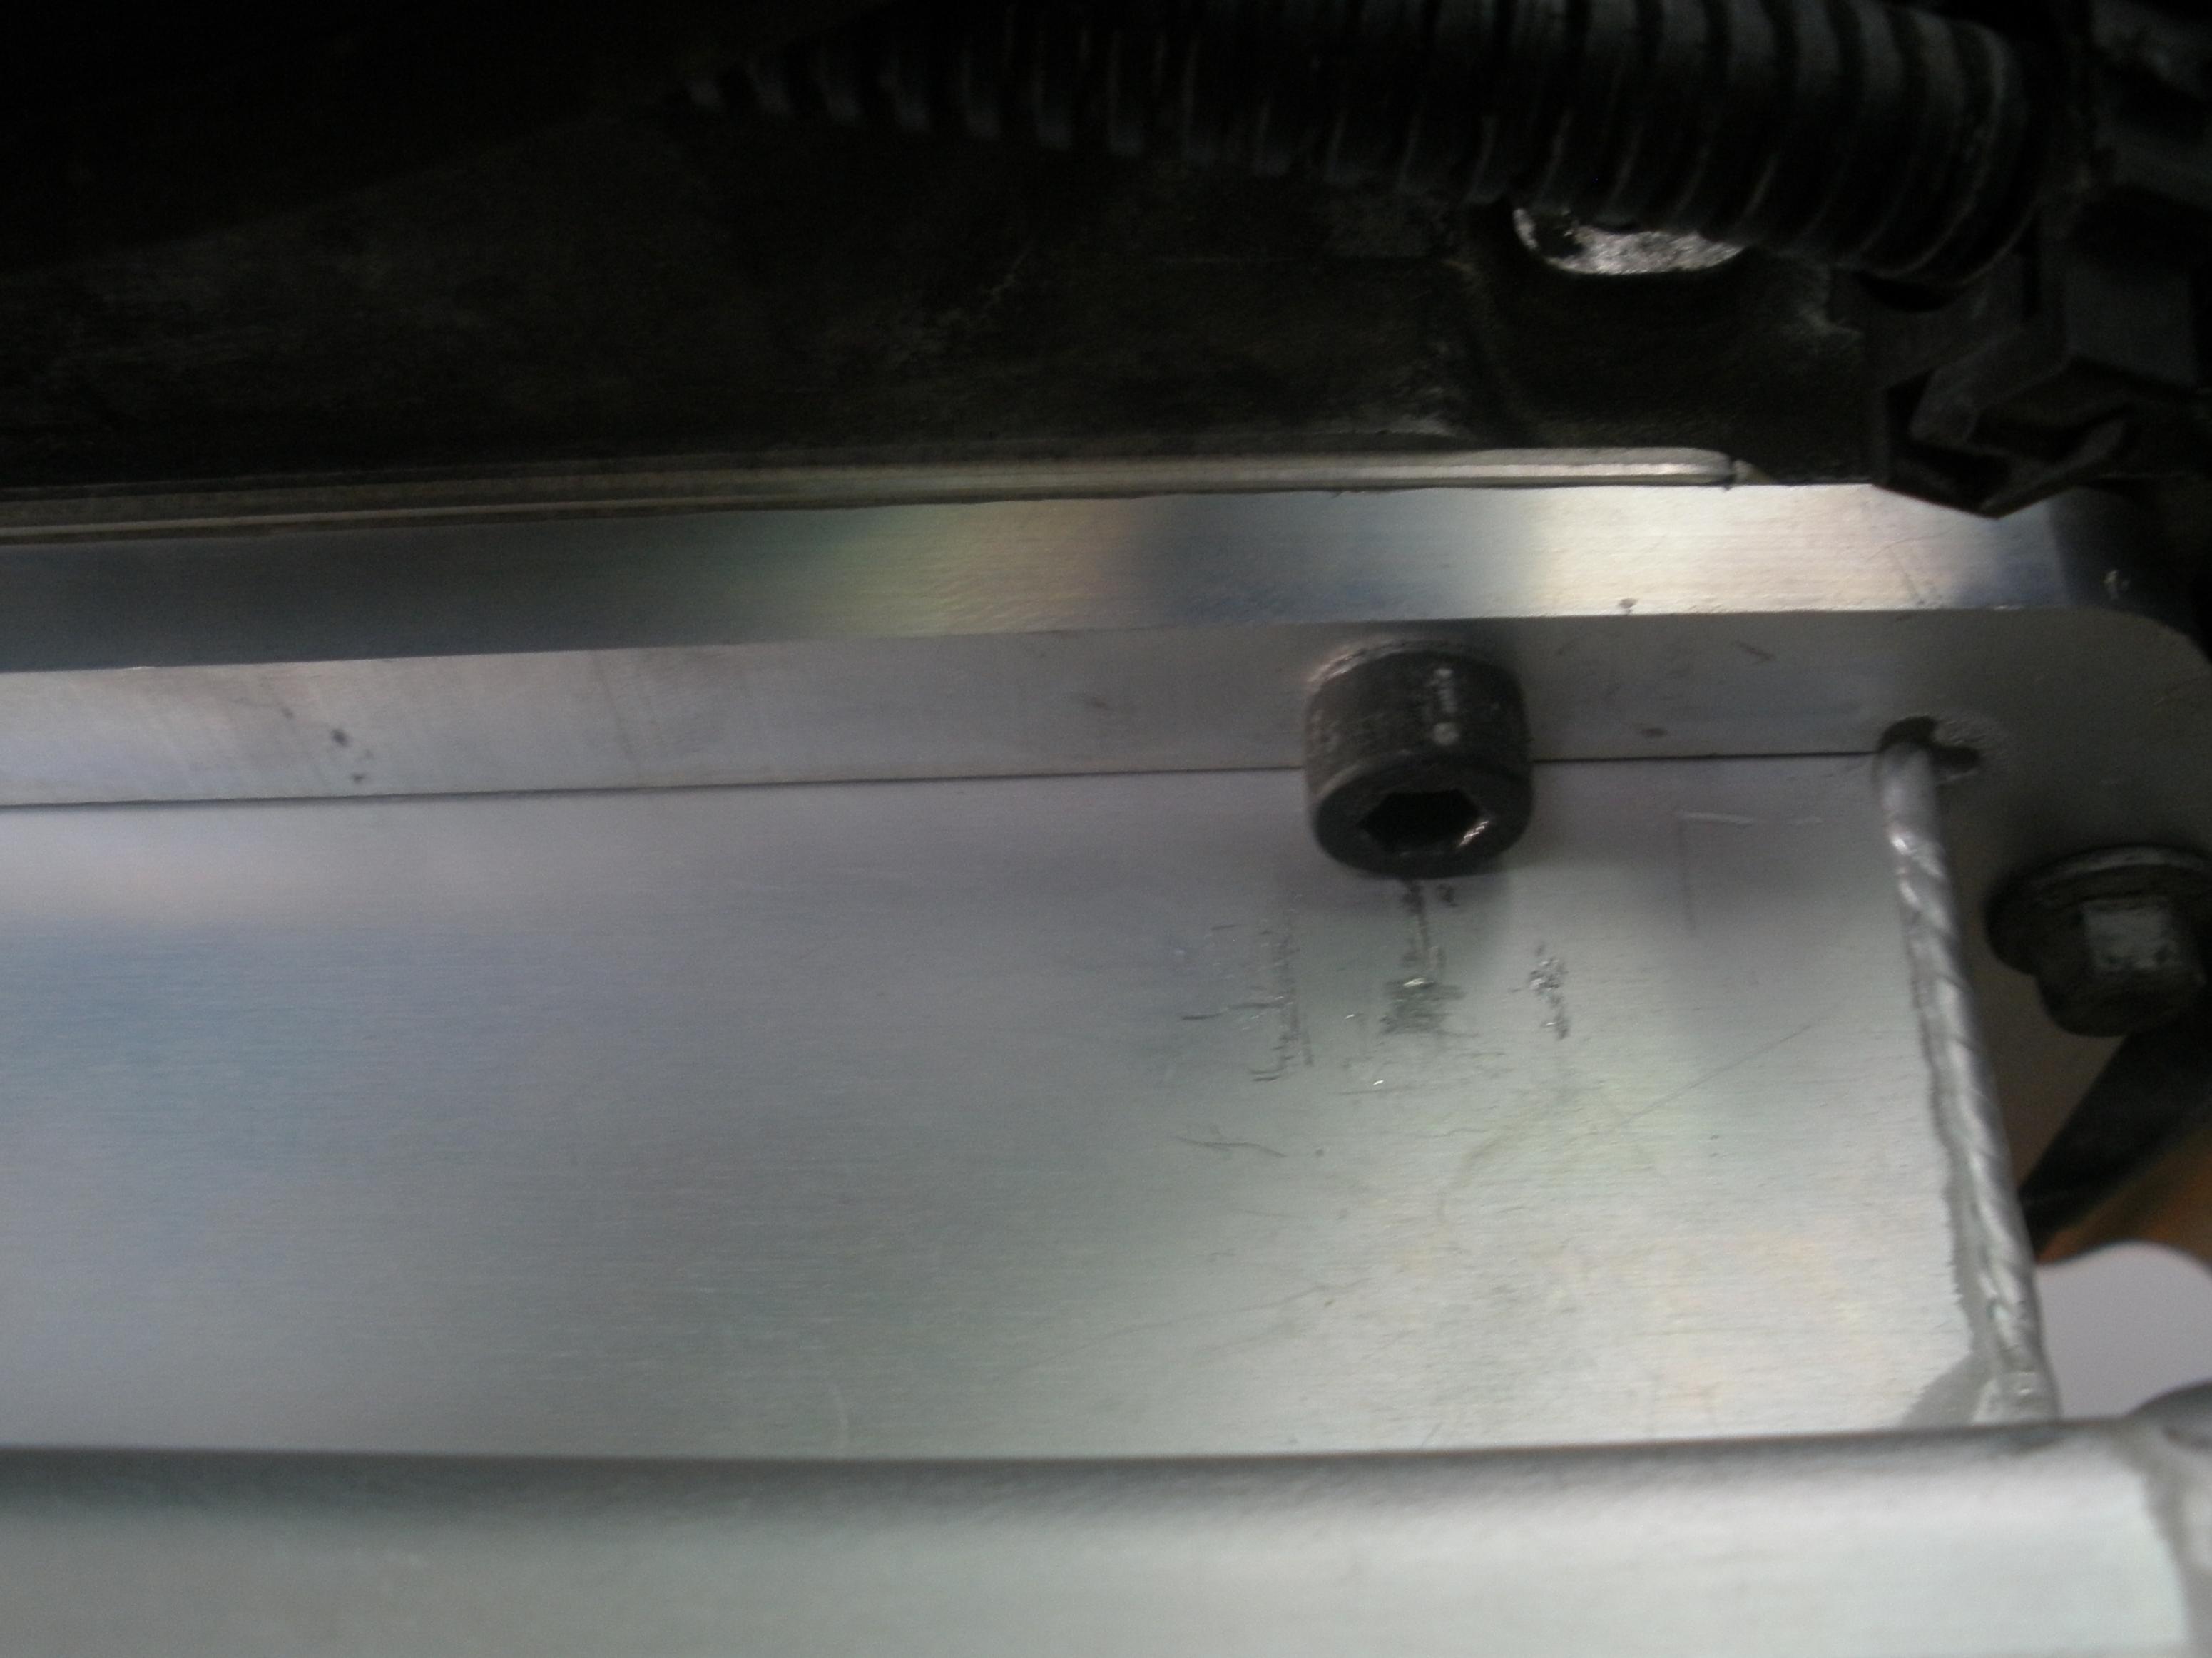
2. The mount hole for the drivers side front of the SIKKY oil pan was drilled too close to the pan to get the stock bolt back in correctly. We had to swap it out for an allen head bolt, we found the right bolt by using one of the allen bolts from the stock LS shifter cover we removed earlier.

1. The mount for the trans dust cover on the passenger side just fell off at the weld. We hadn't even touched it yet and I saw it fall off while we were tightening the pan down

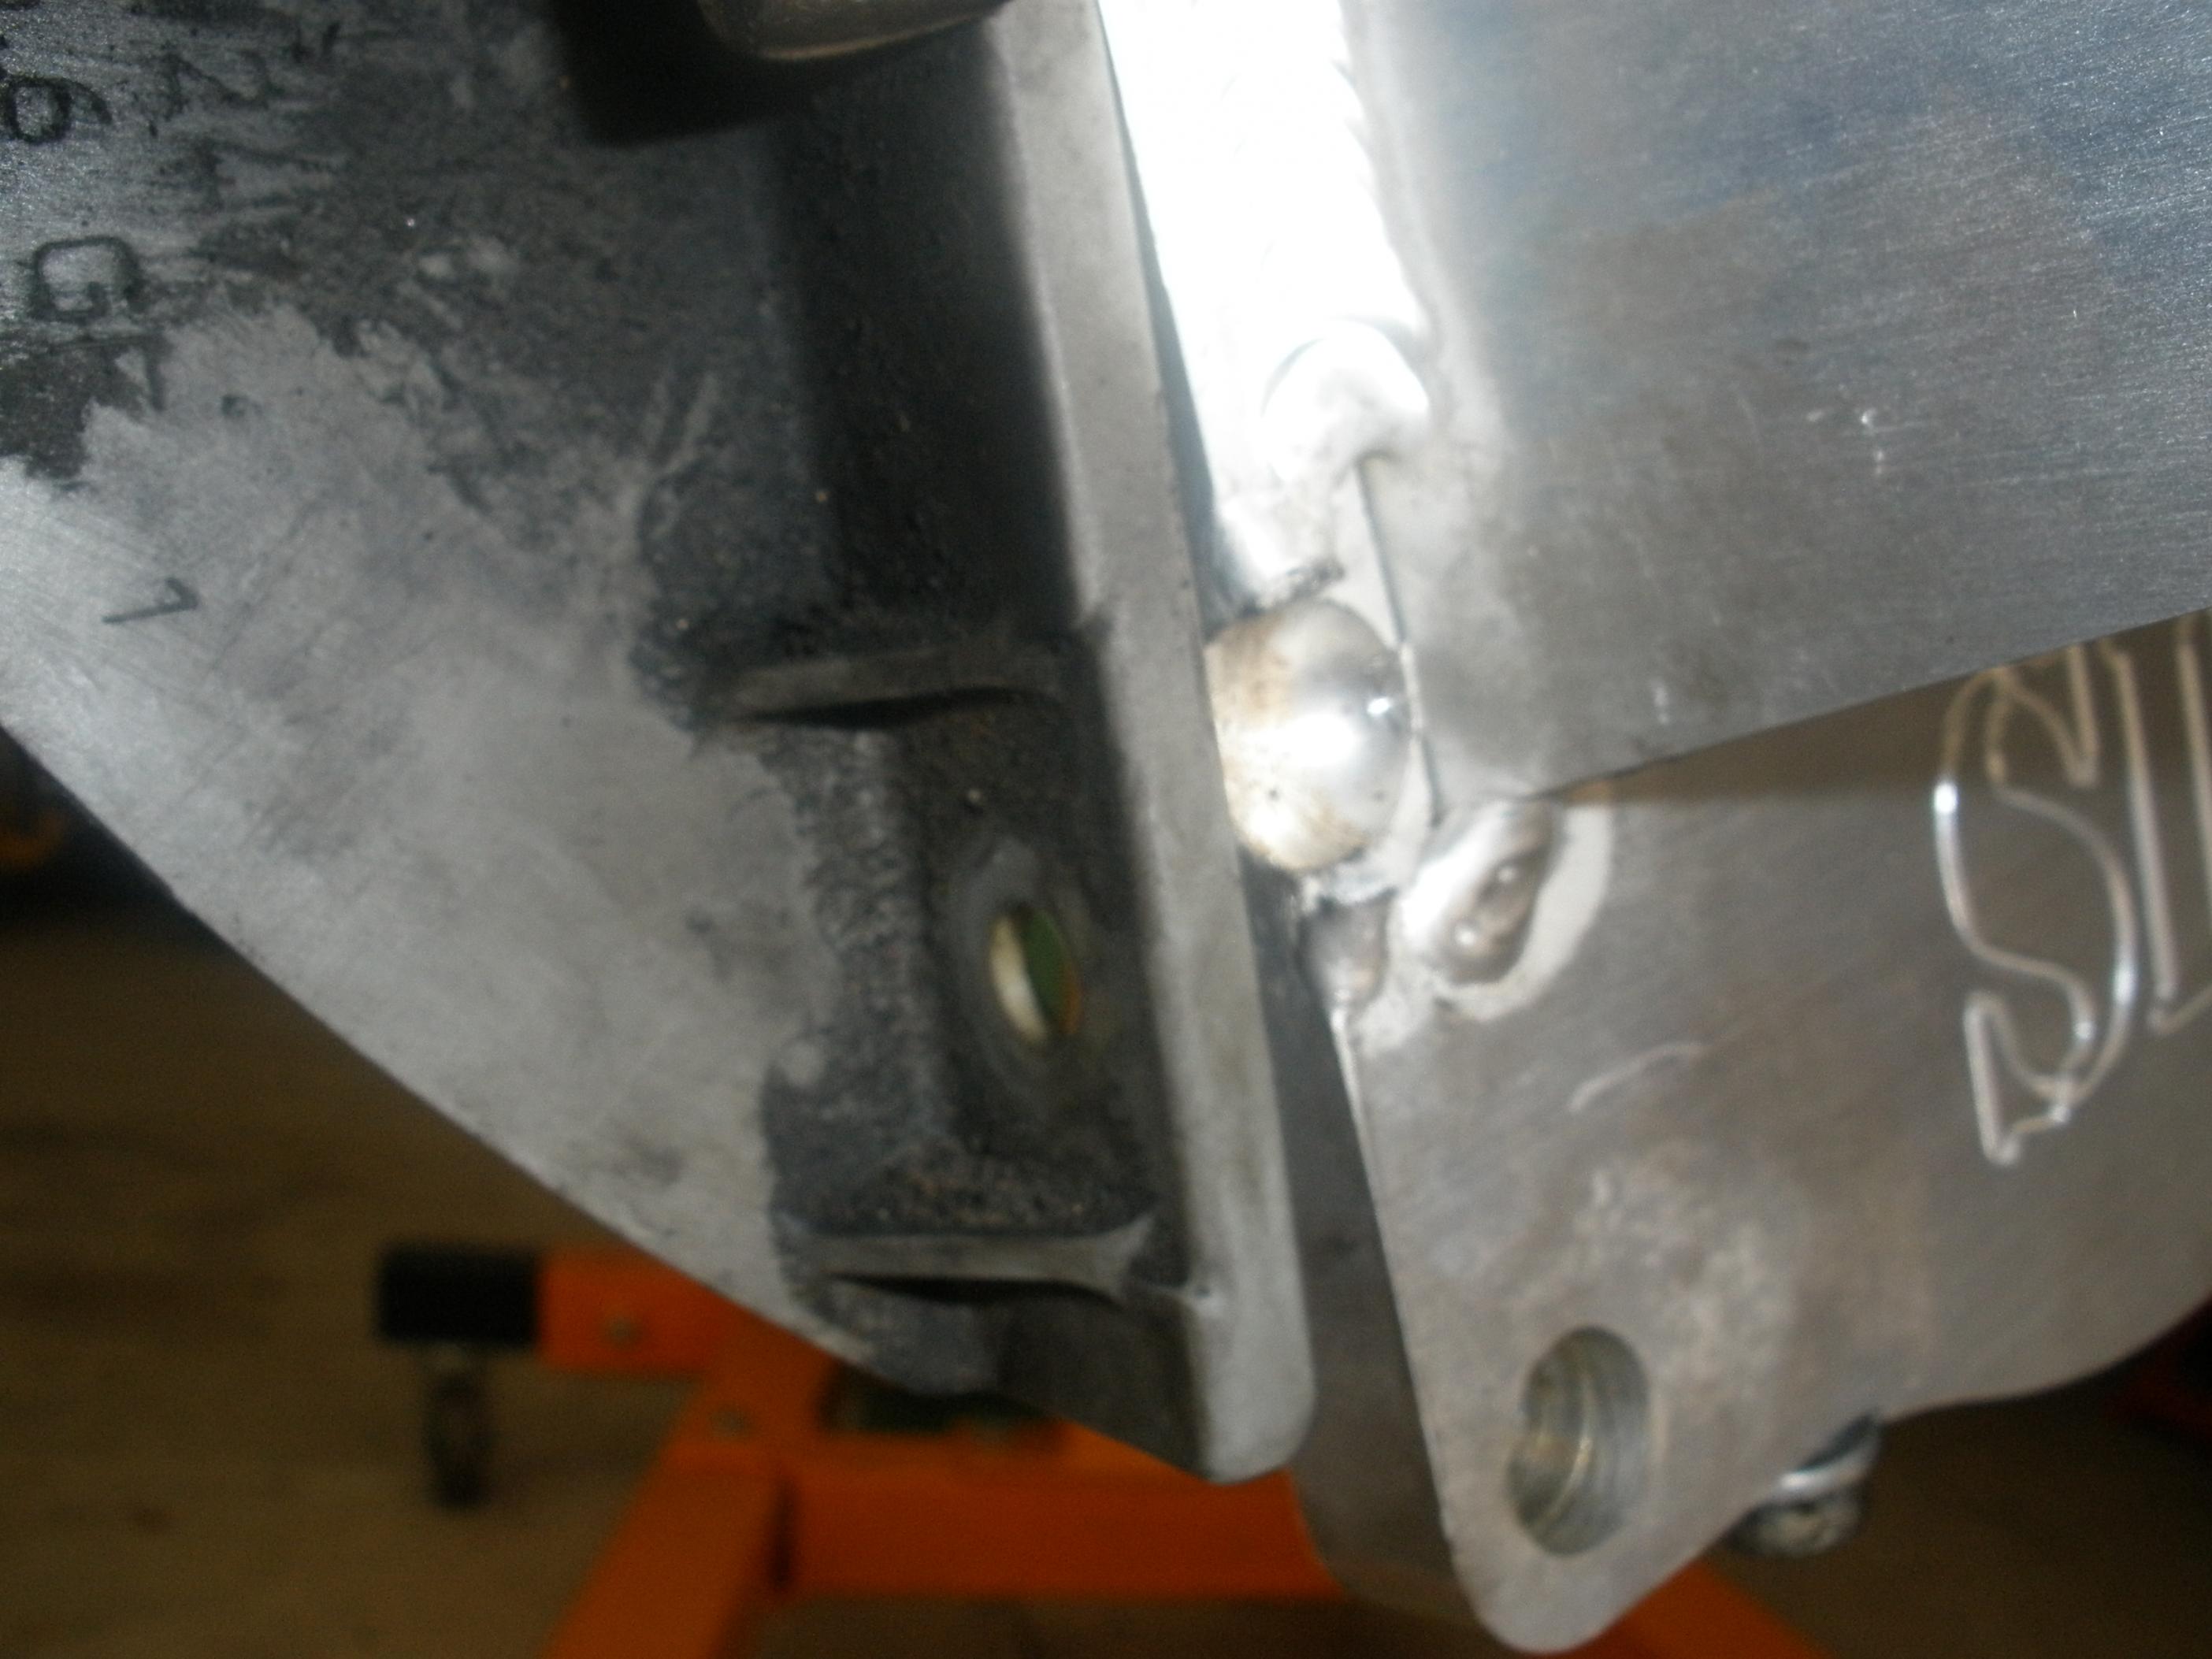
We used some RTV to hold the cover in place on the oil pan and trans. Also, when doing the drivers side we noticed that the stock bolt for the cover on that side bottomed out against the oil pan before it secured the cover. We replaced that bolt with a shorter one.
2. The mount hole for the drivers side front of the SIKKY oil pan was drilled too close to the pan to get the stock bolt back in correctly. We had to swap it out for an allen head bolt, we found the right bolt by using one of the allen bolts from the stock LS shifter cover we removed earlier.
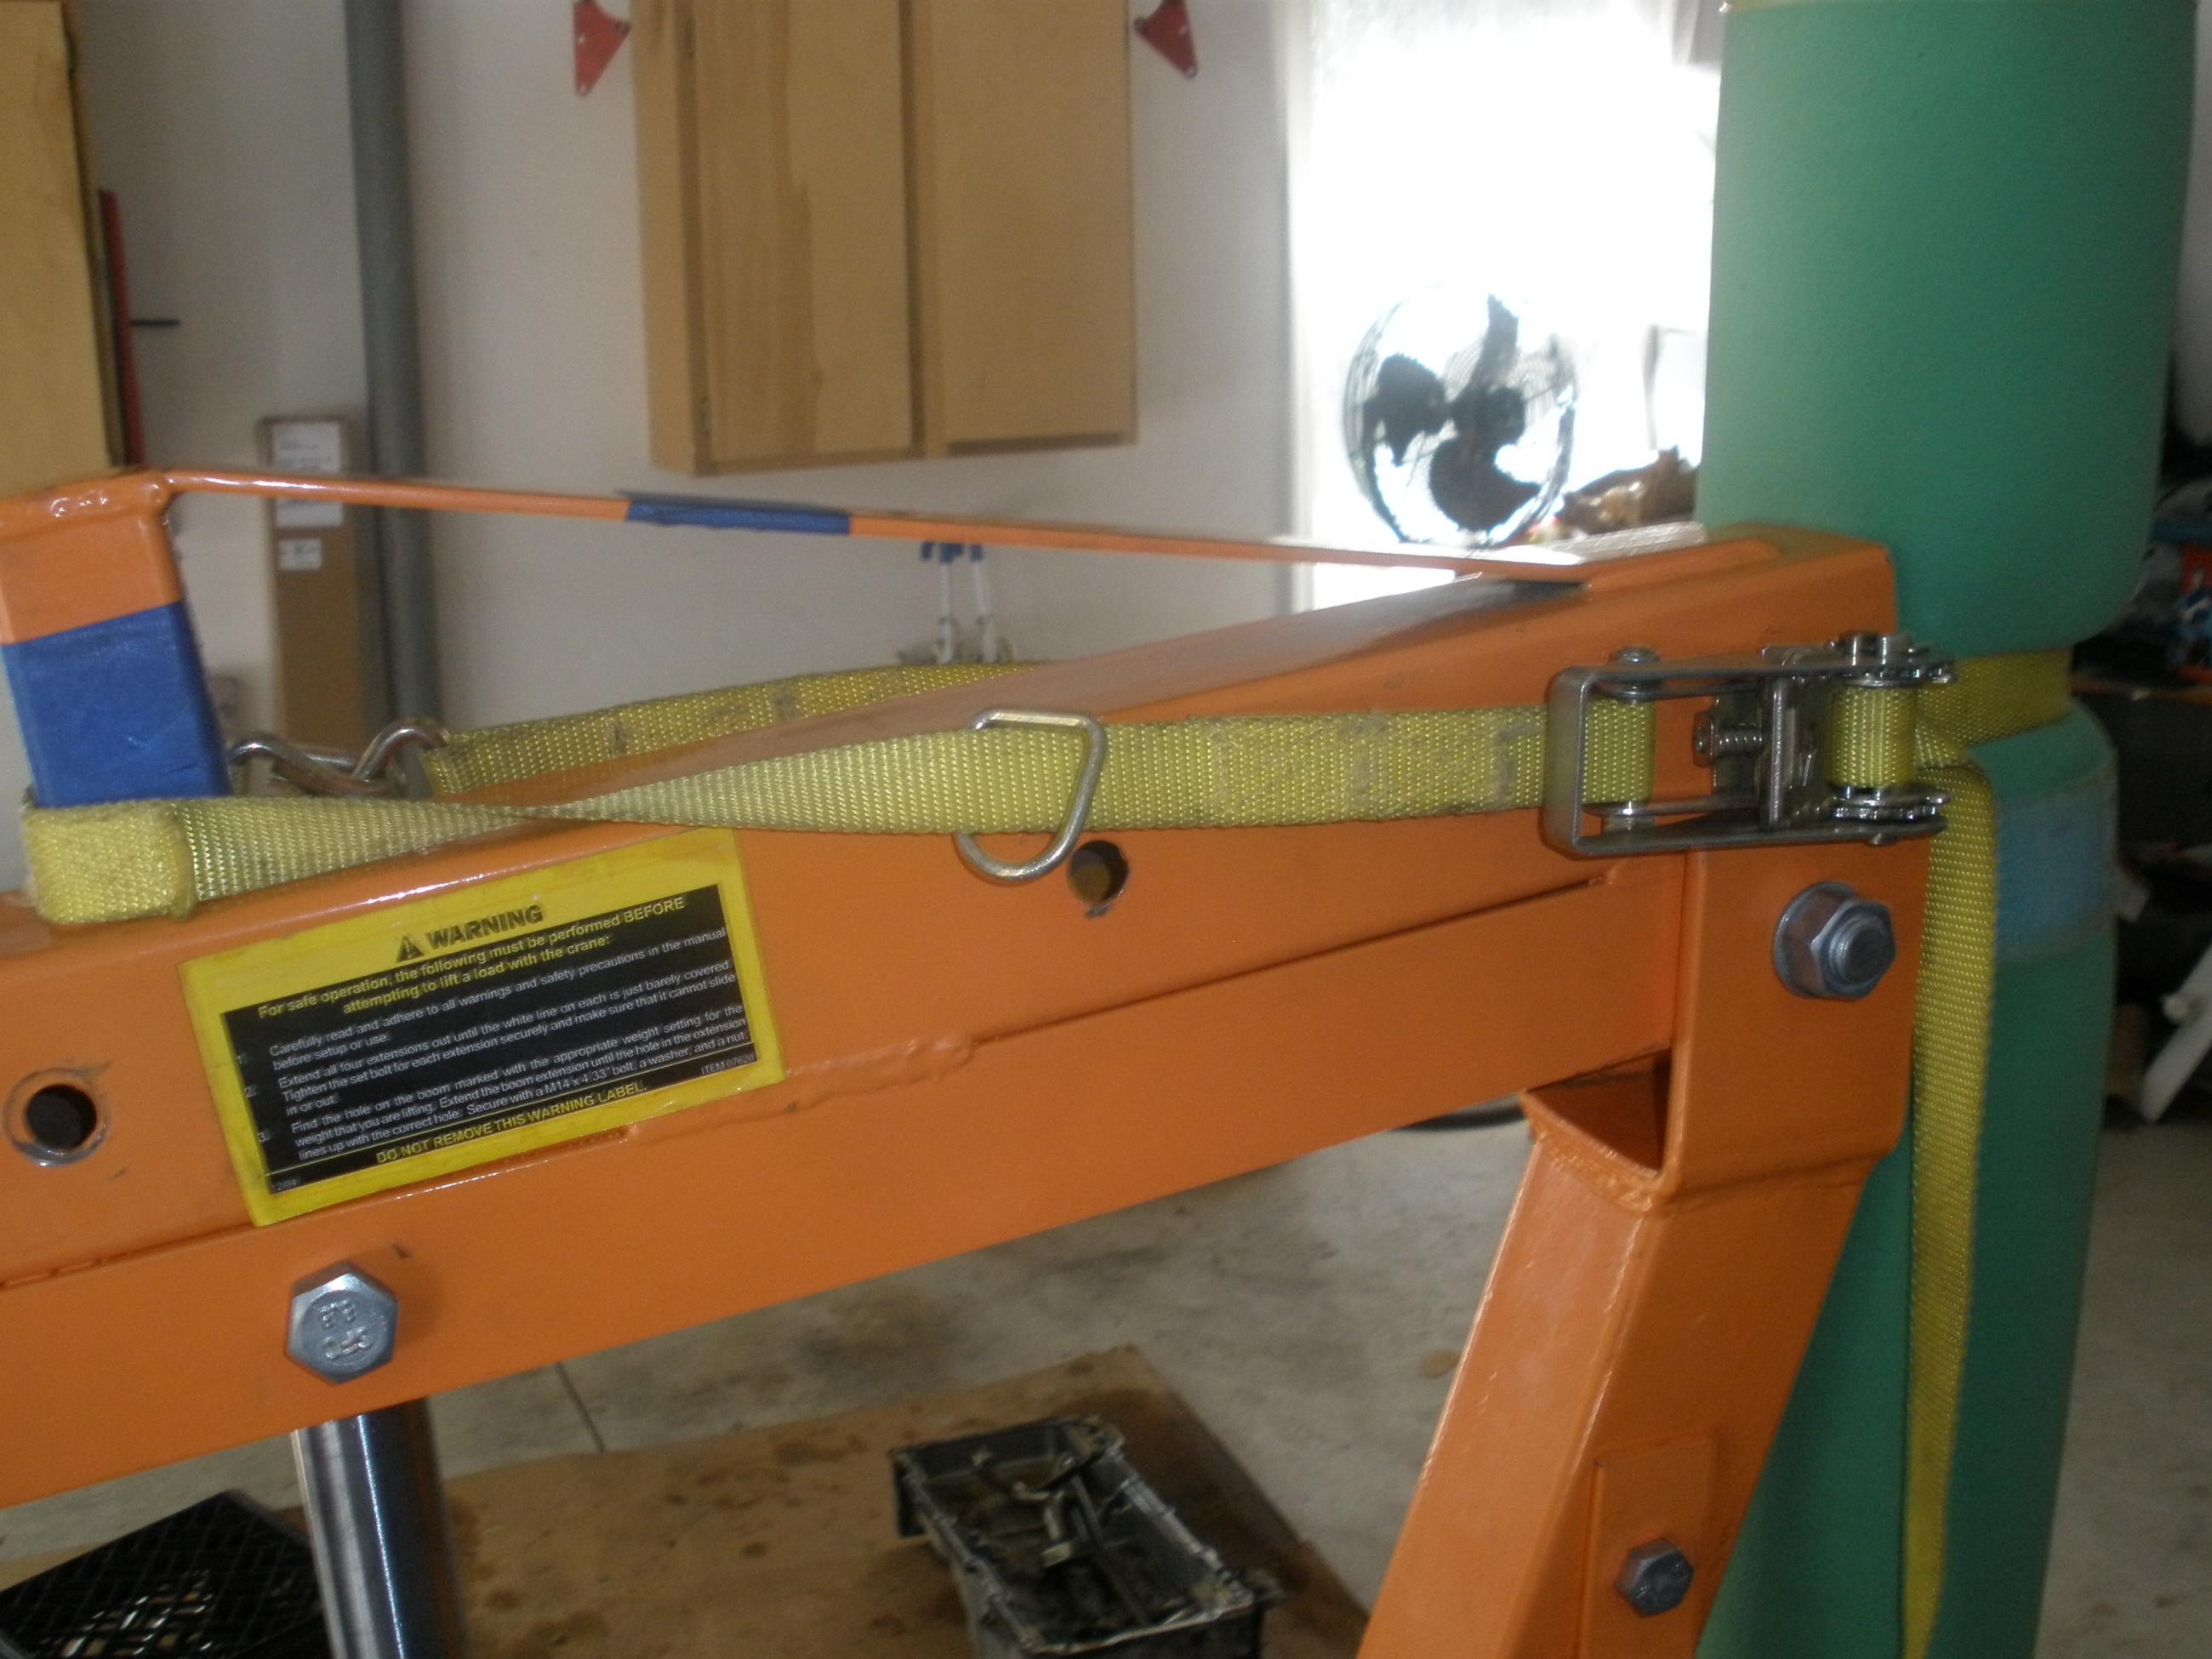
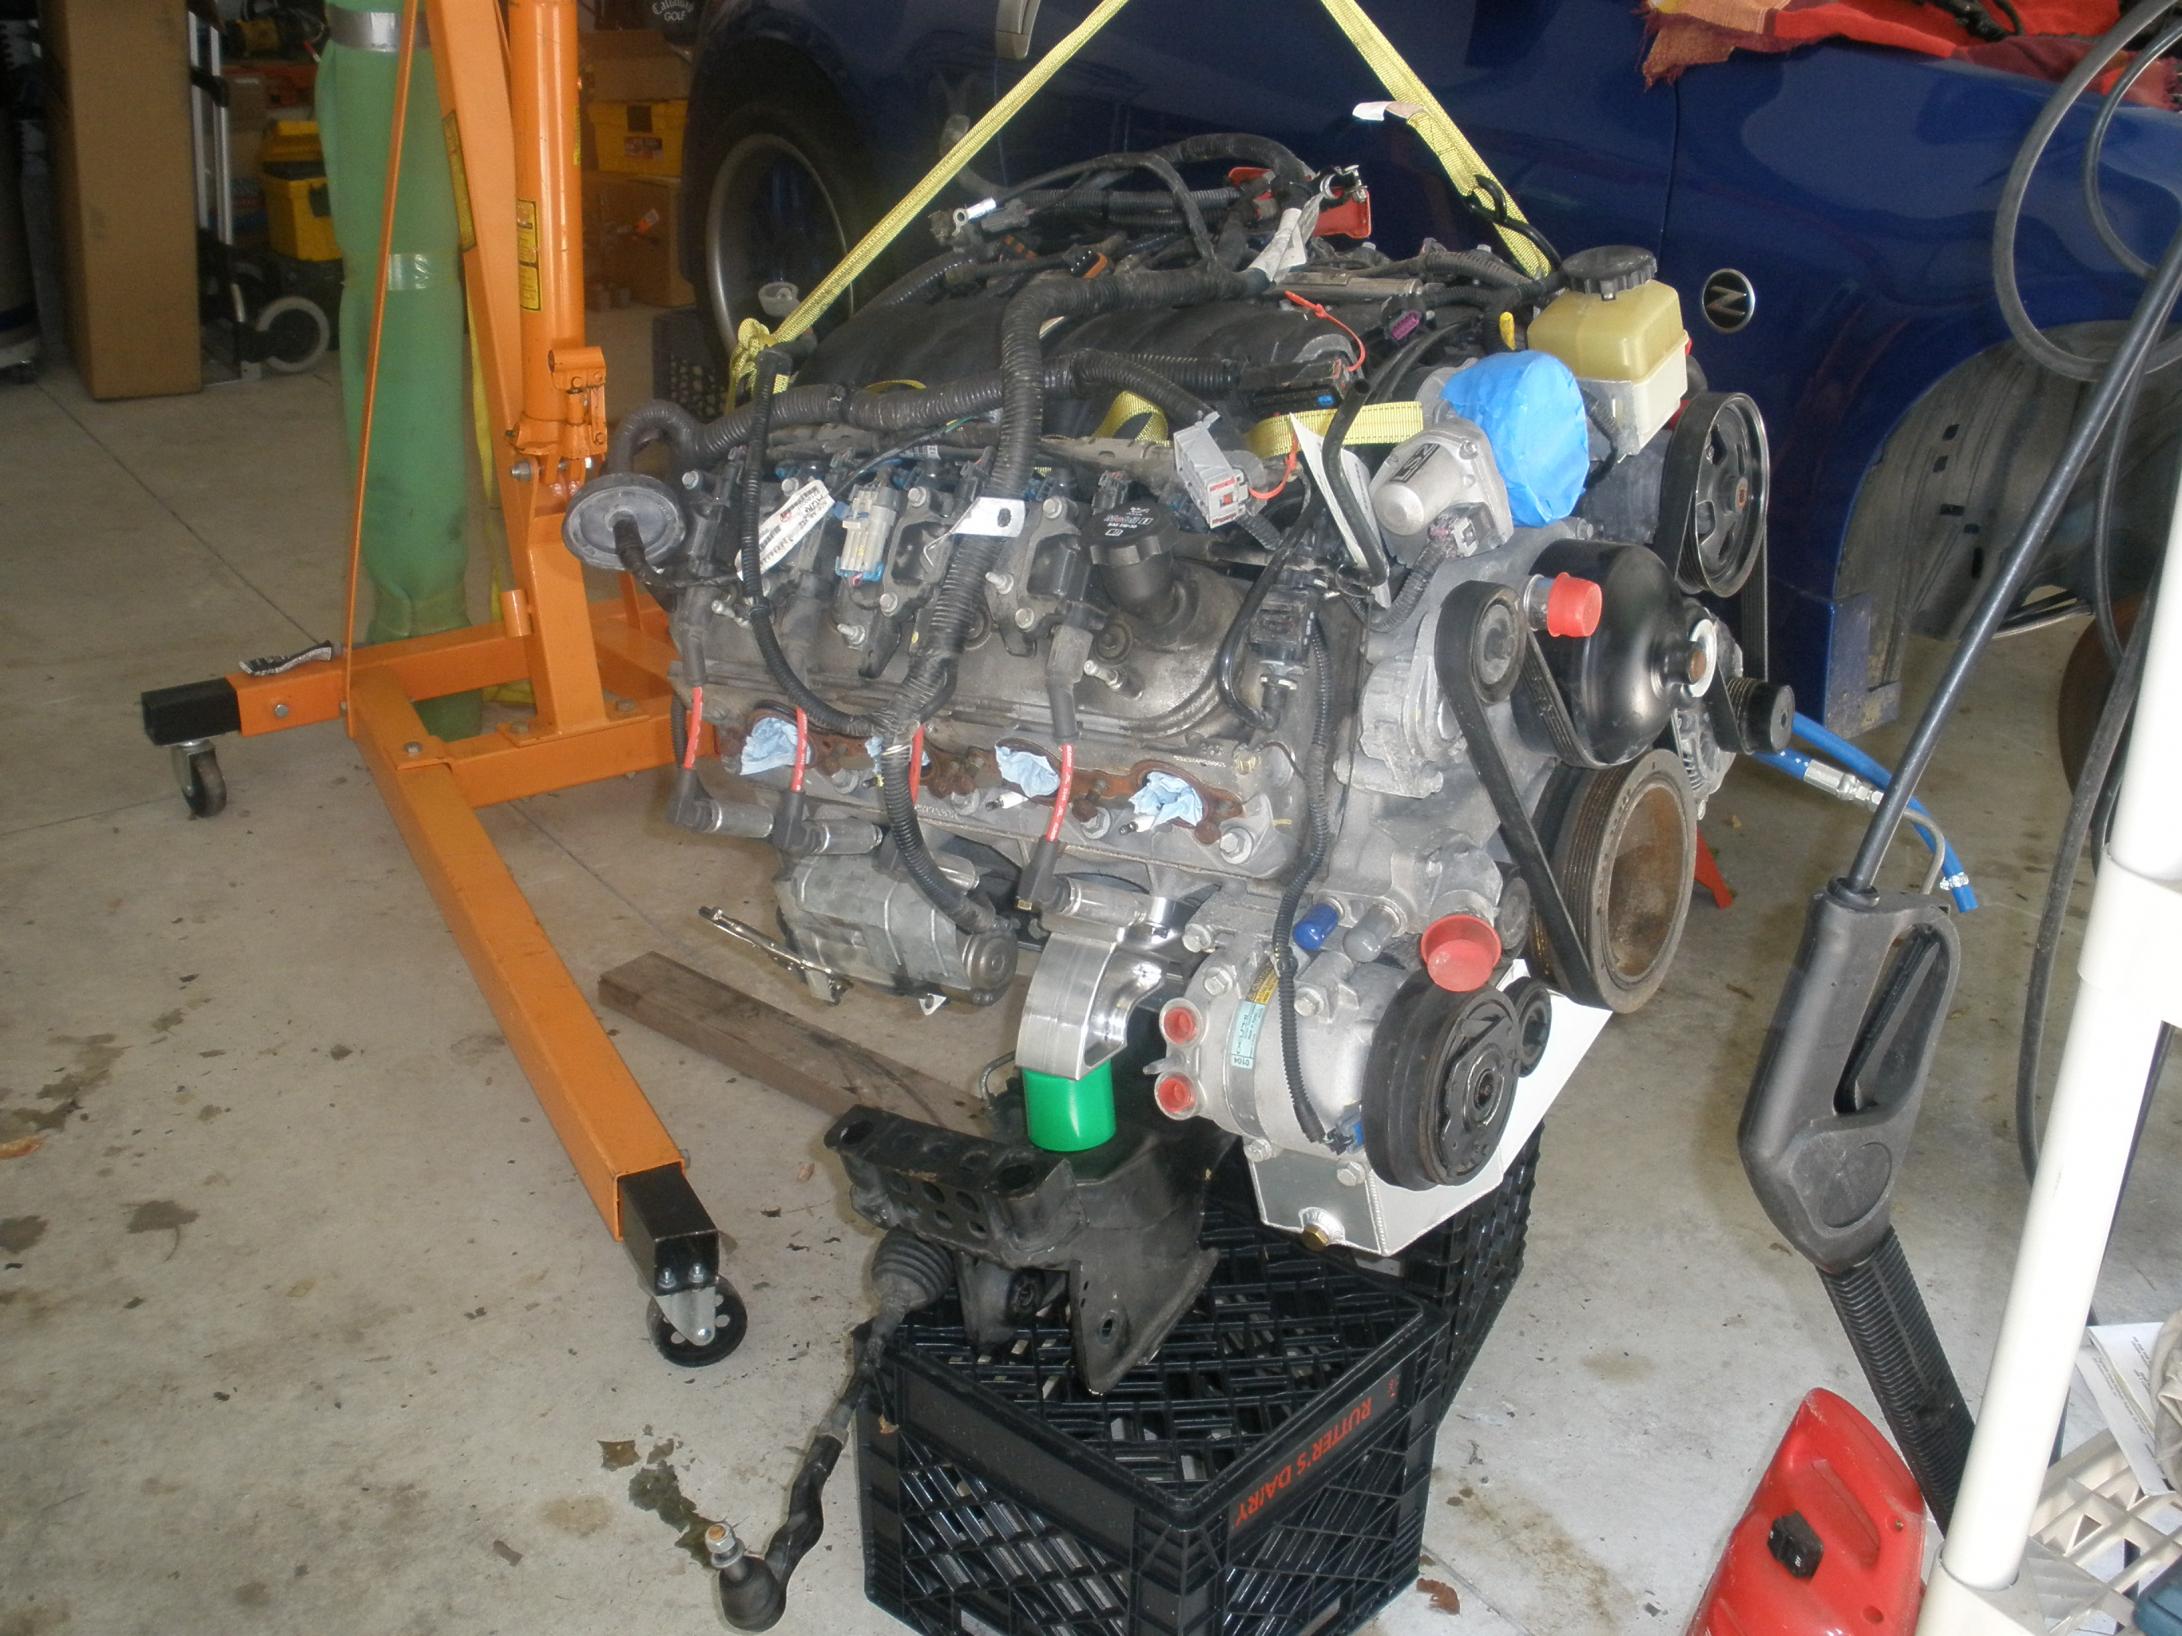
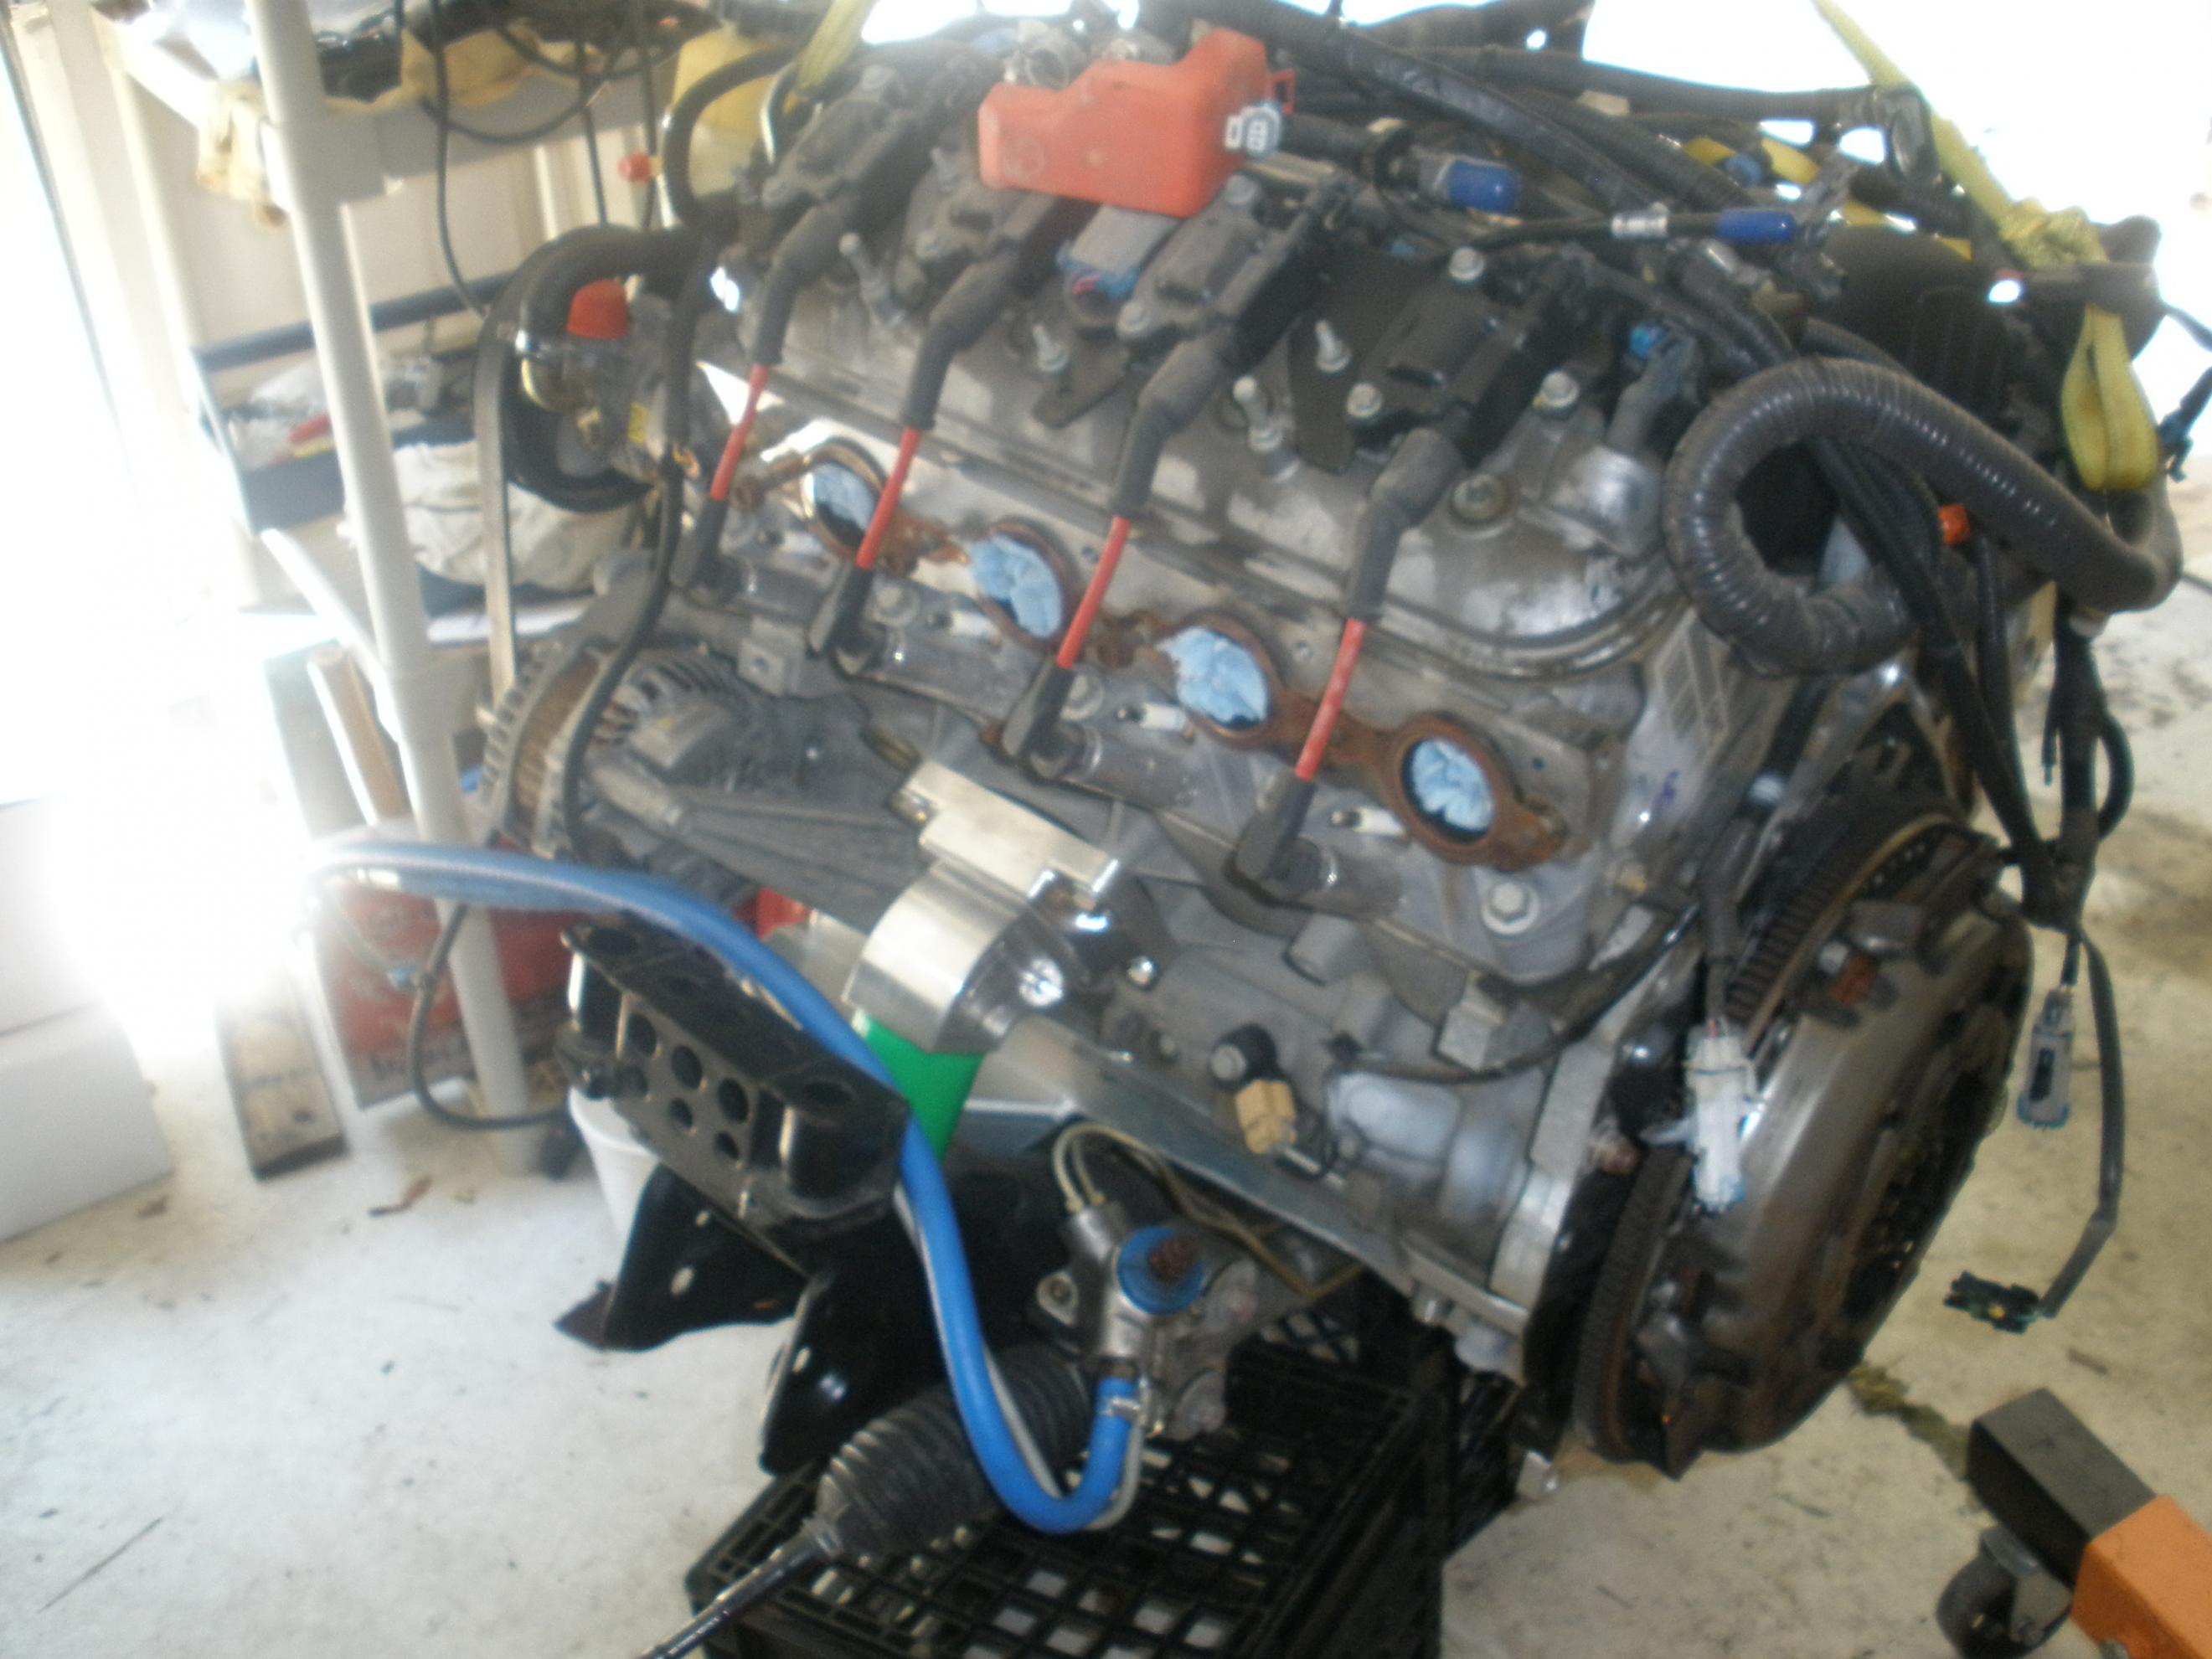
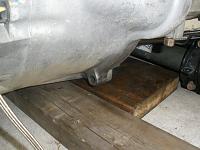
My friend and I did all the work on the LS without putting it on an engine stand. we just used the stock mount points, a piece of tie-down strap (run through twice) and the engine hoist. For safety I also used a tie-down to strap it to the pole in my garage. Not pretty, but effective 
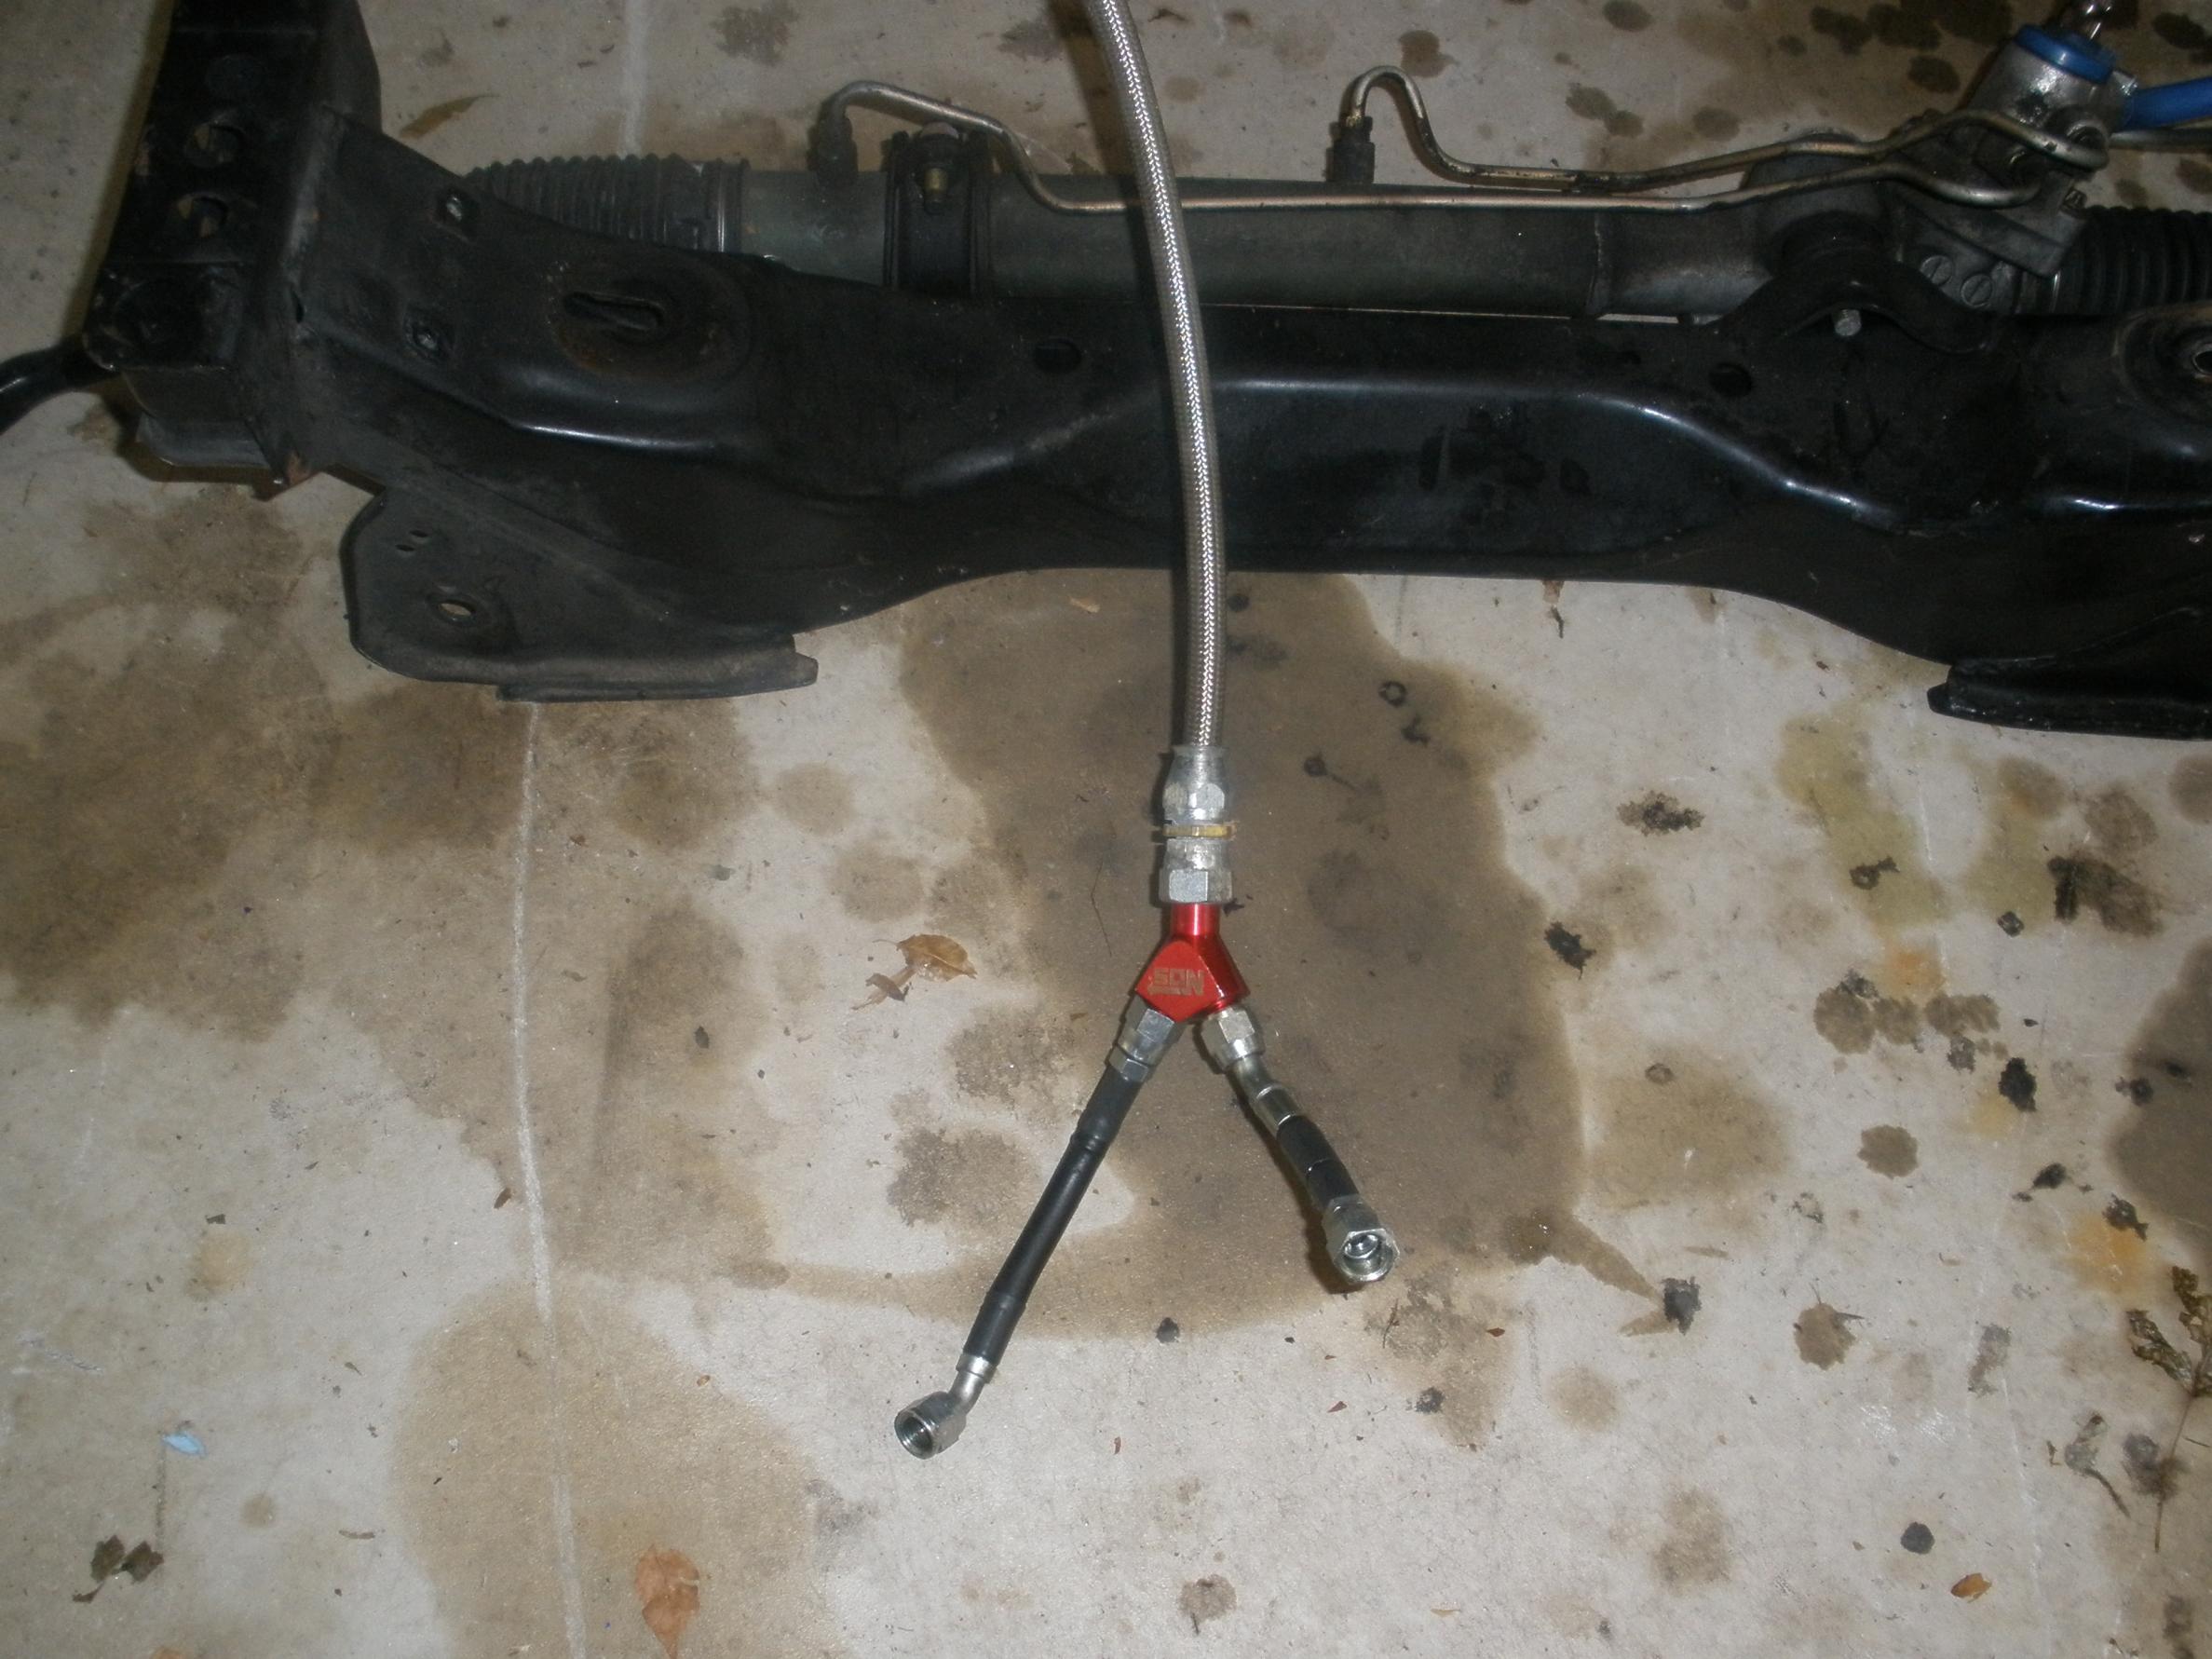
The next step was to put the Nissan cross member and sttering assembly on the LS mounts. We just hand tightened these on since you need to let the trans mount determine where the engine is square since there is a ton of room for the SIKKY mounts to wander on this sub-frame.


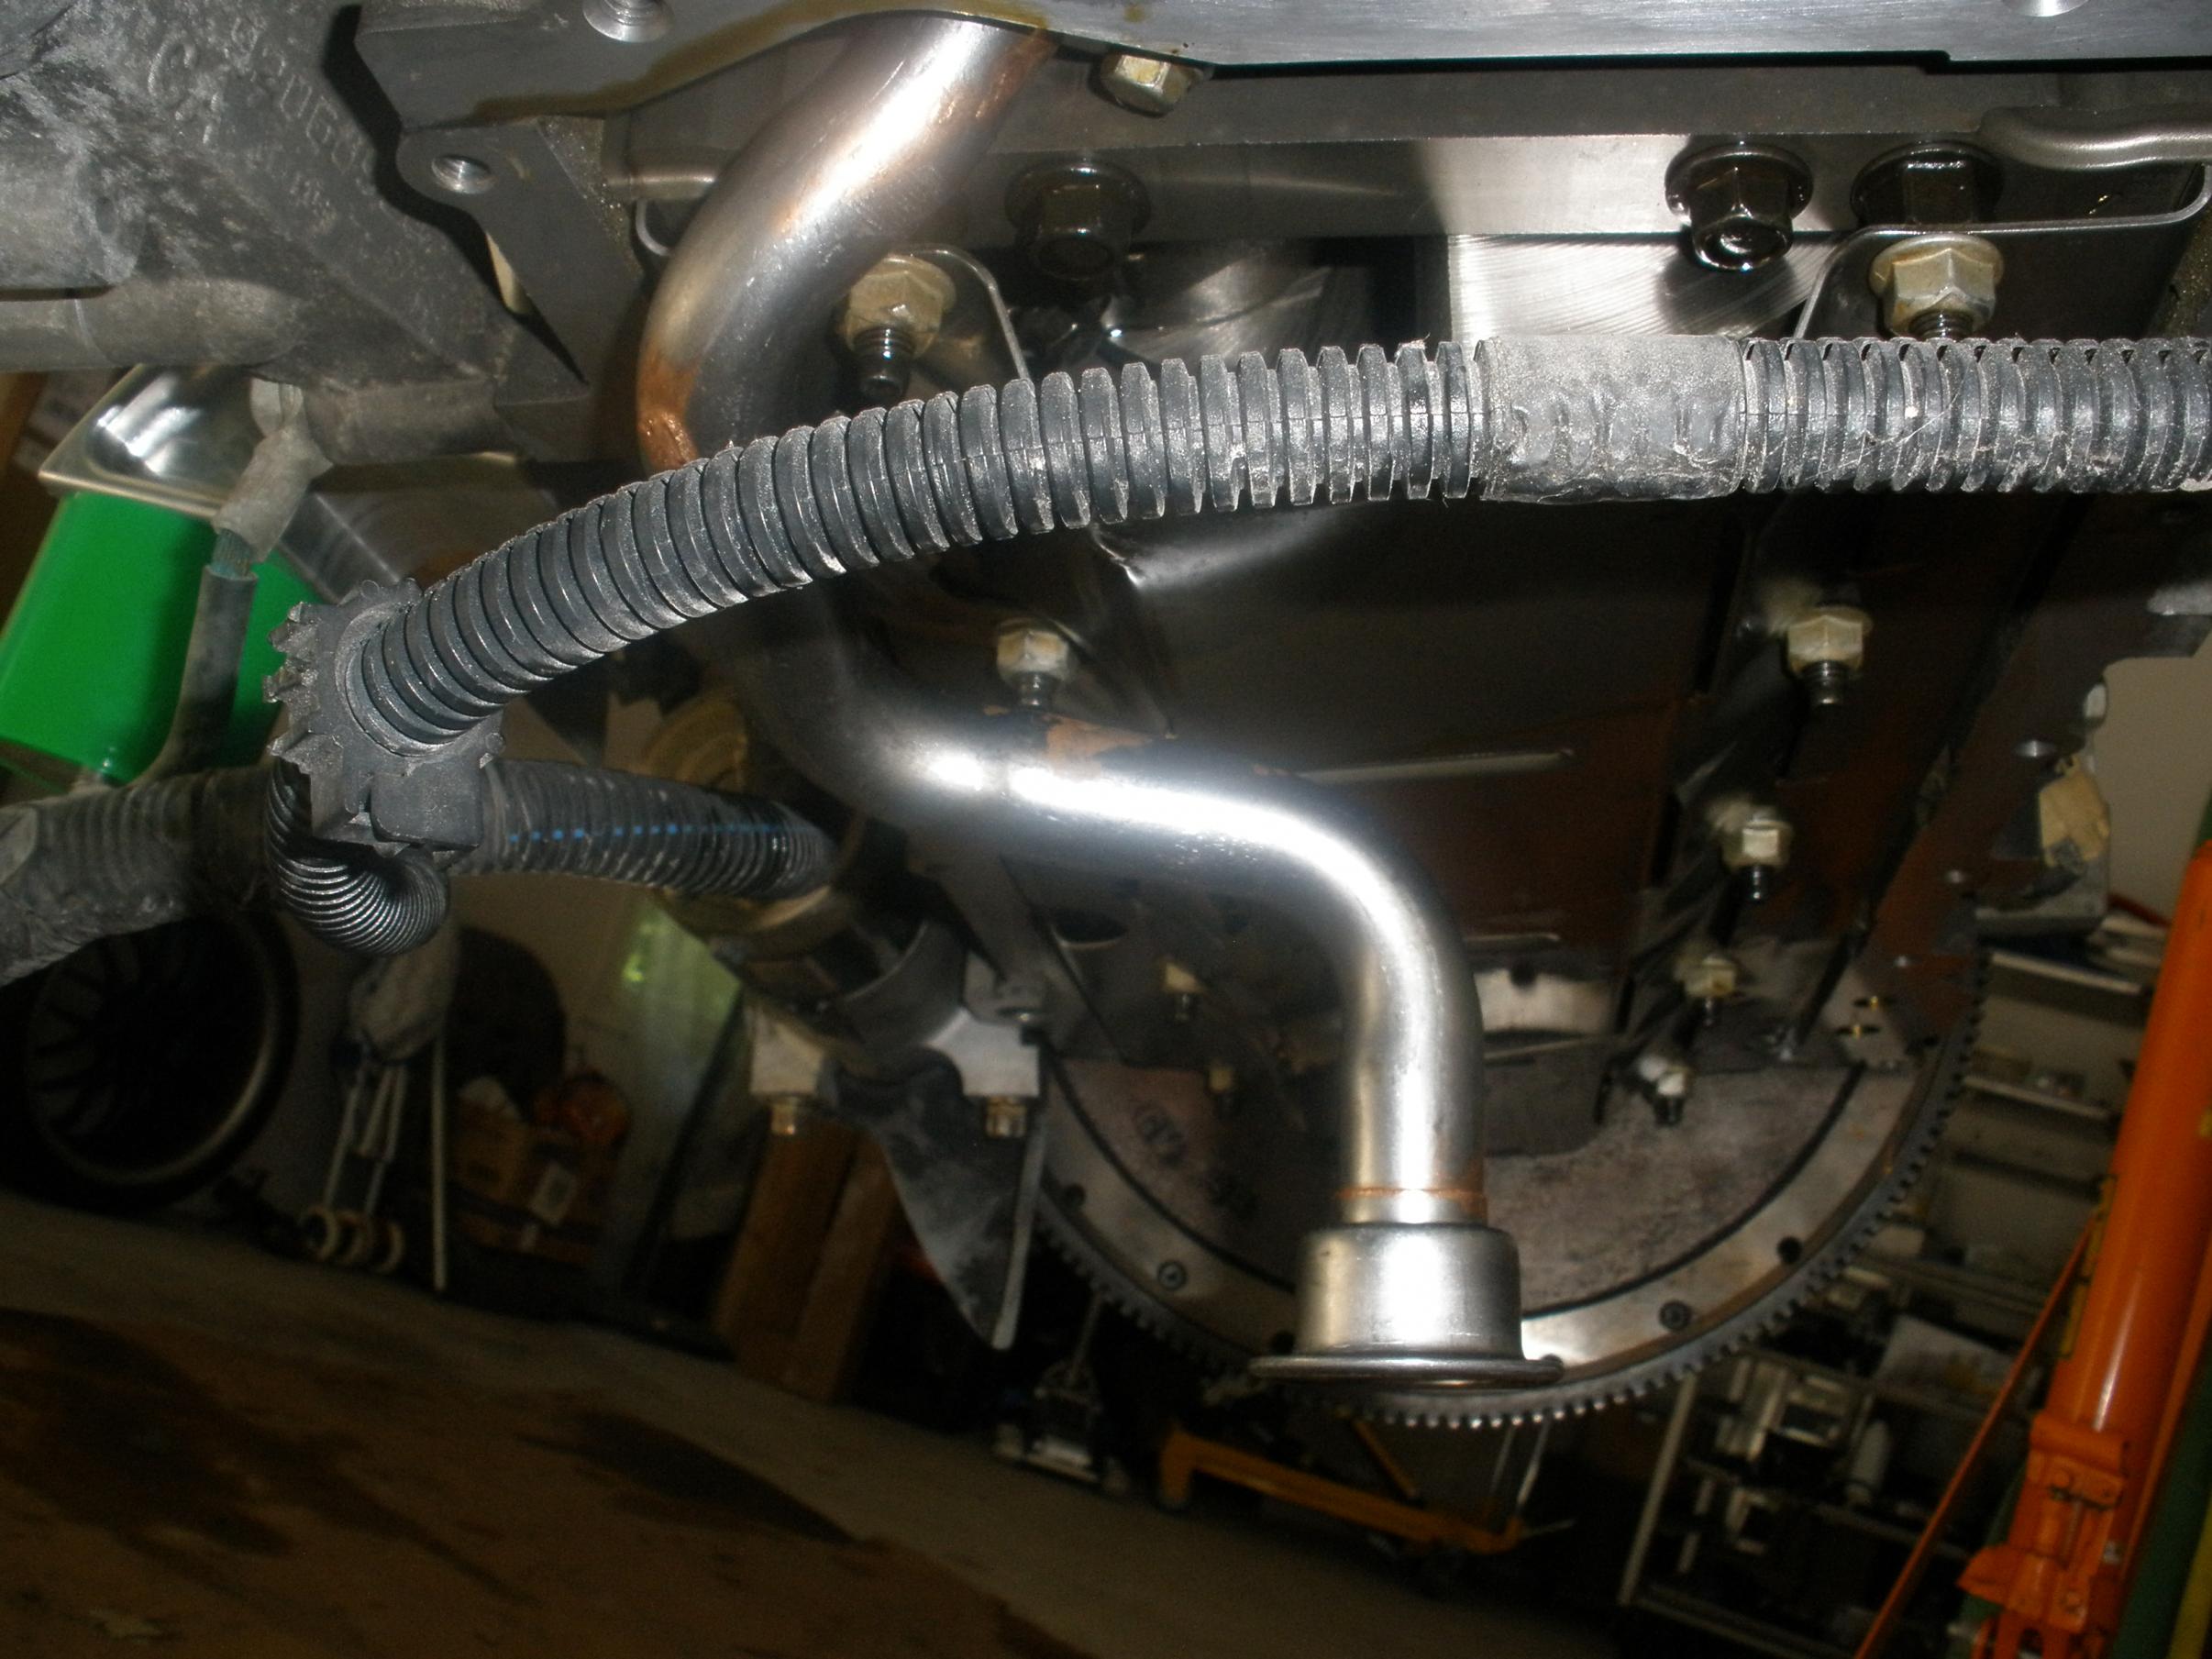
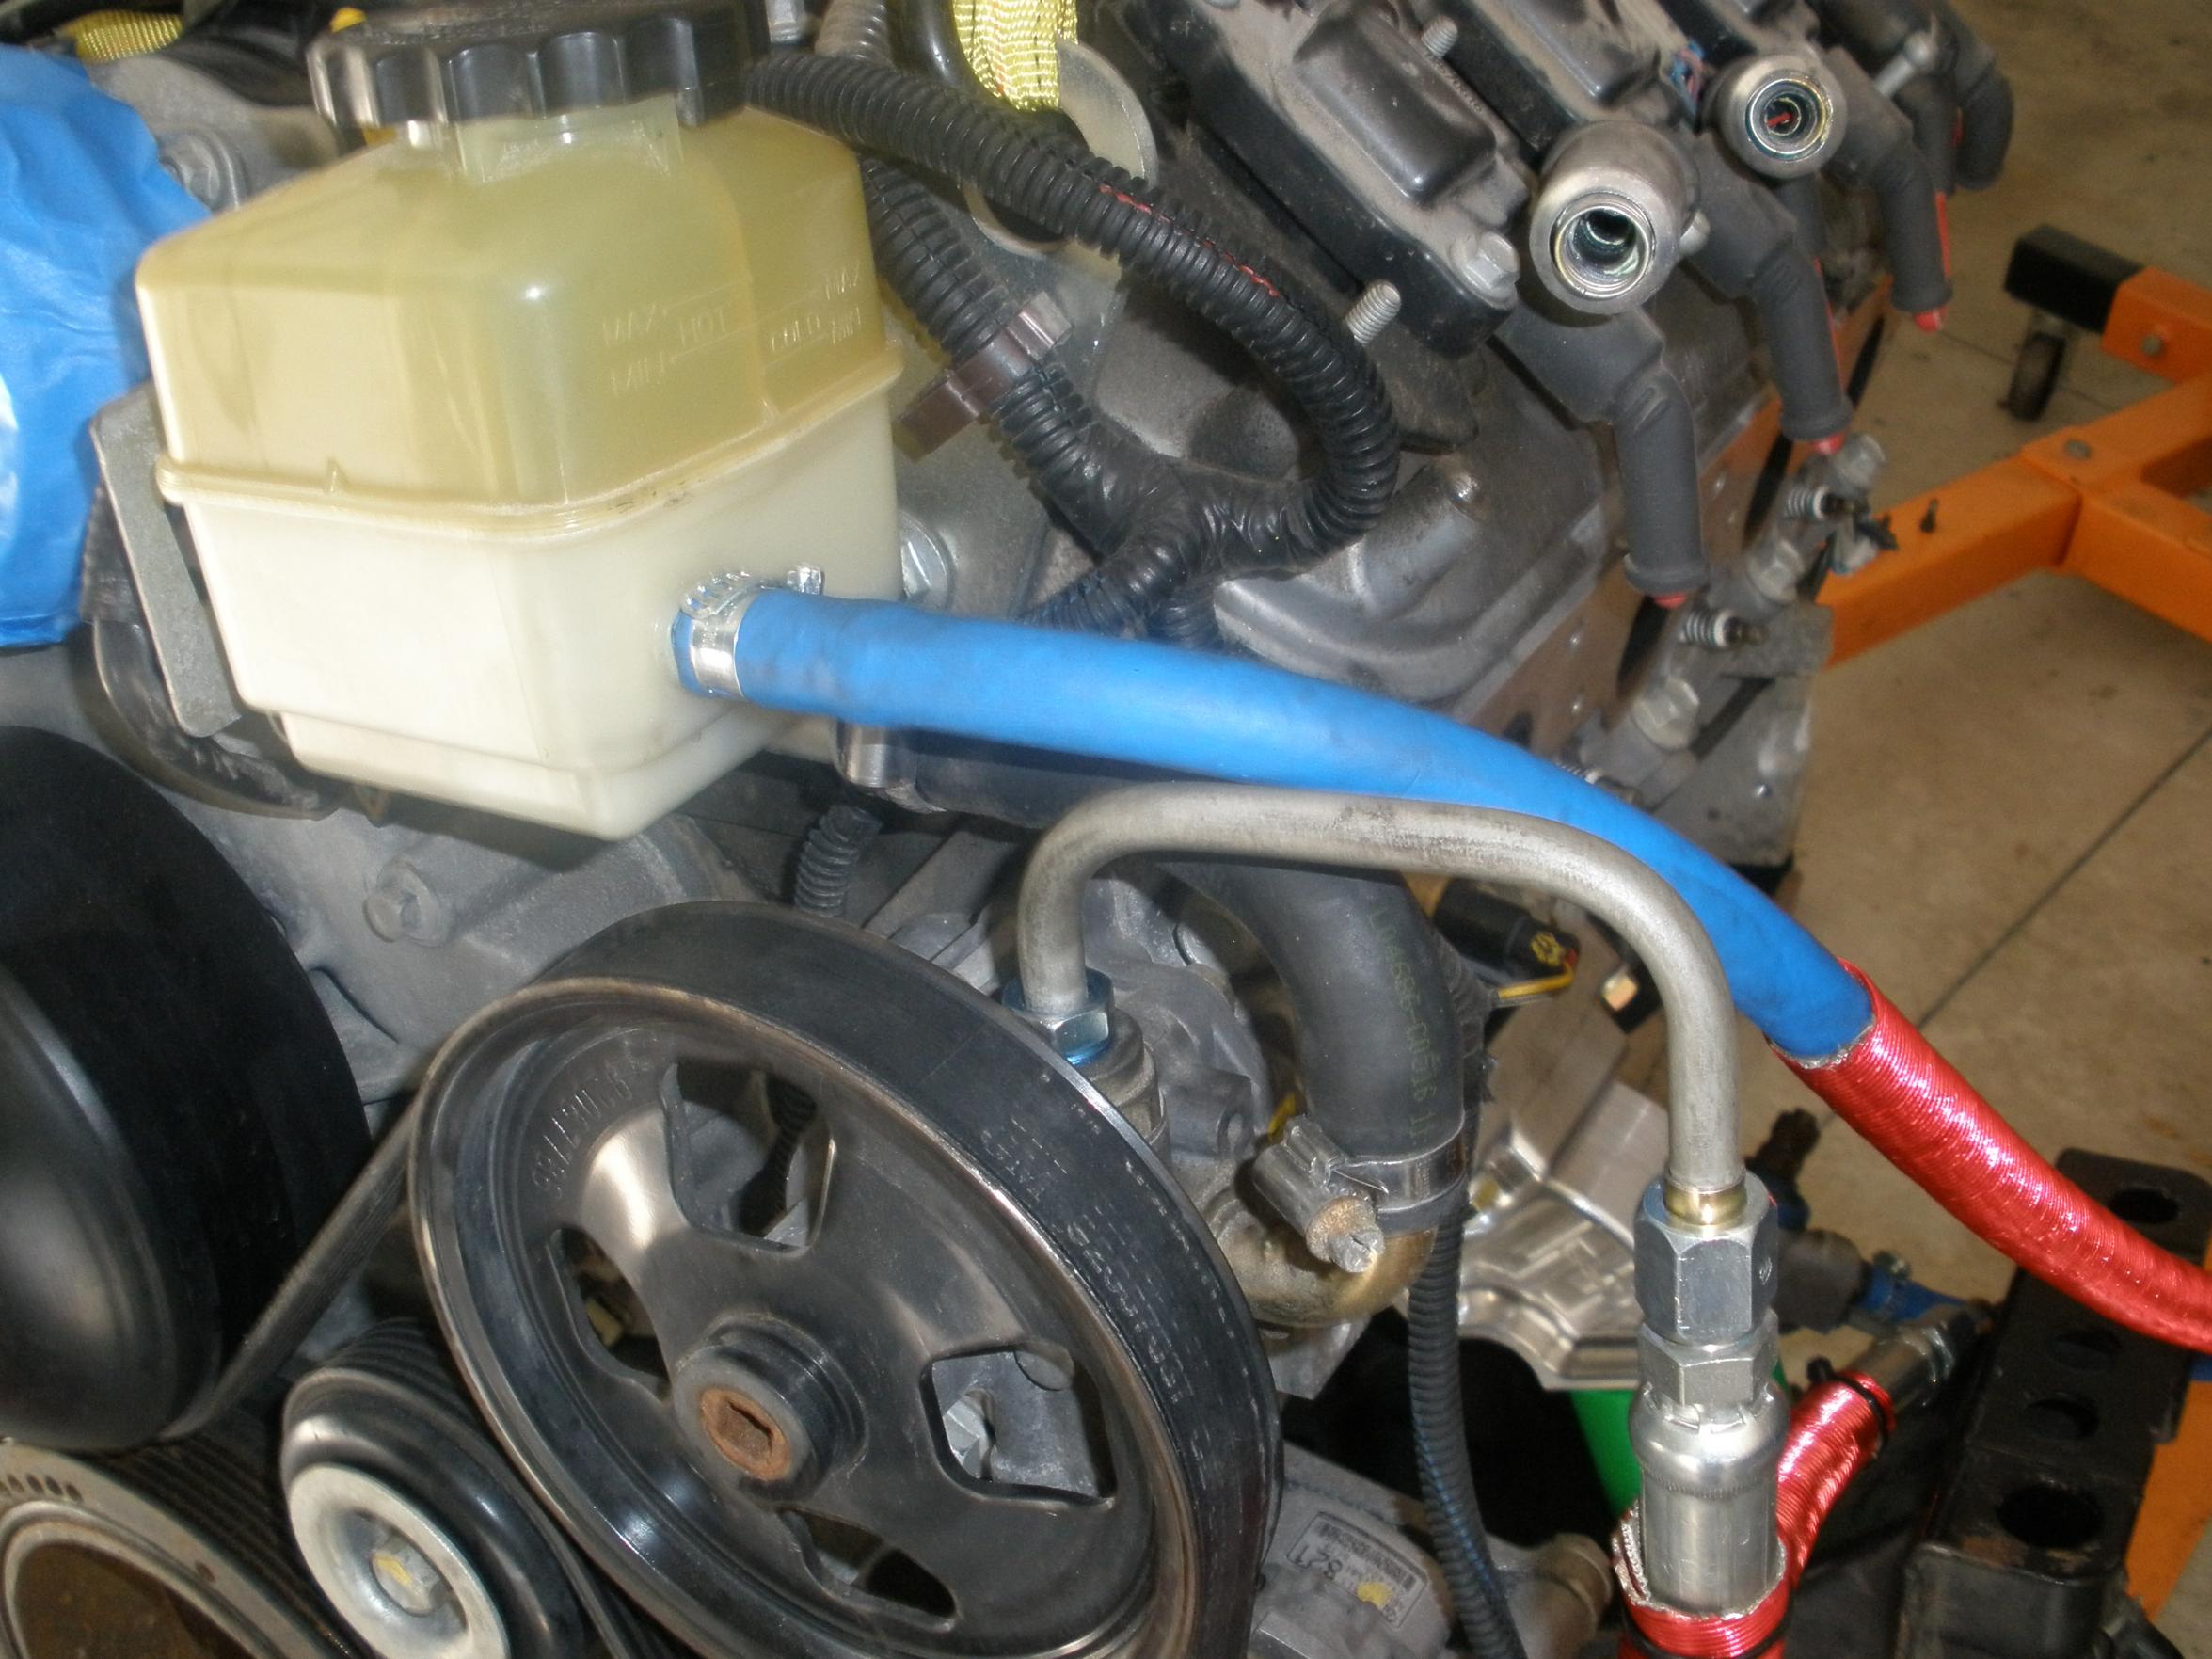
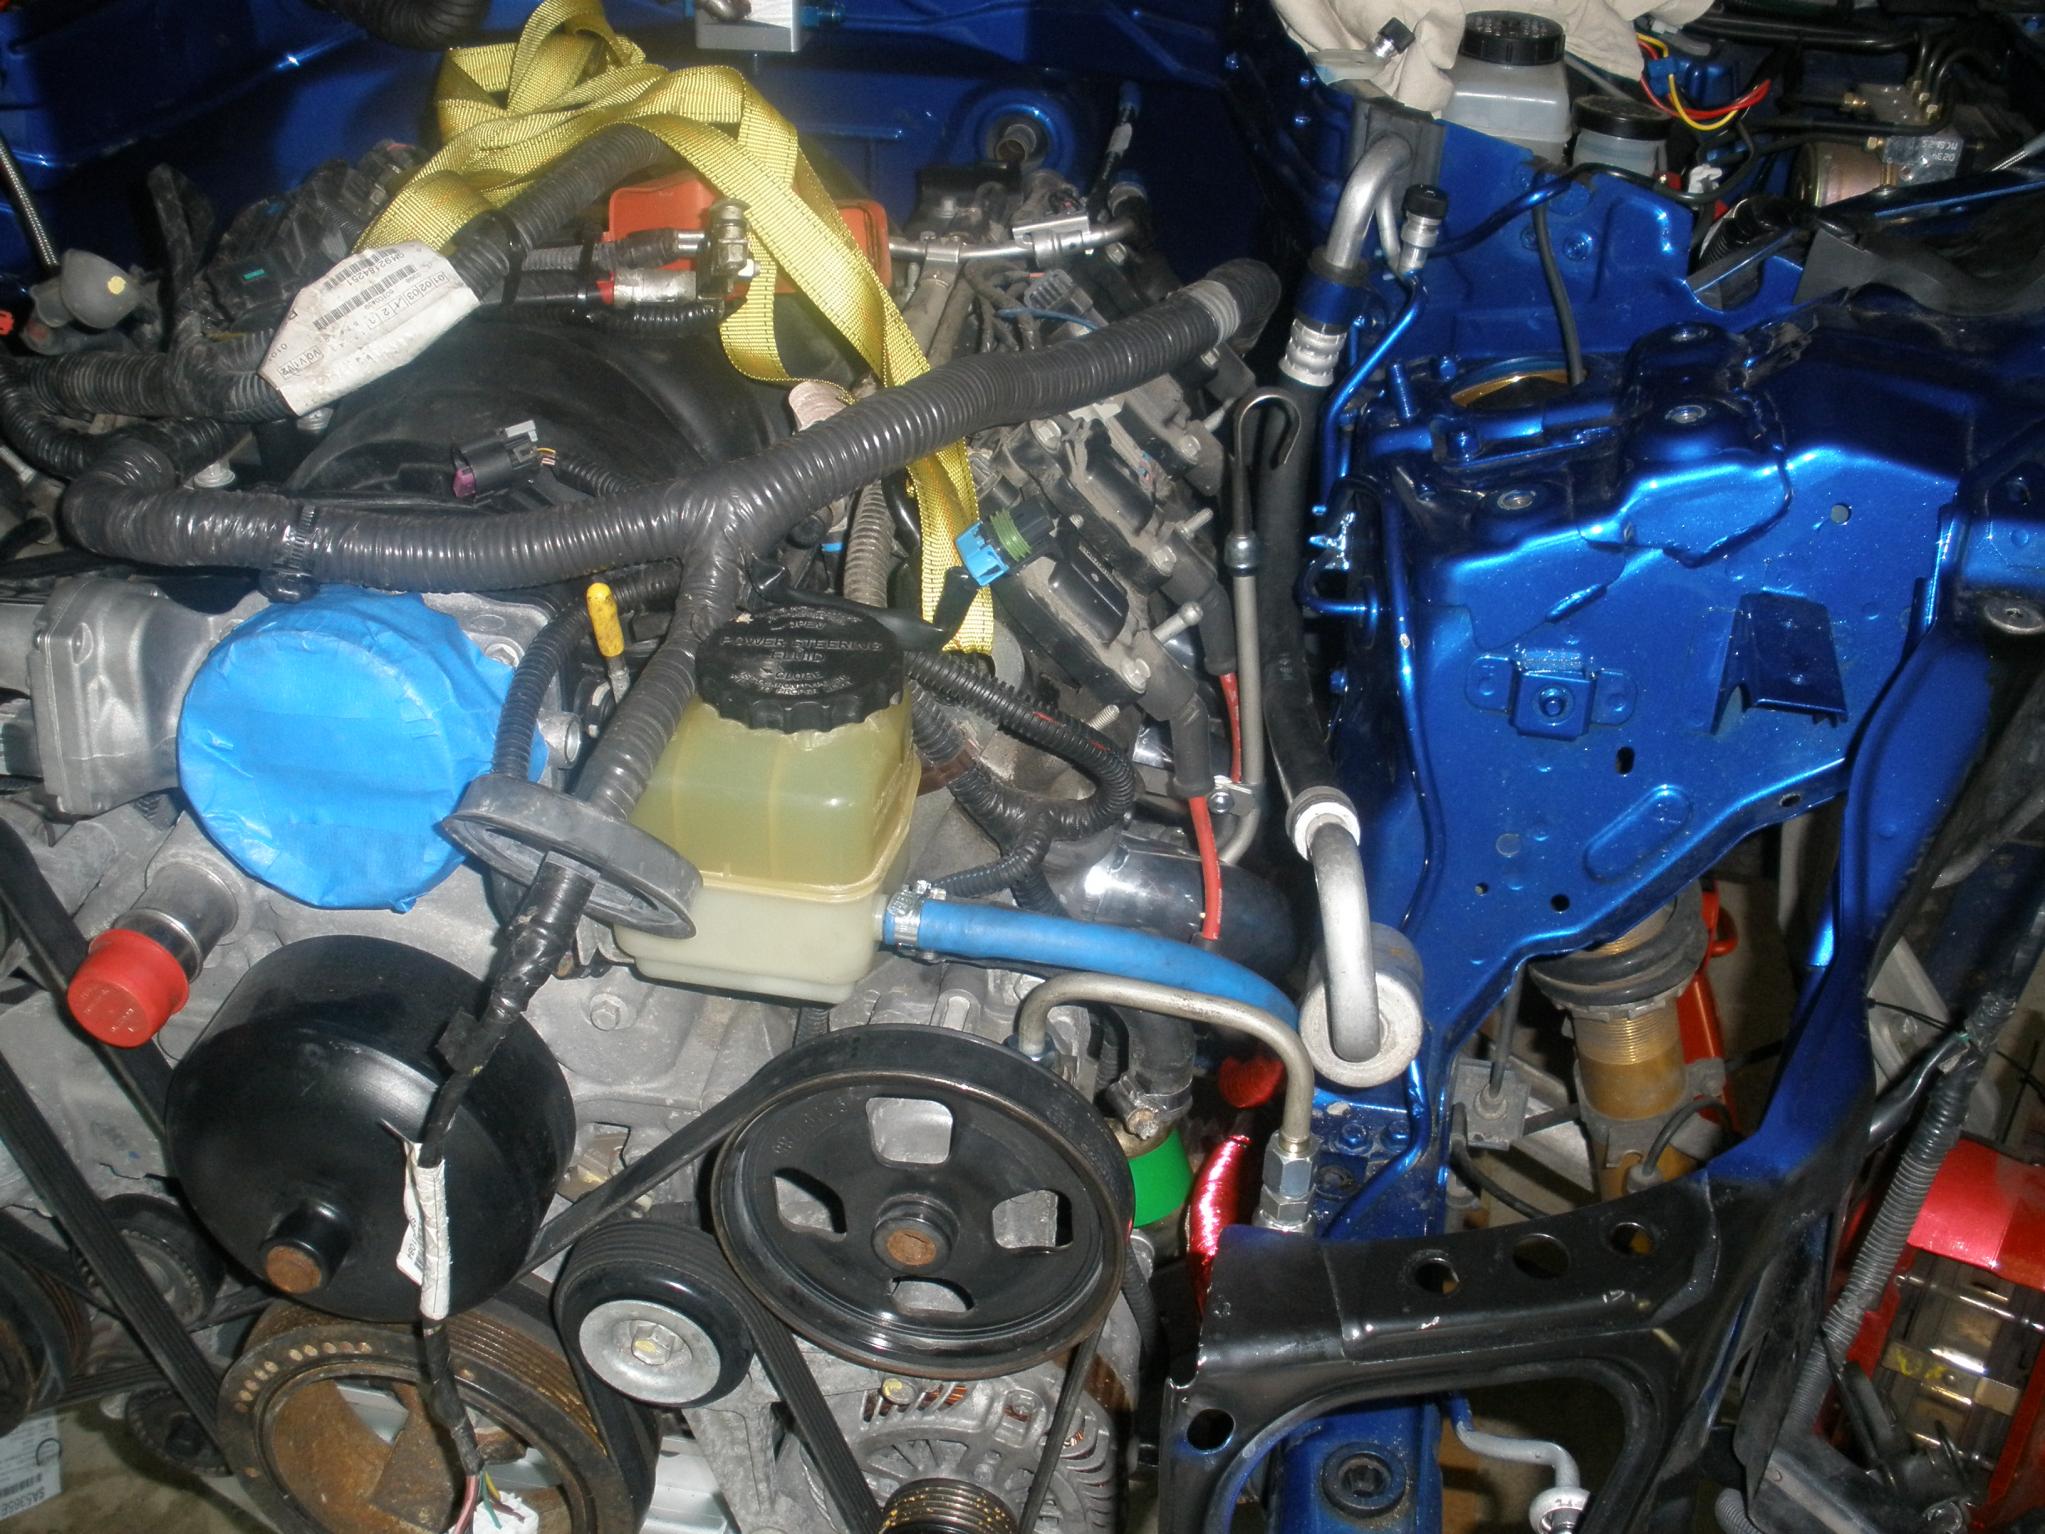
Here is the drivers side, you can see where the PS lines are routed:

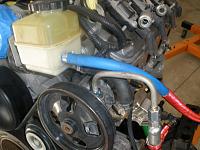
Then we put some heat wrap on the PS lines and hooked them up. You may have to remove the black rubber line on the PS pump to get at the SIKKY line fitting to the pump. The SIKKY fitting is 16mm, so you will need a complete set of metric wrenches to get this easily, not just the odd numbered set over 14mm.

The next step was to put the Nissan cross member and sttering assembly on the LS mounts. We just hand tightened these on since you need to let the trans mount determine where the engine is square since there is a ton of room for the SIKKY mounts to wander on this sub-frame.
Here is the drivers side, you can see where the PS lines are routed:
Then we put some heat wrap on the PS lines and hooked them up. You may have to remove the black rubber line on the PS pump to get at the SIKKY line fitting to the pump. The SIKKY fitting is 16mm, so you will need a complete set of metric wrenches to get this easily, not just the odd numbered set over 14mm.
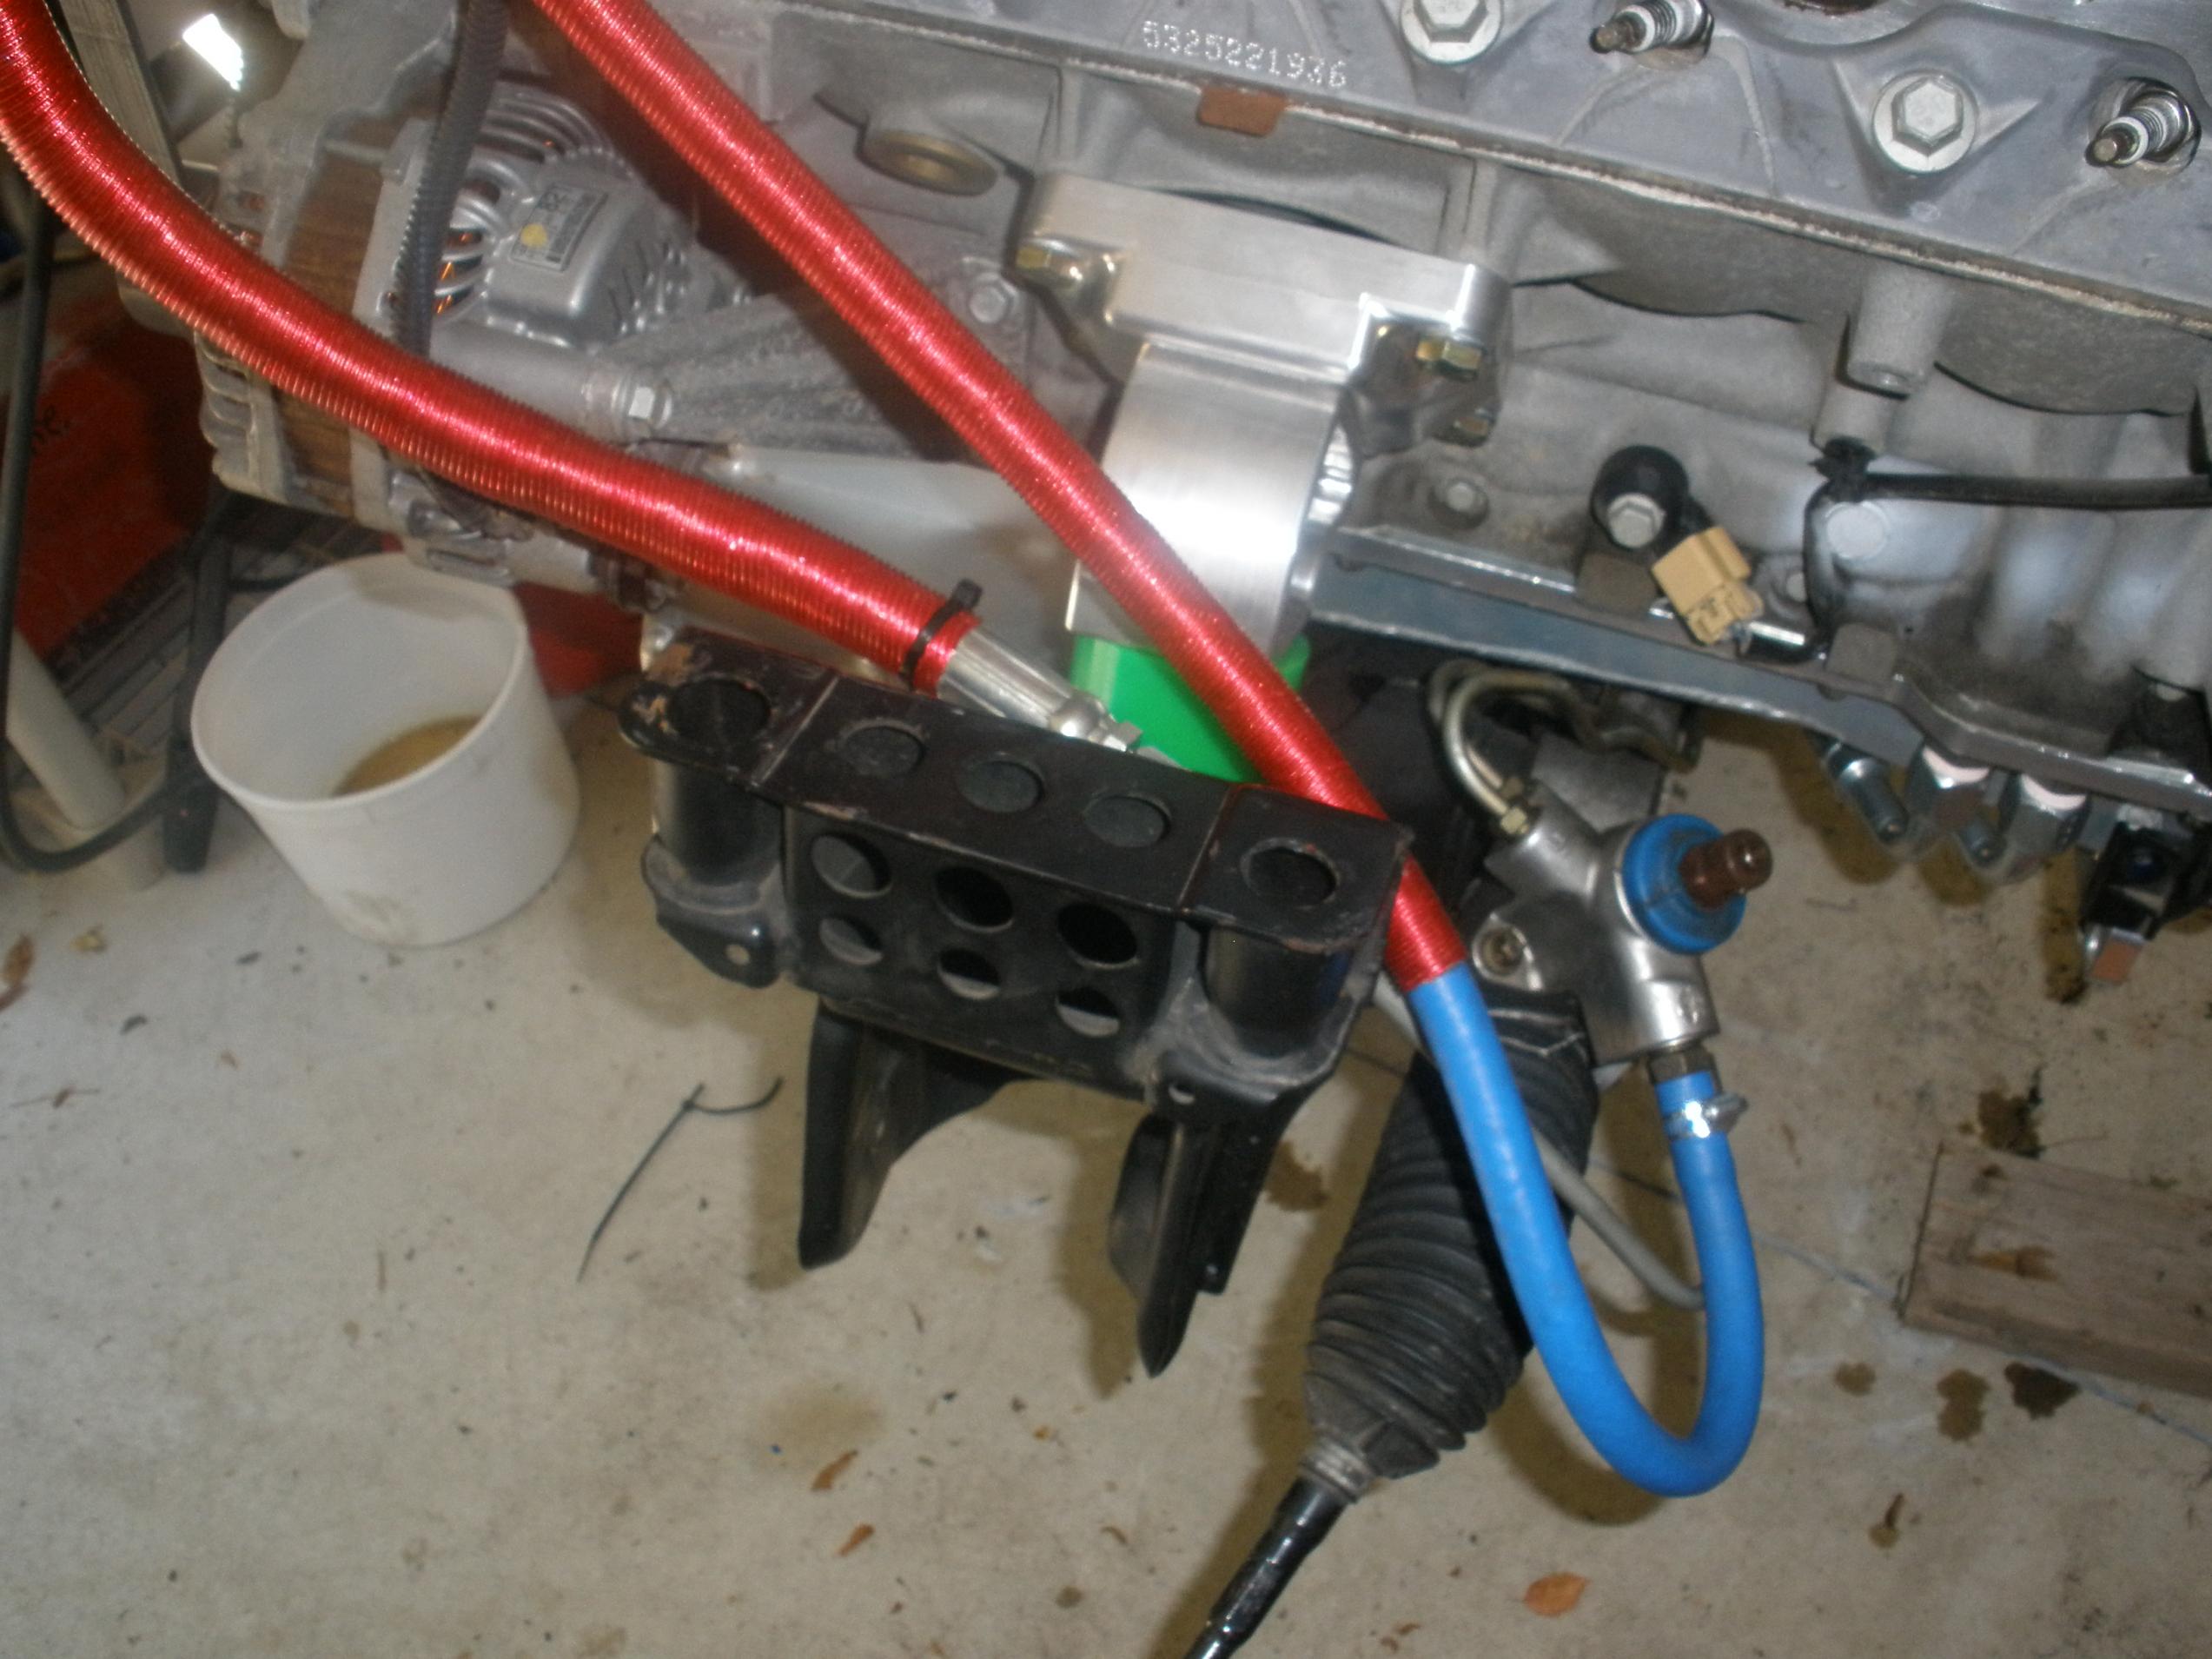
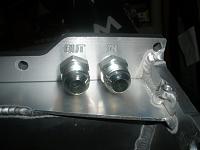
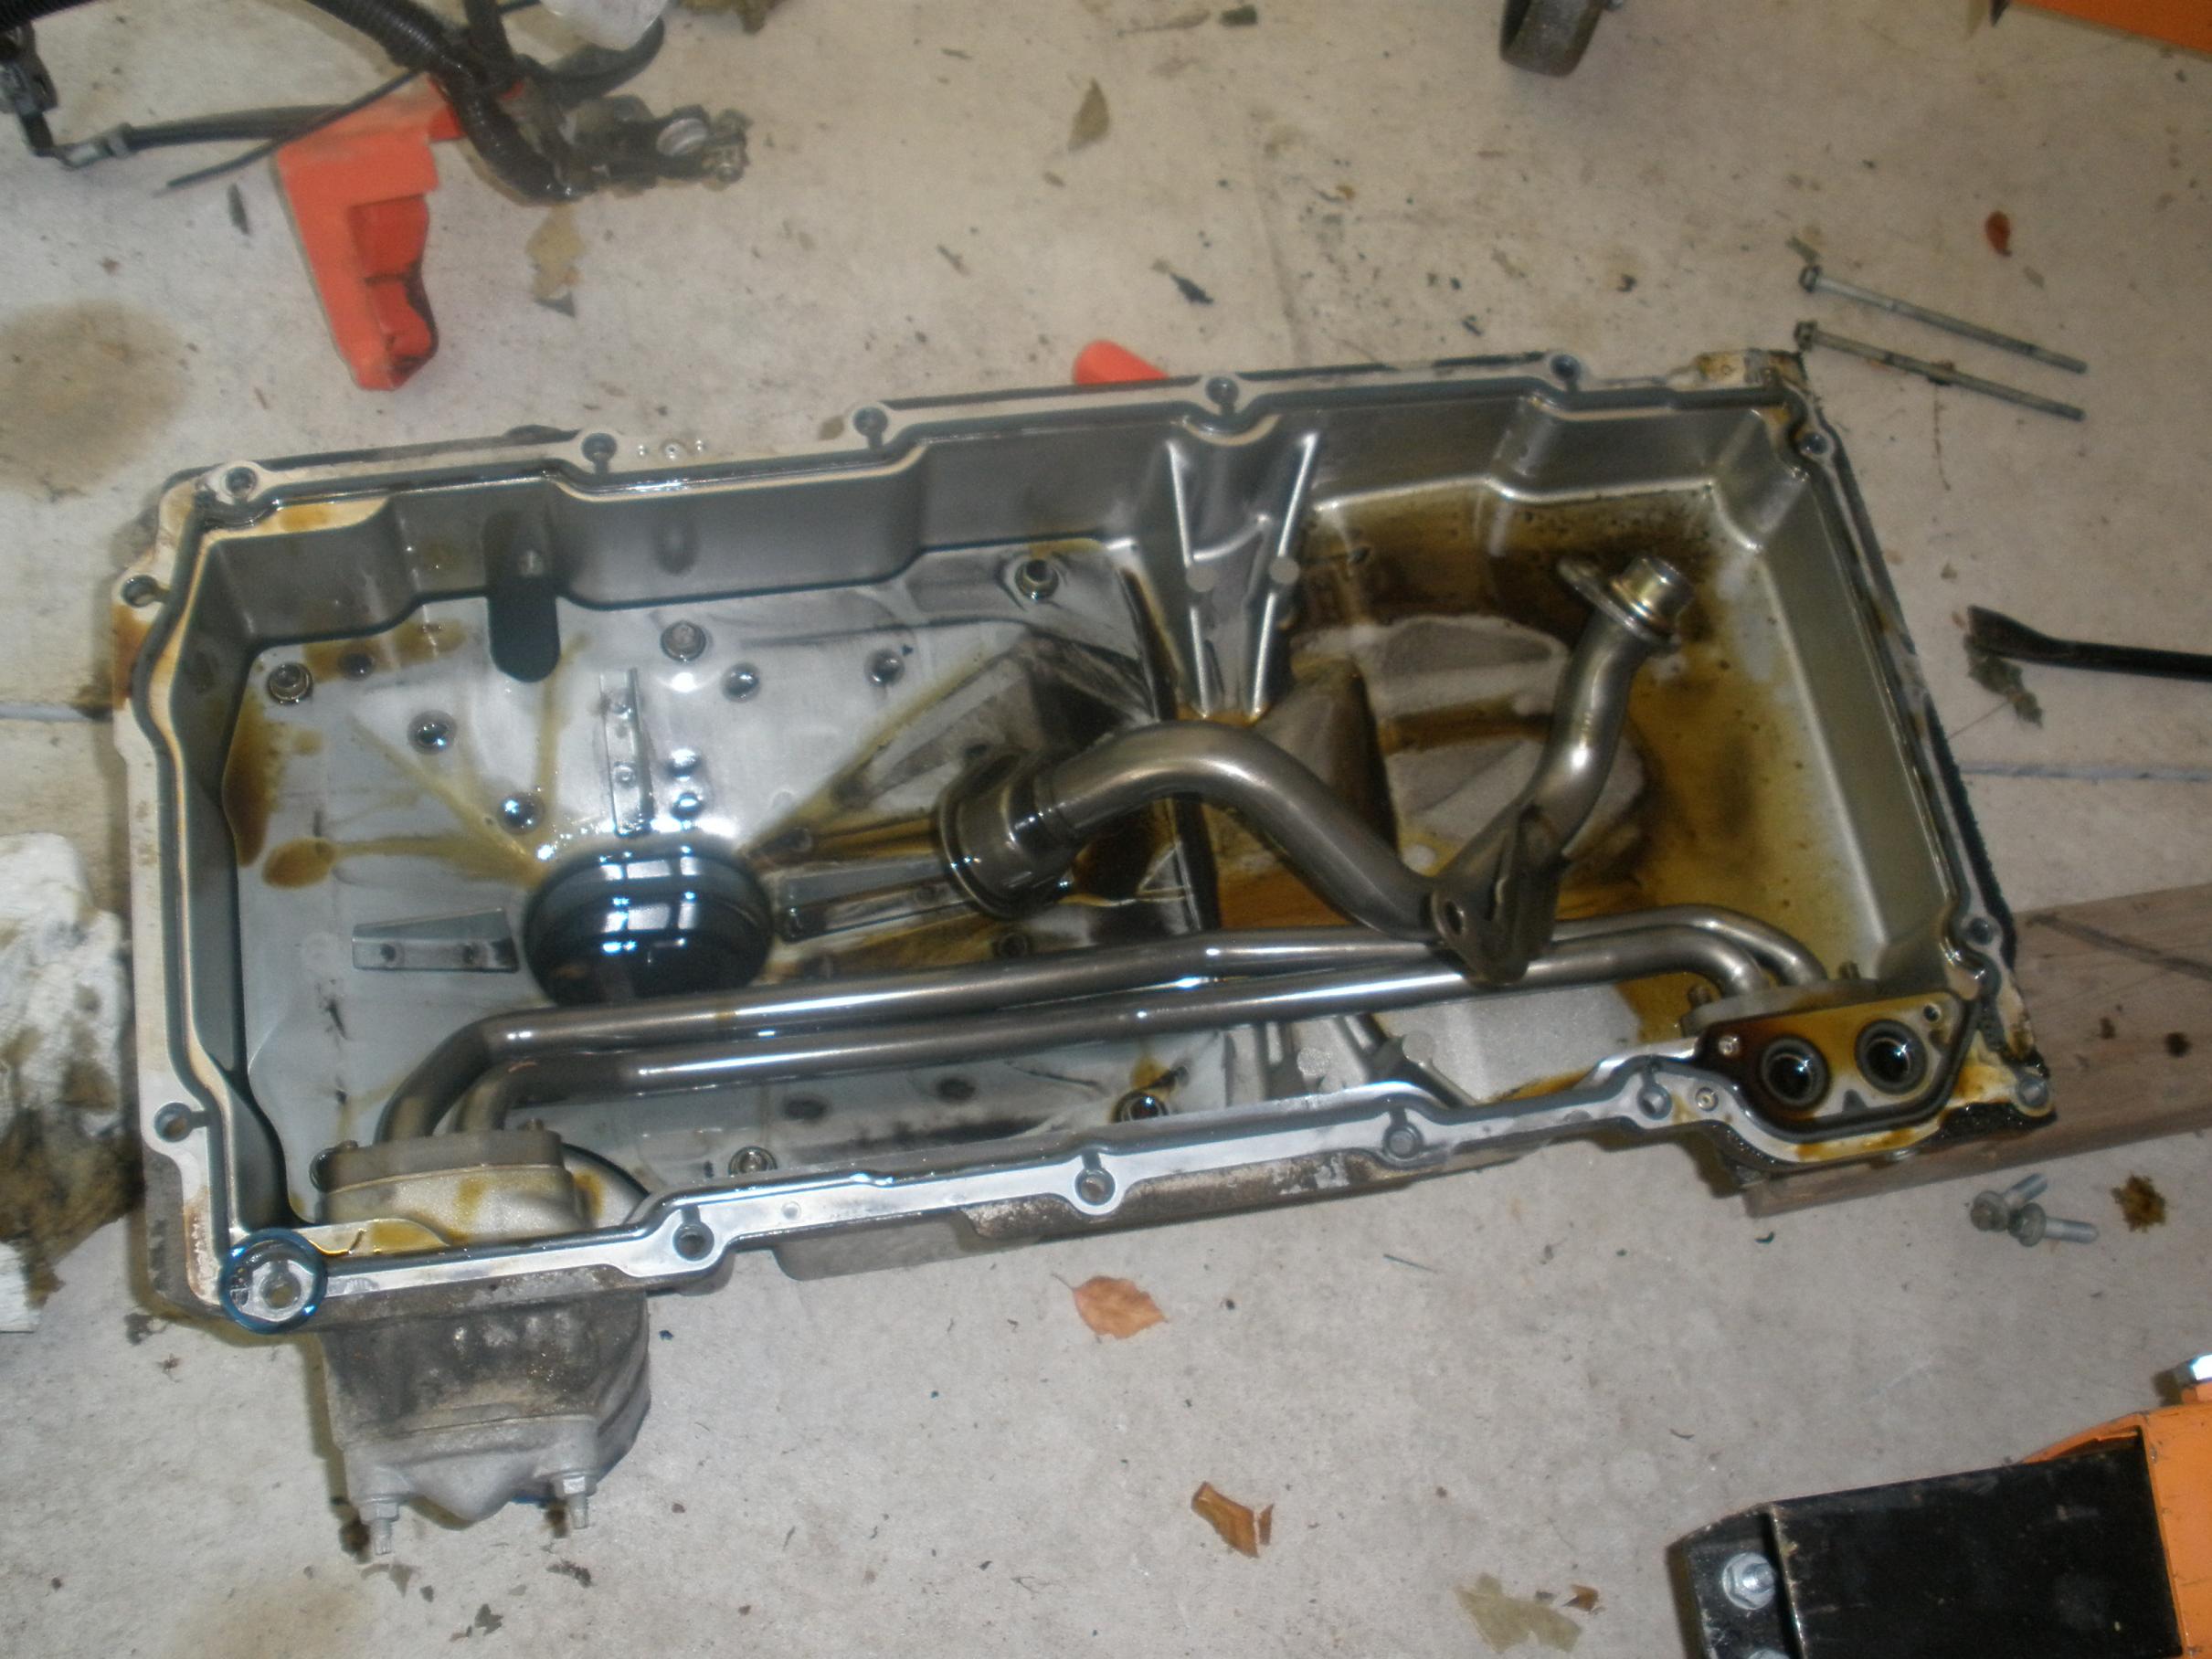
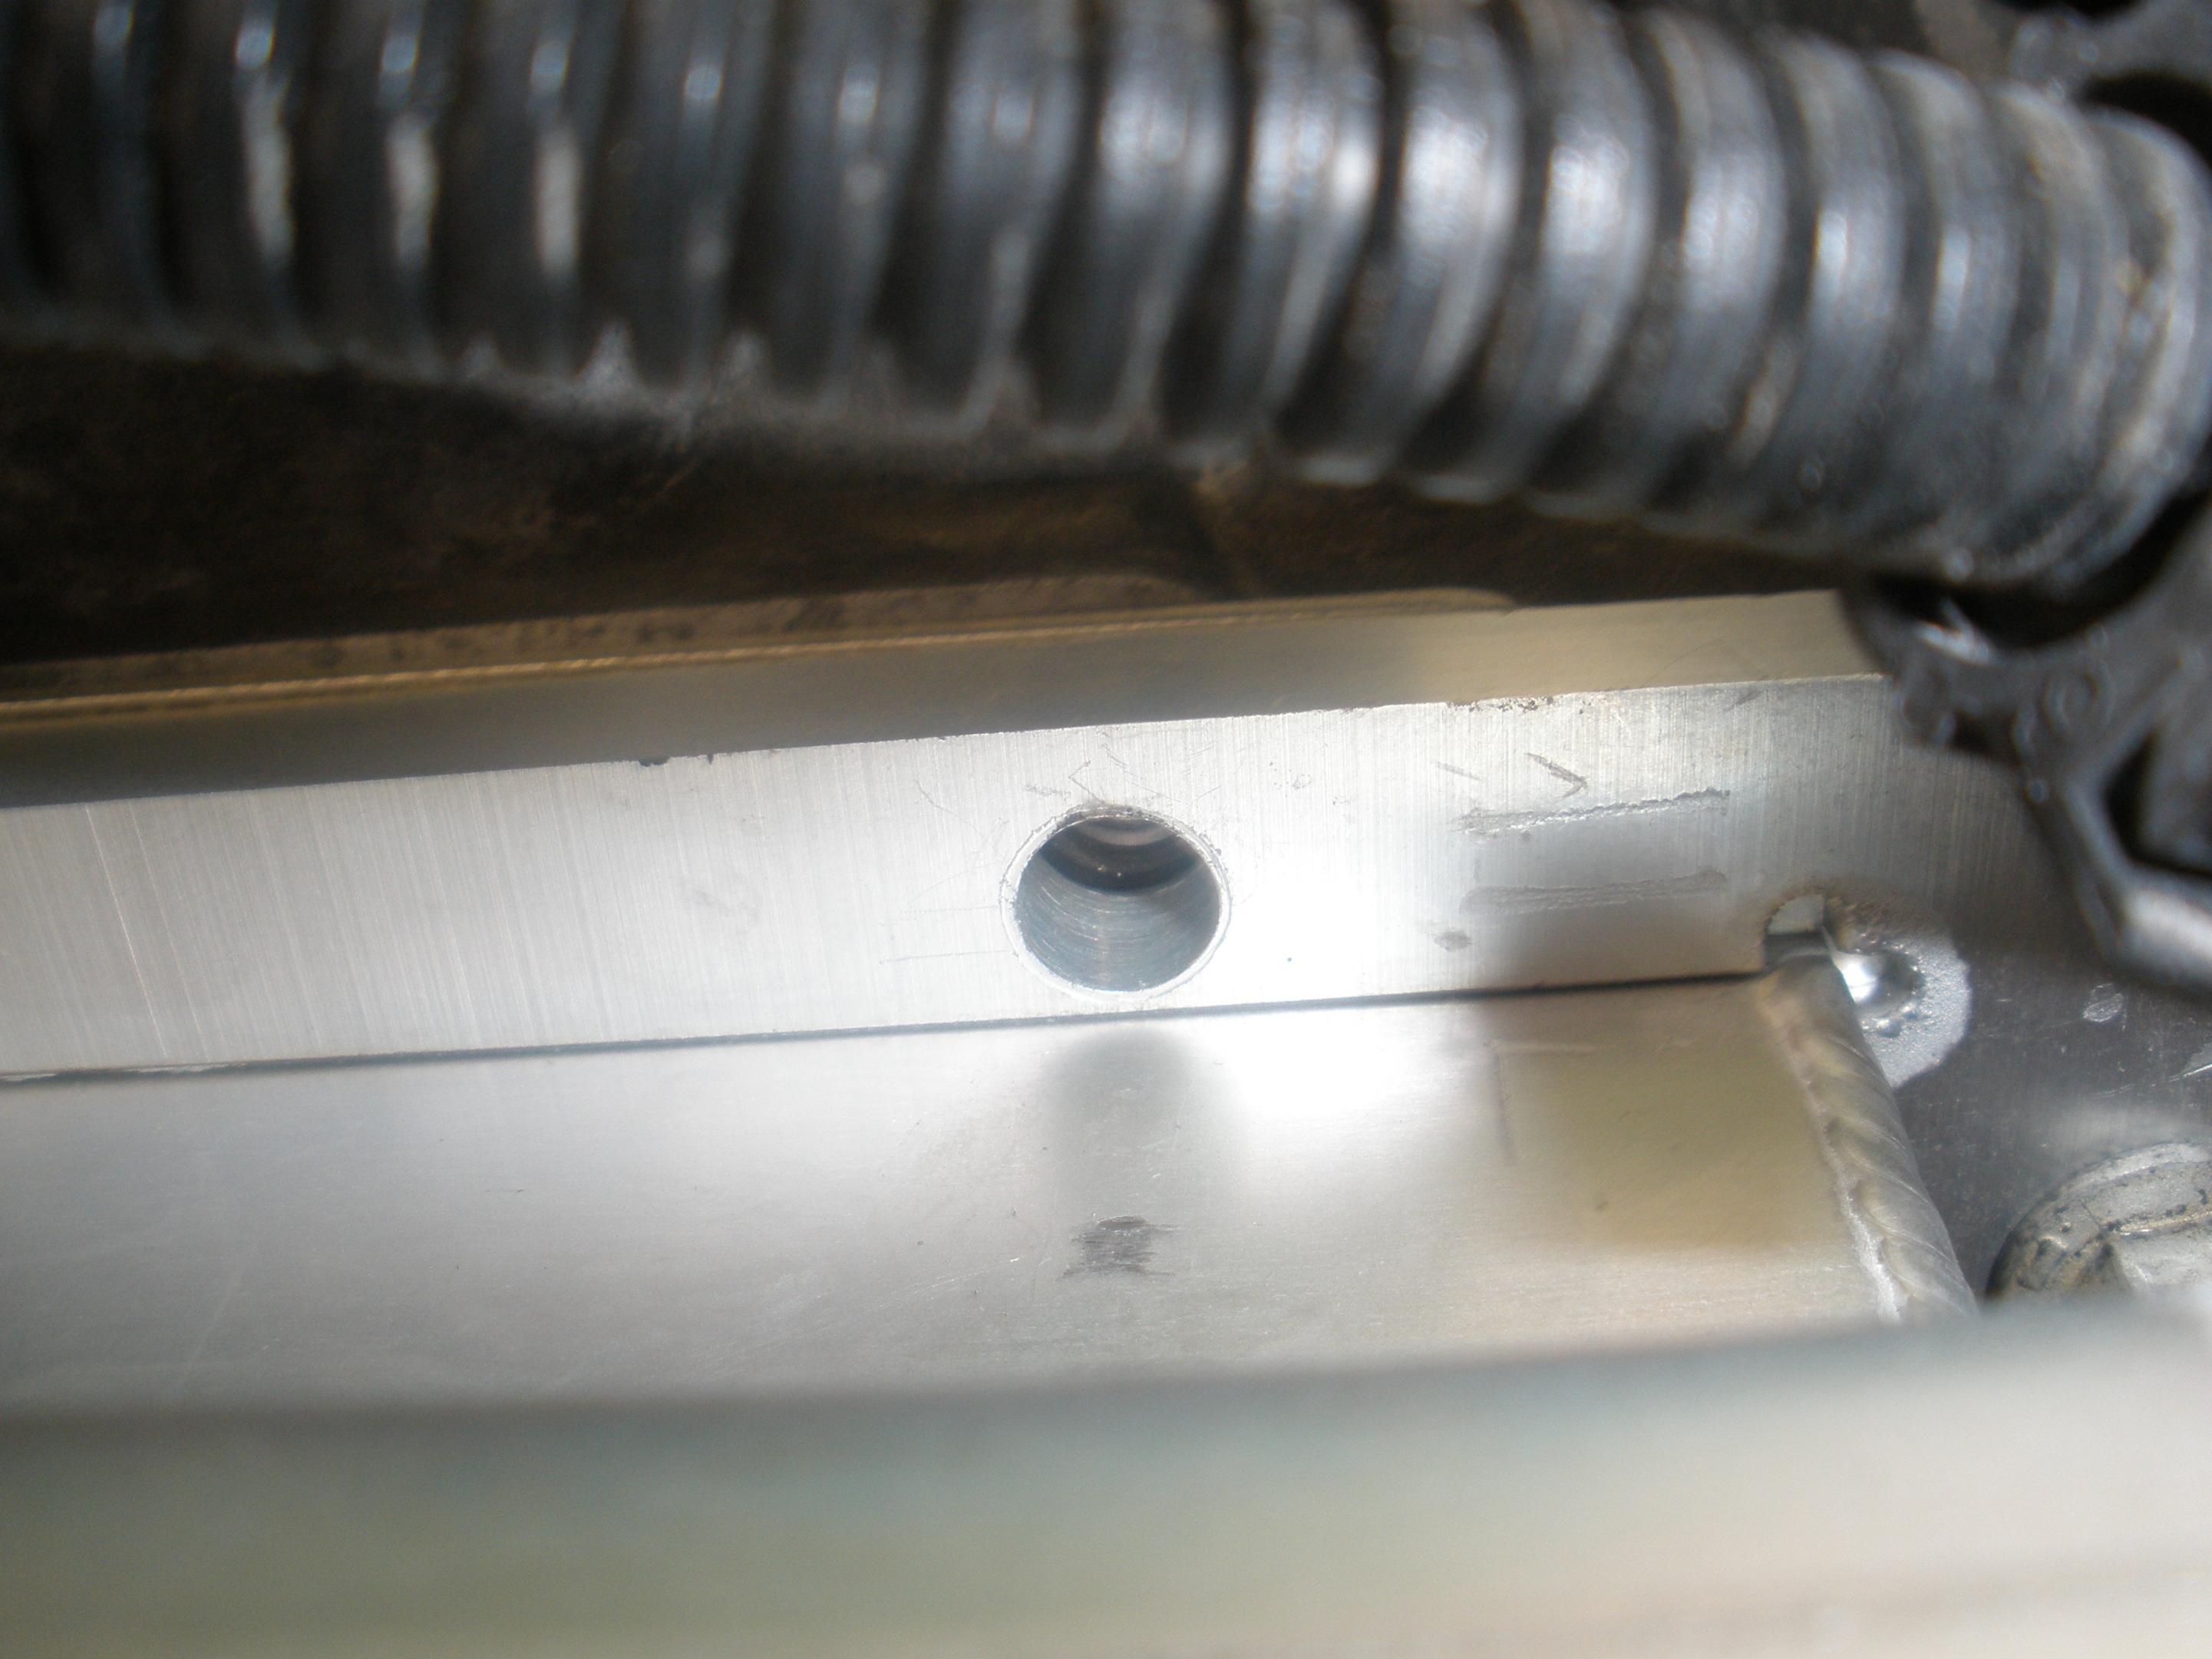
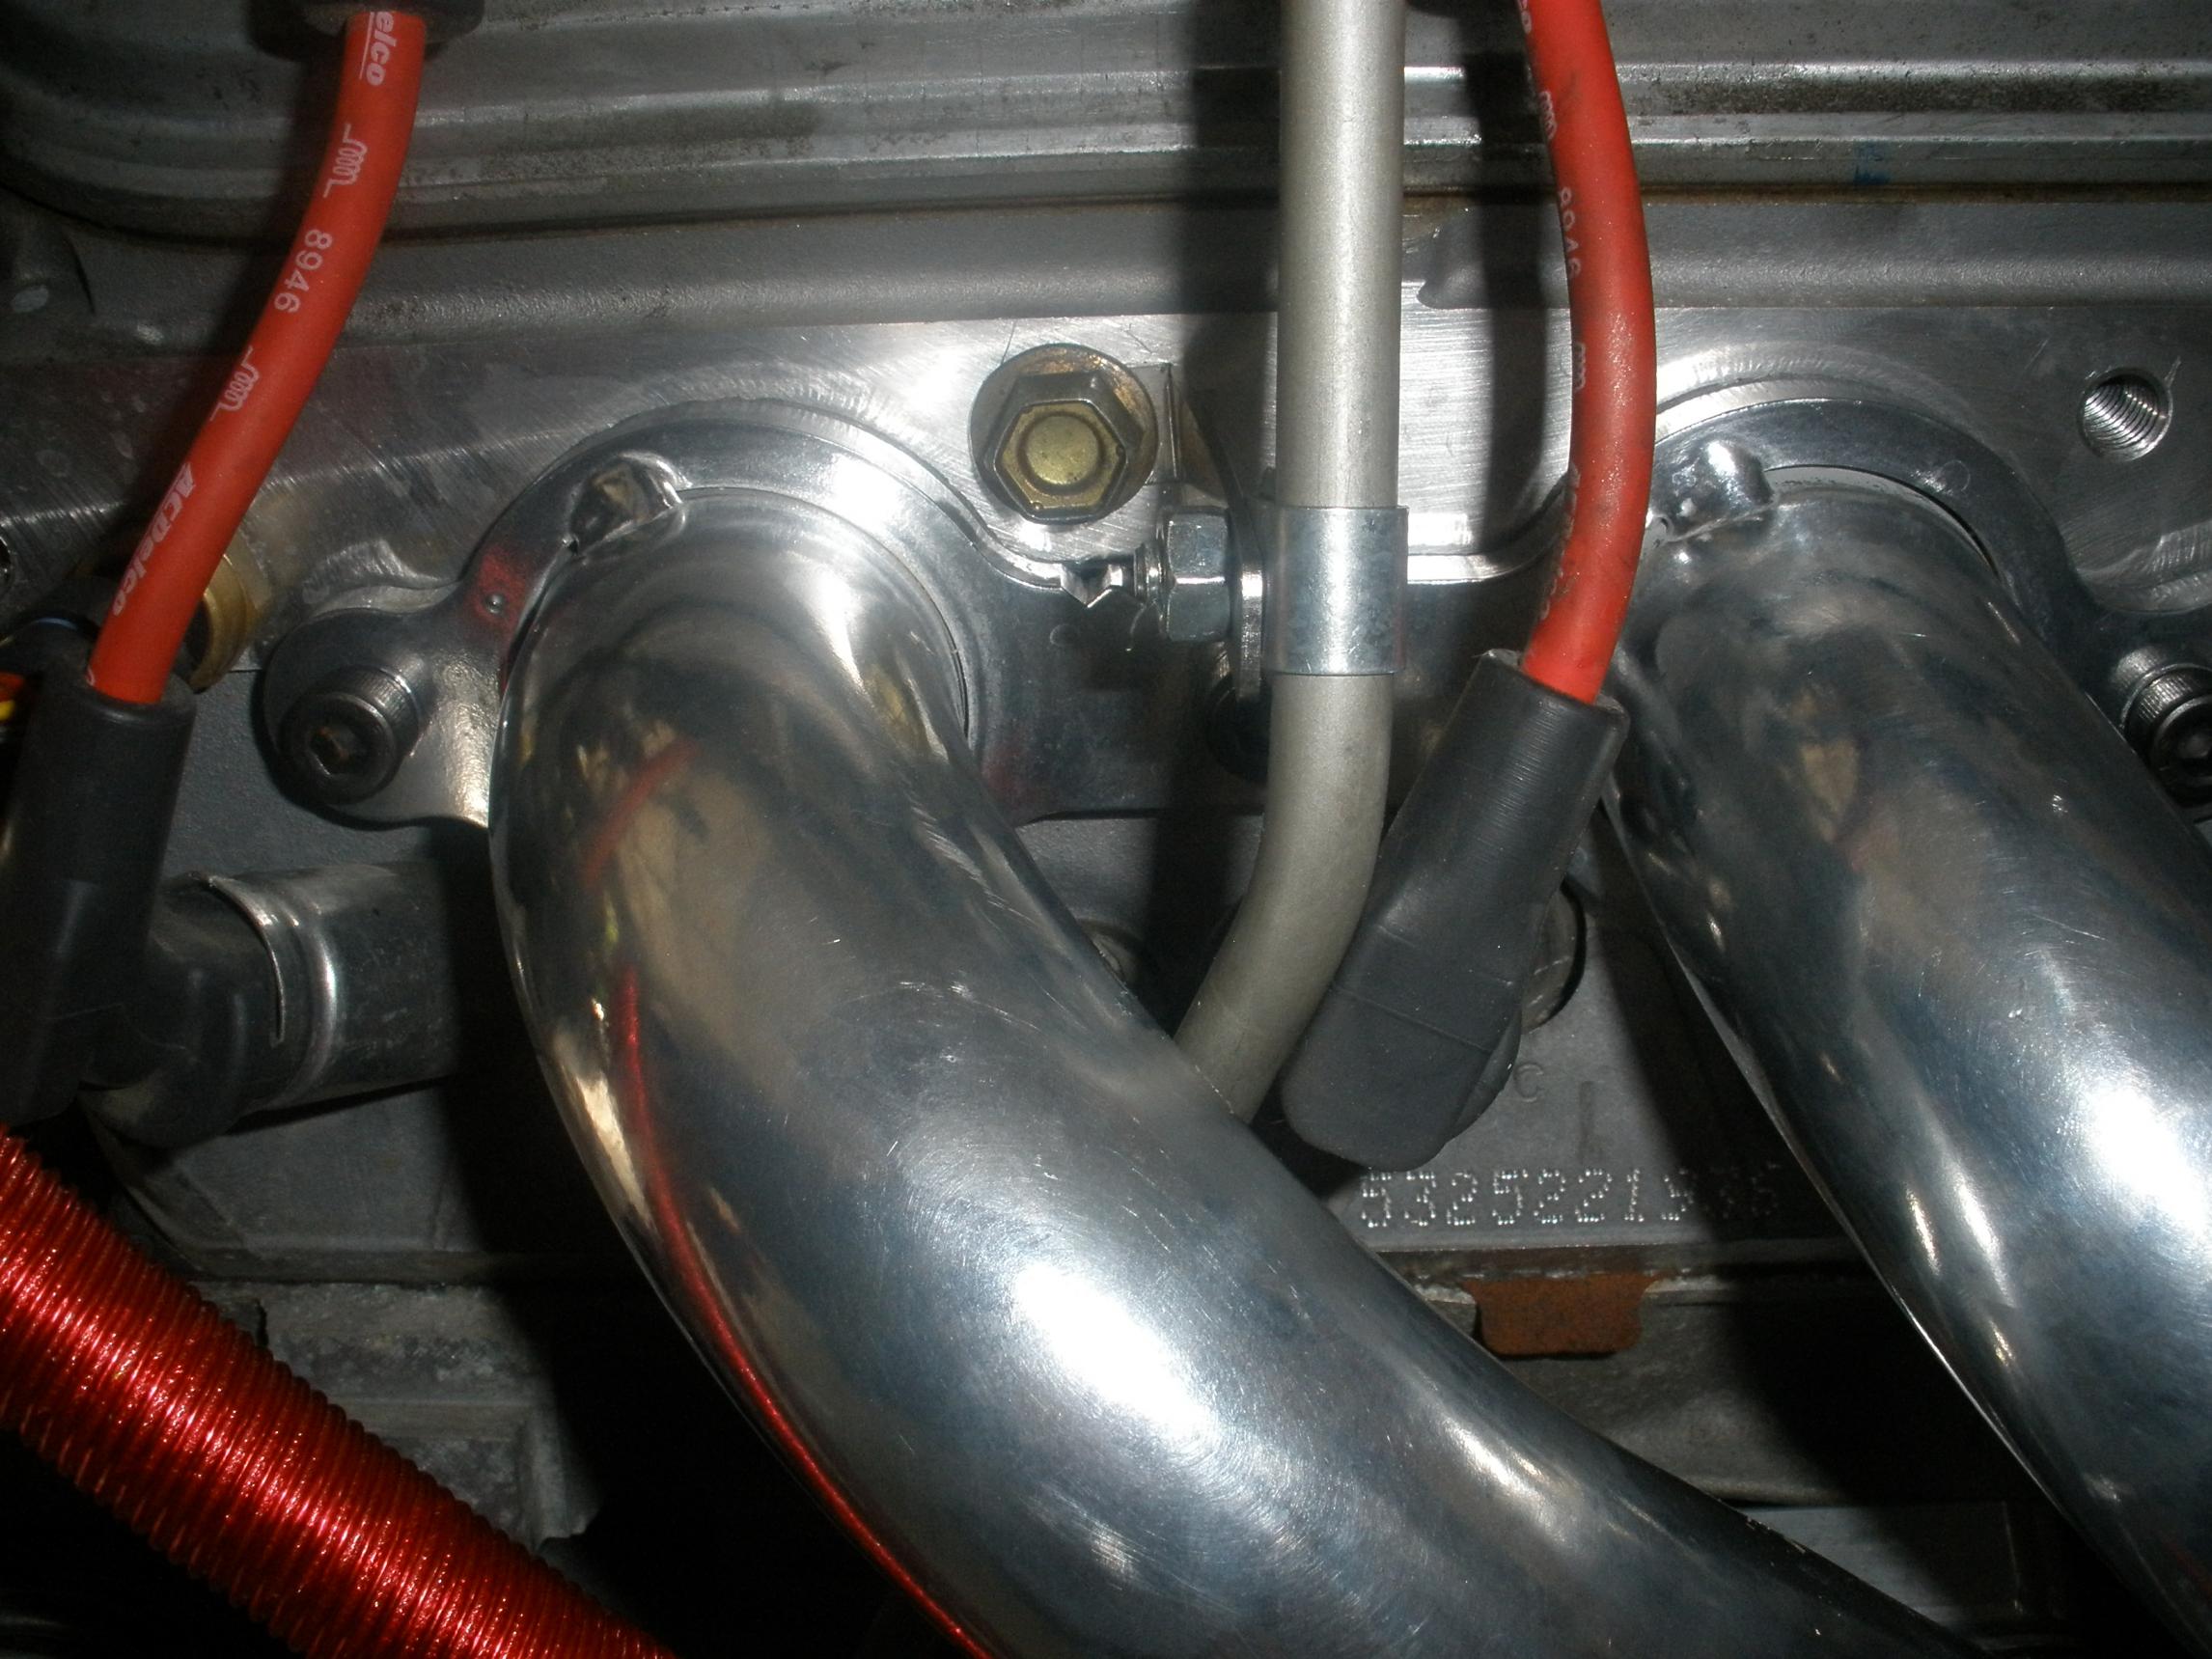
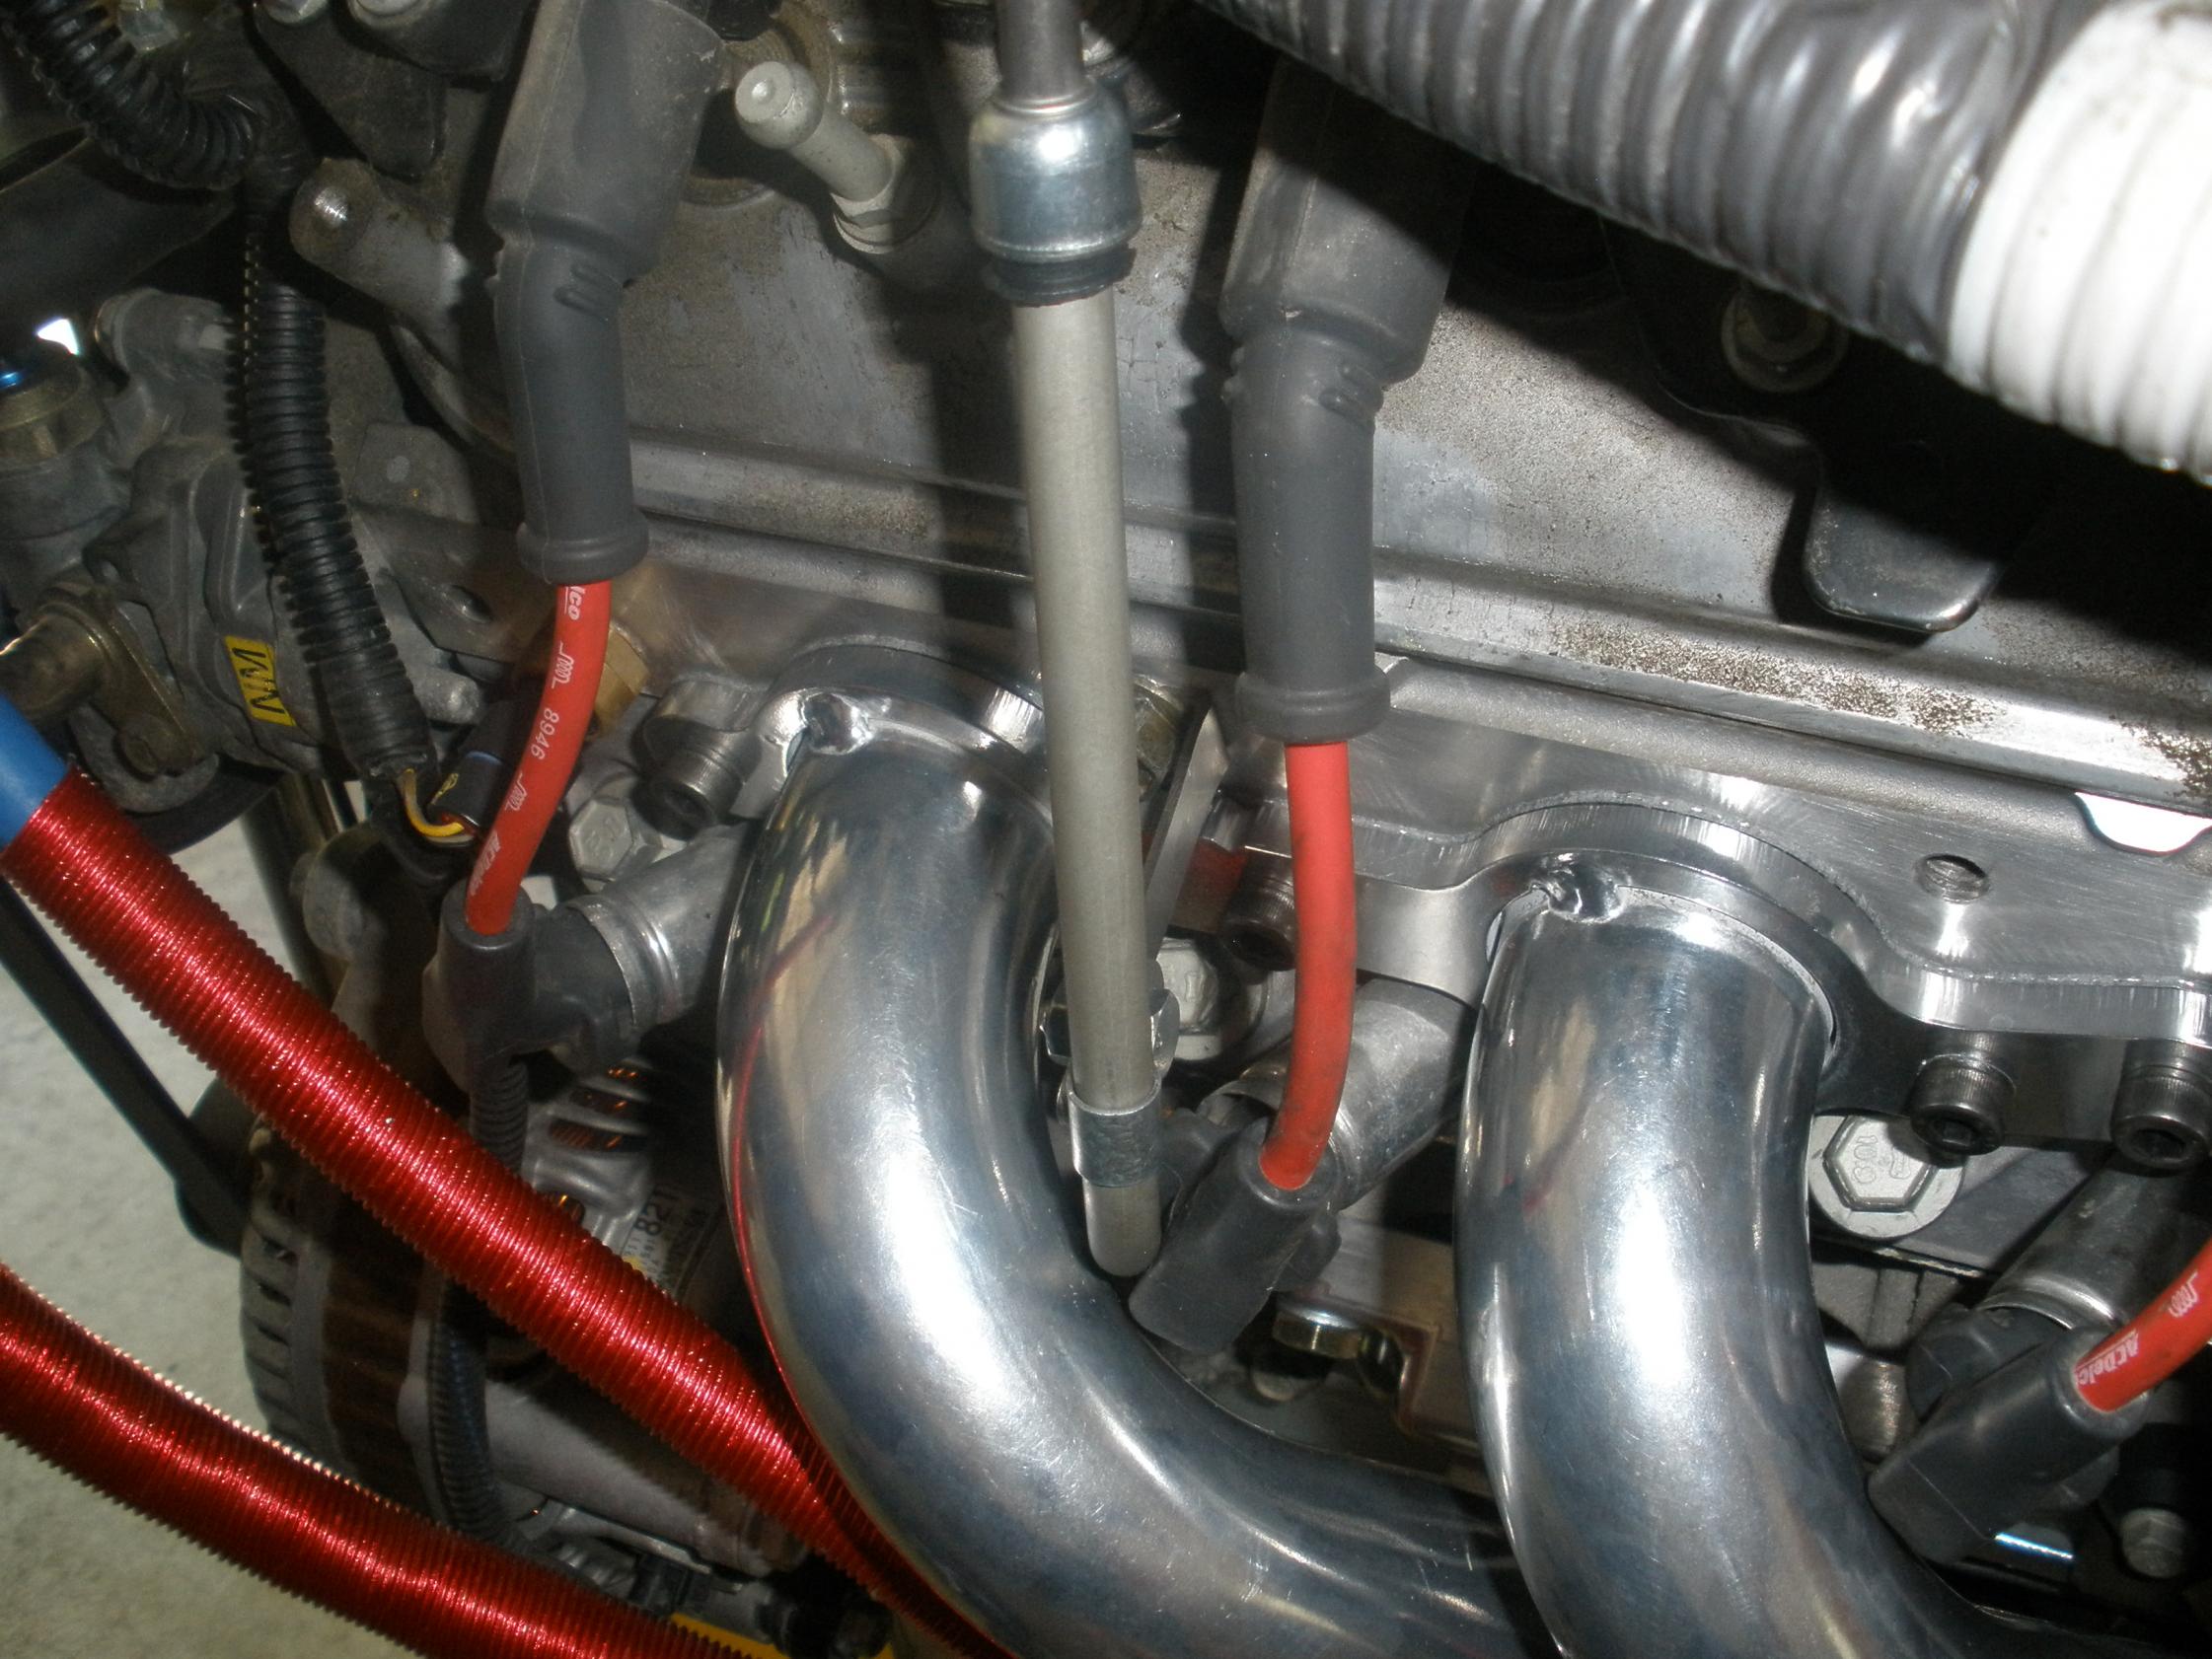
DO NOT PUT TEFLON TAPE ON THE BOTTOM OF THE OIL PAN FITTINGS WHERE THE LINES CONNECT OR IT WILL CAUSE A LEAK. DO USE THE TAPE ON THE SIDE OF THE FITTINGS THAT GO INTO THE PAN AND THE RELOCATOR HEAD.
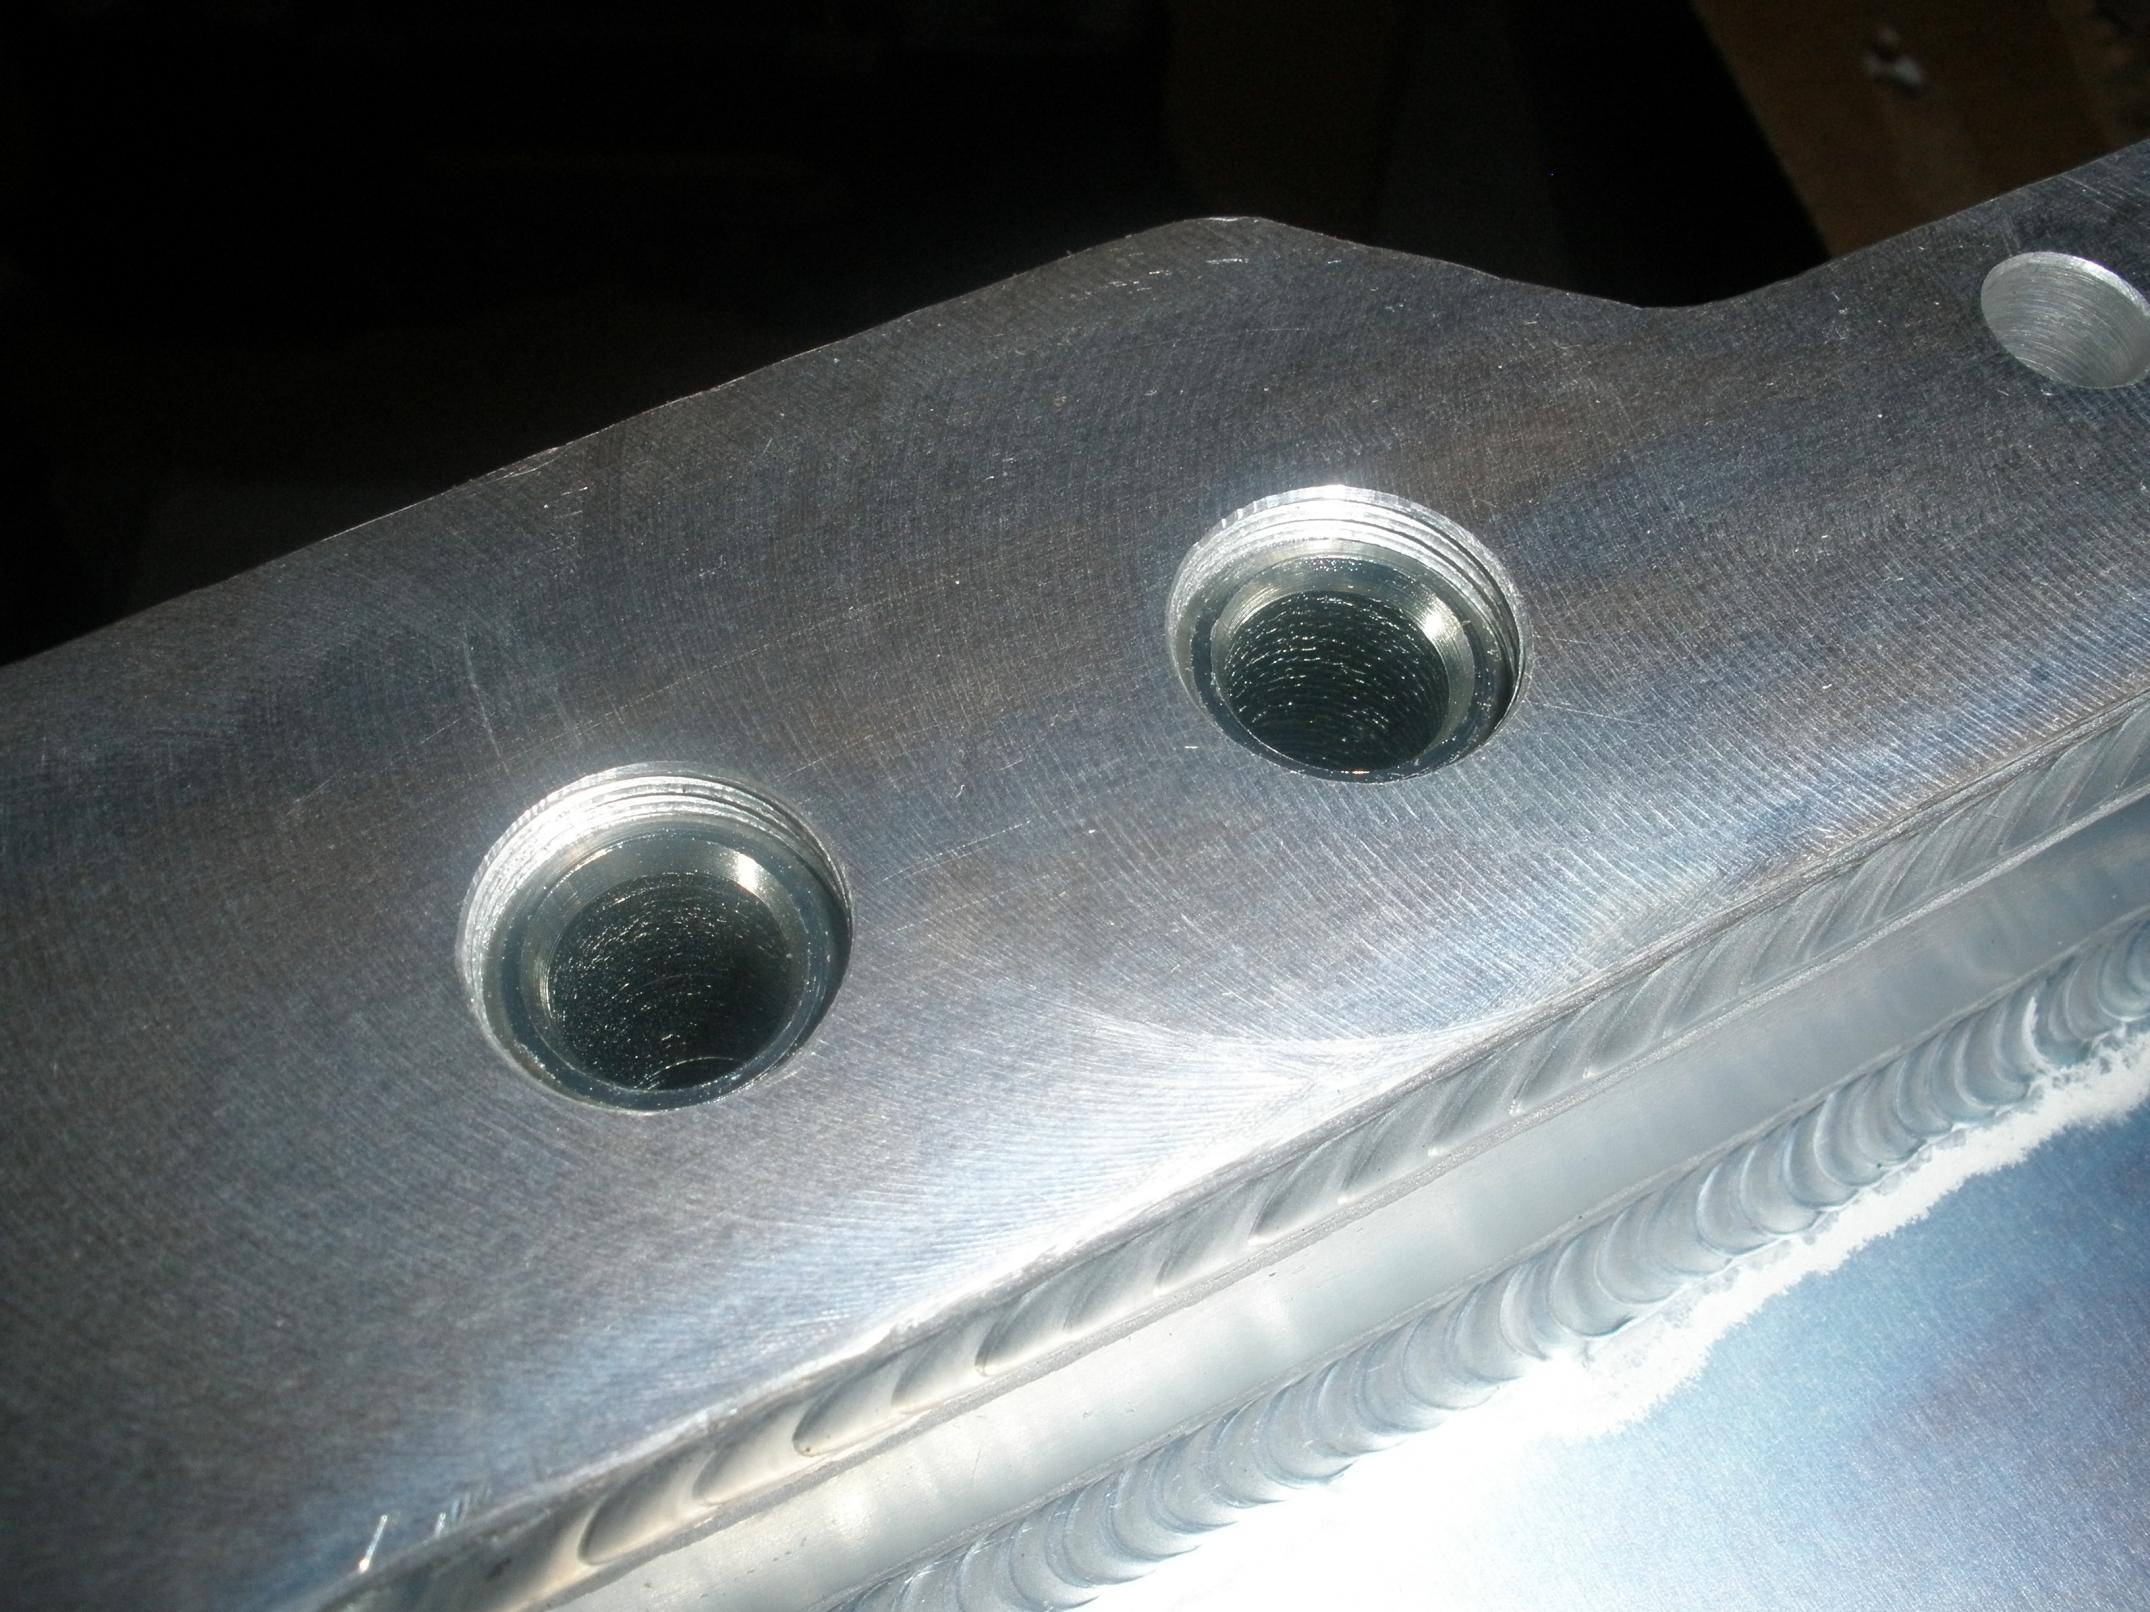
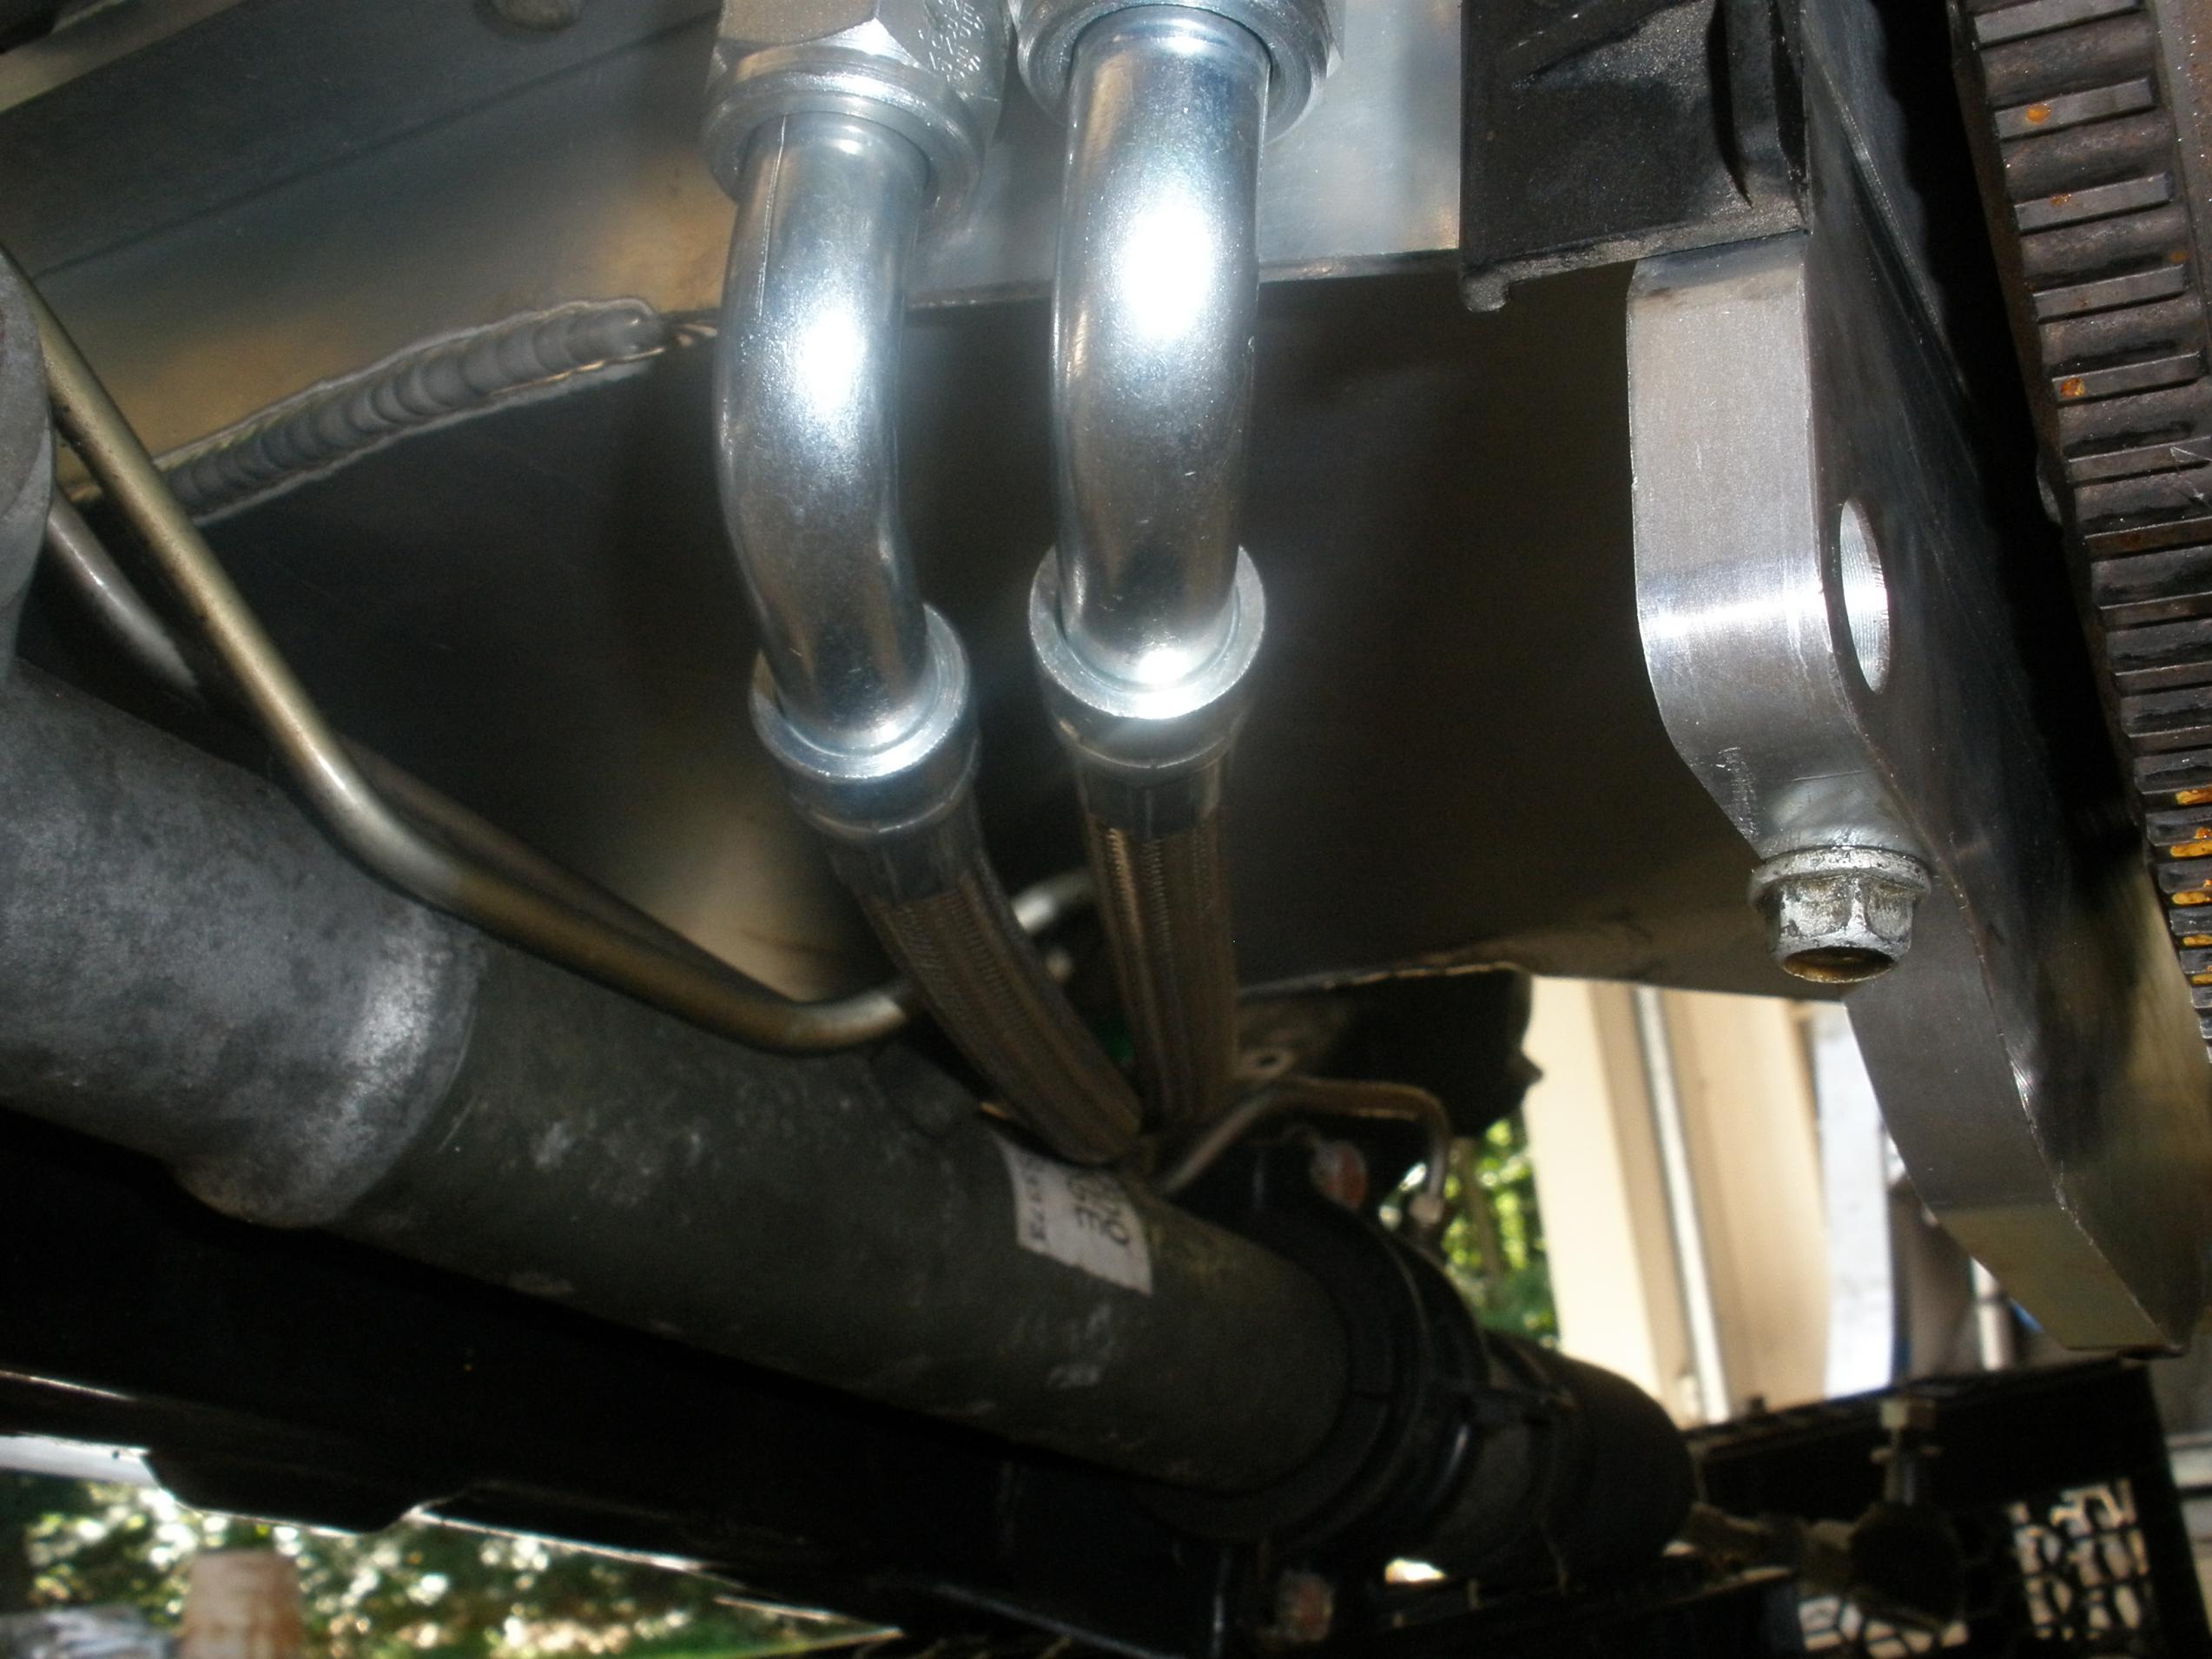
Then its time to run the oil filter relocator (OFR) lines. Just some teflon tape on the threads and a big *** wrench (I think it was a 24mm). Its a very tight fit while tightening, so be patient and use the method where you tighten a half turn, flip the wrench over and pull the nut around a bit, then back to the original side and another half turn. If I did this again I would do this before I put the pan on the car or get the special thin headed wrenches to get at the nut better.

Here are pics of how I routed my lines. Not sure if its right, but there aren't any F-ing instructions for any of this so I will just do whatever I want

Then its time to run the oil filter relocator (OFR) lines. Just some teflon tape on the threads and a big *** wrench (I think it was a 24mm). Its a very tight fit while tightening, so be patient and use the method where you tighten a half turn, flip the wrench over and pull the nut around a bit, then back to the original side and another half turn. If I did this again I would do this before I put the pan on the car or get the special thin headed wrenches to get at the nut better.
Here are pics of how I routed my lines. Not sure if its right, but there aren't any F-ing instructions for any of this so I will just do whatever I want
Last edited by Cass007; Aug 31, 2011 at 04:51 AM.
We decided to change the spark plugs before doing the trans install. No biggie there, just regular plugs for this stock motor. The parts store said gap to .40, but all the stock plugs that came out were .44. We split the difference and gapped at .42. Just remember to do it right and put anti-seize on the threads for the plugs prior to install or you risk stripping them upon removal.

Next we used some red scotch pad and cleaned up the mounting area for the headers. Take your time here, a poor surface can lead to exhaust leaks.
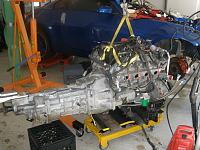
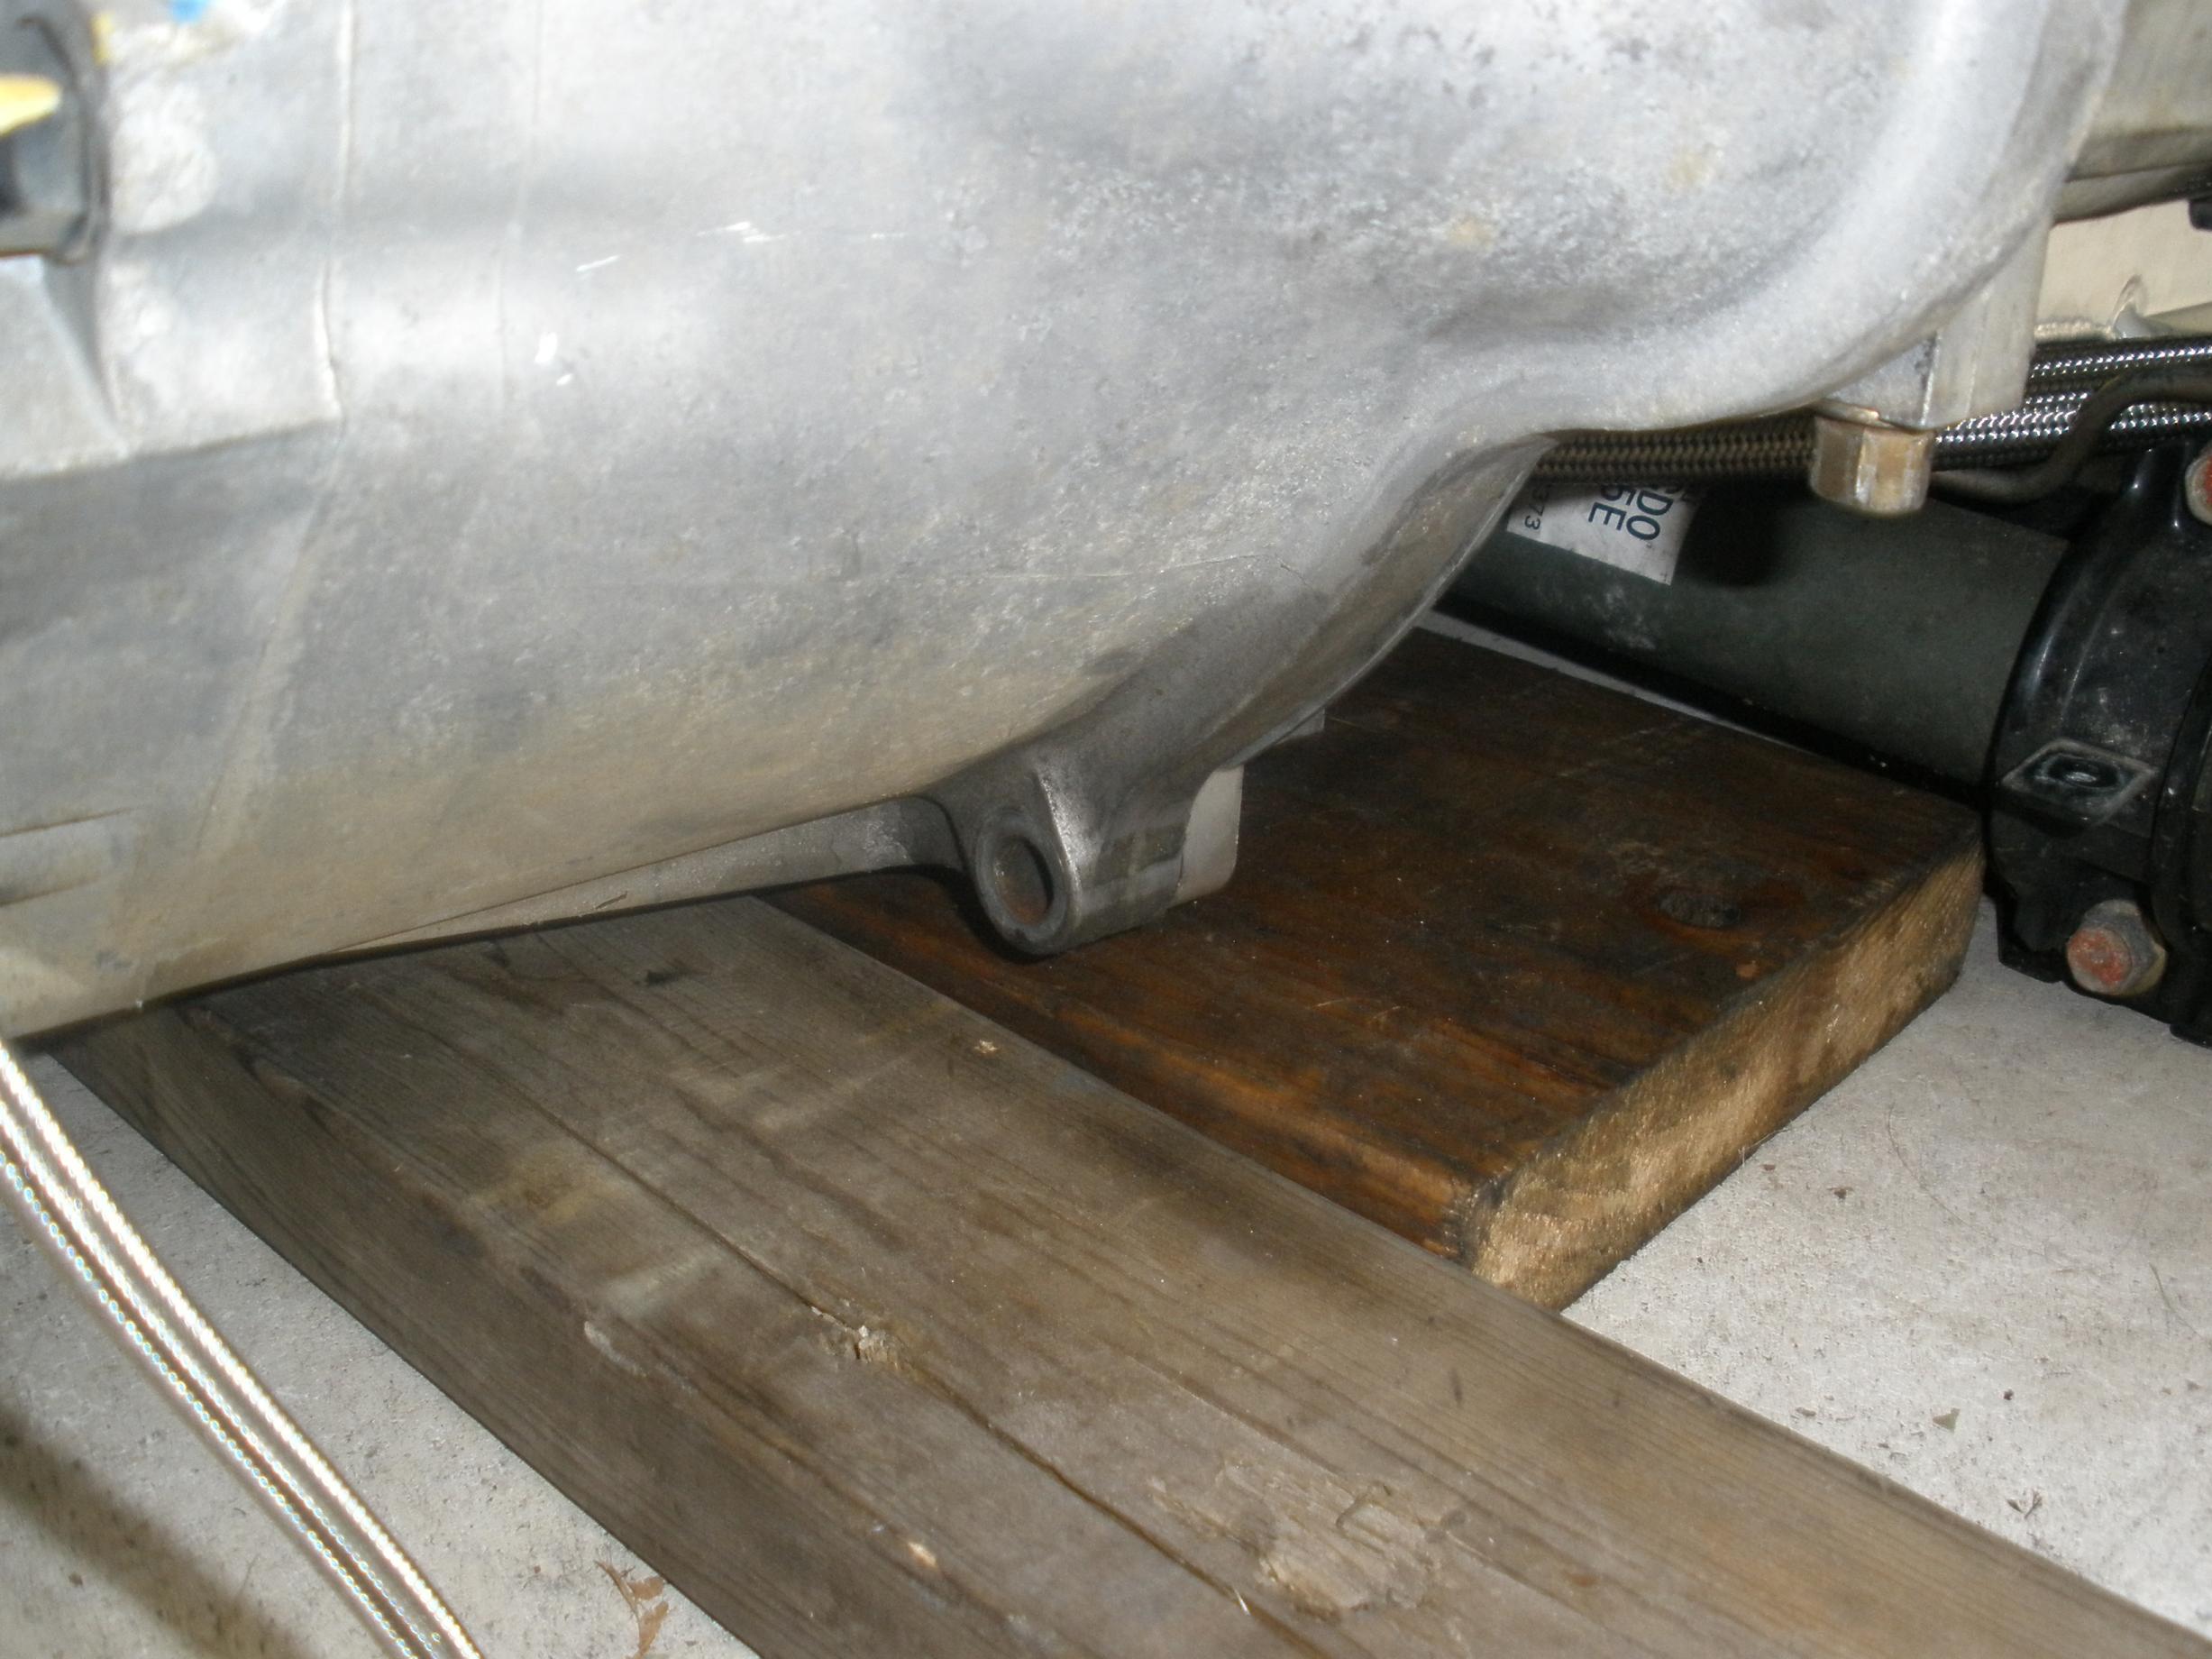
We dropped the motor onto the trans press and then mounted the trans. Use a piece of wood to balance the assembly squarely on the press so it doesn't rock back too far and jack up the steering rack or OFR lines.

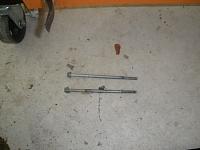
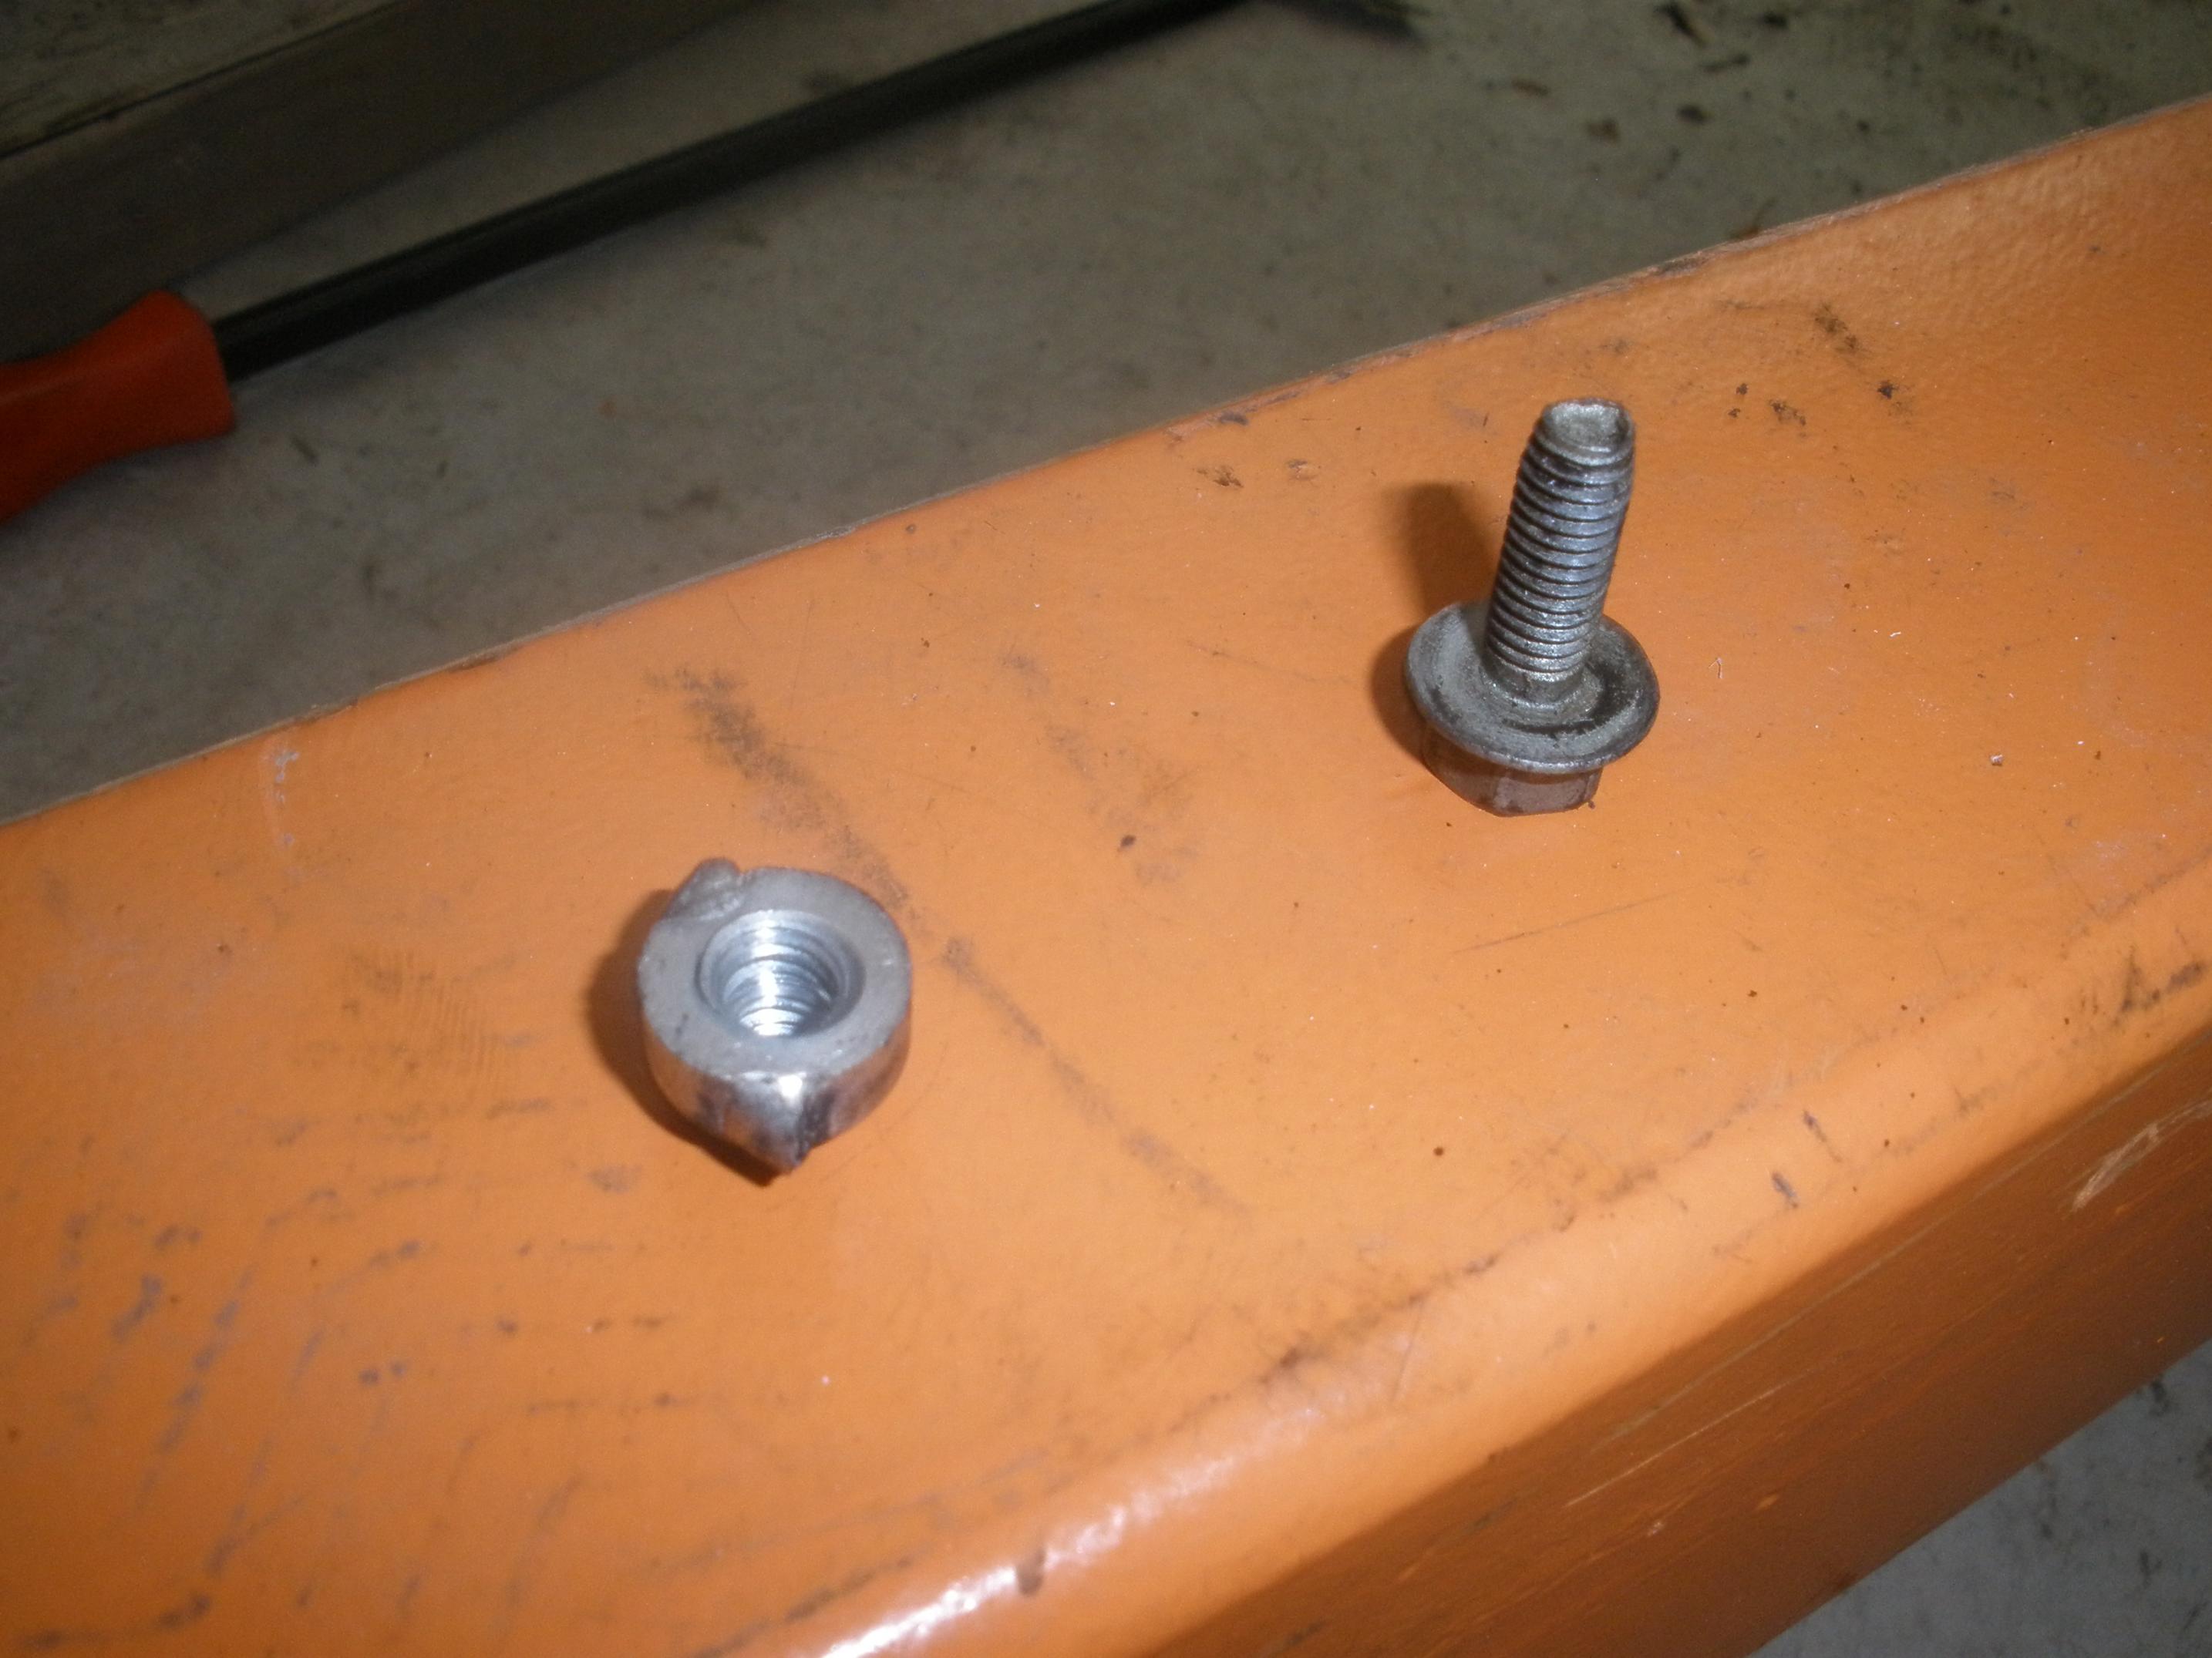
Had a bit of fail here. My SIKKY kit was either missing the two longer bolts needed for the new oil pan and trans to mount or they are not included in the kit at all. The stock bolts are too short and will NOT fit back on the underside of the trans.
Next we used some red scotch pad and cleaned up the mounting area for the headers. Take your time here, a poor surface can lead to exhaust leaks.
We dropped the motor onto the trans press and then mounted the trans. Use a piece of wood to balance the assembly squarely on the press so it doesn't rock back too far and jack up the steering rack or OFR lines.

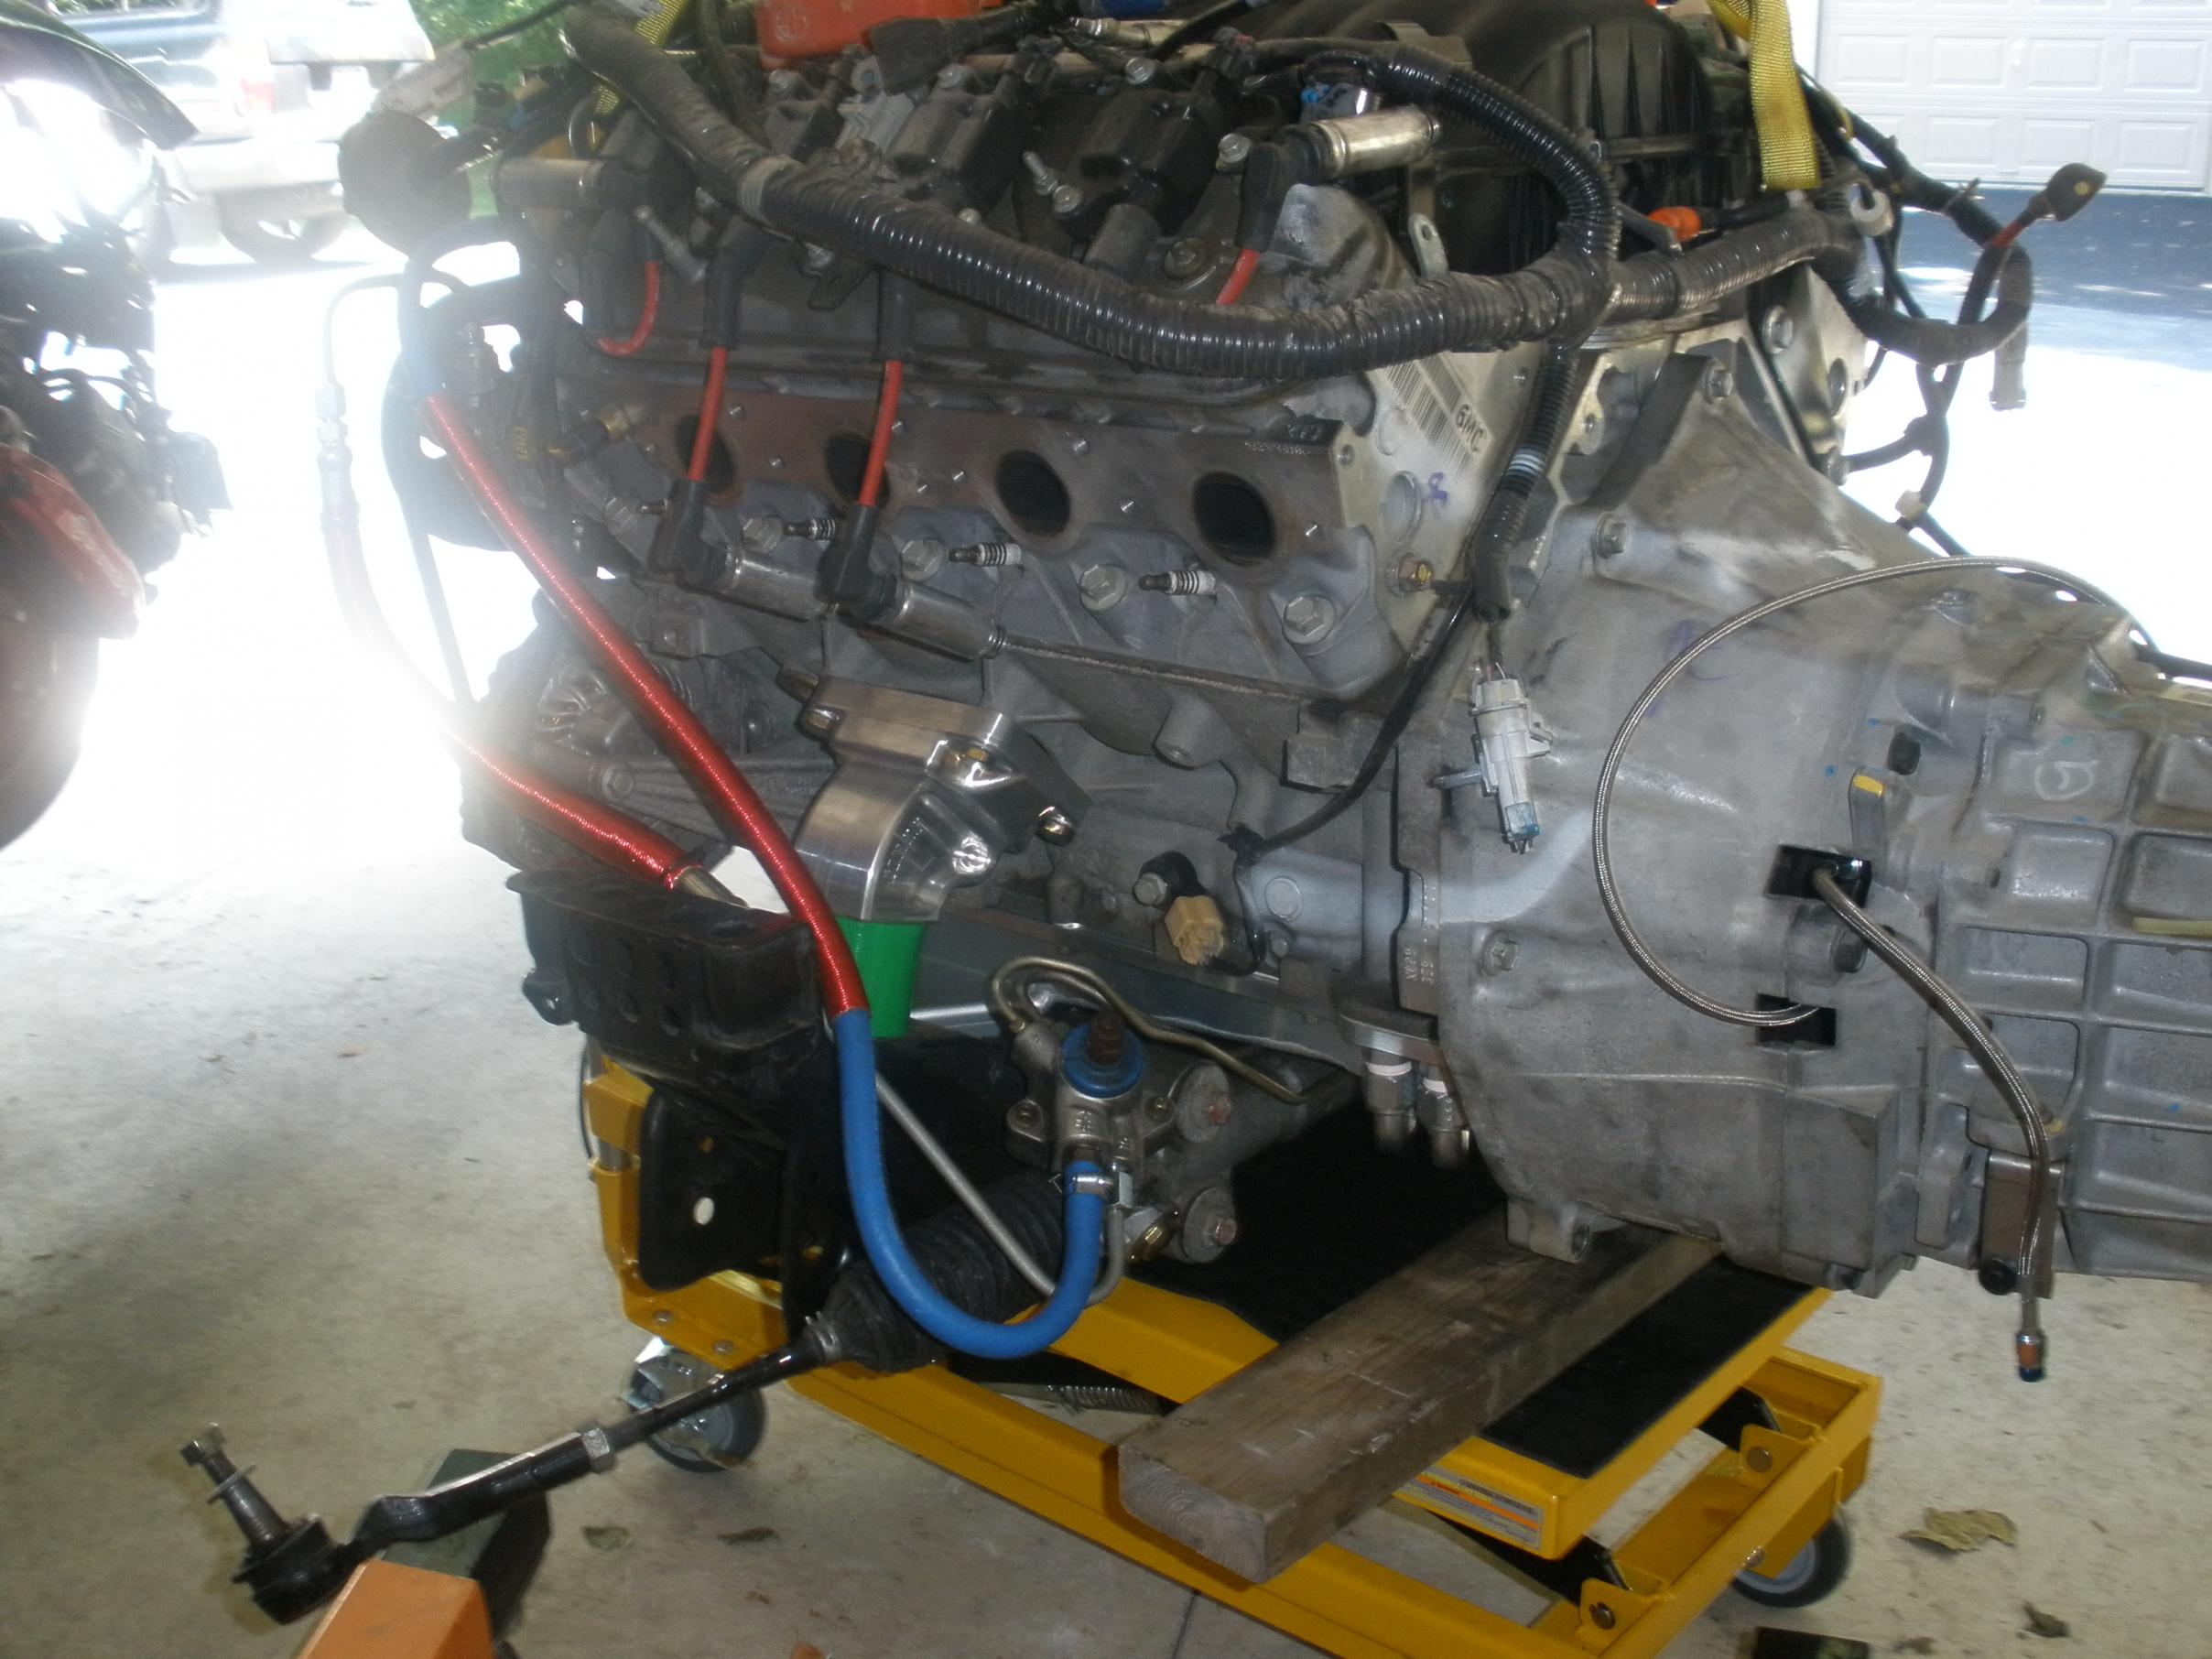
Had a bit of fail here. My SIKKY kit was either missing the two longer bolts needed for the new oil pan and trans to mount or they are not included in the kit at all. The stock bolts are too short and will NOT fit back on the underside of the trans.
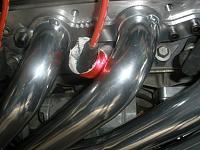
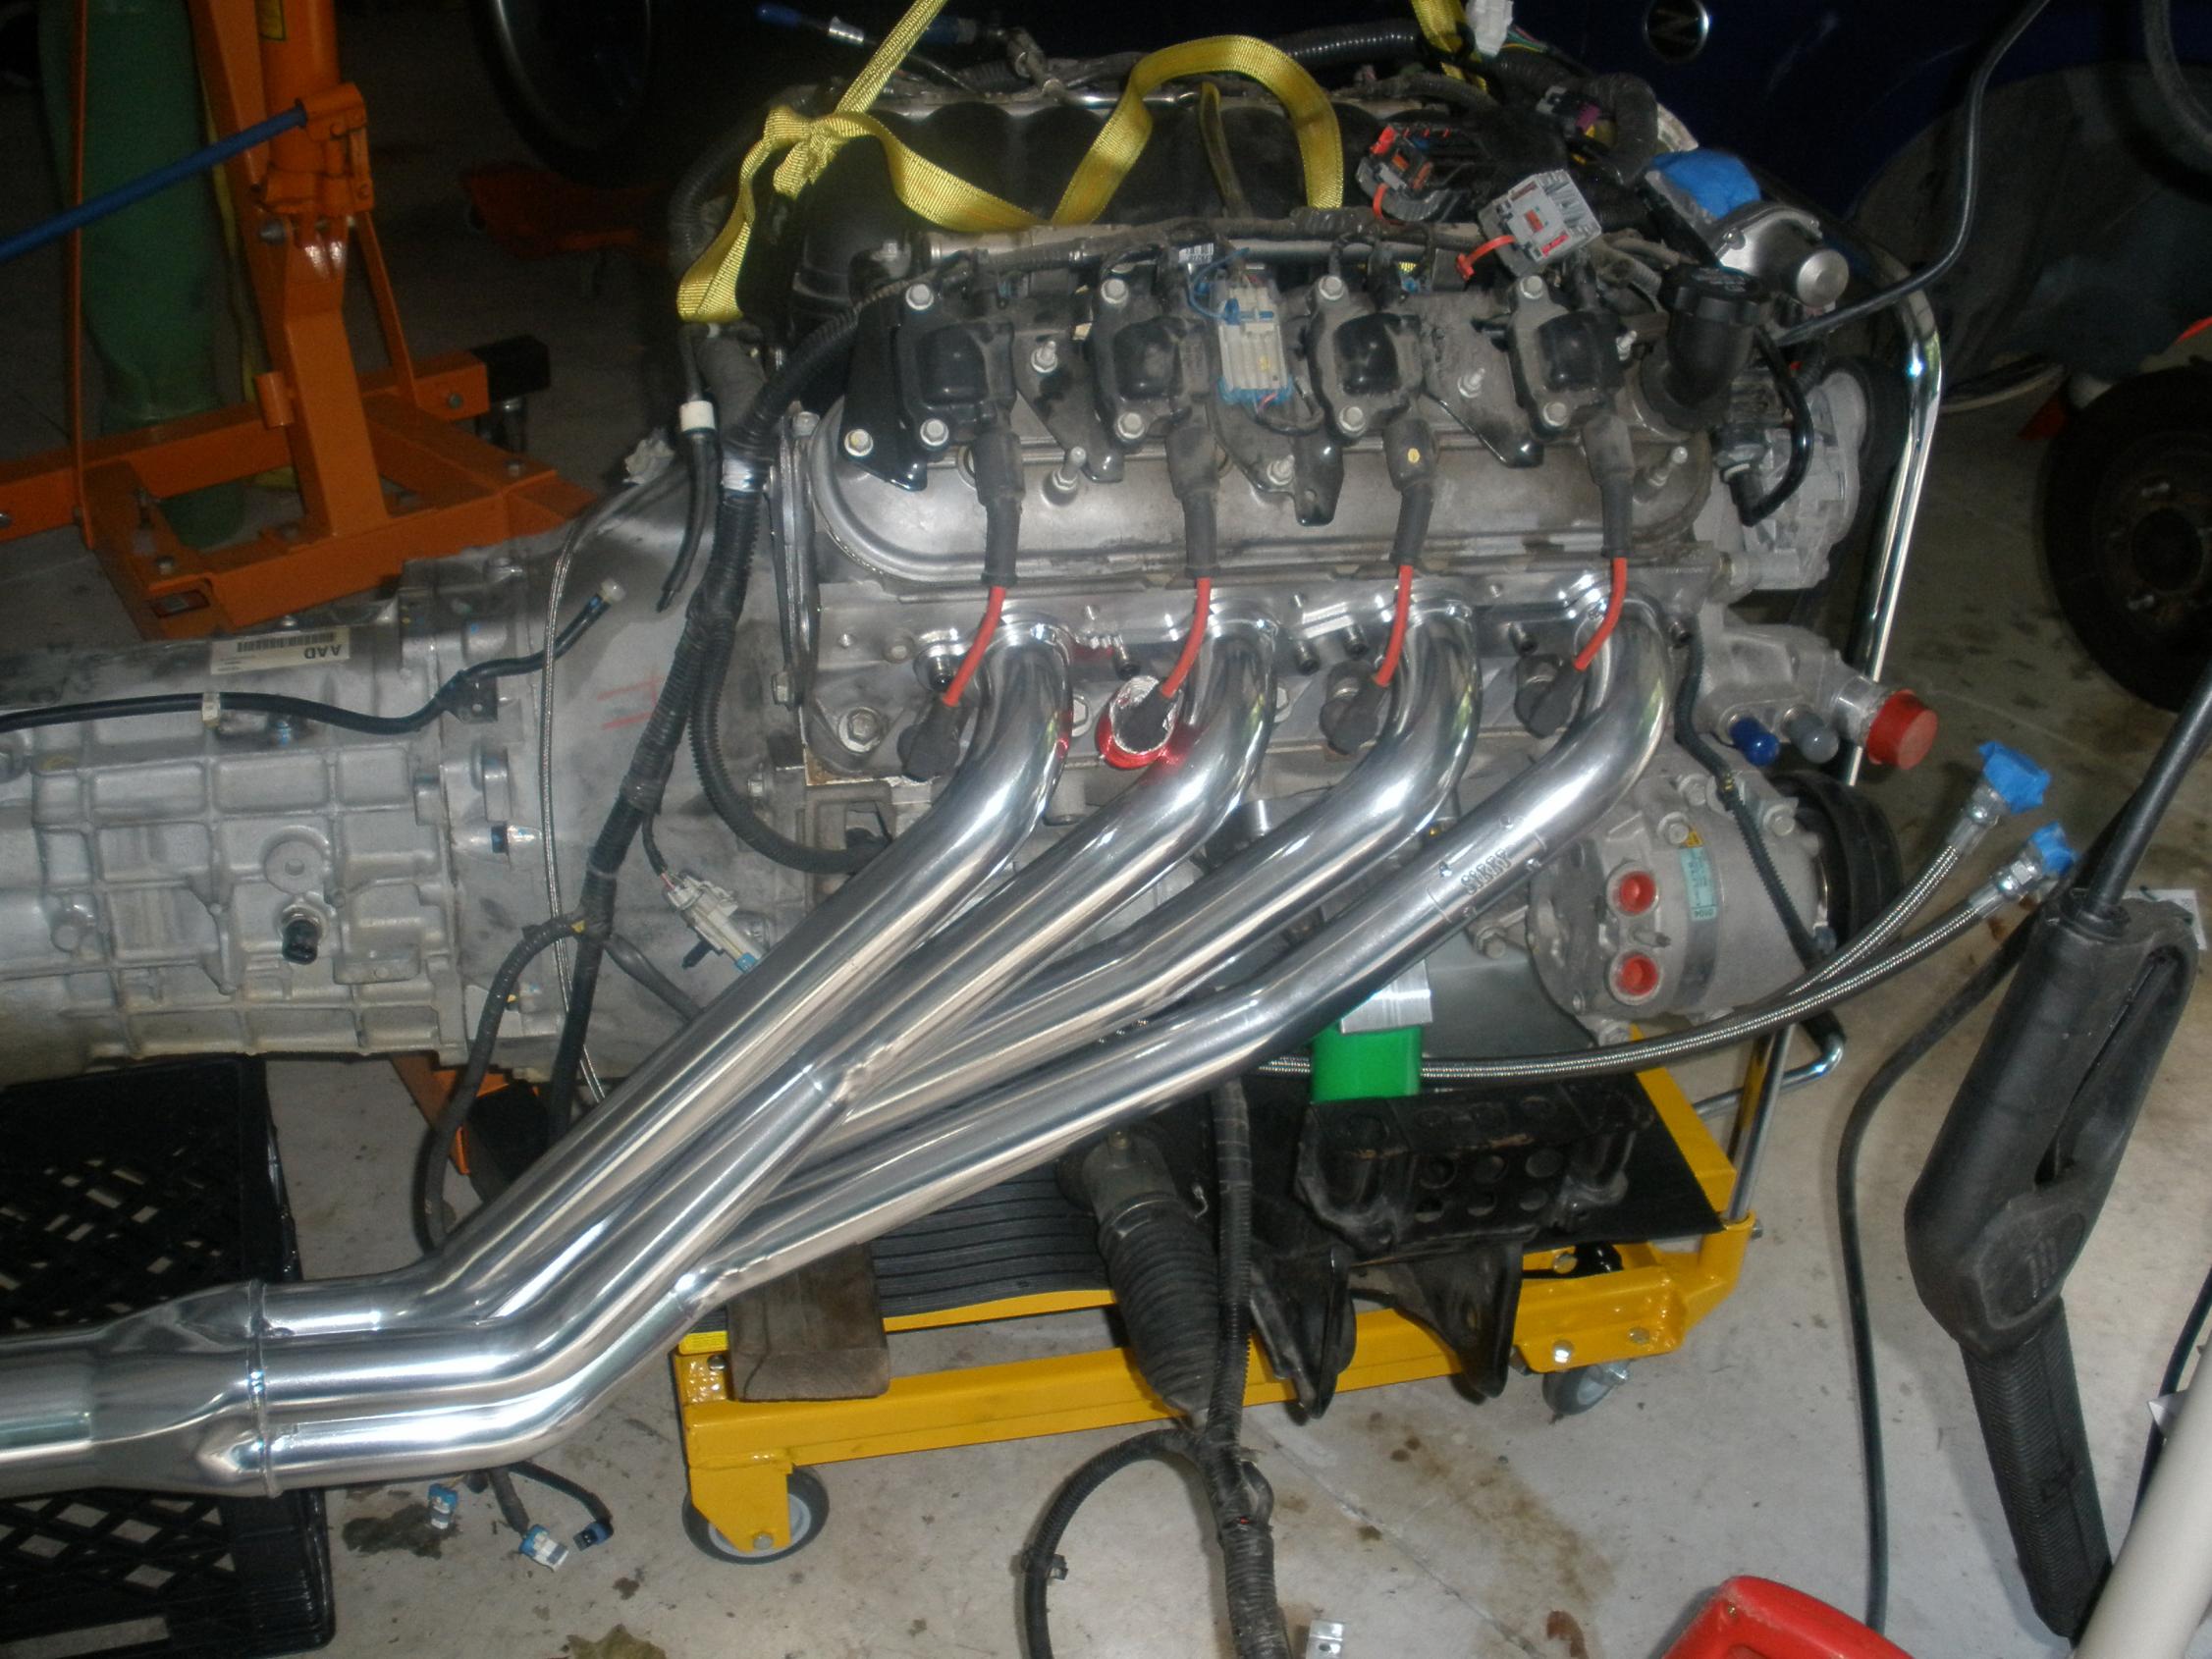
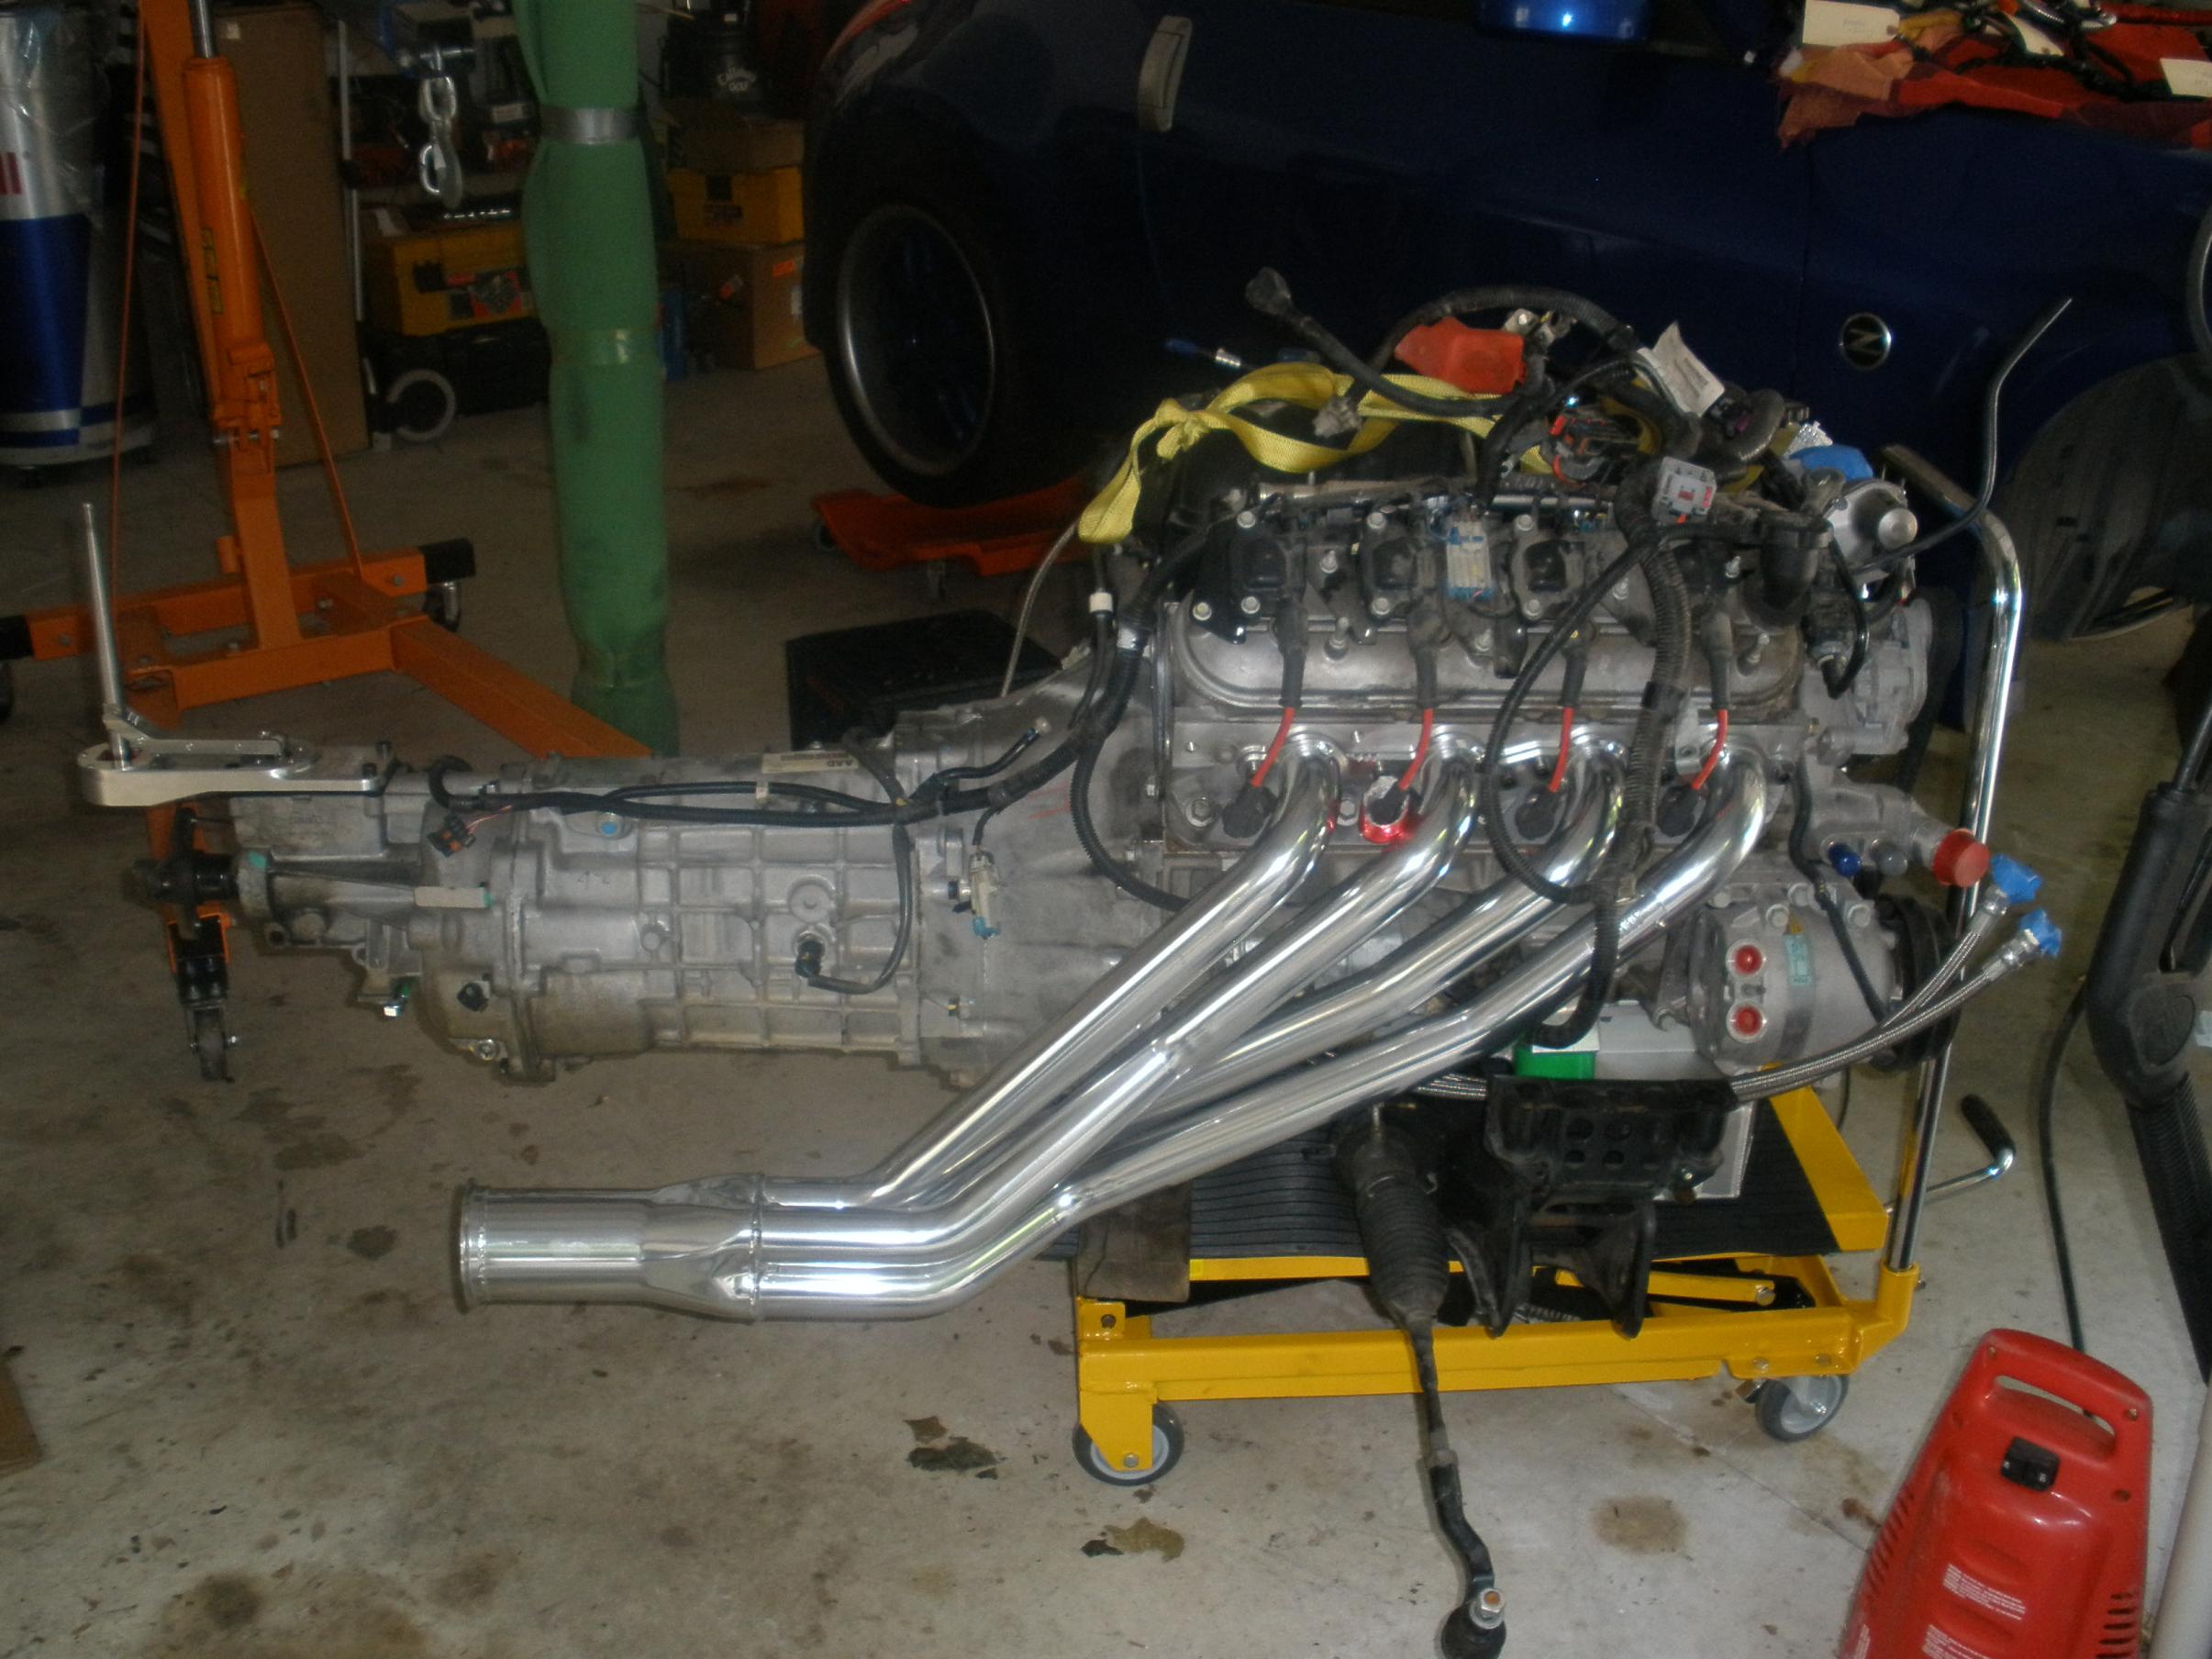
Install the headers next. Remember the anti-sieze again here. Use the SIKKY supplied gaskets and allen bolts (6mm). An allen bolt set for the socket drive is nice here. Simple as pie, but is much easier with two people.
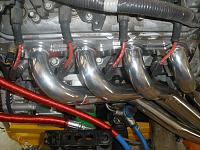

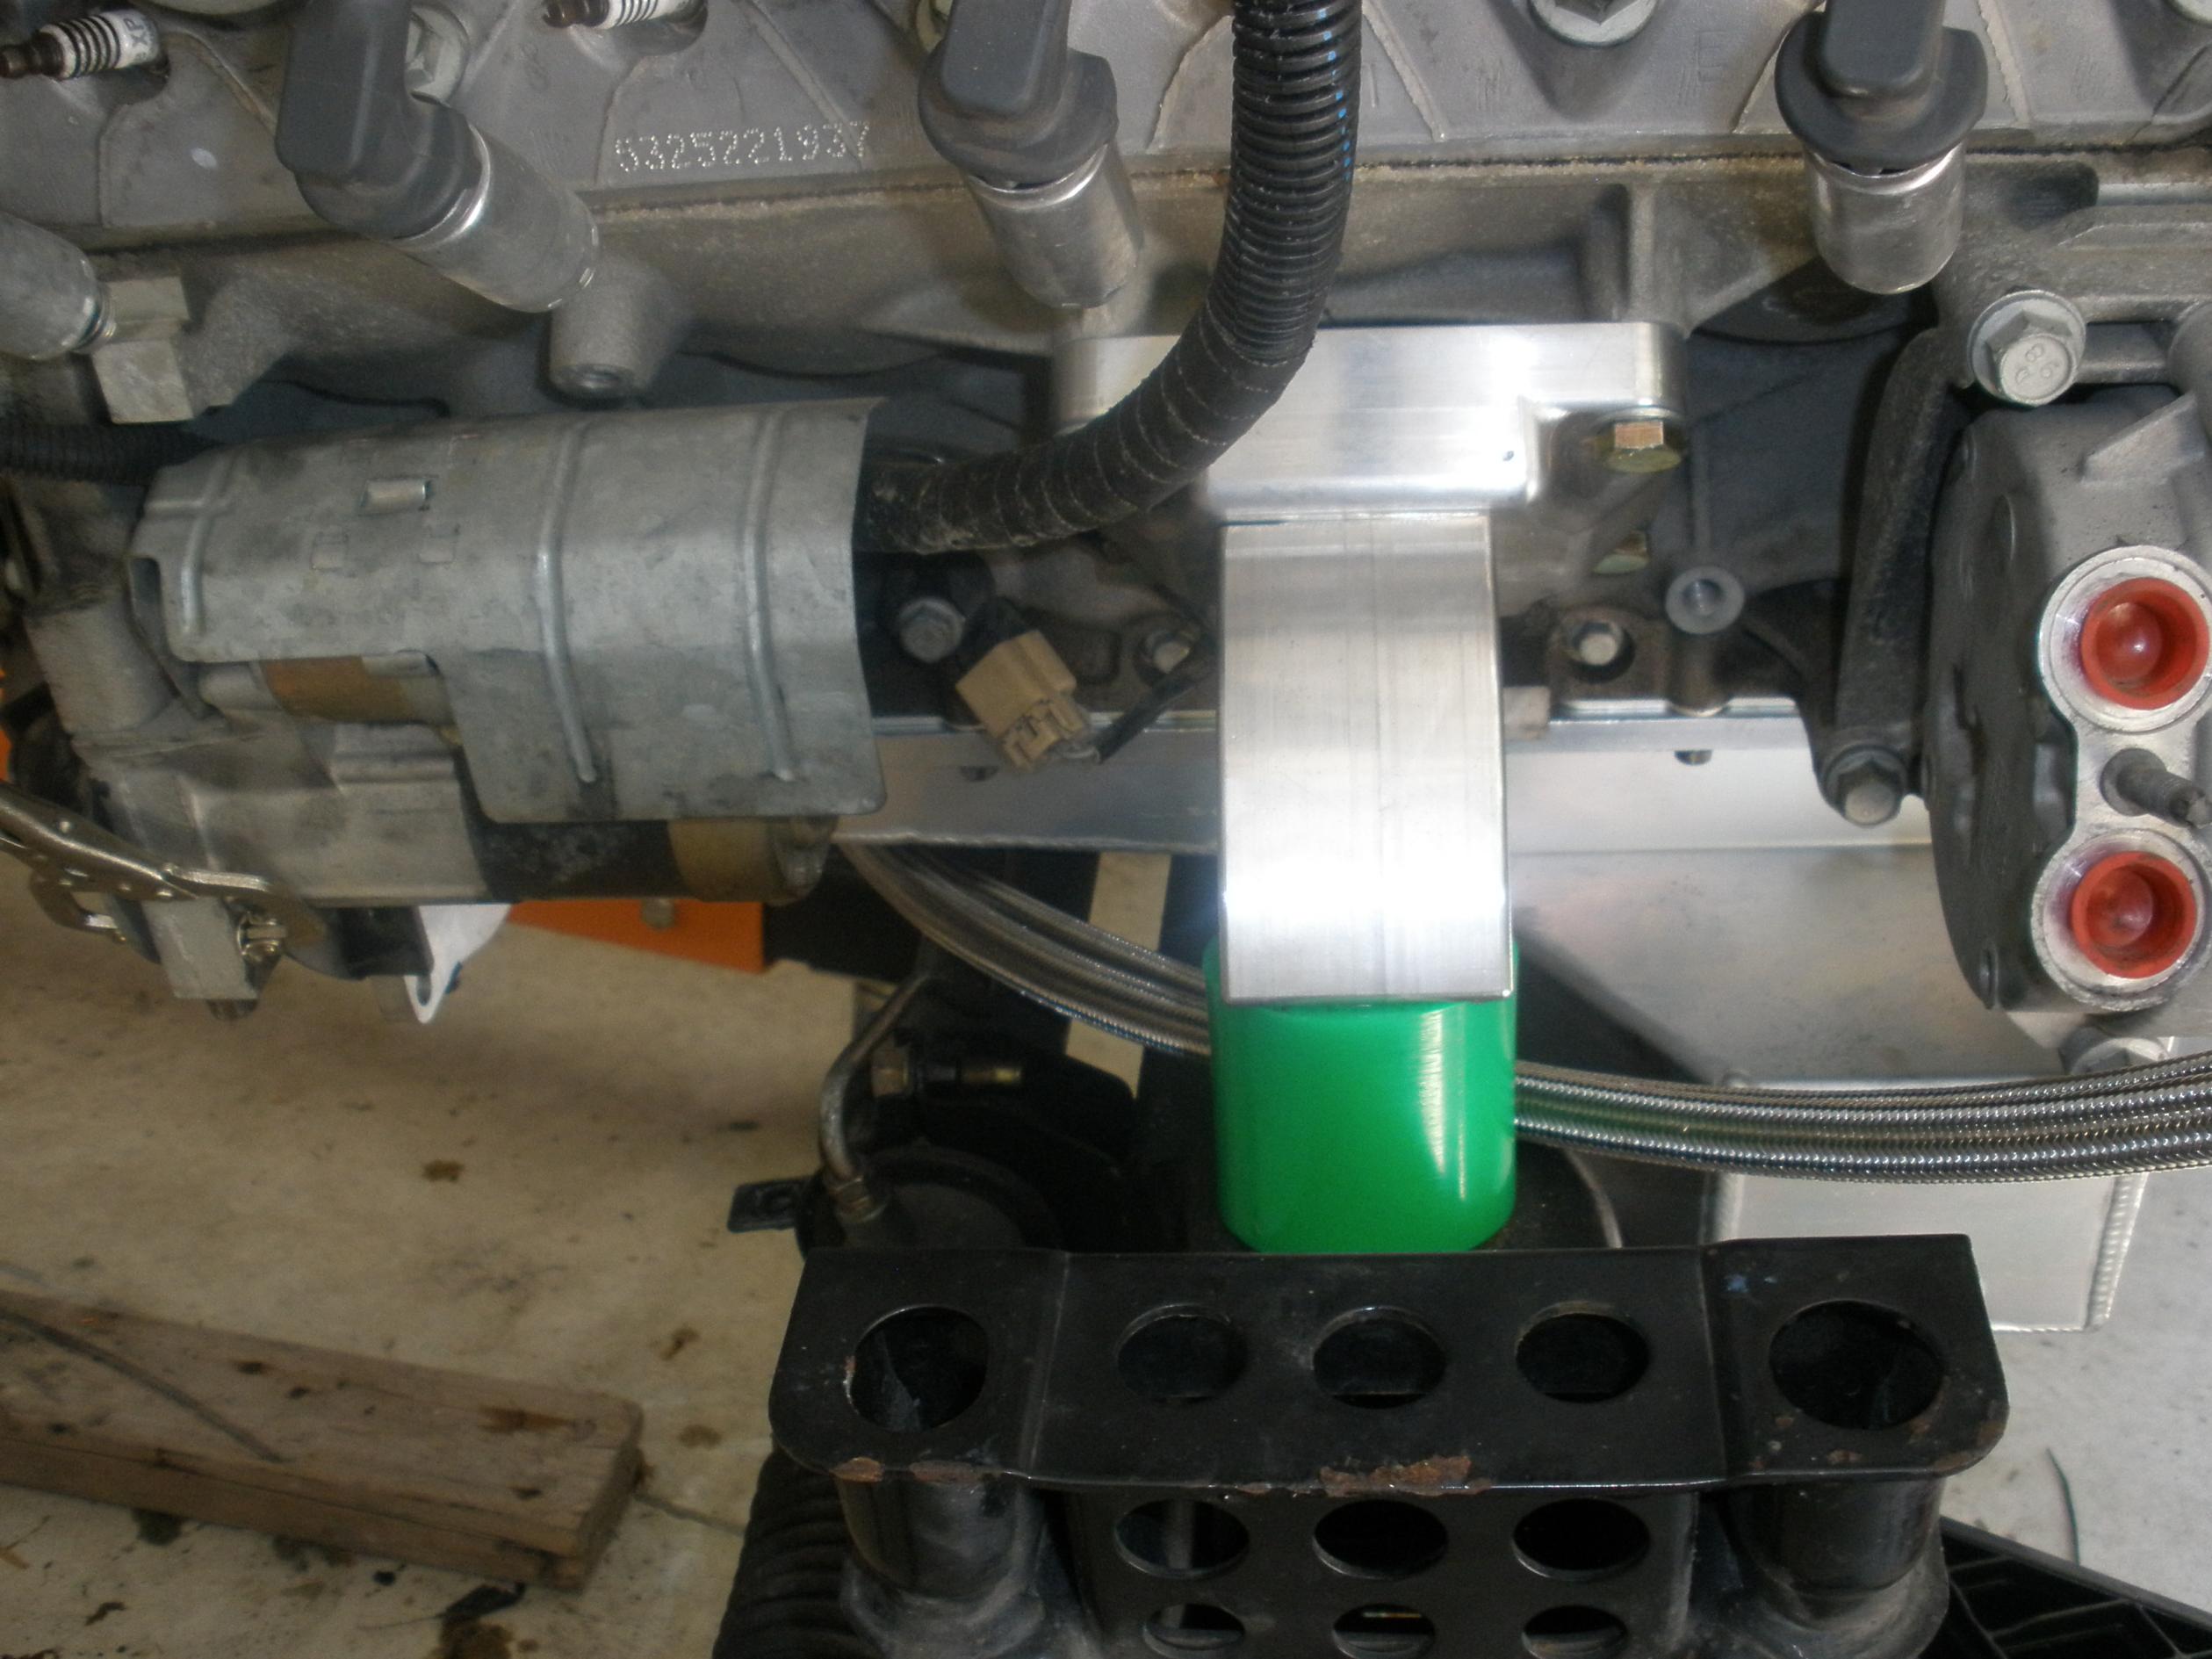
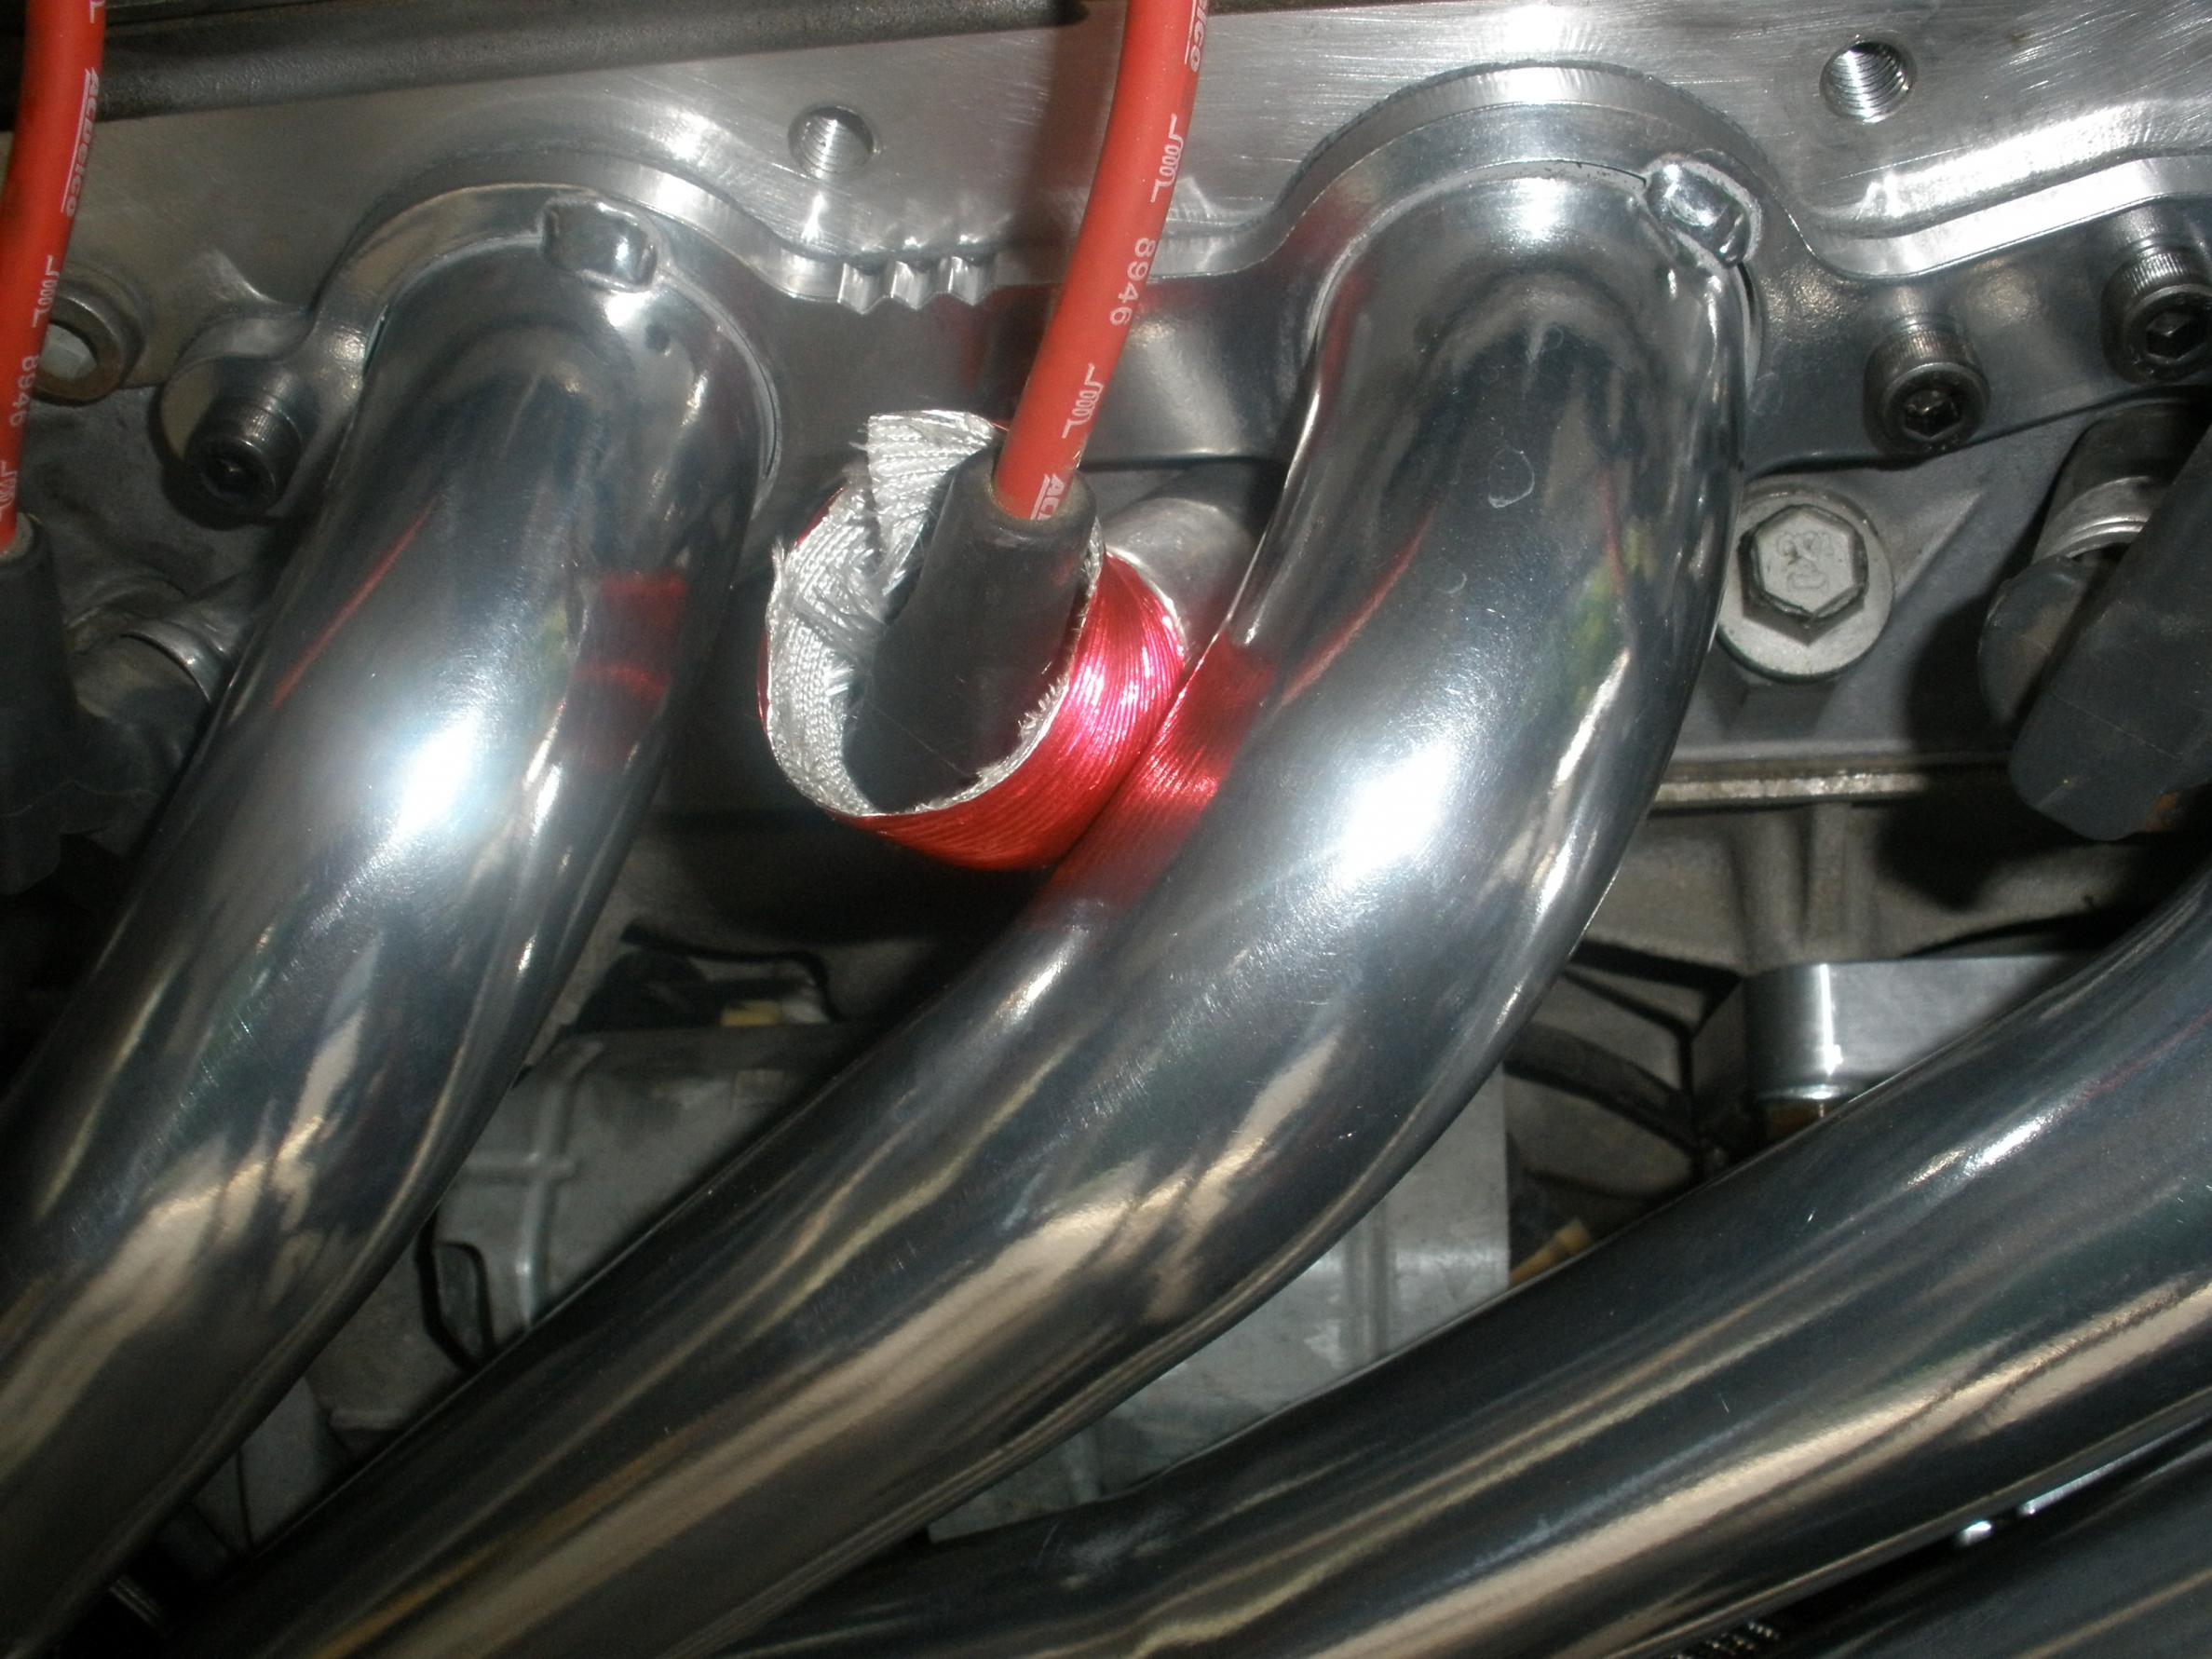
Three of my plug wire caps were very close to the headers (two were touching a bit). I put a piece of heat wrap between the plug cap and the header on two of them and used the dip-stick to push the other one over a bit so it doesn't touch. The caps were close on the stock headers too, but not touching. My dipstick isn't in the location that SIKKY shows in their thread, but it works here too and is easy enough to change if needed. Also, I didn't have a bolt to secure the dipstick in with my kit, so I just drilled out the mount hole a bit and used a bolt off my VQ.

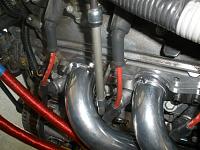
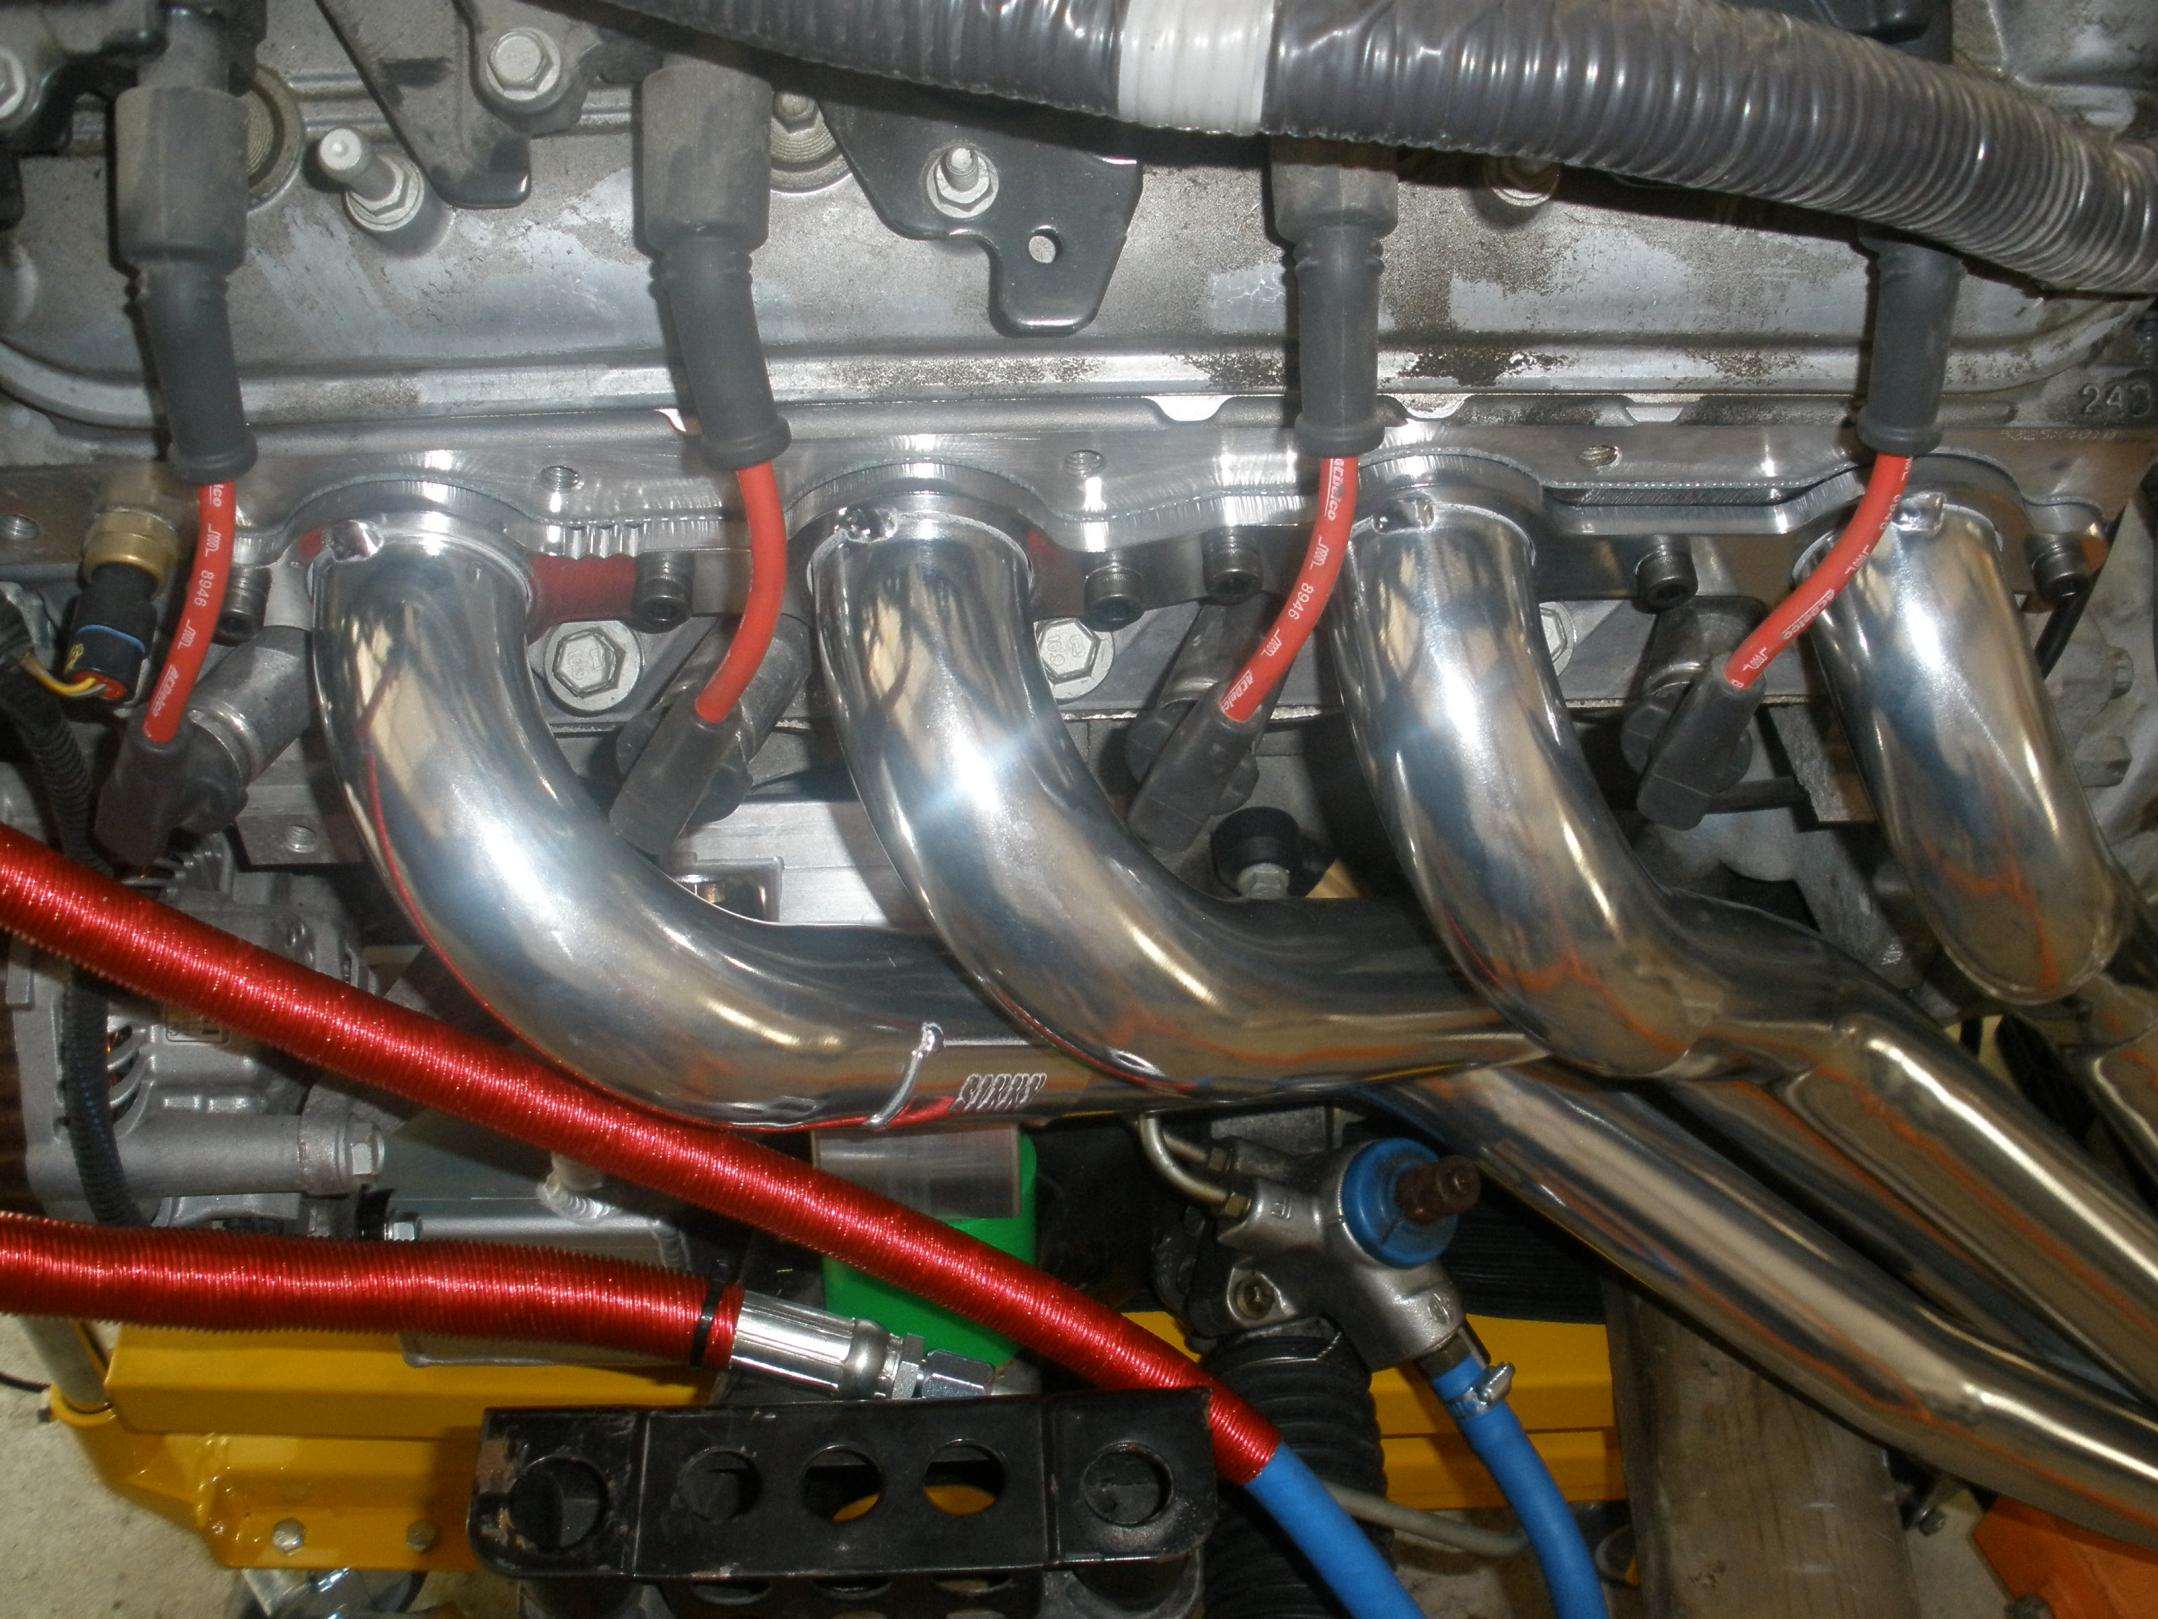
Three of my plug wire caps were very close to the headers (two were touching a bit). I put a piece of heat wrap between the plug cap and the header on two of them and used the dip-stick to push the other one over a bit so it doesn't touch. The caps were close on the stock headers too, but not touching. My dipstick isn't in the location that SIKKY shows in their thread, but it works here too and is easy enough to change if needed. Also, I didn't have a bolt to secure the dipstick in with my kit, so I just drilled out the mount hole a bit and used a bolt off my VQ.

This is a good time to mention to NOT buy the 500lb transmission press at harbor freight, it is NOT strong enough to lift the engine and trans into place by itself. That being said, when used with the hoist and the race jack it is easy to get the engine in with a little patience.
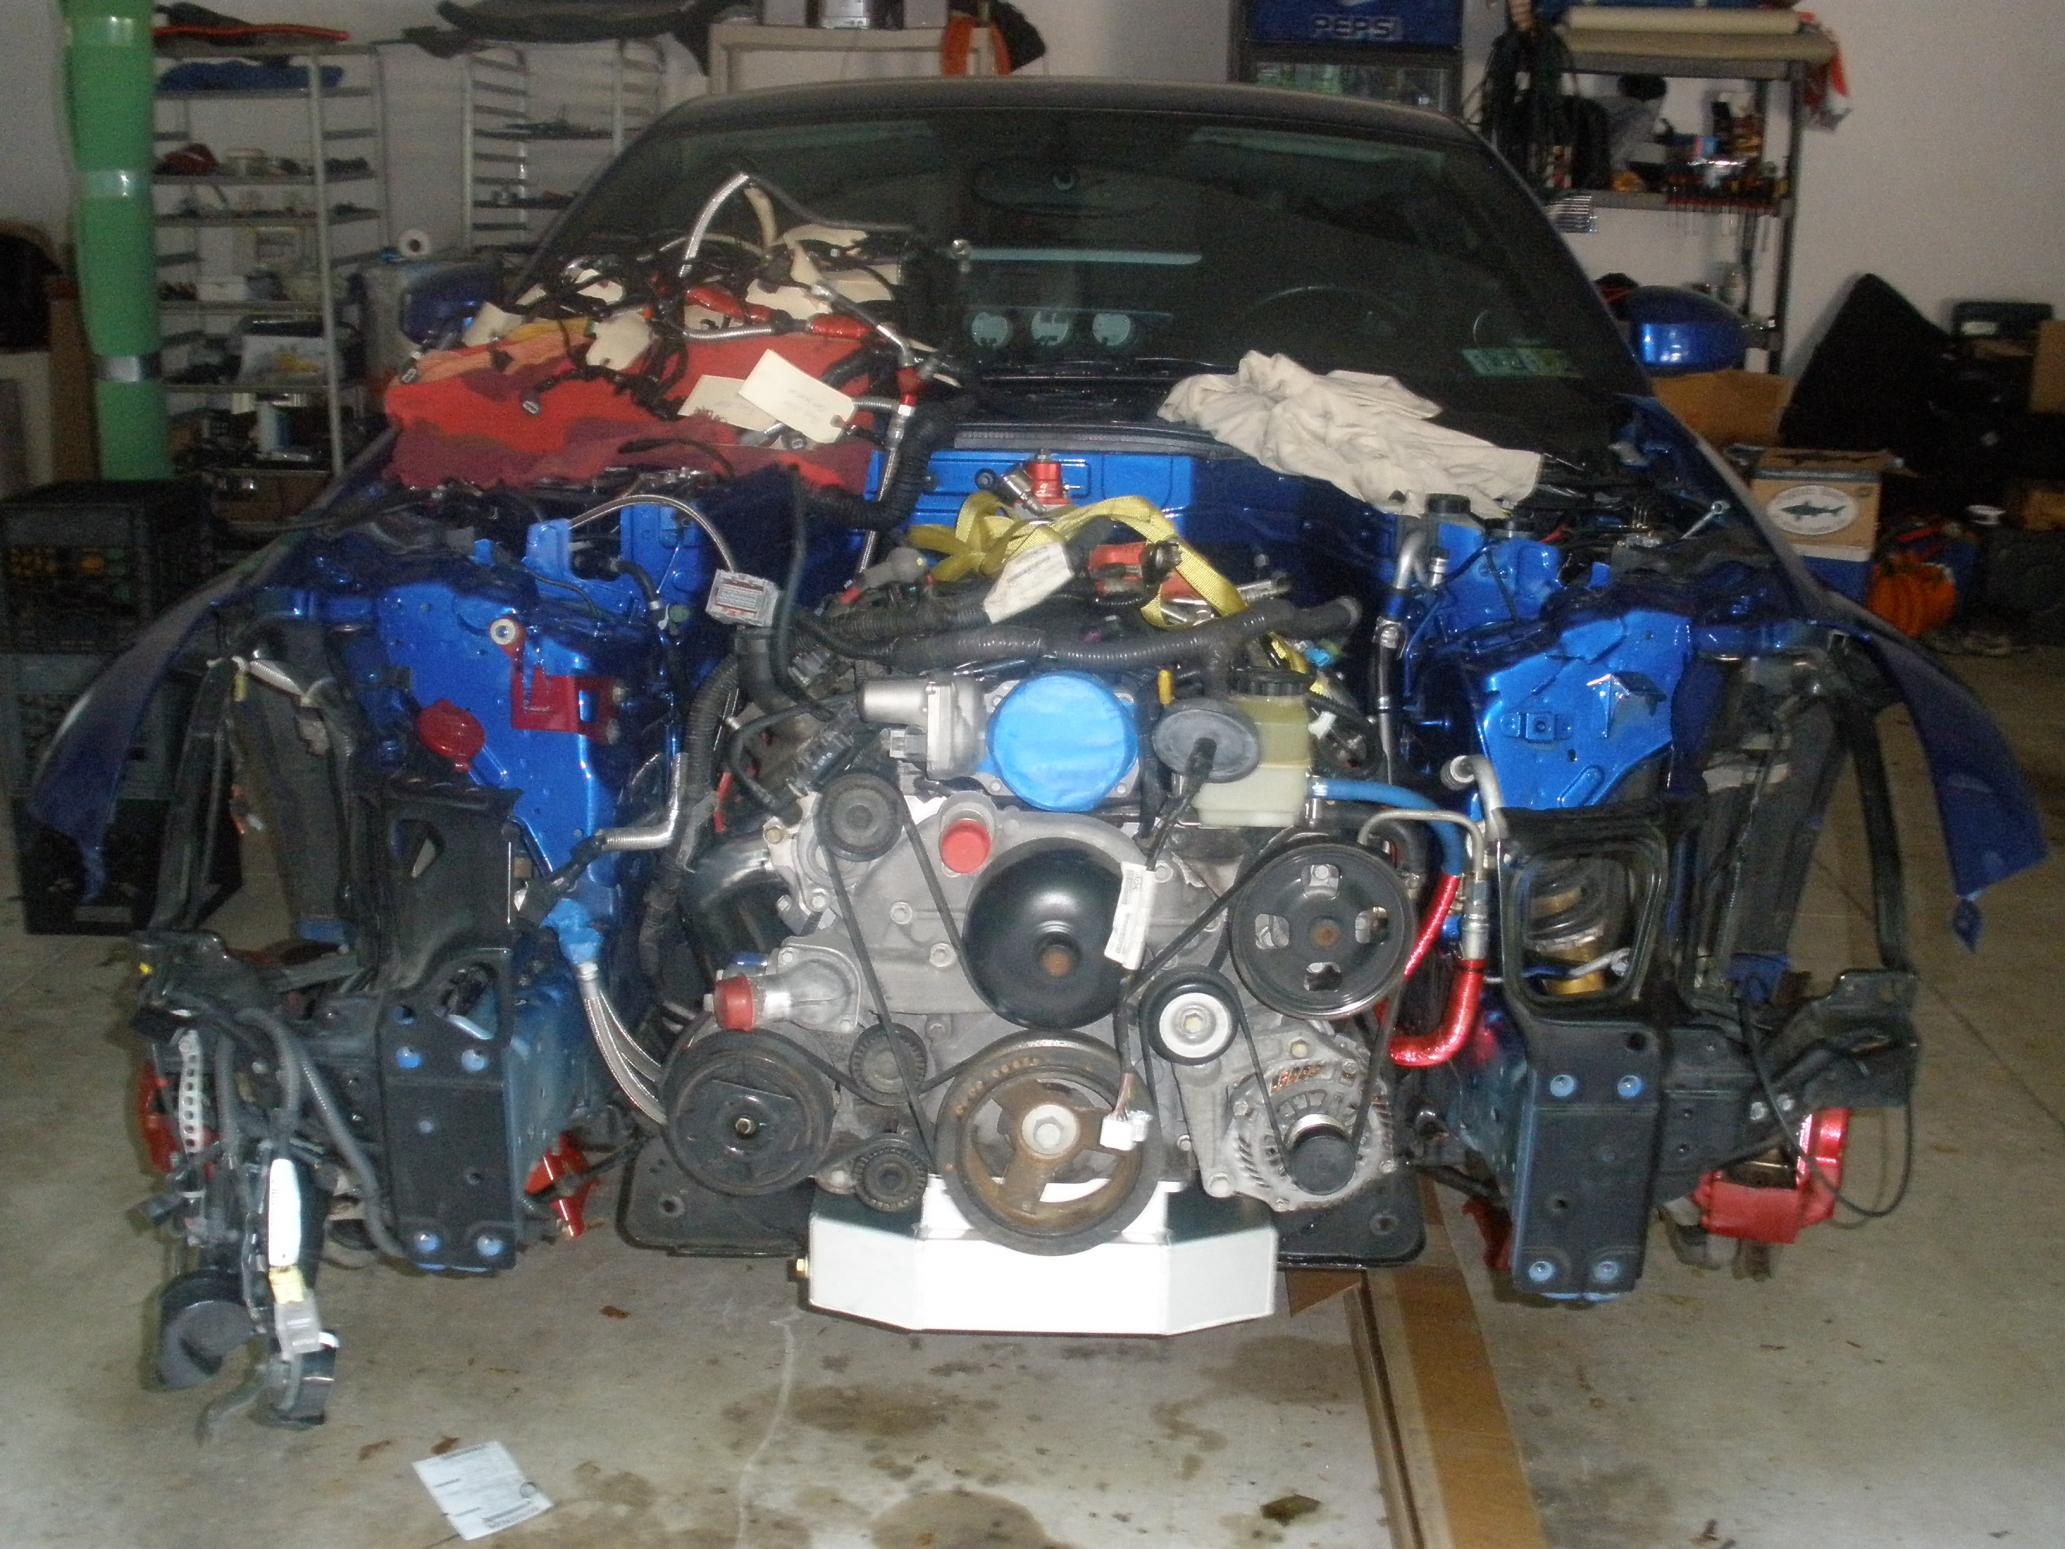
Center the engine and trans in front of the car. Be sure to remove the small cross brace that sits towards the front of the trans too, not just the main trans brace. Then remove the piece of wood from under the trans and let the trans slide down enough to get the shifter under the tunnel. Use the race jack to come in from the rear of the car and support the back of the trans.
Begin pushing the whole thing back in until the drivers side header just about hits the mount tab for the stock clutch line. Put the SIKKY clutch line through the hole you drilled for it now. Then its just a dance of using the hoist to bring the engine up a bit and then raising the trans press table up to level it out. Once you clear the clutch tab, line up the bolts on the car body with the cross member holes. Usually one side will be slightly higer than the other, do the high side first (on my hoist it was the passenger side).
Get one side of the bolt to line up and then just keep hoisting and pressing until you get the heads of all 4 bolts to come through enough to get hte nuts on them and them tighten them down with the 19mm socket. I had to use a pry bar to get them to line up with my VQ, but they slid right in with the LS.
Now use the race jack to press the trans up and put the shifter through the floor. Put the SIKKY cross brace on with the angled edge facing down and the the two sides pointing to the front. We encountered some resistence getting the trans brace to line up correctly, but using a screwdriver to line the holes up to get the bolts started while manuvering the jack to push it around a bit got us home. It was at this point where I dropped the socket and it fell a hit me in the eye
Here is the final result:


If anyone has any info on hoses for coolant I would appreciate it very much!!
This Thursday we will try to get the rest of the car put together and get it back on the ground
Center the engine and trans in front of the car. Be sure to remove the small cross brace that sits towards the front of the trans too, not just the main trans brace. Then remove the piece of wood from under the trans and let the trans slide down enough to get the shifter under the tunnel. Use the race jack to come in from the rear of the car and support the back of the trans.
Begin pushing the whole thing back in until the drivers side header just about hits the mount tab for the stock clutch line. Put the SIKKY clutch line through the hole you drilled for it now. Then its just a dance of using the hoist to bring the engine up a bit and then raising the trans press table up to level it out. Once you clear the clutch tab, line up the bolts on the car body with the cross member holes. Usually one side will be slightly higer than the other, do the high side first (on my hoist it was the passenger side).
Get one side of the bolt to line up and then just keep hoisting and pressing until you get the heads of all 4 bolts to come through enough to get hte nuts on them and them tighten them down with the 19mm socket. I had to use a pry bar to get them to line up with my VQ, but they slid right in with the LS.
Now use the race jack to press the trans up and put the shifter through the floor. Put the SIKKY cross brace on with the angled edge facing down and the the two sides pointing to the front. We encountered some resistence getting the trans brace to line up correctly, but using a screwdriver to line the holes up to get the bolts started while manuvering the jack to push it around a bit got us home. It was at this point where I dropped the socket and it fell a hit me in the eye
Here is the final result:

If anyone has any info on hoses for coolant I would appreciate it very much!!
This Thursday we will try to get the rest of the car put together and get it back on the ground