
sintaxeror's build log - tons of PICS/No 56k!

its tough to get all the tape out to be honest, so dont worry about it, ots not going to affect anything in the long run.
my tip on building it up.
what you said is exactly true, cloth will not build it up as stiff as mat, what the cloth excels at is doing a smooth job in complexi curved areas. where as mat is great for building up rigidity and thickness.
so, you should move onto the mat here...now working wtih mat, i am sure yo uknow, is much tougher than working with cloth in this kind of shape...do this:
get 3/4 oz mat, i know you may be tempted to get thicker to build if faster, but for a shape like this, use 3/4oz/
then, cut htem into strips, say...umm..3-4" x 7-8", then use your hands and tear each strip into three pieces. you dont have to be precise, just roughly three pieces.
what this gives you is two pieces with straight edge on one side and jagged torn edge on the other and one piece with torn edgs on both.
the torn edge allows the mat to conform with curves much better than scissor cut.
so yo uuse the straight edges to do the outter permiter, where the outter edge you want to maintain a relatively clean line, and then use the fully torn pieces for hte middle nad the curves, it will go much faster.
then you can tear more pieces into either fully torn or straight/torn poieces as needed dpending on how much you need
good luck! this way gets rid of as much bubbling and lift as [possible in corners, those are dtrimental to the overall stiffness of hte box
b

Thread Starter
Registered User
iTrader: (3)
Joined: Jun 2005
Posts: 670
Likes: 0
From: St. Petersburg, FL
Originally Posted by 16psibrick
its tough to get all the tape out to be honest, so dont worry about it, ots not going to affect anything in the long run.
my tip on building it up.
what you said is exactly true, cloth will not build it up as stiff as mat, what the cloth excels at is doing a smooth job in complexi curved areas. where as mat is great for building up rigidity and thickness.
so, you should move onto the mat here...now working wtih mat, i am sure yo uknow, is much tougher than working with cloth in this kind of shape...do this:
get 3/4 oz mat, i know you may be tempted to get thicker to build if faster, but for a shape like this, use 3/4oz/
then, cut htem into strips, say...umm..3-4" x 7-8", then use your hands and tear each strip into three pieces. you dont have to be precise, just roughly three pieces.
what this gives you is two pieces with straight edge on one side and jagged torn edge on the other and one piece with torn edgs on both.
the torn edge allows the mat to conform with curves much better than scissor cut.
so yo uuse the straight edges to do the outter permiter, where the outter edge you want to maintain a relatively clean line, and then use the fully torn pieces for hte middle nad the curves, it will go much faster.
then you can tear more pieces into either fully torn or straight/torn poieces as needed dpending on how much you need
good luck! this way gets rid of as much bubbling and lift as [possible in corners, those are dtrimental to the overall stiffness of hte box
b
my tip on building it up.
what you said is exactly true, cloth will not build it up as stiff as mat, what the cloth excels at is doing a smooth job in complexi curved areas. where as mat is great for building up rigidity and thickness.
so, you should move onto the mat here...now working wtih mat, i am sure yo uknow, is much tougher than working with cloth in this kind of shape...do this:
get 3/4 oz mat, i know you may be tempted to get thicker to build if faster, but for a shape like this, use 3/4oz/
then, cut htem into strips, say...umm..3-4" x 7-8", then use your hands and tear each strip into three pieces. you dont have to be precise, just roughly three pieces.
what this gives you is two pieces with straight edge on one side and jagged torn edge on the other and one piece with torn edgs on both.
the torn edge allows the mat to conform with curves much better than scissor cut.
so yo uuse the straight edges to do the outter permiter, where the outter edge you want to maintain a relatively clean line, and then use the fully torn pieces for hte middle nad the curves, it will go much faster.
then you can tear more pieces into either fully torn or straight/torn poieces as needed dpending on how much you need
good luck! this way gets rid of as much bubbling and lift as [possible in corners, those are dtrimental to the overall stiffness of hte box
b
Thanks again bing! Keep the tips coming!
you are doing great, just be patient and dont rush things.
i dont know how many times you hae glassed before, but this project is already looking a million times better than when i first tsarted glassing, practicing by glassing bowls and any other random object i can get my hands on around the house lol...those projects ended up, for the earlier part, looking like extra cheese pizza lol
keep up the good work!
b
Thread Starter
Registered User
iTrader: (3)
Joined: Jun 2005
Posts: 670
Likes: 0
From: St. Petersburg, FL
Originally Posted by 16psibrick
you are doing great, just be patient and dont rush things.
i dont know how many times you hae glassed before, but this project is already looking a million times better than when i first tsarted glassing, practicing by glassing bowls and any other random object i can get my hands on around the house lol...those projects ended up, for the earlier part, looking like extra cheese pizza lol
keep up the good work!
b
i dont know how many times you hae glassed before, but this project is already looking a million times better than when i first tsarted glassing, practicing by glassing bowls and any other random object i can get my hands on around the house lol...those projects ended up, for the earlier part, looking like extra cheese pizza lol
keep up the good work!
b
You don't have to worry about me rushing things, I used a whole summer for that one

Thread Starter
Registered User
iTrader: (3)
Joined: Jun 2005
Posts: 670
Likes: 0
From: St. Petersburg, FL
3/3/08 Evening Update
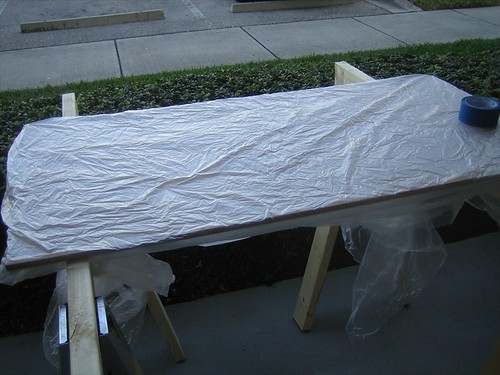
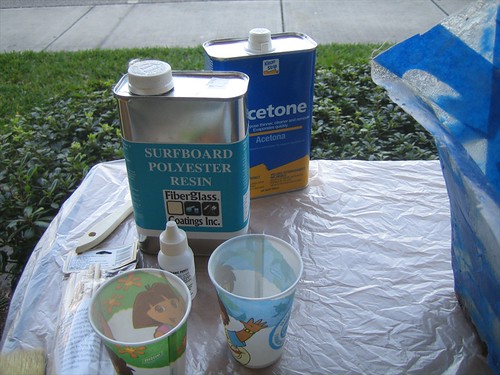
My work bench...
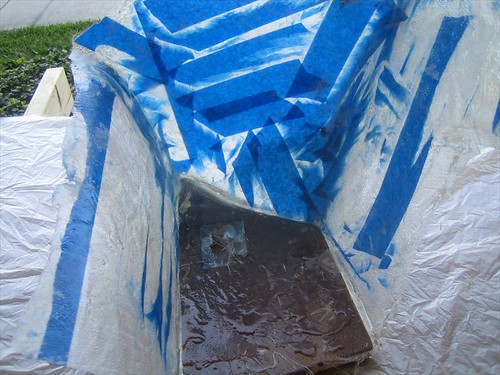
The shell.. there are some spots i ground down to prevent air bubbles (i.e. stray strands that cured poking out)..
More stuff...
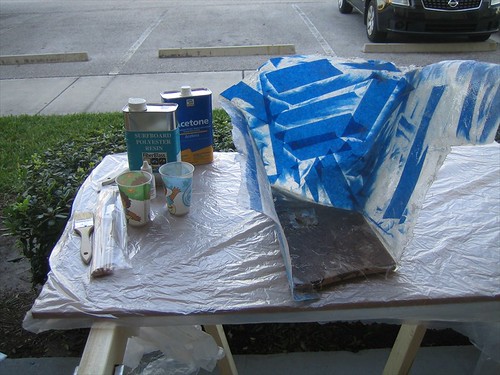
When I thought I would only need a quart of resin (back when I assumed I would be able to build primarily of wood), I got the surf board resin because it came in a bottle, and the regular resin came in a paint can type container.. The guy at the shop assured me it would be fine. you can see that it is very clear and colorless. I have since switched to regular since I went and got a gallon jug today.
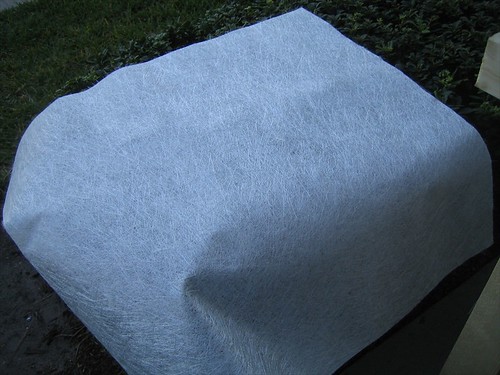
Big piece of chop mat..1.5oz
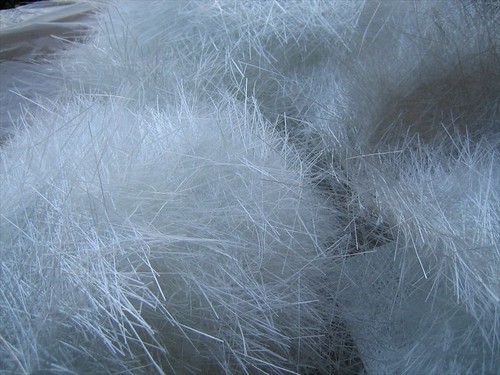
Torn into pieces
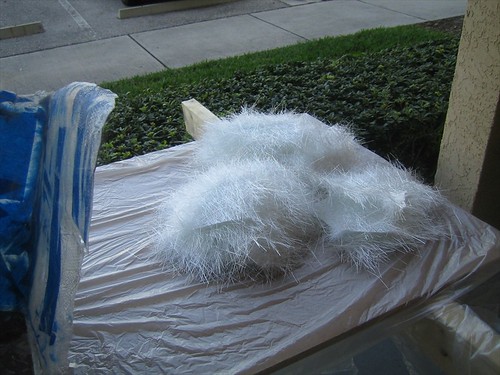
You can see how it frays out when you tear it...
Then I started glassing.. and didn't stop until I ran out of light. I think this ought to be enough for this part, but we'll see how rigid it is tomorrow.
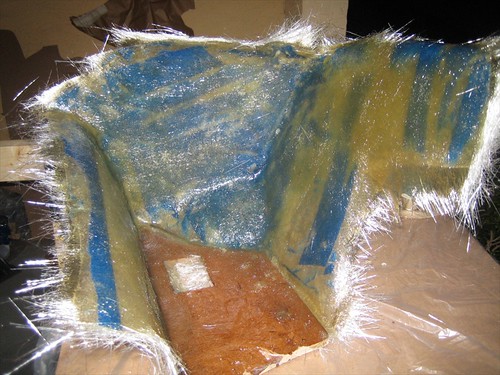
Not sure how many layers it was.. Some where around a buttload, give or take.
My work bench...
The shell.. there are some spots i ground down to prevent air bubbles (i.e. stray strands that cured poking out)..
More stuff...
When I thought I would only need a quart of resin (back when I assumed I would be able to build primarily of wood), I got the surf board resin because it came in a bottle, and the regular resin came in a paint can type container.. The guy at the shop assured me it would be fine. you can see that it is very clear and colorless. I have since switched to regular since I went and got a gallon jug today.
Big piece of chop mat..1.5oz
Torn into pieces
You can see how it frays out when you tear it...
Then I started glassing.. and didn't stop until I ran out of light. I think this ought to be enough for this part, but we'll see how rigid it is tomorrow.
Not sure how many layers it was.. Some where around a buttload, give or take.
Thread Starter
Registered User
iTrader: (3)
Joined: Jun 2005
Posts: 670
Likes: 0
From: St. Petersburg, FL
I took all the updates out of the first post.. it was getting unruly. I will add them all into the first post again when the entire build is done. For not I will just update in posts. Feel free to make comments!


nice, i seen this on the ...-tech.com site in teh sub photo section and love it for 8"s but i'm trying to decide if I want to do 8s or 10s. what are you planning on dropping in there? wanna build 2? 
Thread Starter
Registered User
iTrader: (3)
Joined: Jun 2005
Posts: 670
Likes: 0
From: St. Petersburg, FL
Originally Posted by iamdigital
nice, i seen this on the ...-tech.com site in teh sub photo section and love it for 8"s but i'm trying to decide if I want to do 8s or 10s. what are you planning on dropping in there? wanna build 2?

Thread Starter
Registered User
iTrader: (3)
Joined: Jun 2005
Posts: 670
Likes: 0
From: St. Petersburg, FL
UPDATE 3/4/08 Evening
Just a little update this evening.. didn't get much done tonight because of the weather and because I had to stay a little later at work today.
Trimmed off all the frays

Washed off all the dust... I'll put it back in the car to check for warping after its dry.. Although I don't know if it will dry off tonight in this weather.
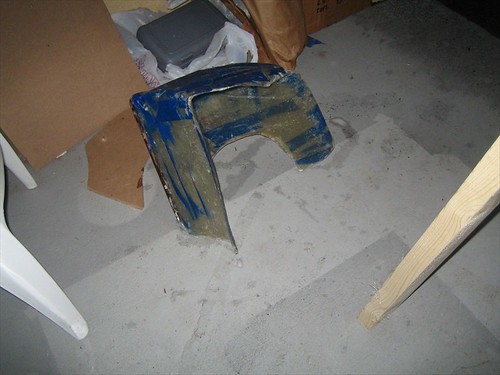
Thats it for now, stay tuned I might be able to get a little test fit in tonight...
Just a little update this evening.. didn't get much done tonight because of the weather and because I had to stay a little later at work today.
Trimmed off all the frays
Washed off all the dust... I'll put it back in the car to check for warping after its dry.. Although I don't know if it will dry off tonight in this weather.
Thats it for now, stay tuned I might be able to get a little test fit in tonight...
Thread Starter
Registered User
iTrader: (3)
Joined: Jun 2005
Posts: 670
Likes: 0
From: St. Petersburg, FL
UPDATE 3/4/08 Night
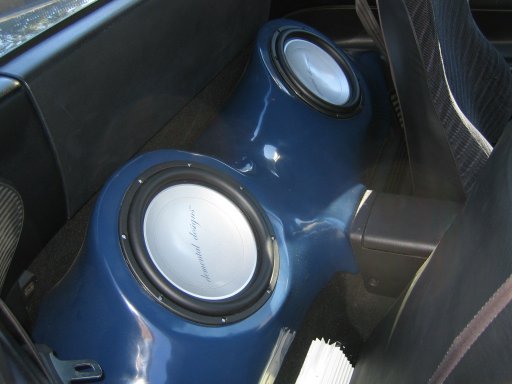
Well it did end up drying up so I test fit it in the car...
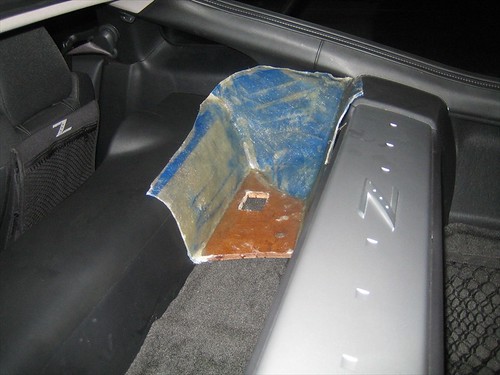
Looks good...
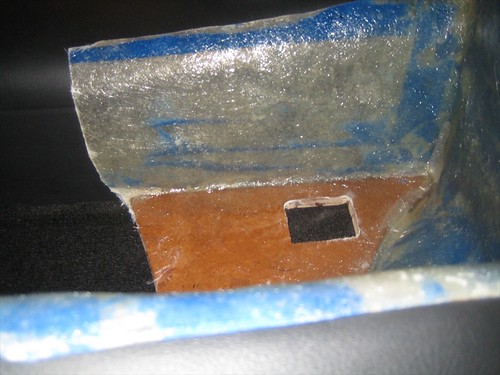
Ah crap.. it warped. Check out the gap at the bottom.
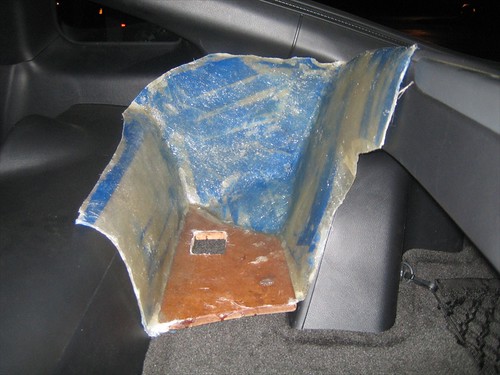
Upon further inspection.. it looks like that little lip at the top is holding it up. I think this problem will correct itself after more trimming.... if not, I will find a way to fix it.. even if I just have to add some material to the base or something.
Well it did end up drying up so I test fit it in the car...
Looks good...
Ah crap.. it warped. Check out the gap at the bottom.
Upon further inspection.. it looks like that little lip at the top is holding it up. I think this problem will correct itself after more trimming.... if not, I will find a way to fix it.. even if I just have to add some material to the base or something.
