
How to: mold a body kit


Thread Starter
Registered User
iTrader: (4)
Joined: Mar 2006
Posts: 1,204
Likes: 0
From: south-central KY
Since we're at the end of the first part of the thing I guess I can answer some questions.
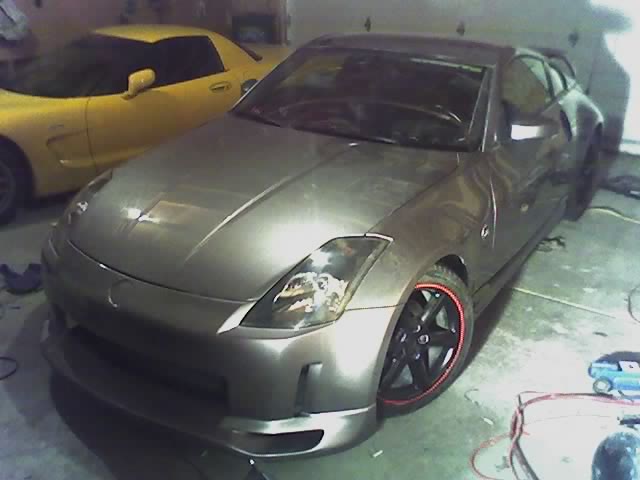
My dad got it from Ebay back when he first got his car. The fitment was horrible so he went stock. I'm just improvising with them a little.
There will be no line when I get to the molding part. As shown in the first pic of the skirt that line comes on the Nismo skirts, which is the only thing I don't like about the Nismo.
Originally Posted by bugsbbunny
Damn where'd you get that kit. Please tell so we don't buy from them.
Originally Posted by creationv2
awesome...now if you get that stupid line from the nismo skirt to disappear when all is sanded and painted itll look siiiiiiick!
Last edited by 03Zilverstone; Mar 2, 2007 at 07:49 PM.
Thread Starter
Registered User
iTrader: (4)
Joined: Mar 2006
Posts: 1,204
Likes: 0
From: south-central KY
Originally Posted by Netko350Z
Holy glue batman!
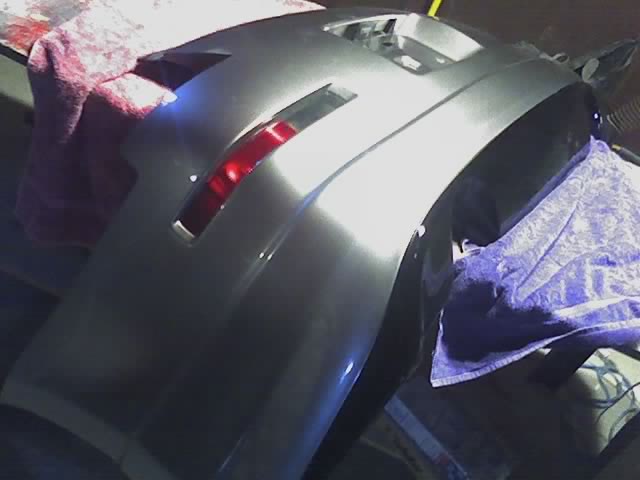
It's held the two pieces of my dad's bumper cover together long enough.

It's a urethane adhesive by the way. And the runs will be sanded off when I let it all cure up for a few days. It just ran out of the holes I drilled.
Thread Starter
Registered User
iTrader: (4)
Joined: Mar 2006
Posts: 1,204
Likes: 0
From: south-central KY
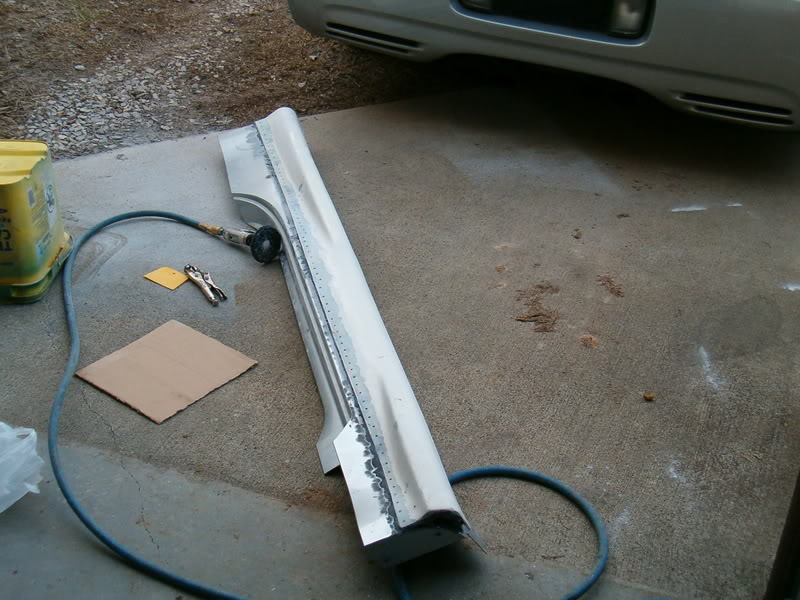
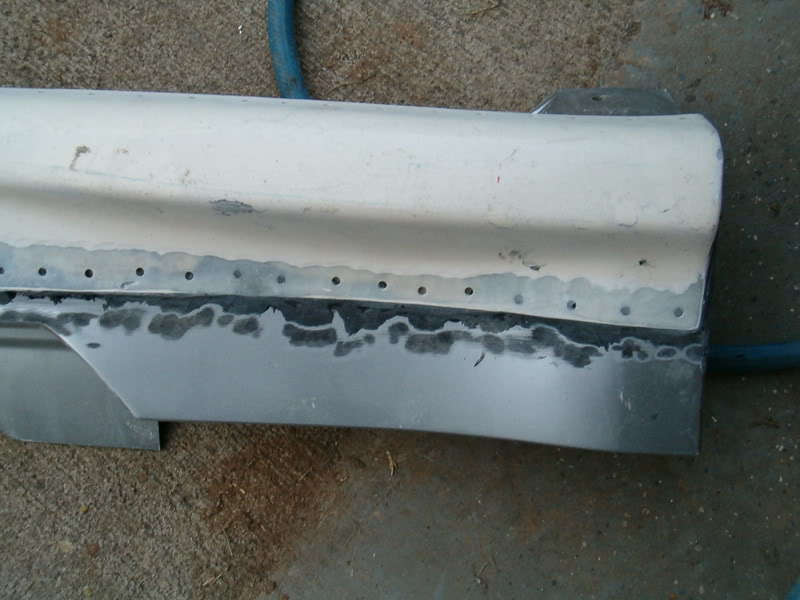
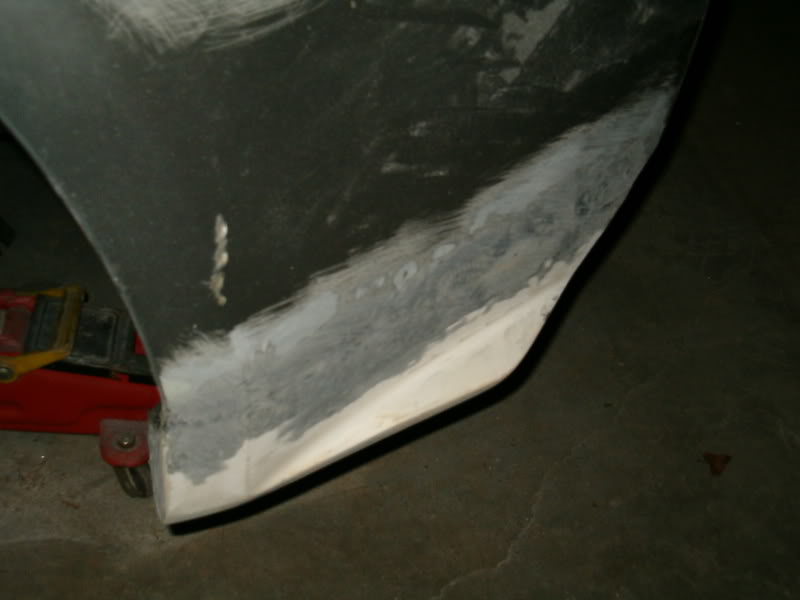
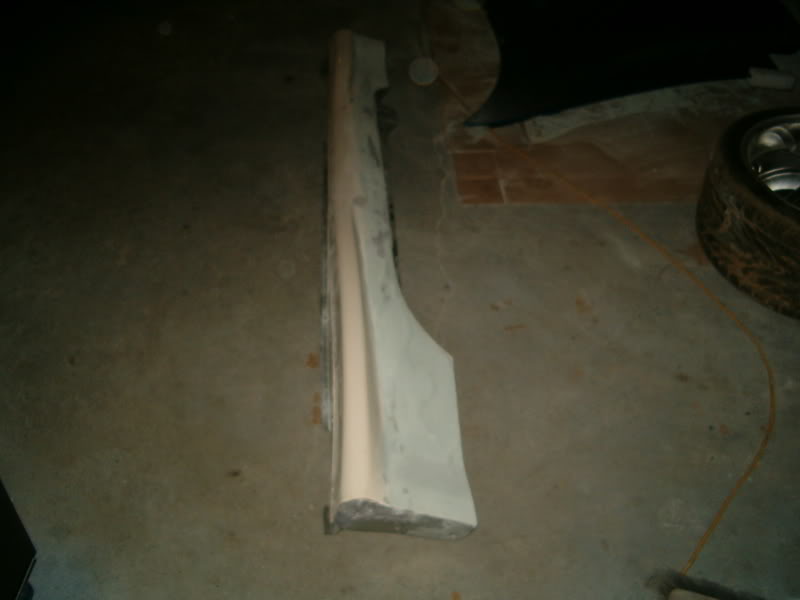
Okay. I picked up some Evercoat Fiber-Tech fiberglass filler yesterday and a course sanding wheel today.
First use the sanding wheel to grind the adhesive down and get the gel coat off the top 2" or so and also the same amount up of the moulding. Then use the 60 grit paper and scuff up a little more.
First use the sanding wheel to grind the adhesive down and get the gel coat off the top 2" or so and also the same amount up of the moulding. Then use the 60 grit paper and scuff up a little more.
Thread Starter
Registered User
iTrader: (4)
Joined: Mar 2006
Posts: 1,204
Likes: 0
From: south-central KY
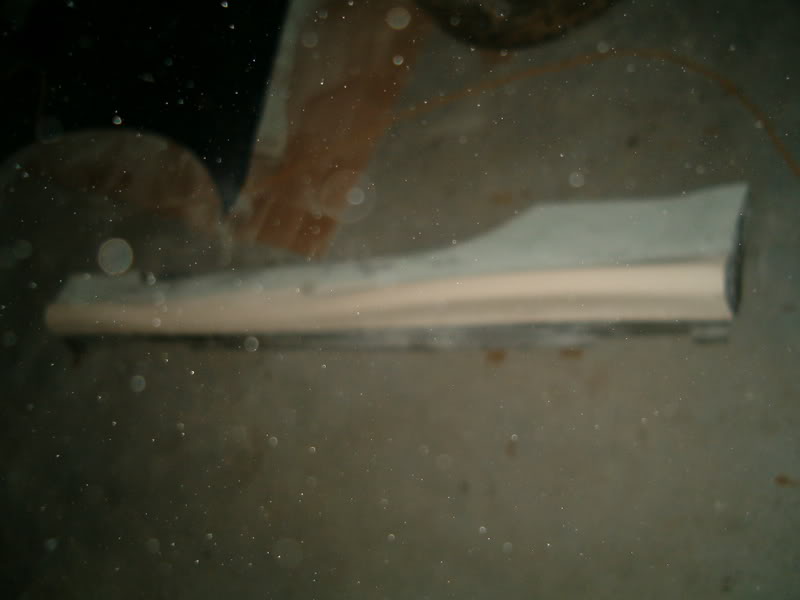
Next mix up some fiberglass filler and spread it along the edge. Don't worry about getting it perfect, since there will be some light weight body filler over top of it. Be sure not to get it past the sanded area though. The process is the same for the rear flares and side skirts.

Registered User
Joined: Jan 2007
Posts: 103
Likes: 0
From: Japan
I dont meen to be a critic and am wondering if you are doing this to make a mold for a new peice or if this is your product in the begining stages.
If this is for a mold and production peice carry on.
However if this is how you are laying the ground work for a final part I have to say this is not in anyones best intrest for a molded look.
Let me explain.
You have used a two component epoxy over a sanded painted surface. The only adheaision you have there is the adheision of the paint to the factory part. On top of that you have also done the same with kitty hair trying to blend the two parts togeather. Another thing I would like to point out is that your side skirt was done off the car with a warpped peice being bonded to a semi rigid peice. I doubt you will retain the fitment that you had with the factory part.
If your intention is to use these peices to make a mold then a mock up like this is acceptable, But if this is a DIY on moling pannles then it is not a quality proceedure and this will fail soon. It will crack out and it will take allot of time to make smooth enough for a descriminating Z enthusiast.
Thread Starter
Registered User
iTrader: (4)
Joined: Mar 2006
Posts: 1,204
Likes: 0
From: south-central KY
Originally Posted by DXJP
I dont meen to be a critic and am wondering if you are doing this to make a mold for a new peice or if this is your product in the begining stages.
If this is for a mold and production peice carry on.
However if this is how you are laying the ground work for a final part I have to say this is not in anyones best intrest for a molded look.
Let me explain.
You have used a two component epoxy over a sanded painted surface. The only adheaision you have there is the adheision of the paint to the factory part. On top of that you have also done the same with kitty hair trying to blend the two parts togeather. Another thing I would like to point out is that your side skirt was done off the car with a warpped peice being bonded to a semi rigid peice. I doubt you will retain the fitment that you had with the factory part.
If your intention is to use these peices to make a mold then a mock up like this is acceptable, But if this is a DIY on moling pannles then it is not a quality proceedure and this will fail soon. It will crack out and it will take allot of time to make smooth enough for a descriminating Z enthusiast.
If this is for a mold and production peice carry on.
However if this is how you are laying the ground work for a final part I have to say this is not in anyones best intrest for a molded look.
Let me explain.
You have used a two component epoxy over a sanded painted surface. The only adheaision you have there is the adheision of the paint to the factory part. On top of that you have also done the same with kitty hair trying to blend the two parts togeather. Another thing I would like to point out is that your side skirt was done off the car with a warpped peice being bonded to a semi rigid peice. I doubt you will retain the fitment that you had with the factory part.
If your intention is to use these peices to make a mold then a mock up like this is acceptable, But if this is a DIY on moling pannles then it is not a quality proceedure and this will fail soon. It will crack out and it will take allot of time to make smooth enough for a descriminating Z enthusiast.
Registered User
Joined: Jan 2007
Posts: 103
Likes: 0
From: Japan
I was just mentioning this because it was in the DIY section. I was just showing concern because the processes are not the appropriate ones but doable. I have done a few of these jobs you could look at my other posts. I think I even have a vid of some of my work posted.
Good luck wanting to see the finished product.
Good luck wanting to see the finished product.
damn, me n u r in the same boat. i bought a ****ty fiberglass trial kit a while ago, and had 2 mold it on due to fitment issues. however i used tiny pop rivets, and u can never tell they were there. my sideskirts were the biggest pain in the *** ever! heres a couple pics. this was b4 i got my turbo setup. i also did my center console, door handles, engine covers, etc. all the work was done in my garage, and it was painted by me in a friends paint booth, and baked on of course. btw is the corvette a z06?


o also, when u put the holes there, did u drill tiny holes on both the factory and after marhet pieces?? i did this 2 let sum resin drip thru, so its stays solid thru and thru
Thread Starter
Registered User
iTrader: (4)
Joined: Mar 2006
Posts: 1,204
Likes: 0
From: south-central KY
I just drilled them to the fiberglass. The stuff I use sticks to urethane like concrete. It sticks to the fiberglass real good, but not as much as the urethane. Looks good though. The Vette is just a regular C5 I'm fixing for someone. There are some more pics in the other vehicles section. The thread's called "New vehicle in the shop" or something to that effect.

Is it preferable to bond urethane parts to the urethane OEM bumper?
(instead of fiberglass to urethane?)
Nice write up....DXJP, I know you have some expertise in this area too.
(instead of fiberglass to urethane?)
Nice write up....DXJP, I know you have some expertise in this area too.
Thread Starter
Registered User
iTrader: (4)
Joined: Mar 2006
Posts: 1,204
Likes: 0
From: south-central KY
Originally Posted by 05-Z
Is it preferable to bond urethane parts to the urethane OEM bumper?
(instead of fiberglass to urethane?)
Nice write up....DXJP, I know you have some expertise in this area too.
(instead of fiberglass to urethane?)
Nice write up....DXJP, I know you have some expertise in this area too.
Preferable in the fact that urethane is more reliable than fiberglass. The bonding part doesn't matter much. If you get the right stuff it will bond to both well. Before I got to far in I just did the drivers side rear flare. When it cured up good I grabbed the flare and aggressively shook it all around and it held good.
Thread Starter
Registered User
iTrader: (4)
Joined: Mar 2006
Posts: 1,204
Likes: 0
From: south-central KY
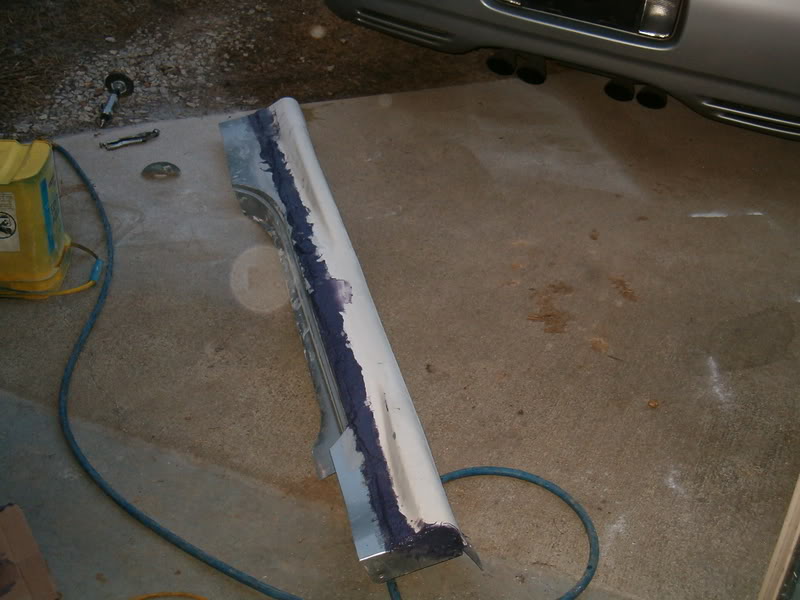
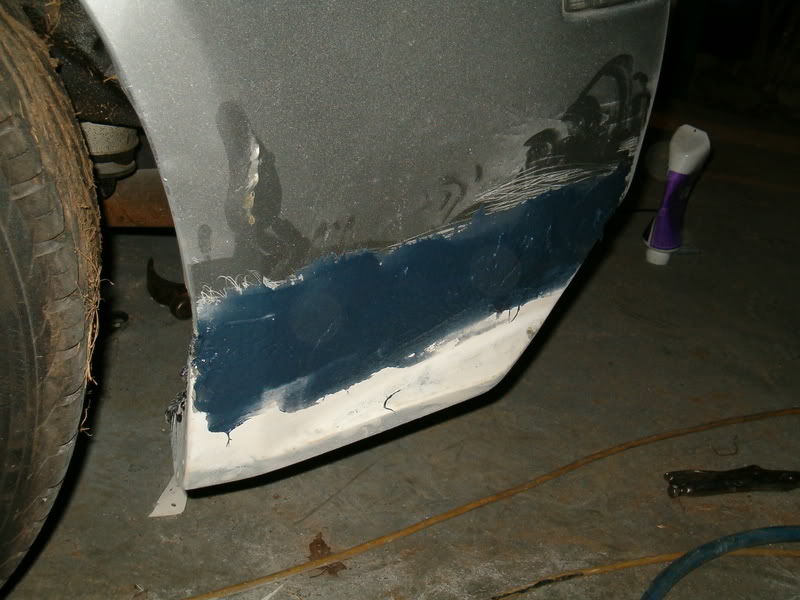
Okay, after the fiberglass filler cures up good use the sanding wheel and grind it down to where it matches the contour pretty good. Then use a long block with 36 grit to knock down the high spots. It doesn't have to be perfect.
Thread Starter
Registered User
iTrader: (4)
Joined: Mar 2006
Posts: 1,204
Likes: 0
From: south-central KY
Next sand out a bit with 36 grit and apply some lightweight body filler. When it cures up good use a long block and 36 grit to sand it down how it needs to be. You may have to apply a few coats to get it perfect. Be sure all areas are sanded with 36 before putting a new coat over that.

are you planning on making a part off of this, or are you just attaching the ebay parts to the stock parts and then just painting over it?
with all that glue/glass/primer, that thing is gonna be heavy, no?
with all that glue/glass/primer, that thing is gonna be heavy, no?
Thread Starter
Registered User
iTrader: (4)
Joined: Mar 2006
Posts: 1,204
Likes: 0
From: south-central KY
Originally Posted by Chebosto
are you planning on making a part off of this, or are you just attaching the ebay parts to the stock parts and then just painting over it?
with all that glue/glass/primer, that thing is gonna be heavy, no?
with all that glue/glass/primer, that thing is gonna be heavy, no?
The glue isn't really that bad, but yes the fiberglass filler does add a bit of weight. It shouldn't be awfully heavy though.
