Notices

How to: mold a body kit

Thread Tools
 
Search this Thread
 
Old Mar 1, 2007 | 12:30 PM
  #1  
03Zilverstone's Avatar
03Zilverstone
Thread Starter
Registered User
iTrader: (4)
 
Joined: Mar 2006
Posts: 1,204
Likes: 0
From: south-central KY
Default How to: mold a body kit

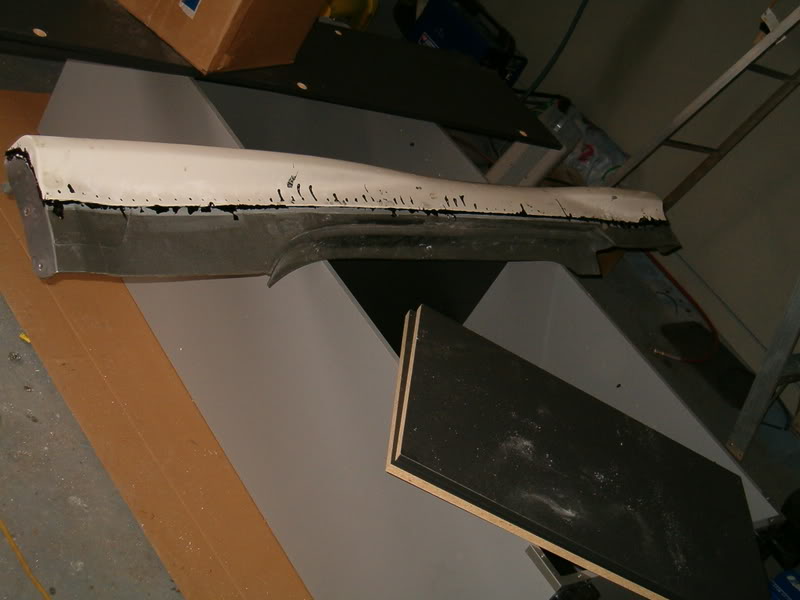
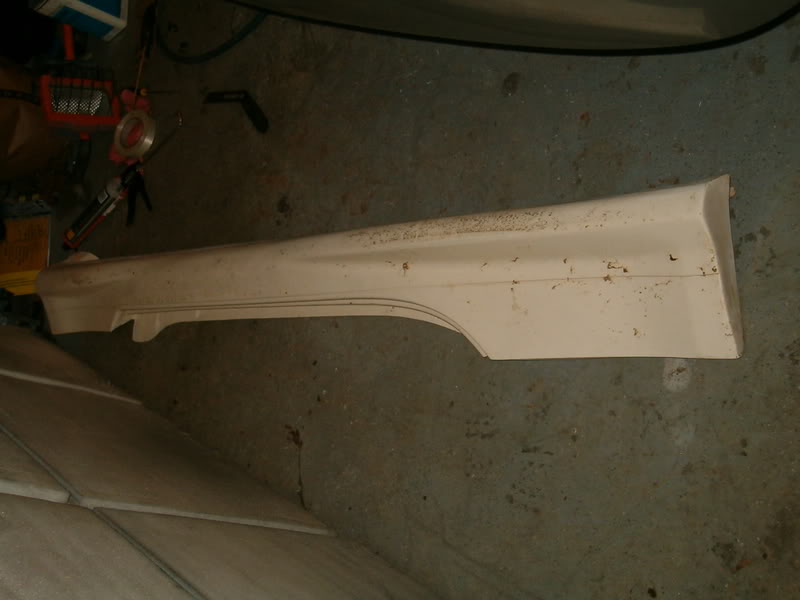
My dad bought a crappy Nismo replica back when he was fixing his car. The fitment was horrible, so we put it up in the barn. Well I decided to do a little something with it. I'm going to mold the rear into the bumper cover. The flares on the side skirt will be cut off and molded onto the stock skirts. The fitment was so bad that there was almost no way to get it to look right by fitting the skirt. This will make it stronger than a regular FPR skirt, since it has the urethane backing. I'm not even going to mess with the front bumper cover. It would be a waste of my time to fit it and have it break the first time out. I'll probably pick up a V1 replica from Evo-r. I'll also be adding a G spoiler.
Reply
Old Mar 1, 2007 | 12:31 PM
  #2  
03Zilverstone's Avatar
03Zilverstone
Thread Starter
Registered User
iTrader: (4)
 
Joined: Mar 2006
Posts: 1,204
Likes: 0
From: south-central KY
Default

Here's where we start. The bumper cover was off a parts car and I know there are a few dents in it. Those will be fixed after I take care of the flares.

Name:  asdfjkl002.jpg
Views: 957
Size:  40.3 KB
Reply
Old Mar 1, 2007 | 12:33 PM
  #3  
03Zilverstone's Avatar
03Zilverstone
Thread Starter
Registered User
iTrader: (4)
 
Joined: Mar 2006
Posts: 1,204
Likes: 0
From: south-central KY
Default

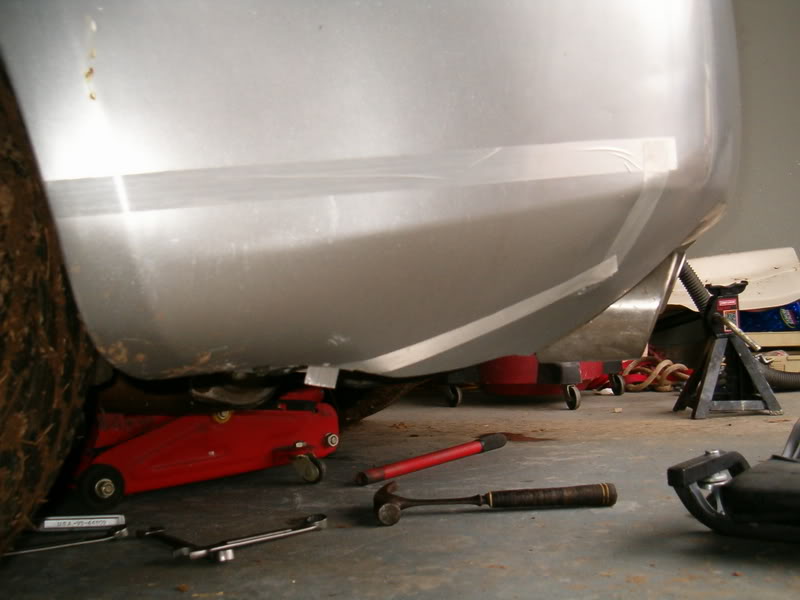
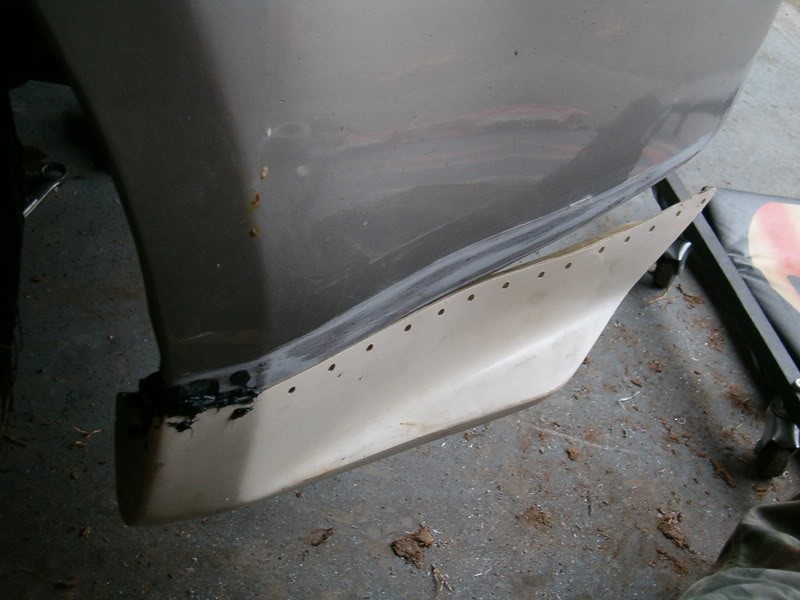
Next you will position the flare on the cover where it needs to go. Use some tape to mark the edge of the flare. You will need to allow an extra half inch or so. You'll see why later.

Name:  asdfjkl003.jpg
Views: 960
Size:  46.5 KB
Reply
Old Mar 1, 2007 | 12:35 PM
  #4  
03Zilverstone's Avatar
03Zilverstone
Thread Starter
Registered User
iTrader: (4)
 
Joined: Mar 2006
Posts: 1,204
Likes: 0
From: south-central KY
Default

Now you will drill some holes through the flare about an inch apart on the outer edge. This will aid the adhesion.

Name:  asdfjkl004.jpg
Views: 1021
Size:  37.6 KB
Reply
Old Mar 1, 2007 | 12:36 PM
  #5  
03Zilverstone's Avatar
03Zilverstone
Thread Starter
Registered User
iTrader: (4)
 
Joined: Mar 2006
Posts: 1,204
Likes: 0
From: south-central KY
Default

Now place the flare on the cover again and mark what needs to be trimmed on the inside part where the fender well is.

Name:  asdfjkl005.jpg
Views: 932
Size:  31.3 KB
Reply
Old Mar 1, 2007 | 12:37 PM
  #6  
03Zilverstone's Avatar
03Zilverstone
Thread Starter
Registered User
iTrader: (4)
 
Joined: Mar 2006
Posts: 1,204
Likes: 0
From: south-central KY
Default

Trim the flare and place it up to make sure the cut is right. I used a pnuematic cut off wheel.

Name:  asdfjkl006.jpg
Views: 923
Size:  29.0 KB
Reply
Old Mar 1, 2007 | 12:40 PM
  #7  
03Zilverstone's Avatar
03Zilverstone
Thread Starter
Registered User
iTrader: (4)
 
Joined: Mar 2006
Posts: 1,204
Likes: 0
From: south-central KY
Default

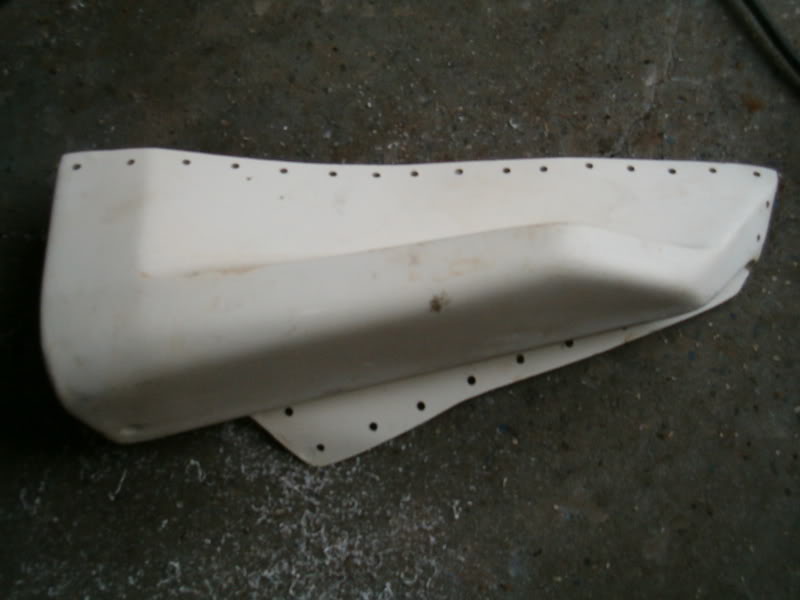
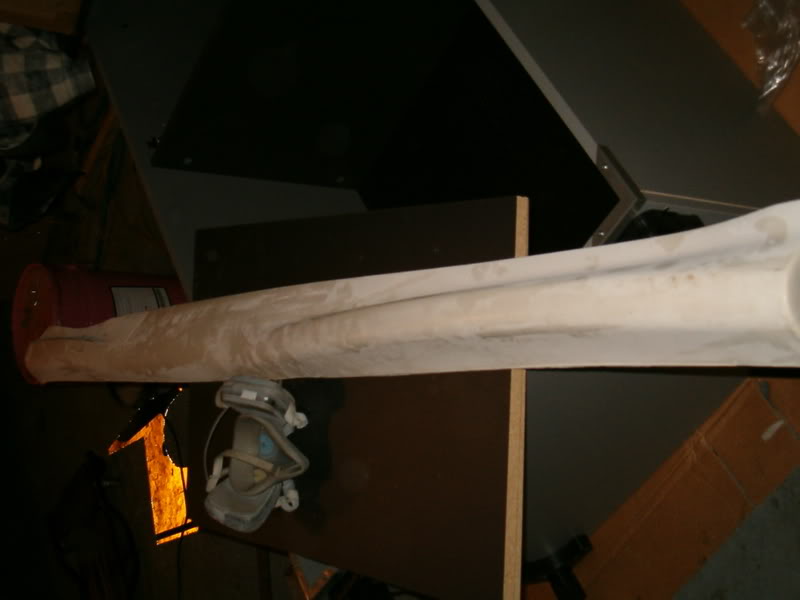
Here's where the tape comes into play. You will need to sand down the area that the adhesive will bond to. The adhesive I used recommended 80 grit, but I went ahead and used 36 since I'll be putting some kitty hair on it to get the mold smooth anyway. Also make sure you go down to the urethane. The adhesive will bond a lot better to that than paint. The reason I didn't go all the way through in the middle is because the adhesive probably won't seap that far down, but if it does sanding it will give it a little something to bite to. Also wipe the area down with a pre paint cleaner before you try to bond the flare. I use PPG Acryli-Clean.

Name:  asdfjkl007.jpg
Views: 931
Size:  44.4 KB

Last edited by 03Zilverstone; Mar 1, 2007 at 12:45 PM.
Reply
Old Mar 1, 2007 | 12:44 PM
  #8  
03Zilverstone's Avatar
03Zilverstone
Thread Starter
Registered User
iTrader: (4)
 
Joined: Mar 2006
Posts: 1,204
Likes: 0
From: south-central KY
Default

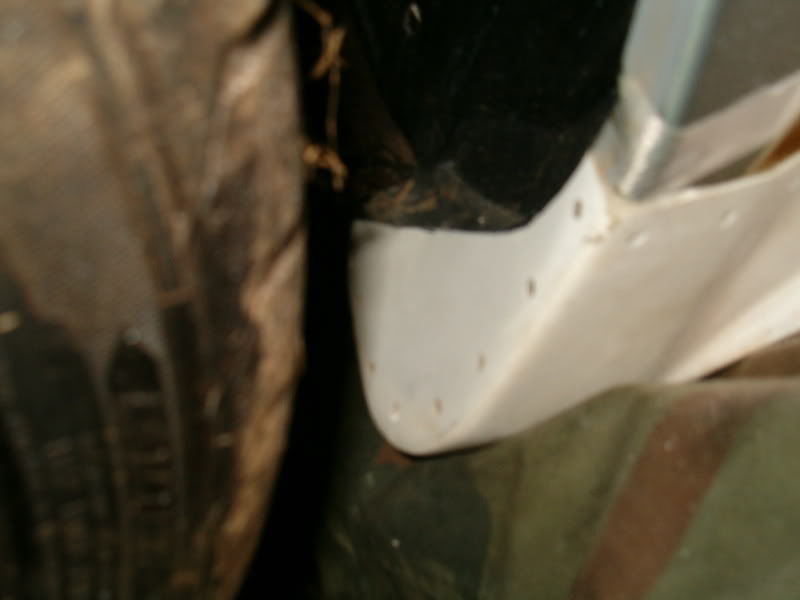
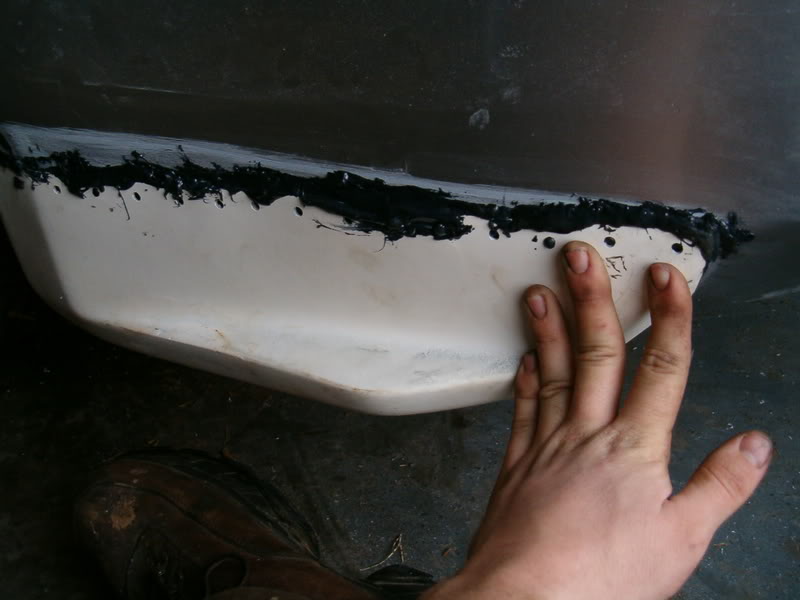
Now you'll start to bond the flare to the cover. You'll want to do a section at a time, since the flare won't fit perfect against the bumper cover. I found it best to start at the fender well area. Be sure to hold the flare in place until the adhesive gets hard. Also don't rely on tape. I just put that on there as extra precaution after I held it until I felt it was hard enough.

Name:  asdfjkl008.jpg
Views: 916
Size:  58.5 KB

Last edited by 03Zilverstone; Mar 1, 2007 at 12:49 PM.
Reply
Old Mar 1, 2007 | 12:46 PM
  #9  
03Zilverstone's Avatar
03Zilverstone
Thread Starter
Registered User
iTrader: (4)
 
Joined: Mar 2006
Posts: 1,204
Likes: 0
From: south-central KY
Default

Here it is with the first section dry. This pic shows why it's easier to do a section at a time.

Name:  asdfjkl009.jpg
Views: 934
Size:  55.2 KB
Reply
Old Mar 1, 2007 | 12:48 PM
  #10  
03Zilverstone's Avatar
03Zilverstone
Thread Starter
Registered User
iTrader: (4)
 
Joined: Mar 2006
Posts: 1,204
Likes: 0
From: south-central KY
Default

Now I'm working the rest of the top part. Again hold it until it's fully hard. If you let go to soon the flare will pull out an make that area stick out.

Name:  asdfjkl010.jpg
Views: 961
Size:  44.2 KB
Reply
Old Mar 1, 2007 | 12:52 PM
  #11  
03Zilverstone's Avatar
03Zilverstone
Thread Starter
Registered User
iTrader: (4)
 
Joined: Mar 2006
Posts: 1,204
Likes: 0
From: south-central KY
Default

Now that the top is secure we can work on the bottom. This lip is a little off and excessive anyway. I'll just cut part of it off.

Name:  asdfjkl011.jpg
Views: 864
Size:  81.1 KB
Reply
Old Mar 1, 2007 | 12:55 PM
  #12  
03Zilverstone's Avatar
03Zilverstone
Thread Starter
Registered User
iTrader: (4)
 
Joined: Mar 2006
Posts: 1,204
Likes: 0
From: south-central KY
Default

Now we've got the driver's side rear flare fully bonded. The other side will be done the same way.

Name:  asdfjkl012.jpg
Views: 929
Size:  36.8 KB
Reply
Old Mar 1, 2007 | 01:19 PM
  #13  
03Zilverstone's Avatar
03Zilverstone
Thread Starter
Registered User
iTrader: (4)
 
Joined: Mar 2006
Posts: 1,204
Likes: 0
From: south-central KY
Default

I've got to go to a play now. I'll post updates as they come.
Reply
Old Mar 2, 2007 | 12:19 PM
  #14  
03Zilverstone's Avatar
03Zilverstone
Thread Starter
Registered User
iTrader: (4)
 
Joined: Mar 2006
Posts: 1,204
Likes: 0
From: south-central KY
Default

On to the side skirts. We all know how they start out.

Name:  asdfjkl014.jpg
Views: 861
Size:  38.2 KB
Reply
Old Mar 2, 2007 | 12:21 PM
  #15  
03Zilverstone's Avatar
03Zilverstone
Thread Starter
Registered User
iTrader: (4)
 
Joined: Mar 2006
Posts: 1,204
Likes: 0
From: south-central KY
Default

I cut it right along the line in the skirt that runs parallel to the door. I also cut it at the bottom right at the edge where it starts to curve back up.

Name:  asdfjkl013.jpg
Views: 880
Size:  30.9 KB
Reply
Old Mar 2, 2007 | 12:24 PM
  #16  
03Zilverstone's Avatar
03Zilverstone
Thread Starter
Registered User
iTrader: (4)
 
Joined: Mar 2006
Posts: 1,204
Likes: 0
From: south-central KY
Default

(Not pictured)
Just like the rear flare drill holes every inch or so close to the edge, then sand the inside edge.
Reply
Old Mar 2, 2007 | 12:26 PM
  #17  
03Zilverstone's Avatar
03Zilverstone
Thread Starter
Registered User
iTrader: (4)
 
Joined: Mar 2006
Posts: 1,204
Likes: 0
From: south-central KY
Default

Mark off and sand the rocker moulding where adhesive will go. Also trim the ends of the flares to sit flush with the rocker.

Name:  asdfjkl015.jpg
Views: 1295
Size:  49.6 KB
Reply
Old Mar 2, 2007 | 12:28 PM
  #18  
03Zilverstone's Avatar
03Zilverstone
Thread Starter
Registered User
iTrader: (4)
 
Joined: Mar 2006
Posts: 1,204
Likes: 0
From: south-central KY
Default

Clean the rocker and flare edge and start bonding it doing about a foot at a time. Be sure one section fully hardens before moving on. I found it best to start at the top front.

Name:  asdfjkl016.jpg
Views: 907
Size:  56.2 KB
Reply
Old Mar 2, 2007 | 12:32 PM
  #19  
03Zilverstone's Avatar
03Zilverstone
Thread Starter
Registered User
iTrader: (4)
 
Joined: Mar 2006
Posts: 1,204
Likes: 0
From: south-central KY
Default

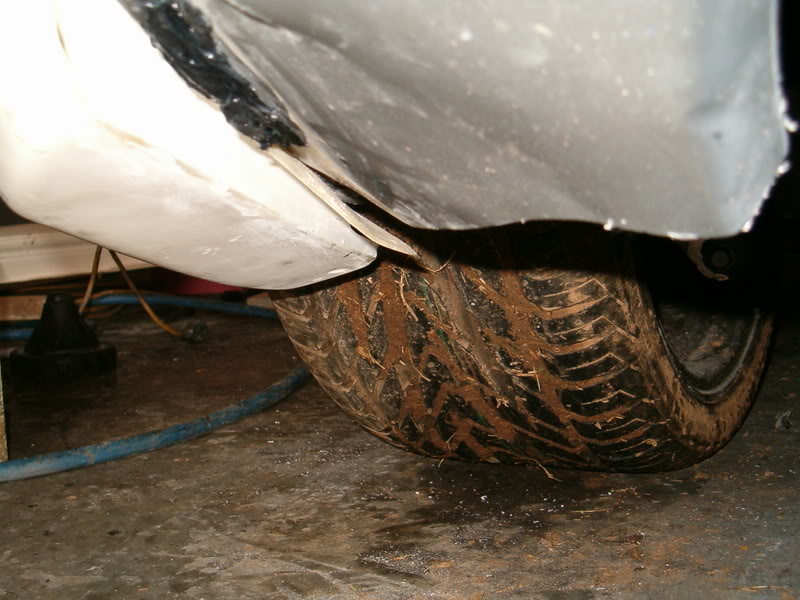
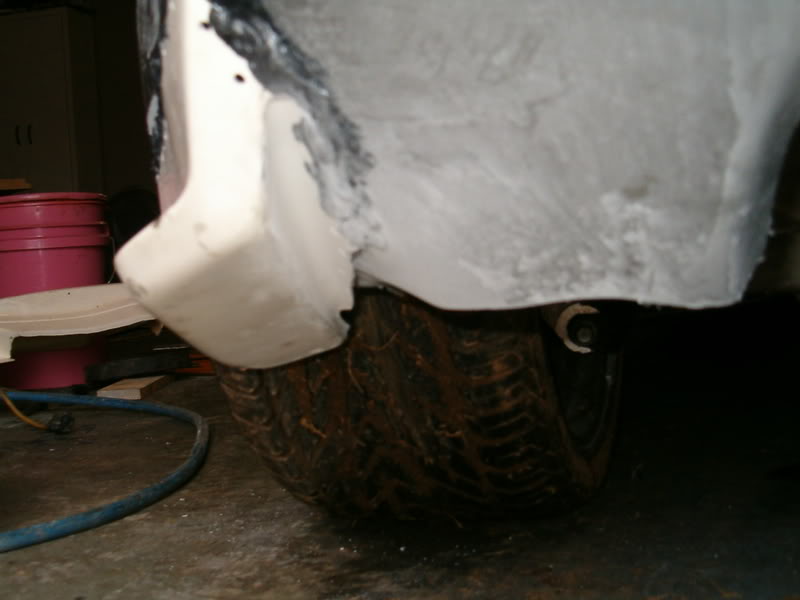
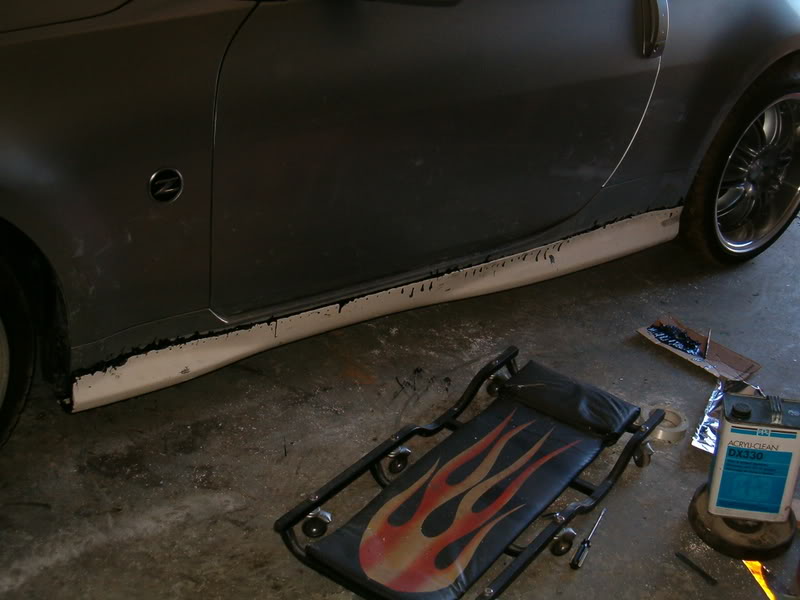
When done with the top and ends remove the rocker moulding. Now you can bond the bottom section. Because of the excellent fitment of these replicas I have an inch gap in the middle of the bottom side. That will be taken care of later with a little fiberglass mat and resin.

Name:  asdfjkl017.jpg
Views: 841
Size:  44.5 KB
Reply
Old Mar 2, 2007 | 02:42 PM
  #20  
Mazinger Z's Avatar
Mazinger Z
New Member
iTrader: (49)
 
Joined: Dec 2005
Posts: 6,712
Likes: 1
From: Los Angeles
Default

Damn where'd you get that kit. Please tell so we don't buy from them.
Reply


All times are GMT -8. The time now is 08:01 AM.