
DIY: TS Rear Diffuser Installation Instructions


anyone got pics of this installed w/ hks rep exhaust?
mines is coming this week and want to get it installed.
also if anyone know where to exactly cut the diffuser so it fits perfect w/ hks rep exhaust
mines is coming this week and want to get it installed.
also if anyone know where to exactly cut the diffuser so it fits perfect w/ hks rep exhaust
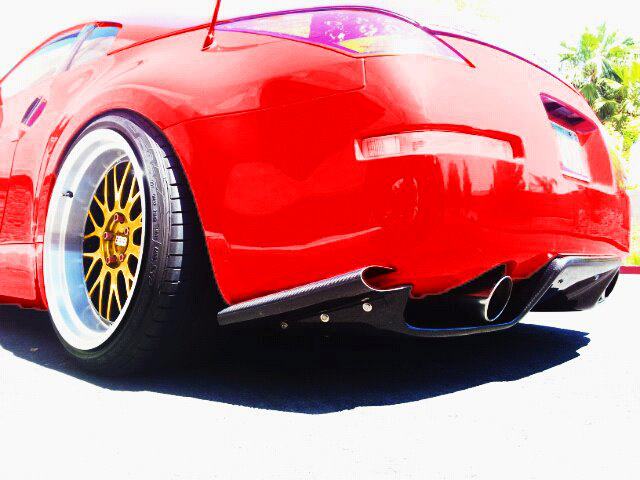

[QUOTE=350zbehold;9722995]the hks need alot of cutting but it fit....therefore more cutting to the diffuser mean less stabilize the diffuser will be here is mine
Incorrect barely any cutting involved at all. I am running this diffuser with my HKS Hi Power Ti true dual.
Pics of where to cut are below:
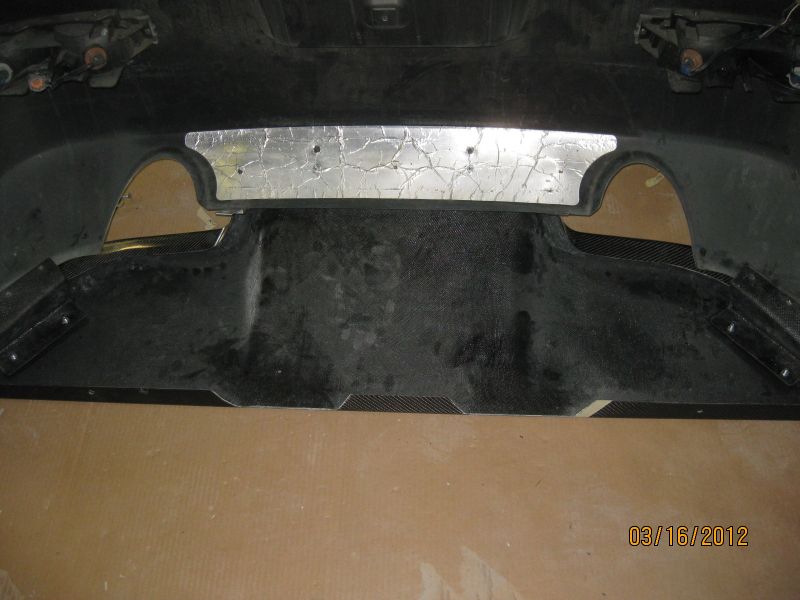
You can see you only need to notch the lip on the back side for the canisters.
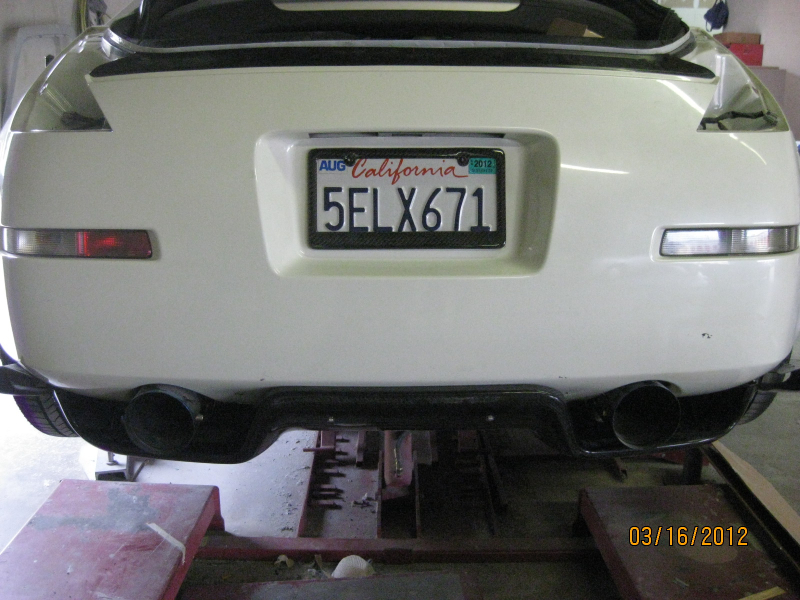
Test fit shots:
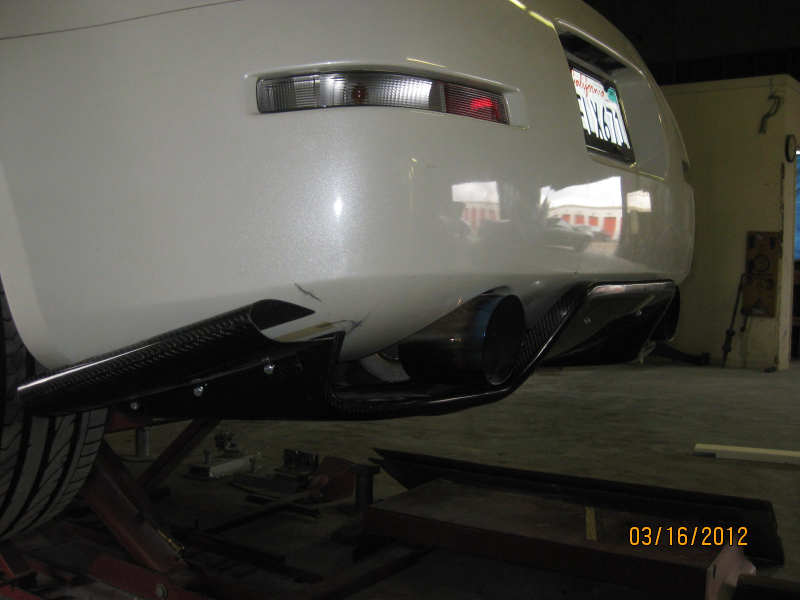
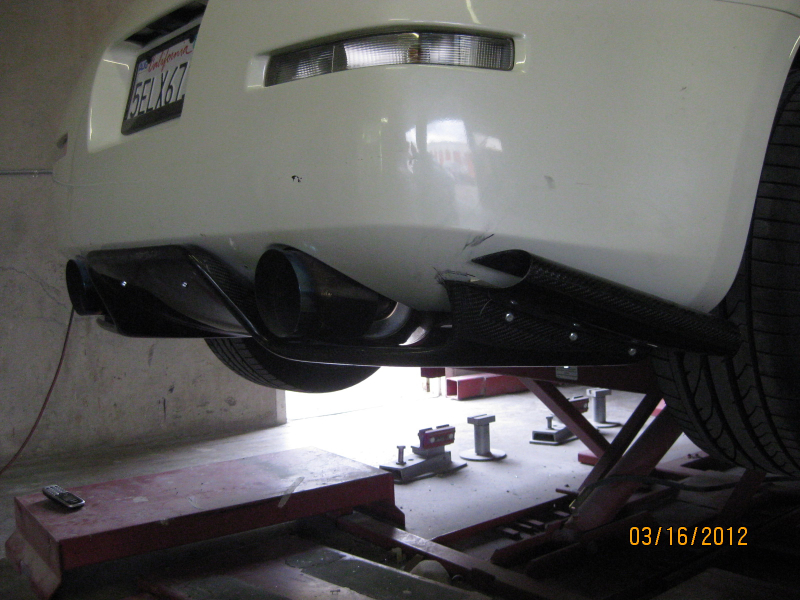
The previous post where they modified the diffuser for the HKS hacked the **** out of the diffuser un-necessarily.
Incorrect barely any cutting involved at all. I am running this diffuser with my HKS Hi Power Ti true dual.
Pics of where to cut are below:
You can see you only need to notch the lip on the back side for the canisters.
Test fit shots:
The previous post where they modified the diffuser for the HKS hacked the **** out of the diffuser un-necessarily.

Registered User
Joined: Dec 2010
Posts: 324
Likes: 0
From: chandler az
well maybe you have the real hks ...many and i mean many peeps from here running x02 and other replicas in therefore are tiny different...but when u cut them did you sand the cut down to prevent spider crack ??? cause i cut it with electric jigsaw so it pretty clean cut
Last edited by 350zbehold; May 3, 2012 at 03:27 PM.
well maybe you have the real hks ...many and i mean many peeps from here running x02 and other replicas in therefore are tiny different...but when u cut them did you sand the cut down to prevent spider crack ??? cause i cut it with electric jigsaw so it pretty clean cut
Last edited by PikesPeakZ; May 3, 2012 at 03:30 PM.
Registered User
Joined: Dec 2010
Posts: 324
Likes: 0
From: chandler az
the main part is did any of you guys drill a hole near the end of the diffuser for water to exit when you wash the car...because when i wash my car water tend to stay inside and within the bumper..everytime i have to blow the water out with my grass blower..it pretty fun ... but kinda pain in the ***


First, thanks to Cheston for writing this DIY.
Now to expose my own mental density: I've read through this 4 times and I still do not understand how to mount the rear center portion to the bumper. I see the heads of two (2) screws, presumably the long machine screws included with the installation hardware kit. But what I cannot fathom is how I will be able to reach inside the rear bumper, with the diffuser and muffler tips in place, to hold a nut into which those screws could thread.
So what I am thinking is this:
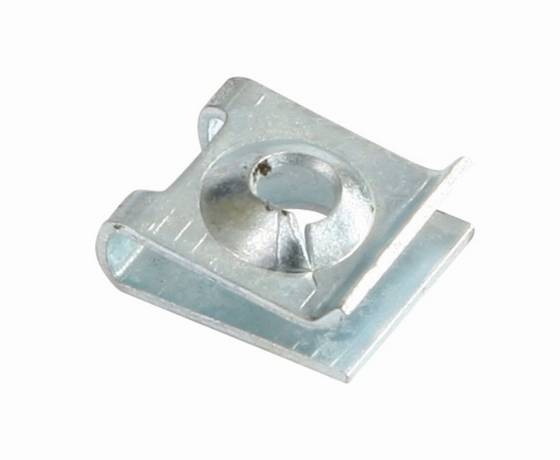
1) Modify the rear "U" bracket to accept "Screw clips" over the two holes on one flange. (Picture of screw clip below....i.e. the same thing that is used to secure the stock rear mud guard in place). The screw clips will be on the "outer" flange of the U bracket, where the diffuser will mount to it.
2) Use short screws and nuts to mount the rear "U" bracket to the bumper.
3) Use sheet metal screws to hold the diffuser to the "U" bracket, with the screw grabbing into the screw clip. The drawback here is that the heads of sheet metal screws tend to look not-as-nice as the heads of machine screws, but I will most likely paint the screw heads black in any case.
My thought it that this makes removal/re-installation of the diffuser much, much easier, should I ever need to sell it, or perform maintenance on the exhaust system, etc.
Any drawbacks that anyone can see to this approach, before I go effing up my bumper?
I think the same approach would work for the holes in the "Z" shaped brackets that hold the diffuser to the bottom of the bumper on each side.
Side note: I am also thinking of taking a large piece of cardboard and cutting a rectangular hole in the middle that is slightly larger than the flange of the "U" bracket, and using the cardboard as a template to spray a healthy patch of black plasti-dip onto the bumper, on top of which the "U" bracket will mount. This way, if/when I eventually remove the diffuser, I should be left with just two holes in the bumper as opposed to two holes and a rectangular scuff mark.
Now to expose my own mental density: I've read through this 4 times and I still do not understand how to mount the rear center portion to the bumper. I see the heads of two (2) screws, presumably the long machine screws included with the installation hardware kit. But what I cannot fathom is how I will be able to reach inside the rear bumper, with the diffuser and muffler tips in place, to hold a nut into which those screws could thread.
So what I am thinking is this:
1) Modify the rear "U" bracket to accept "Screw clips" over the two holes on one flange. (Picture of screw clip below....i.e. the same thing that is used to secure the stock rear mud guard in place). The screw clips will be on the "outer" flange of the U bracket, where the diffuser will mount to it.
2) Use short screws and nuts to mount the rear "U" bracket to the bumper.
3) Use sheet metal screws to hold the diffuser to the "U" bracket, with the screw grabbing into the screw clip. The drawback here is that the heads of sheet metal screws tend to look not-as-nice as the heads of machine screws, but I will most likely paint the screw heads black in any case.
My thought it that this makes removal/re-installation of the diffuser much, much easier, should I ever need to sell it, or perform maintenance on the exhaust system, etc.
Any drawbacks that anyone can see to this approach, before I go effing up my bumper?
I think the same approach would work for the holes in the "Z" shaped brackets that hold the diffuser to the bottom of the bumper on each side.
Side note: I am also thinking of taking a large piece of cardboard and cutting a rectangular hole in the middle that is slightly larger than the flange of the "U" bracket, and using the cardboard as a template to spray a healthy patch of black plasti-dip onto the bumper, on top of which the "U" bracket will mount. This way, if/when I eventually remove the diffuser, I should be left with just two holes in the bumper as opposed to two holes and a rectangular scuff mark.
Last edited by sry110; Aug 9, 2012 at 08:41 AM.
Thread Starter

Joined: Aug 2002
Posts: 10,681
Likes: 11
From: Redondo Beach, CA
First, thanks to Cheston for writing this DIY.
Now to expose my own mental density: I've read through this 4 times and I still do not understand how to mount the rear center portion to the bumper. I see the heads of two (2) screws, presumably the long machine screws included with the installation hardware kit.
Now to expose my own mental density: I've read through this 4 times and I still do not understand how to mount the rear center portion to the bumper. I see the heads of two (2) screws, presumably the long machine screws included with the installation hardware kit.
it is not ONE long bolt that goes through both the diffuser, U bracket, and rear bumper. (which i have seen done, that is not the correct way)
But what I cannot fathom is how I will be able to reach inside the rear bumper, with the diffuser and muffler tips in place, to hold a nut into which those screws could thread.
So what I am thinking is this:
1) Modify the rear "U" bracket to accept "Screw clips" over the two holes on one flange. (Picture of screw clip below....i.e. the same thing that is used to secure the stock rear mud guard in place). The screw clips will be on the "outer" flange of the U bracket, where the diffuser will mount to it.
2) Use short screws and nuts to mount the rear "U" bracket to the bumper.
3) Use sheet metal screws to hold the diffuser to the "U" bracket, with the screw grabbing into the screw clip. The drawback here is that the heads of sheet metal screws tend to look not-as-nice as the heads of machine screws, but I will most likely paint the screw heads black in any case.
I think the same approach would work for the holes in the "Z" shaped brackets that hold the diffuser to the bottom of the bumper on each side.
Side note: I am also thinking of taking a large piece of cardboard and cutting a rectangular hole in the middle that is slightly larger than the flange of the "U" bracket, and using the cardboard as a template to spray a healthy patch of black plasti-dip onto the bumper, on top of which the "U" bracket will mount. This way, if/when I eventually remove the diffuser, I should be left with just two holes in the bumper as opposed to two holes and a rectangular scuff mark.
Side note: I am also thinking of taking a large piece of cardboard and cutting a rectangular hole in the middle that is slightly larger than the flange of the "U" bracket, and using the cardboard as a template to spray a healthy patch of black plasti-dip onto the bumper, on top of which the "U" bracket will mount. This way, if/when I eventually remove the diffuser, I should be left with just two holes in the bumper as opposed to two holes and a rectangular scuff mark.
+1 on the plastidip, you can also use painter's tape as you will not be able to see it when the diffuser is attached.
^ thanks for the additional insight. I should have clarified, mine (Shine replica) is not predrilled, but has indentations where all the holes are to be drilled. So all I had to do was carefully drill them out.
I guess the nutserts have to be positioned in the bracket such that the little flange is on the opposite side of the bracket from the diffuser, so that the as the screw tightens the nutsert pulls back against the bracket......but what keeps the nutsert from rotating with the screw?
I guess the nutserts have to be positioned in the bracket such that the little flange is on the opposite side of the bracket from the diffuser, so that the as the screw tightens the nutsert pulls back against the bracket......but what keeps the nutsert from rotating with the screw?
Welp I don't have enough patience to order nutserts and wait for them to be delivered, so I went on my initial idea utilizing the screw clips from the stock rear mudguards. I super-glued the flat part of the clip to the front of the bracket (which adhered surprisingly well!), and the back part on the inside of the bracket just floats there but clamps in against the bracket when the screw is tightened:
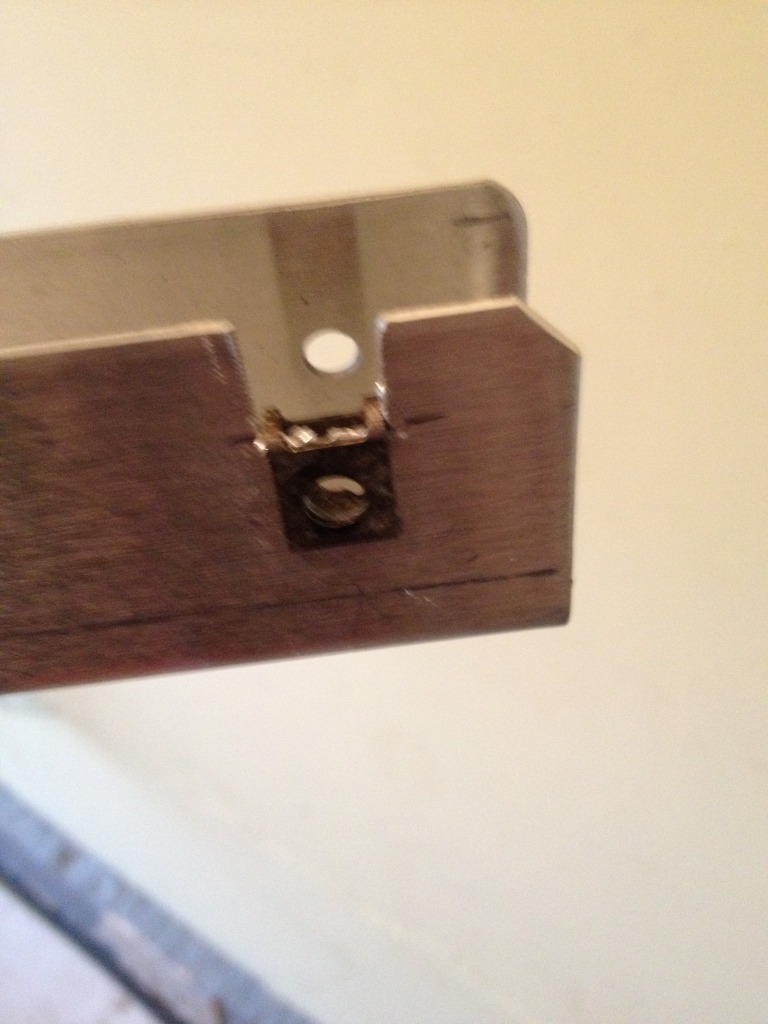
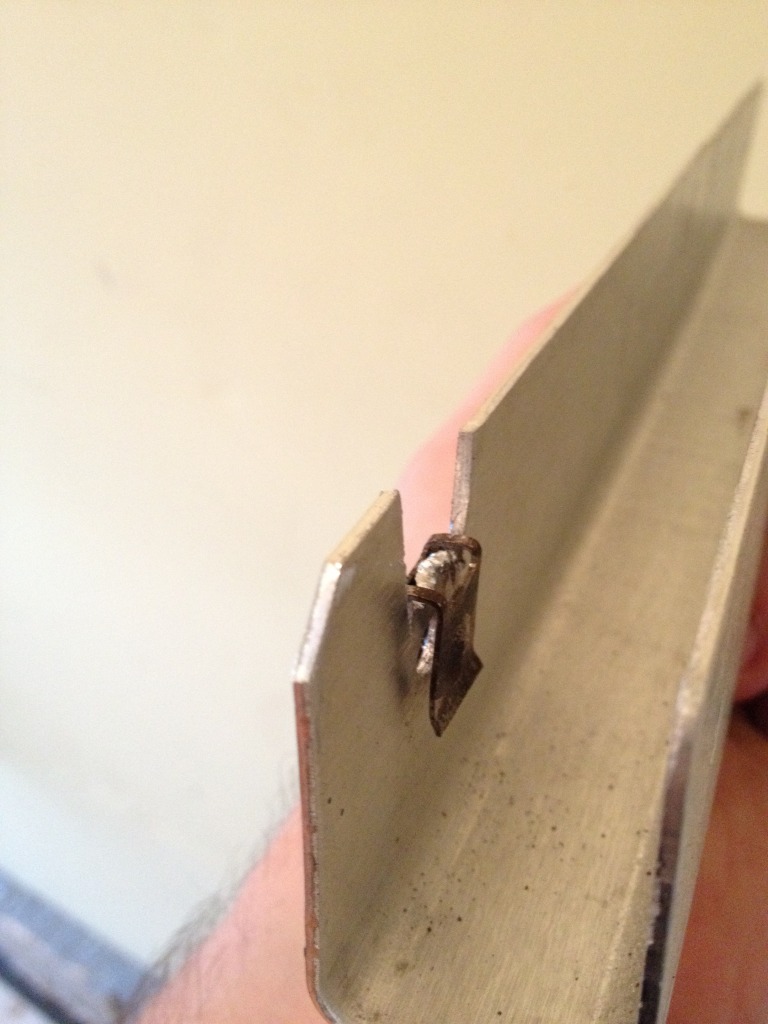
I'll reuse a couple of the sheet metal screws from the stock mud guards, with a fresh coat of gloss black Rustoleum on them:
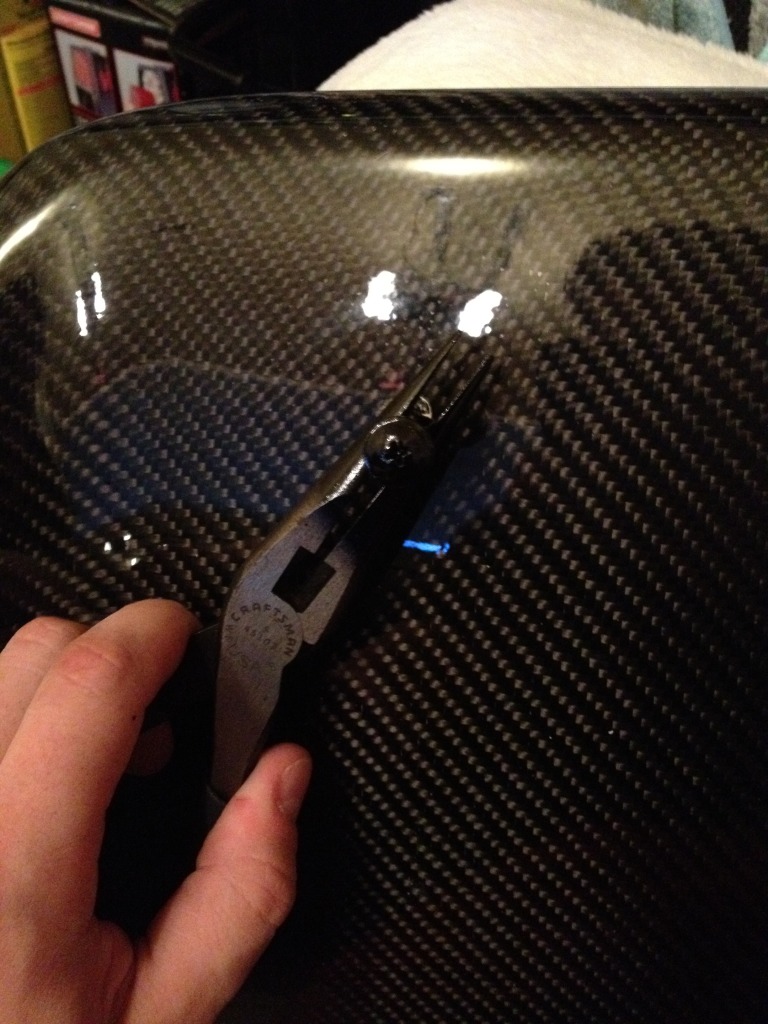
Sorry for crappy iphone photos
I'll reuse a couple of the sheet metal screws from the stock mud guards, with a fresh coat of gloss black Rustoleum on them:
Sorry for crappy iphone photos
Thread Starter
Joined: Aug 2002
Posts: 10,681
Likes: 11
From: Redondo Beach, CA

ack! dont use sheet metal screws, you can probably find the correct pitch on a stainless steel button head allen bolt at homedepot / lowes / osh..
it'll looks wayyyyy cleaner than a phillips machine screw..
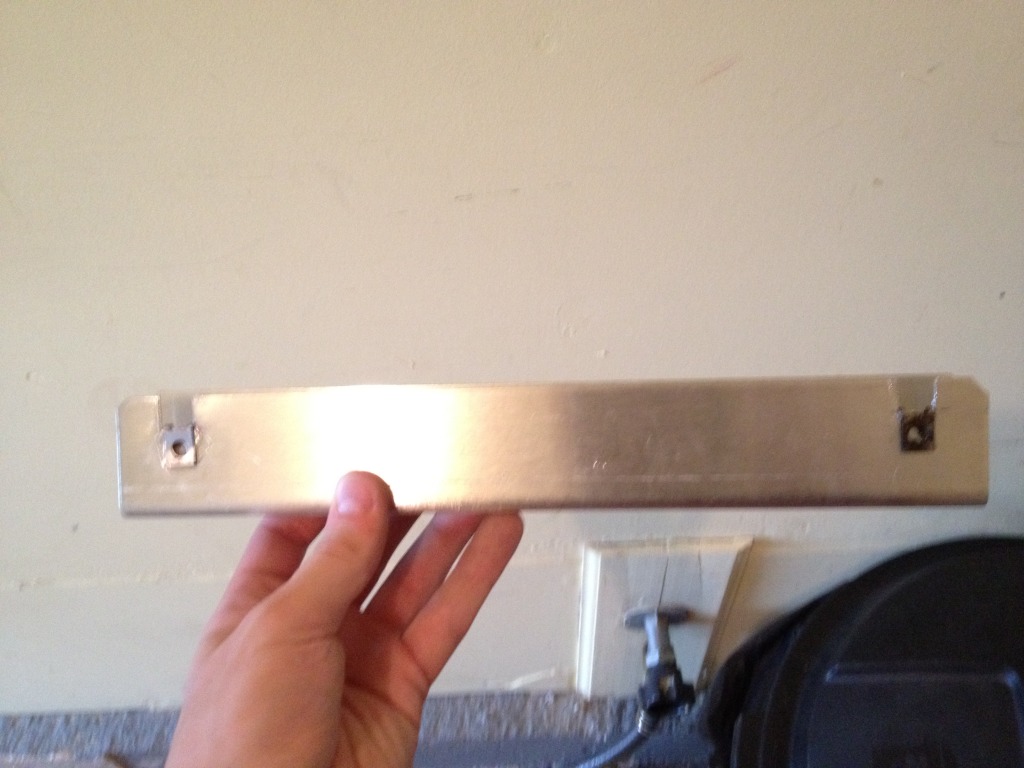
as for the aluminum bracket.. hmm.. was this a Shine Replica?
And yes, this is a Shine replica. I'm in the process of measuring 3 times before I drill, but in the process I did have to do some Dremel trimming/sanding where the diffuser wraps into the exhaust tip cutouts from the outsides. Up at the top "corner', the inner part of the curve stuck up too high and would jab into the bumper when I tried to move it into position. That took some extra time so I plan to finally get the thing mounted tomorrow. I also had to notch out the front flange on one side to fit around the rear pipe of my Invidia Gemini exhaust.
NOTE: The "Z" brackets that come with the shine kit are also silver aluminum. So I'm going to have additional time into it painting those brackets black prior to final installation.
Another side note, the carbon weave on the Shine piece is sub-par in my opinion. Maybe on-par for a replica, but I've had other less-expensive carbon fiber replica pieces with better weaves than this. Also plenty of surface imperfections, many of which are visible. Probably fine from 5 feet away, but painful when you spend all afternoon up close and personal with it.
Last edited by sry110; Aug 11, 2012 at 02:09 PM.

If you look at an 07-08 Nismo 350z, the rear bumper has a big rectangular hole in it to let air escape across the entire length, and the bumper does not extended all the way to the bottom like a regular bumper because the regular canister muffler is not there to prevent air from being trapped inside the bumper.
So if you remove the OEM canister muffler and use tips only and use this diffuser that doesn't have enough of a lip under the car to prevent air from being trapped, it just creates drag. The only way to fix it would be to extend the lip much higher up to the trunk floor to prevent any air from being trapped in the rear bumper.
So in my opinion, it's not functional at all.
Last edited by Andrei; Aug 13, 2012 at 08:50 AM.
Thread Starter
Joined: Aug 2002
Posts: 10,681
Likes: 11
From: Redondo Beach, CA
If you look at an 07-08 Nismo 350z, the rear bumper has a big rectangular hole in the rear bumper to let air escape across the entire length, and the bumper does not extended all the way to the bottom like a regular bumper because the regular canister muffler is not there to prevent air from being trapped inside the bumper.
So if you remove the OEM canister muffler and use tips only and use this diffuser that doesn't have enough of a lip under the car to prevent air from being trapped, it just creates drag. The only way to fix it would be to extend the lip much higher up to the trunk floor to prevent any air from being trapped in the rear bumper.
So in my opinion, it's not functional at all.
this was never intended to be used on the Nismo rear bumper. only the non-nismo shaped versions. there are other ways to prevent air entrapment on a Nismo rear bumper if you switch to canisters, you are correct that you have to extend the floor of the diffuser, generally anywhere from axle back.. the vent holes in the nismo rear already aleviate air trapped underneath the car, and main purpse was to alieveate rear wheel drag
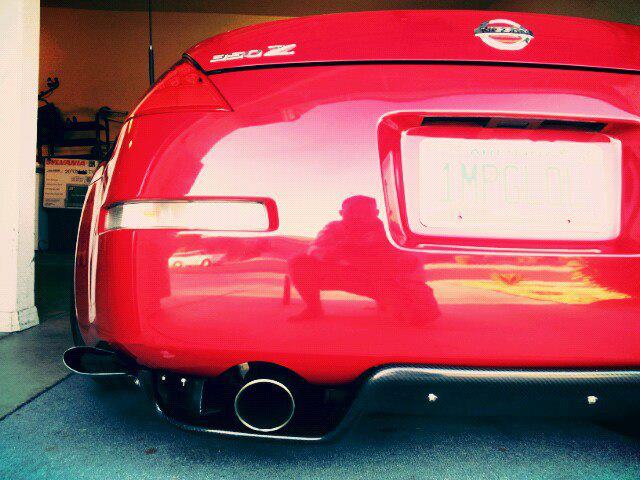
Re: black painted sheet metal screws, it actually looks alright to me once everything is mounted up. At least it looks good from ~5 feet away, which is as close to my car as I want anyone besides me:
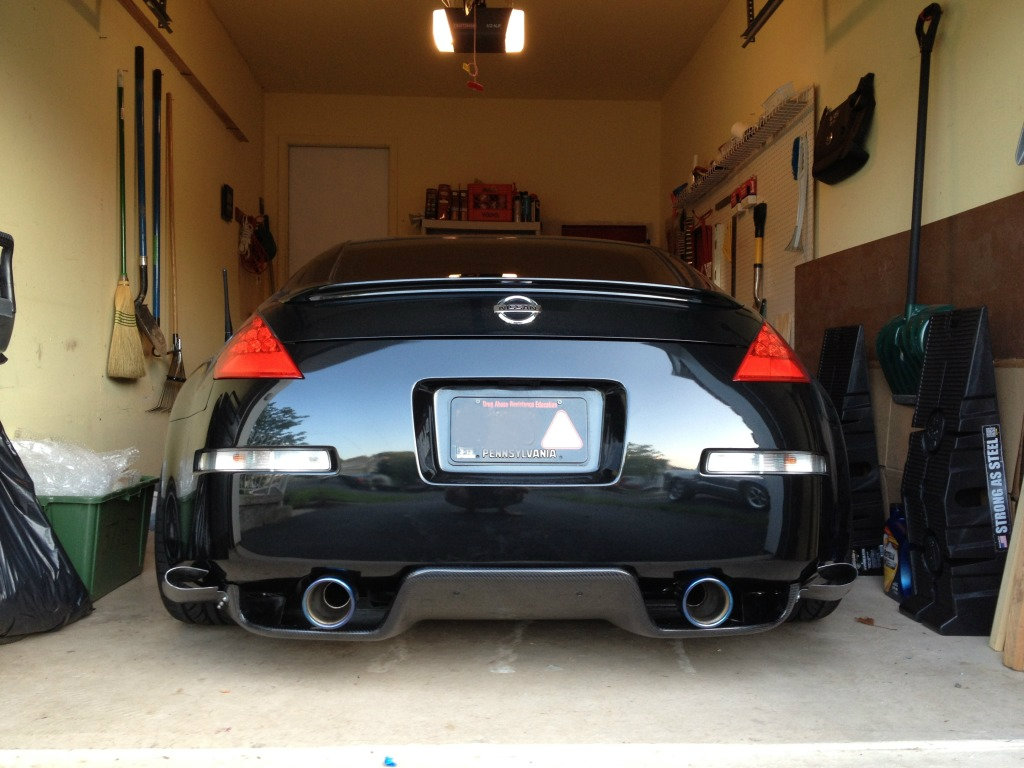

I'm wondering, would the shine replica clear a single exhaust set up? I know this wouldn't clear the agency power, but im talking about the greddy single ti-c. I've been at a stalemate for months now with buying an exhaust because I dont want to get a single and to do the bumper tuck and then find out that it would have fit fine with the shine ts diffuser. Anyone have any knowledge to share?