
Removing your A & B Pillars

What's up Kids. Here we are again, digging through my archives and sharing another DIY project. Today we remove the B-Pillars and then we remove the A-Pillars. This is a very delicate task because if you fail to take the necessary care and attention to remove these pieces carefully they may break costing lots of money to replace. Each A-Pillar is in the $400 range. Ouch!!!
B-Pillars on the other hand are much less expensive, but I never did actually price them. Probably because they are much less likely to break.
I have removed in total 3 sets of the A-pillars and in 2/3 instances I cracked at least 1 piece. Accidents happen, especially if you try to work in cold weather when plastic is much less flexible than in warmer weather...Lesson learned.
***PLEASE READ THROUGH ALL OF THE COMMENTS AS IMPORTANT UPDATES WERE MADE AFTER THIS INITIAL WRITE UP.*****
Anyway, here we go:
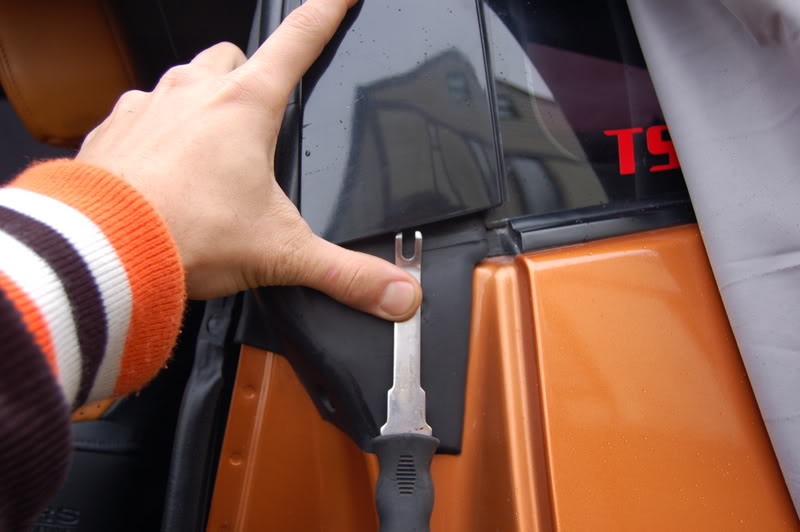
The B-pillar is held in place by 3 snap in button tabs. The best way to remove them is by first opening the door and to slip a flat screwdriver or better yet a pry tool to pop each of the tabs out. This can be accomplished by turning the screwdriver slightly and gently to provoke the snap button to pop out.
They are positioned in a zig zag pattern as seen below.

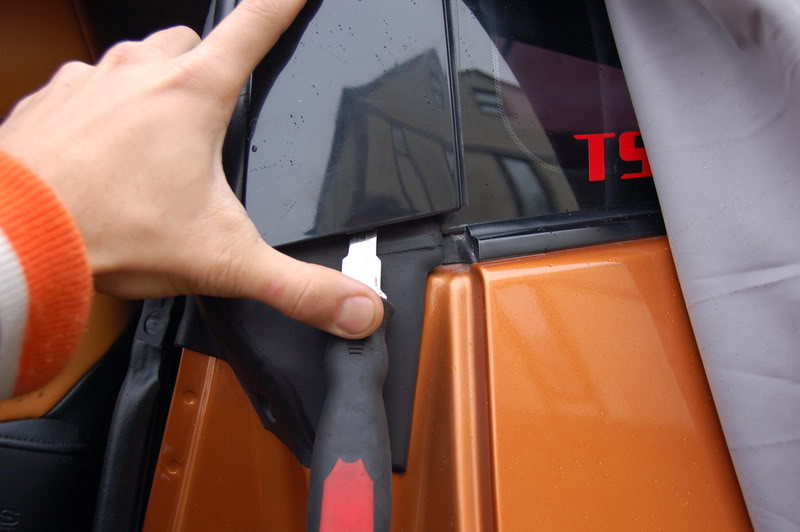
In this last photo you can clearly see the zig zag pattern of the button snaps holding the B-Pillar in place:
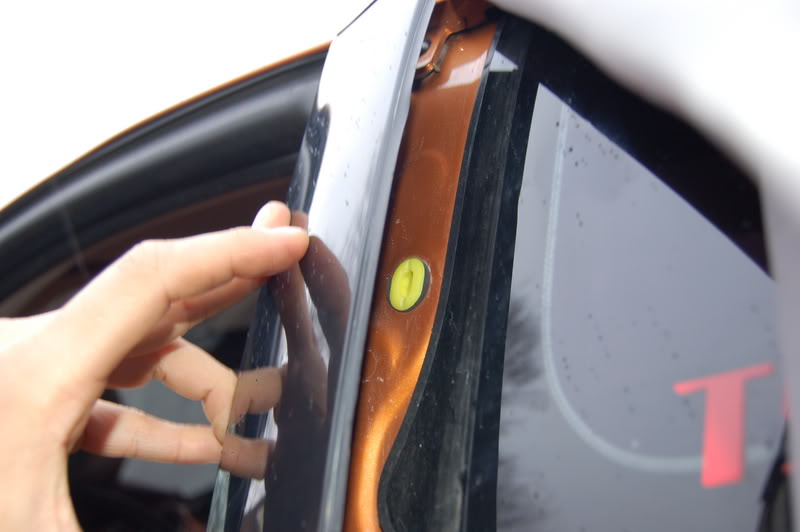
This is the car with the B-Pillar removed;
Now on to the A-Pillar:
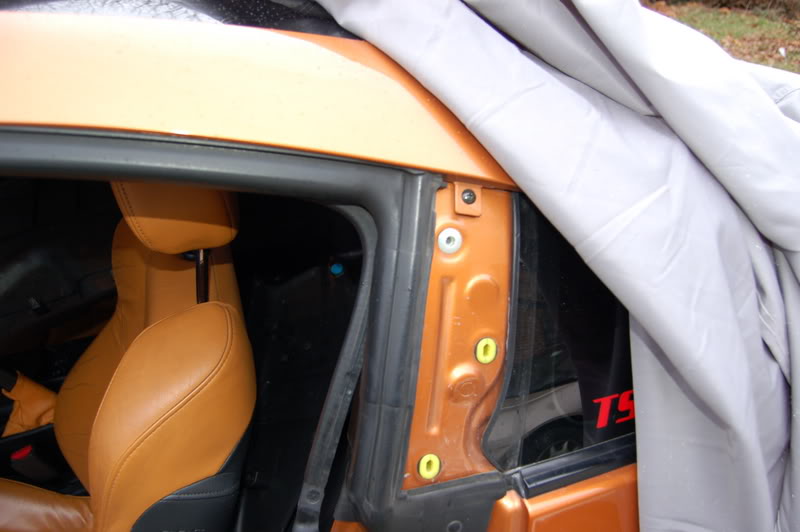
First and foremost please don't forget to remove this screw before you attempt anything further with the A-pillar.
The remaining attachments are similar to those found on the B-Pillar, snap buttons. However they are strategically placed and you have to be cautious not to just forcefully rip away at this piece because it will break.
Here with the screw removed:
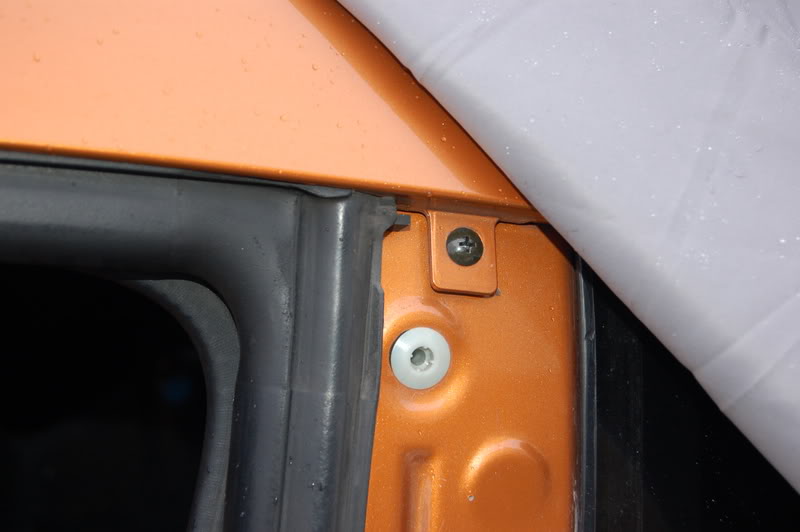
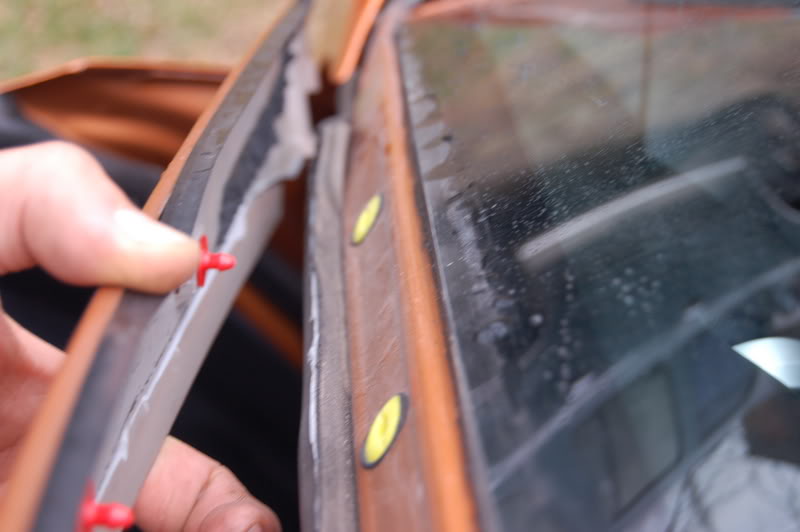
STOP EVERYTHING!!!! NOW PLEASE PAY SPECIAL ATTENTION. THIS IS THE PART THAT HAS BEEN RECENTLY UPDATED. (8-6-09) IT IS ESSENTIAL TO PULL DOWN THE RUBBER WINDOW MOLDING AND LOOK TO REMOVE THE 8 SCREWS THAT ARE SECURING THE UNDERPART OF THE A-PILLAR. APPARENTLY THE A-PILLAR HAS A BIT OF AN L-SHAPE WHICH IS OBSCURED BY THE WINDOW MOLDING. SO PULL IT DOWN AND LOOK FOR SCREWS BEFORE PULLING THE A-PILLAR AWAY FROM THE BODY OF THE CAR.
SAMPLE...Look at the upper edge of the door frame to see the screws that need to be removed before attempting to remove A-Pillar!!!!
This is a borrowed shot from a fellow Z-Owner only to demonstrate the location of the screws.
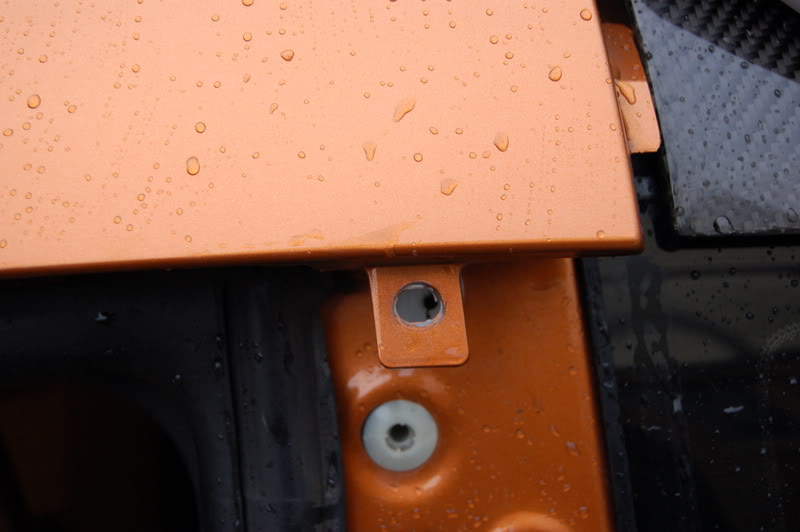
Gently just tugging at the whole piece to see if it would come loose at all:
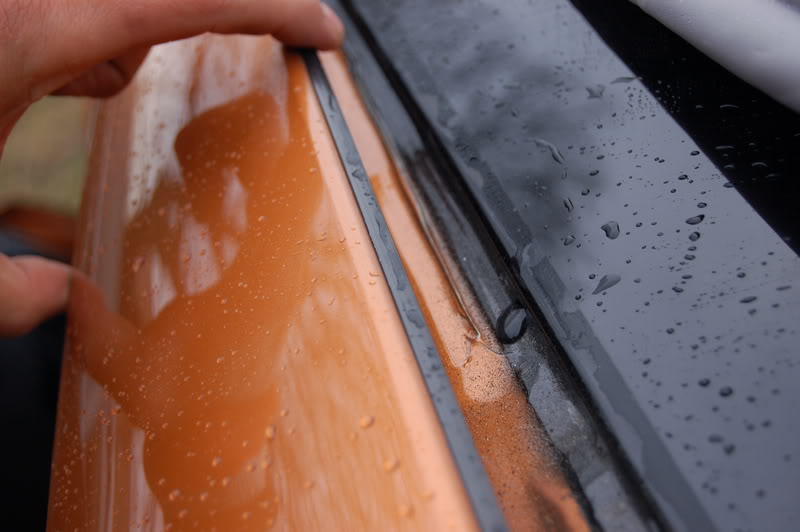
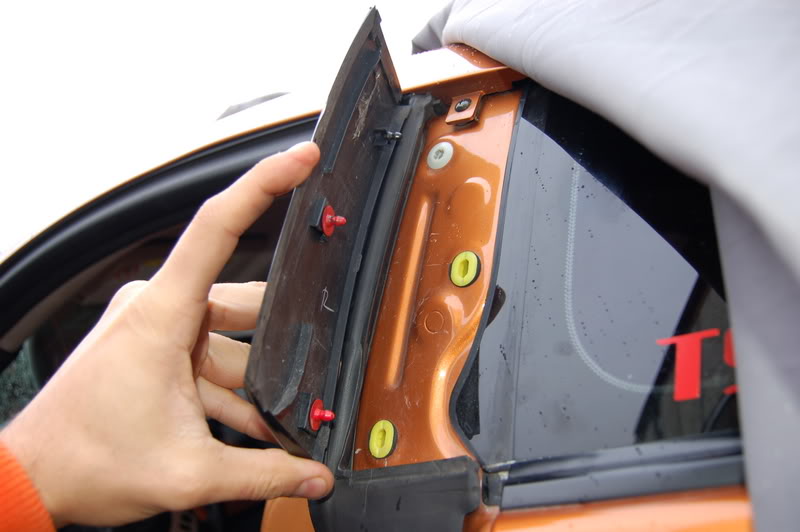
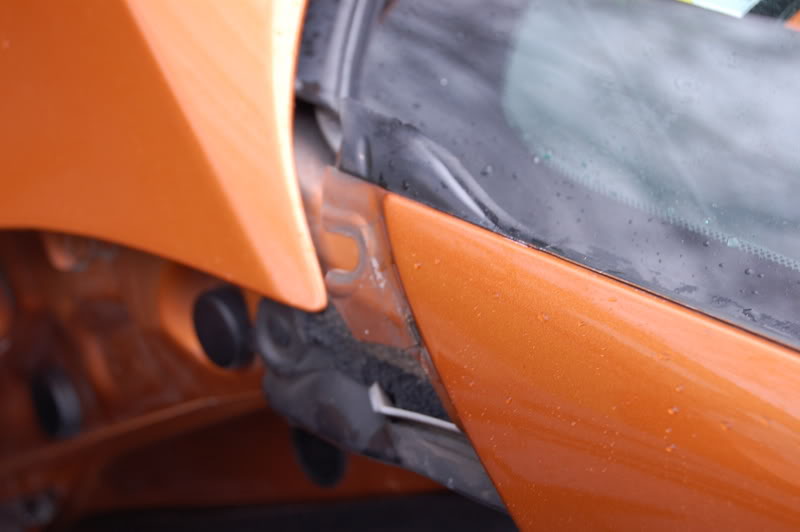
Looking at it from the back end of the car facing forward you can see what is on the inside of the A-Pillar:
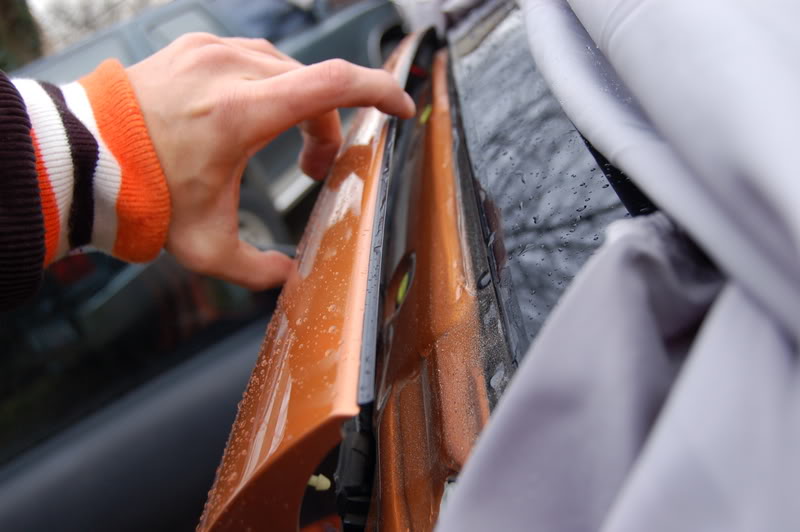
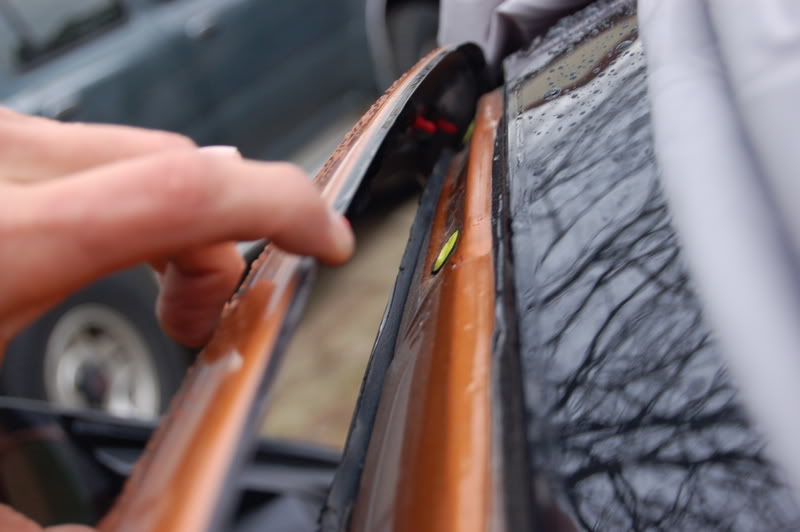
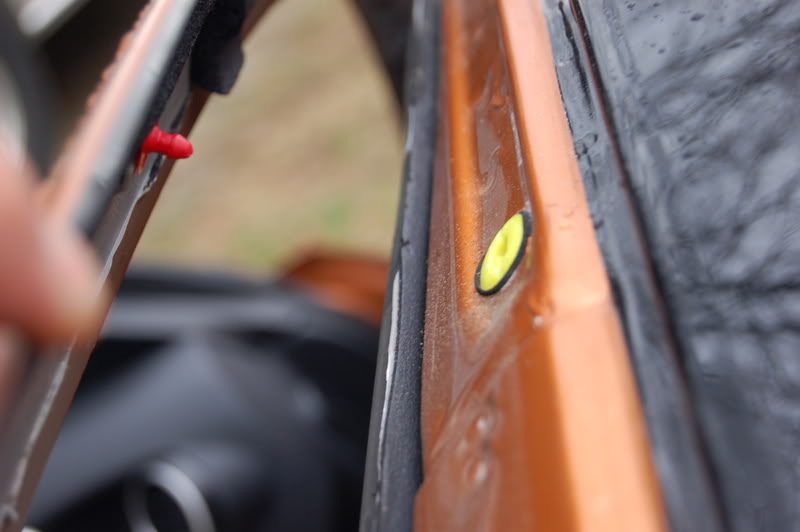
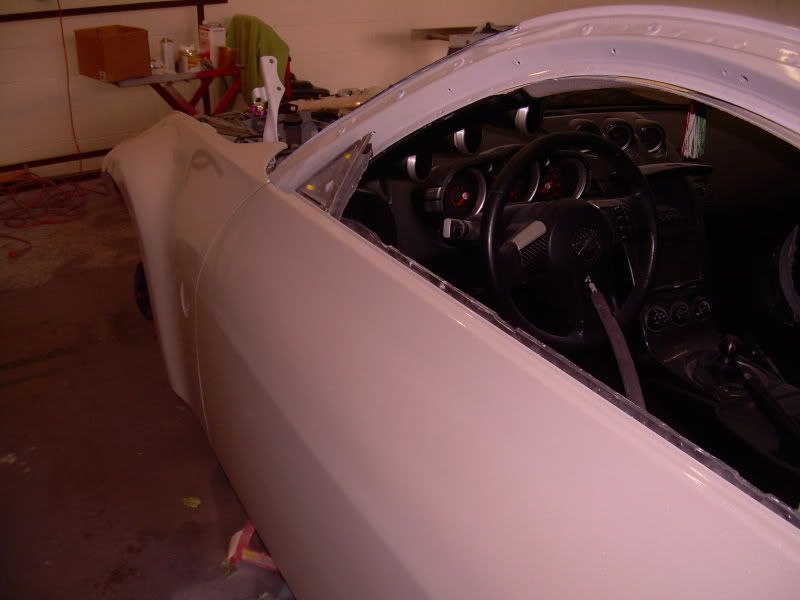
Almost done;
The last component is the slotted end. I had to pull on the fender just slightly to make it comfortable for this delicate plastic piece to come out.
If/when you get to this point, you will see what I mean:
That's it.
Remember do not try this project in the cold as the plastic is more likely to crack!!!
Good Luck.
Zmedic
B-Pillars on the other hand are much less expensive, but I never did actually price them. Probably because they are much less likely to break.
I have removed in total 3 sets of the A-pillars and in 2/3 instances I cracked at least 1 piece. Accidents happen, especially if you try to work in cold weather when plastic is much less flexible than in warmer weather...Lesson learned.
***PLEASE READ THROUGH ALL OF THE COMMENTS AS IMPORTANT UPDATES WERE MADE AFTER THIS INITIAL WRITE UP.*****
Anyway, here we go:
The B-pillar is held in place by 3 snap in button tabs. The best way to remove them is by first opening the door and to slip a flat screwdriver or better yet a pry tool to pop each of the tabs out. This can be accomplished by turning the screwdriver slightly and gently to provoke the snap button to pop out.
They are positioned in a zig zag pattern as seen below.
In this last photo you can clearly see the zig zag pattern of the button snaps holding the B-Pillar in place:
This is the car with the B-Pillar removed;
Now on to the A-Pillar:
First and foremost please don't forget to remove this screw before you attempt anything further with the A-pillar.
The remaining attachments are similar to those found on the B-Pillar, snap buttons. However they are strategically placed and you have to be cautious not to just forcefully rip away at this piece because it will break.
Here with the screw removed:
STOP EVERYTHING!!!! NOW PLEASE PAY SPECIAL ATTENTION. THIS IS THE PART THAT HAS BEEN RECENTLY UPDATED. (8-6-09) IT IS ESSENTIAL TO PULL DOWN THE RUBBER WINDOW MOLDING AND LOOK TO REMOVE THE 8 SCREWS THAT ARE SECURING THE UNDERPART OF THE A-PILLAR. APPARENTLY THE A-PILLAR HAS A BIT OF AN L-SHAPE WHICH IS OBSCURED BY THE WINDOW MOLDING. SO PULL IT DOWN AND LOOK FOR SCREWS BEFORE PULLING THE A-PILLAR AWAY FROM THE BODY OF THE CAR.
SAMPLE...Look at the upper edge of the door frame to see the screws that need to be removed before attempting to remove A-Pillar!!!!
This is a borrowed shot from a fellow Z-Owner only to demonstrate the location of the screws.
Gently just tugging at the whole piece to see if it would come loose at all:
Looking at it from the back end of the car facing forward you can see what is on the inside of the A-Pillar:
Almost done;
The last component is the slotted end. I had to pull on the fender just slightly to make it comfortable for this delicate plastic piece to come out.
If/when you get to this point, you will see what I mean:
That's it.
Remember do not try this project in the cold as the plastic is more likely to crack!!!
Good Luck.
Zmedic
Last edited by rrmedicx; Aug 11, 2009 at 06:49 AM.


I would like to say that this is the wrong way to do this and if you do it this way you are actually breaking the a pillar. This thread caused me to break one side of mine and then i looked harded and what you need to do is pull the rubber trim that goea along the edge of the pillar that the window sits on and youll see screws behind the rubber trim that actually mount the pillar to the car. Follow all the way the length of the pillar pulling the molding back as you go and remove all the screws. Then you can pops the clips out and slide it out with ease. Lesson learned.

Originally Posted by chromesilver6
I would like to say that this is the wrong way to do this and if you do it this way you are actually breaking the a pillar. This thread caused me to break one side of mine and then i looked harded and what you need to do is pull the rubber trim that goea along the edge of the pillar that the window sits on and youll see screws behind the rubber trim that actually mount the pillar to the car. Follow all the way the length of the pillar pulling the molding back as you go and remove all the screws. Then you can pops the clips out and slide it out with ease. Lesson learned.
Trending Topics
I know someone that purchased a set of CF A-Pillars and advised me of the same procedure, but since the OEM pillars did not come with the same add on tabs that the Mastergrade pillars came with, I didn't see it as possible to apply the same theory.
Do you have any pictures to demonstrate your version?
Anyone that is heavy handed can easily break the pillars if you are not careful in removing them, I broke 2 myself (on another car). Once off the car you will notice that they are in fact very thin plastic pieces. (For some reason I always thought they were metal when on the car) I never said it was easy, but in all actuality, the first set I ever removed, was accomplished the way I stated above and I managed to do so without any problem. My pictures prove that...anyway.. The above instruction is for the '03 version 350z. Now maybe since then Nissan may have changed something...perhaps in the newer version 350's, I would be happy to learn a better technique if one exists.
Please share.
Last edited by rrmedicx; Aug 7, 2008 at 02:46 PM.

You can see in this pic if you look along the edge thats its broken in 2 peices. If you take the screws out from under that rubber molding then it all comes off together.. Ill get some pics when i get home after work today and post them up to help everyone out. And yes i have an 03 350Z.

[QUOTE=chromesilver6]You can see in this pic if you look along the edge thats its broken in 2 peices. If you take the screws out from under that rubber molding then it all comes off together.. Ill get some pics when i get home after work today and post them up to help everyone out. And yes i have an 03 350Z. [QUOTE]
Hey man, if you can find a better way to skin a cat, bring it on. Great. Maybe we can all benefit from it. Thanks for sharing. Looking forward to some pics.
Hey man, if you can find a better way to skin a cat, bring it on. Great. Maybe we can all benefit from it. Thanks for sharing. Looking forward to some pics.
Yea not trying to hate on you just dont want people breaking them. I took some pics last night but was so busy i didnt get them up. (on the phone with customer service about my blackberry for over an hour!!!).. Ill get the pics up tonight for everyone.


The A-Pillars have a very thin rubber moulding that rests on the front windshield and create a light seal. So, yes, one would have to remove the A-pillars to get to the base of the glass.
