
DIY: Seat squeak/click fix


After years of Z ownership I finally had it. Every time I would get out of my Z or shift in the seat (to get my wallet from my back pocket or taking a hard turn) I would hear an annoying squeak from the driver's seat  . I have seen many people asking for a fix over the years, but haven't had the time/will to do it myself.
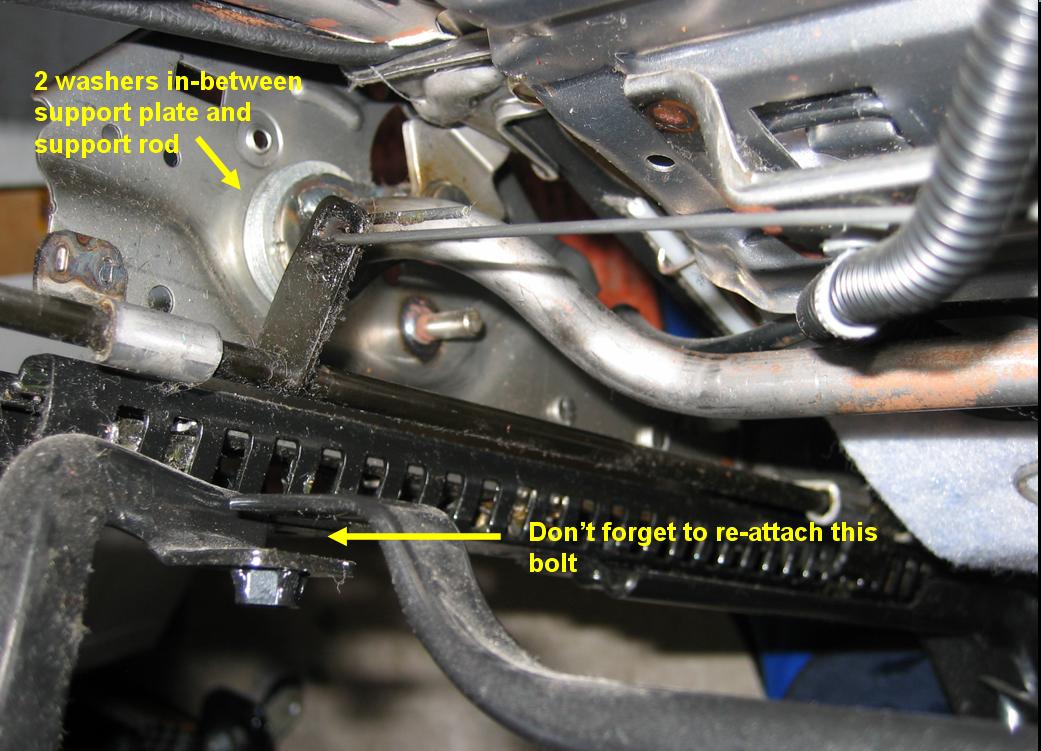
The cause of the squeak/click is excessive lateral play in the front of the seat where it meets the main lateral support rod. To fix, we will insert 2 washers in-between the seat and the support rod to close the gab and stop the lateral “play.” There is a TSB out for this, but I haven't seen any DIY guide and my method differs a bit so I thought I would post this up.
Link to original TSB: http://www.myzroadster.com/Files/tsb.../NTB02-122.pdf
Keep in mind the TSB calls for adding washers to both sides. I found the other side to be more difficult to get to than it is worth, and if you add both washers to the inboard side you accomplish the same thing without the hassle.
It is ridiculously easy, requires no special washer, and takes about 30 minutes of real work. Enjoy!
Tools required:
-14 mm socket (seat bolts)
-Extension (makes removing 4 seat bolts easier)
-Flathead screwdriver (not 100% necessary, but makes removing the clips under the seat easier)
-10mm socket (little bolt under seat)
-Torque wrench (for seat bolts @ 32-42 ft/lbs)
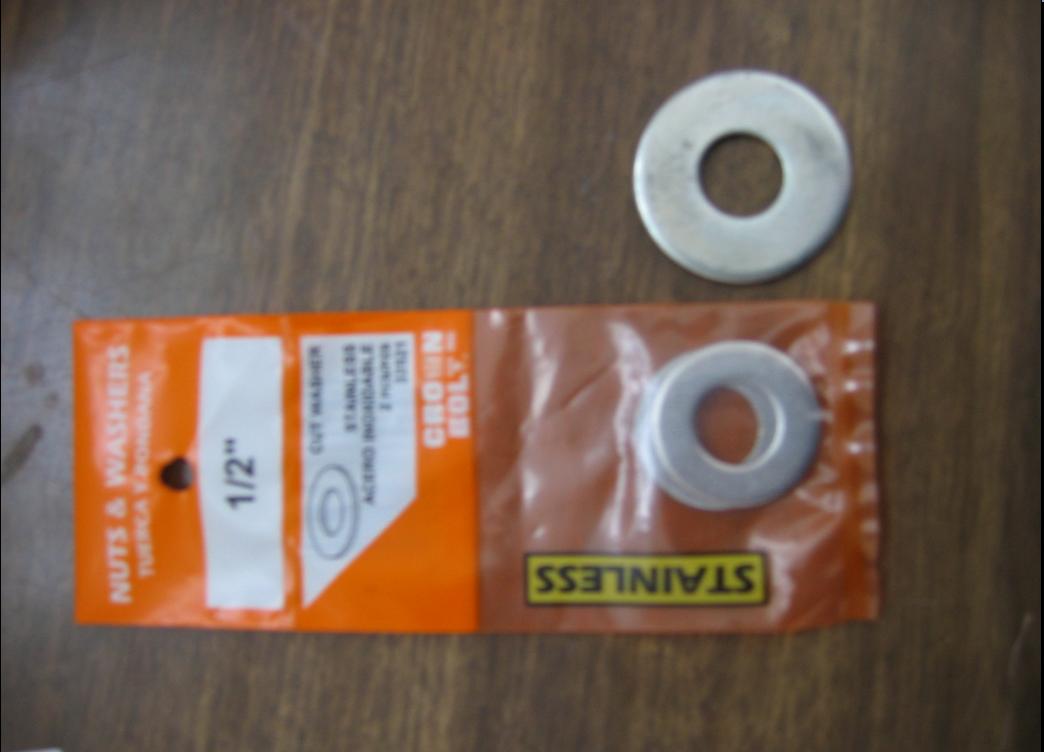
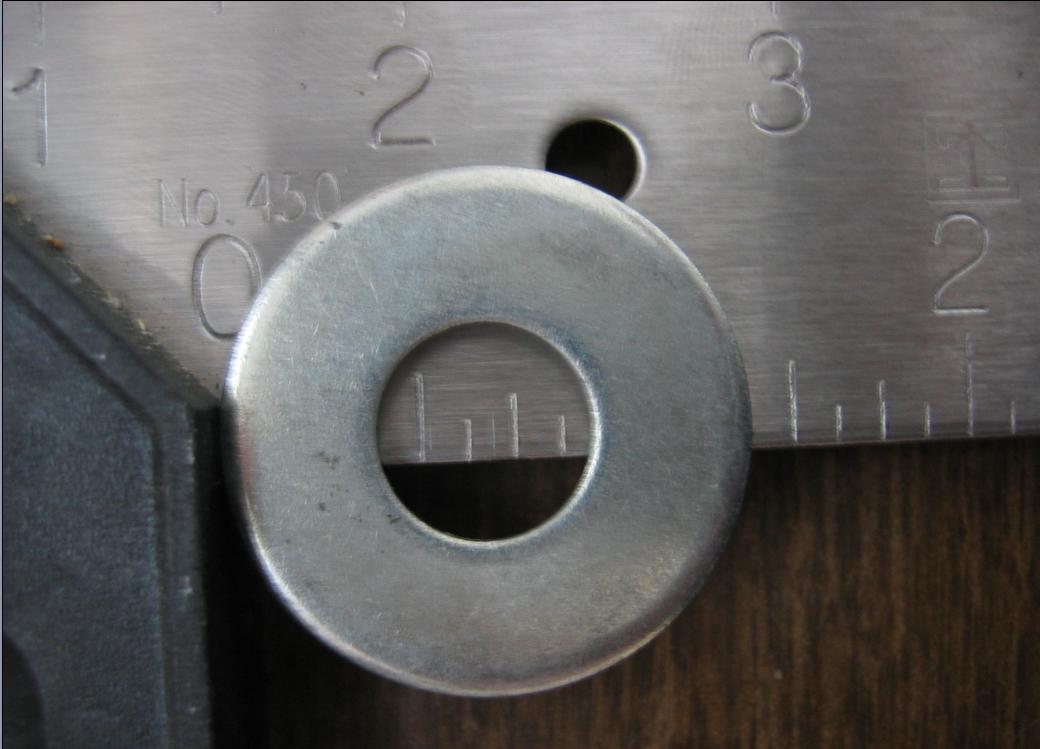
-2 metal washers - 5/8” inner diameter; 1 3/8 outer diameter (NOTE: You can get any outer diameter you want, but I found this size to fit best)
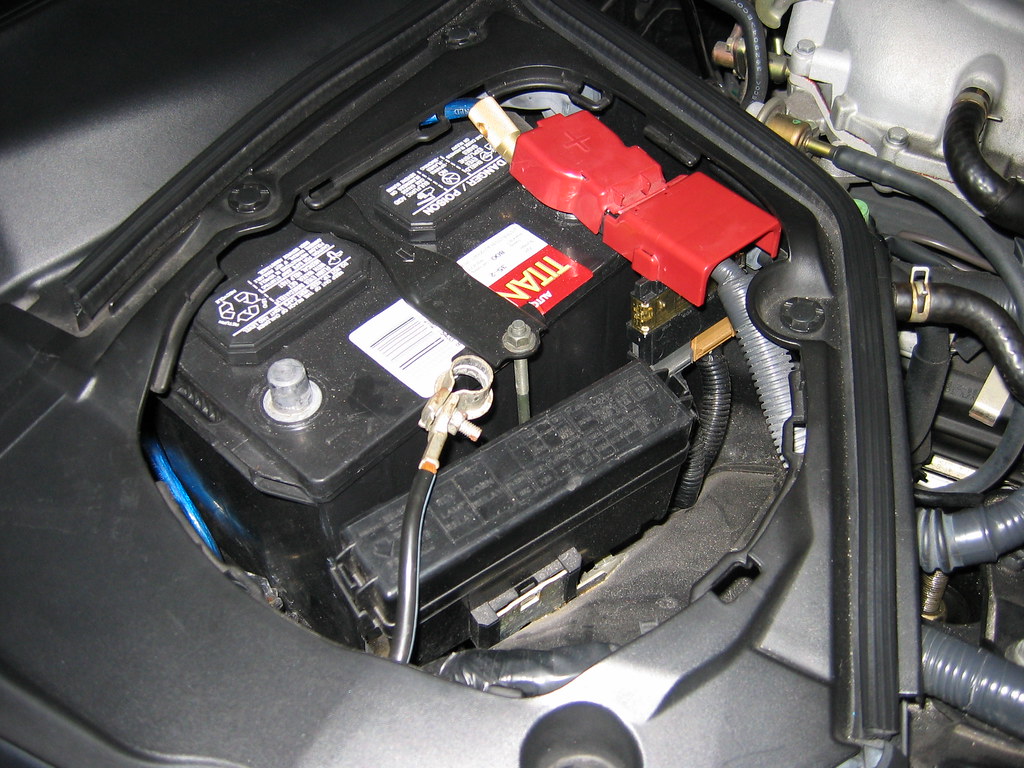
Step 1: Unplug the negative battery terminal. WAIT AT LEAST 3 MINUTES BEFORE PROCEEDING!!! The FSM and TSB both call for this if your vehicle is equipped with side airbags. I don't know why it is required, but presume it has something to do with the airbag and the ECU. Either way, I don't want to mess around, so just unplug and wait (grab your tools in the meantime)
Step 2: Go under seat and remove any connectors. Mine had 2, which came off easy with the assistance of a flathead screwdriver.

Step 3: Remove headrest. This makes taking the seat out of the car easier (no pics)
Step 4: Remove the little black plastic caps that cover the 4 14mm bolts holding the seat in (no pics)
Step 5: Using the 14 socket and extension, remove the 4 bolts holding the seat in place (no pics)
Step 6: Remove seat from vehicle
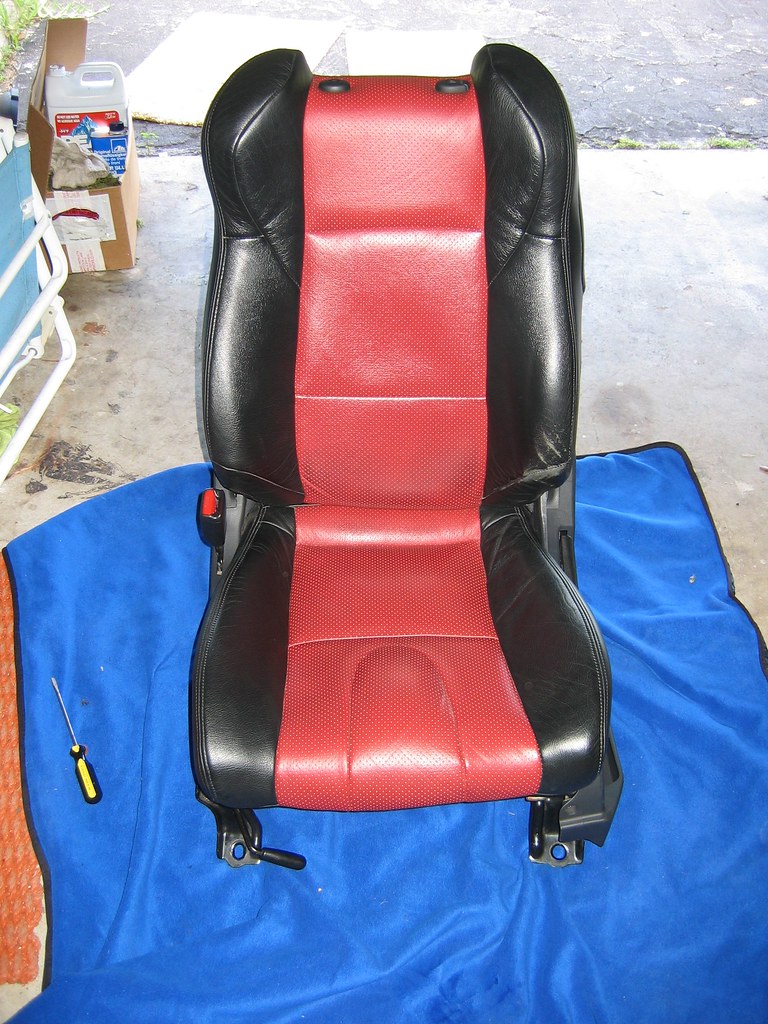
Step 7: Lay seat on a clean surface (lay down a sheet or similar so it doesn’t get filthy). This is what you will see:
Seat bottom:
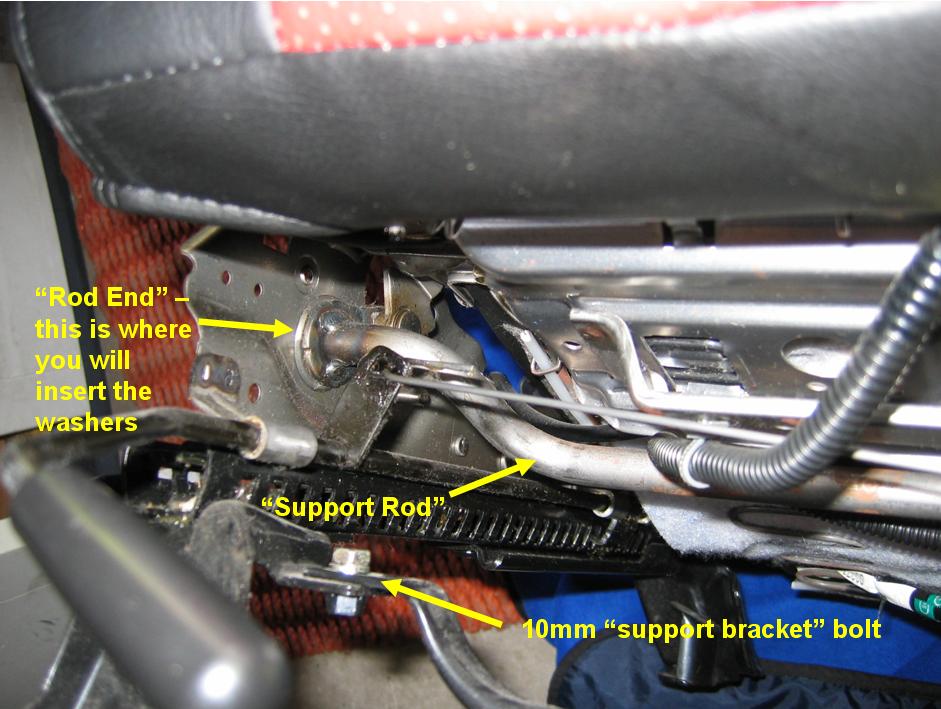
Seat side (this is the support rod sticking through the end of the seat support bracket – the rod on which you will slip the 2 washers to close the gap which is causing the seat squeaking):
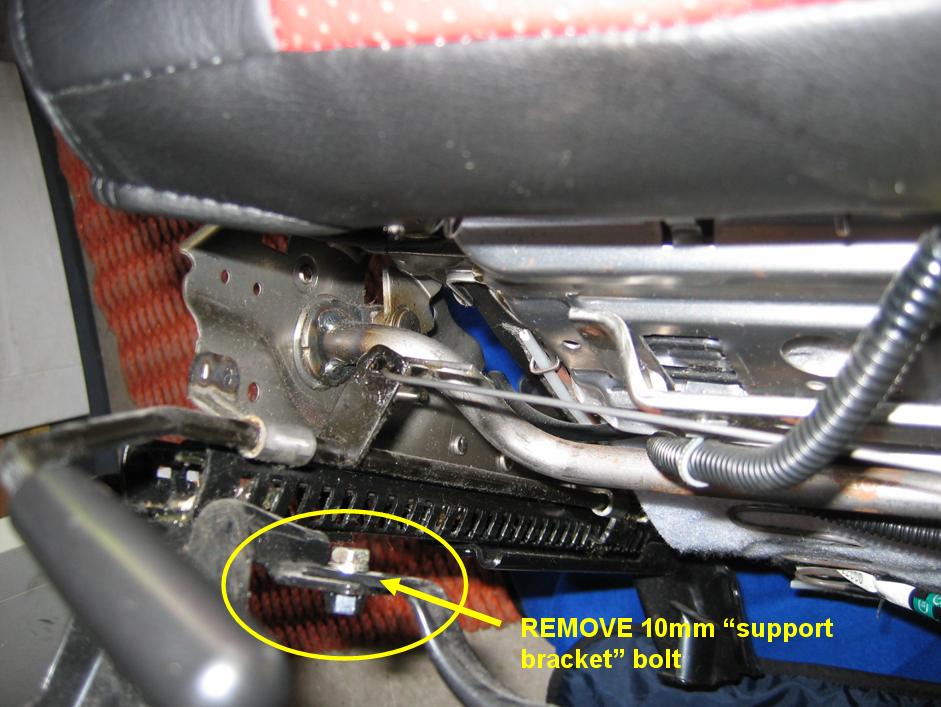
Step 8: Remove the small 10mm bolt on the left side of the seat (circled in the picture). This will allow you to pull the end of the support rod out of the metal plate and use regular washers purchased from your local hardware store (the TSB calls for “special” washers that have a cutout to allow you install from around the rod on the seat). My method allows you to slip the washers onto the end of the rod (via the removal of the 10mm bolt), so no “special” BS washers required.
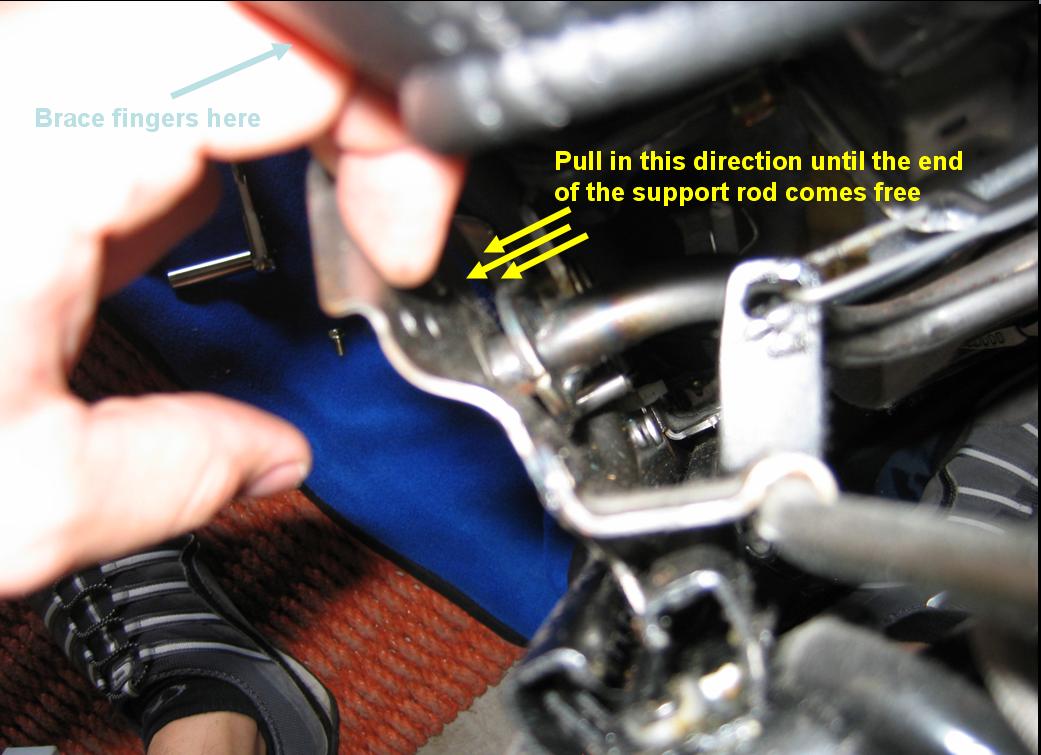
Step 9: Pull the seat apart by bracing your fingers on the seat and pulling gently on the metal plate in which the support rod is sticking through. Once you pull enough, the rod will come free from the end of the metal plate.
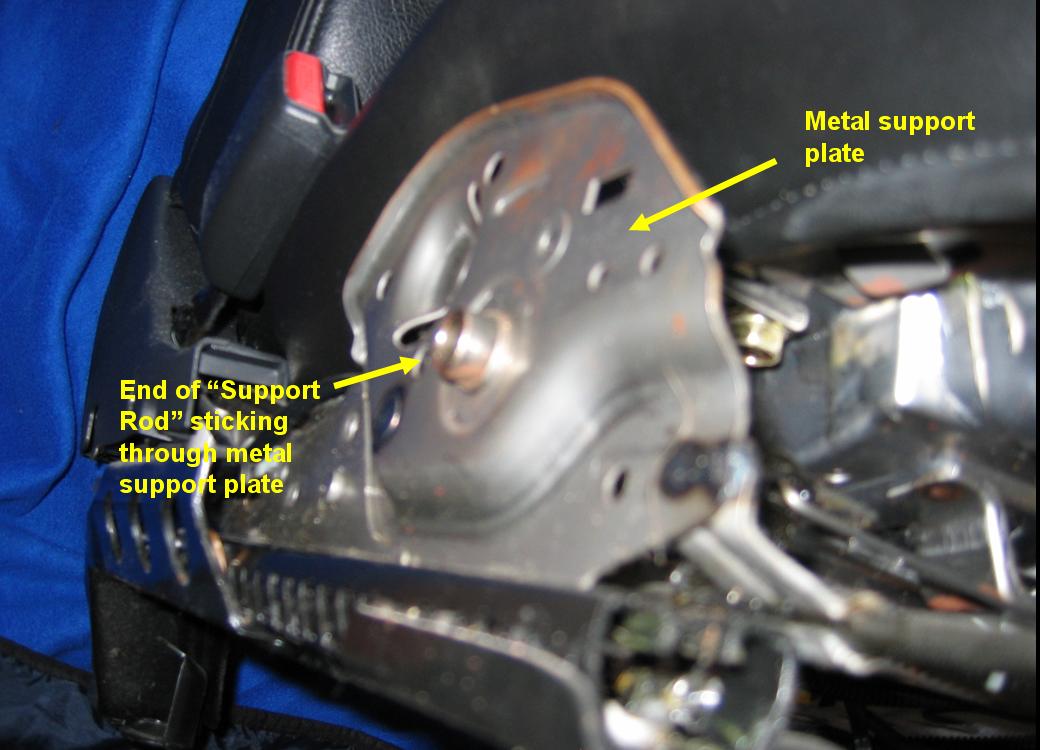
Step 10: Insert both washers onto the end of the metal rod. Once on, insert the rod back into the metal support plate. It should look like this:
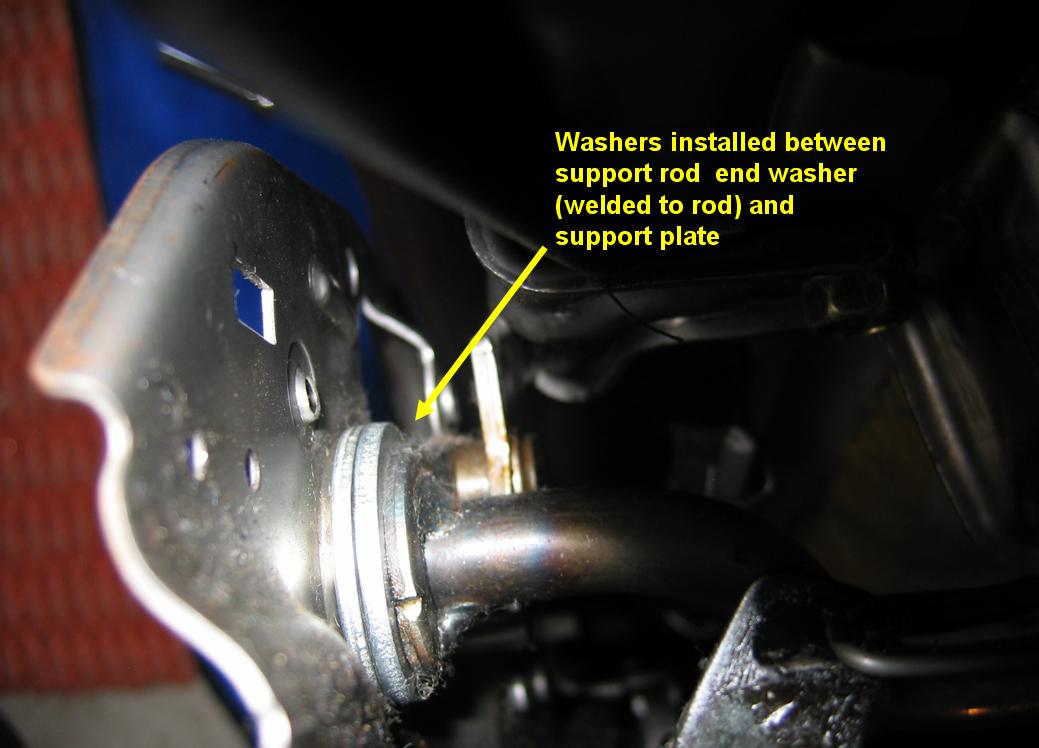
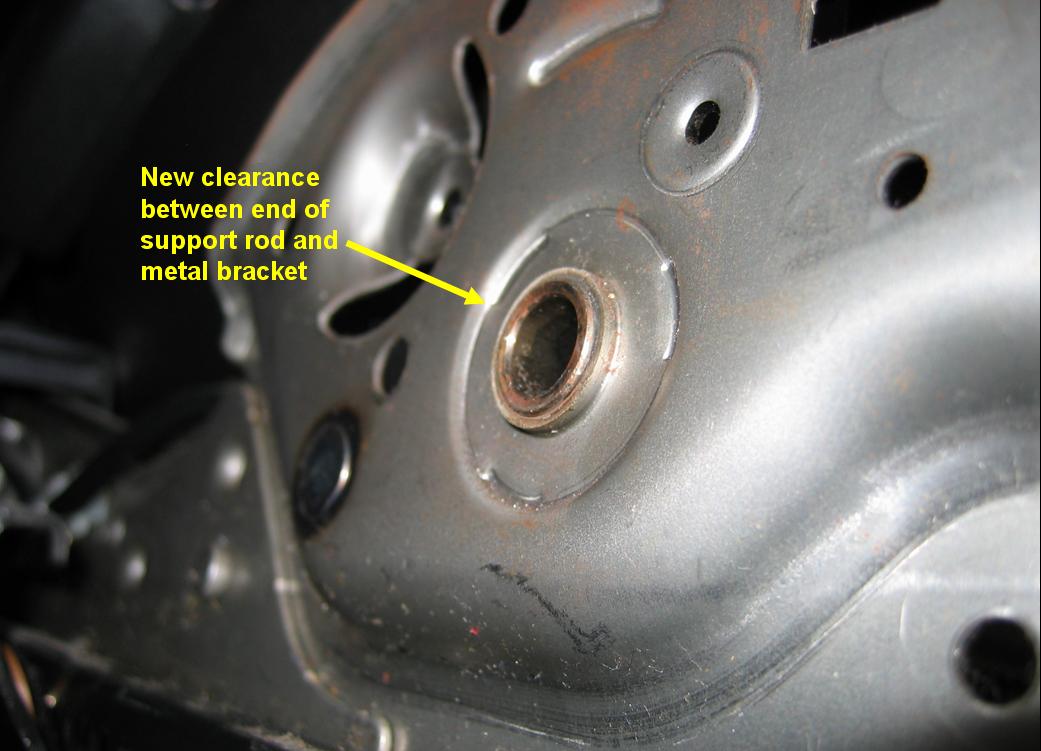
Rod and metal support plate with washers inserted (notice that the rod sticks through the metal less, but still has enough clearance to safely support your weight):
Step 11: Screw the 10mm bolt back into the support bracket
Step 12: Pull out the trusty vacuum and clean all that clag that you can never reach with your seat on
Step 13: Place seat back in car and torque the 4 seat bolts to 32-42 ft/lbs using a torque wrench.
Step 14: Reconnect any cables you disconnected when removing the seat. Make sure they do not bind/pinch when adjusting the seat forward and backward.
Step 15: Reconnect battery negative
Washer Details (you want the bigger one - the one with the 5/8" inner diameter):
Have a sarsaparilla to celebrate....no more squeaking!!!
. I have seen many people asking for a fix over the years, but haven't had the time/will to do it myself. The cause of the squeak/click is excessive lateral play in the front of the seat where it meets the main lateral support rod. To fix, we will insert 2 washers in-between the seat and the support rod to close the gab and stop the lateral “play.” There is a TSB out for this, but I haven't seen any DIY guide and my method differs a bit so I thought I would post this up.
Link to original TSB: http://www.myzroadster.com/Files/tsb.../NTB02-122.pdf
Keep in mind the TSB calls for adding washers to both sides. I found the other side to be more difficult to get to than it is worth, and if you add both washers to the inboard side you accomplish the same thing without the hassle.
It is ridiculously easy, requires no special washer, and takes about 30 minutes of real work. Enjoy!
Tools required:
-14 mm socket (seat bolts)
-Extension (makes removing 4 seat bolts easier)
-Flathead screwdriver (not 100% necessary, but makes removing the clips under the seat easier)
-10mm socket (little bolt under seat)
-Torque wrench (for seat bolts @ 32-42 ft/lbs)
-2 metal washers - 5/8” inner diameter; 1 3/8 outer diameter (NOTE: You can get any outer diameter you want, but I found this size to fit best)
Step 1: Unplug the negative battery terminal. WAIT AT LEAST 3 MINUTES BEFORE PROCEEDING!!! The FSM and TSB both call for this if your vehicle is equipped with side airbags. I don't know why it is required, but presume it has something to do with the airbag and the ECU. Either way, I don't want to mess around, so just unplug and wait (grab your tools in the meantime)
Step 2: Go under seat and remove any connectors. Mine had 2, which came off easy with the assistance of a flathead screwdriver.
Step 3: Remove headrest. This makes taking the seat out of the car easier (no pics)
Step 4: Remove the little black plastic caps that cover the 4 14mm bolts holding the seat in (no pics)
Step 5: Using the 14 socket and extension, remove the 4 bolts holding the seat in place (no pics)
Step 6: Remove seat from vehicle
Step 7: Lay seat on a clean surface (lay down a sheet or similar so it doesn’t get filthy). This is what you will see:
Seat bottom:
Seat side (this is the support rod sticking through the end of the seat support bracket – the rod on which you will slip the 2 washers to close the gap which is causing the seat squeaking):
Step 8: Remove the small 10mm bolt on the left side of the seat (circled in the picture). This will allow you to pull the end of the support rod out of the metal plate and use regular washers purchased from your local hardware store (the TSB calls for “special” washers that have a cutout to allow you install from around the rod on the seat). My method allows you to slip the washers onto the end of the rod (via the removal of the 10mm bolt), so no “special” BS washers required.
Step 9: Pull the seat apart by bracing your fingers on the seat and pulling gently on the metal plate in which the support rod is sticking through. Once you pull enough, the rod will come free from the end of the metal plate.
Step 10: Insert both washers onto the end of the metal rod. Once on, insert the rod back into the metal support plate. It should look like this:
Rod and metal support plate with washers inserted (notice that the rod sticks through the metal less, but still has enough clearance to safely support your weight):
Step 11: Screw the 10mm bolt back into the support bracket
Step 12: Pull out the trusty vacuum and clean all that clag that you can never reach with your seat on
Step 13: Place seat back in car and torque the 4 seat bolts to 32-42 ft/lbs using a torque wrench.
Step 14: Reconnect any cables you disconnected when removing the seat. Make sure they do not bind/pinch when adjusting the seat forward and backward.
Step 15: Reconnect battery negative
Washer Details (you want the bigger one - the one with the 5/8" inner diameter):
Have a sarsaparilla to celebrate....no more squeaking!!!
Last edited by guitman32; Jun 9, 2009 at 06:10 AM.


Trending Topics


Put the washers in yesterday... not one squeak on my way to work this morning. Before it sounded like a 20 year old school bus squeaking at every turn and from every bump. Awesome fix, thanks OP.

I'm about to go try this right now. The last couple days, mine has started squeaking like crazy. I thought it was the center console at first, but after nudging everything around I came to the conclusion it was def coming from the seat. I'll go try and let you guys know (btw I have an '06) so we'll see what happens


Nice write up. Thanks for posting. I will do this once the weather gets warmer.
I've been living with that damn squeeking for over 3 years now. About 2 years ago I took it to a local Nissan Dealer and they told me the springs in my seats were worn out and that I would need to buy a new seat for like $800. I told them to take a hike. My car only had about 15k miles on it at the time. I dont' think in that short period I would have worn out my seat springs. Soon as the weather warms up I'm doing this. Thanks again.
Wil
05

I have an 03 touring. Leather power seats. Any specific reason why this only works on manual seats? Its incredibly squeaky only in a certain position (happens to be my driving position). Would this method not help me get rid of the squeak?


New Member
Joined: Feb 2009
Posts: 2,821
Likes: 512
From: Seattle, WA
I'm bringing this thread back for anyone who owns a 2007 or 2008 with a powered seat. My seat had been squeaking for months, so I took the seat out, lubed it at all the factory lube points that were indicated in the FSM, re-installed the seat and found that the squeak hadn't gone away. There was much swearing and throwing of tools when this occurred.
So I'm sitting there, struttin' my butt back and forth listening to my seat go "SCREEEE SCREEEE SCREEEE" and decided to try a different approach. I got out of the car, grabbed the seat back with one hand and pushed and pulled it back and forth, listening to it squeak, while with the other hand, I felt around underneath the seat for vibrations.
The vibration came from only one source: at the bottom of the seat, there's a cloth flap that is held on by three Velcro tabs. Lift the flap up and tape it to the seat back with a piece of tape. There are a couple of bars that run the lenght of the seat from one side to the other. On the lowest bar on the side closest to the door, you'll see the end of a screw pointing out that connects the bar from an almost hidden bung to the seat's frame. Spritz a little lube between the bar and the seat frame in the area around the screw. I used Liquid Wrench Spray Lube with a straw. Catch any excess lube into a rag.
Pull the cloth flap back down and re-velcro it to the bottom of the seat. Re-adjust your seat, sit on it, shake your butt around and bask in the glory of buttockular silence.
If that didn't make sense, PM me and I'll post some photos. I hope this helps someone. The nice thing about this fix is you really don't need to pull your seat out to fix the squeak.