
Rear knuckle shock/true coilover bushing replacement - W62535

Thread Starter


Joined: Jan 2006
Posts: 11,204
Likes: 32
From: San Antonio/I miss DFW, TX
Ref.: Whiteline bushing part number W62535
Hi,
so it seems i made this "HOW TO" before, but made it in the DFW lounge thread and never made its OWN thread for EVERYONE to easily find......oops
The bushing I'm replacing is on the top of the rear knuckle. It is the oem shock to knuckle location - same as true coilover to knuckle location...
So here goes:
ALSO NOTE:
This took a bit of research as NO sites that sell these bushings, clearly explain or even give part numbers for the spring bucket to knucke mount bushing location. But in case you need its the same bushing as the commonly listed "knuckle to shock mount bushing" that everyone replaces when going to coilovers.
Mainly those with true coilovers as thats the only point of mounting for them to rear suspension arms.
see here:
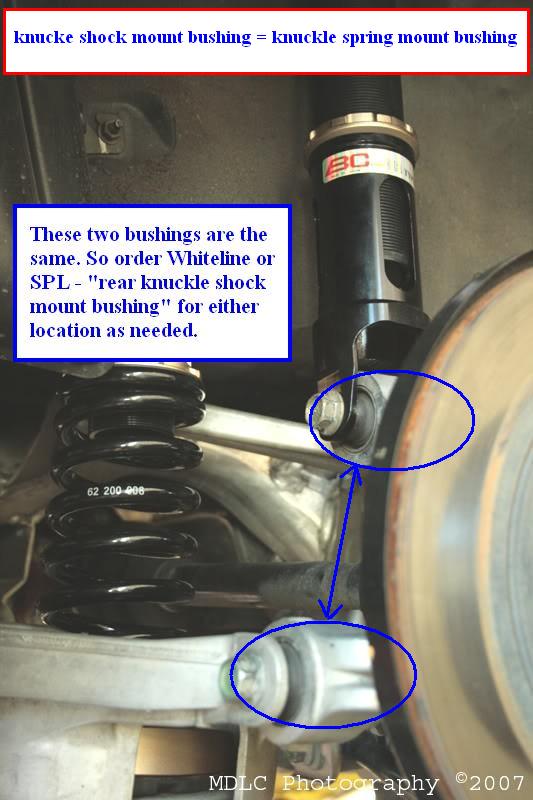

That bushing is the same for both locations - whiteline p/n is W62535 - if you notice on most sites, its the same price for those two, because they are the same. To install this whiteline bushing you need to go to a local steel yard and get a 1.5" DOM STEEL round stock with a .083 wall.
that results in a 1.33 Inner diameter that fits over the W62535 rear shock mount bushing perfectly:
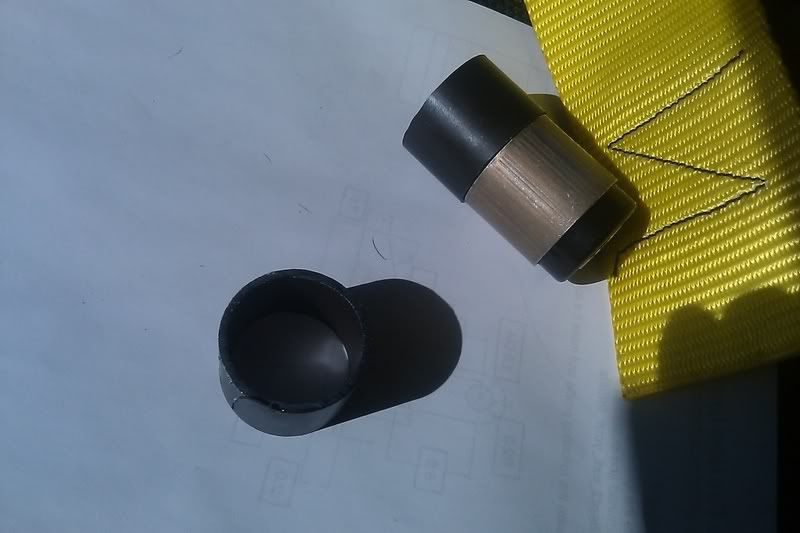
that steel DOM shown will now be the driver for installing that bushing.
Hi,
so it seems i made this "HOW TO" before, but made it in the DFW lounge thread and never made its OWN thread for EVERYONE to easily find......oops
The bushing I'm replacing is on the top of the rear knuckle. It is the oem shock to knuckle location - same as true coilover to knuckle location...
So here goes:
ALSO NOTE:
This took a bit of research as NO sites that sell these bushings, clearly explain or even give part numbers for the spring bucket to knucke mount bushing location. But in case you need its the same bushing as the commonly listed "knuckle to shock mount bushing" that everyone replaces when going to coilovers.
Mainly those with true coilovers as thats the only point of mounting for them to rear suspension arms.
see here:
That bushing is the same for both locations - whiteline p/n is W62535 - if you notice on most sites, its the same price for those two, because they are the same. To install this whiteline bushing you need to go to a local steel yard and get a 1.5" DOM STEEL round stock with a .083 wall.
that results in a 1.33 Inner diameter that fits over the W62535 rear shock mount bushing perfectly:
that steel DOM shown will now be the driver for installing that bushing.
Last edited by JasonZ-YA; Feb 18, 2013 at 04:45 AM.
Thread Starter
Joined: Jan 2006
Posts: 11,204
Likes: 32
From: San Antonio/I miss DFW, TX
Install that bushing like this:
Rear knuckle bushing where shock/coilover attaches:
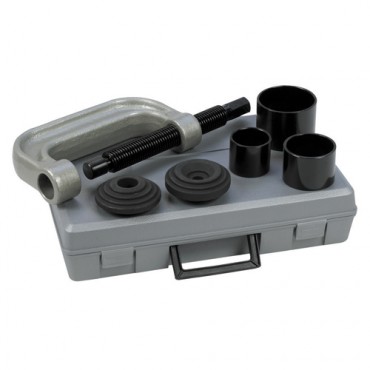
HF Ball joint tool: ~ $29.99 on sale Item 38335
26mm socket used to remove oem bushing:

Obviously this picture was taken after i took the bushing out to show that the socket fit well.
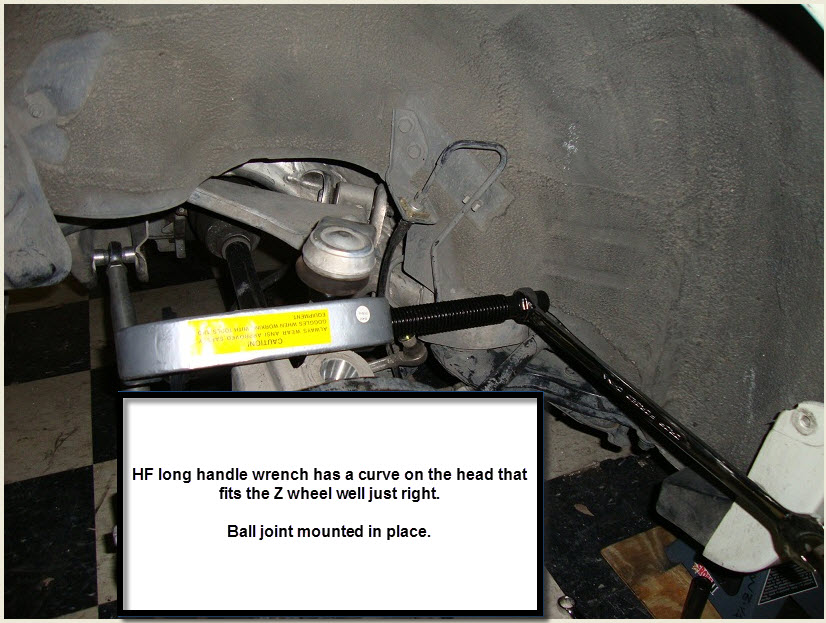
Mounted up:

I purchased HF long handle wrench set ITEM #47067 and used the 22mm wrench from the set. The beautiful thing about it was the angle the head had and the length for leverage in fighting the bushing out. Having the 22mm wrench made it EASY:
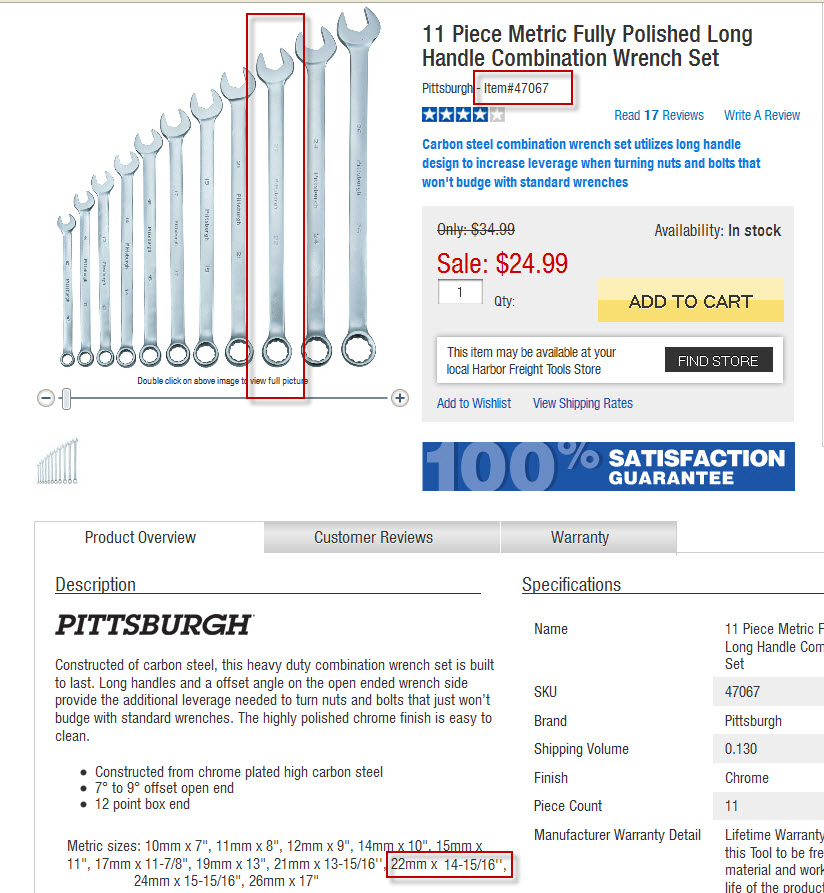
22mm long handle wrench from HF set used to turn da bish:
OEM BUSHING ON ITS WAY OUT ~ FALLING INTO RECEIVING STEEL CUP:

OUT:
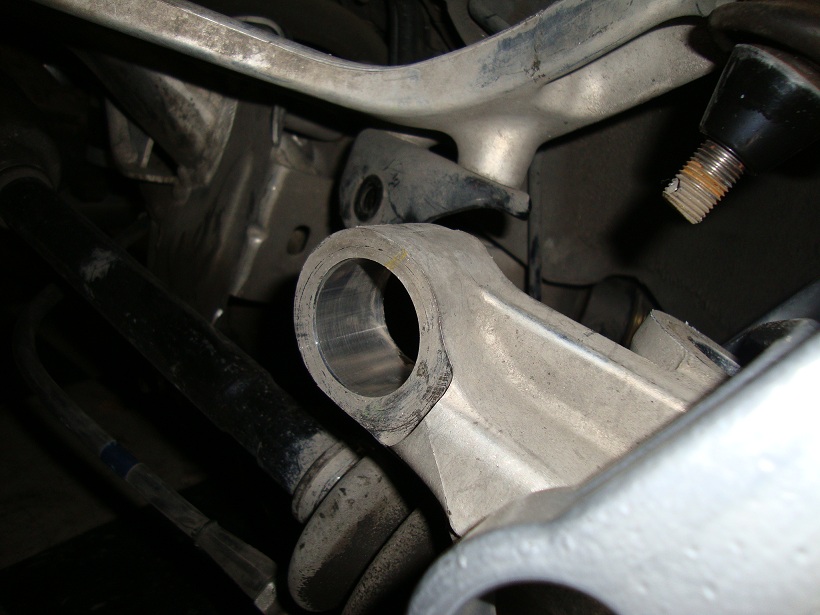
However, notice how this side of the rear knuckle is machined FLAT!
Well, the opposite side is NOT flat and is angled at about a 5 degree angle.
~ Sorry, I didn't get a picture of this ~ but I then found a larger piece of steel and cut one side of it at a five degree angle with my chop saw to help line up the ball joint tool STRAIGHT!
Update - here is a picture showing the 5 degree issue im talking about:
Notice how this side is angled at 5 degrees, and how the black receiving cup isn't straight:

I replaced the black steel cup with another larger piece of steel, cut one side at a 5 degree angle and then when i rigged the entire ball joint tool back up everything lined up great and bushing pressed in easy on the first time!
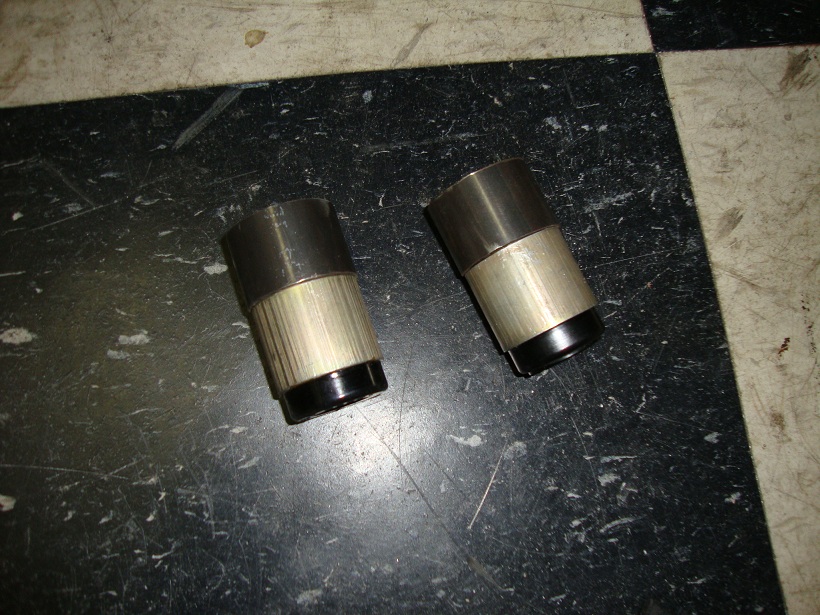
Steel needed to install the whiteline bushing in:
To install this whiteline W62535 bushing you need to go to a local steel yard and get a Overal diameter 1.5" DOM STEEL round stock with a .083 wall.
That results in a 1.5-.083-.083 = 1.33" Inner diameter that fits over the W62535 rear shock mount bushing perfectly:
New Whiteline P/N W62535 bushing installed:

-J
HF Ball joint tool: ~ $29.99 on sale Item 38335
26mm socket used to remove oem bushing:
Obviously this picture was taken after i took the bushing out to show that the socket fit well.
Mounted up:
I purchased HF long handle wrench set ITEM #47067 and used the 22mm wrench from the set. The beautiful thing about it was the angle the head had and the length for leverage in fighting the bushing out. Having the 22mm wrench made it EASY:
22mm long handle wrench from HF set used to turn da bish:
OEM BUSHING ON ITS WAY OUT ~ FALLING INTO RECEIVING STEEL CUP:
OUT:
However, notice how this side of the rear knuckle is machined FLAT!
Well, the opposite side is NOT flat and is angled at about a 5 degree angle.
~ Sorry, I didn't get a picture of this ~ but I then found a larger piece of steel and cut one side of it at a five degree angle with my chop saw to help line up the ball joint tool STRAIGHT!
Update - here is a picture showing the 5 degree issue im talking about:
Notice how this side is angled at 5 degrees, and how the black receiving cup isn't straight:
I replaced the black steel cup with another larger piece of steel, cut one side at a 5 degree angle and then when i rigged the entire ball joint tool back up everything lined up great and bushing pressed in easy on the first time!
Steel needed to install the whiteline bushing in:
To install this whiteline W62535 bushing you need to go to a local steel yard and get a Overal diameter 1.5" DOM STEEL round stock with a .083 wall.
That results in a 1.5-.083-.083 = 1.33" Inner diameter that fits over the W62535 rear shock mount bushing perfectly:
New Whiteline P/N W62535 bushing installed:
-J
Thread Starter
Joined: Jan 2006
Posts: 11,204
Likes: 32
From: San Antonio/I miss DFW, TX
Thread Starter
Joined: Jan 2006
Posts: 11,204
Likes: 32
From: San Antonio/I miss DFW, TX
I decided to make this its "HOW TO" own thread after i saw this post:
https://my350z.com/forum/10045586-post1.html
I thought i had made its own thread some time back, but i guess i only did it in the dfw lounge and the other thread mentioned.....
anyways, hopefully now more people find it that need it...
-J
https://my350z.com/forum/10045586-post1.html
I thought i had made its own thread some time back, but i guess i only did it in the dfw lounge and the other thread mentioned.....
anyways, hopefully now more people find it that need it...
-J
Last edited by JasonZ-YA; Feb 18, 2013 at 04:38 AM.

Registered User
Joined: Feb 2003
Posts: 841
Likes: 9
From: indiana
Jason,
I planned on doing this and used this to make sure what the job would be like. I took a peek under the car again and never noticed from the corner of your pics that the ball joint needs to come out because it is in the way. Being the stubborn man I am, I was determined to avoid that. I did the same basic method you did but used acme threaded rod, nuts, and washers, and the same size receiving cups and a 26mm socket to do all the work as well. I noted the 5degree slope you mentioned and actually it did not make much difference using a threaded rod because you can adjust the angle that it pulls at somewhat. Everything fit though and just made it clearance wise. Of course there would not be room if the car was not up in the air and all of the arms had drooped down.
What I DID run into trouble is with the stupid whiteline bushing. I did not run into any problems with Whiteline with all of the bushings I put in the front suspension last year but I was using a hydraulic press and didn't measure anything since I had no problems. However with the W62535 I did have problems getting it started and figured it was just the 5 degree slope killing me. After several attempts and also trying to match my press tool to the slope exactly to make sure the pulling rod was perfectly straight it still would not start straight. Well I measured and the arm is 0.421" the original OEM busing OD was 0.421-0.422"
THe whiteline bushing measured 0.430-0.435!!! It is WAY too big for fitment and not perfectly round. Since my car was in the air and one of the factory bushings was destroyed removing the shock (shock bolt is fused to bushing from corrosion - year round DD in the snow/salt with 200,000miles) I had no choice but to make it fit. I put a sanding flapper wheel in my drill and sanded it down. Couldn't fit it in my lathe - it was 1/16" too big for the jaw chuck and was too lazy to put the large 4 jaw and get everything centered properly. I ended up sanding it down to about 0.422-0.423 or so not wanting to go too small and it went in straight and fit tight. I ended up with it more round than Whiteline made it. I cannot believe how much it was oversized though.
Trending Topics

If one had the knuckle completely off the car, would it be possible to just press all the whiteline bushings in with a vise? I asked a shop about pressing these bushings in, and they said that they would most likely just use vise to do it. . .

Yes, pop the whole knuckle off (takes 15 minutes tops), and just use a vise. I promise you won't have any problem with that whatsoever! I'm doing it this weekend if you want me to report back on it or make a how-to
Thread Starter
Joined: Jan 2006
Posts: 11,204
Likes: 32
From: San Antonio/I miss DFW, TX
Ya take pics plz. Would be good to see.
Thx
J

Thread
Thread Starter
Forum
Replies
Last Post
350Z Project X
Suspension
9
Oct 10, 2015 09:23 AM