
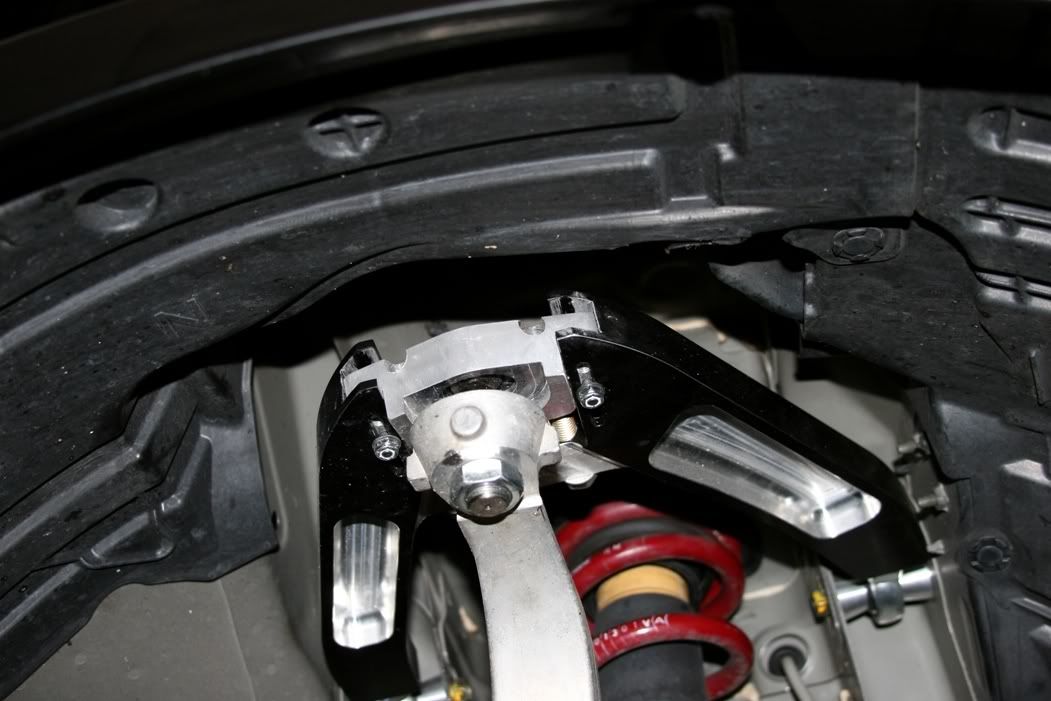
Revised SPL A-Arms


Note to readers: these bumps are on the OEM piece, not the SPL parts piece!


They have to ground down to provide clearance to the arm under maximum suspension travel. The shim design takes up a little more room and those bumps (leftover from the casting process) are just in the way.
They are very easy to grind out with a grinder, or even a rotozip or dremel.
They are very easy to grind out with a grinder, or even a rotozip or dremel.

Thread Starter
Registered User
iTrader: (6)
Joined: Jan 2007
Posts: 1,844
Likes: 0
From: DeLand, Florida
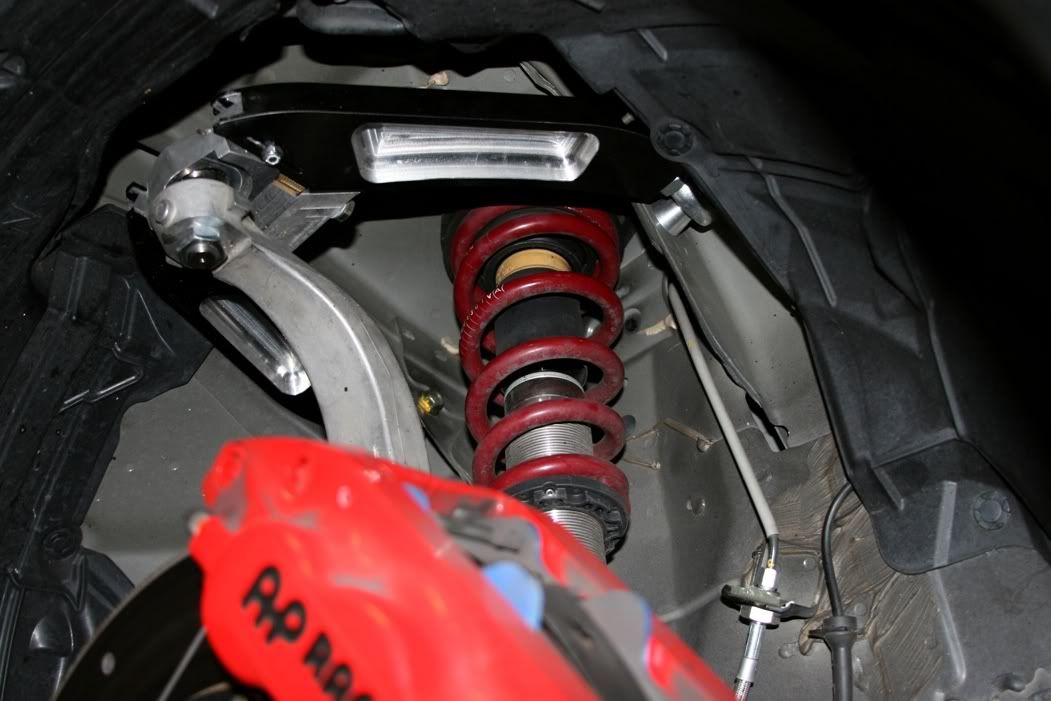
Aligned the car today. Drives awesome although I think I may take a little front camber out if I'm not getting to the shoulder of the tire on the track.
Front:
-3.2 degrees camber, right and left
9.2 degrees of caster (with the bolts on the arms threaded in) right and left
-1/32" toe right and left (total 1/16" toe out)
Rear:
-2.0 degrees camber right and left
1/16" toe in right and left (1/8" total toe in)
I have a .5" drop all around, and am on factory rear alignment bits, the rear camber is more than I wanted with more toe in than I wanted, but this was the happy medium before buying toe bolts and getting the rear realigned.
Very happy overall, the car drives well and the arms make zero noise.


BTW, I wanted to mention that owners of our existing v1 front upper arms will be able to upgrade to this version at a subsidized price of $199 (note: we will re-use the inside rod ends from the old arms). However because we made very few sets in our first production run, and we do not have enough arms to meet demand, upgrades will be available with the next production run (ETA mid-late June).
Also a future retrofit kit/option may be available to allow caster adjustment on car. It was one part of the design that did not make it into production because we had trouble keeping costs down enough to meet our target selling price.
Also a future retrofit kit/option may be available to allow caster adjustment on car. It was one part of the design that did not make it into production because we had trouble keeping costs down enough to meet our target selling price.

 engineering
On some arms there might be an issue where the ball joint adapter does not have enough friction against the ball joint bearing to turn the bearing properly when you turn the wheel. We are mailing out a simple service pack for customers to apply a bearing retaining compound between the ball joint adapter and the ball joint bearing; it should take about an hour to perform the fix. I apologize for the inconvenience, this issue did not come up on any of our test sets.
The arms we ship out from here now all have this compound pre-applied on the ball joint.
The arms we ship out from here now all have this compound pre-applied on the ball joint.
Thread Starter
Registered User
iTrader: (6)
Joined: Jan 2007
Posts: 1,844
Likes: 0
From: DeLand, Florida
Took me less than 45 minutes. Jacked the front up from the center, took the wheels off.
Started to loosen the retaining bolt (hex headed bolt), put a bottle jack under the spindle and lifted it slightly to alight the spherical bearing more vertically. Holding the ratchet in the wheel well pocket I took the screw out. I lightly tapped the A-arm with a dead blow (lol at lightly) while jacking up and down with the bottle jack, after a few pivots of the arm and lots of banging the joint to be loctited came free. Cleaned with brake parts cleaner, dressed with loctite, reassembled, mounted wheels, lowered car. I didn't need to remove the lower strut bolt or the sway bar endlinks.
I had a loose connection on my driver side, and a noise starting to happen, I'd noticed that screw was loose before and tightened it, but it came loose again, noise is completely gone now, definitely very happy with the repair and the customer service from SPL.

Upgrades are available now, but arms may take upto 1-2 business days to ship because it takes about an hour to assemble each set.
Here is information on how to obtain the upgrade to our v2 upper arms:
Upgrade price is $199 + shipping
The 4 inside rod ends (the ones connecting to the chassis) and adapters on your v1 upper arms will be re-used. If those rod ends require replacement it will cost an additional $70.
We can ship the v2 arms (minus the inside rod ends and adapters) first to you with a additional core charge of $100, which is refunded when you return the v1 arms to us. You will need to swap over the inside rod ends yourself.
If you ship us the v1 arms first then there will be no core charge. Also we will inspect the inside rod ends for you to make sure they are OK to re-use.

Registered User
Joined: Dec 2007
Posts: 107
Likes: 1
From: Ontario
This might seem like a dumb question but I'm curious as to how the two gold coloured bolts on the inside of the arm are secured? It looks to me these bolts don't a have a nut on the other end. What is keeping these bolts from backing out from vibration? Thanks. Engineering mind at work here ha Arms look great though. I'll be picking up a set next year.
This might seem like a dumb question but I'm curious as to how the two gold coloured bolts on the inside of the arm are secured? It looks to me these bolts don't a have a nut on the other end. What is keeping these bolts from backing out from vibration? Thanks. Engineering mind at work here ha Arms look great though. I'll be picking up a set next year.
The other 2 gold colored bolts connecting the arm to the chassis (stock bolts) are threaded into the chassis.
Registered User
Joined: Dec 2007
Posts: 107
Likes: 1
From: Ontario
The 2 gold colored bolts in the middle of the arm are threaded into the bearing (ball joint) block itself, with nord-lock washers to resist loosening from vibration.
The other 2 gold colored bolts connecting the arm to the chassis (stock bolts) are threaded into the chassis.
The other 2 gold colored bolts connecting the arm to the chassis (stock bolts) are threaded into the chassis.