
DIY Engine & Tranny Removal

Well, I woke up this morning, knowing I had the day off, and decided that this was the day that I was going to remove my engine.
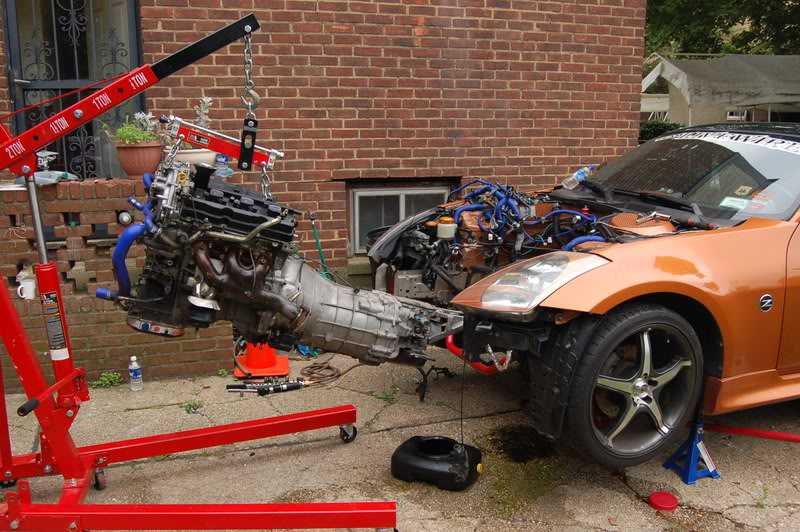
My Z has been KIA (Killed in Action) for almost 2 months now, and I was sick of seeing her getting older in my driveway. I have been working like a madman, to pay for all of the parts I need, and now, the only thing holding me back is my clutch. That shouldn't stop me from taking the engine out, though. So anyway, since I didn't have access to a lift, I decided that the best way to remove the engine was while it was still attached to the tranny.
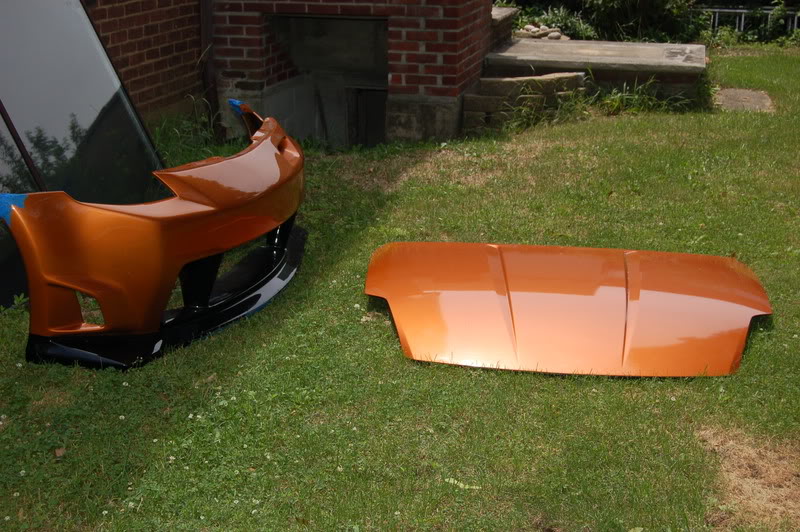
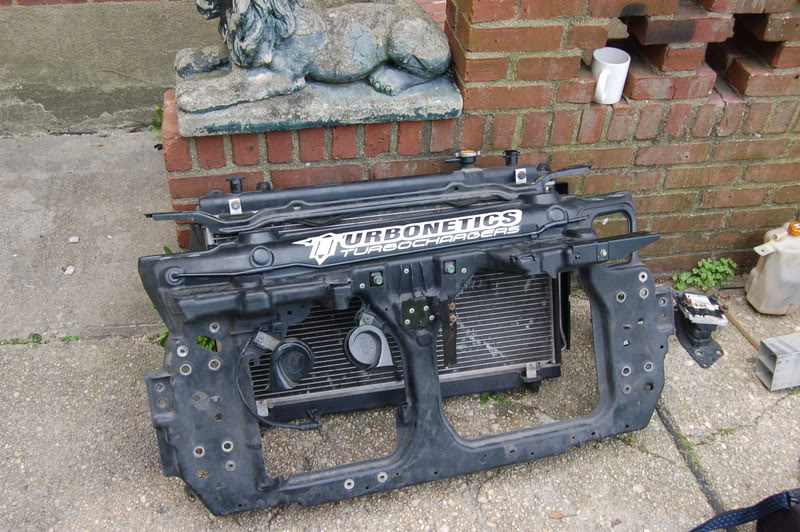
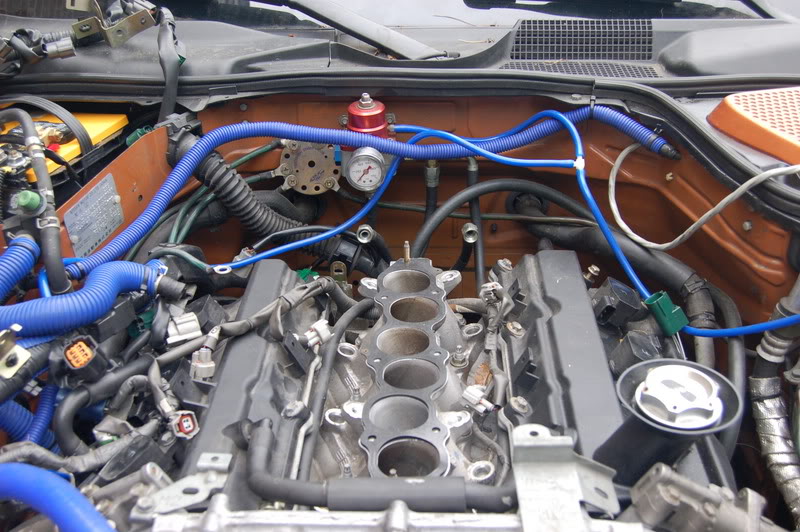
I needed to clear the way, so off with the bumper, off with the superficial stuff: plenum, upper and lower, and bottom portion of the intake...The out for the electric fans... then disconnect the radiator. This requires special clamps to disconnect the A/C lines. My A/C was already drained, so no worried about pollution or illegal dumping of freon, etc...Anyway, disconnect the radiator and remove the front bumper. Remove the plastic shroud from in front of the radiator. Drain any coolant by opening the lowest coolant hose. There is a lot of coolant in these engines, I was amazed at the quantity of fluid that these engines can hold.
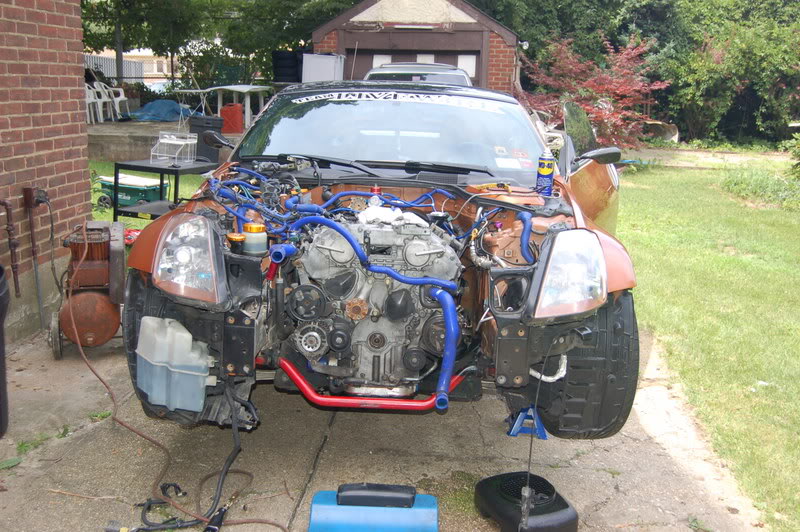
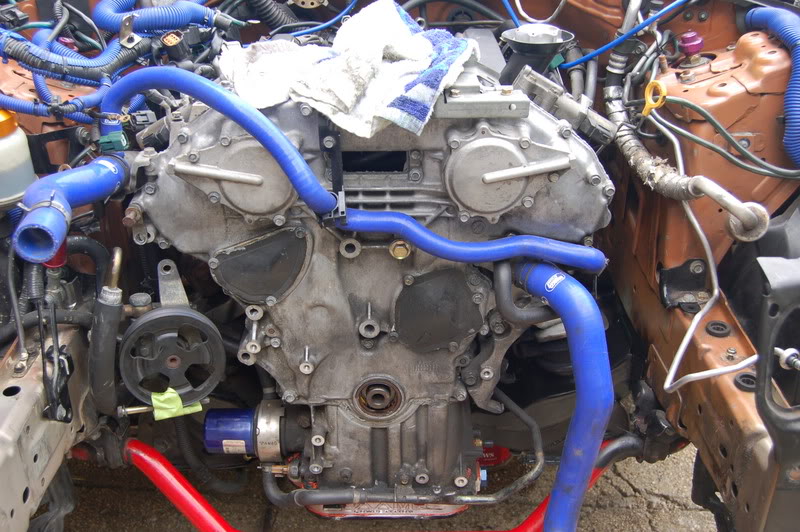
Once the radiator fluid was drained, and the radiator was clear of obstacles, out with the radiator. That leaves us with a beautiful unobstructed view of the front of the engine.
Remove the serpentine belts by loosening the adjuster pulleys. Remove the adjuster pulleys.So far, all of the disassembly is easy because you can see where everything is. I took the time to mark ziplock bags for all of the appropriate bolts and nuts, so I didn't have to worry about what goes where.
In the case of some of the accessory support brackets, and such, I put a piece of tape on them so I would remember the proper orientation. You know, "This end up," to help me along.
So we are up to removing pulleys. Next I removed the accessories...ower steering pump, Alternator, A/C Compressor. Once those are out of the way, things are really looking good.
Now all thats left is to disconnect every little connector in sight, and even those out of sight. It takes a lot of time, but be patient, and it will happen.
All of the above took me about 3 hours. It really wasn't as bad as I thought.
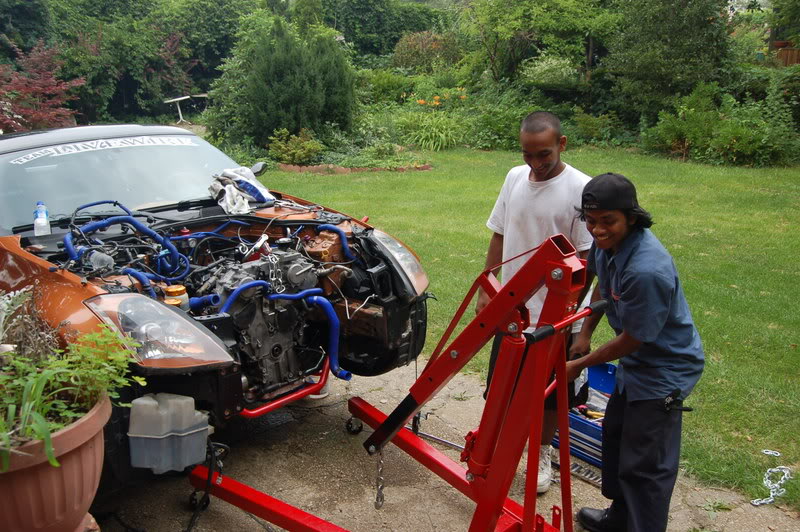
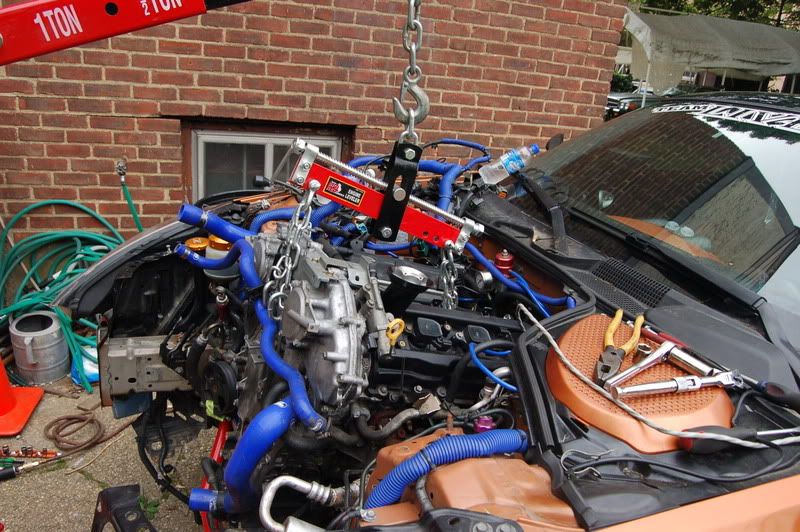
Next, I loosened the transmission support, meanwhile I kept a jack underneath in case something happened...Next, I found a couple of good places to secure the hoist and fastened some big bolts to support both the engine and tranny. Don't be lazy here, you really need to take your time and find some really dependable support bolts or else you could break something.
I used the top two transmission mounting bolts and the front 2 biggest bolts on the timing cover.
Once the engine is secured, its time to start cranking away. Remember to open up the shifter cover, remove the ****, and even better if you remove the transmission shift **** altogether. Less clutter. Important!
I have pictures of the whole process, along with a couple of sticking points, but all in all it was a great day.

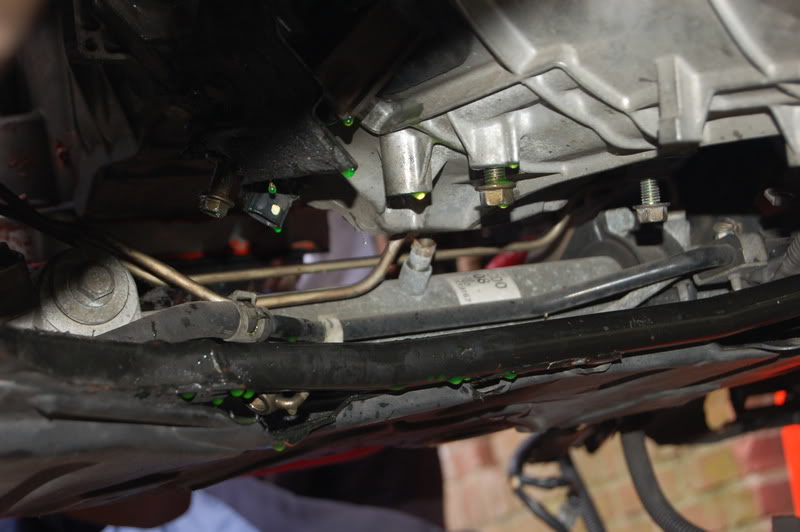
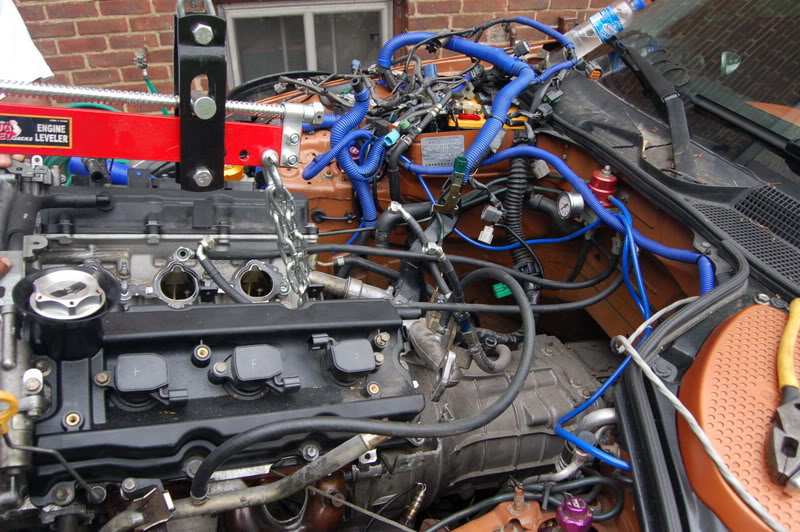
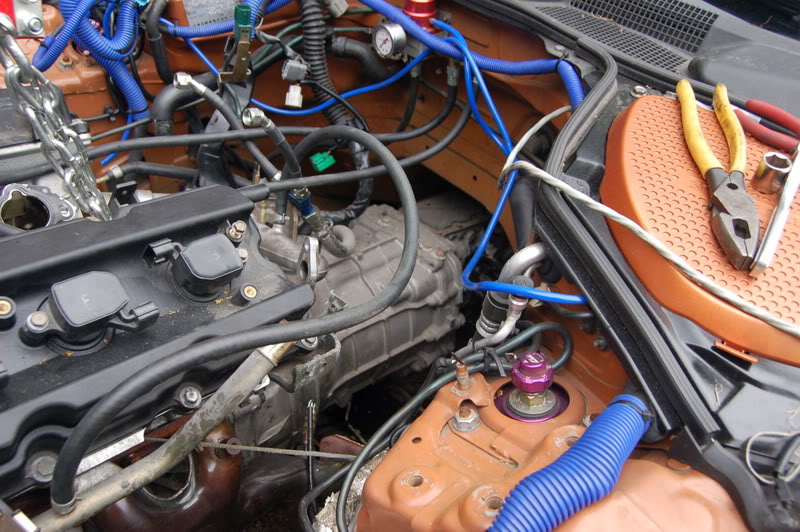
This is important, Be sure to watch for these 2 lines. You don't want to crush them. One is power steering, and the other I forget, but watch as you remove the engine. It took an extra 15 minutes of careful guiding to clear the lines.
Almost!!!
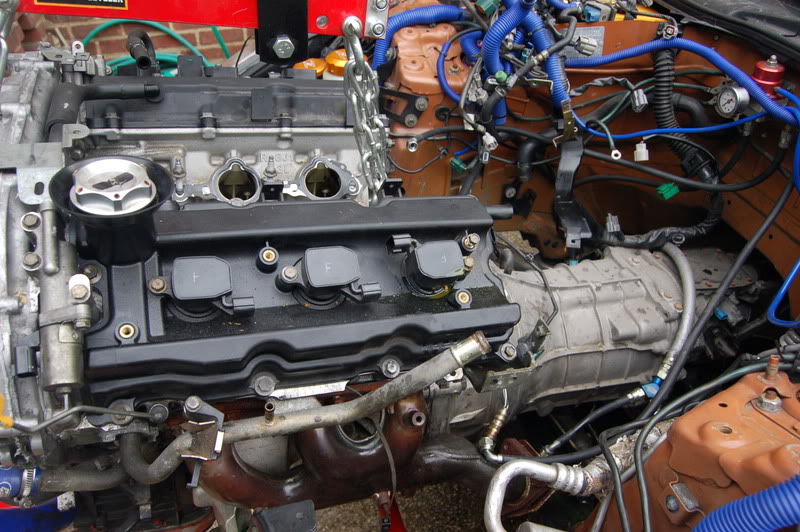

She's Free!!!!!
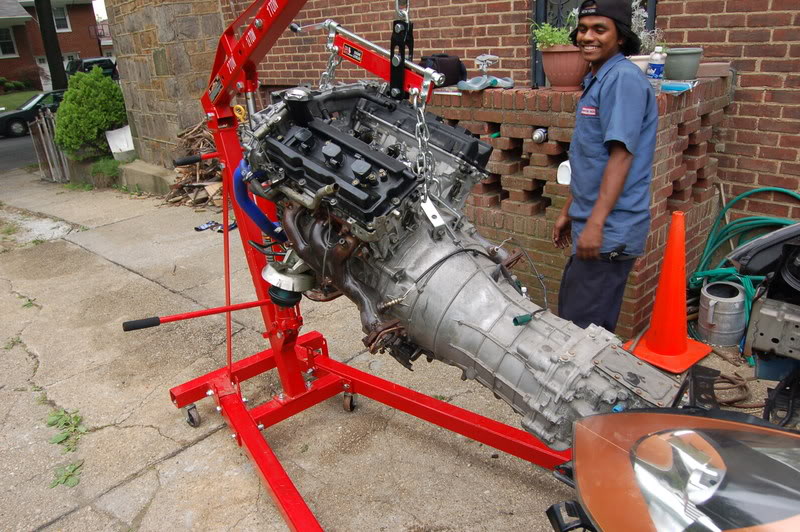
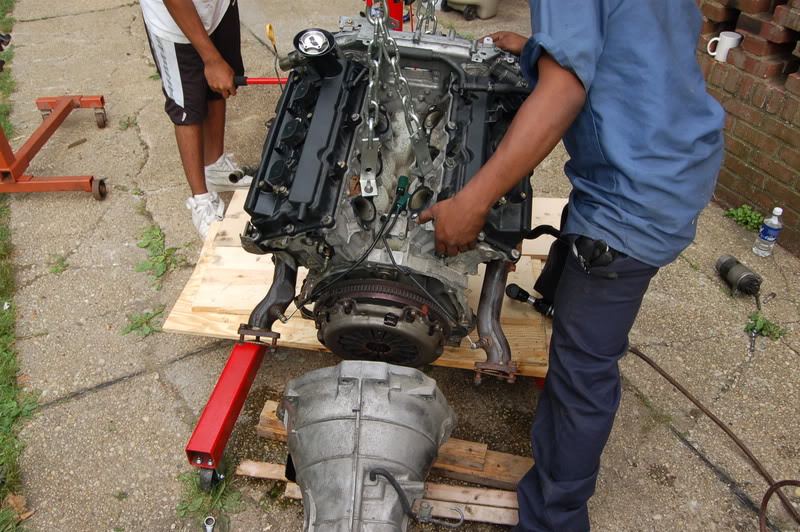
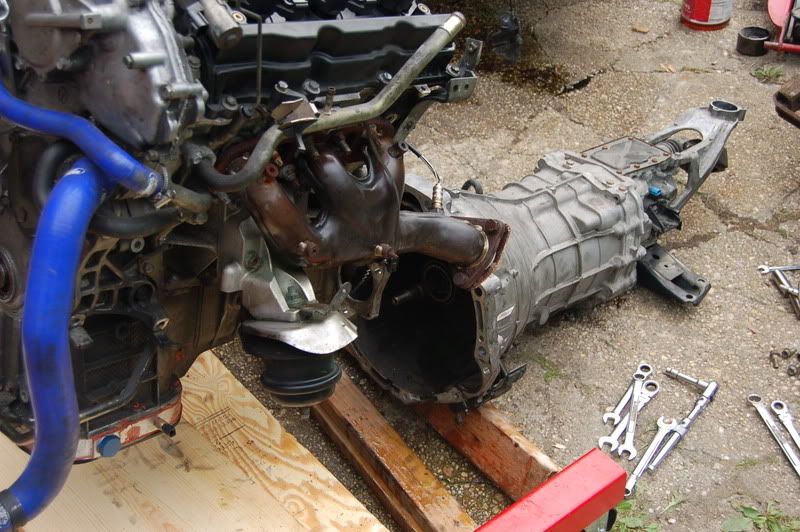
Separate the engine and tranny, so I can get the engine on the engine stand, for more disassembly.
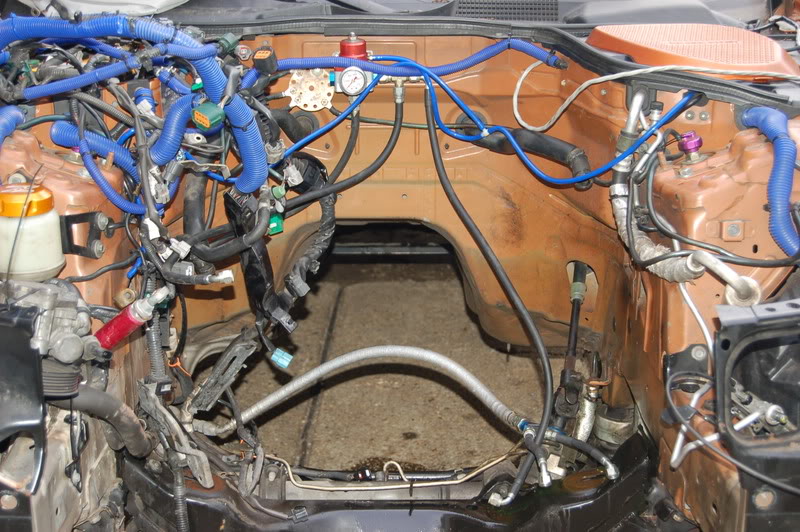
My Poor Naked Car! It ain't got no heart!
My Z has been KIA (Killed in Action) for almost 2 months now, and I was sick of seeing her getting older in my driveway. I have been working like a madman, to pay for all of the parts I need, and now, the only thing holding me back is my clutch. That shouldn't stop me from taking the engine out, though. So anyway, since I didn't have access to a lift, I decided that the best way to remove the engine was while it was still attached to the tranny.
I needed to clear the way, so off with the bumper, off with the superficial stuff: plenum, upper and lower, and bottom portion of the intake...The out for the electric fans... then disconnect the radiator. This requires special clamps to disconnect the A/C lines. My A/C was already drained, so no worried about pollution or illegal dumping of freon, etc...Anyway, disconnect the radiator and remove the front bumper. Remove the plastic shroud from in front of the radiator. Drain any coolant by opening the lowest coolant hose. There is a lot of coolant in these engines, I was amazed at the quantity of fluid that these engines can hold.
Once the radiator fluid was drained, and the radiator was clear of obstacles, out with the radiator. That leaves us with a beautiful unobstructed view of the front of the engine.
Remove the serpentine belts by loosening the adjuster pulleys. Remove the adjuster pulleys.So far, all of the disassembly is easy because you can see where everything is. I took the time to mark ziplock bags for all of the appropriate bolts and nuts, so I didn't have to worry about what goes where.
In the case of some of the accessory support brackets, and such, I put a piece of tape on them so I would remember the proper orientation. You know, "This end up," to help me along.
So we are up to removing pulleys. Next I removed the accessories...ower steering pump, Alternator, A/C Compressor. Once those are out of the way, things are really looking good.
Now all thats left is to disconnect every little connector in sight, and even those out of sight. It takes a lot of time, but be patient, and it will happen.
All of the above took me about 3 hours. It really wasn't as bad as I thought.
Next, I loosened the transmission support, meanwhile I kept a jack underneath in case something happened...Next, I found a couple of good places to secure the hoist and fastened some big bolts to support both the engine and tranny. Don't be lazy here, you really need to take your time and find some really dependable support bolts or else you could break something.
I used the top two transmission mounting bolts and the front 2 biggest bolts on the timing cover.
Once the engine is secured, its time to start cranking away. Remember to open up the shifter cover, remove the ****, and even better if you remove the transmission shift **** altogether. Less clutter. Important!
I have pictures of the whole process, along with a couple of sticking points, but all in all it was a great day.
This is important, Be sure to watch for these 2 lines. You don't want to crush them. One is power steering, and the other I forget, but watch as you remove the engine. It took an extra 15 minutes of careful guiding to clear the lines.
Almost!!!
She's Free!!!!!
Separate the engine and tranny, so I can get the engine on the engine stand, for more disassembly.
My Poor Naked Car! It ain't got no heart!


I'm a little concerned about Part 2, the install, but I've got all of my nuts and bolts labeled and bagged up. My only concern, is getting the harness back the way it was. I feel that if it doesn't reach where it is supposed to, its probably because I ran it improperly.
Trending Topics
Next is to mount up the old engine on a proper engine stand and remove the oil pan, to get access to a couple of the hidden timing cover bolts. I read the book on this one. Please do not attempt to simply rip off the timing cover, assuming you go all of the bolts on the exterior. There are at least 2 interior bolts holding it onto the front of the engine. You need to actually get below and look up into the oil pan to find them.


I think a few others have tried to show the install, but few have done a truly good job documenting progress w/photos. I'll try to do my best, but working alone slows everything down, when you have to stop and snap a photo of each move.
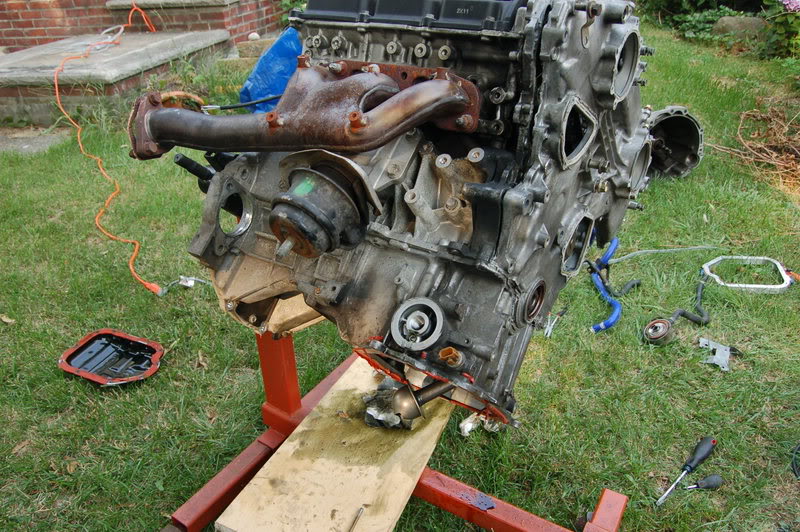
OK Boys & girls, I was bored again today, so after I came home from work, I decided to remove as much from the original block as I could in the precious few hours of daylight left.
On my To-Do-List was to remove, the valve covers, timing cover, engine mounts, and other miscellaneous exterior stuff, exhaust manifold, water pump, etc...
So here goes.
I already transferred the engine from the hoist to the engine stand.
First and foremost, I removed each of the four small covers on the top of the timing cover.
Removed all 22 bolts holding the timing cover, BUT BEWARE, there are 2 bolts from inside the oil pan that also hold the timing cover on. FAILURE TO REMOVE THOSE 2 BOLTS WILL RESULT IN DAMAGE TO YOUR TIMING COVER!!!!
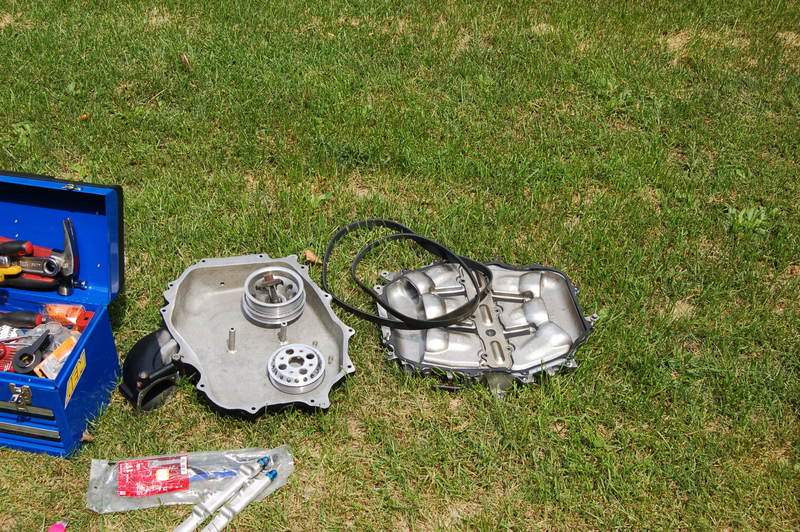
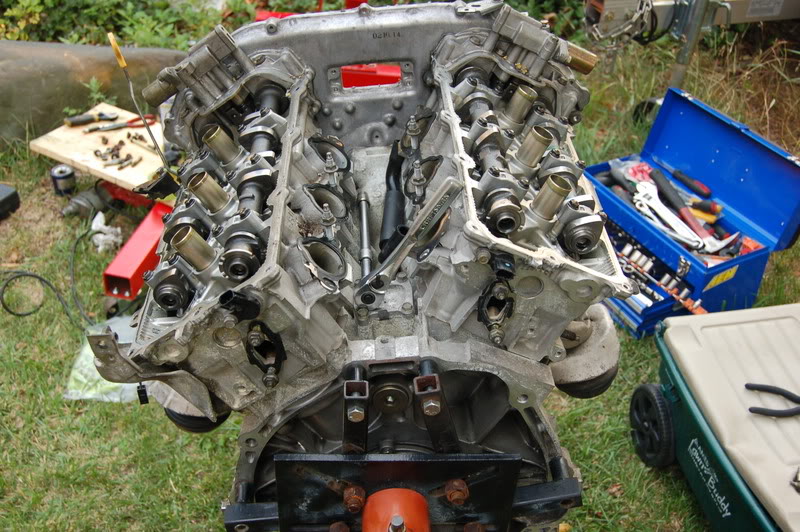
OK, now that I got that out of the way, proceed to remove the cover.
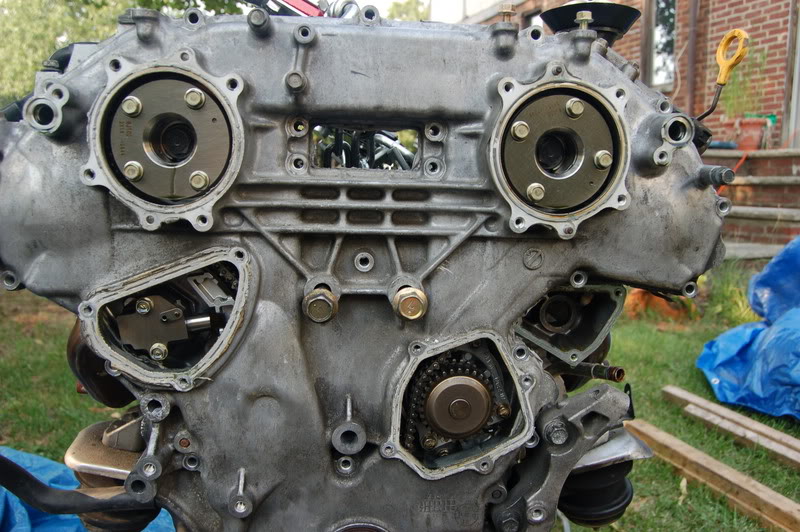
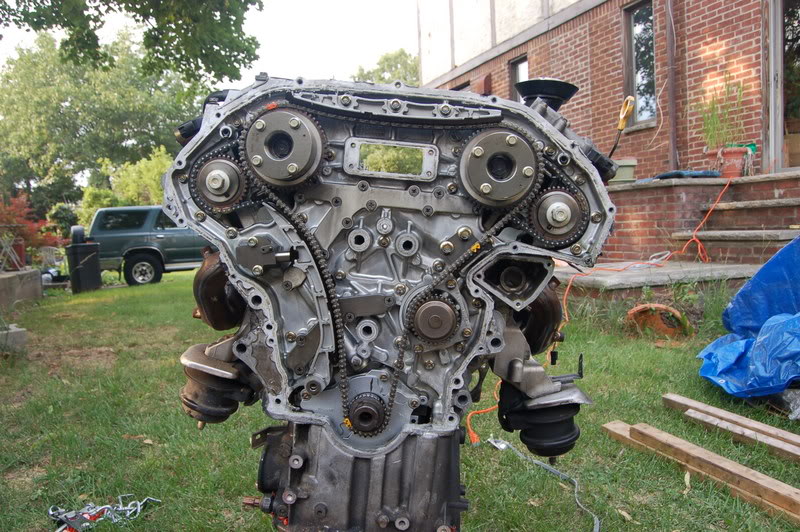
Revealing a mess of chains and gears that I do not want to touch until I have some guidance from a mechanic, or I have more time to read the service manual about a dozen times.
I proceeded on to some other items, valve covers, engine mounts, etc.
Here are the photos:
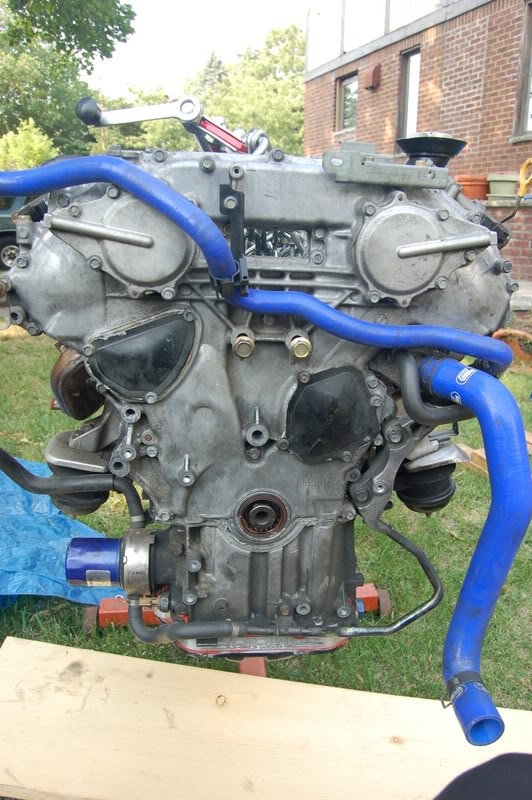
Getting started today.. You can see the oil filter still attached to the oil cooler base. That is easily removed along with some of the water cooler lines.
Off with the 4 small covers
Here you can still see the engine mount and exhaust manifold still attached:
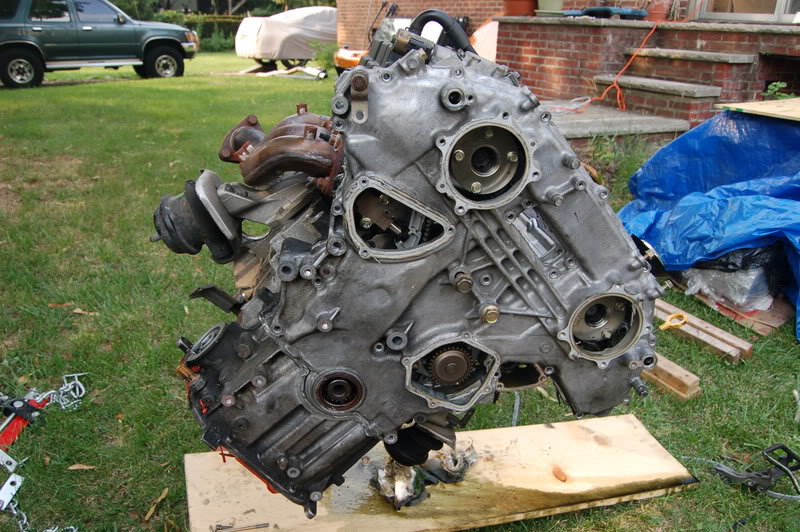
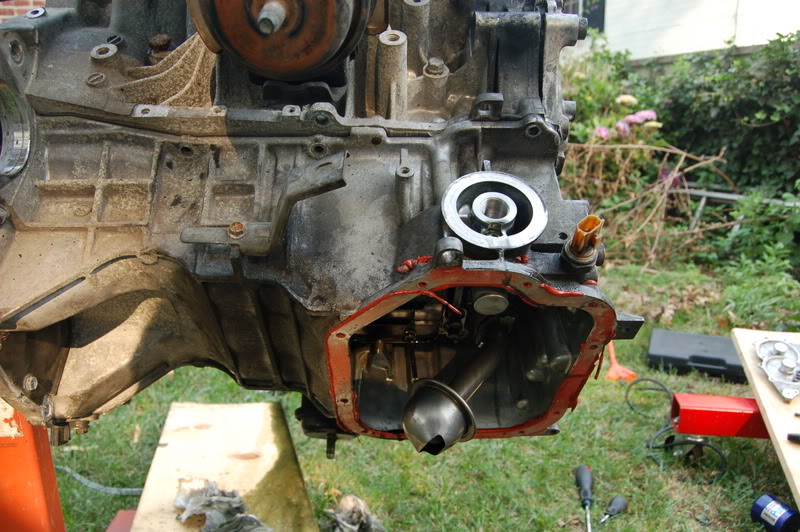
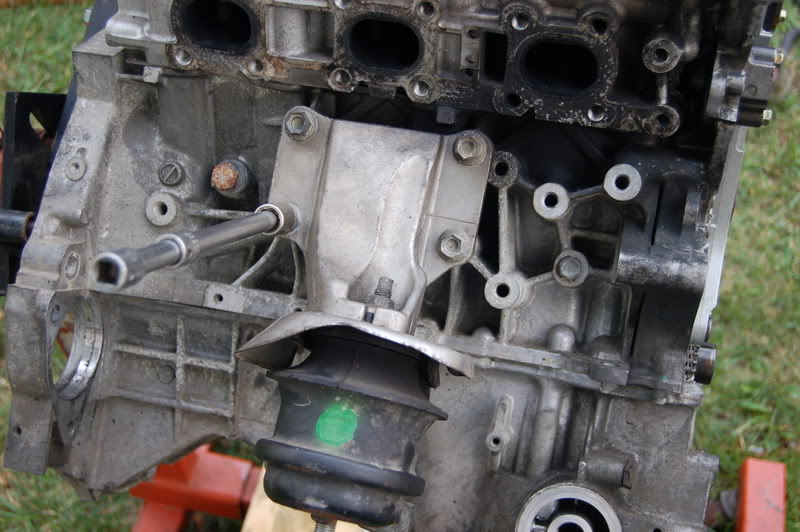
Remove the oil pan to expose the critical 2 secret bolts that will prevet me from removing the timing cover:
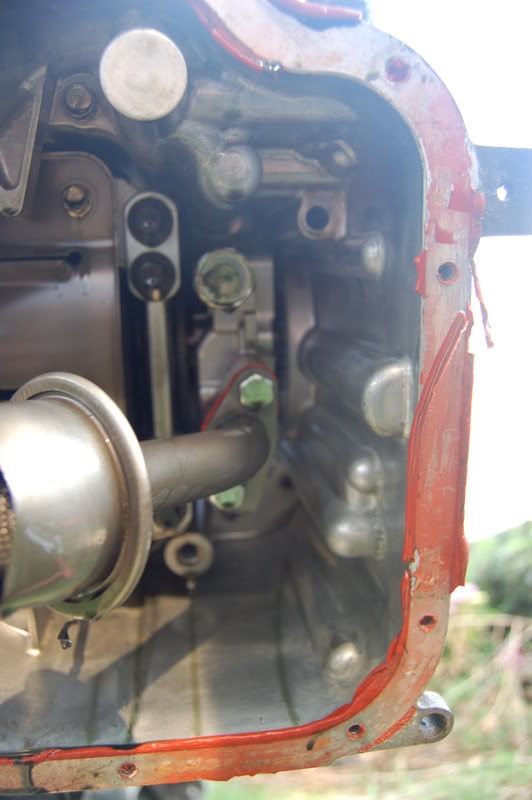
Very difficult to see but they are the forward most bolts. If you look closely you will see empty bolt holes, since I already removed the 2 bolts.
Now the timing cover is free to be removed:
Valve covers held in by 10 bolts (I think) on each bank:
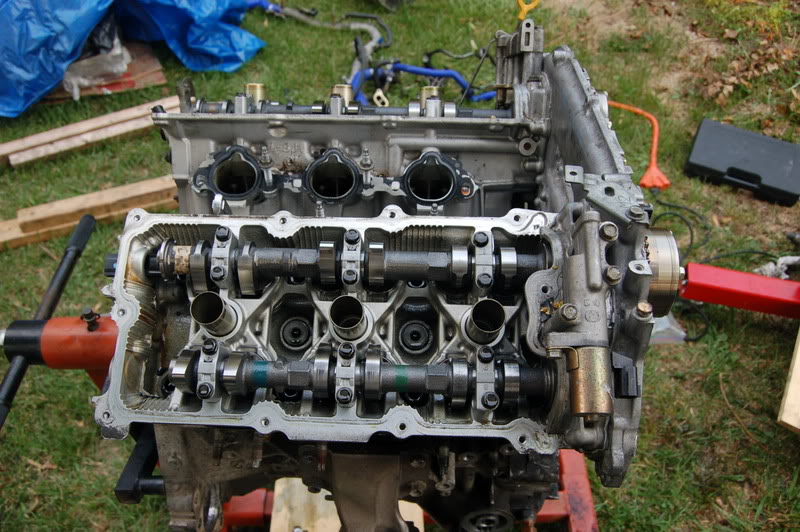
There is also a special valve covering the corner of each valve cover. You can see the 2 valve devices at the far end of the block. Each is held by 3 bolts. Simply remove the 3 bolts and remove that as well. Be careful not to lose the gasket.
I removed the 2 engine mounts here.
That's it for today boys and girls. Gotta go back and read the manual if I want to attempt and take off the timing chains. But I will need to also remove the cams in order to salvage the heads.
I will also have to remove the lower girdle and transfer than to the new block as well. I thought it was included in the short-block, but I was mistaken. I'll have to get that cleaned, because it has a lot of dirt and grime on it.
On my To-Do-List was to remove, the valve covers, timing cover, engine mounts, and other miscellaneous exterior stuff, exhaust manifold, water pump, etc...
So here goes.
I already transferred the engine from the hoist to the engine stand.
First and foremost, I removed each of the four small covers on the top of the timing cover.
Removed all 22 bolts holding the timing cover, BUT BEWARE, there are 2 bolts from inside the oil pan that also hold the timing cover on. FAILURE TO REMOVE THOSE 2 BOLTS WILL RESULT IN DAMAGE TO YOUR TIMING COVER!!!!
OK, now that I got that out of the way, proceed to remove the cover.
Revealing a mess of chains and gears that I do not want to touch until I have some guidance from a mechanic, or I have more time to read the service manual about a dozen times.
I proceeded on to some other items, valve covers, engine mounts, etc.
Here are the photos:
Getting started today.. You can see the oil filter still attached to the oil cooler base. That is easily removed along with some of the water cooler lines.
Off with the 4 small covers
Here you can still see the engine mount and exhaust manifold still attached:
Remove the oil pan to expose the critical 2 secret bolts that will prevet me from removing the timing cover:
Very difficult to see but they are the forward most bolts. If you look closely you will see empty bolt holes, since I already removed the 2 bolts.
Now the timing cover is free to be removed:
Valve covers held in by 10 bolts (I think) on each bank:
There is also a special valve covering the corner of each valve cover. You can see the 2 valve devices at the far end of the block. Each is held by 3 bolts. Simply remove the 3 bolts and remove that as well. Be careful not to lose the gasket.
I removed the 2 engine mounts here.
That's it for today boys and girls. Gotta go back and read the manual if I want to attempt and take off the timing chains. But I will need to also remove the cams in order to salvage the heads.
I will also have to remove the lower girdle and transfer than to the new block as well. I thought it was included in the short-block, but I was mistaken. I'll have to get that cleaned, because it has a lot of dirt and grime on it.
Last edited by rrmedicx; Jul 15, 2007 at 04:58 PM.
I think in the interest of avoiding excessively long threads, I will continue this in the next chapter called "Attacking the timing chain".
Thanks for all of your support.
Thanks for all of your support.
BTW, for those curious as to how I would keep track of all of the nuts and bolts, I have a system of taping them in bunches, since I ran out of zip-lock bags. Then I label them with some tape and my trusty marker.
See below:
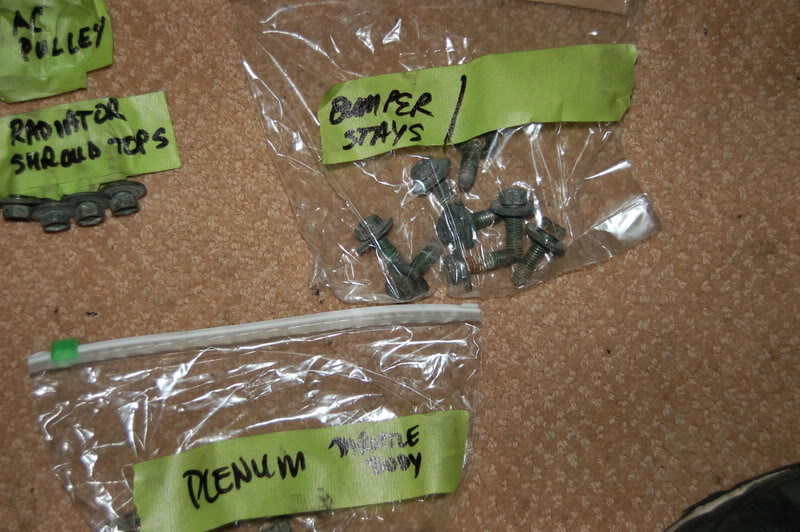

I do the same for the brackets and odd looking parts, so this should hopefully help in the re-assembly process.
I don't intend to have any left over nuts or bolts.
See below:
I do the same for the brackets and odd looking parts, so this should hopefully help in the re-assembly process.
I don't intend to have any left over nuts or bolts.

 thanks again.
