
DIY Attacking the timing chain

Alright boys and girls. Ready for lesson #3. This one is called Timing Chain removal. This is a first for me as I'm sure it is for most of you.
Now that you have noticed the engine represented below is without a timing cover...see below. The trick is how to remove the chain.
It has a couple of tension points that keep it very tight. There is essentially no slack in the chain. Nothing like your BMX bike you had as a kid, when the chain would fall off and you would just pull it a little over and start pedaling to remount it...No sir. This is much more advanced.
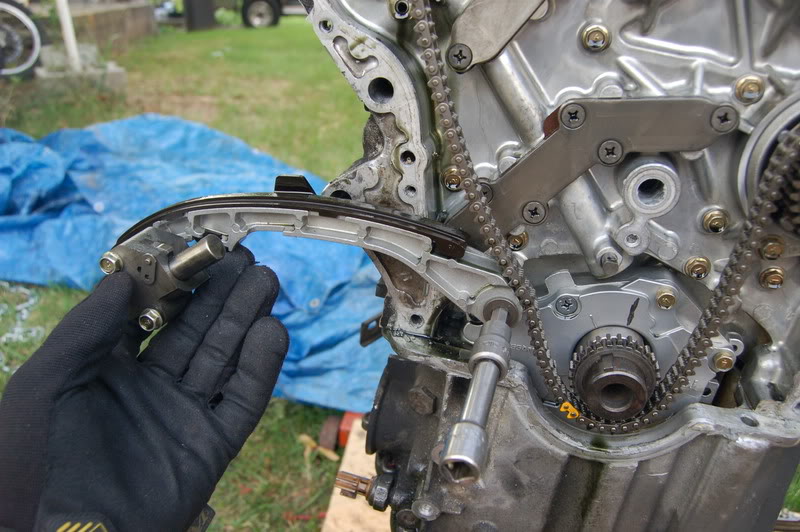
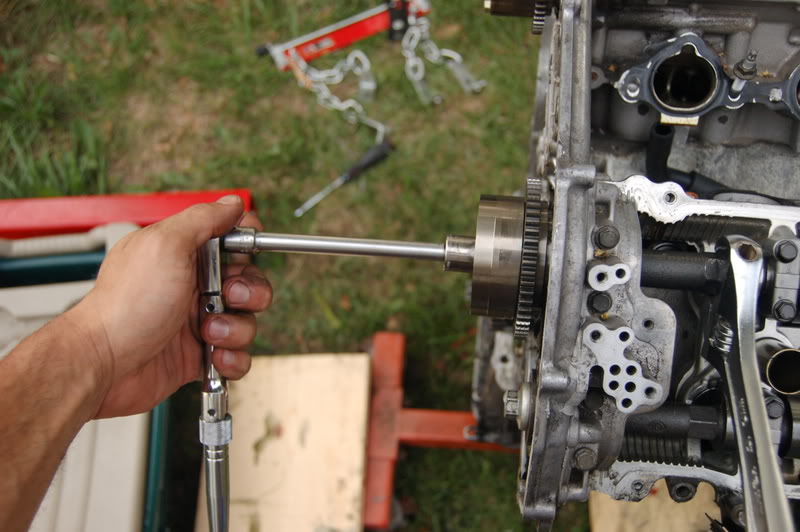
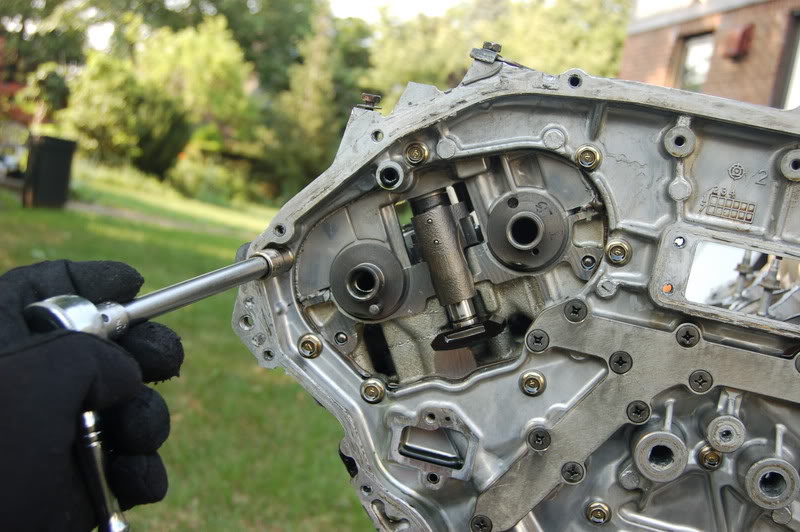
You will see below, The first item I will attempt to remove is the chain tensioner. It has a slotted tongue that sticks out and is kept in place by a move-able locking pin. Objective is to turn the key and release the tension in the chain. Once you have a little slack it will allow you to remove the other tensioner.
See photos below:
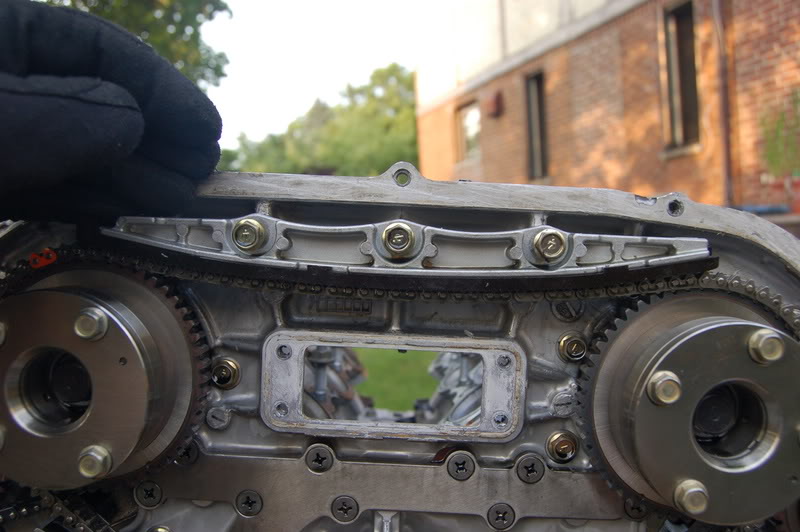
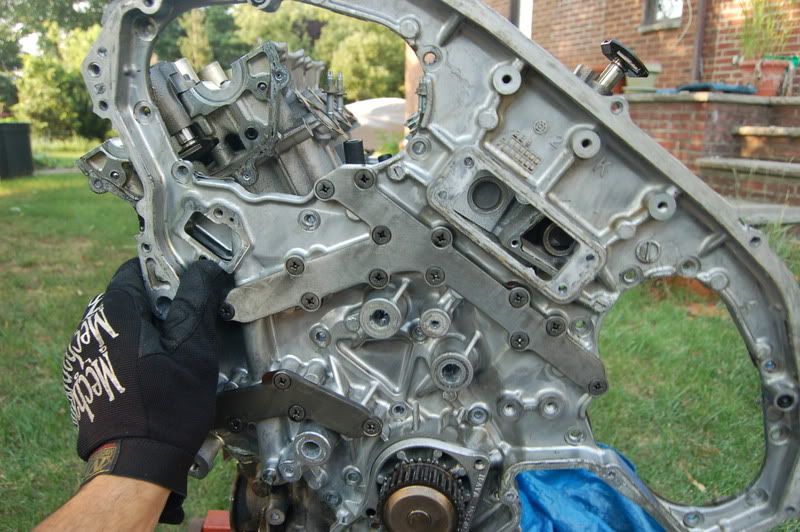
Here is the timing cover removed exposing the cam gears and timing chains.
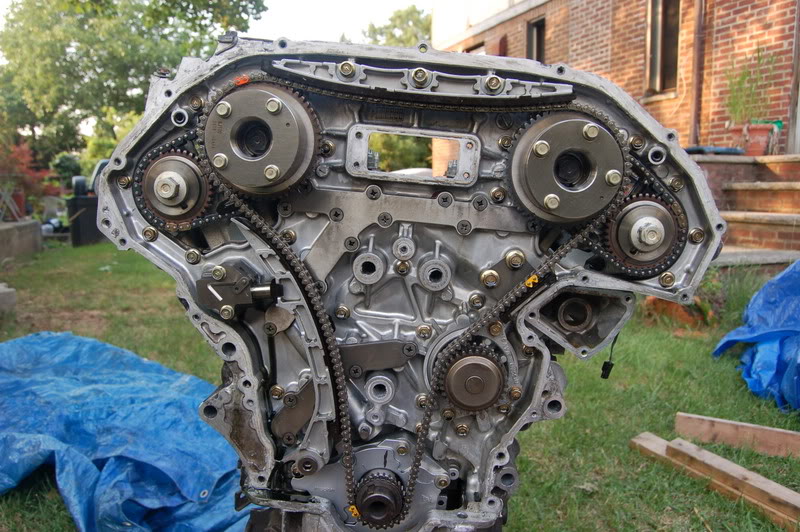
That gadget in the center is the primary chain tensioner. It has a tongue that is slotted and sticks out to apply pressure to the chain guide. This keeps the chain tight and in place.
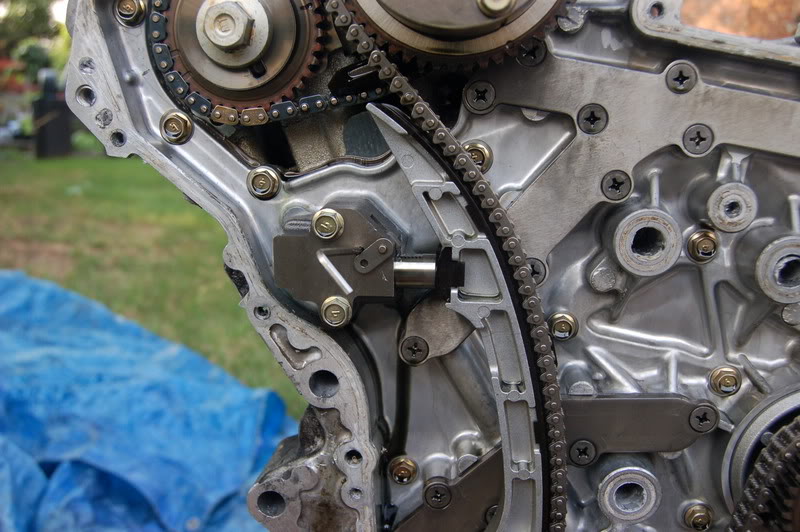
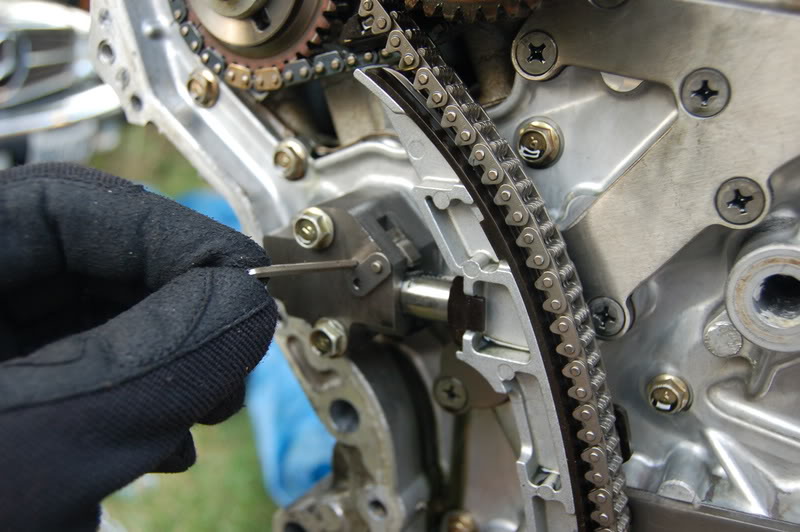
This little lever helps to release the locking mechanism. Watch as I turn it...Ooooh, Ahhhhh
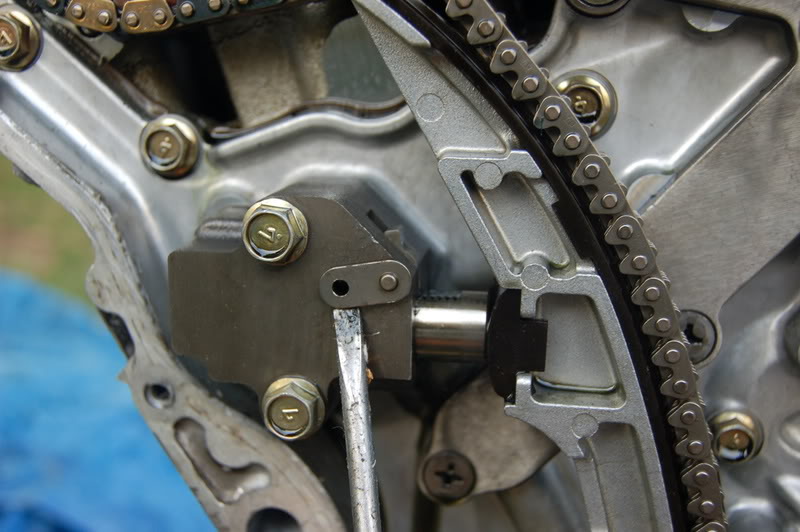
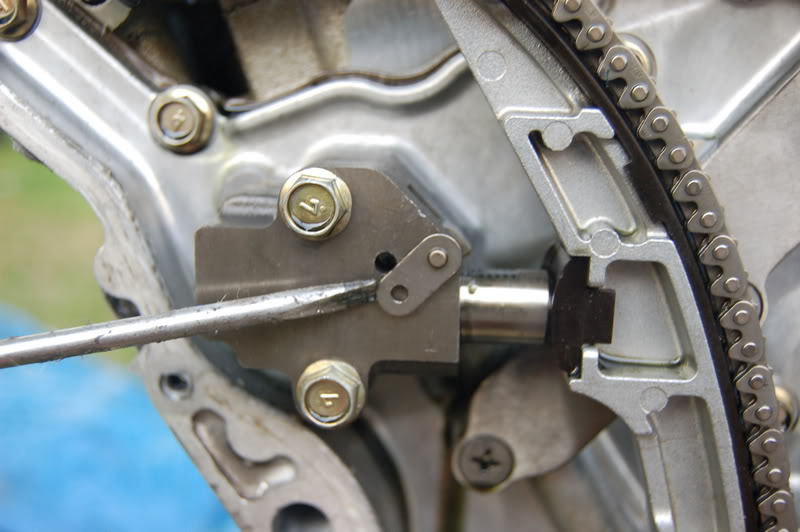
Keep in mind that this device is driven by oil pressure and you really need to push against it in order to release the little oil that is left in it.
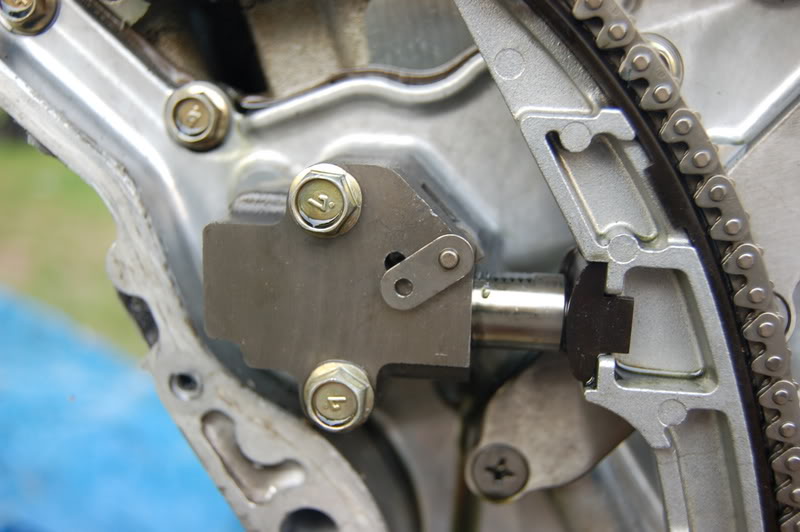
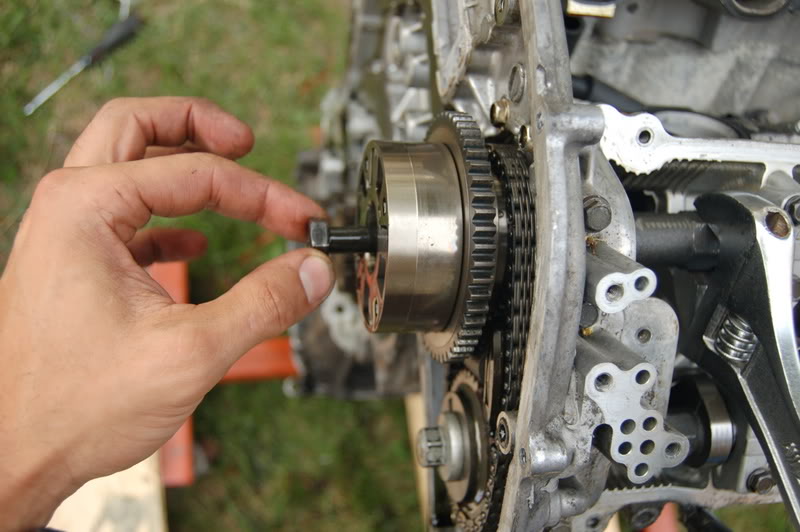
Once it is loose, remove the tensioner and this releases a lot of slack in the chain and chain guide.
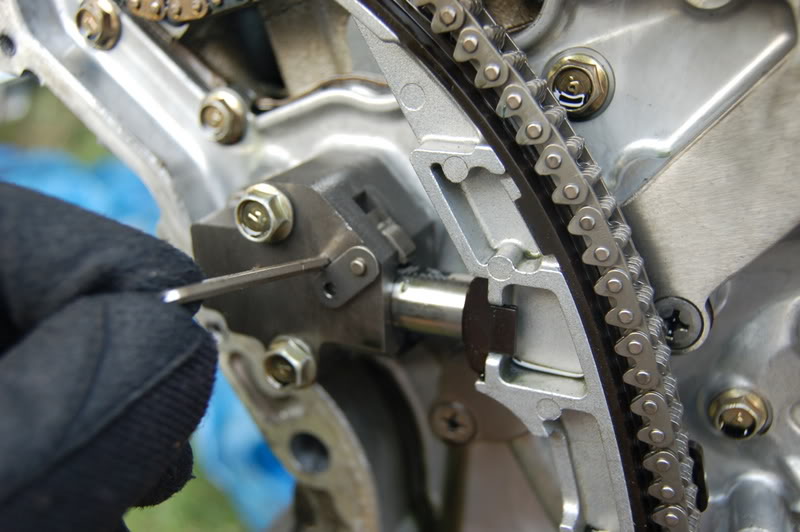
Remove the chain guide/tensioner
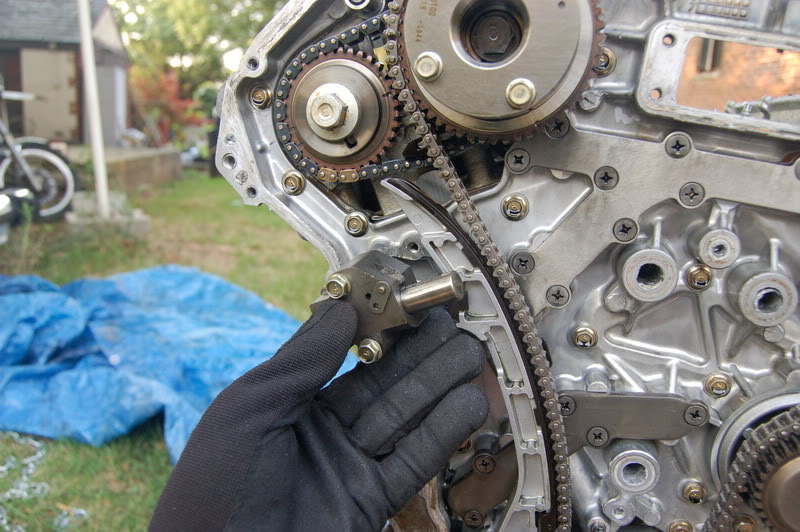
You can next remove the upper chain guide/tensioner:
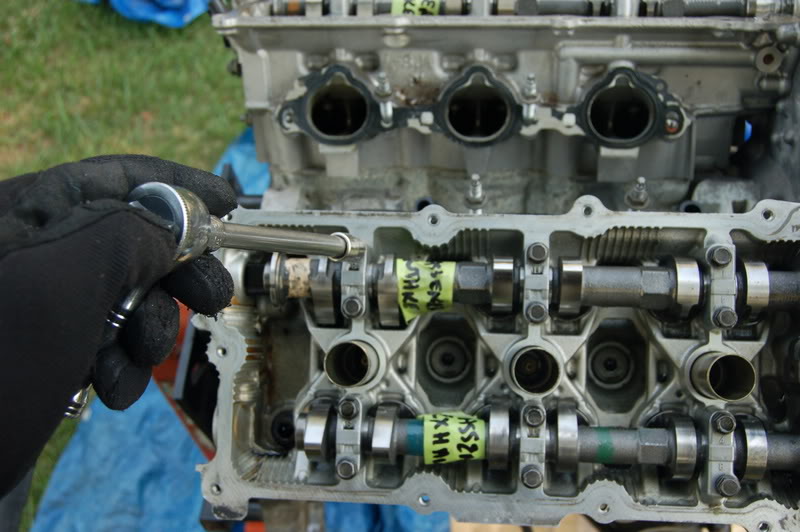
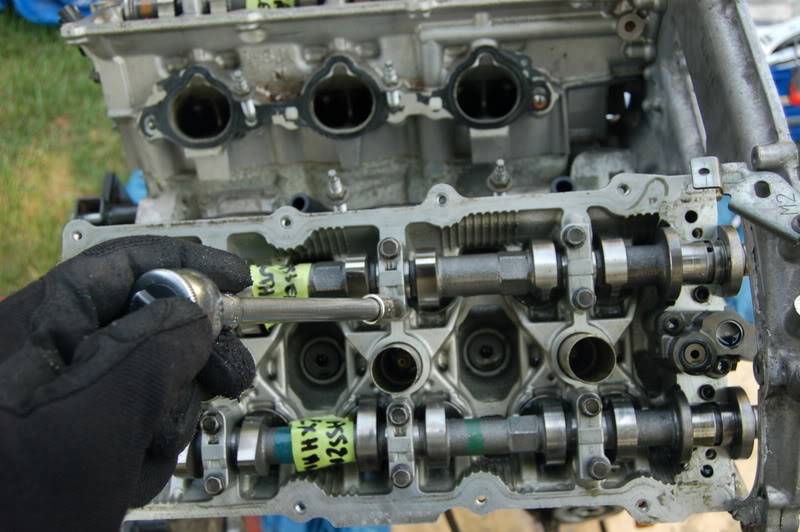
Then we go to the actual cam which has slots for an adjustable wrench to hold it in place. You use your right hand to hold the cam steady and use your left with a ratchet to remove the main bolt that holds in each cam to the gear. You'll see what I mean below.
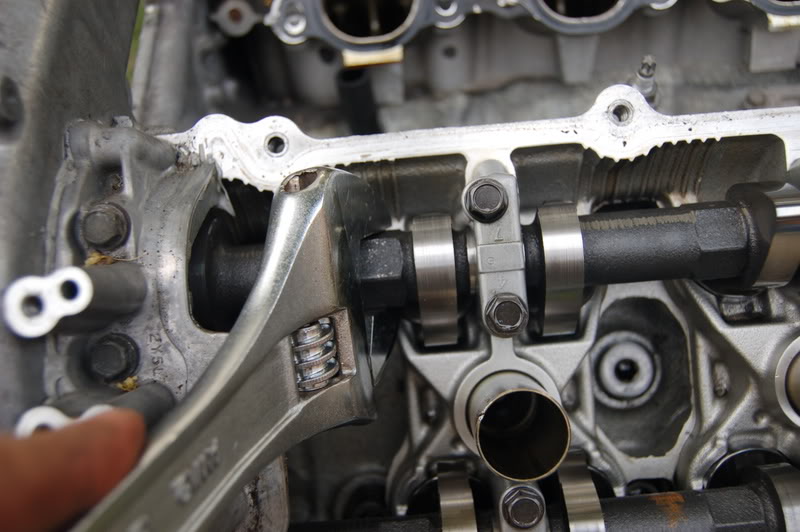
Repeat this process for each of the 4 cams. (2 Intake and 2 exhaust)
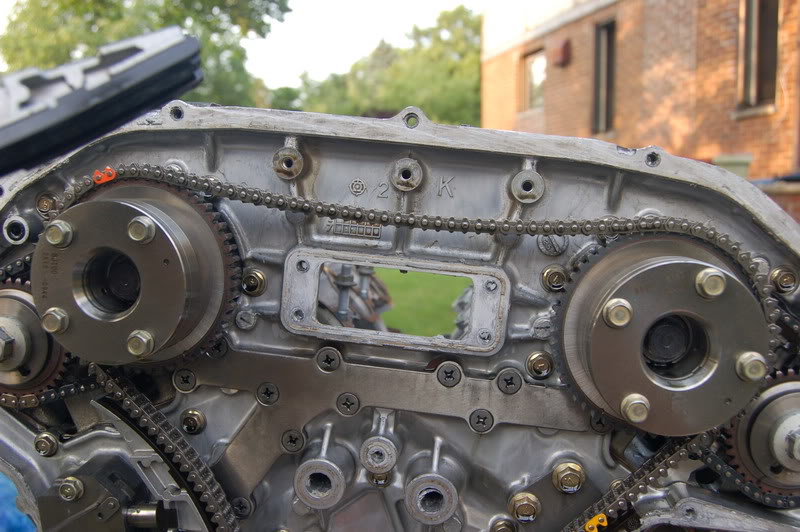
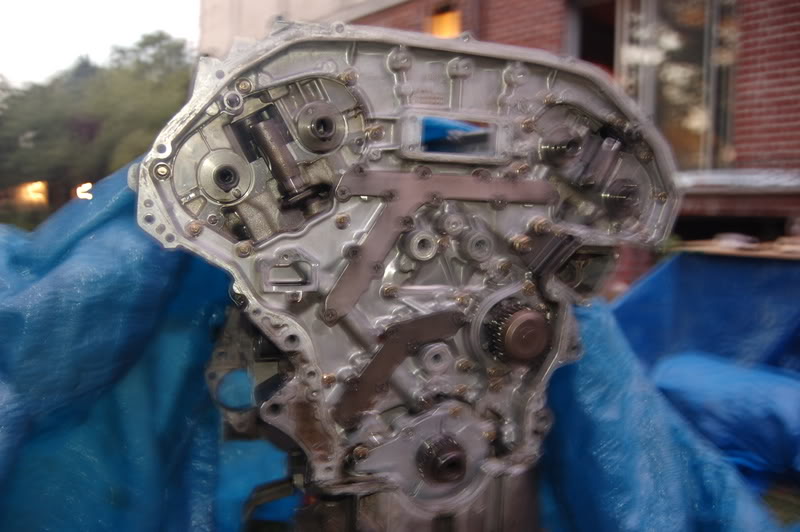
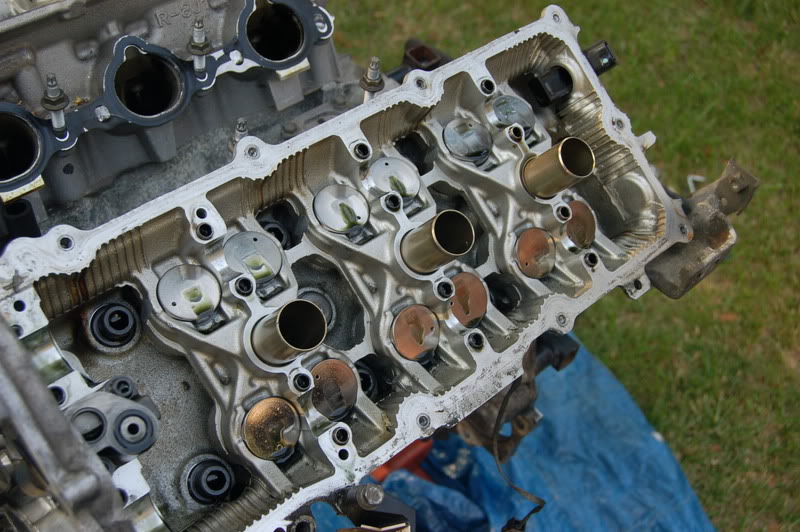
Now your engine should look something like this:
That's it for today. Tomorrow is another day.
My ultimate objective is to remove everything necessary to transfer the relevant parts over to the built short block I have sitting in my garage.
Once completed, I will then proceed to reinstall the new engine in my car.
Wish me luck.
Now that you have noticed the engine represented below is without a timing cover...see below. The trick is how to remove the chain.
It has a couple of tension points that keep it very tight. There is essentially no slack in the chain. Nothing like your BMX bike you had as a kid, when the chain would fall off and you would just pull it a little over and start pedaling to remount it...No sir. This is much more advanced.
You will see below, The first item I will attempt to remove is the chain tensioner. It has a slotted tongue that sticks out and is kept in place by a move-able locking pin. Objective is to turn the key and release the tension in the chain. Once you have a little slack it will allow you to remove the other tensioner.
See photos below:
Here is the timing cover removed exposing the cam gears and timing chains.
That gadget in the center is the primary chain tensioner. It has a tongue that is slotted and sticks out to apply pressure to the chain guide. This keeps the chain tight and in place.
This little lever helps to release the locking mechanism. Watch as I turn it...Ooooh, Ahhhhh
Keep in mind that this device is driven by oil pressure and you really need to push against it in order to release the little oil that is left in it.
Once it is loose, remove the tensioner and this releases a lot of slack in the chain and chain guide.
Remove the chain guide/tensioner
You can next remove the upper chain guide/tensioner:
Then we go to the actual cam which has slots for an adjustable wrench to hold it in place. You use your right hand to hold the cam steady and use your left with a ratchet to remove the main bolt that holds in each cam to the gear. You'll see what I mean below.
Repeat this process for each of the 4 cams. (2 Intake and 2 exhaust)
Now your engine should look something like this:
That's it for today. Tomorrow is another day.
My ultimate objective is to remove everything necessary to transfer the relevant parts over to the built short block I have sitting in my garage.
Once completed, I will then proceed to reinstall the new engine in my car.
Wish me luck.


Good luck!
I always wondered why it took so long to change cams in a VQ. Are you going to reuse these cams or did you get new ones for your new engine.
Very nice write-up and pictures.
I always wondered why it took so long to change cams in a VQ. Are you going to reuse these cams or did you get new ones for your new engine.
Very nice write-up and pictures.
Last edited by __jb; Jul 16, 2007 at 10:04 PM.

I wouldn't dare try this myself, but here's my question:
What is the recommended service interval for timing chain replacement on the VQ35DE? I know on some engines it used to be 60k miles, but I didn't see it in the maintenance (MA) section of the 350Z service manual (maybe I missed it)
What is the recommended service interval for timing chain replacement on the VQ35DE? I know on some engines it used to be 60k miles, but I didn't see it in the maintenance (MA) section of the 350Z service manual (maybe I missed it)

Originally Posted by mthreat
I wouldn't dare try this myself, but here's my question:
What is the recommended service interval for timing chain replacement on the VQ35DE? I know on some engines it used to be 60k miles, but I didn't see it in the maintenance (MA) section of the 350Z service manual (maybe I missed it)
What is the recommended service interval for timing chain replacement on the VQ35DE? I know on some engines it used to be 60k miles, but I didn't see it in the maintenance (MA) section of the 350Z service manual (maybe I missed it)
You are thinking of timing belts. We have chains and they don't need the same maintenance check ups as rubber timing belts.
The cam gears are on really, really, really tight. I had to put all of my weight on it to break those bolts free. Probably a ton of lock tight there. I'm glad you mentioned the timing chain replacement. I hadn't thought of that. Good idea. If anyone knows the replacement interval, I would appreciate some feedback.
P.S. The cams in there now are JWT S1 race cams. I plan to re-use them in the new block.
P.S. The cams in there now are JWT S1 race cams. I plan to re-use them in the new block.
Last edited by rrmedicx; Jul 17, 2007 at 04:17 AM.
Trending Topics
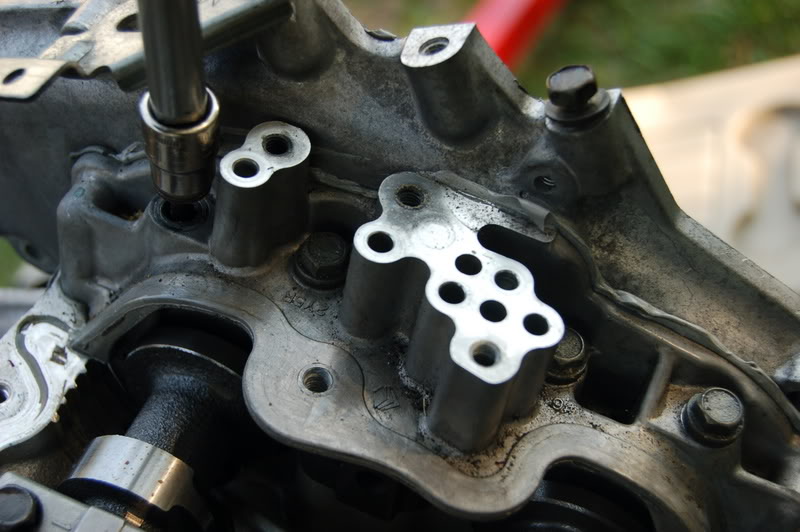
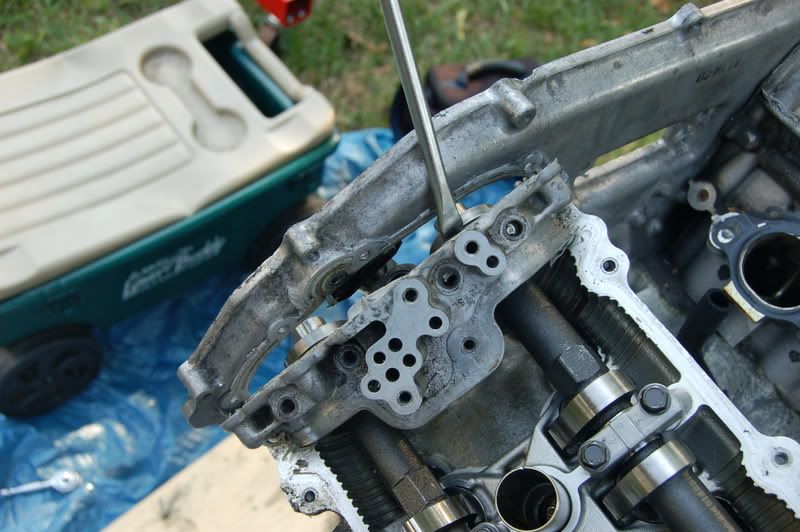
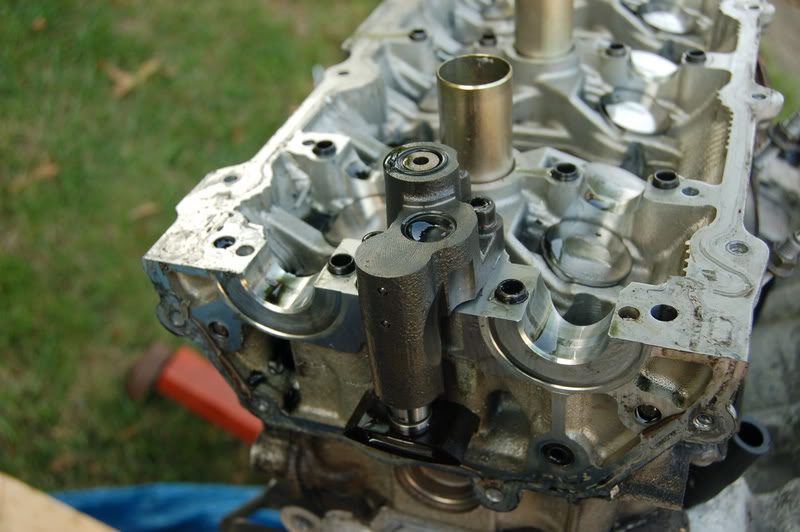
Here we go...Where did I leave off, oh yeah, trying to get the timing chain and cover off. Well the timing chain cover consists of 4 components: The front face, a back face, and 2 half moons that lock down the front end of the camshafts.
I have already removed the front cover and the sprocket gear heads of the cams. Whats next is removing the 2 half moons that are locking down the camshafts.
Here you see what it looks like from the front (Bumper)side of the car .

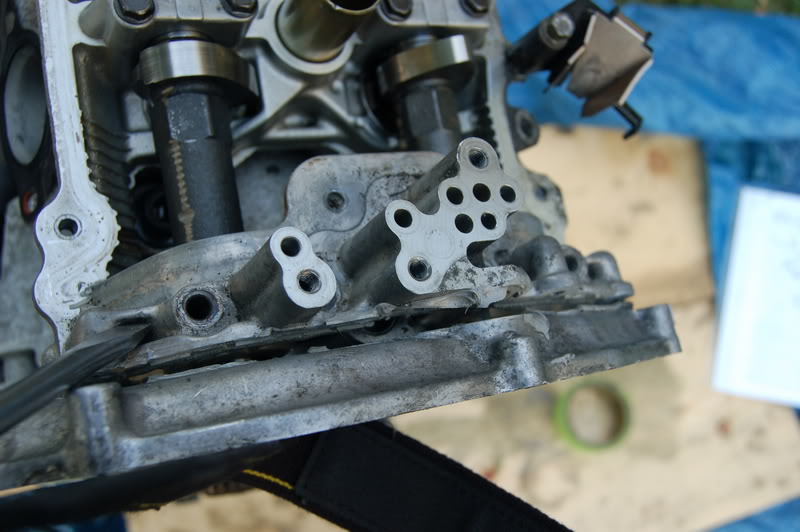
Same part, but looking at it from the rear:
Remove the bolts holding it down and gently break it free. It is held down a few bolts from the front side and also by some gray RTV sealant.
Bolts removed:

Now find a sharp flathead screwdriver and try to pry it apart. Be gentle and always double check to make sure you didn't forget any bolts.
You may need to use more than 1 screw driver and space them apart to remove it evenly. This piece can crack if you force one side off without freeing the other side first.
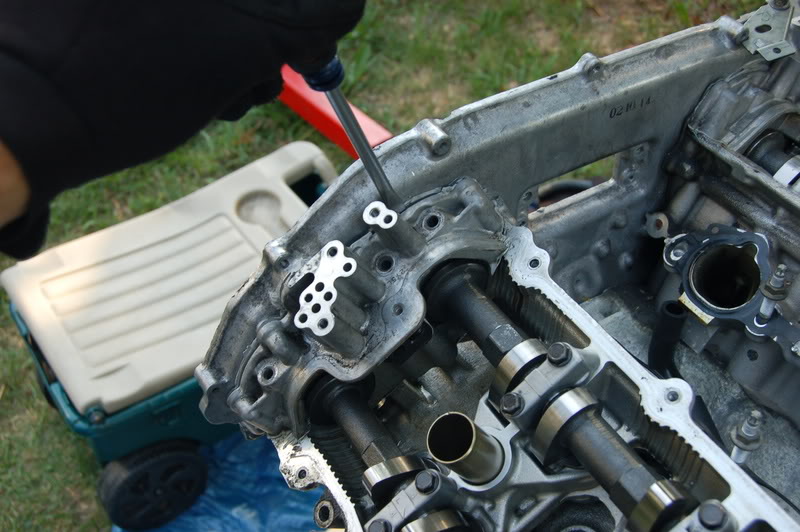
Here you can see it breaking free:
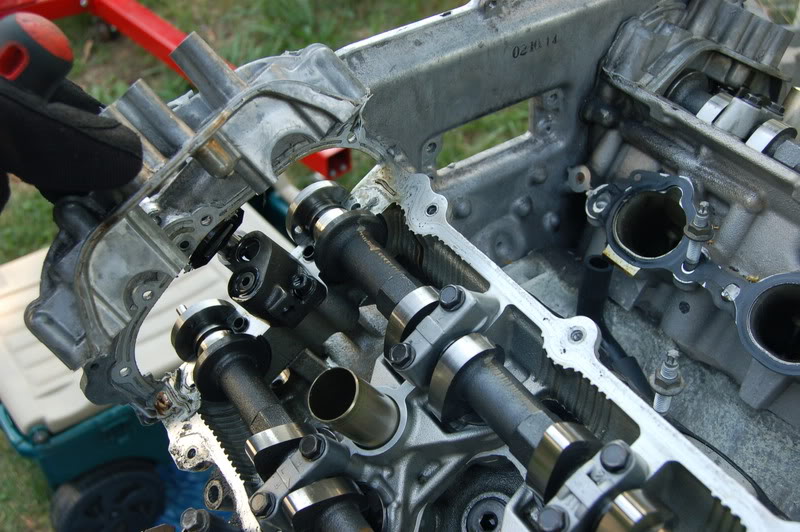
Free At Last!!!
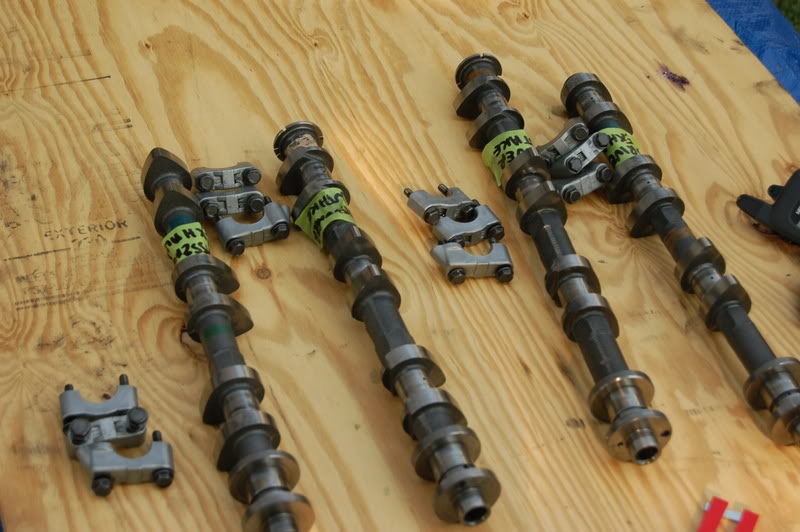
There is an art to removing the cams. You must be careful to release them in a sort of sequence. This is done to prevent the cam from getting damaged in either the removal process of installation process. I chose to zig zag opening only 3 turns at a time. At no time were the 2 bolts on 1 bracket loosened at one time. I loosened one bolt on each block at a time, then I went back and alternated in the reverse sequence.
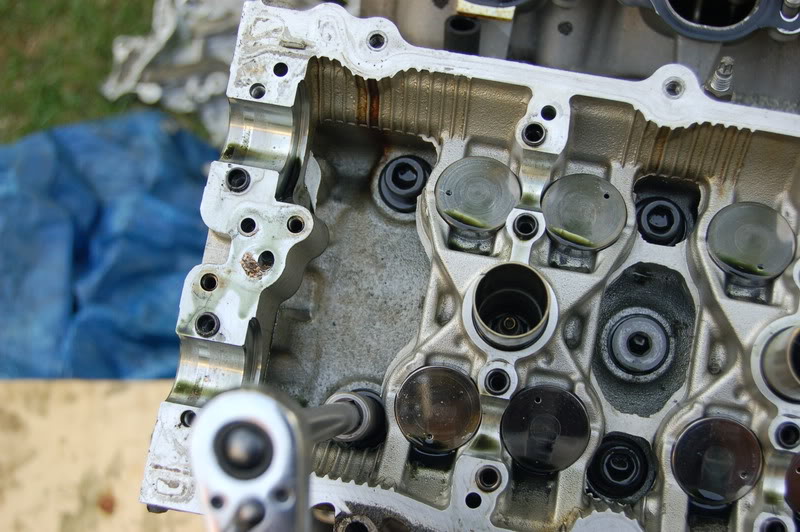
Take the caps off and gently remove the camshafts. Keep them in a safe place. You don't want to bang these up, or take a chance of falling off of a shelf.

Here are the cams and caps:
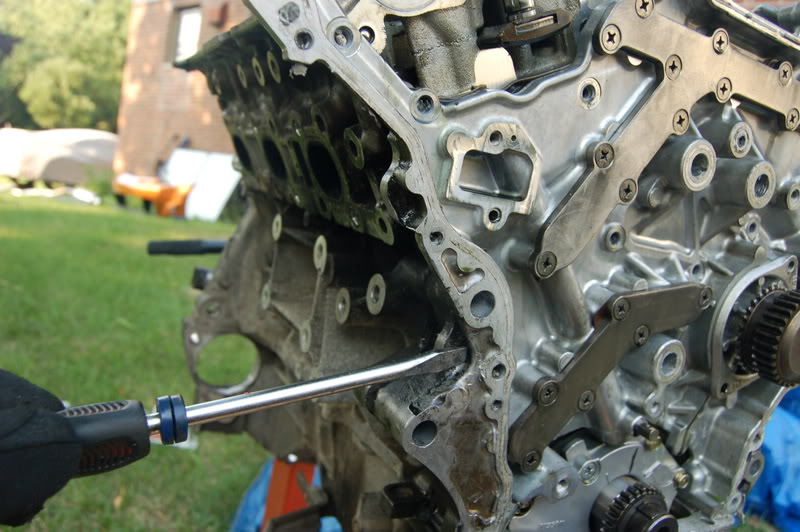
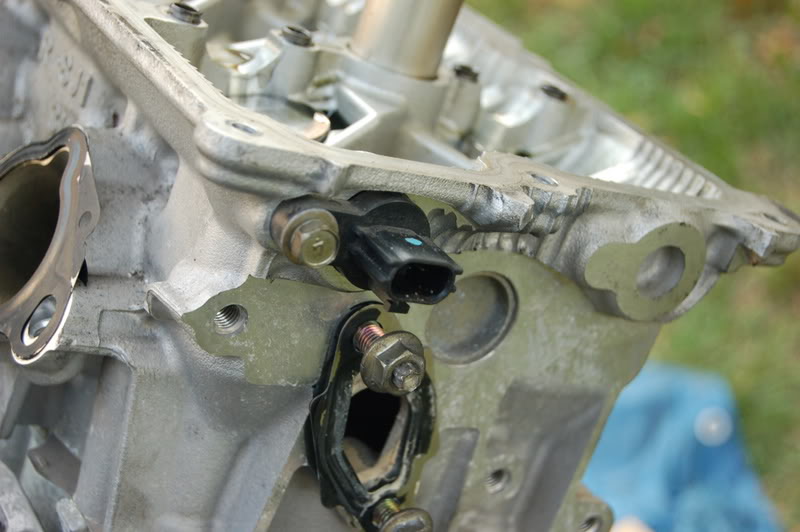
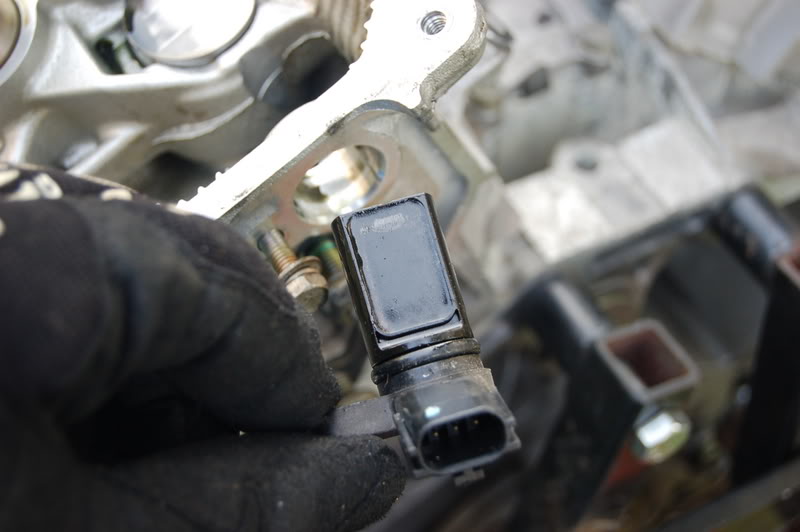
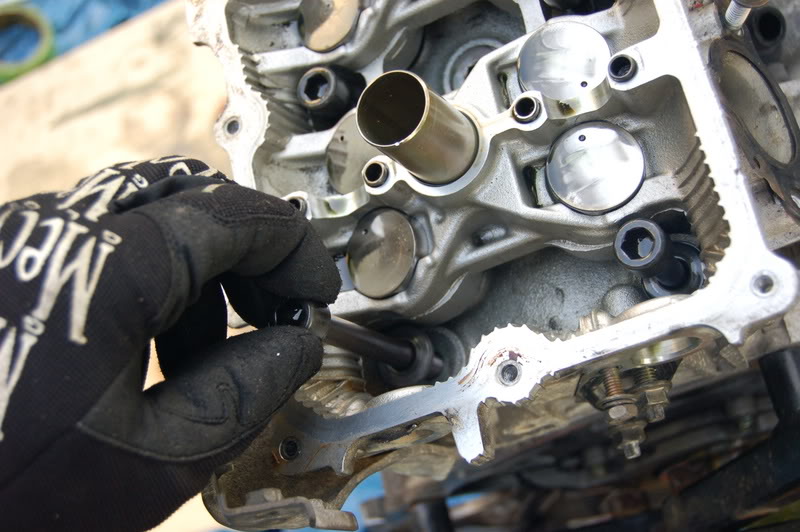
Don't forget to remove the cam sensor at the back end of the block. One for each side:
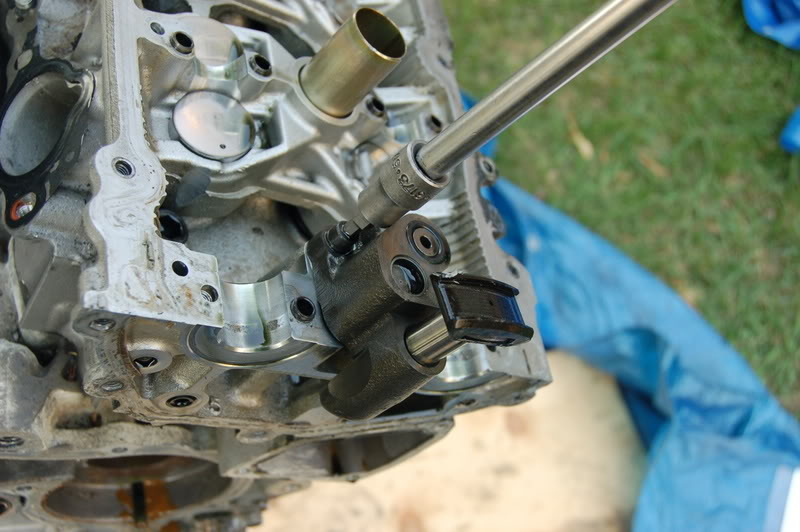
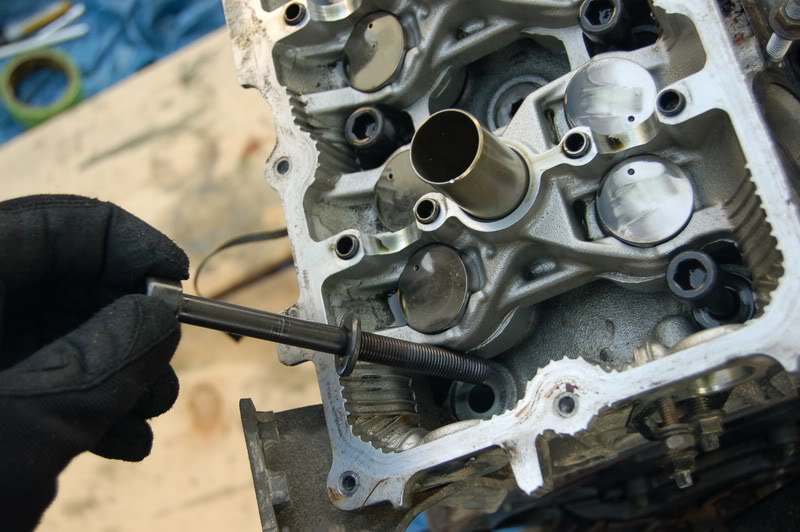
Next you can easily remove the smaller tensioner, one on each side. These tensioners are also using pressurized oil to expand and remain tension on the chain to minimize slack.
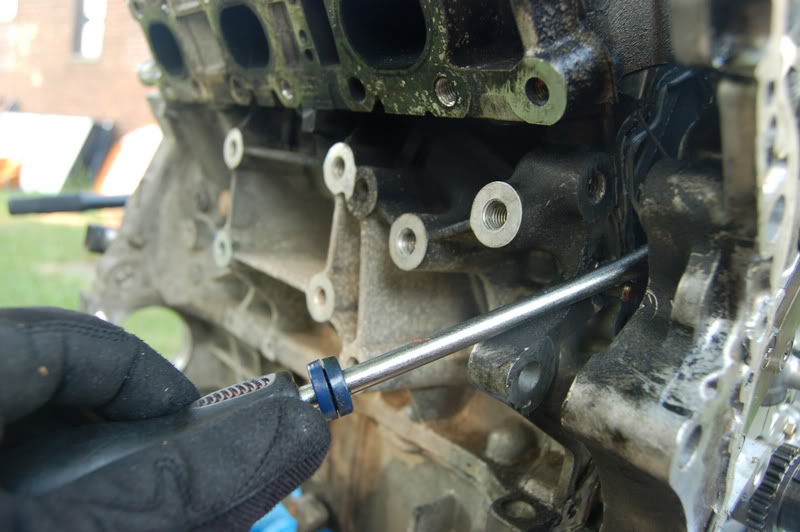
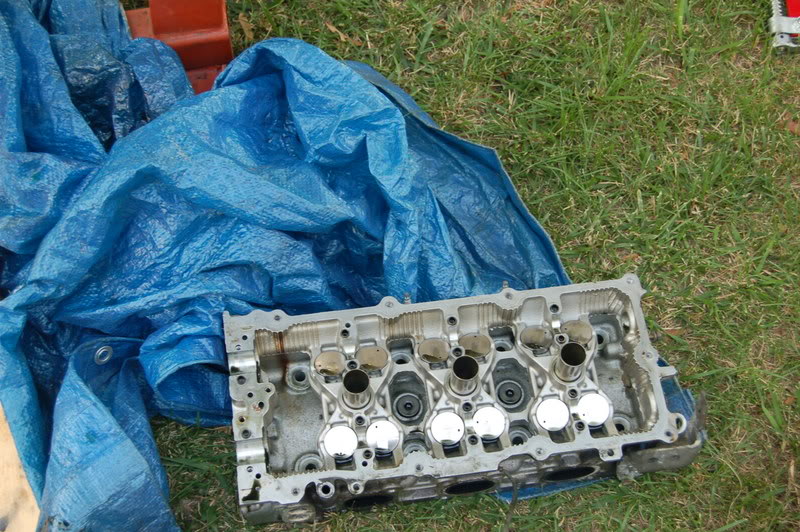
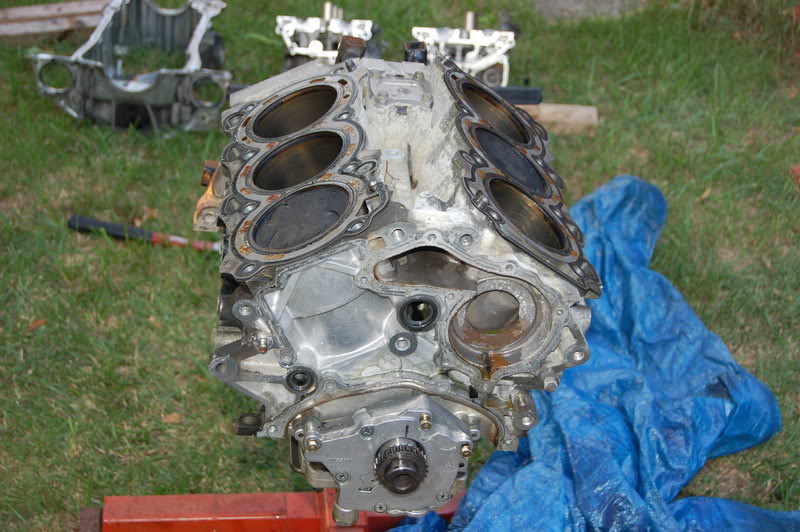
Now that all of the moving parts are out of the way, we can work on removing the actual cylinder head. You will need a #10 allen head ratchet and a big ratchet. You will need all of your might to break these loose.
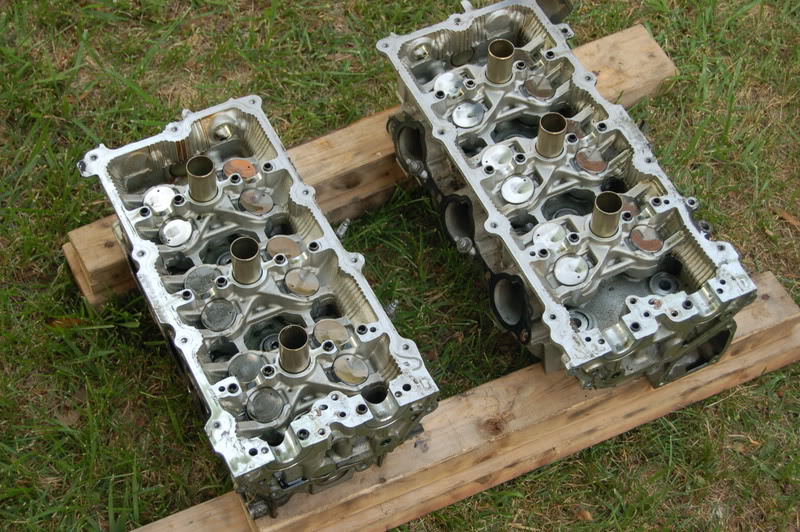
Once all of the bolts are removed, you can pretty easily lift the cylinder head out:
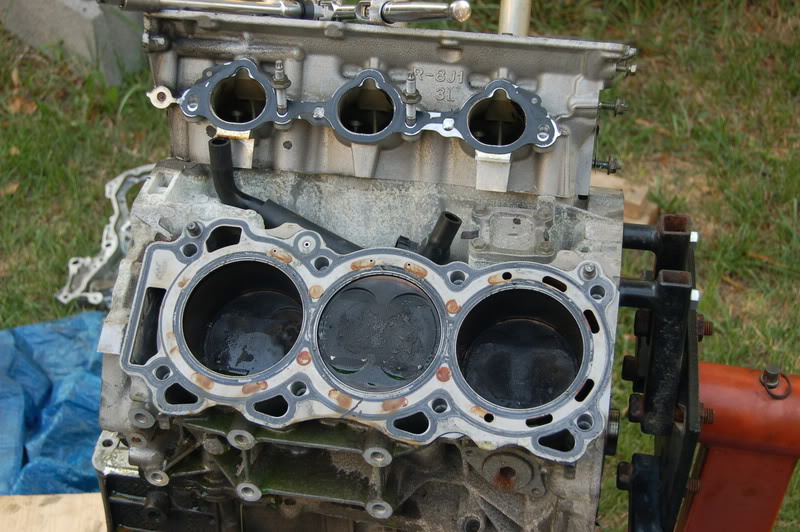
And there is my Cylinder Head. Hurray!
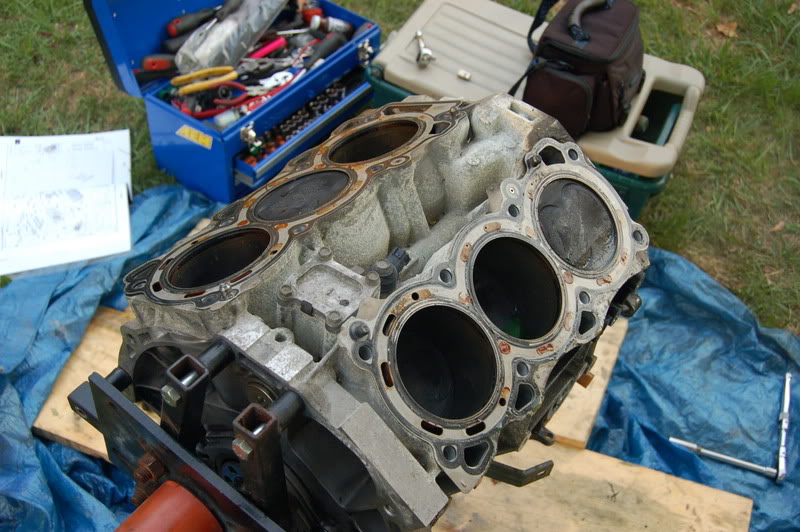
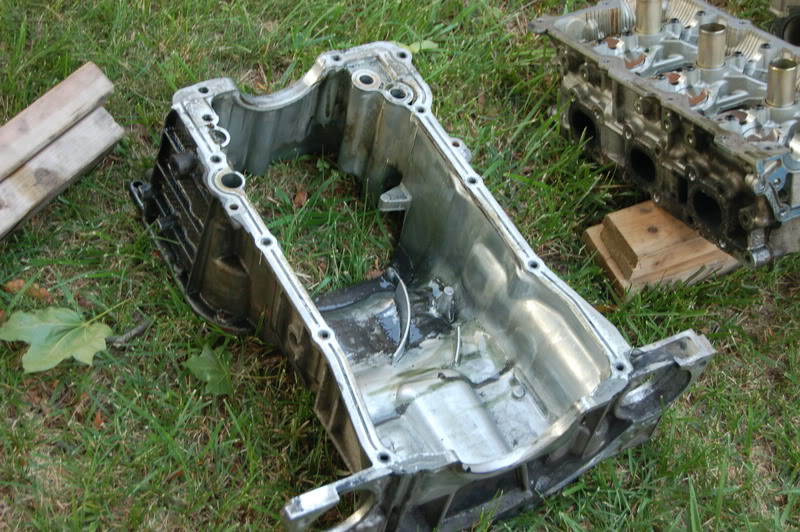
All that is left now is to remove the girdle (Lowest portion of the block).
A couple of whacks with rubber mallet broke it free.
I have already removed the front cover and the sprocket gear heads of the cams. Whats next is removing the 2 half moons that are locking down the camshafts.
Here you see what it looks like from the front (Bumper)side of the car .
Same part, but looking at it from the rear:
Remove the bolts holding it down and gently break it free. It is held down a few bolts from the front side and also by some gray RTV sealant.
Bolts removed:
Now find a sharp flathead screwdriver and try to pry it apart. Be gentle and always double check to make sure you didn't forget any bolts.
You may need to use more than 1 screw driver and space them apart to remove it evenly. This piece can crack if you force one side off without freeing the other side first.
Here you can see it breaking free:
Free At Last!!!
There is an art to removing the cams. You must be careful to release them in a sort of sequence. This is done to prevent the cam from getting damaged in either the removal process of installation process. I chose to zig zag opening only 3 turns at a time. At no time were the 2 bolts on 1 bracket loosened at one time. I loosened one bolt on each block at a time, then I went back and alternated in the reverse sequence.
Take the caps off and gently remove the camshafts. Keep them in a safe place. You don't want to bang these up, or take a chance of falling off of a shelf.
Here are the cams and caps:
Don't forget to remove the cam sensor at the back end of the block. One for each side:
Next you can easily remove the smaller tensioner, one on each side. These tensioners are also using pressurized oil to expand and remain tension on the chain to minimize slack.
Now that all of the moving parts are out of the way, we can work on removing the actual cylinder head. You will need a #10 allen head ratchet and a big ratchet. You will need all of your might to break these loose.
Once all of the bolts are removed, you can pretty easily lift the cylinder head out:
And there is my Cylinder Head. Hurray!
All that is left now is to remove the girdle (Lowest portion of the block).
A couple of whacks with rubber mallet broke it free.
This is a great post. Thanks for writing about what you're doing and posting the pictures to go along with it. This should be a "sticky" for sure.
If someone wanted to install new cams, would it be best to just remove the motor from the car? It looks like an awful lot of stuff to remove to finally get at the camshafts.
If someone wanted to install new cams, would it be best to just remove the motor from the car? It looks like an awful lot of stuff to remove to finally get at the camshafts.
It can be done with the engine still in place. I had my cams installed by a shop and now after dismantling everything, the hardest part of all of it was just getting all of the small stuff out of the way. The bumper removal is easy, the aluminum reinforcement is easy, the radiator gets dumped of fluids and removed, the shroud that holds it gets removed, the front face of the timing cover, Upper and lower plenum, valve covers, belts, I think thats it. All relatively easy stuff. Nothing overly complicated. Granted, its a lot, its not hard. I like to challenge myself, and this has proven to be a wonderful project. I am thrilled about the whole thing and the way its been working out so far.

Registered User
Joined: Jul 2004
Posts: 332
Likes: 1
From: South Fla.
To everyone else attempting this, please refer to the factory service manual for proper tightening/loosening sequences. In some case, they are different when tightening than they are when loosening (i.e. cylinder head bolts). Please do not rely on eyeballing or "this seems right".


Registered User
Joined: Jul 2007
Posts: 4
Likes: 0
From: Holly Springs, NC
Originally Posted by miamimax96
To everyone else attempting this, please refer to the factory service manual for proper tightening/loosening sequences. In some case, they are different when tightening than they are when loosening (i.e. cylinder head bolts). Please do not rely on eyeballing or "this seems right".
Why are you taking the heads and cams off? You don't need to do that to replace timing chain, tensioners, etc. The timing job isn't that hard btw. I did it to my Dad's VQ in his maxima when I was 16 lol.
Originally Posted by jknc90
Why are you taking the heads and cams off? You don't need to do that to replace timing chain, tensioners, etc. The timing job isn't that hard btw. I did it to my Dad's VQ in his maxima when I was 16 lol.
Originally Posted by rrmedicx
My ultimate objective is to remove everything necessary to transfer the relevant parts over to the built short block I have sitting in my garage.
Once completed, I will then proceed to reinstall the new engine in my car.
Wish me luck.
Once completed, I will then proceed to reinstall the new engine in my car.
Wish me luck.
Read the thread please. My objective was stated. Thanks.
I am doing a complete engine swap for a built short block. I therefore need to transfer everything over. Leaving the core to sell. (SOLD)
I am doing a complete engine swap for a built short block. I therefore need to transfer everything over. Leaving the core to sell. (SOLD)
It might be helpful to actually post the technique/sequence of removal of cylinder heads along with the torque specs. I know that I tried to keep this thread as simple and clear as I could, stopping between every phase of breaking down my block to snap photos for your personal enjoyment.
(Not mine since it did nothing but slow me down.)
For the record, I am not a mechanic, but simply very handy. I have a decent set of tools and thats about it. I will have the help of a mechanic to supervise the rebuild of the block, so he will help me to make sure that I hit all of the right torque specs.
Thanks for the comments.

Registered User
Joined: Jan 2005
Posts: 1,176
Likes: 0
From: ATown, GA
ah the memories... Good work, reminds me of the few times I'm stripped the motor down.
Did you really use (what looks to be) that small ratchet to take off the head bolts? It took a very long breaker bar for me.
good progress!
Did you really use (what looks to be) that small ratchet to take off the head bolts? It took a very long breaker bar for me.
good progress!