
DIY - Filter Cover for open filter intakes


Tools needed:
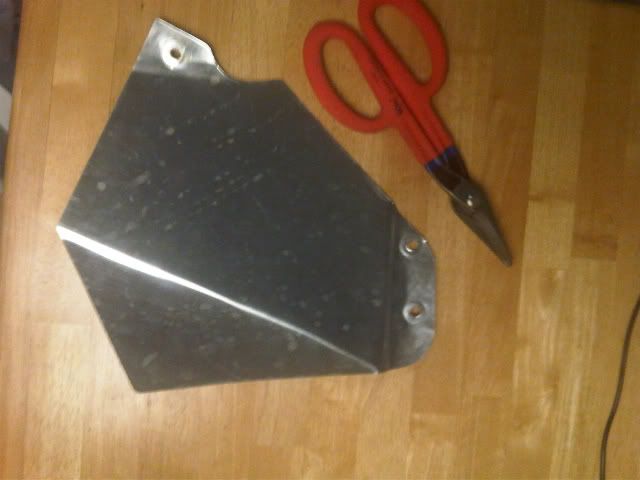
1. A pair of Duckbill snips that can cut straight and at both angles ($15)
2. An aluminum sheet approx. 24"x24" or bigger ($20 or so)
3. (Optional) metal file to round out your sharp edges
4. Piece of cardboard 24"x24" or bigger
5. Sharpie marker
6. Scissors
7. Power drill and metal bits (Forgot size but easy to figure out)
8. Ice pick or similar sharp point object
9. Patience
Step 1:
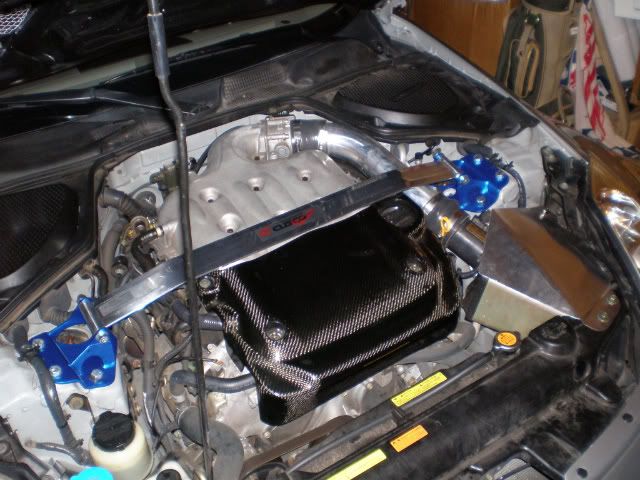
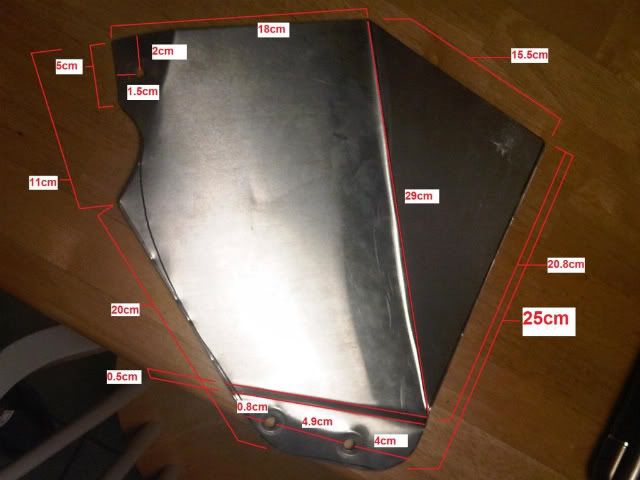
How i started was i got a piece of cardboard and laid it over the area above the filter, and drew a rough design of how i wanted it to look. This took some trial and error, but for you it will be easier because i provided measurements of the piece below.
After rough design was drawn in cardboard with Sharpie, i cut it out with scissors to ensure fittment over filter area, and depressed cardboard edges with my fingers really hard over bolts that i was going to use to bolt piece on. By doing this, the bolt heads (x3) made an impression in the cardboard (which i later sharpied) and thats how i figured out where to drill the holes.
Step 2:
NOTE: Be sure to place cardboard stencil UPSIDE DOWN on aluminum sheet before drawing your outline in aluminum. this ensure sharpie marks will not be seen when you install cover!!
I then placed the still flat (NO BENDS IN CARBOARD STENCIL YET) on my sheet of aluminum and used it and Sharpie to stencil the outline of the cover. (BE SURE TO DRAW STRAIGHT LINE WHERE MAIN VERTICAL BEND WILL BE AS WELL AS 2 SMALLER HORIZONTAL BENDS UP FRONT NEAR TWIN BOLT HOLES AND 1 BEND NEAR LONE UPPER RIGHT BOLT HOLE) Once stencil was drawn on aluminum sheet, i placed cardboard stencil perfectly over drawn outline and used an ice pick to press holes through middle of drawn drill holes (x3) in cardboard stencil which in turn put 3 indentations in the aluminum outline where the drill holes were supposed to be.
Step 3:
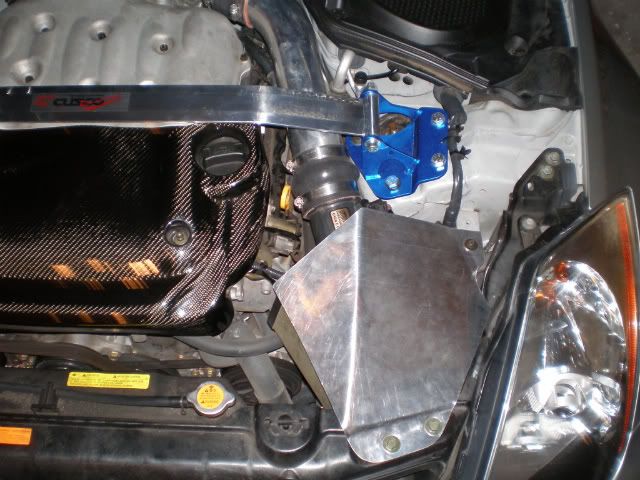
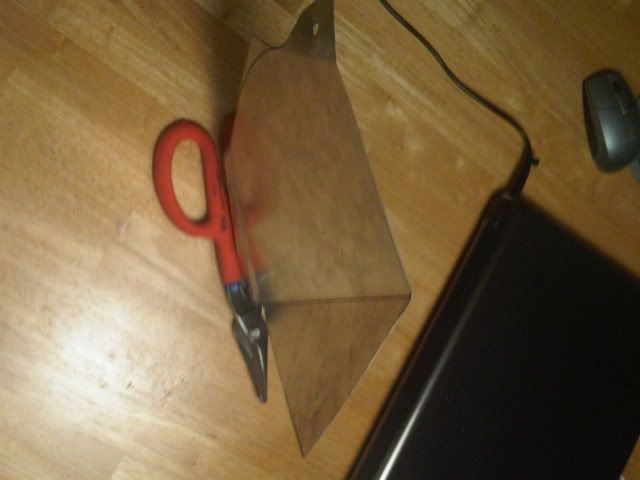
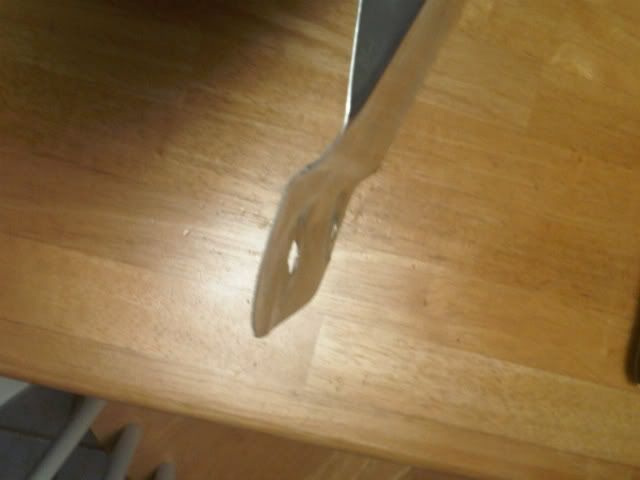
Then i used the Duckbill snips to slowly cut around the outline i drew in the aluminum sheet. For the dip in cut under the lone bolt hole in upper right, use your best judgement and my pics to gauge depth of this dip. This part just allows the cover to bypass the headlamp housing (you can see its purpose in my installed pics in my main thread).
Step 4:
Finally, figure out what size drill bit to use by judging diameter of two lower bolts (radiator support bolts above intake duct) and the skinnier third upper right bolt (one that holds on JWT filter support). Drill these 3 holes in aluminum cover.
Step 5:
Find a large area with a sharp 90 degree edge (I used a wooden shelf in garage with 90 degree edges) to make your necessary bends. Line up your sharpied bend lines on edge of shelf and make your bends (about 40 degree bends for lone upper right bolt hole area and main large vertical bend through middle).
Bend degrees should look like this when looking at back of cover:
The 2 close lower bends near twin bolt holes can be done lightly and made more pronounced once you install the cover. Use your best judgement to figure the degree of these 2 close bends.
2 close bends near twin holes should look like this when done:
Step 6:
If you want, file down your sharp edges with metal file to be more rounded for a safer and cleaner look.
Step 7:
Finally, install the cover. Take off 2 front radiator support bolts above air inlet duct and one single skinner bolt near top right of filter area (One JWT filter support bracket bolts to). Place cover on and bolt top upper right JWT support bolt first, then 2 lower radiator support bolts last.
FINISHED!
NOTE: This cover make take some trial and error, so feel free to purchase multiple sheets (not that expensive) and keep trying till you get it. Lining the 3 bolt holes in the cover is the hardest part or this process.
Last edited by GeauxLadyZ; Jul 8, 2010 at 09:47 AM.


Nice...I will be working on this over the winter, so I will have plenty of time. I do have a few questions:
1)Is this a total seal? If not, have you found a way to make it a totally sealed off box?
2)Stock hood issues?
3)Vibration noises?
4)How does it attach to the upper part of the JWT Shield? Does it just rest on the top of it?
Thanks a million for the time/effort it took to make this piece. I plan on making two (one sprayed with High heat black paint for short time, then another color matched to the car). Wish there was Rep on this site, you sir, would have all of mine for the day!!
I am in the process of creating the rest of this "induction box" that will fully enclose the filter area, just as the ARC box does. This will take some time, but the JWT heat sheild will be fully replaced with a piece that will bolt to the top with some nice hex bolts, and a back side will be added that will also bolt to the top and will have circle opening for MAF tube to go perfectly through.
Once complete, i will add those parts to this DIY, but it will take a while.
None whatsoever. The Seibon TS hood actually sits alittle lower than stock due to its support braces underneath. Stock hood will clear just fine.
None whatsoever. The cover is VERY sturdy and tight in place...there is no room for this cover to vibrate anywhere.
However, if you want, the cover IS designed to bolt to the JWT sheild or something similar, so if you like, just line up the edge of the cover to the start of the angled portion on the JWT sheild and drill 2 holes through the cover and through the angled portion of top of JWT sheild (where top rubber hood seal was attached to the JWT.
(Keep in mind, once you make this cover, you must take off that top rubber hood seal on the JWT sheild.)
For now, the cover just rest tightly on the heat sheild but there is NO vibration as the cover's angled edge sits VERY firmly on the JWT sheild.
GL buddy, and if you have any further ?'s please ask away.


Trending Topics

Instead of replacing the heat shield, cover the outside part of it with thick aluminum wrap that has a tar adhesive on the bottom. It prevents heat from being transmitted to the filter area, so heat soak is greatly reduced from that alone.
I did an experiment where I ran scolding hot water over the heat shield (which is a crappy piece of plastic, btw), and put my hand underneath the other side. Within a few seconds I felt the heat come through and couldn't hold my hand in place anymore.
I then wrapped it with the sticky aluminum/tar stuff all over (I'm pretty sure its a type of sound deadener) and tried the same water trick. And believe it or not, I could hold my hand on the other side of the shield for as long as I wanted - I barely felt any heat transferring through. I've had my popcharger uninstalled for the past 6 months now because I couldn't deal with the heat soak. But I reinstalled it a few days ago with my new and improved heat shield, and I was also able to observe cooler intake airtemps via Osiris/Cipher - difference of 6-degrees on average (OEM intake was 50-degree night vs. popcharger 58 degree night). So despite the warmer day, my shield skin reduced intake temp, and was also slower to have its intake temp increase vs. OEM.
I also wrapped the intake airduct in the engine bay with the same aluminum deadener. After some heavy footed runs, driving the car for an extended period of time, the heatsoak has not been killing the experience for me at all. I'll take a picture of the shield if anyone's curious. But I didn't come here to brag, I actually wanted to suggest people do what I did to compliment GeauxLadyZ's work - it should, essentially, perfect the Popcharger design.
How much are you charging for these, Geaux? I don't recall if you mentioned it in the other thread.


Thread
Thread Starter
Forum
Replies
Last Post
Gruppe-S
Body Interior
13
May 16, 2016 10:42 PM
ars88
Zs & Gs For Sale
18
Apr 4, 2016 07:52 AM