
DIY Oil Cooler on a NA HR


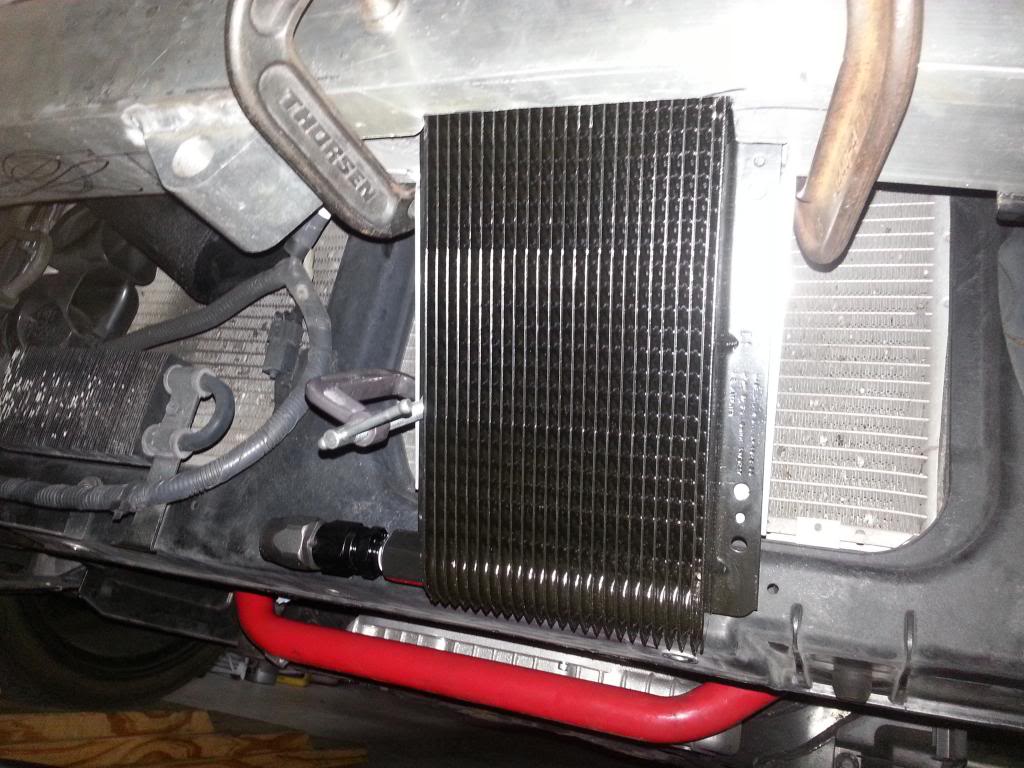
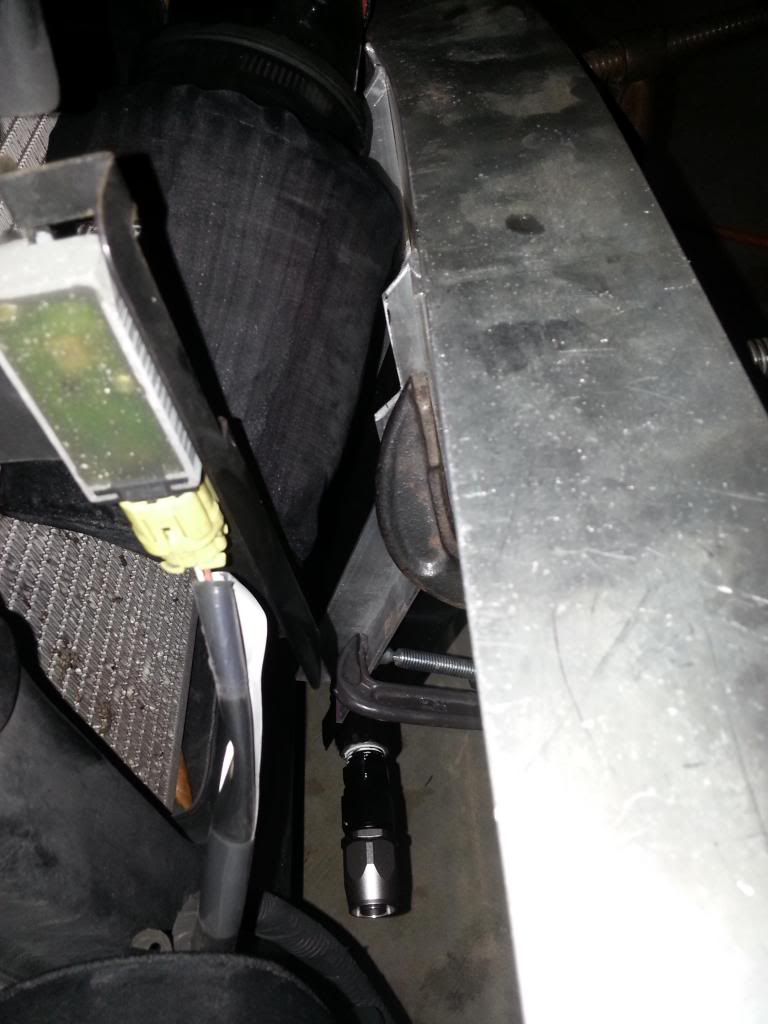
One of my fittings (the one on the right if you're looking at it while standing in front of the car) may get the ever so slightest amount of mist between oil changes... but so very little that it's not hardly worth trying to wipe it off.
However... the left one was actually leaking and would "mist" up a decent amount. It'd never leave a puddle under the car or anything, but I could look down from the top and see where (at what I assume is really high pressures, probably when cold or under high revs) it was showing signs of some dripping. I broke down and removed the fitting on the cooler and discovered the "L" fitting had actually been stripped by the cooler (it's aluminum, the cooler is steel) on a thread. I filed the wounded thread down, cleaned it all up, and put some Teflon tape (I had some on both sides even in the beginning where the "L" fittings went into the cooler) back on it and cranked it down even more than before. After another thousand miles it still "mists", but not as bad. I will eventually need to replace the "L" bracket... but as it sits now it's so very minor (and such a hassle) that I don't think it's worth it.
Hope that shed some light on it for ya!
Are you sure the cooler is steel?
The Tru-cool description states its a aluminum and I'm 99% that the B&M Supercooler #70273 is the exact same heat exchanger .
Both state they are aluminum coolers.
BTW for anyone out there still looking to put together and oil cooler setup.
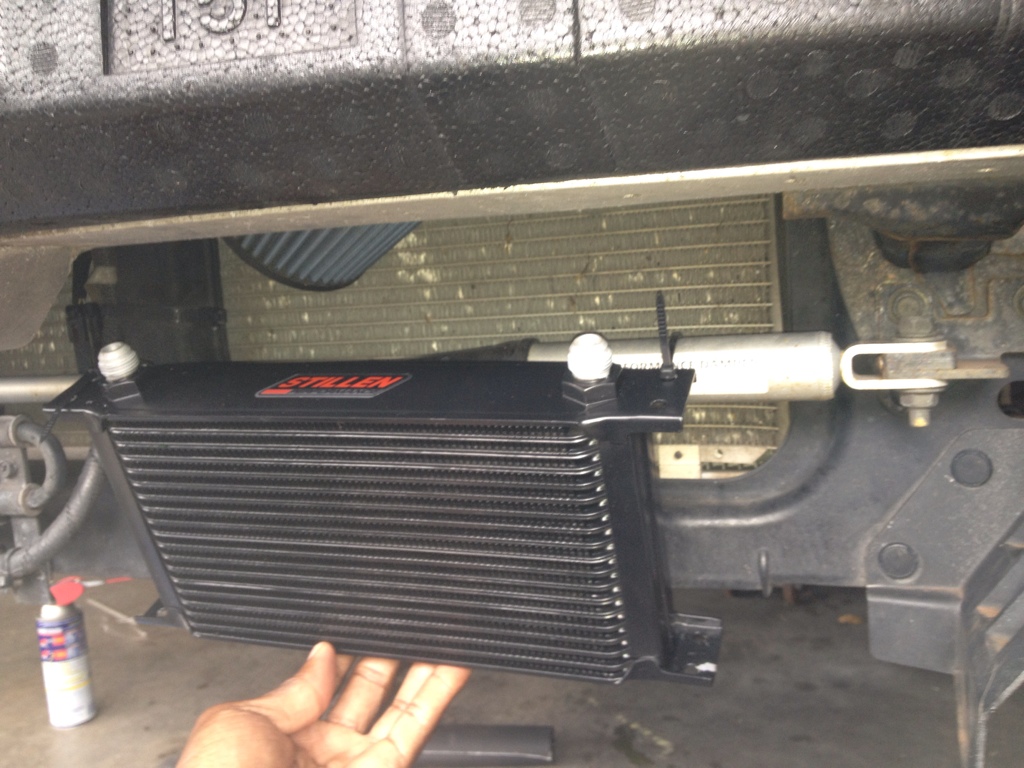
The fittings on the cooler should be facing up or better this cooler would be 90� compared to this photo (port pointed to driver side).
With the cooler ports facing down you end up with an air trap for aerated oil to build up a pocket of air thus reducing the efficiency of the cooler. This could also send large air bubbles thru the oil circuit (VERY BAD).
Ports facing up will avoid this problem but cause oil draining issues.
Ports on the side (fluid flowing from bottom to top) is ideal allowing guaranteed cooler filling and draining.
This is generally debated scenario with the pressure and or volume presumably clear the air out of the downward facing port cooler.
Take it from an engineer in the OEM fluid's business, don't point them down!
Last edited by ian99rt; Jul 1, 2012 at 04:45 PM.

Wish I'd seen this thread sooner.
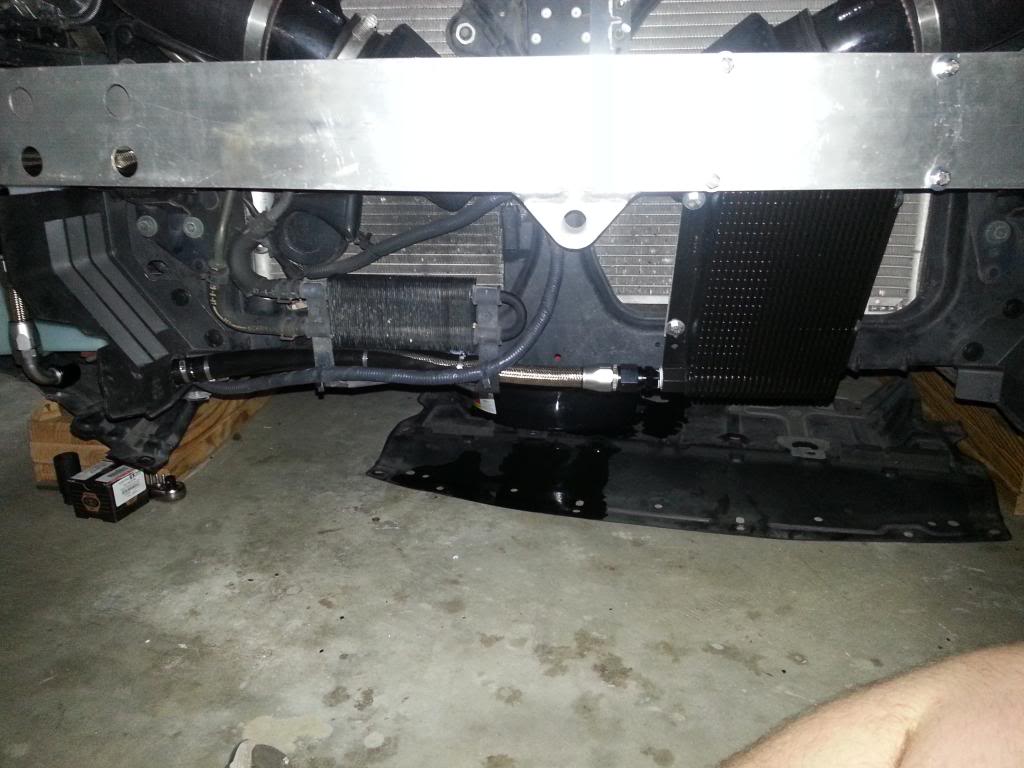
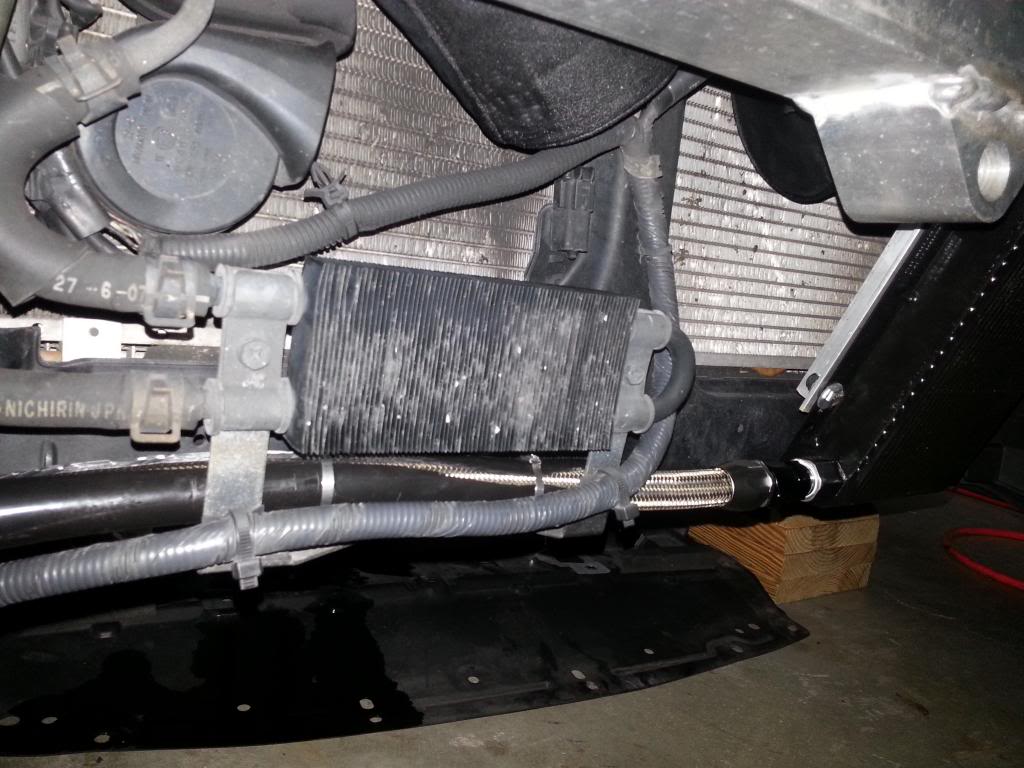
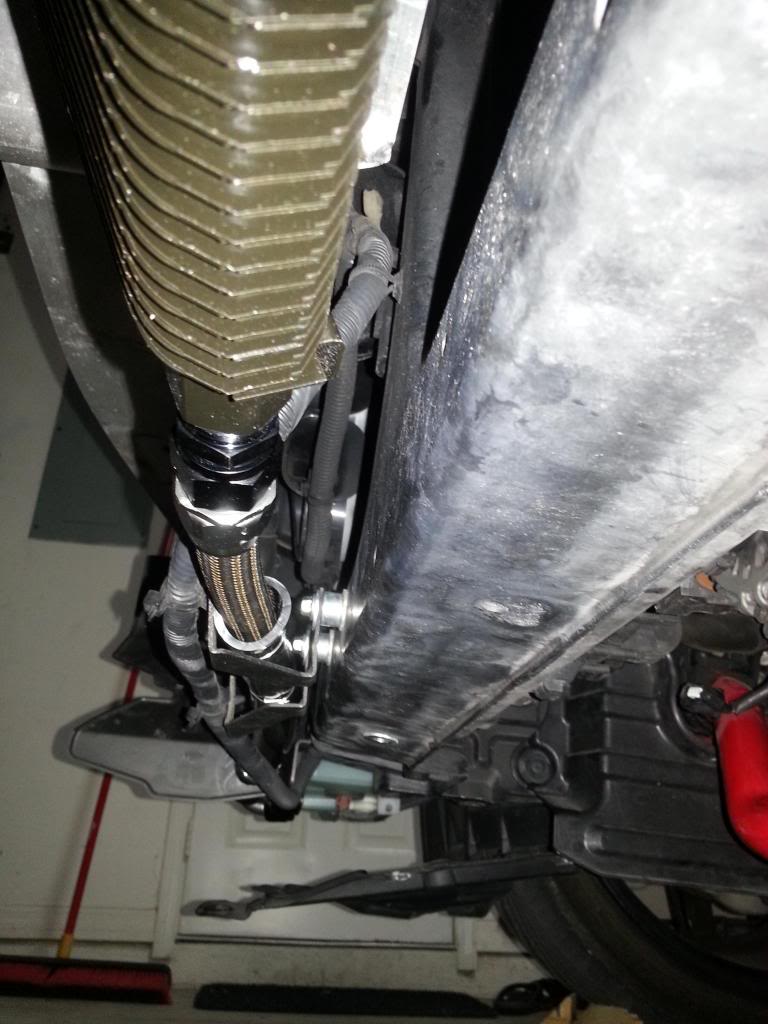
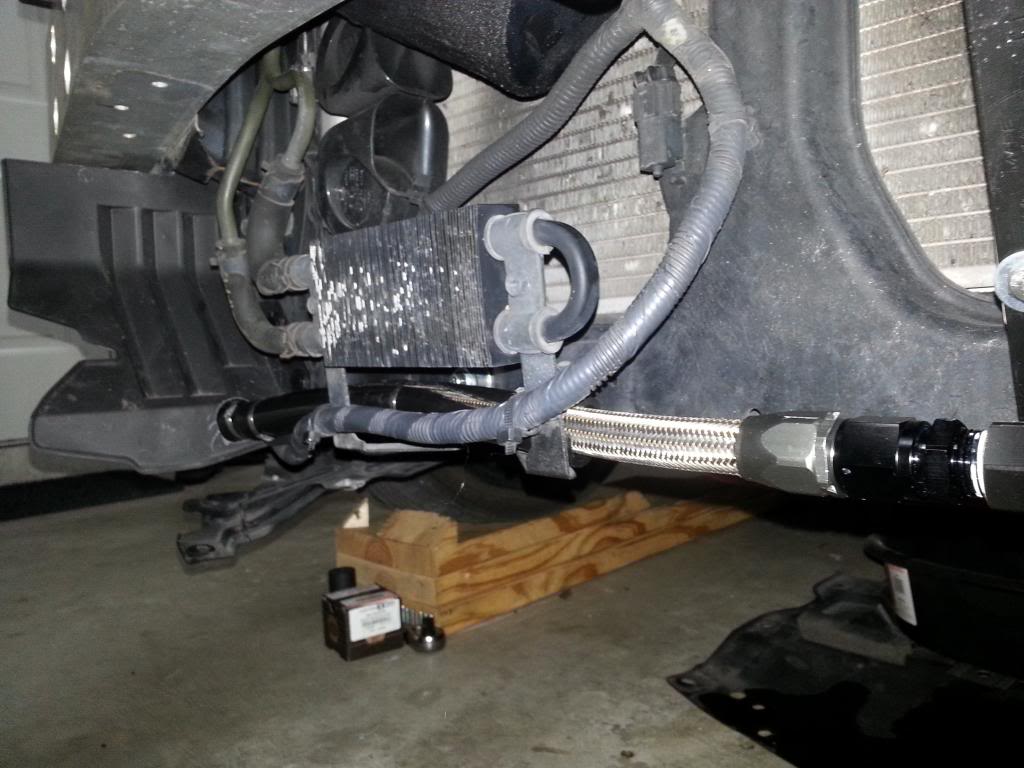
I decided to embark on the same project, and actually somehow ended up with almost all the same parts from RPW. Really had no need for this but tbh I wanted something to work on, and it seemed like a fun project and was pretty cheap. Same radiator, sandwich plate and all. I think my total was around 260$. However I'm not very happy at all with my mounting location. I made some nice brackets that came out really well, but it's just a bad location.
Pretty sure I'm going to move it - plus one of my hoses for the oil cooler is lightly touching one of the silicone hoses for the radiator. I keep checking it and it doesn't seem to be having any effect (I guess the silicone hosing is meant to handle high temps, but I worry about the metal). Stole your picture since you snapped it and I didn't. Where I boxed, my hoses touch that silicone hose from the rad lightly. Do you think thats an issue? Yours appear to be close as well.

Anywhere here's mine - I was worried about mounting to the plastic of the radiator core support and whether it would hold well enough. So I tried to find a place to mount it to the metal bumper support. I think I'm going to move it after seeing this. But I had fun with it anyway.
Putting together the AN fittings was a lot harder than I thought. Nothing leaks though, so that's good. Temps are a bit cooler than before and stabilize lower on hot days, but I'm sure with a decent mount location and some airflow it would help even more.


I decided to embark on the same project, and actually somehow ended up with almost all the same parts from RPW. Really had no need for this but tbh I wanted something to work on, and it seemed like a fun project and was pretty cheap. Same radiator, sandwich plate and all. I think my total was around 260$. However I'm not very happy at all with my mounting location. I made some nice brackets that came out really well, but it's just a bad location.
Pretty sure I'm going to move it - plus one of my hoses for the oil cooler is lightly touching one of the silicone hoses for the radiator. I keep checking it and it doesn't seem to be having any effect (I guess the silicone hosing is meant to handle high temps, but I worry about the metal). Stole your picture since you snapped it and I didn't. Where I boxed, my hoses touch that silicone hose from the rad lightly. Do you think thats an issue? Yours appear to be close as well.
Anywhere here's mine - I was worried about mounting to the plastic of the radiator core support and whether it would hold well enough. So I tried to find a place to mount it to the metal bumper support. I think I'm going to move it after seeing this. But I had fun with it anyway.
Putting together the AN fittings was a lot harder than I thought. Nothing leaks though, so that's good. Temps are a bit cooler than before and stabilize lower on hot days, but I'm sure with a decent mount location and some airflow it would help even more.
Last edited by Traininvain; Jul 2, 2012 at 06:40 PM.
Wish I'd seen this thread sooner.
I decided to embark on the same project, and actually somehow ended up with almost all the same parts from RPW. Really had no need for this but tbh I wanted something to work on, and it seemed like a fun project and was pretty cheap. Same radiator, sandwich plate and all. I think my total was around 260$. However I'm not very happy at all with my mounting location. I made some nice brackets that came out really well, but it's just a bad location.
Pretty sure I'm going to move it - plus one of my hoses for the oil cooler is lightly touching one of the silicone hoses for the radiator. I keep checking it and it doesn't seem to be having any effect (I guess the silicone hosing is meant to handle high temps, but I worry about the metal).
Anywhere here's mine - I was worried about mounting to the plastic of the radiator core support and whether it would hold well enough. So I tried to find a place to mount it to the metal bumper support. I think I'm going to move it after seeing this. But I had fun with it anyway.
Putting together the AN fittings was a lot harder than I thought. Nothing leaks though, so that's good. Temps are a bit cooler than before and stabilize lower on hot days, but I'm sure with a decent mount location and some airflow it would help even more.

Without a welder I wouldn't have come up with much better.
Looking at your photos I'm starting to think that bolting it to the back side of the Alum. crash bumper might be the ticket.
Depending on height you might be putting a bit of it behind the bumper but you could stick the majority of it right in the airflow and have the ports in the right orientation (your current position).
I'm starting to get impatient about doing this project but more important things keep coming up (clutch job this weekend comes to mind).
Thanks for the photos, they helped me alot with ball park fitment without ripping my bumper off.
In talking with a local turbo'd DE guy it got me thinking about the oil cooler again.
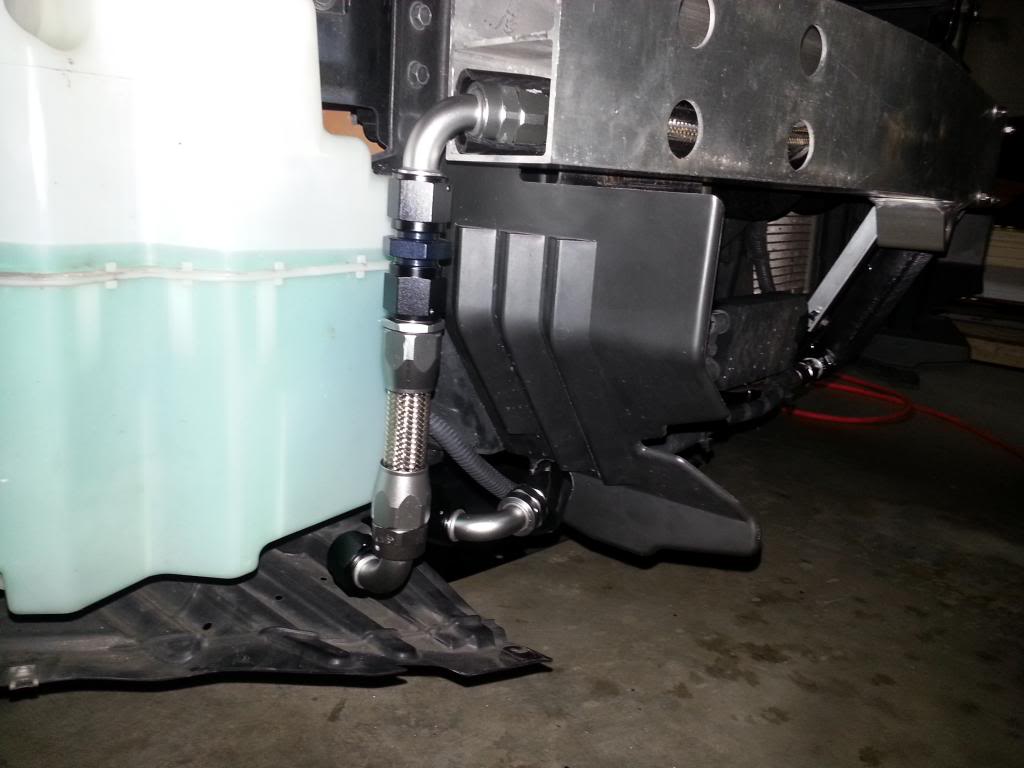
So I grabbed a Greddy 7 Quart turbo kit oil pan (simply tap the 2 return line holes with 3/8 npt and plug them), and essentially the same components as listed in the DIY,
I'm fully expecting to need to order additional fittings as I'm planning to run the lines parallel to the frame rails ahead of the radiator, and use 90� hose ends and unions to make 2 piece hoses for routing purposes. I just havn't been behind the bumper in a few months and don't' want to buy needlessly.
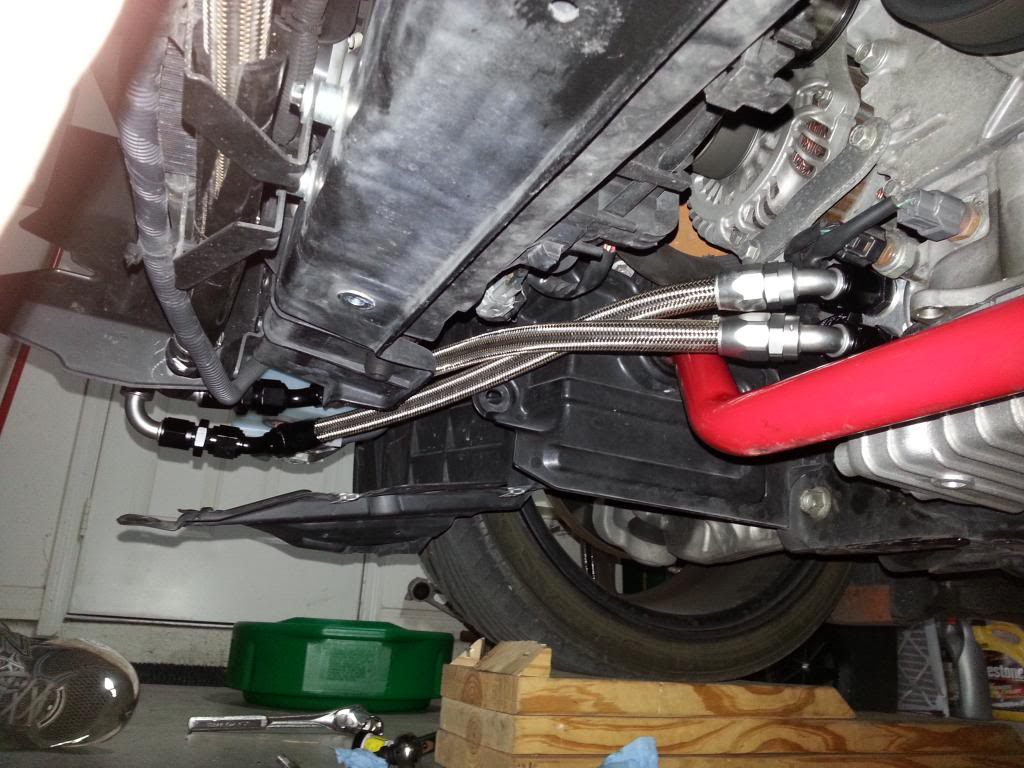
I will be securing the hoses with rubber insulated cushion clamps: . This is the correct way to mount braided line, zip ties are not...
The heat exchanger will mounted to the back of the alum crash bar, driverside, with fittings on top and bottom, pointed towards the passenger side. Lines will be routed on the back side of the crash bar.
I'll post up picks of my mounting and hose routing here when i'm finished.
So I grabbed a Greddy 7 Quart turbo kit oil pan (simply tap the 2 return line holes with 3/8 npt and plug them), and essentially the same components as listed in the DIY,
I'm fully expecting to need to order additional fittings as I'm planning to run the lines parallel to the frame rails ahead of the radiator, and use 90� hose ends and unions to make 2 piece hoses for routing purposes. I just havn't been behind the bumper in a few months and don't' want to buy needlessly.
I will be securing the hoses with rubber insulated cushion clamps: . This is the correct way to mount braided line, zip ties are not...
The heat exchanger will mounted to the back of the alum crash bar, driverside, with fittings on top and bottom, pointed towards the passenger side. Lines will be routed on the back side of the crash bar.
I'll post up picks of my mounting and hose routing here when i'm finished.
Last edited by ian99rt; Jan 23, 2013 at 08:20 AM.


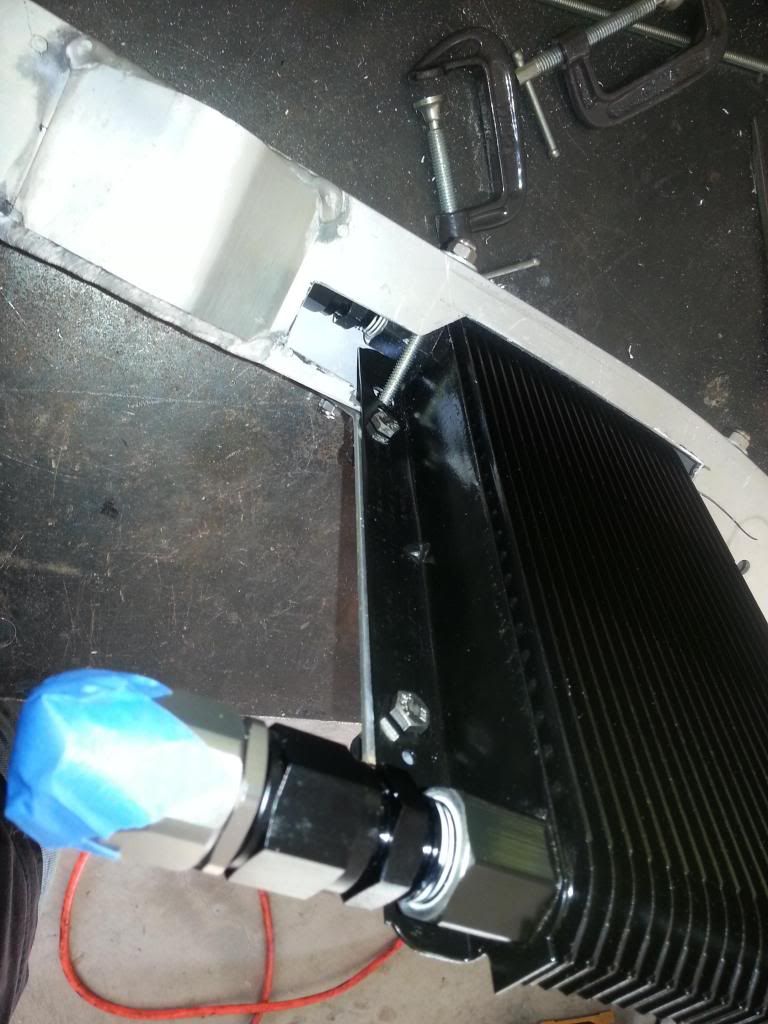
Well got started on my install and ran into a few issues:
1) Injen / Stillen Long Tube intakes prevent you from installing the cooler to the backside of the alum. crash bumper. You could install it with fittings down but you should not install with fittings down. The cooler should be oriented so the fittings are pointed side ways or up.
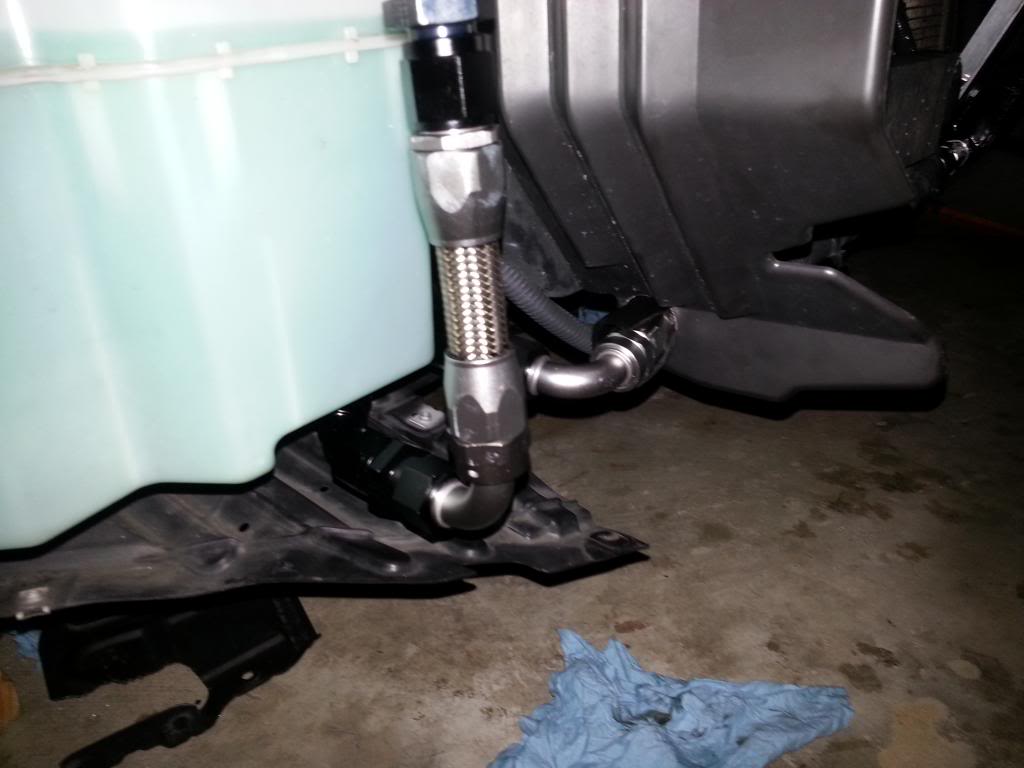
2) Installing a Greddy VQ37HR twin turbo oil pan for an extra 2 qts of capacity. This make the previous posts connection (90� coming out horizontal) to the Mocal sandwich plate not work as the pan is in the way. Instead I have to use 45� fittings to get around the Greddy Pan and sway bar.
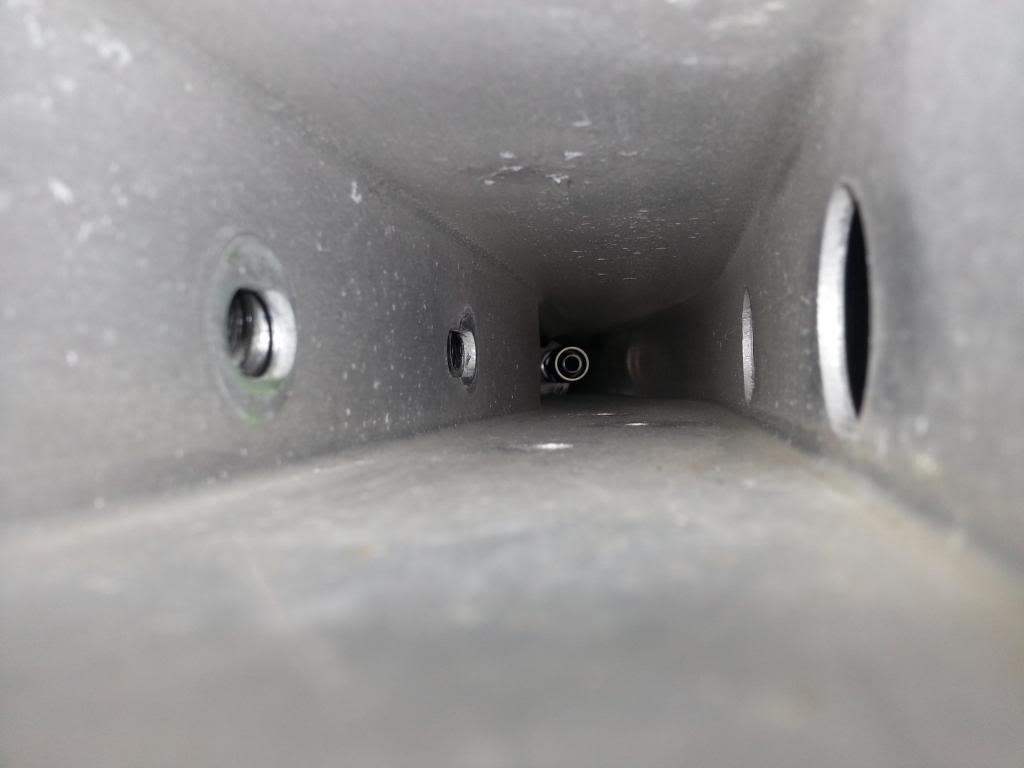
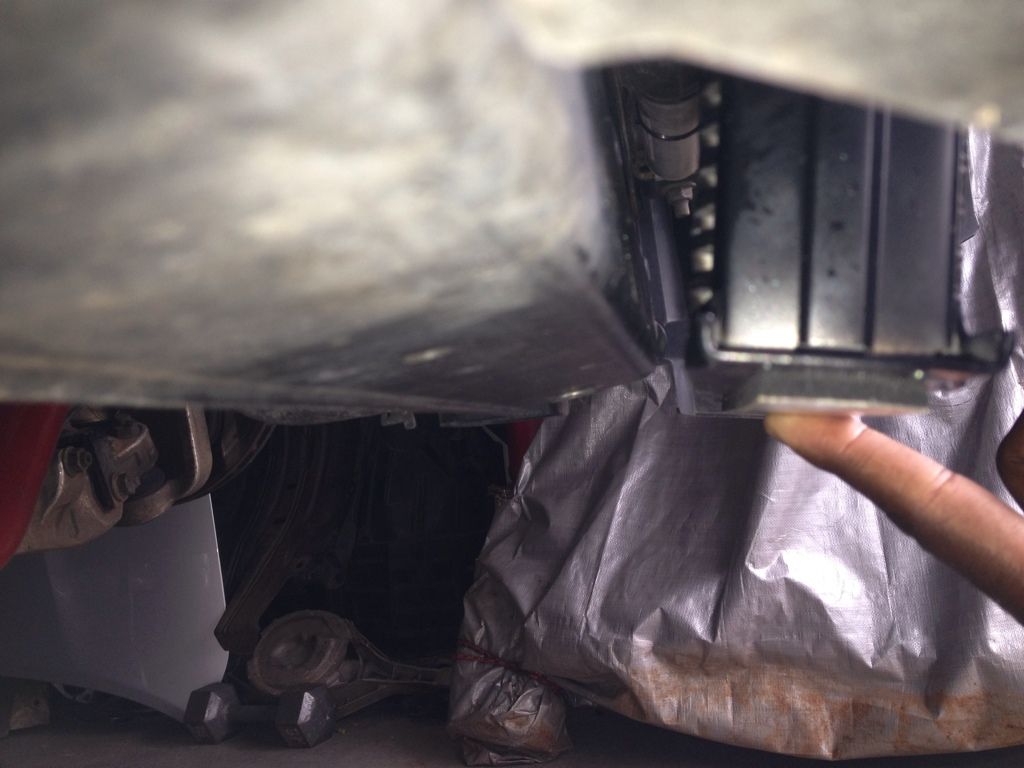
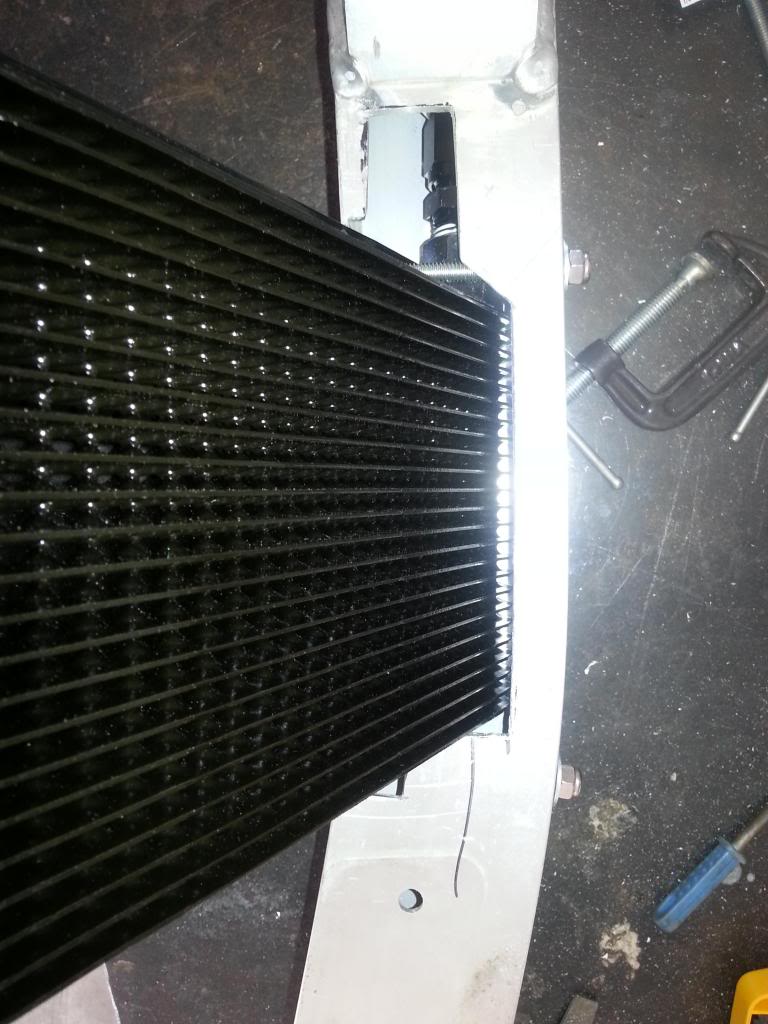
So after much debating I decided to run the cooler with the fittings to the side orientation but with a twist: I have cut a slot into the crash bumper to run the top fittings/hose through the bottom half of crash bumper out to the passenger side. I'm fully aware of the structural implications but I plan to reinforce the bumper in these areas as well. Additionally I have angled the cooler back (Approx 27�) so its almost (still about 1/8" lower) flush with the lower radiator support.

I will be welding up the cooler mounting bracket and finalizing its mounting tomorrow. Due to the need for additional fittings ( I'm making 2 piece hoses) my car will be down for the week
I also will have to space the power steering cooler out about 3/8" to run the braided line behind the PS bracket.
1) Injen / Stillen Long Tube intakes prevent you from installing the cooler to the backside of the alum. crash bumper. You could install it with fittings down but you should not install with fittings down. The cooler should be oriented so the fittings are pointed side ways or up.
2) Installing a Greddy VQ37HR twin turbo oil pan for an extra 2 qts of capacity. This make the previous posts connection (90� coming out horizontal) to the Mocal sandwich plate not work as the pan is in the way. Instead I have to use 45� fittings to get around the Greddy Pan and sway bar.
So after much debating I decided to run the cooler with the fittings to the side orientation but with a twist: I have cut a slot into the crash bumper to run the top fittings/hose through the bottom half of crash bumper out to the passenger side. I'm fully aware of the structural implications but I plan to reinforce the bumper in these areas as well. Additionally I have angled the cooler back (Approx 27�) so its almost (still about 1/8" lower) flush with the lower radiator support.
I will be welding up the cooler mounting bracket and finalizing its mounting tomorrow. Due to the need for additional fittings ( I'm making 2 piece hoses) my car will be down for the week
I also will have to space the power steering cooler out about 3/8" to run the braided line behind the PS bracket.
Last edited by ian99rt; Jan 26, 2013 at 03:13 PM.

Joined: Feb 2008
Posts: 13,406
Likes: 130
From: MexiCali dodging potholes
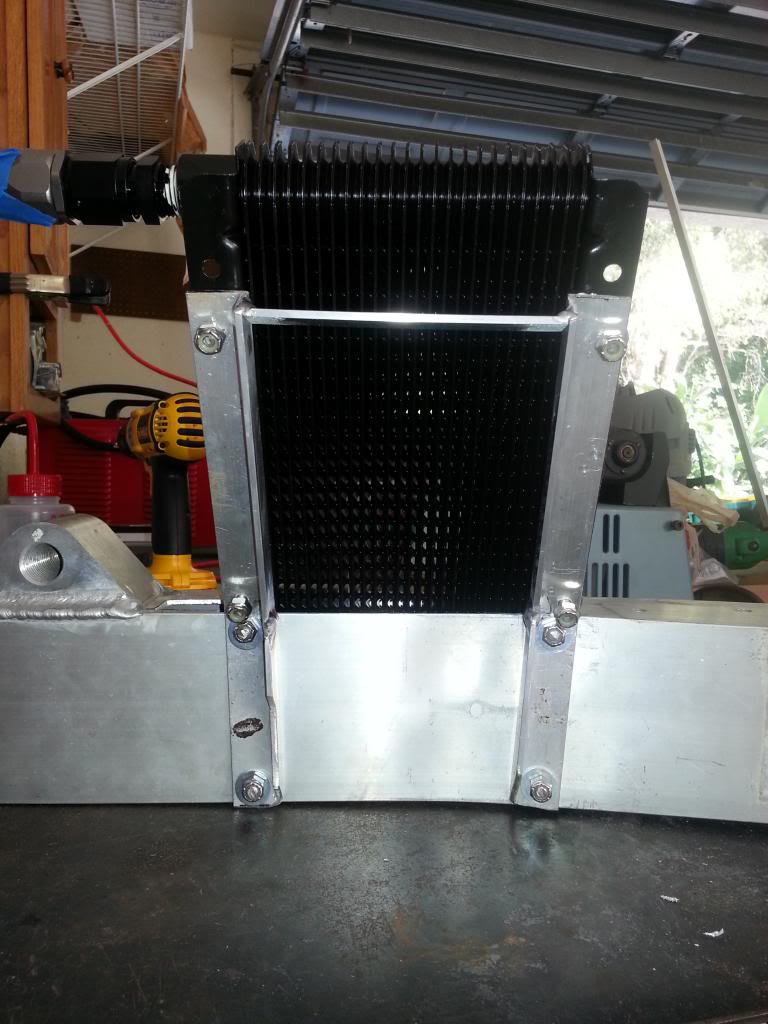
I'm doing something similiar without the cutting headache....
brb...
edit:
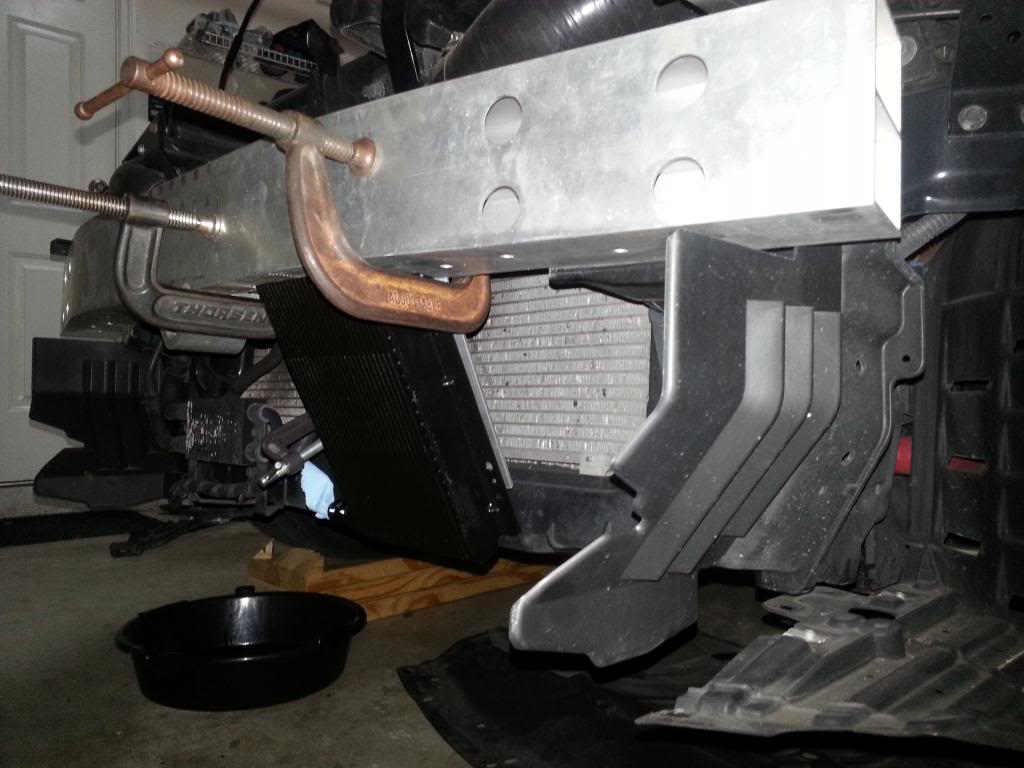
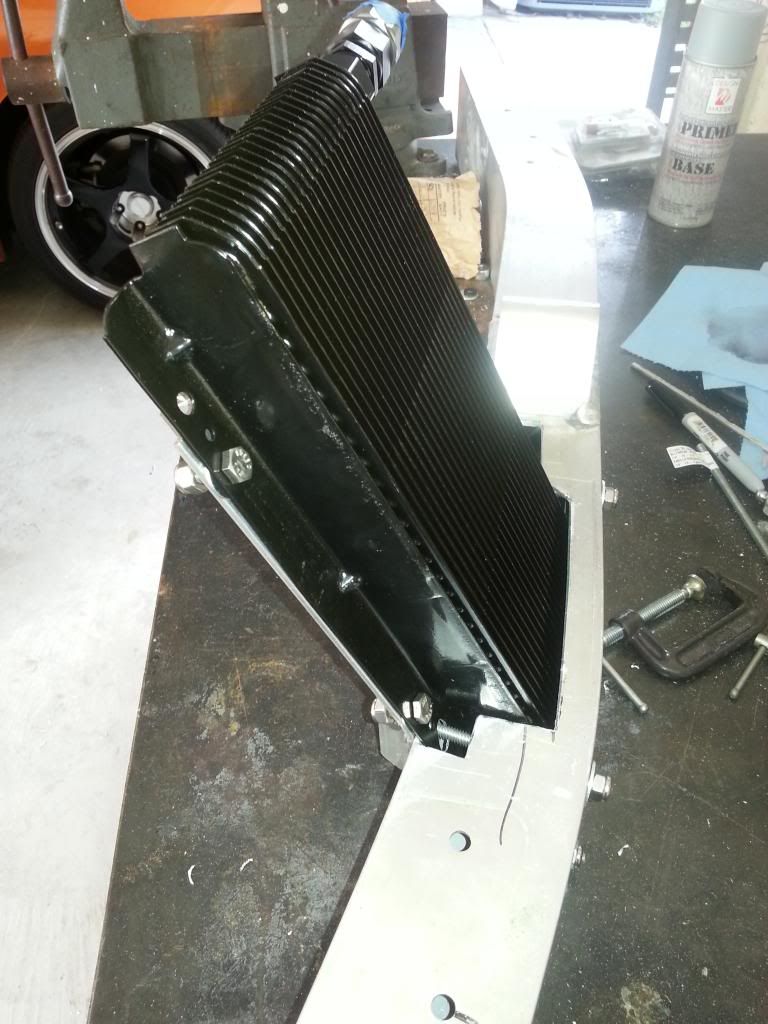
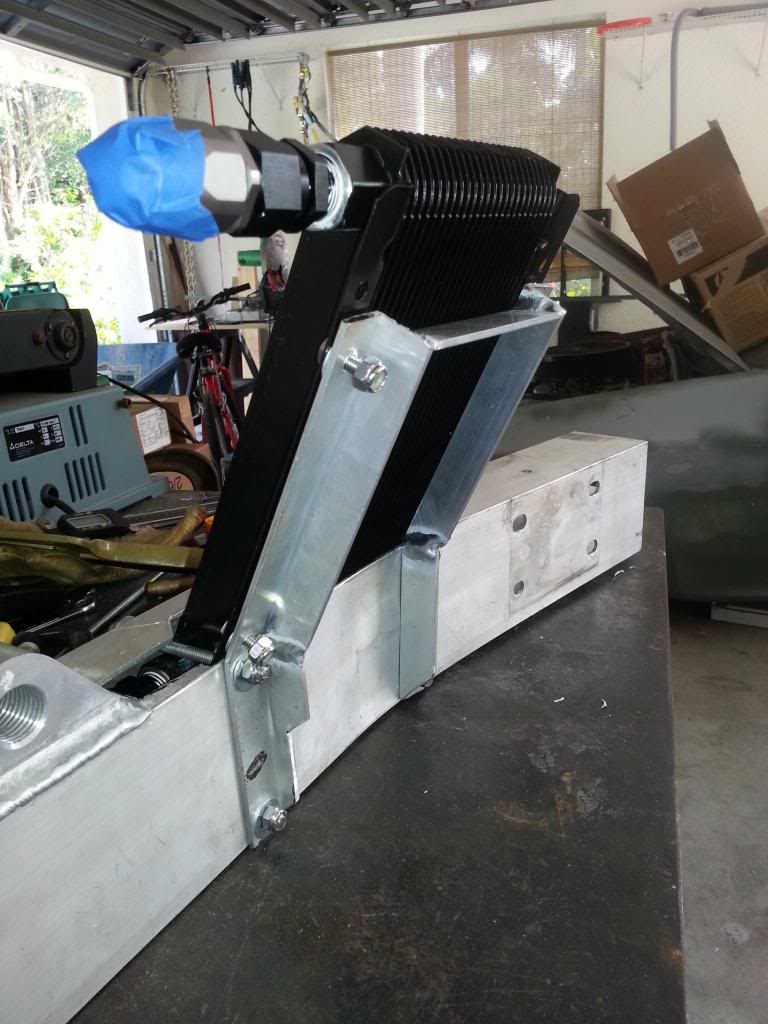
angled like this
make two support strips and bolt it to the radiator core to create that angle....
that's what I planned out...
brb...
edit:
angled like this
make two support strips and bolt it to the radiator core to create that angle....
that's what I planned out...
Last edited by KingBaby; Jan 26, 2013 at 03:37 PM.

How big is that cooler? I just can't tell by the 2 photos, the 1st looks like its going to hang really low where the bottom of the cooler is way past the bottom of the radiator support, while the other looks like its kinda flush?
I'm going through all the effort to get the cooler as high as possible so a crappy parking lot -> street transition doesn't bust my cooler.
Joined: Feb 2008
Posts: 13,406
Likes: 130
From: MexiCali dodging potholes
Lol no the zipties are just to show the angle the brackets will hold it at. It's way higher than the strut bar. If you hit anything with your radiator core you are too low!
It's a 18 row, your cooler is bigger?
It's a 18 row, your cooler is bigger?
Just gives me another excuse to get creative
Joined: Feb 2008
Posts: 13,406
Likes: 130
From: MexiCali dodging potholes
Nice man anything bigger you gotta do what your doing! I have none of the skills you got so I got to stick to drilling and bolting 
In for how a 24 row performs!
In for how a 24 row performs!
Got a bit further today. Realized I seriously need to practice my aluminum tig skills, I'm so rusty its embarrassing.
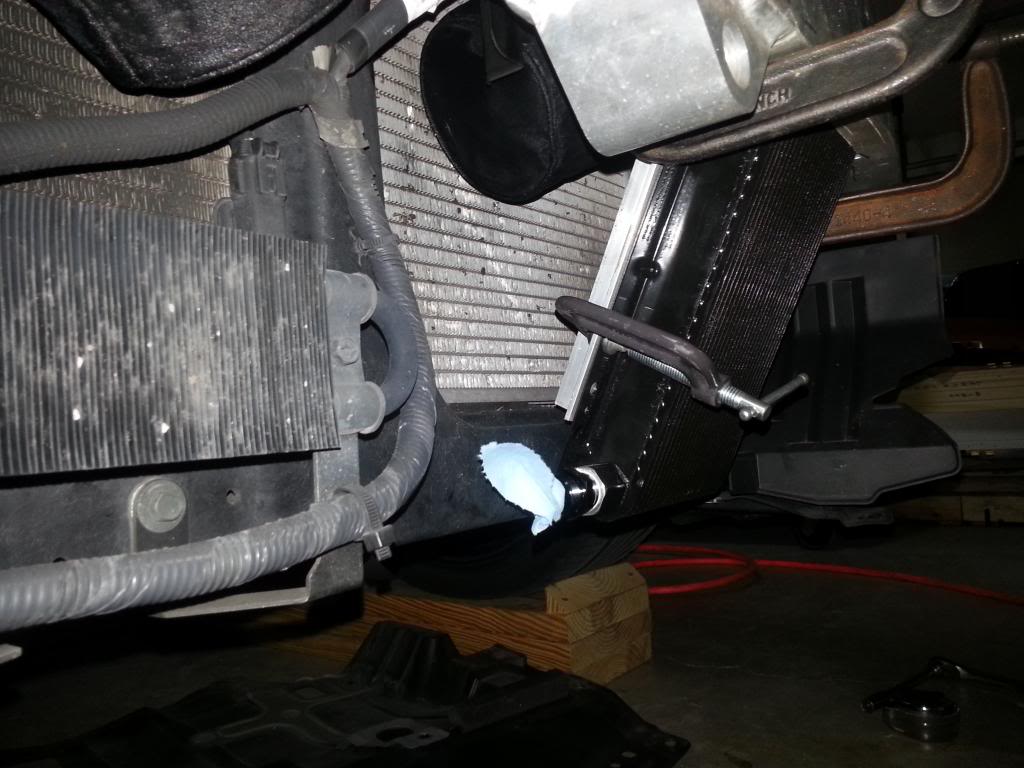
Anyways here is the bracket bolted into the bumper.
I still need to find/make some isolating rubber washers to sandwich between the cooler and bracket but that will be finished up tomorrow as well as the hose/fittings for the inside bumper line.
Anyways here is the bracket bolted into the bumper.
I still need to find/make some isolating rubber washers to sandwich between the cooler and bracket but that will be finished up tomorrow as well as the hose/fittings for the inside bumper line.

All buttoned up. Ran the car for 45 mins in the garage to spot leaks, had 1 NPT to AN fitting on the cooler that stubbornly wouldn't seal with liquid PTFE sealant so i resorted to extra thick PTFE tape. That stopped it and no other leaks to be found.
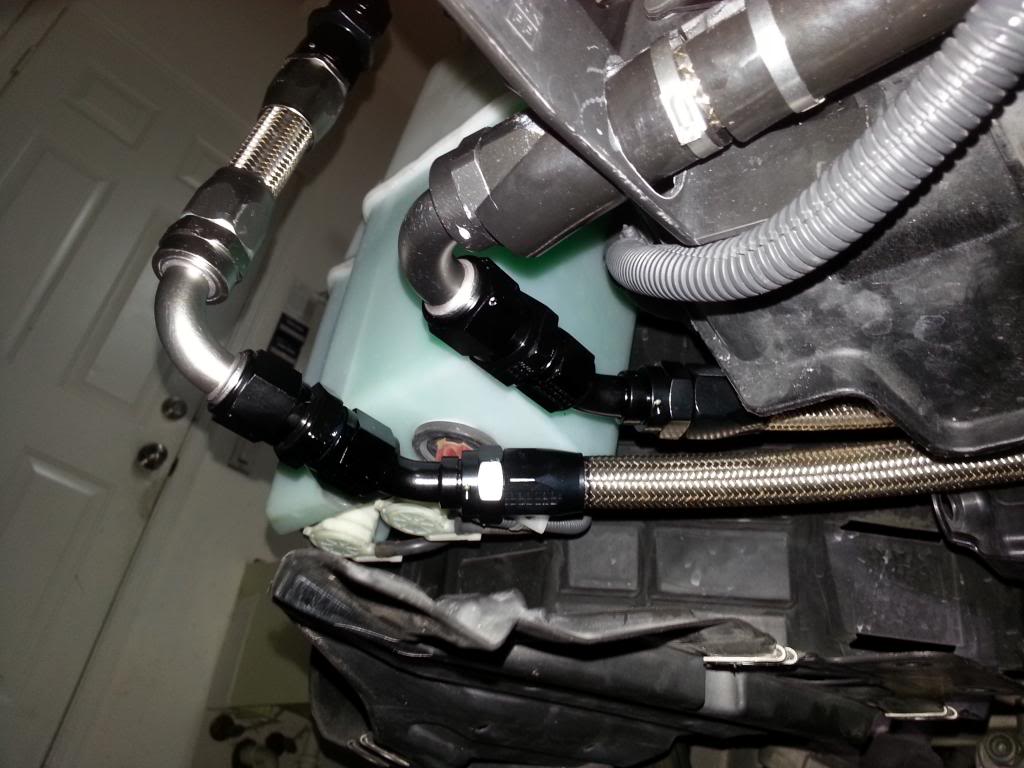

Total Fittings Used:
-10 AN Straight: 2
-10 AN 90�: 3
-10 AN 45�: 4
Alot more $ spent than OP but worth it to me to do it right.
Also photos don't show some of the rubber hose over laid to protect from rubbing in a few areas.
Top all that with a Greddy 7 qt. oil pan & slightly larger oil filter (Titan V8 Filter, Bosch # 3233) and i'm now up to 9+ quarts of oil per oil change.


Note: due to the oil line routing by the sandwich adapter / swaybar my initial position of the lower hose actually has the sway bar contacting when the wheels are off the ground ( install was done with front wheels on ramps).
I will loosen the lower 45 deg fitting and rotate it up to clear with this worst case scenario of the front wheels coming unloaded.