
DIY Oil Cooler on a NA HR


It's more oil to heat up so your engine stays cooler longer. The HRs run hot so any mod to keep the temps down should be done. Even with the 25 row cooler, I can easily hit 255F in the Texas heat. If I had a few more quarts of oil, it would take longer to get that hot.
Edit: This is only if you track your car. If it never sees a track, you're wasting your money.
Edit: This is only if you track your car. If it never sees a track, you're wasting your money.
Last edited by crZydave; Feb 26, 2013 at 03:55 PM.


Registered User
Joined: Aug 2010
Posts: 77
Likes: 0
From: Alabama
What are the pro's of piecing together the parts for as much or more money than this kit from racer parts?
http://www.racerpartswholesale.com/p...oolerKits#tabs
It has a thermostatic sandwich plate,10an lines, and the same 24 row cooler you are using correct? So why not buy the kit they have?
http://www.racerpartswholesale.com/p...oolerKits#tabs
It has a thermostatic sandwich plate,10an lines, and the same 24 row cooler you are using correct? So why not buy the kit they have?

I have been wanting to do this a lot recently, and I finally bit the bullet and used this thread for lots of tips. I was going to run my lines very similar to Ian99RT, but after I got under the car I found that was not going to work at all.
Momentum used Aeroquip Startlite hose for a lot of their cooling and oil return lines, so I used that line to match the other hoses. I LOVE this line, it is super easy to work with, and very clean looking in the car.
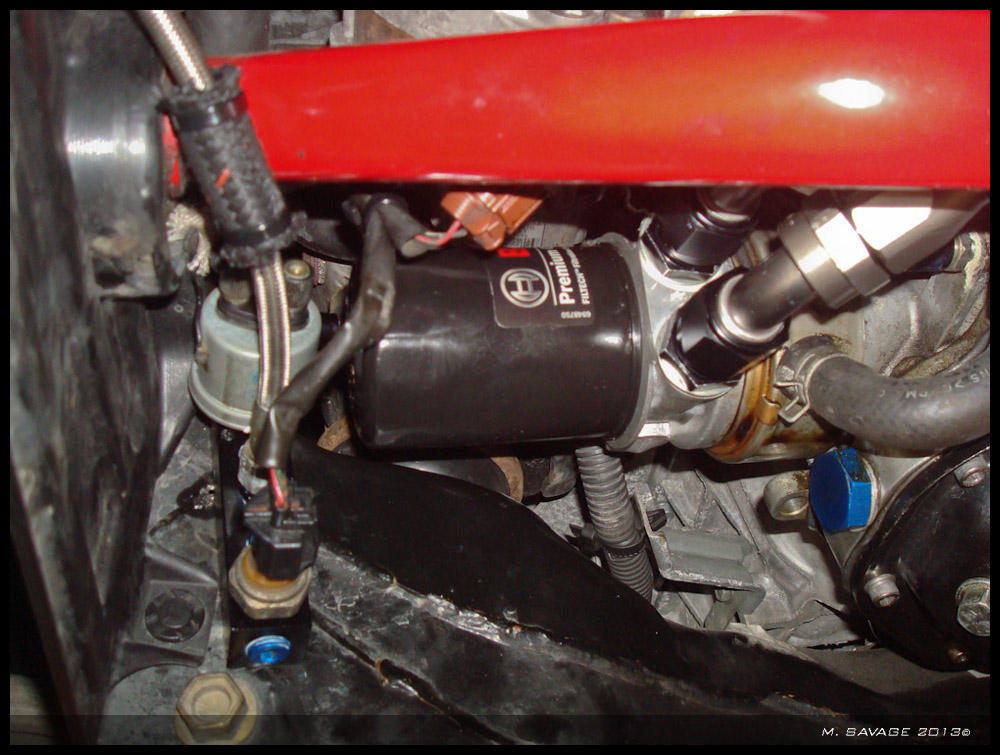
I started by taking a look at the sandwich plate and how I wanted to mount it. I then realized the sensors were all in the way, which made my issue a lot work and required a whole bunch of new parts.
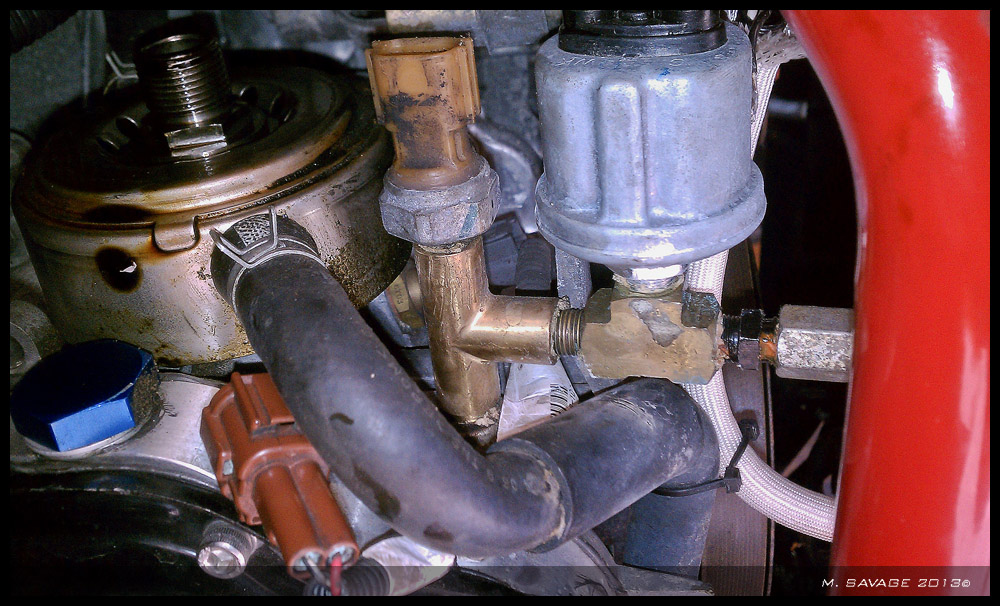
So after ordering all the correct BSP thread adapters, and a bunch of -4 line and fittings as well as a new manifold I came up with this.
I went up over the oil filter and around to another 90 to the top of a 5 port manifold to relocate all of my sensors and oil feed line.

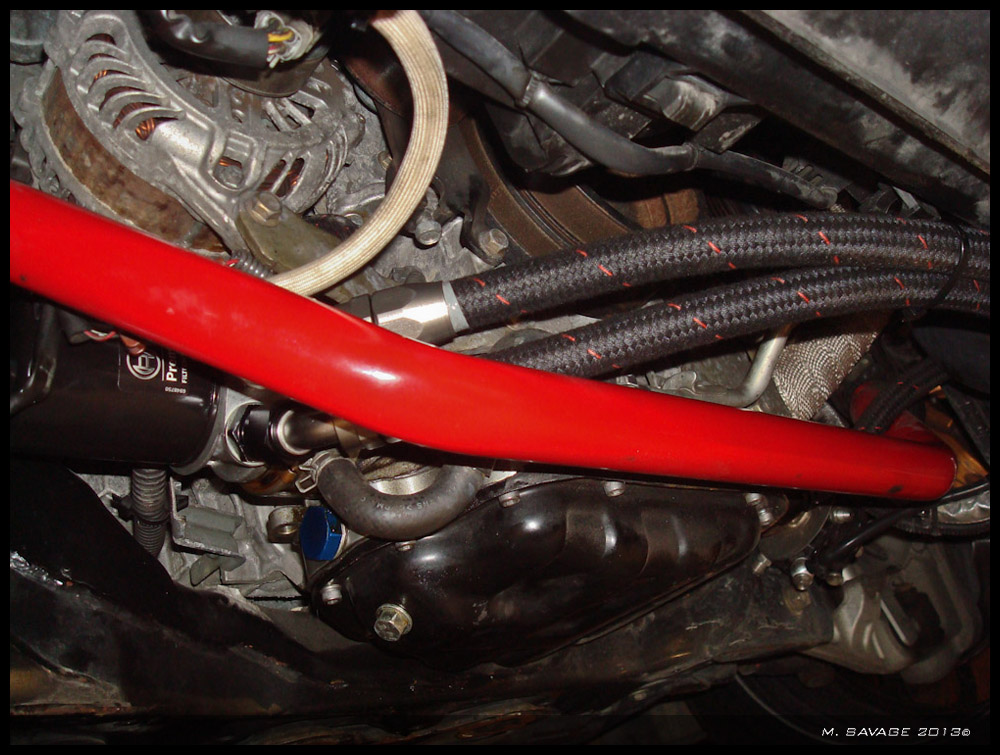
All this allowed me to mount the sandwhich plate forward with 45 degree fittings arcing towards the drivers side up over the sway bar.
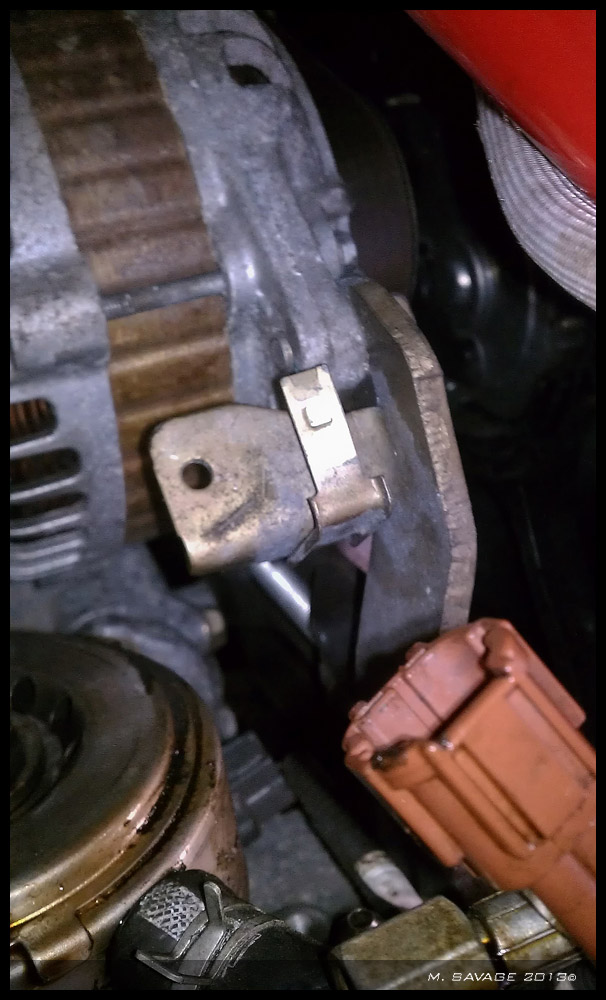
This electro spot welded bracket on the alternator brack also had to go. my air chisel made quick work of it.
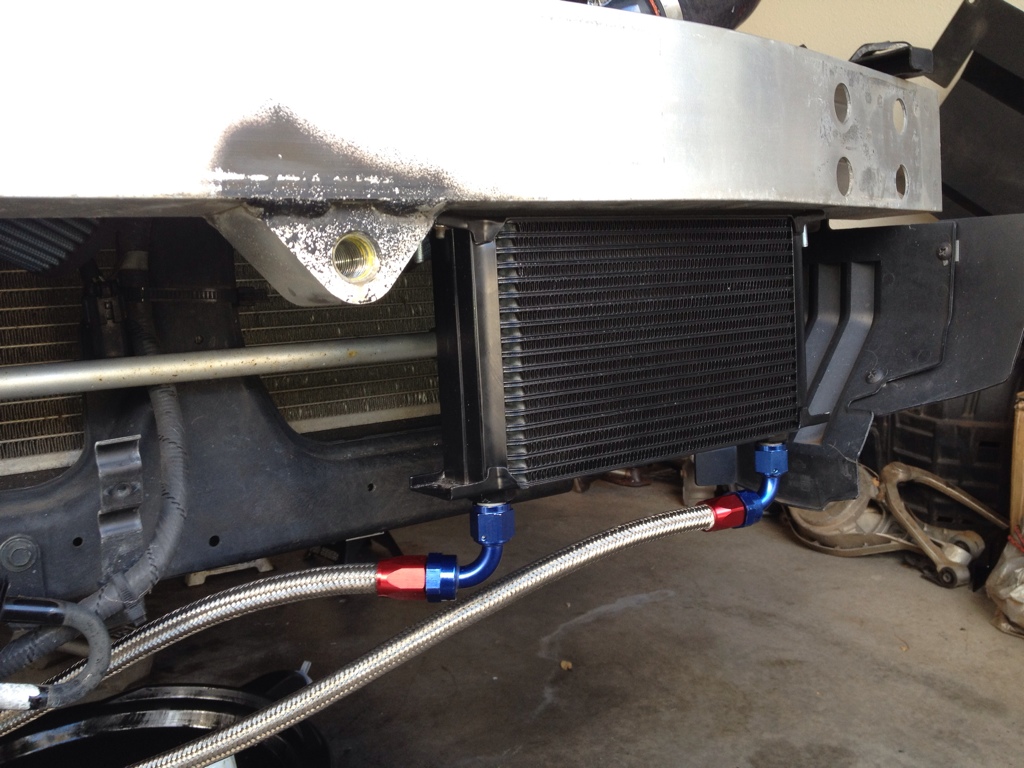
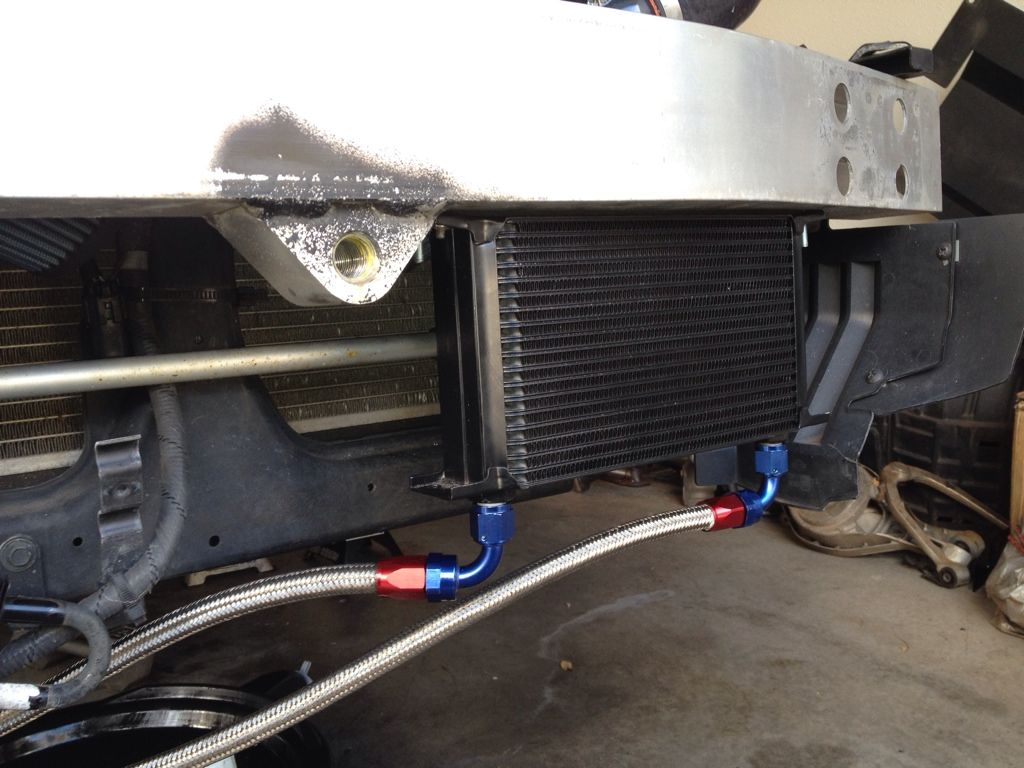
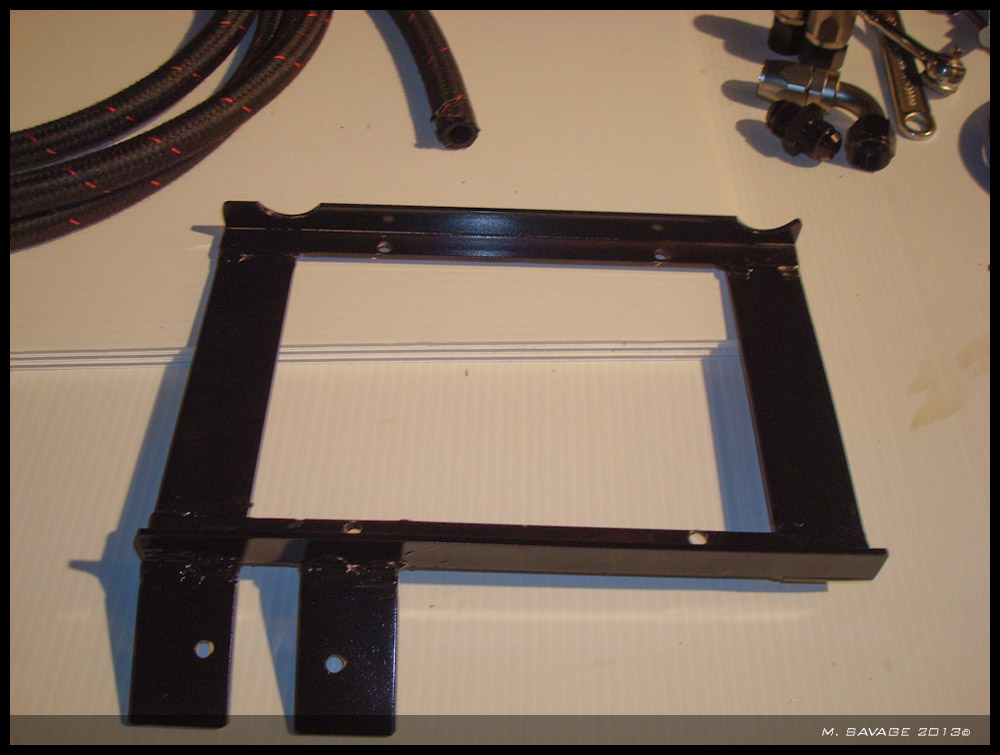
I did this stuff first, but it flows better to show it now. I welded up a quick oil cooler support bracket out of some aluminum and then powder coated the bracket black.
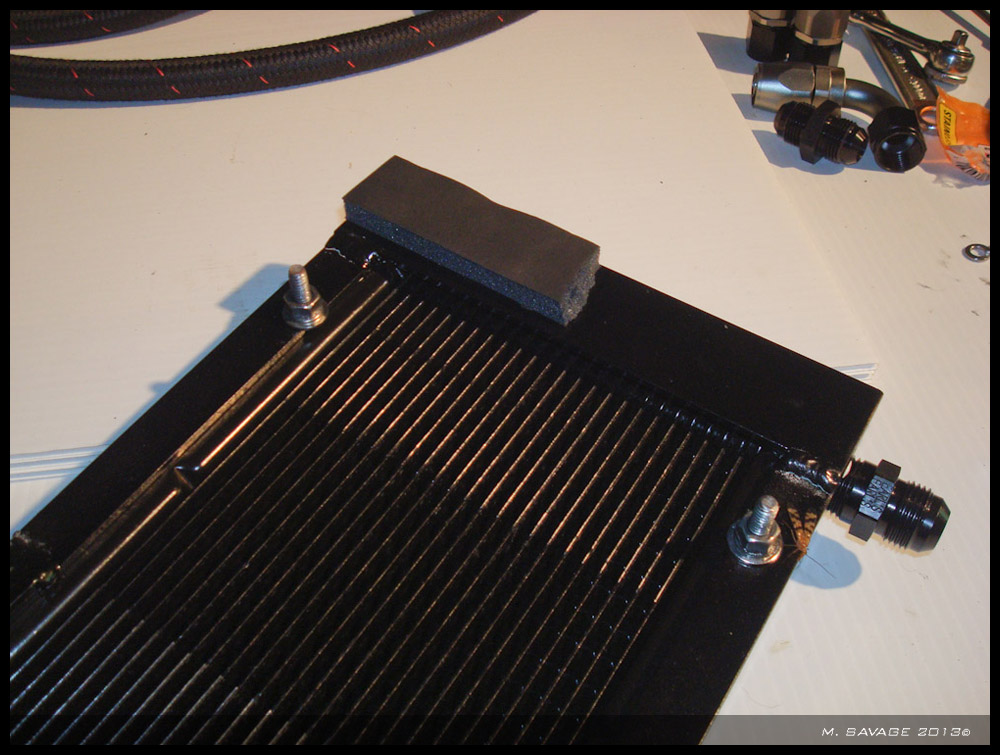
I mounted the cooler to the bracket with stainless steel hardware coated in never sieze to prevent rust and the stainless from gauling. I also stuck on a small peice of foam to prefent the bracket from vibrating against my intercooler piping.

This is probably the more disapointing part of my installation. Due to all the stuff I have in front of my grill I decided to mount the cooler off to the drivers side crash bar. I drilled throught the crash bar and used a uni bit to expand the forward most holes to fit a socket for the stainless steel hardware. This allows me to torque down the bracket without the tube crushing and not achiving a proper torque.

I am not super excited about the cooling effect this has over all, I have not had it on the highway, but I have not seen the reduction in numbers I was hoping for. It does keep the temps down while under boost, but not quite to the extent I was hoping.
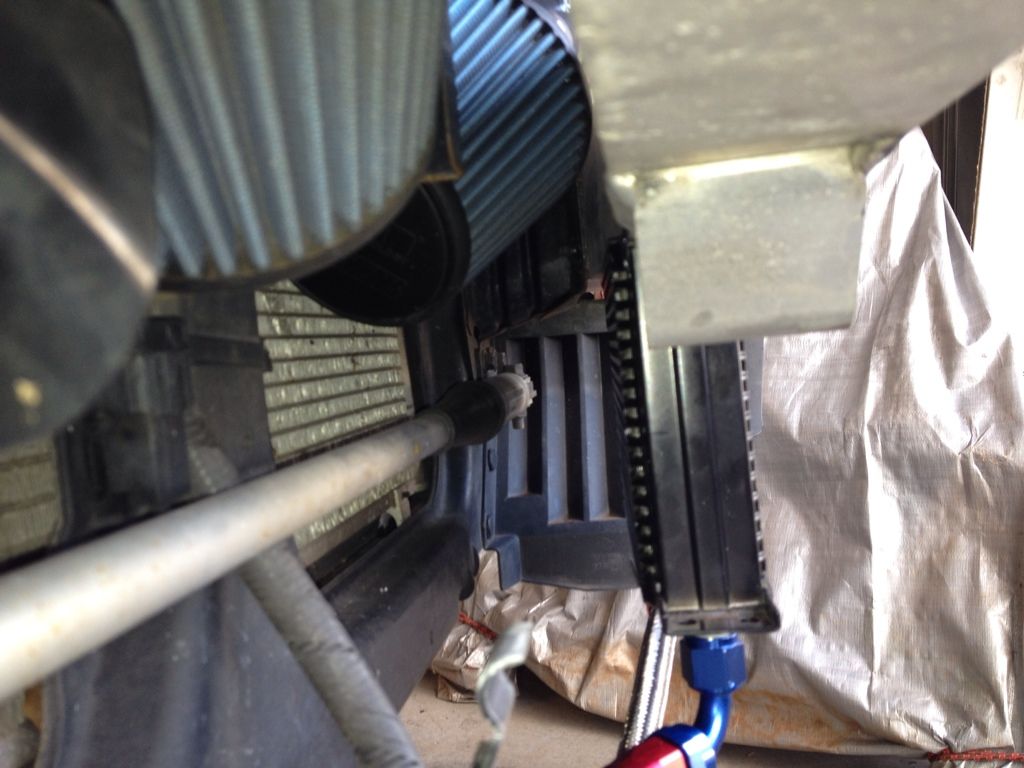
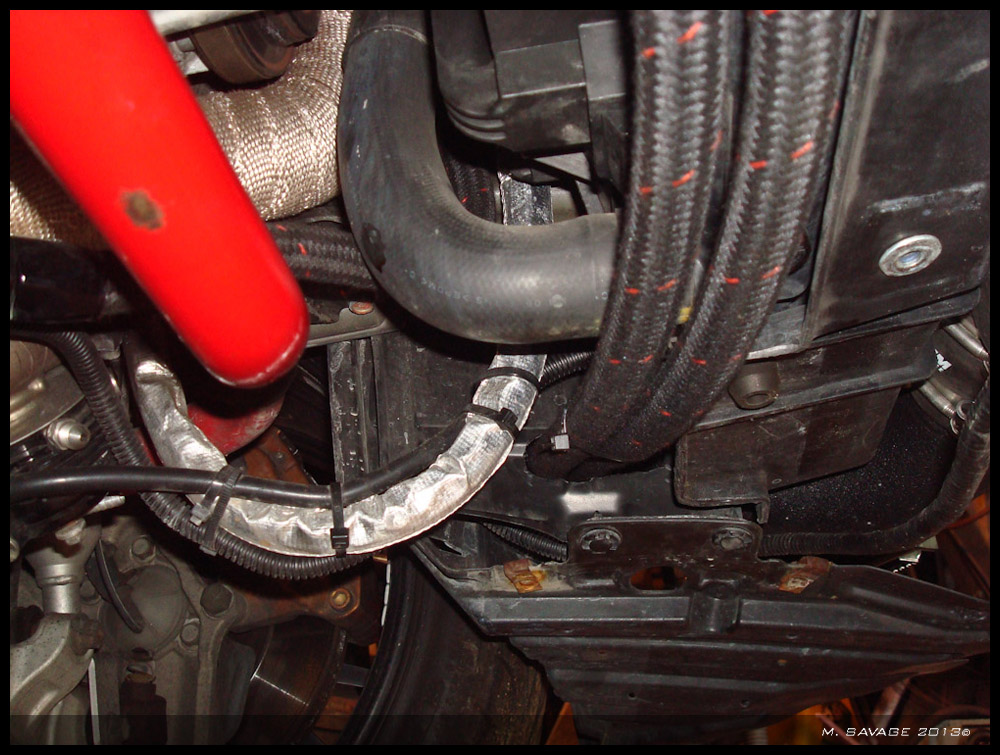
So from here I routed the lines under my intercooler pipe and along the inside of the core support to the sandwich plate.
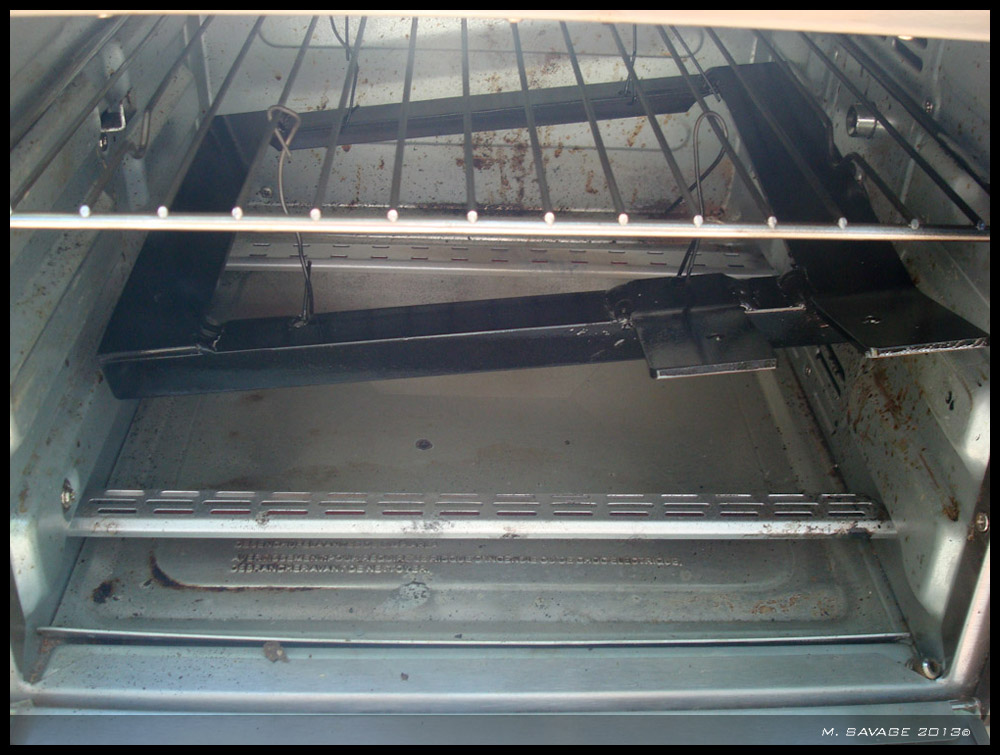
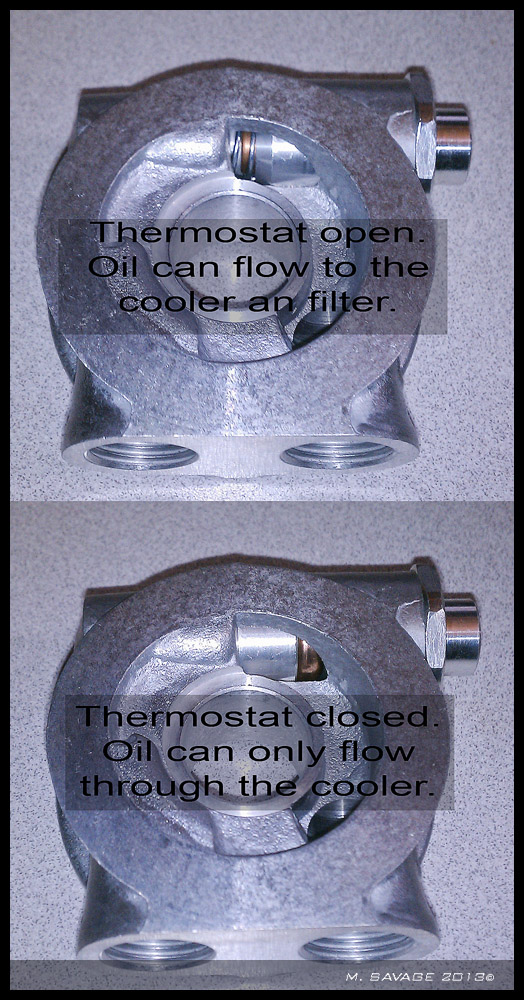
As a bit of an extra, I have read a lot about the thermostatic sandwich plate and how it works. I took my mocal plate and put it in a pan of water on the stove top till the thermostat shut and took some photos. I hope it helps answer some peoples questions.
Momentum used Aeroquip Startlite hose for a lot of their cooling and oil return lines, so I used that line to match the other hoses. I LOVE this line, it is super easy to work with, and very clean looking in the car.
I started by taking a look at the sandwich plate and how I wanted to mount it. I then realized the sensors were all in the way, which made my issue a lot work and required a whole bunch of new parts.
So after ordering all the correct BSP thread adapters, and a bunch of -4 line and fittings as well as a new manifold I came up with this.
I went up over the oil filter and around to another 90 to the top of a 5 port manifold to relocate all of my sensors and oil feed line.
All this allowed me to mount the sandwhich plate forward with 45 degree fittings arcing towards the drivers side up over the sway bar.
This electro spot welded bracket on the alternator brack also had to go. my air chisel made quick work of it.
I did this stuff first, but it flows better to show it now. I welded up a quick oil cooler support bracket out of some aluminum and then powder coated the bracket black.
I mounted the cooler to the bracket with stainless steel hardware coated in never sieze to prevent rust and the stainless from gauling. I also stuck on a small peice of foam to prefent the bracket from vibrating against my intercooler piping.
This is probably the more disapointing part of my installation. Due to all the stuff I have in front of my grill I decided to mount the cooler off to the drivers side crash bar. I drilled throught the crash bar and used a uni bit to expand the forward most holes to fit a socket for the stainless steel hardware. This allows me to torque down the bracket without the tube crushing and not achiving a proper torque.
I am not super excited about the cooling effect this has over all, I have not had it on the highway, but I have not seen the reduction in numbers I was hoping for. It does keep the temps down while under boost, but not quite to the extent I was hoping.
So from here I routed the lines under my intercooler pipe and along the inside of the core support to the sandwich plate.
As a bit of an extra, I have read a lot about the thermostatic sandwich plate and how it works. I took my mocal plate and put it in a pan of water on the stove top till the thermostat shut and took some photos. I hope it helps answer some peoples questions.

Thread
Thread Starter
Forum
Replies
Last Post