
Custom Painted Hatch Lifts Installed. Much Better Than OEM. 56k Die...

Thread Starter
Administrator
iTrader: (25)
Joined: Jun 2005
Posts: 58,609
Likes: 2,747
From: Down Under & Dirty
I started a thread about a week ago, searching for polished hatch lifts. The search turned up no results. Next best thing, buy black aftermarket hatch lifts and color match them to the interior instead. That's exactly what I did.
Total project time: 7 hours
Total cost for painting material: $27
Ordered new lifts from: 350zhatchshocksandmore.com
I started off by ordering new lifts. They came in, in one day. I ordered heavy duty ones. They're capable of lifting twice the weight of my hatch. The hatch is fully dynomat layered, so it's a bit heavier than normal by a few pounds. The OEM lifts weren't cutting it and the hatch was begining to fall on it's own.
A quick trip to Home Depot, I picked up all the necessary materials for a clean paint job. At first I was going to paint the lifts a metallic silver to match my exterior paint, then I changed my mind and exchanged the paint for an "apple red" paint to match my Bride seats and Sparco harness bar.

First came the OEM lift removal. It was necessary to cut the ball joints/brackets off the OEM lifts, so I could reuse them with the new lifts. I used a Dremmel cutting wheel to slice through them. It was a very tedious/delicate job. I had to make sure not to slice into the ball joint or nick the brackets.


Once I had the OEM brackets cut loose, it was time to prep the brackets and new lifts for painting. 15 minute paint stripper made waste of the factory bracket paint. I just let them soak in it for about 30mins. The new lifts had some pretty tough black paint on them. I brushed on a coat of the paint stripper and left it there in 15 minute intervals x 2. Best I could do was get it thinned out and removed in some places. Using a "00" grit wool sanding pad, I soaked it in Mineral Spirits fluid and begin sanding the lifts/brackets down to a fine finish.
The brackets soaking in paint stripper.

The lifts layered and soaking in paint stripper.

Brackets soaking in Mineral Spirits after the paint stripper. I soaked them in the Mineral spirits to remove any grime and grease left over.

This is how the lifts ended up after paint stripper and sanding.

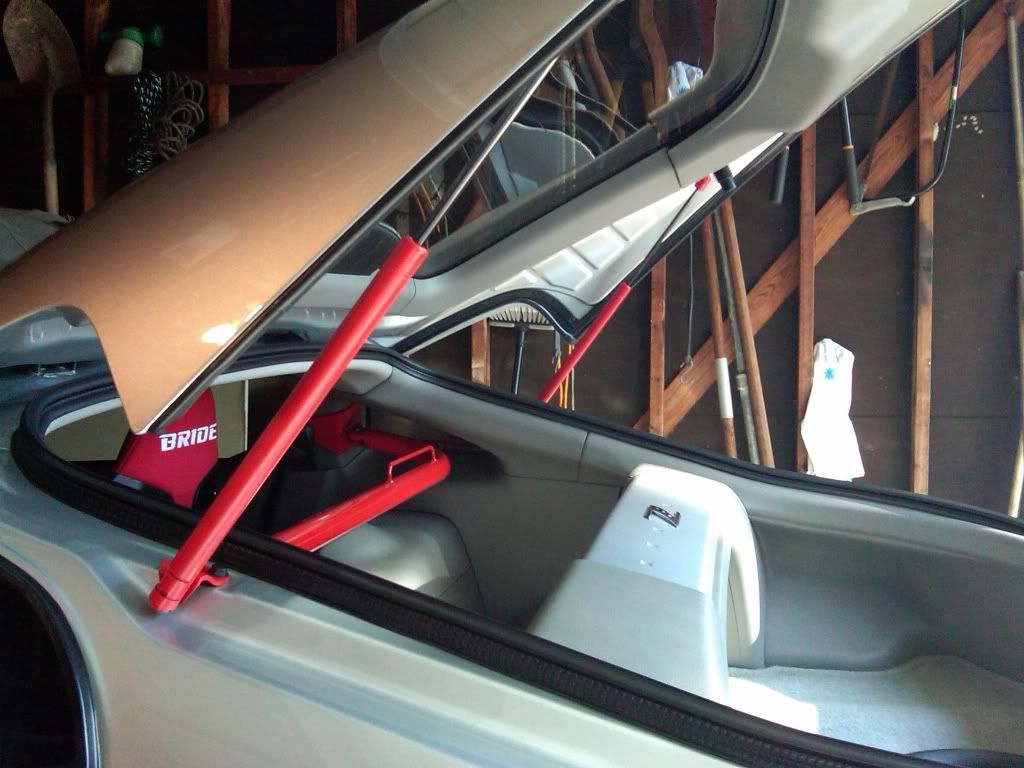
I used a broom stick to hold the hatch up. You'd be surprised how heavy that thing is!

The painting took a very long time. I made sure to layer each coat on very thin, to avoid dripping. I didn't want it to look like a chop job, especially since I was using spray paint. In the end, I'd say I laid about 20 coats on the parts. I hung dried them in the garage for 24hrs.


After 24hrs of drying, I installed the new product. I must say I'm impressed on how they turned out. The spray paint did a decent job. I wouldn't spray paint a large item, but for something small like this it came out nice and clean.
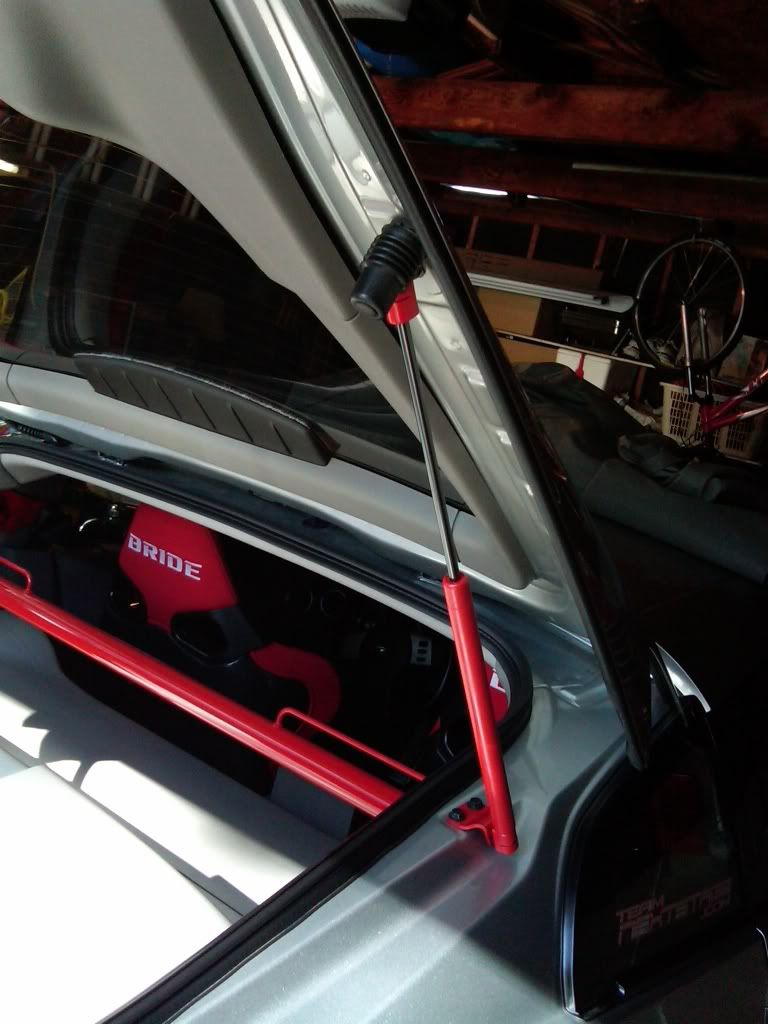
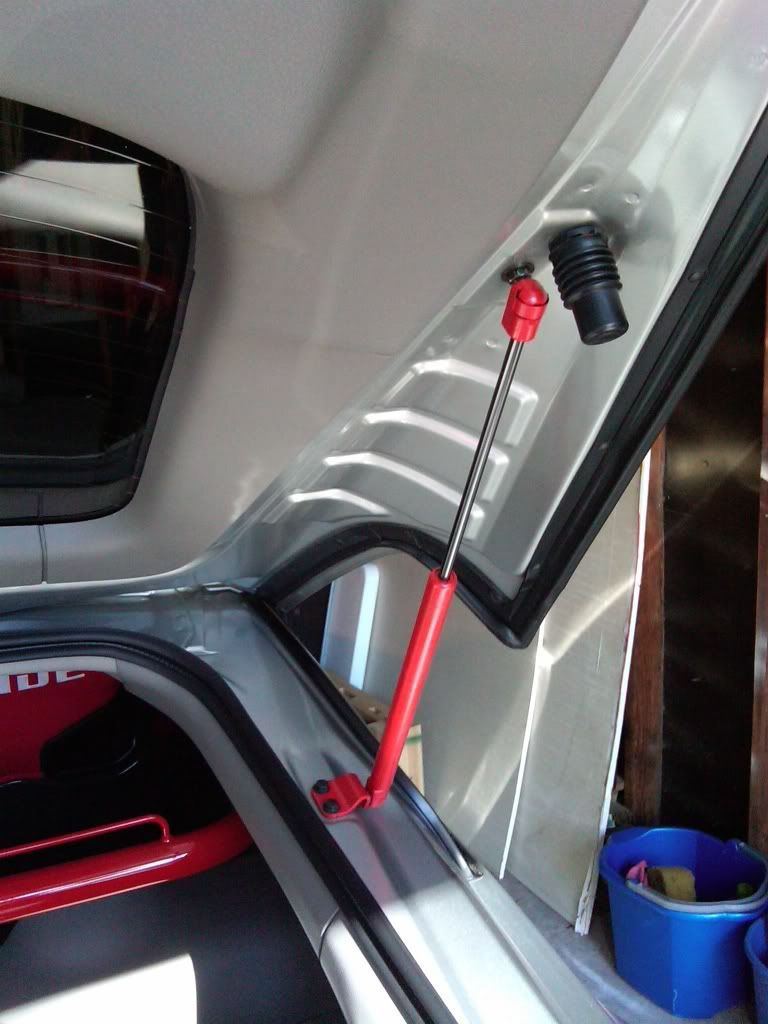

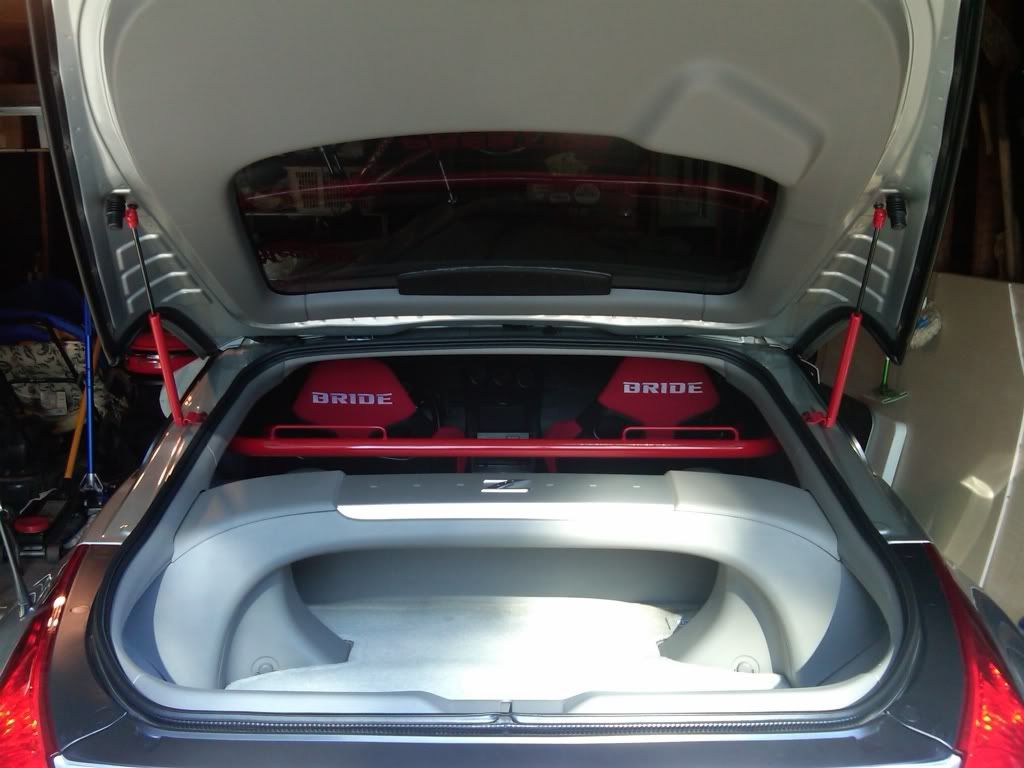

A closing note. I love the new lifts. Just one held the hatch up. When I installed the second one, it was magic. All I have to do is lift the hatch about 5 inches now and it raises on it's own...
Total project time: 7 hours
Total cost for painting material: $27
Ordered new lifts from: 350zhatchshocksandmore.com
I started off by ordering new lifts. They came in, in one day. I ordered heavy duty ones. They're capable of lifting twice the weight of my hatch. The hatch is fully dynomat layered, so it's a bit heavier than normal by a few pounds. The OEM lifts weren't cutting it and the hatch was begining to fall on it's own.
A quick trip to Home Depot, I picked up all the necessary materials for a clean paint job. At first I was going to paint the lifts a metallic silver to match my exterior paint, then I changed my mind and exchanged the paint for an "apple red" paint to match my Bride seats and Sparco harness bar.
First came the OEM lift removal. It was necessary to cut the ball joints/brackets off the OEM lifts, so I could reuse them with the new lifts. I used a Dremmel cutting wheel to slice through them. It was a very tedious/delicate job. I had to make sure not to slice into the ball joint or nick the brackets.
Once I had the OEM brackets cut loose, it was time to prep the brackets and new lifts for painting. 15 minute paint stripper made waste of the factory bracket paint. I just let them soak in it for about 30mins. The new lifts had some pretty tough black paint on them. I brushed on a coat of the paint stripper and left it there in 15 minute intervals x 2. Best I could do was get it thinned out and removed in some places. Using a "00" grit wool sanding pad, I soaked it in Mineral Spirits fluid and begin sanding the lifts/brackets down to a fine finish.
The brackets soaking in paint stripper.
The lifts layered and soaking in paint stripper.
Brackets soaking in Mineral Spirits after the paint stripper. I soaked them in the Mineral spirits to remove any grime and grease left over.
This is how the lifts ended up after paint stripper and sanding.
I used a broom stick to hold the hatch up. You'd be surprised how heavy that thing is!
The painting took a very long time. I made sure to layer each coat on very thin, to avoid dripping. I didn't want it to look like a chop job, especially since I was using spray paint. In the end, I'd say I laid about 20 coats on the parts. I hung dried them in the garage for 24hrs.
After 24hrs of drying, I installed the new product. I must say I'm impressed on how they turned out. The spray paint did a decent job. I wouldn't spray paint a large item, but for something small like this it came out nice and clean.
A closing note. I love the new lifts. Just one held the hatch up. When I installed the second one, it was magic.
All I have to do is lift the hatch about 5 inches now and it raises on it's own...
Last edited by VO...; Jan 25, 2010 at 09:32 AM. Reason: Added site URL...


Thread Starter
Administrator
iTrader: (25)
Joined: Jun 2005
Posts: 58,609
Likes: 2,747
From: Down Under & Dirty
Thanks fellas!
350zhatchshocksandmore.com
350zhatchshocksandmore.com


Thread
Thread Starter
Forum
Replies
Last Post
350Z_Al
Exterior & Interior
133
Oct 29, 2020 07:44 PM
ars88
Zs & Gs For Sale
18
Apr 4, 2016 07:52 AM