

Question about bodykit fitment (pics included)
 02-14-2010, 01:28 PM
#1
Banned
Thread Starter
iTrader: (39)

Join Date: Jan 2007
Location: So-cal
Posts: 10,107
Likes: 0
Received 0 Likes
on
0 Posts
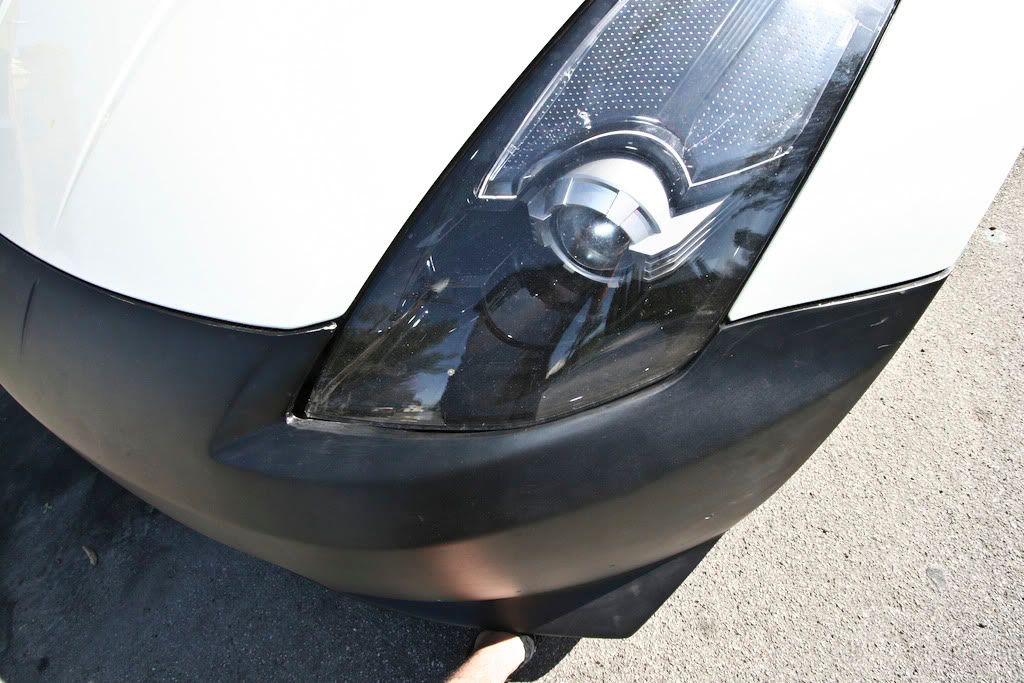
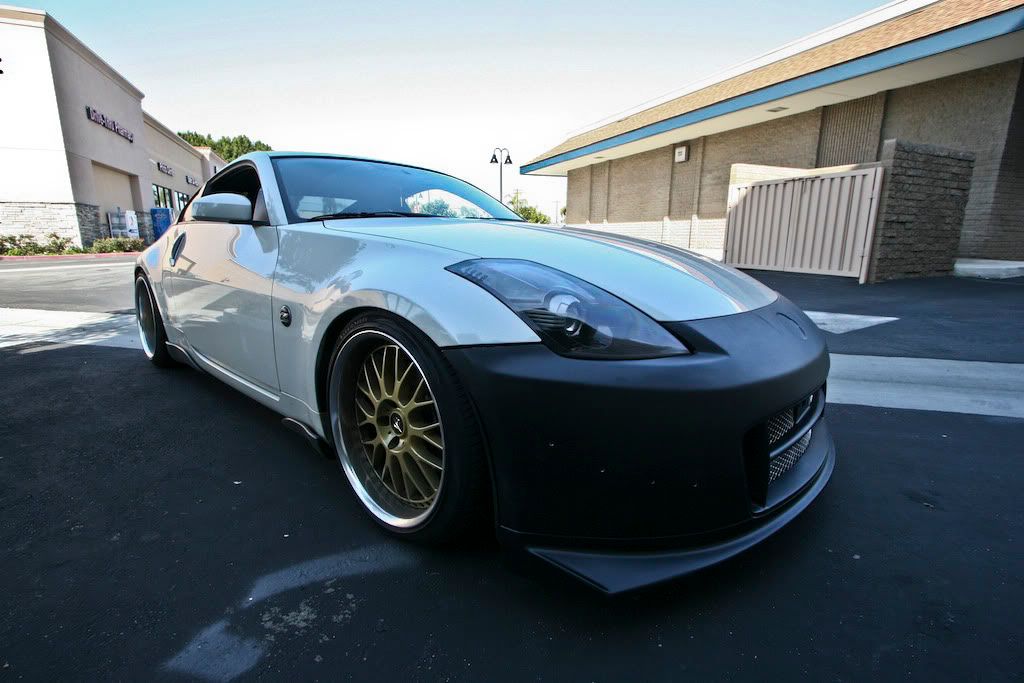
Ok so a few days ago I bought a Nismo V2 replica front and sideskirts. Today I decided to test fit the front bumper to see how the fitment is. Overall I'm pretty happy with the fitment, but there's a small gap by both headlights. It's looks like the kit is slightly off there, so I wanted to ask you guys who have experience with bodykit fitment if a good body shop can get that aligned nicely. I know replica kits don't have OEM fitment of course, but just how good of a fitment do you guys think this is?
That's the gap around the tip of the headlight
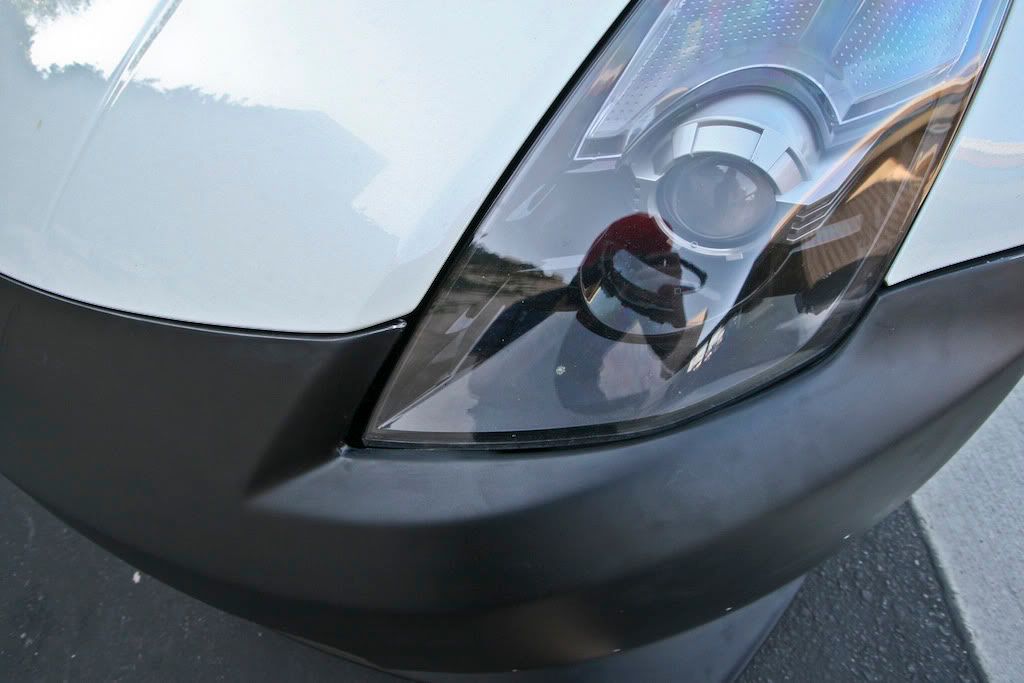
And same on the other side

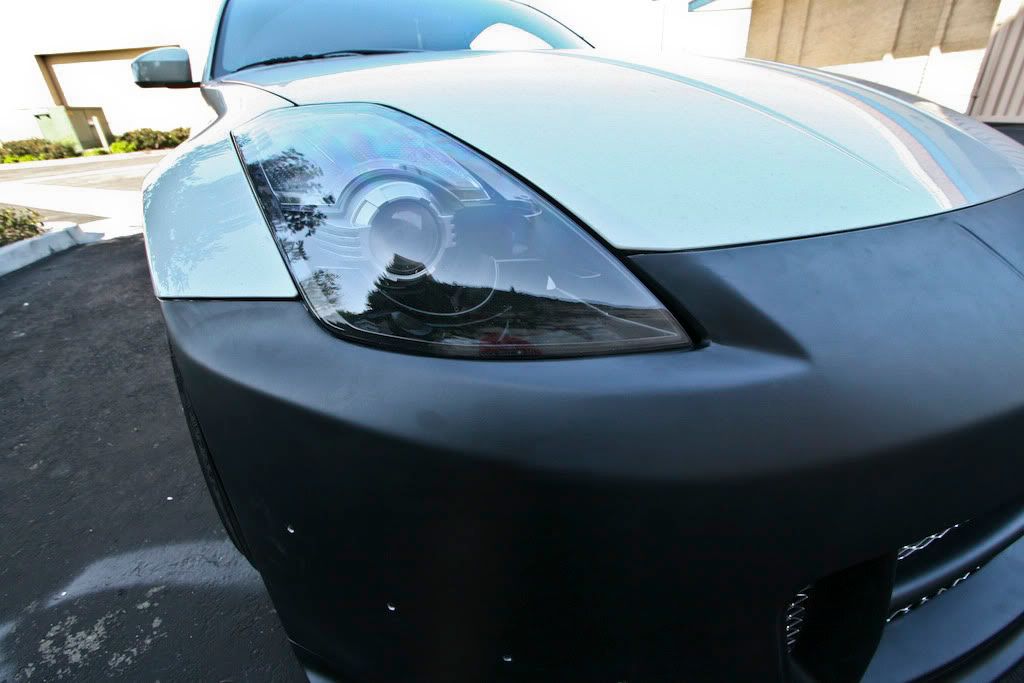
Don't mind the gap around the fenders here, there are no screws holding it up there. The only thing holding the bumper in these pictures is those 6 plastic clips along the edge of the hood.


So can those gaps around the lights be fixed? I just want a few opinions before I take this bumper down to the body shop. Thanks guys!!
That's the gap around the tip of the headlight
And same on the other side
Don't mind the gap around the fenders here, there are no screws holding it up there. The only thing holding the bumper in these pictures is those 6 plastic clips along the edge of the hood.
So can those gaps around the lights be fixed? I just want a few opinions before I take this bumper down to the body shop. Thanks guys!!


 02-14-2010, 03:14 PM
#7
Registered User
iTrader: (2)

Join Date: Apr 2009
Location: usa
Posts: 895
Likes: 0
Received 0 Likes
on
0 Posts
Ok so a few days ago I bought a Nismo V2 replica front and sideskirts. Today I decided to test fit the front bumper to see how the fitment is. Overall I'm pretty happy with the fitment, but there's a small gap by both headlights. It's looks like the kit is slightly off there, so I wanted to ask you guys who have experience with bodykit fitment if a good body shop can get that aligned nicely. I know replica kits don't have OEM fitment of course, but just how good of a fitment do you guys think this is?
That's the gap around the tip of the headlight
And same on the other side
Don't mind the gap around the fenders here, there are no screws holding it up there. The only thing holding the bumper in these pictures is those 6 plastic clips along the edge of the hood.
So can those gaps around the lights be fixed? I just want a few opinions before I take this bumper down to the body shop. Thanks guys!!
One solution is to get rubber hose and attach to the bumper. Somethin akin to the rubber sealing the rest of the interior. This will close the gap AND provide some protection from water getting into the gap.
Trending Topics

 02-14-2010, 06:04 PM
#16

are all the screws/bolts nice and tight?
edit: just read its being held on there very lightly. I would say tighten everything up and get it on there like your ready to drive with it. Its amazing when tightening a bolt at the bottom can do to the whole car. So dont under estimate tightening that sucker up.
Thats really not all that bad for replica, Iv seen a LOT worse.
Just get a body shop to use some body filler on it. It looks like it will need some work to cover up the canard screw holes anyways
Car is of course gonna look good when its all done
Last edited by zerafian; 02-14-2010 at 06:06 PM.
02-14-2010, 06:10 PM
#17

you can loosen up the two bolts on bottom of headlights (bumper off) then put spacers/washers to make bottom of light come out a bit, then adjust your headlight light projection down to make up the difference, that gap will be almost completely gone...not that i had to do this on mine but i replaced headlights plenty of times and i know they can be adjusted in that way. it will help alot with that gap with hood and headlight also (towards front near bumper)
Last edited by akks350z; 02-14-2010 at 06:12 PM.
02-14-2010, 06:12 PM
#18
Banned
Thread Starter
iTrader: (39)
Join Date: Jan 2007
Location: So-cal
Posts: 10,107
Likes: 0
Received 0 Likes
on
0 Posts
^ Thanks for the advice guys!! I'm going to call a few body shops tomorrow to get some quotes for paint. Hopefully I won't have to drive too long with an unpainted bumper 
 02-14-2010, 07:03 PM
#20
Registered User

Join Date: Aug 2009
Location: The cold
Posts: 1,671
Likes: 0
Received 0 Likes
on
0 Posts
are all the screws/bolts nice and tight?
edit: just read its being held on there very lightly. I would say tighten everything up and get it on there like your ready to drive with it. Its amazing when tightening a bolt at the bottom can do to the whole car. So dont under estimate tightening that sucker up.
Thats really not all that bad for replica, Iv seen a LOT worse.
Just get a body shop to use some body filler on it. It looks like it will need some work to cover up the canard screw holes anyways
Car is of course gonna look good when its all done
edit: just read its being held on there very lightly. I would say tighten everything up and get it on there like your ready to drive with it. Its amazing when tightening a bolt at the bottom can do to the whole car. So dont under estimate tightening that sucker up.
Thats really not all that bad for replica, Iv seen a LOT worse.
Just get a body shop to use some body filler on it. It looks like it will need some work to cover up the canard screw holes anyways
Car is of course gonna look good when its all done