Notices
Exterior & Interior 350Z Body modification, interior styling and lighting
Sponsored by:
Sponsored by:

Finishing touches on the interior...

Thread Tools
 
Search this Thread
 
Old 04-03-2010, 04:31 AM
  #21  
shezzzhot
Abzolutely Zexy
iTrader: (5)
 
shezzzhot's Avatar
 
Join Date: Aug 2003
Location: Lithia/Tampa, Flo-Rida Bishes
Posts: 5,504
Likes: 0
Received 3 Likes on 2 Posts
Default

Sik man, really sik! CF for my Z's interior is next (hides all the scratches).
Old 04-03-2010, 04:50 AM
  #22  
beezee
New Member
iTrader: (19)
 
beezee's Avatar
 
Join Date: Nov 2008
Location: Minneapolis
Posts: 1,911
Received 33 Likes on 32 Posts
Default

Very clean man. I am gonna search on how to apply carbon fiber. My next interior mod.
Old 04-09-2010, 04:03 AM
  #23  
ctwentytwo
Registered User
Thread Starter
iTrader: (9)
 
ctwentytwo's Avatar
 
Join Date: Dec 2003
Location: Waipahu HI; Phoenix AZ
Posts: 2,069
Likes: 0
Received 1 Like on 1 Post
Default

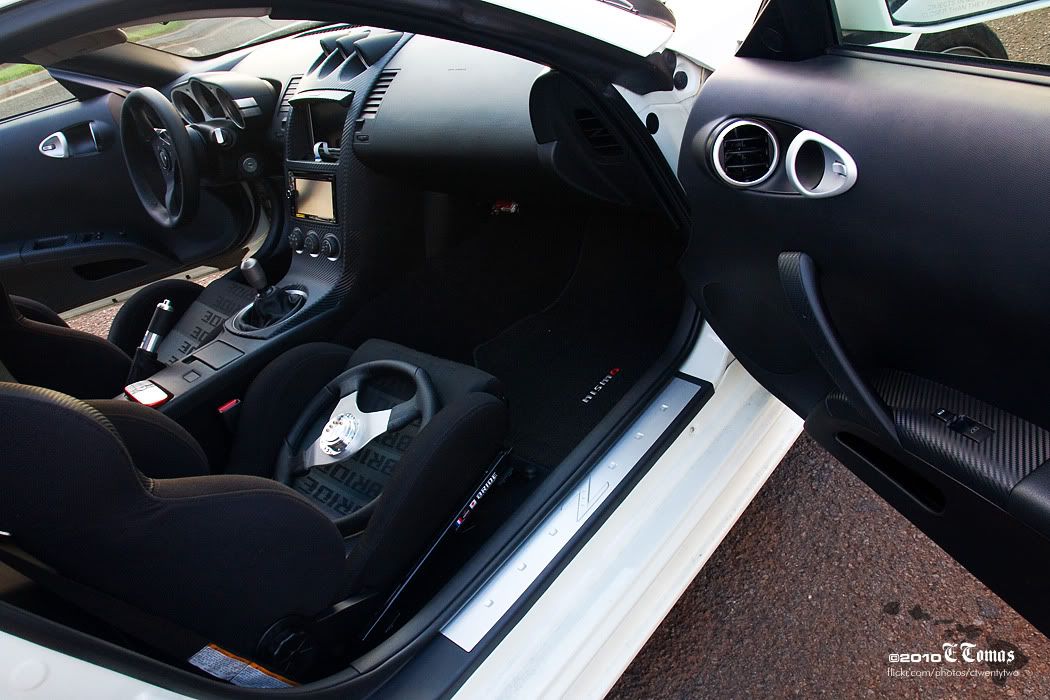
Finished the passenger door handle and both window control panels... or whatever you call 'em. That's it for the Di-Noc... now just need to finish the custom display controls in the cubby.

Old 04-09-2010, 07:20 AM
  #24  
Goo$e
Banned
iTrader: (9)
 
Goo$e's Avatar
 
Join Date: Aug 2009
Location: asdf
Posts: 1,157
Likes: 0
Received 0 Likes on 0 Posts
Default

Very clean man. How much to do mine?
Old 04-09-2010, 07:31 AM
  #25  
kaminariZ
Registered User
iTrader: (3)
 
kaminariZ's Avatar
 
Join Date: Oct 2003
Location: Chicago
Posts: 538
Likes: 0
Received 0 Likes on 0 Posts
Default

is this it? i want!

http://cgi.ebay.com/ebaymotors/ws/eB...d=400094398656
Old 04-09-2010, 08:13 AM
  #26  
optimus350z
Registered User
iTrader: (4)
 
optimus350z's Avatar
 
Join Date: Feb 2010
Location: North Jersey
Posts: 701
Likes: 0
Received 0 Likes on 0 Posts
Default

Nice man. Clean looking .
Old 04-09-2010, 11:20 AM
  #27  
dkmesa350z
New Member
iTrader: (41)
 
dkmesa350z's Avatar
 
Join Date: Feb 2006
Location: Atlanta
Posts: 3,828
Likes: 0
Received 2 Likes on 2 Posts
Default

Very well done. Looks great. Was the Di-Noc easy to work with on the interior pieces?
Old 04-09-2010, 07:53 PM
  #28  
ctwentytwo
Registered User
Thread Starter
iTrader: (9)
 
ctwentytwo's Avatar
 
Join Date: Dec 2003
Location: Waipahu HI; Phoenix AZ
Posts: 2,069
Likes: 0
Received 1 Like on 1 Post
Default

Originally Posted by Goo$e
Very clean man. How much to do mine?
It's pretty easy man, you just need a blow dryer and the stuff stretches. You can peel up and reapply if you mess up.

Originally Posted by kaminariZ
Yeah, that's it.

Originally Posted by dkmesa350z
Very well done. Looks great. Was the Di-Noc easy to work with on the interior pieces?
It was pretty easy, but you'll have to get used to it. Just make sure to use a blow dryer so you can stretch it.
Old 04-10-2010, 01:13 AM
  #29  
aloh
New Member
iTrader: (26)
 
aloh's Avatar
 
Join Date: Feb 2007
Location: socal
Posts: 4,190
Received 3 Likes on 1 Post
Default

Im loving the new interior! That dinoc stuff looks nice...too bad i have alot of that other CF interior wrap left... I just might try the di noc instead though. My door switch panels have the chitty OEM finish flaking off pretty bad....

What does the di noc feel like?
Old 04-10-2010, 02:12 AM
  #30  
ctwentytwo
Registered User
Thread Starter
iTrader: (9)
 
ctwentytwo's Avatar
 
Join Date: Dec 2003
Location: Waipahu HI; Phoenix AZ
Posts: 2,069
Likes: 0
Received 1 Like on 1 Post
Default

Originally Posted by aloh
Im loving the new interior! That dinoc stuff looks nice...too bad i have alot of that other CF interior wrap left... I just might try the di noc instead though. My door switch panels have the chitty OEM finish flaking off pretty bad....

What does the di noc feel like?
Thanks. Yeah, wrapped every part that had scratches on them. There's a texture to the di-noc, feels like vinyl, but because of the texture, is almost scratch proof. Imagine stiff electrical tape, but again with a texture.
Old 04-10-2010, 05:08 AM
  #31  
brandon3434
New Member
iTrader: (9)
 
brandon3434's Avatar
 
Join Date: Apr 2009
Location: Cincinnati, Ohio
Posts: 2,728
Likes: 0
Received 2 Likes on 2 Posts
Default

That looks absolutely amazing man! Great job! I love that steering wheel.
Old 04-10-2010, 06:46 AM
  #32  
Mapleleaf
Registered User
iTrader: (10)
 
Mapleleaf's Avatar
 
Join Date: May 2003
Location: Hamilton ,Ont.
Posts: 767
Likes: 0
Received 1 Like on 1 Post
Default

Very Nice ...
Old 04-10-2010, 07:13 AM
  #33  
Travic
Registered User
iTrader: (1)
 
Travic's Avatar
 
Join Date: Sep 2002
Location: Tampa FL
Posts: 119
Likes: 0
Received 0 Likes on 0 Posts
Default

Originally Posted by shezzzhot
Sik man, really sik! CF for my Z's interior is next (hides all the scratches).
This is also on my list of things to do maybe we can split an order and have a tech day..
Old 04-11-2010, 11:10 AM
  #34  
luv2bsidewaz
Registered User
iTrader: (4)
 
luv2bsidewaz's Avatar
 
Join Date: Feb 2008
Location: Arkansas, H Town
Posts: 257
Likes: 0
Received 0 Likes on 0 Posts
Default

Has there been a DIY for this mod yet? I checked the DIY Interior section and didn't see it. That's not to say that I couldn't have missed it either...
Old 04-11-2010, 11:51 AM
  #35  
IanP
New Member
iTrader: (2)
 
IanP's Avatar
 
Join Date: Dec 2006
Location: UK
Posts: 426
Likes: 0
Received 8 Likes on 6 Posts
Default

Originally Posted by ctwentytwo

Damn you IanP!!!!!

BTW, got it from Crowder's Customizing.


....LOL....
I bought it after seeing your pics, I'd been searching for ages for something different to what everyone else has
Old 04-11-2010, 08:51 PM
  #36  
ctwentytwo
Registered User
Thread Starter
iTrader: (9)
 
ctwentytwo's Avatar
 
Join Date: Dec 2003
Location: Waipahu HI; Phoenix AZ
Posts: 2,069
Likes: 0
Received 1 Like on 1 Post
Default

Originally Posted by IanP
I bought it after seeing your pics, I'd been searching for ages for something different to what everyone else has
You install it yet? Got pics?

BTW, now it's DONE. Last piece of the puzzle for the interior... been meaning to do this for a while. I already had the screen in about 3-4 years ago. Took a lot of ***** to chop it up.


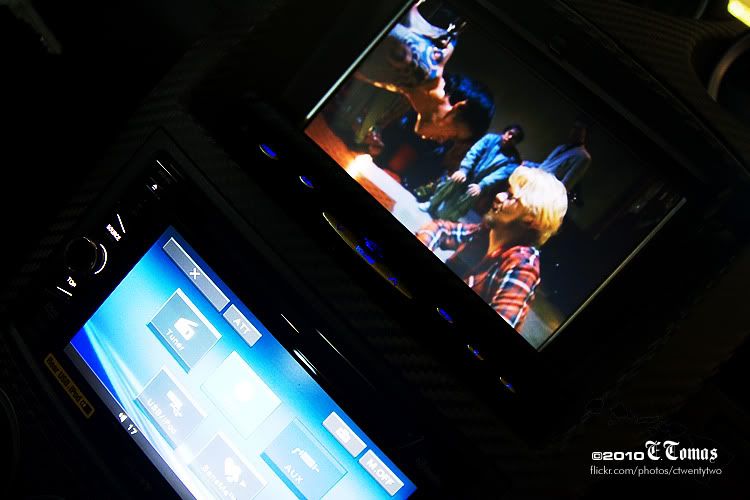
Here's a pic of the screen pre chop.


The screen installed but no access to control buttons. Had to turn it on via the remote control.


Yeah, now I can turn it on without the remote!


Grafted in with JB Weld.
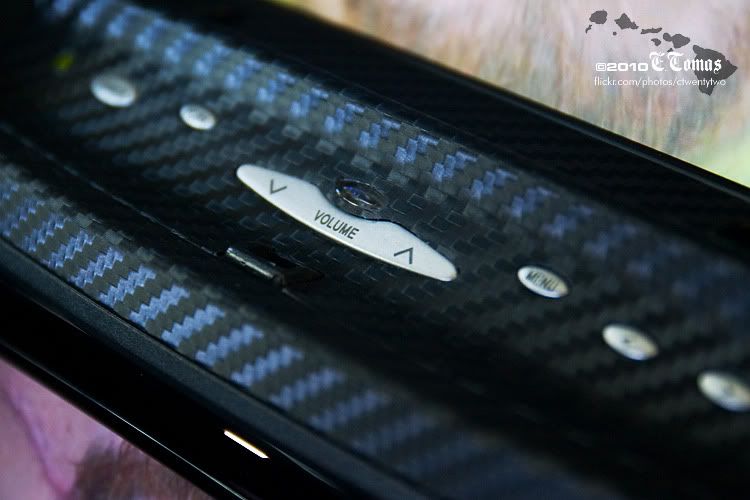

Di-Noc'd


Blue lights on buttons work.


The last piece of the puzzle.

Last edited by ctwentytwo; 04-11-2010 at 08:52 PM.
Old 04-11-2010, 09:26 PM
  #37  
shezzzhot
Abzolutely Zexy
iTrader: (5)
 
shezzzhot's Avatar
 
Join Date: Aug 2003
Location: Lithia/Tampa, Flo-Rida Bishes
Posts: 5,504
Likes: 0
Received 3 Likes on 2 Posts
Default

Originally Posted by Travic
This is also on my list of things to do maybe we can split an order and have a tech day..

Yes! Would be great. I'll let Justin know.


I love this site!! I'm inspired....
Old 04-12-2010, 04:19 AM
  #38  
IanP
New Member
iTrader: (2)
 
IanP's Avatar
 
Join Date: Dec 2006
Location: UK
Posts: 426
Likes: 0
Received 8 Likes on 6 Posts
Default

Originally Posted by ctwentytwo
You install it yet? Got pics?
Not yet, need to finish making my Bride boot for it first
Old 04-12-2010, 05:31 AM
  #39  
_ink
Registered User
iTrader: (2)
 
_ink's Avatar
 
Join Date: Mar 2008
Location: Sydney, Australia
Posts: 379
Likes: 0
Received 0 Likes on 0 Posts
Default

Awesome work done there!!!!!

Where did you get your shift boot from?? The fitment looks perfect!!!
Old 04-12-2010, 07:13 PM
  #40  
ctwentytwo
Registered User
Thread Starter
iTrader: (9)
 
ctwentytwo's Avatar
 
Join Date: Dec 2003
Location: Waipahu HI; Phoenix AZ
Posts: 2,069
Likes: 0
Received 1 Like on 1 Post
Default

Originally Posted by _ink
Awesome work done there!!!!!

Where did you get your shift boot from?? The fitment looks perfect!!!
Redline Goods.

http://www.redlinegoods.com/


Quick Reply: Finishing touches on the interior...


All times are GMT -8. The time now is 04:00 AM.