
Nismo e-brake handle


Thread Starter
Registered User
Joined: Jan 2010
Posts: 608
Likes: 3
From: Kansas city
So in spite on my dog continuously chewing on the end of my e-brake handle, i came up with a nice solution. chewed my oem one then my 2 more that I stitched up myself.
also had a perviously black nismo **** that I stopped using due to it constantly being either too hot or too cold to use, plus after years of use the paint was worn down, so i stuck it on a drill and sanded it.
cut, chopped, sanded and used some misc hardware and this is what i came up with.
fully functional, push entire handle in to unlock. will post of pictures later of how it exactly works. This was just my test fit. need to take it all apart again to stitch new boot cover and prolly gunna paint white to match my other ****. also I need insert a small nylon bushing i got to keep it all super tight.
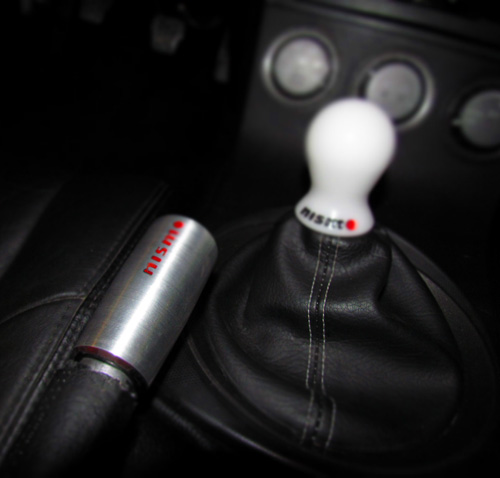


Trending Topics


Thread Starter
Registered User
Joined: Jan 2010
Posts: 608
Likes: 3
From: Kansas city
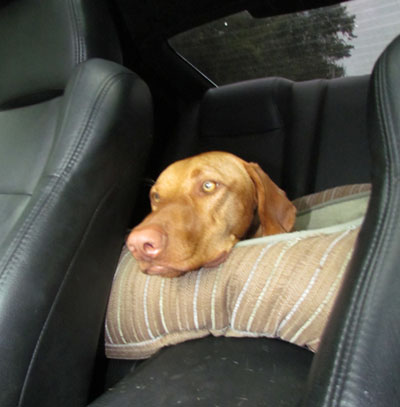
lets just say i got the point across... luckily it wasn't the steering wheel or anything. but she goes everywhere with me in the z, even anticipates fast turns and leans and balances perfectly pretty funny ****
ya made it my self out of random hardware and a little dremel'n here and there. I will post complete set of pics, and how I assembled it sometime this week. kinda want to finish it first.
daily drive to work.........
ya made it my self out of random hardware and a little dremel'n here and there. I will post complete set of pics, and how I assembled it sometime this week. kinda want to finish it first.
daily drive to work.........

Thread Starter
Registered User
Joined: Jan 2010
Posts: 608
Likes: 3
From: Kansas city
so i kinda forgot about this.... still need to work on my design a lil to get it perfect but this is how it works now
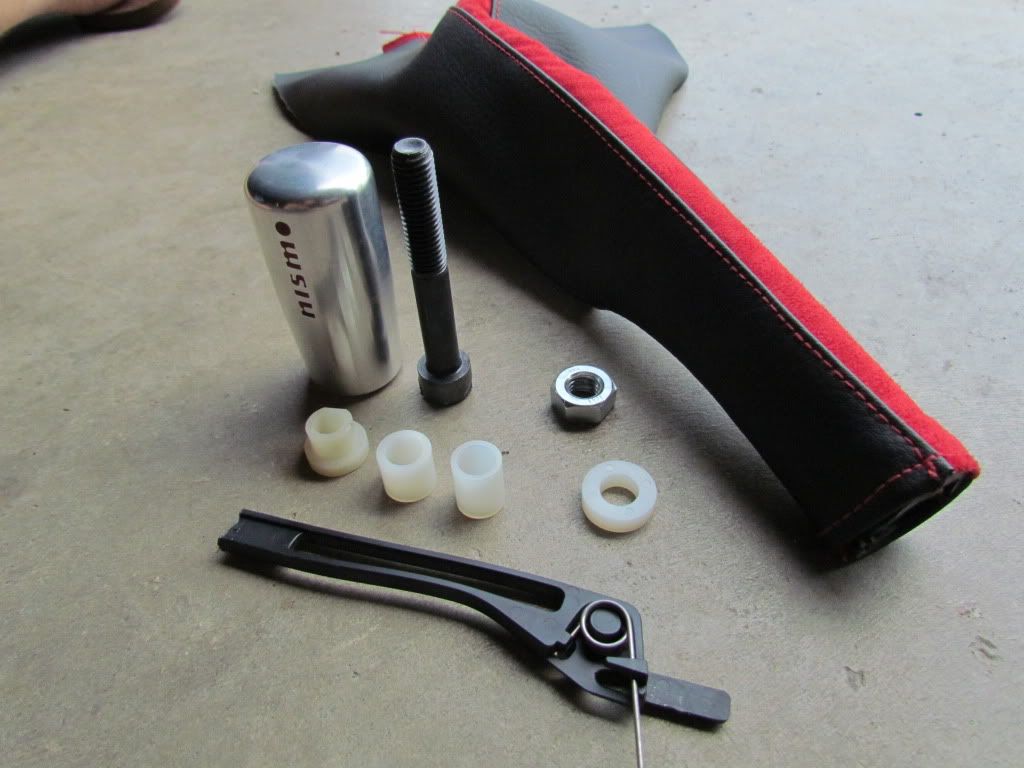
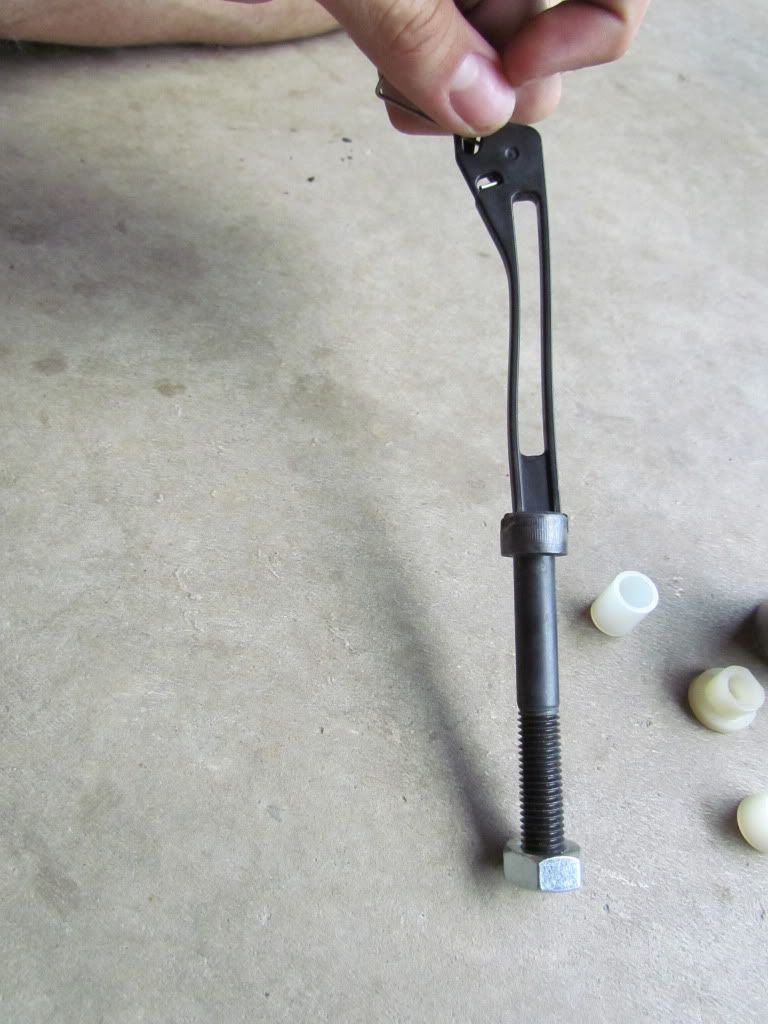
the basic ingredients.
- bolt the fits your handle
- couple different bushings, grabbed a couple bigger than i need to sanded to fit
- have to cut an inch off the rubber and the leather on your boot. stitched up a new one.
depending on your bolt length, and other various parts, you may need washers and/or extra bushings here or there to keep it all super tight. my biggest problem is the long plastic piece that actually causes the release. I really need to reenforce or build it out of metal.
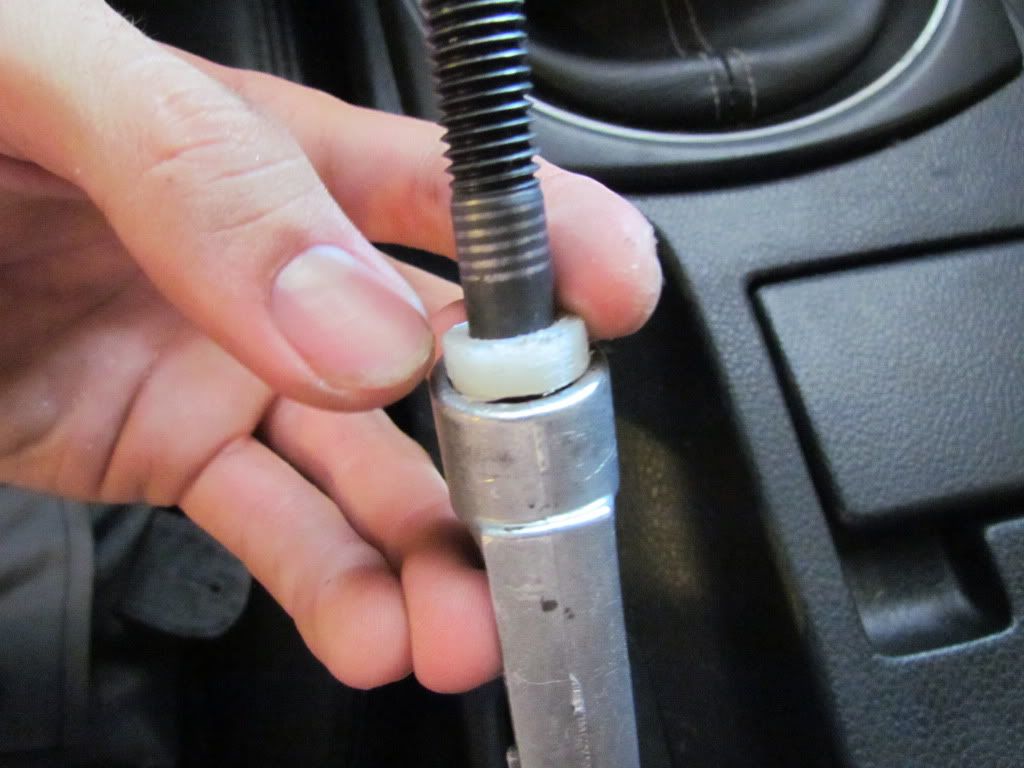
next you'll have to cut the plastic arm short and notch the end of your bolt to fit.
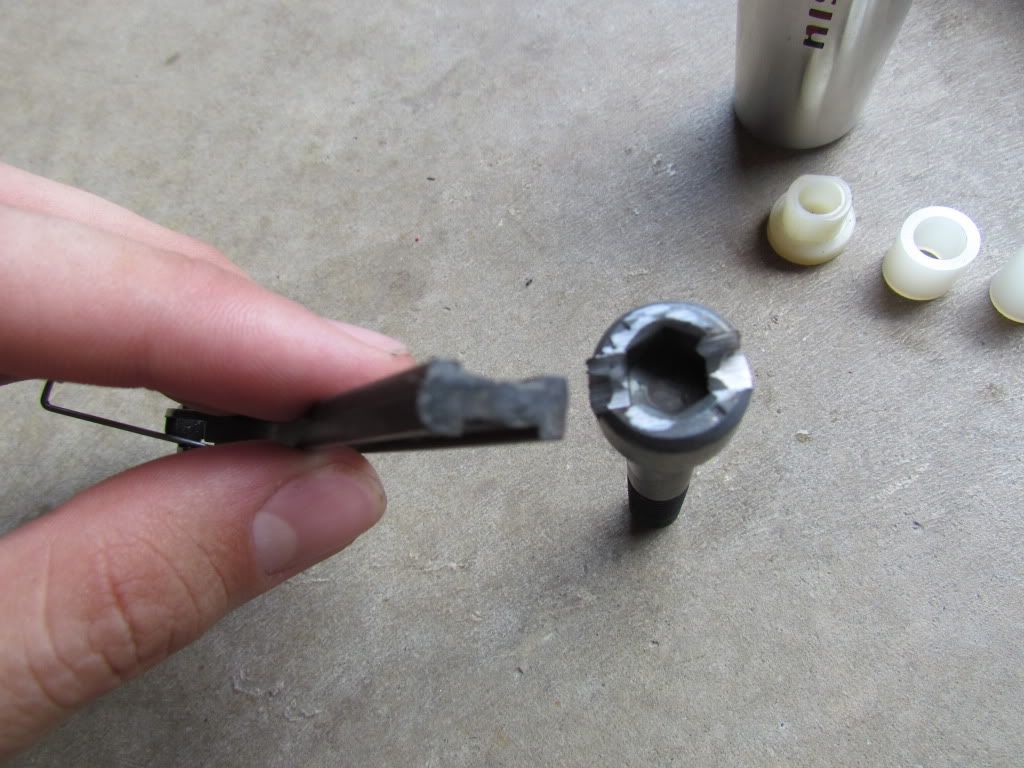
next you have to dremel/sand the inside of your handle so it fits on the end of the e-brake.
sanded the nylon all the way out and then the threads that held it. so its smooth bout an inch in.
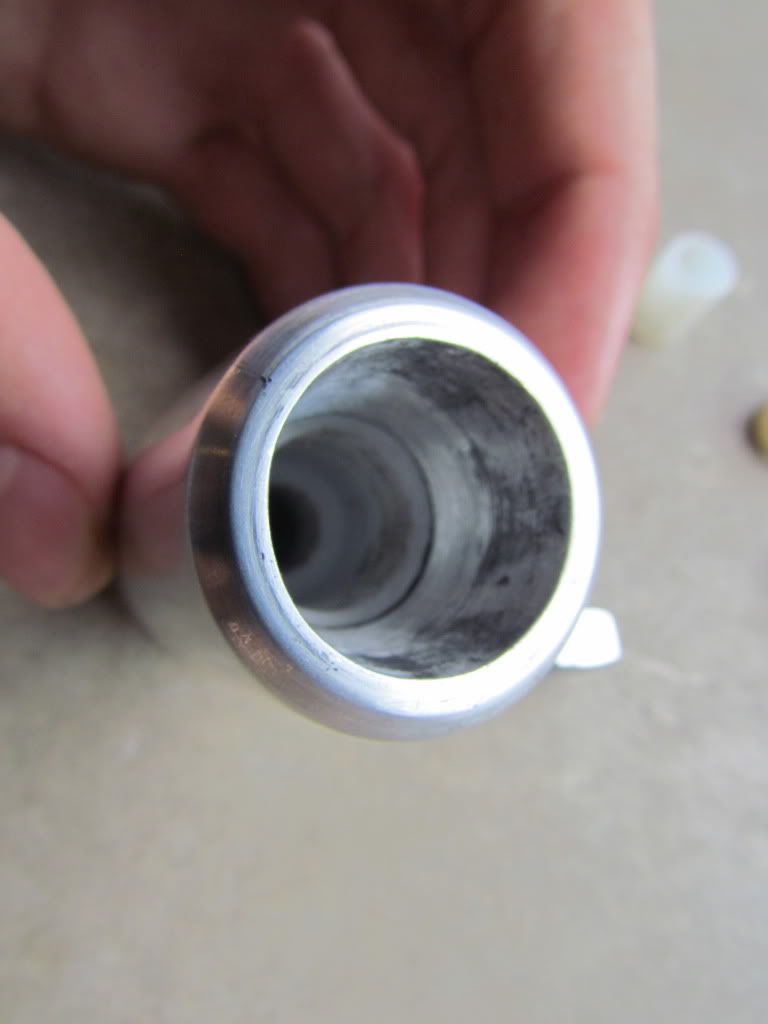
next sand your bushing so it fits tight. too loose the thing will be wiggly, to tight it wont move. actually dropped 2 of this in that whole. and one of the taller thiner bushings behind it for spacing.
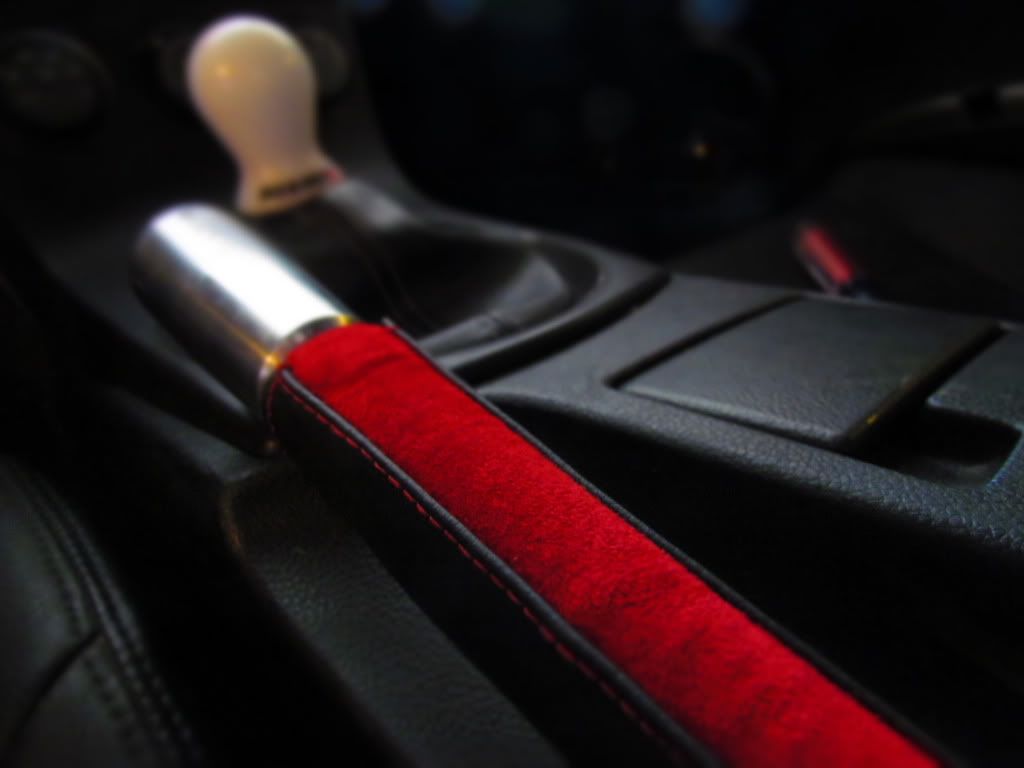
assembled w/out boot
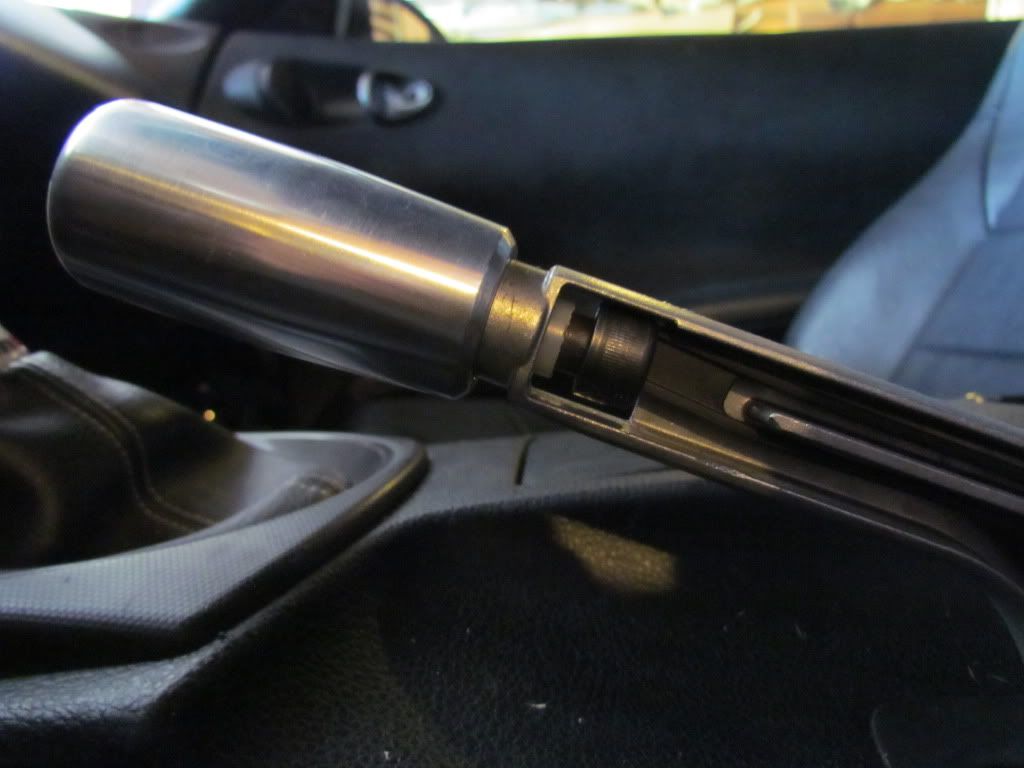
not sure i really like the red suede but it works for now
the basic ingredients.
- bolt the fits your handle
- couple different bushings, grabbed a couple bigger than i need to sanded to fit
- have to cut an inch off the rubber and the leather on your boot. stitched up a new one.
depending on your bolt length, and other various parts, you may need washers and/or extra bushings here or there to keep it all super tight. my biggest problem is the long plastic piece that actually causes the release. I really need to reenforce or build it out of metal.
next you'll have to cut the plastic arm short and notch the end of your bolt to fit.
next you have to dremel/sand the inside of your handle so it fits on the end of the e-brake.
sanded the nylon all the way out and then the threads that held it. so its smooth bout an inch in.
next sand your bushing so it fits tight. too loose the thing will be wiggly, to tight it wont move. actually dropped 2 of this in that whole. and one of the taller thiner bushings behind it for spacing.
assembled w/out boot
not sure i really like the red suede but it works for now