When you click on links to various merchants on this site and make a purchase, this can result in this site earning a commission. Affiliate programs and affiliations include, but are not limited to, the eBay Partner Network.
are you talking about the 2nd link in my original post?
Originally Posted by mcubed45
Are you talking about the chrome/smoked ones?
I was looking for a blacked out version with a clear lens for the longest time but couldn't find anything so I went the DIY route.
Were you able to bake yours open? Idk what kinda adhesive they used but it wouldn't budge and I didn't want to melt the housing so I ended up cutting them open with a soldering iron. Such a pita.
No. there was an actual blacked out one just like the one painted. I dont recall where and didnt save link but certain it was available as I showed my buddy the site and we had a laugh about it as it was just after we baked and painted mine. maybe got pulled cause light output issues but know it was out there.
I've actually overlayed mine with a light smoke tint. It looks great and surprisingly doesn't diminish the light output at all. The 1st link look great too but a bit too much for turn lights.
No. there was an actual blacked out one just like the one painted. I dont recall where and didnt save link but certain it was available as I showed my buddy the site and we had a laugh about it as it was just after we baked and painted mine. maybe got pulled cause light output issues but know it was out there.
Ah cool. Ya painting them was definitely a PITA. Would've gladly paid for a premade version.
How'd you end up opening yours? I tried the typical baking procedure but the seal wasn't really softening up and I didn't want to melt the lenses. Mine didn't have the black oxyl butyl seal like on most headlights. It was a hard gray epoxy type material. I ended up cutting the lights open with a soldering iron.
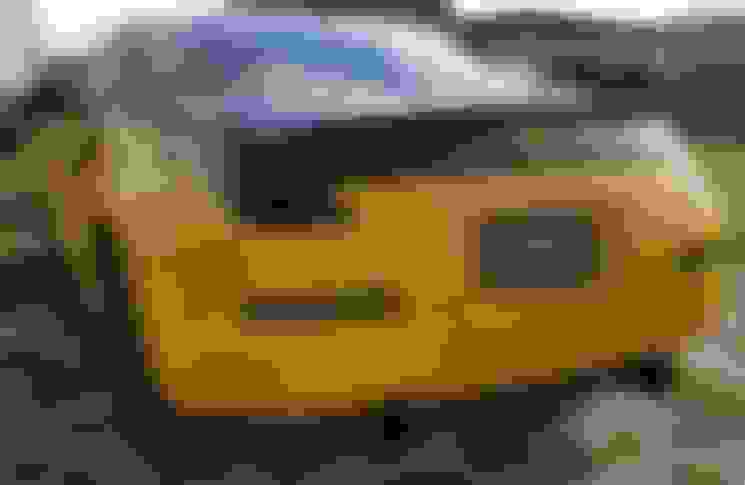
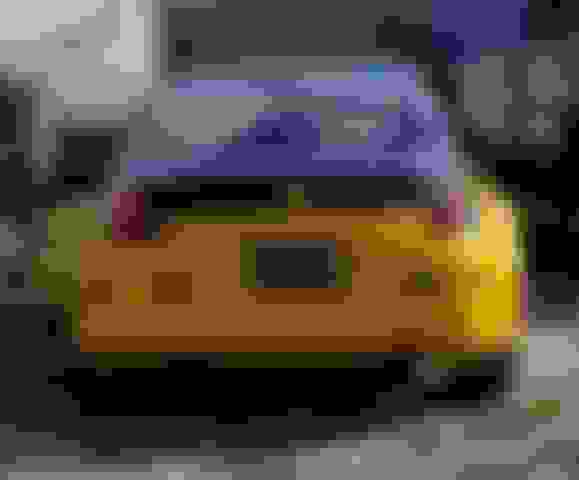
So I finally got around to tinting my rear turn signals. First I bought overlays for both the tail lights and turn signals so they would match. $30 off Amazon for precuts. They were crap. The overlays for the turn signals were not straight but curver in a slight "u" shape. Would not apply right without creasing them. The overlays for tail lights were not cut properly and would require trimming. If I wanted to put in that work, I'd do it myself. So I did.
For those curious about how to do it, (not starting another DIY thread for this), go to Lowes or Home Depot and pick up a roll of home window vinyl tint and the application kit. About $30 and enough tint to do a small fleet of cars.
As far as the process, as I said there are plenty of DIY's, so the very short version.
Tail Lights: It's easier to just remove them by taking out the 3 bolts. Easier to work with and less chance of scratching your paint during trimming. Simply cut a square big enough to cover the light and lay it over it. Trim to about within 1" of the edge of the light. Use the spray and squeegee to get out the bubble. Then start trimming closer to the edge of the lens. You will notice as you remove more material from the edge of the tint, the fewer bubble that pop up. At this point, smooth out all of the bubble. Then carefully trim the tint to the edge of the light. Due to the design of the light, you'll find you can't have the tint cover the area the hatch covers as that puts too much of a bend in the tint and it won't want to stay in place.
Turn signals: No need to remove the bumper. Use a straight edge to cut a 1.5" wide strip. Sorry, I forgot the length, but it's easy enough to measure. Use scissors to round off the corners a bit. This applys very easy.
This vinyl tint has no adhesive. In reality, it isn't needed. As long as the edges are flat, the static cling will hold it just fine, even at high speeds. I did this on my Subaru Legacy and it held at over 150 mph. The only time I've ever had an issue is hitting the edge with the sprayer at the car wash. Simply use your hand to smooth it back out and go on about your day.
So now, the pics. People say that tinting the tails hurts the light out put. As long as you are using LED lights, it really doesn't. In fact it some cases it improves visibility because you have a black panel suddenly light up vs a red lens, already reflecting light due to the sun, just glow a little brighter.
No, and for the signals, as I mentioned perviously, you'll need load resistors.
So something interesting happened today. I noticed that my driver's side rear turn signal quick working. I noticed some rust in the car socket and load resistor plug. Using electric contact cleaner I cleaned them both, but it still wouldn't work. So I plugged the LED directly into the car's socket and it worked. The odd thing was, it blinks at exactly the same speed as the other side that still has the load resistor.
Edit: So I went out later and checked the turn signals. The driver side was hyperflashing. Guess when running the blinkers the one load resistor works for both sides.
Last edited by Sebastian777; Apr 28, 2017 at 04:46 PM.