
Semi-Gutted 350z OEM Muffler Write Up


Thread Starter
Registered User
Joined: Jun 2011
Posts: 108
Likes: 3
From: North Carolina
Where in the world did I get this idea from? Well, I saw an old post from 2009 on this forum about a guy who gutted his factory muffler, and made it completely empty. He took 2 pictures and made a sound clip or two, however, his sound clips have vanished since then and nobody has tried anything like this since then. He received so much hate for it, I don�t think he has even posted anything on the forum since. However, I was very curious about this and I decided before I went out and bought an exhaust I would try something different that I hadn�t seen before and report it, good or bad. I have a friend who is an excellent TIG welder (he's the dude in the pictures below), so I did something similar to my factory 350z muffler and wanted to share it with this forum, since it actually did improve the car with no drawbacks.
Tools Used:
12mm socket and socket wrench with extensions
Can of PB Blaster
Hand Held Drill with metal Drill bit
Hand Held Grinder with Metal Cutting Blade
SAWZALL with short metal-cutting blade
Dremel Tool with metal cutting blades
TIG Welder (A MIG welder will do and would have actually been faster, but welds are not as pretty with a MIG)
Latex Gloves (not optional unless you want glass in your skin)
Respriator or Dust Mask (Not optional unless you want glass in your throat)
Ratchet Straps (at least 2)
Now that I have your interest, here�s the steps:
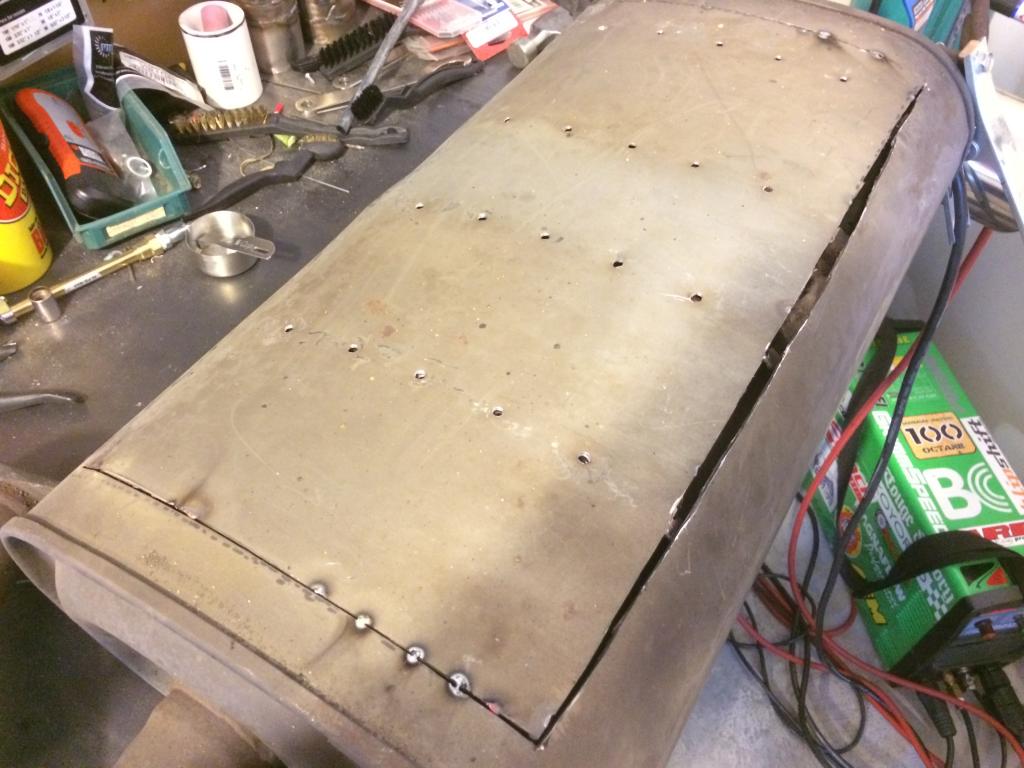
1. Remove the muffler section of the factory exhaust system and drill out the spot welds on the top of the muffler.
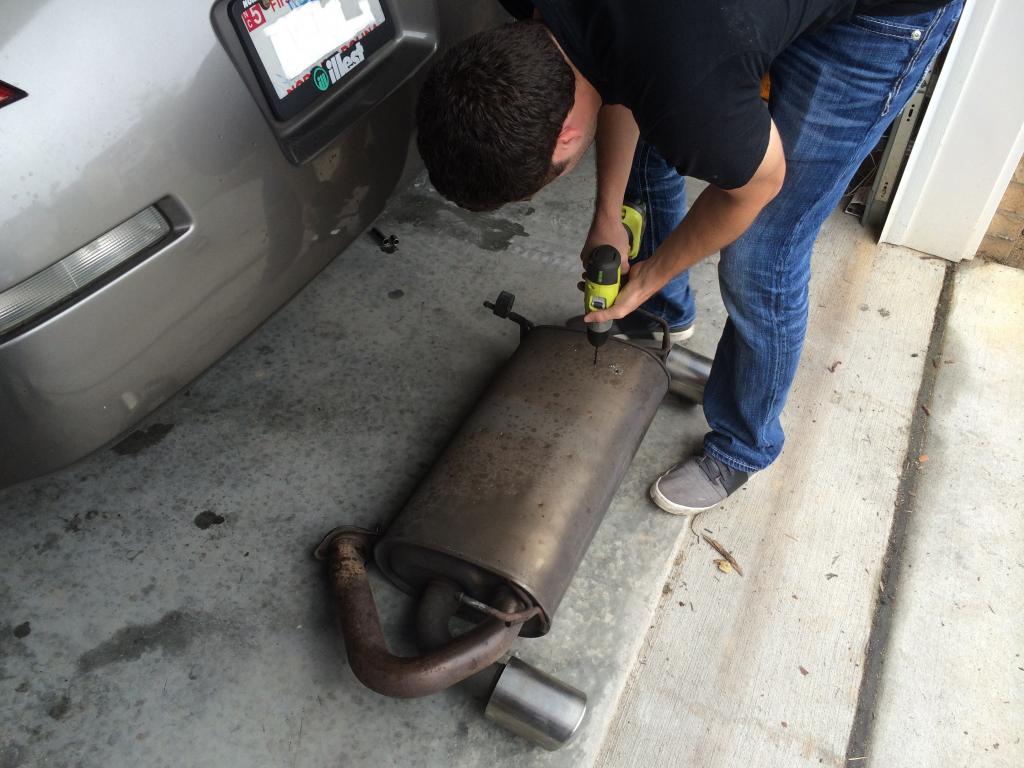
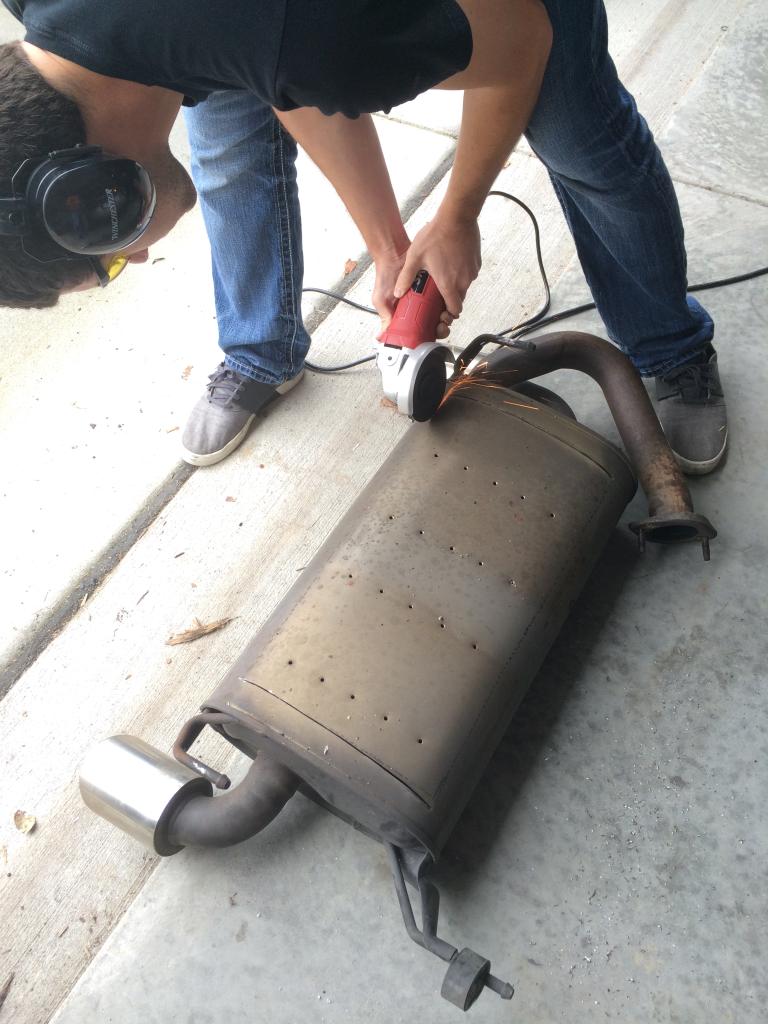
2. Cut open the top of the muffler with a grinder fitted with a metal cutting blade. Don�t cut too much, as you do not want to be able to see the welds once the muffler is re-installed later.
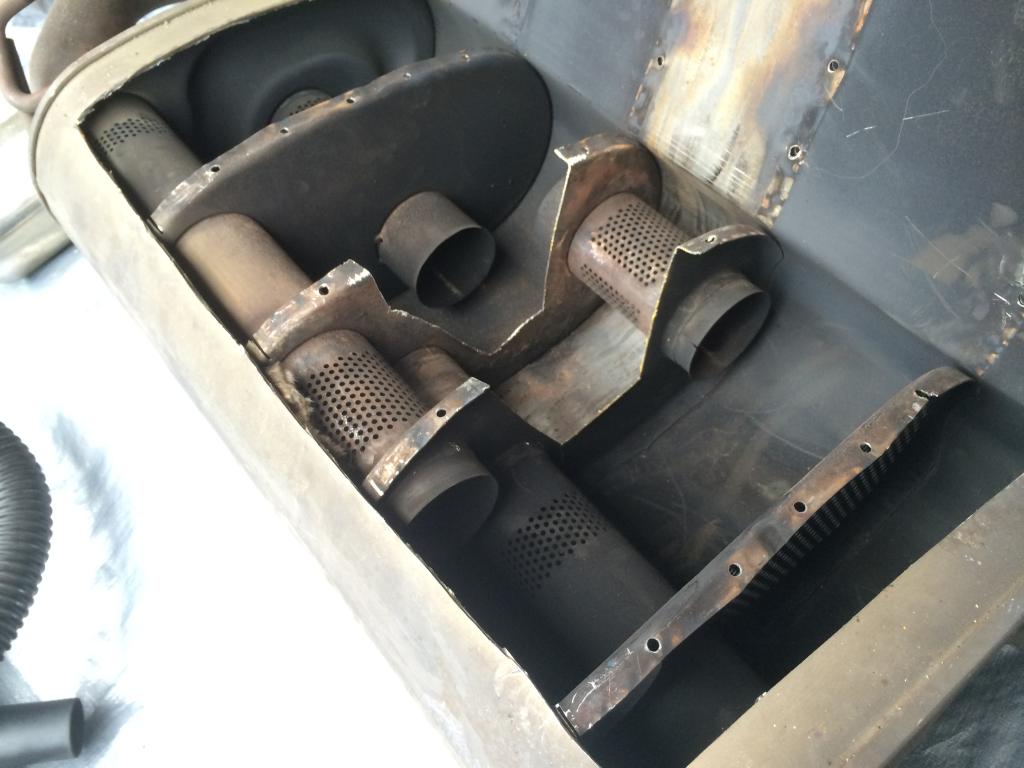
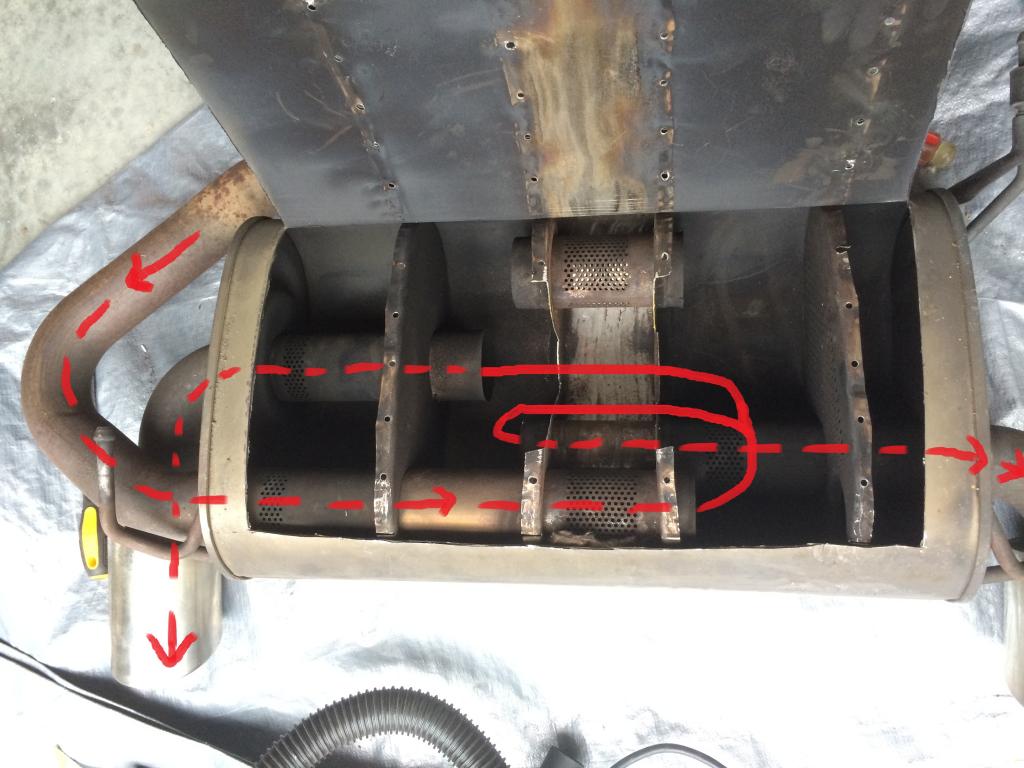
This is what the inside of the OEM factory muffler looks like...I've drawn lines so that you can see how it flows. The fluffy stuff is fiberglass insulation material that is packed around the pipes to absorb sound.
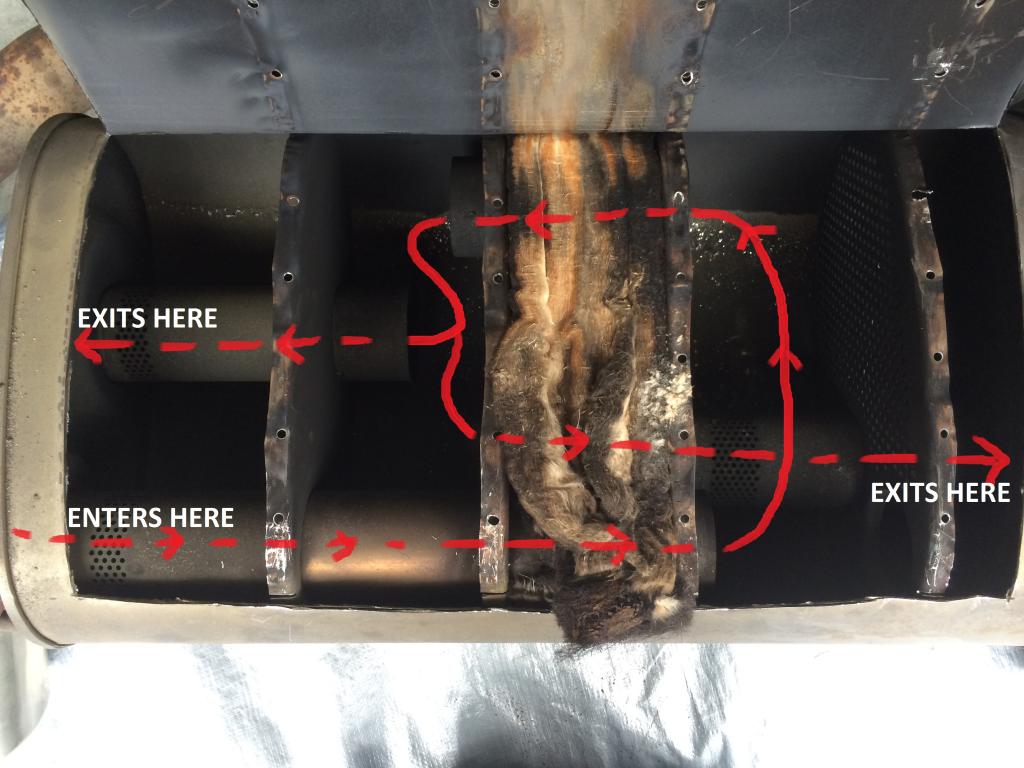
3. Pull out the fiberglass insulation, this will produce more sound. You don�t have to get every last bit of it out (I didn�t) but get the portion that will come out. I put on some latex gloves and a screwdriver to dig and pull it out. Wear a mask. Once you have it out, it should look like this:
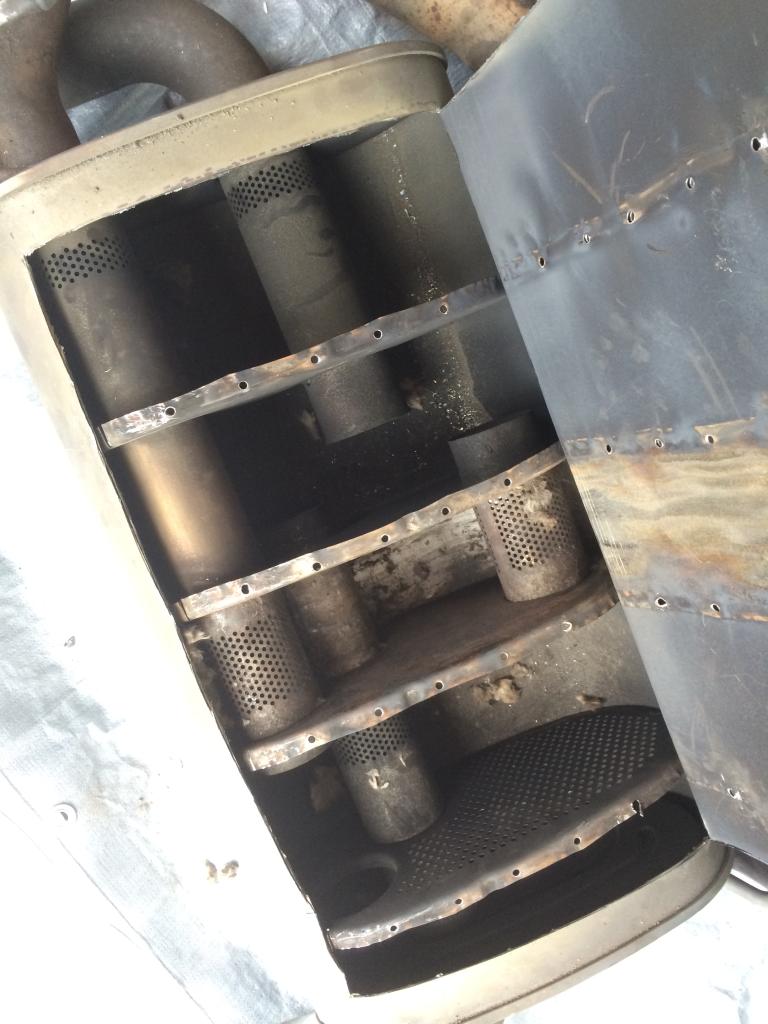
4. OK now comes the cutting part to make things flow better...using a Sawzall or other metal cutting tool, cut off as much stuff as you dare. I just cut the middle baffles using a Sawzall, I figred it would produce better flow without changing too much. I didnt want to completley empty the muffler because 1. I didn't have time and 2. It would weaken the ridigity of the muffler, and may cause vibrations in the muffler walls that would resonate and produce an unwanted sound...That being said, if you decide to cut the baffles partially without fully removing them like I did - Be sure to leave two spot weld locations intact, one on each side of the groove you cut on the top portion of the baffles so that when you re-weld the �lid� back on, the now cut and weakened baffles will have a way to be secured. You do not want those vibrating and rattling loose inside the muffler making unwanted noise. Clean up any jagged edges on your cuts with a Dremel tool.
Now the exhaust flow has been changed to this:
There are other reasons why I left certain things where they were, mainly for supporting structure and making sure the sound would remain "clean". For example, I did leave the little bit of fiberglass that was trapped between the wall of the muffler and the "exhaust entry pipe" with the perforated holes to help clean up the sound a little as it passed through that pipe.
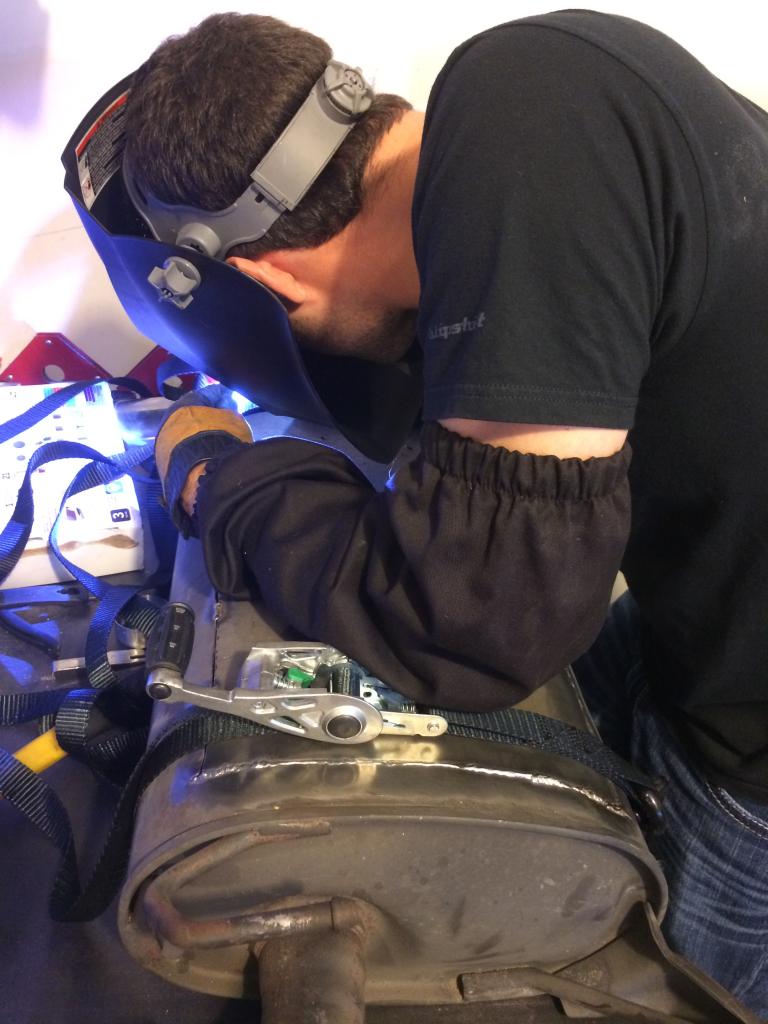
5. Weld the �lid� back on the muffler and re-spot weld all the spot welds you drilled out earlier.
6. We used ratchet straps to tighten the gap on the lid in order to weld the whole thing tight again.
7. Finished product.
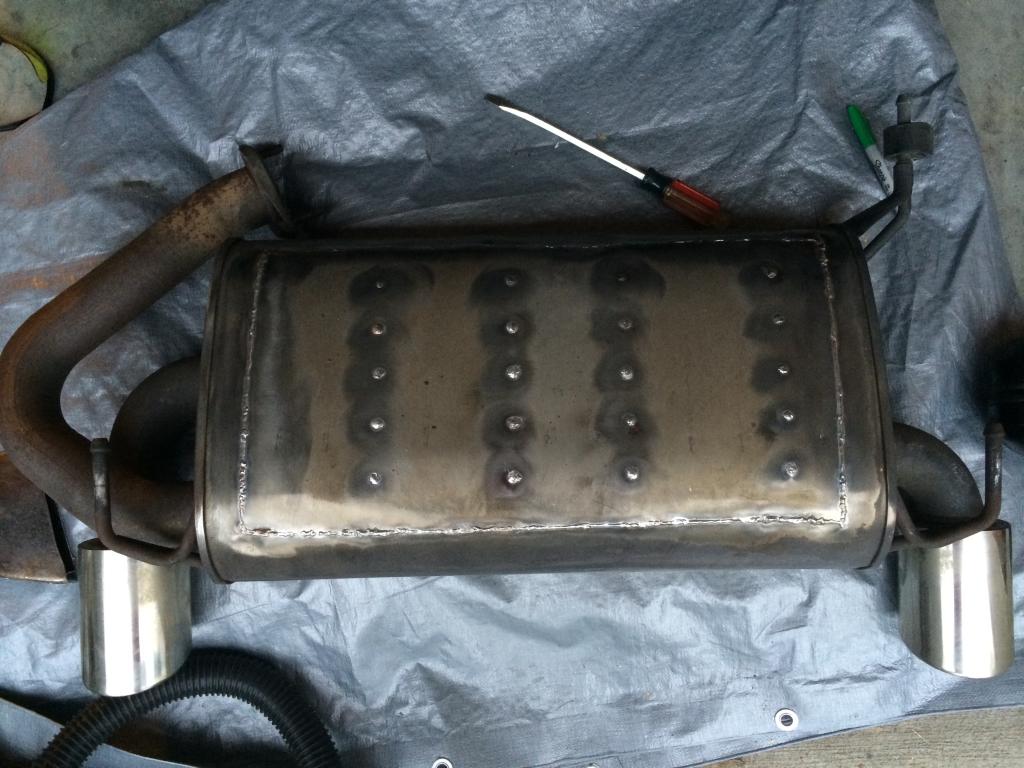
8. Reinstall the muffler. You're done, hope it sounds awesome!
Enjoy my sound clip (click the link below) this is what it sounded like the next day after install, also I have Motordyne ART pipes and Injen Longtube Intakes installed also, which have been on the car for 2 years and are broken in. The rest of the exhaust/intake is OEM factory.

Tools Used:
12mm socket and socket wrench with extensions
Can of PB Blaster
Hand Held Drill with metal Drill bit
Hand Held Grinder with Metal Cutting Blade
SAWZALL with short metal-cutting blade
Dremel Tool with metal cutting blades
TIG Welder (A MIG welder will do and would have actually been faster, but welds are not as pretty with a MIG)
Latex Gloves (not optional unless you want glass in your skin)
Respriator or Dust Mask (Not optional unless you want glass in your throat)
Ratchet Straps (at least 2)
Now that I have your interest, here�s the steps:
1. Remove the muffler section of the factory exhaust system and drill out the spot welds on the top of the muffler.

2. Cut open the top of the muffler with a grinder fitted with a metal cutting blade. Don�t cut too much, as you do not want to be able to see the welds once the muffler is re-installed later.

This is what the inside of the OEM factory muffler looks like...I've drawn lines so that you can see how it flows. The fluffy stuff is fiberglass insulation material that is packed around the pipes to absorb sound.

3. Pull out the fiberglass insulation, this will produce more sound. You don�t have to get every last bit of it out (I didn�t) but get the portion that will come out. I put on some latex gloves and a screwdriver to dig and pull it out. Wear a mask. Once you have it out, it should look like this:

4. OK now comes the cutting part to make things flow better...using a Sawzall or other metal cutting tool, cut off as much stuff as you dare. I just cut the middle baffles using a Sawzall, I figred it would produce better flow without changing too much. I didnt want to completley empty the muffler because 1. I didn't have time and 2. It would weaken the ridigity of the muffler, and may cause vibrations in the muffler walls that would resonate and produce an unwanted sound...That being said, if you decide to cut the baffles partially without fully removing them like I did - Be sure to leave two spot weld locations intact, one on each side of the groove you cut on the top portion of the baffles so that when you re-weld the �lid� back on, the now cut and weakened baffles will have a way to be secured. You do not want those vibrating and rattling loose inside the muffler making unwanted noise. Clean up any jagged edges on your cuts with a Dremel tool.

Now the exhaust flow has been changed to this:

There are other reasons why I left certain things where they were, mainly for supporting structure and making sure the sound would remain "clean". For example, I did leave the little bit of fiberglass that was trapped between the wall of the muffler and the "exhaust entry pipe" with the perforated holes to help clean up the sound a little as it passed through that pipe.
5. Weld the �lid� back on the muffler and re-spot weld all the spot welds you drilled out earlier.

6. We used ratchet straps to tighten the gap on the lid in order to weld the whole thing tight again.

7. Finished product.

8. Reinstall the muffler. You're done, hope it sounds awesome!
Enjoy my sound clip (click the link below) this is what it sounded like the next day after install, also I have Motordyne ART pipes and Injen Longtube Intakes installed also, which have been on the car for 2 years and are broken in. The rest of the exhaust/intake is OEM factory.
Last edited by ShineMaster; Oct 17, 2014 at 02:27 PM. Reason: Wanted to put sound clip in the title


Trending Topics


Thread
Thread Starter
Forum
Replies
Last Post
VQA33
Wheels Tires
8
Sep 8, 2015 08:30 PM