
Wire Tuck in progress

Thread Starter


Joined: Apr 2005
Posts: 15,391
Likes: 1,085
From: Greenville, SC
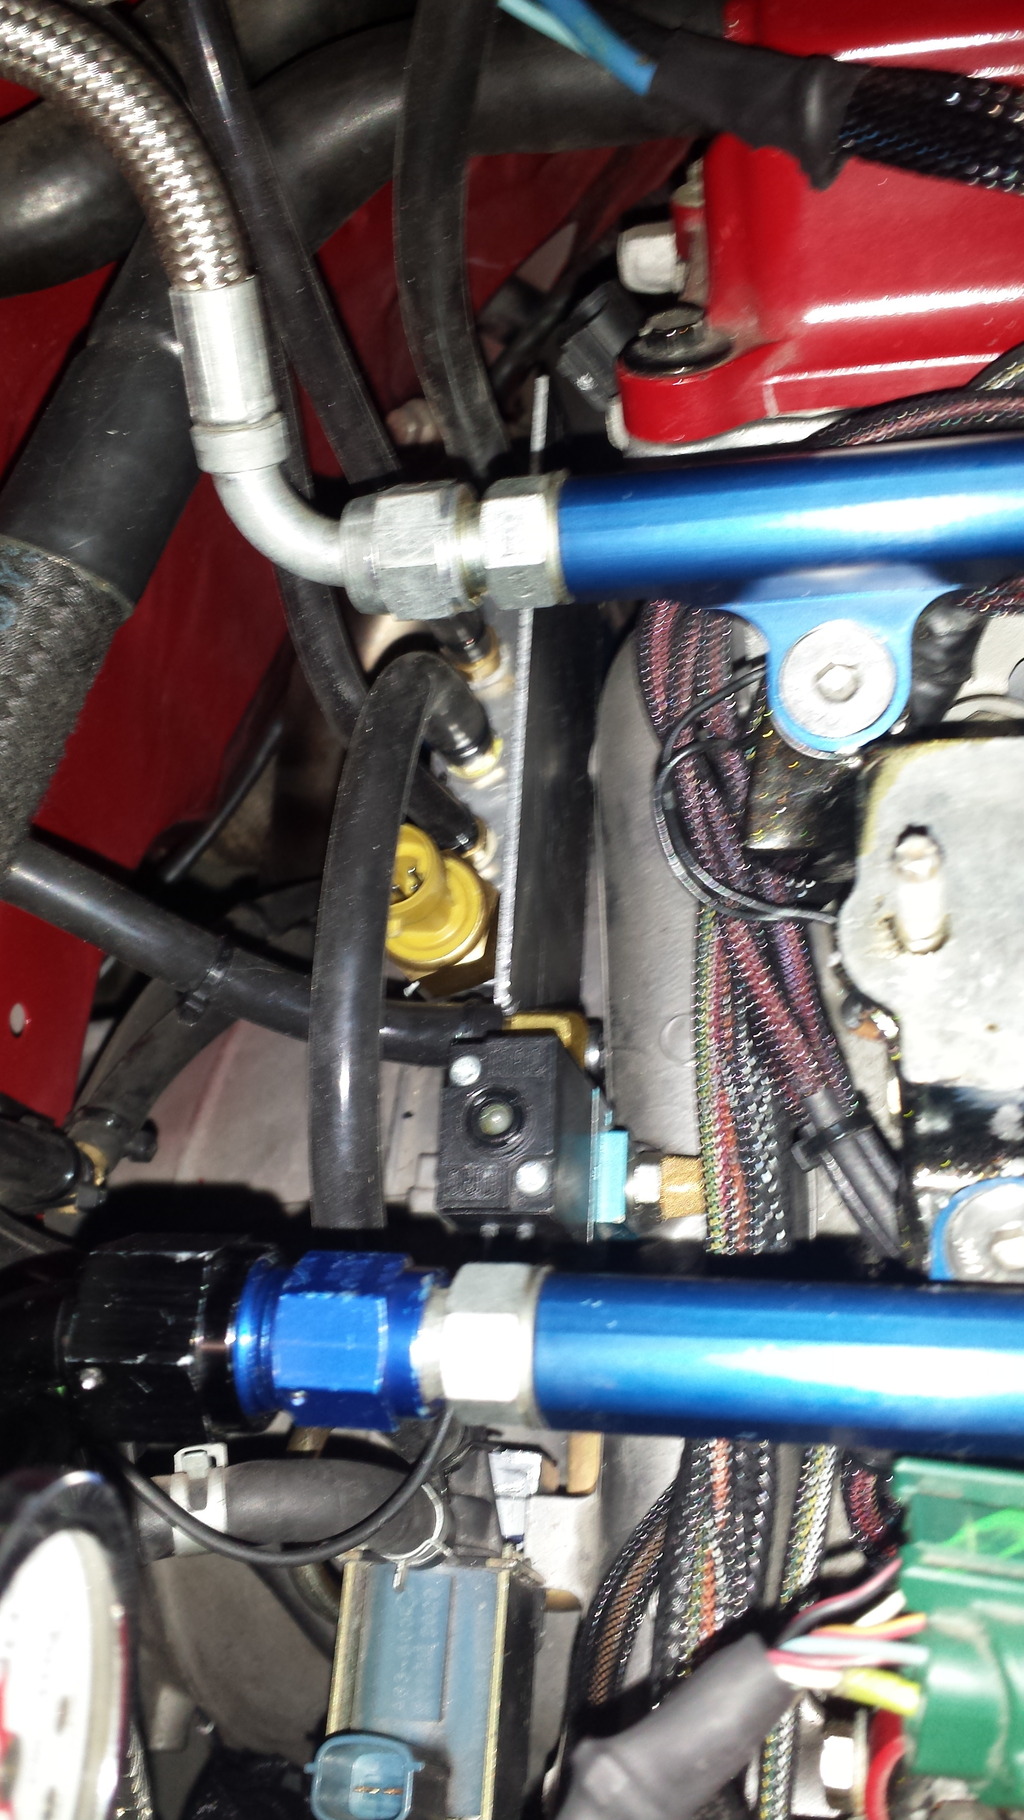
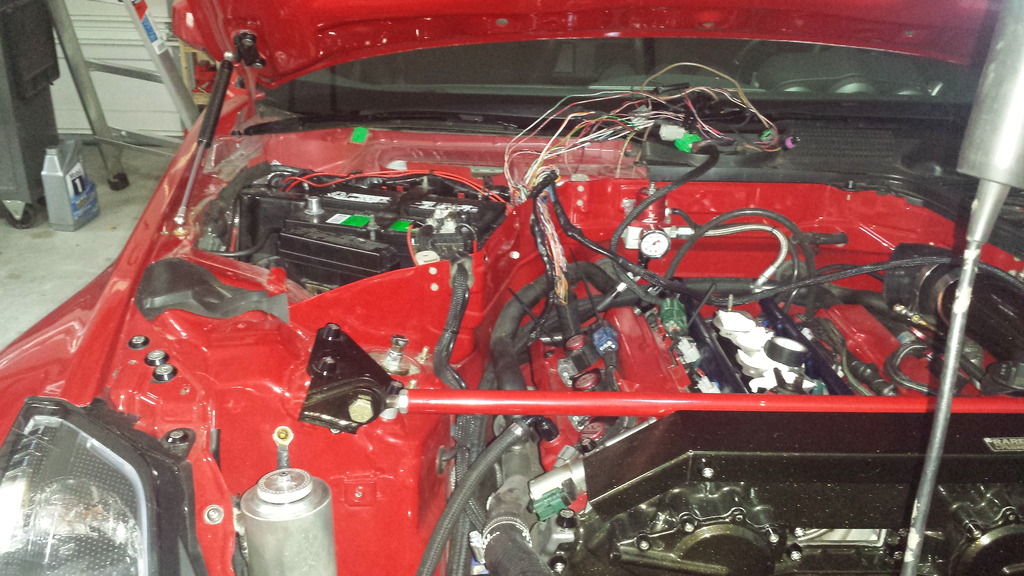
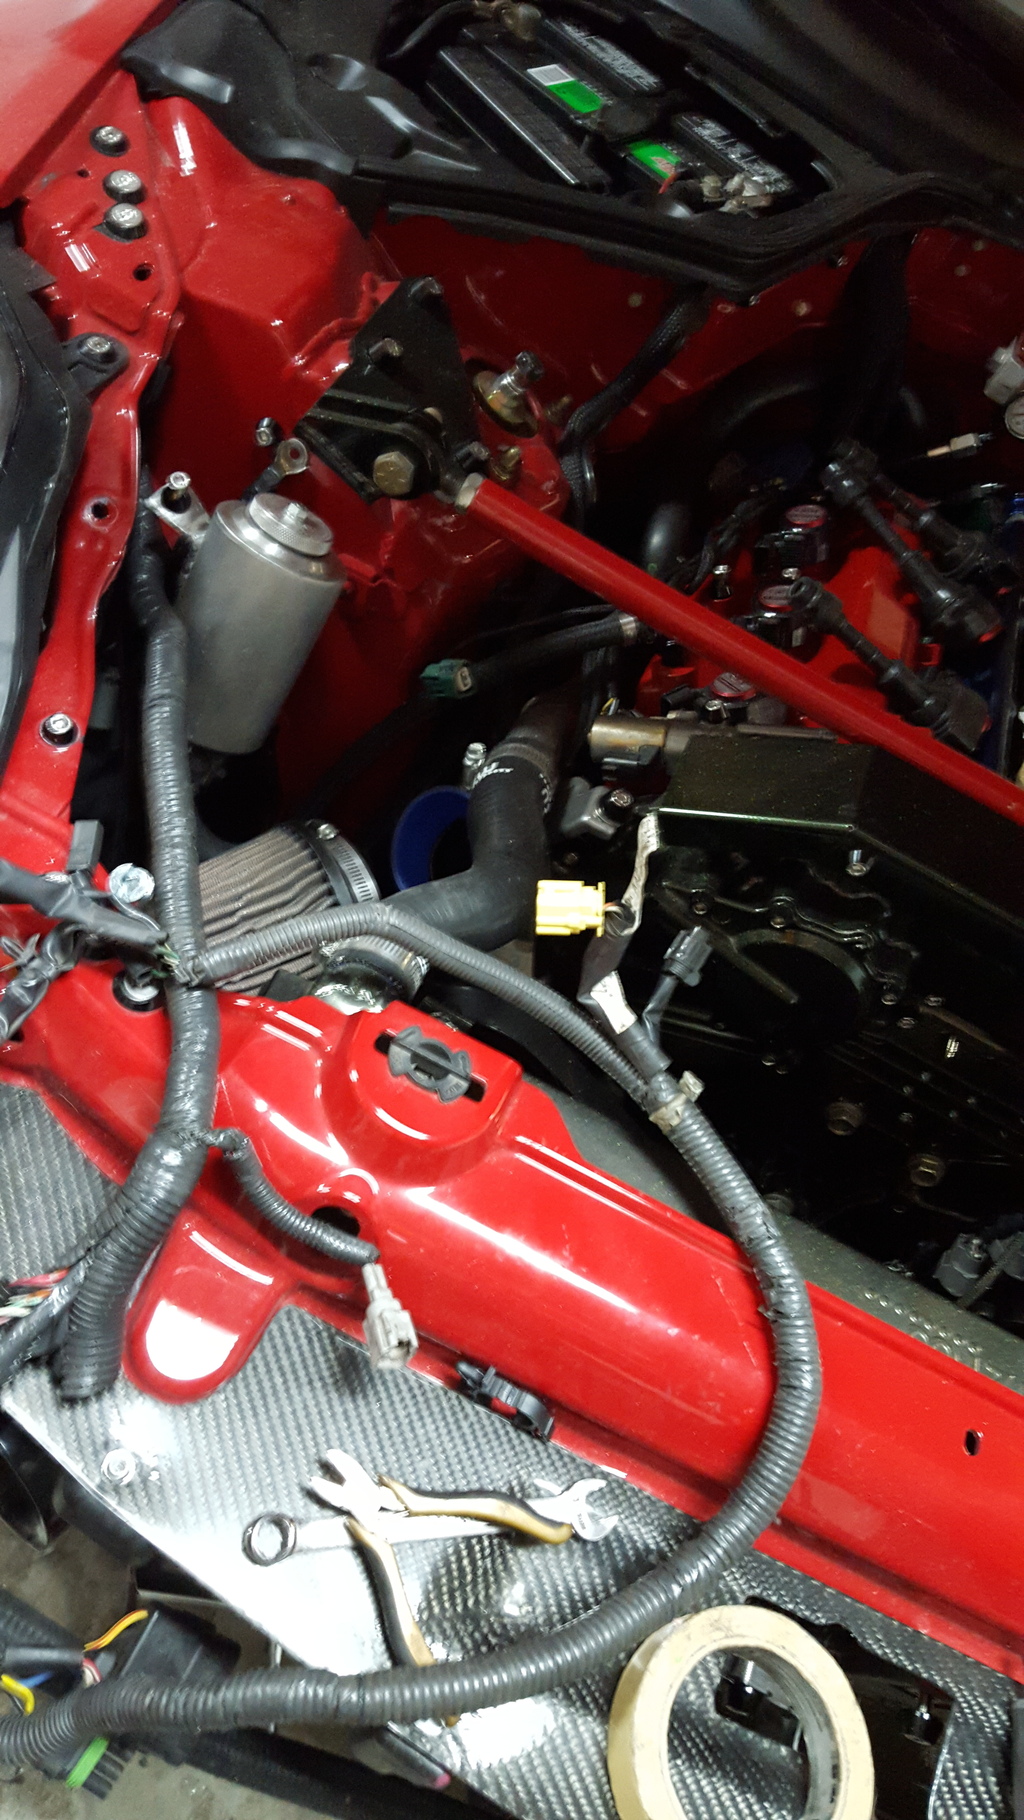
As you can see...it has been an ongoing process. My bay tuck started almost 3 years ago...and the colors of parts has changed as well.
the long term stretch goal would be to tuck the alternator harness and brake lines but i think the ship has sailed on those.
As for when tending to other maint...no joke. The cosworth makes spark plugs/coil packs a breeze. The wire tuck make things nicer too..you can get your hand in so many more places and see so many more things. Nissan used a ton of brackets and that ribbed plastic adds so much bulk.

New Member
Joined: Mar 2014
Posts: 1,405
Likes: 374
From: Watauga, Texas
It was your thread that convinced me to re-do this area.
As you can see...it has been an ongoing process. My bay tuck started almost 3 years ago...and the colors of parts has changed as well.
the long term stretch goal would be to tuck the alternator harness and brake lines but i think the ship has sailed on those.
As for when tending to other maint...no joke. The cosworth makes spark plugs/coil packs a breeze. The wire tuck make things nicer too..you can get your hand in so many more places and see so many more things. Nissan used a ton of brackets and that ribbed plastic adds so much bulk.
 You have got that right. Too bad Nissan didn't set our engines up this clean, they would have saved a decent amount of money on wire and bracket if they spend a little more time R&D on the harness. At least they left something for us to mod though...lmao.
New Member
Joined: Mar 2014
Posts: 1,405
Likes: 374
From: Watauga, Texas
You can calibrate the value in haltech and OEM ecu.
20awg (rough equivalent to japanese MM wiring) has a value of .01 Ohm per foot. I removed maybe 6 ft...so were looking .06 ohm.
TB has 2 potentiometers in it...most likely in the 10k ohm range.
Most ECU inputs have 1k pull up resistors
So looking at the change in wire vs the target devices...its insignificant.
Ill let you know how it goes when i go to re-crank the motor.
In most small electrical circuits...wiring is negligible.
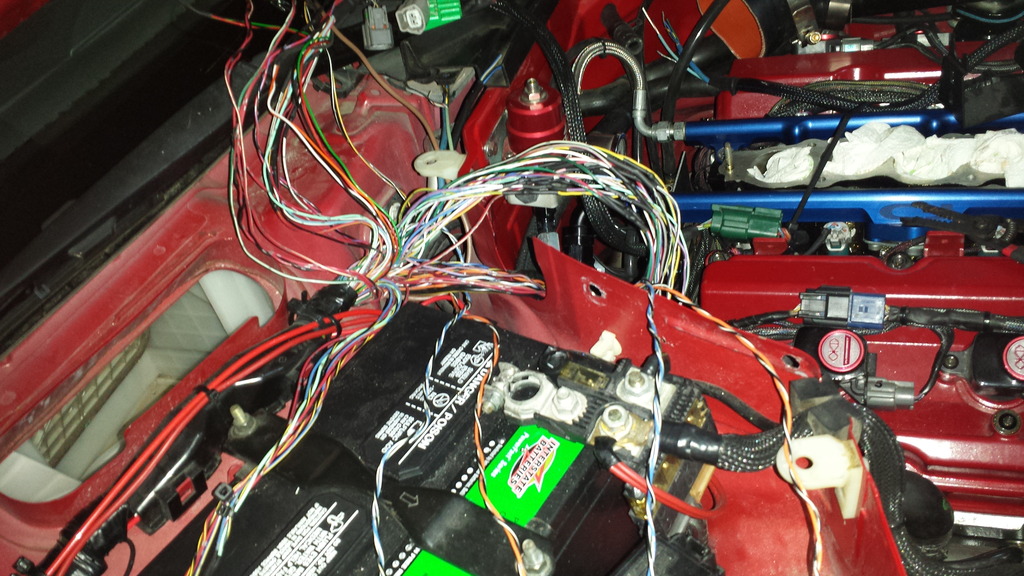
The next plan I have when I do go back in to start pruning again is to upgrade ground wires and rebuild the coil harness. I found 2 wires with cracked insulation that I repaired.
Another thought that i have had is to install a grommet above the transmission and pull all the 02/crank sensor/transmission wire straight up through under the dash. This would reroute nearly 20 wires away from the back of the engine and behind the false firewall.
I am loving your progress and is making me want to go back in again

Thread Starter
Joined: Apr 2005
Posts: 15,391
Likes: 1,085
From: Greenville, SC
Sweet, I had missed this post when i made the previous. This is what I had seen from Honda forums in the past, that all wire could be pruned back. But now with our drive by wire and issues with TB relearn I felt that I should not disturb any of the circuits until i knew exactly what would not be effected. Plus if i am going to shorted the wire I would prefer not to splice but terminate at the pigtail. I have been looking for pins and have found a couple of possibilities to get them from, just haven't pulled the trigger yet.
The next plan I have when I do go back in to start pruning again is to upgrade ground wires and rebuild the coil harness. I found 2 wires with cracked insulation that I repaired.
Another thought that i have had is to install a grommet above the transmission and pull all the 02/crank sensor/transmission wire straight up through under the dash. This would reroute nearly 20 wires away from the back of the engine and behind the false firewall.
I am loving your progress and is making me want to go back in again
stop...just stop. I dont need any more ideas! lol
*oem calibration would be the three peddle setups with the ignition key. Not a value that i know. Haltech just calibrates on full open and full close and maps it.
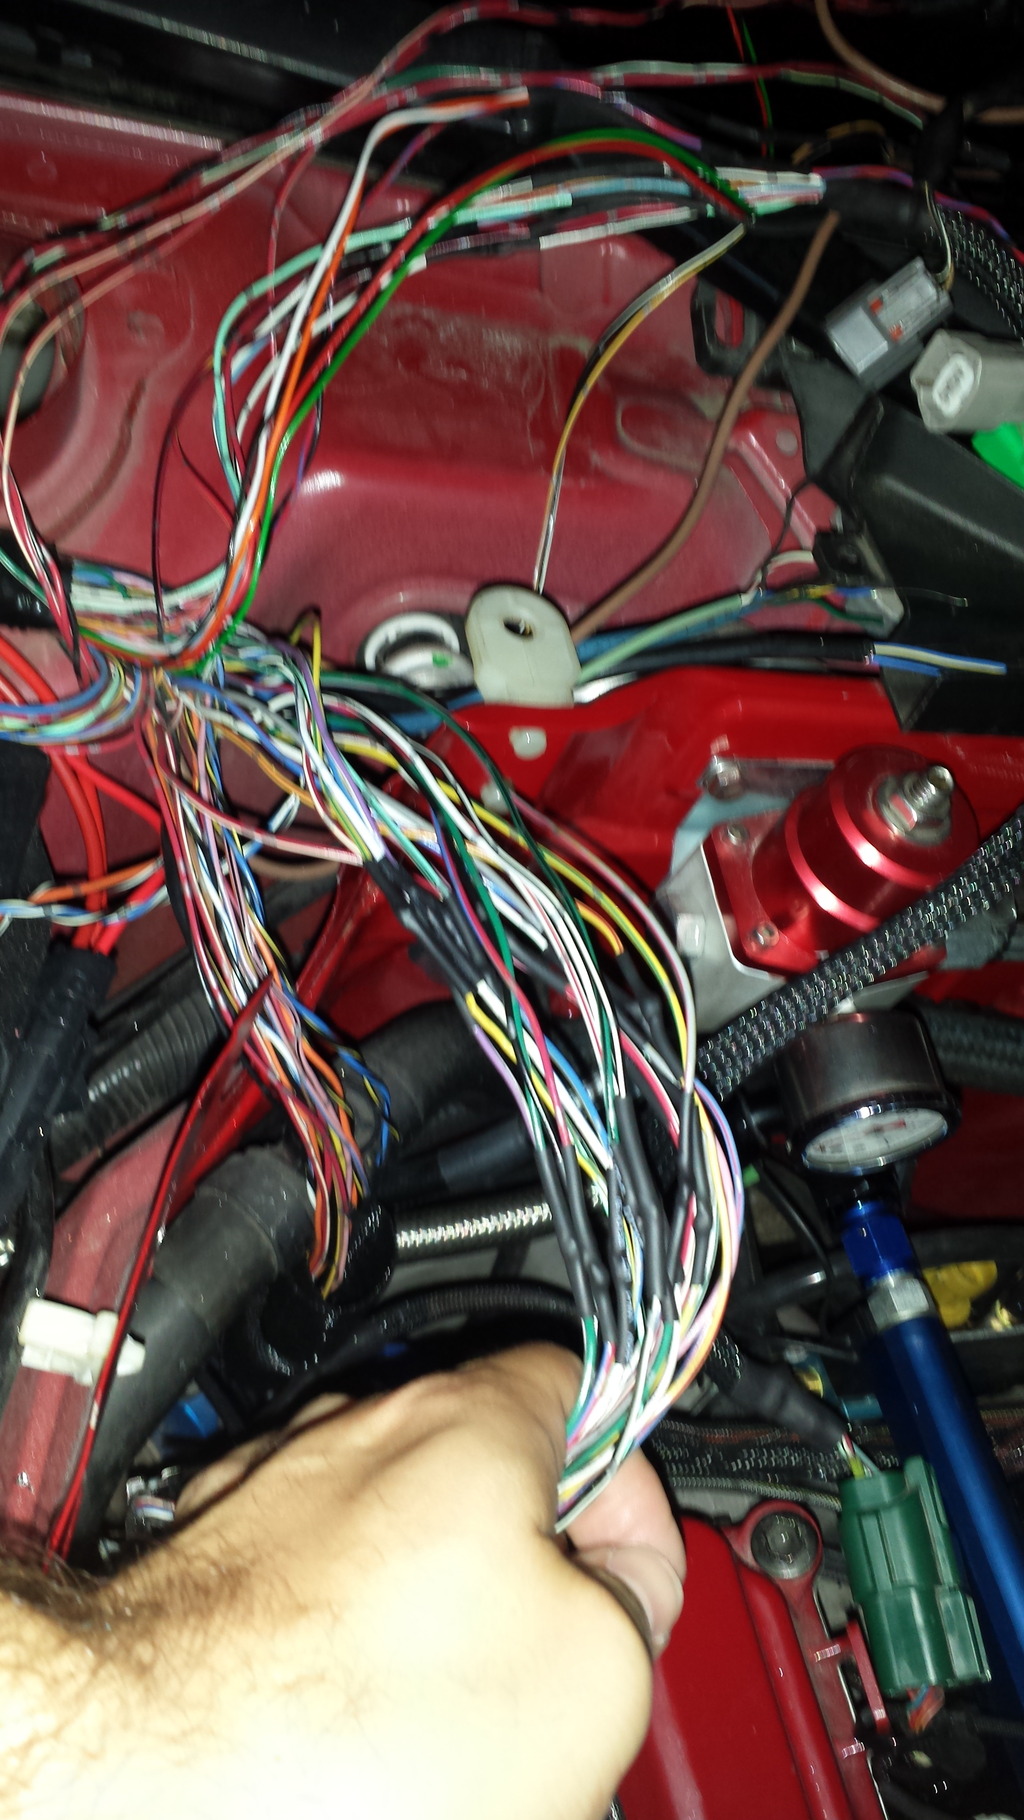
Yeah I ran all my widebands up through the shifter area. Would be nice to run the transmission wiring the same (starer sol, o2 sensors, two tranny and crank pos sensor). I have those wires separated out as well.
I rebuilt the injector harness but left too much length in them. Could trim 6 more inches from each injector.
As for the splicing vs new pins. I looked up the pins and could get them in rolls of 1000. Only need the female pins...i have not found a way to de-pin the male connectors without destroying it. I hooksplice, solder and heat shrink. I dont see any issue with it. I also offset my splices since it does add bulk to the diameter. My next post will show you what i mean.
Last edited by Cux350z; Jun 14, 2015 at 08:42 AM.
Thread Starter
Joined: Apr 2005
Posts: 15,391
Likes: 1,085
From: Greenville, SC
A bit more progress:
So i had mentioned some of the relocated parts. Here they are:
EGR valve is on the right, the dark blue connector is coolant temp
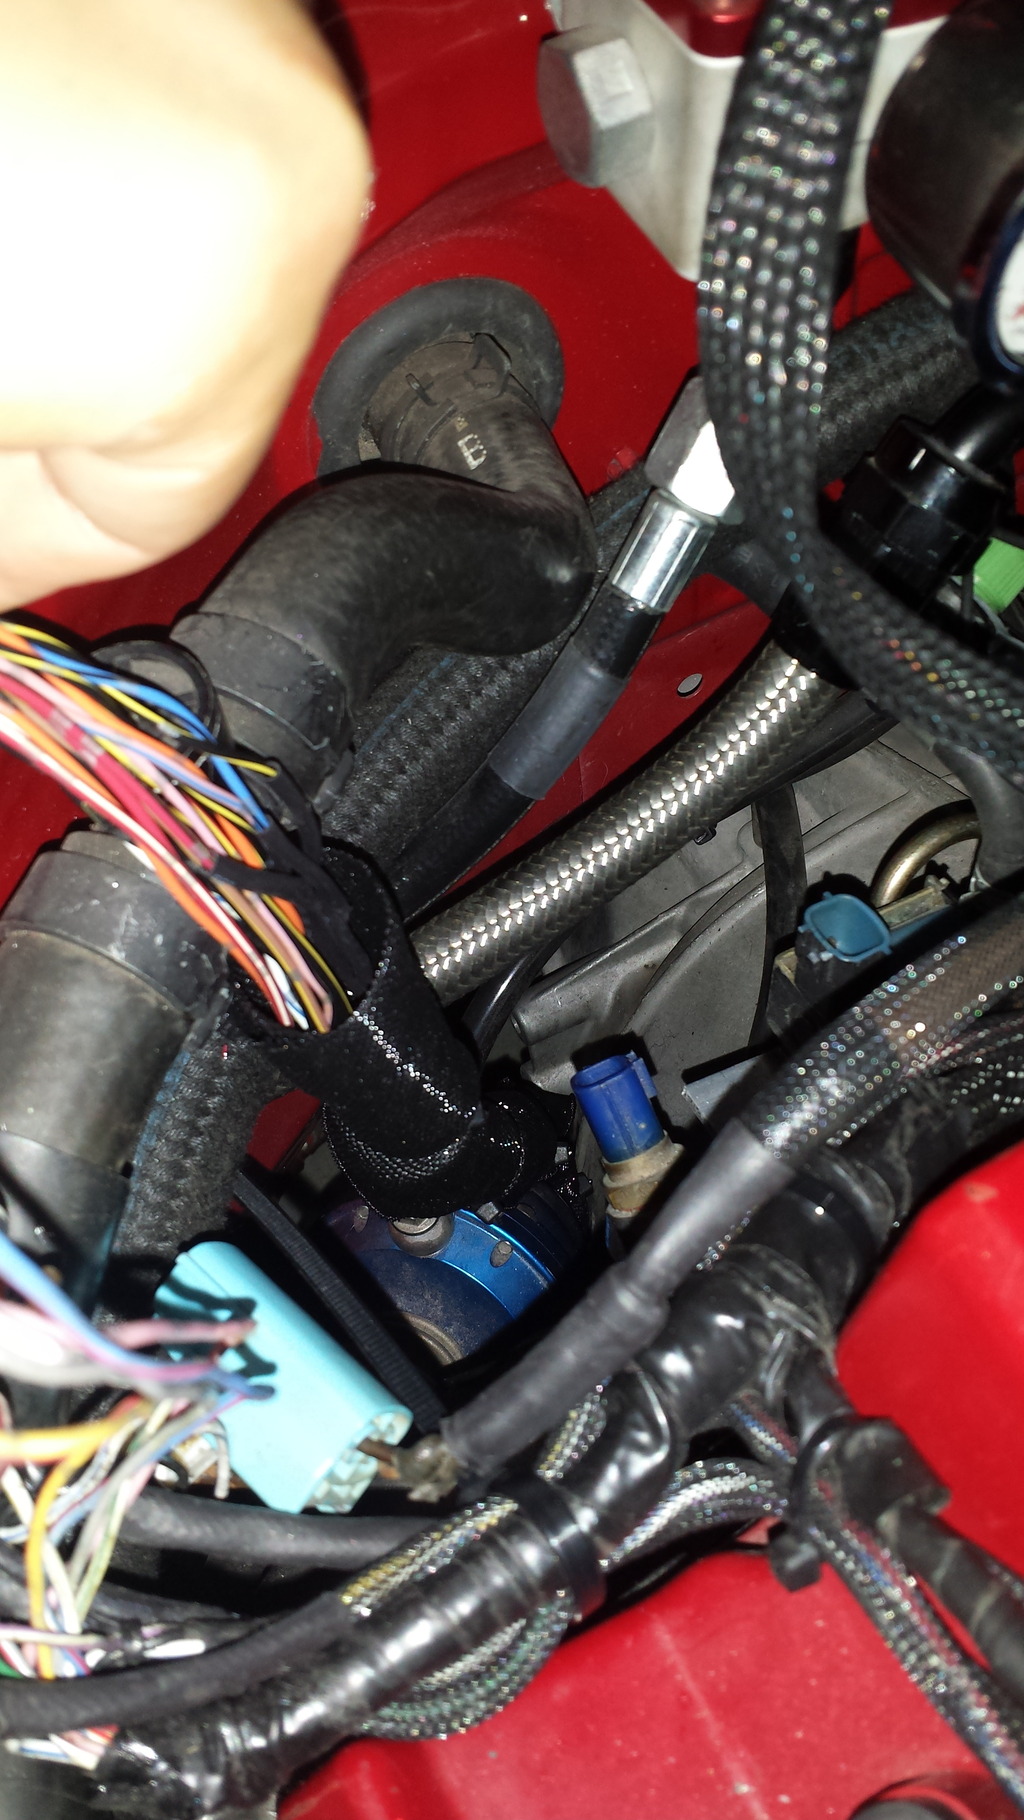
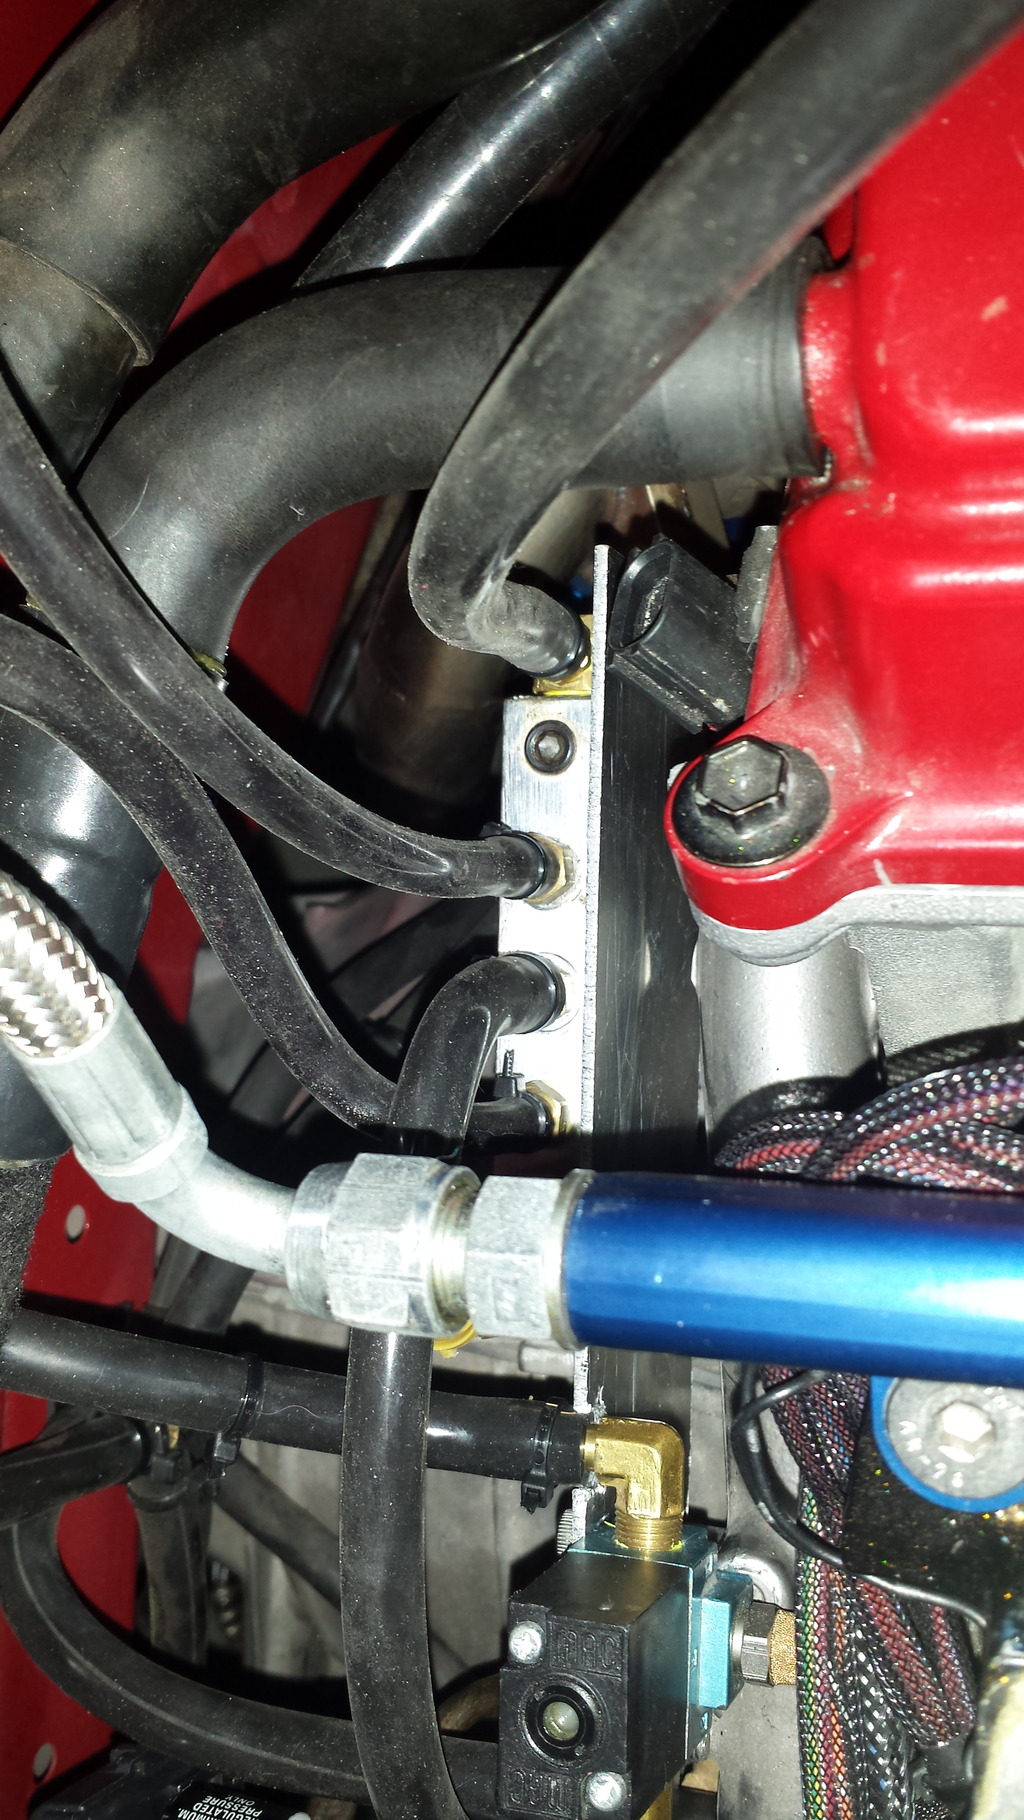
Boost control valve mounted off a plate that is mounted off the rear coolant pipe
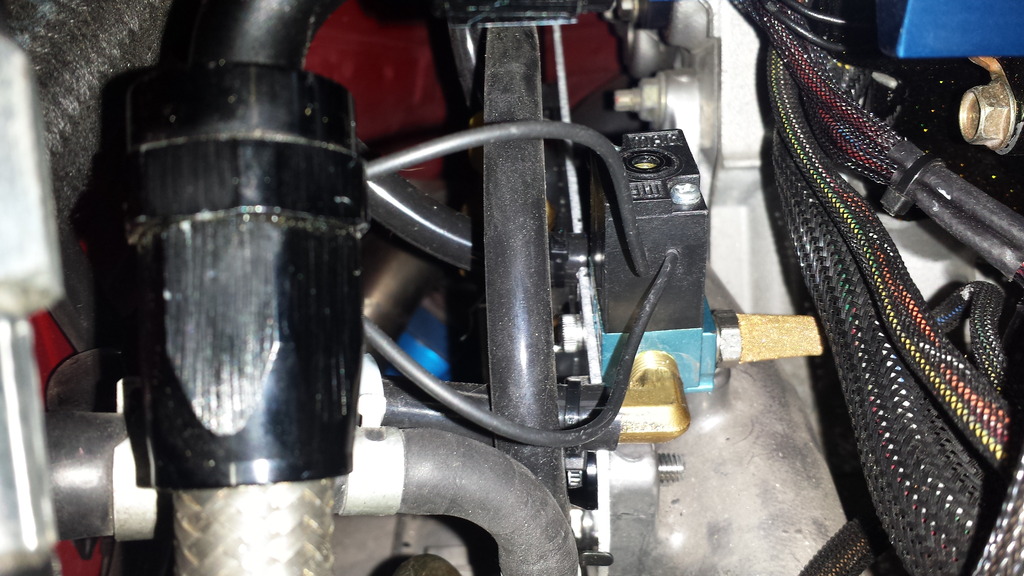
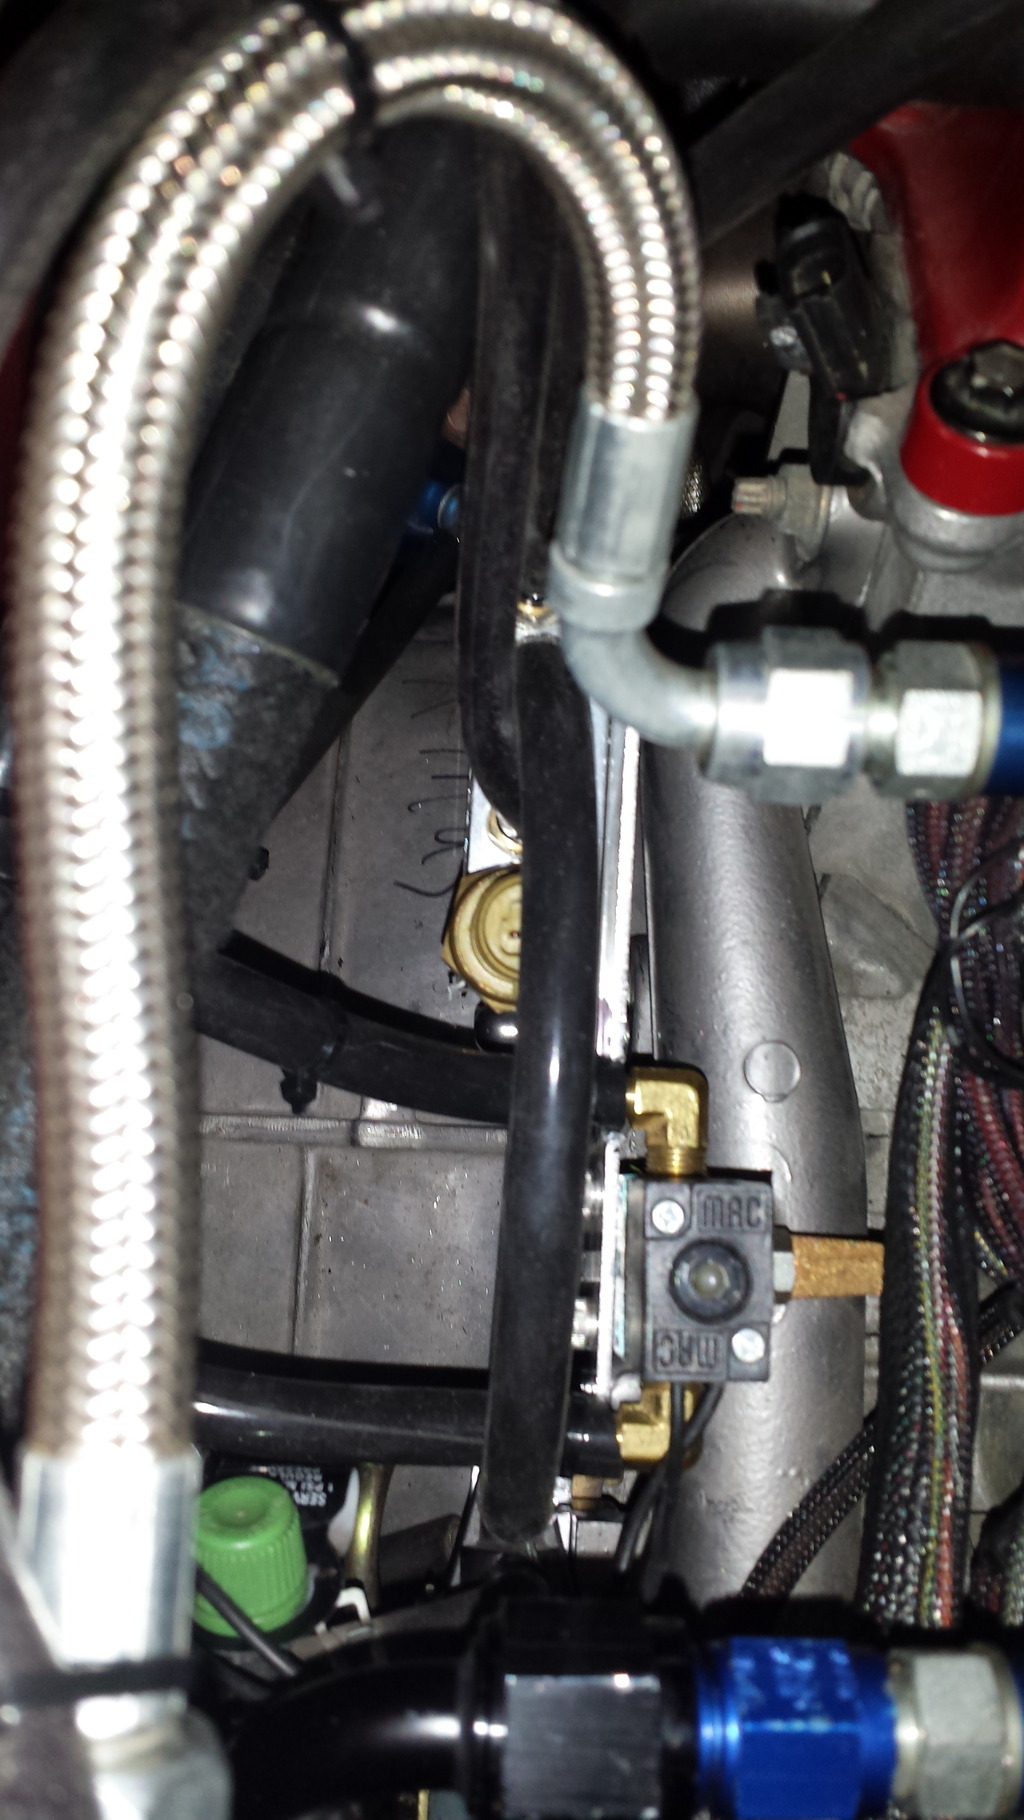
Vibrant vacuum distribution block with AEM sensor installed (shortened up a ton of VAC hose)
All three:
It is a tight area and a real SOB to get it in there. But once installed, these parts are not really serviced.
Heat Shrunk wire Splices. Offset the splice locations to minimize buildup of diameter. Did 6 wires at a time Got 4 to go, in two twisted pairs (most likely maf and AIT)
I left a few inches of extra wire so i can service and do my final tucking. I have room in the battery box area to stow them.
So i had mentioned some of the relocated parts. Here they are:
EGR valve is on the right, the dark blue connector is coolant temp
Boost control valve mounted off a plate that is mounted off the rear coolant pipe
Vibrant vacuum distribution block with AEM sensor installed (shortened up a ton of VAC hose)
All three:
It is a tight area and a real SOB to get it in there. But once installed, these parts are not really serviced.
Heat Shrunk wire Splices. Offset the splice locations to minimize buildup of diameter. Did 6 wires at a time Got 4 to go, in two twisted pairs (most likely maf and AIT)
I left a few inches of extra wire so i can service and do my final tucking. I have room in the battery box area to stow them.
Thread Starter
Joined: Apr 2005
Posts: 15,391
Likes: 1,085
From: Greenville, SC
same stuff as before from www.cableorganizer.com
Their PET sleeve: http://www.cableorganizer.com/expandable-sleeving/
Ive got some wrap around for the part where i cannot get a full sleeve on it.
Going to depin and sleeve:
Knock sensor
TB
CAm1
Cam2
water temp
boost sol
pressure sensor
egr
Their PET sleeve: http://www.cableorganizer.com/expandable-sleeving/
Ive got some wrap around for the part where i cannot get a full sleeve on it.
Going to depin and sleeve:
Knock sensor
TB
CAm1
Cam2
water temp
boost sol
pressure sensor
egr


Thread Starter
Joined: Apr 2005
Posts: 15,391
Likes: 1,085
From: Greenville, SC
New Member
Joined: Mar 2014
Posts: 1,405
Likes: 374
From: Watauga, Texas
Agreed, a small subtle change can make all the difference.
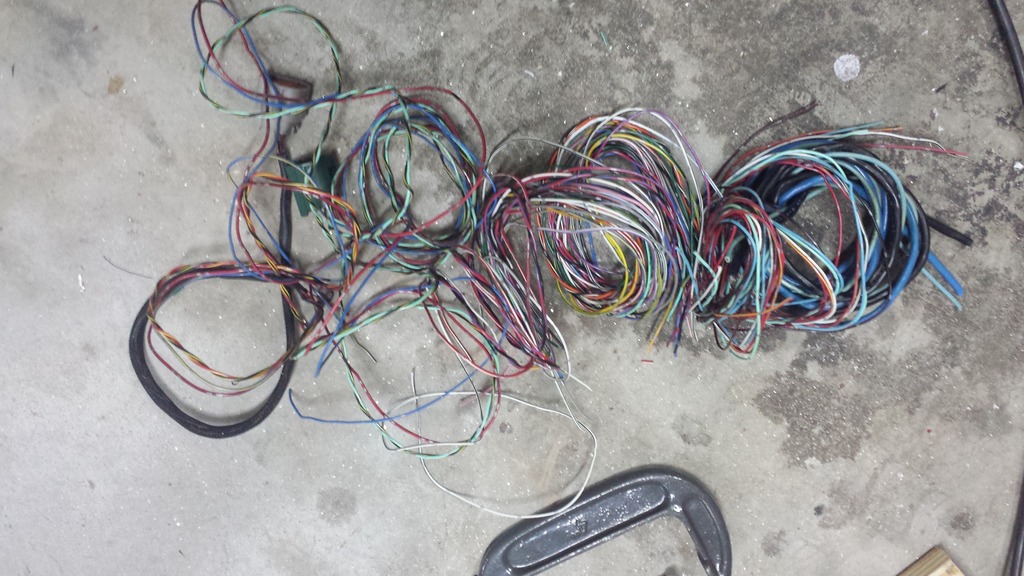
For now I am staying away from the engine bay. In the process of removing approx 5lbs of wire from the inside of the car. I never use my Navigation so I am pulling the system. Once the screen is out, I will be preparing the location for a oil temp and afr guage. Those will be done the road some but since i have the sound bar location open from adding my sub, I have taken the oppurtunity to make a few changes and trying to get ideas for the interior as well.
Once i get back into my engine bay again, I will be looking to move my starter/alternator power cable. After seeing your tuck renovation and looking over mine, my fat red cable sticks out too much. Should be a really easy move. If i have it figured correctly i shouldn't need to change the length of my cable at all and tie it into my current main loom.
Thread Starter
Joined: Apr 2005
Posts: 15,391
Likes: 1,085
From: Greenville, SC
Agreed, a small subtle change can make all the difference.
For now I am staying away from the engine bay. In the process of removing approx 5lbs of wire from the inside of the car. I never use my Navigation so I am pulling the system. Once the screen is out, I will be preparing the location for a oil temp and afr guage. Those will be done the road some but since i have the sound bar location open from adding my sub, I have taken the oppurtunity to make a few changes and trying to get ideas for the interior as well.
Once i get back into my engine bay again, I will be looking to move my starter/alternator power cable. After seeing your tuck renovation and looking over mine, my fat red cable sticks out too much. Should be a really easy move. If i have it figured correctly i shouldn't need to change the length of my cable at all and tie it into my current main loom.
That nav harness is a beast. Connects in so many places.
Started the engine today. Fired right up. Did not care about the shortened TB or cam pos sensor wires. The only thing it cared a little about is that i forgot to connect the brake booster hose on the plenum = vacuum leak but not a big deal since i am MAP tuned and no MAF.
Thread Starter
Joined: Apr 2005
Posts: 15,391
Likes: 1,085
From: Greenville, SC
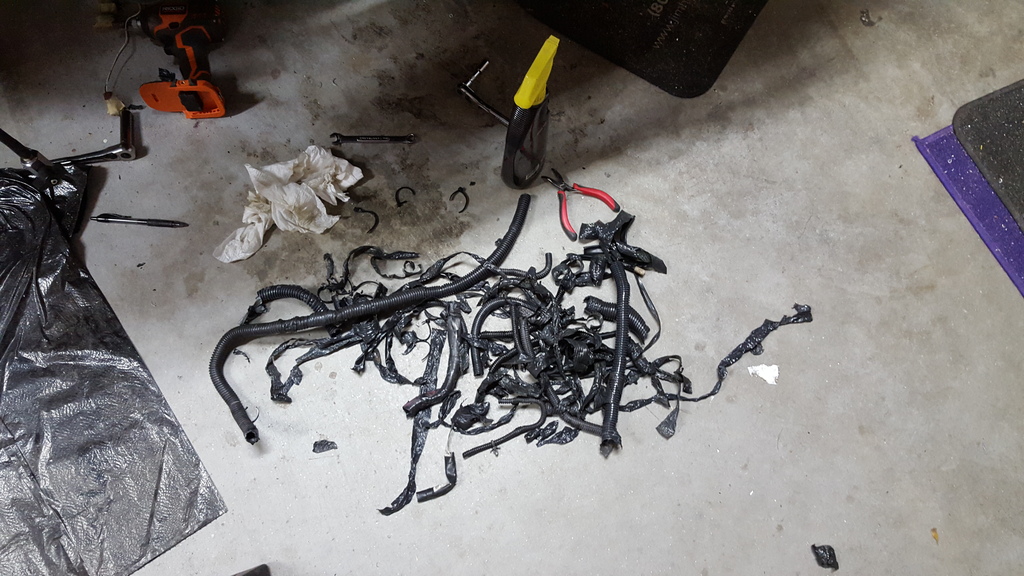
Doing some more work. This harness is the one that runs to the front for the radiator fans, horns, crash sensor, pass headlight. It was NASTY..covered in fluid/sticky. Nissan used a ton of tape and that split loom plastic crap.
Also deleting the 3 clips for the Washer fluid tank (front, rear and level sensor) and the clip for the hood latch closed. That will remove 8 wires from the harness.
Not done yet...just got all the crap pulled off and ready to de-pin and re-wrap.
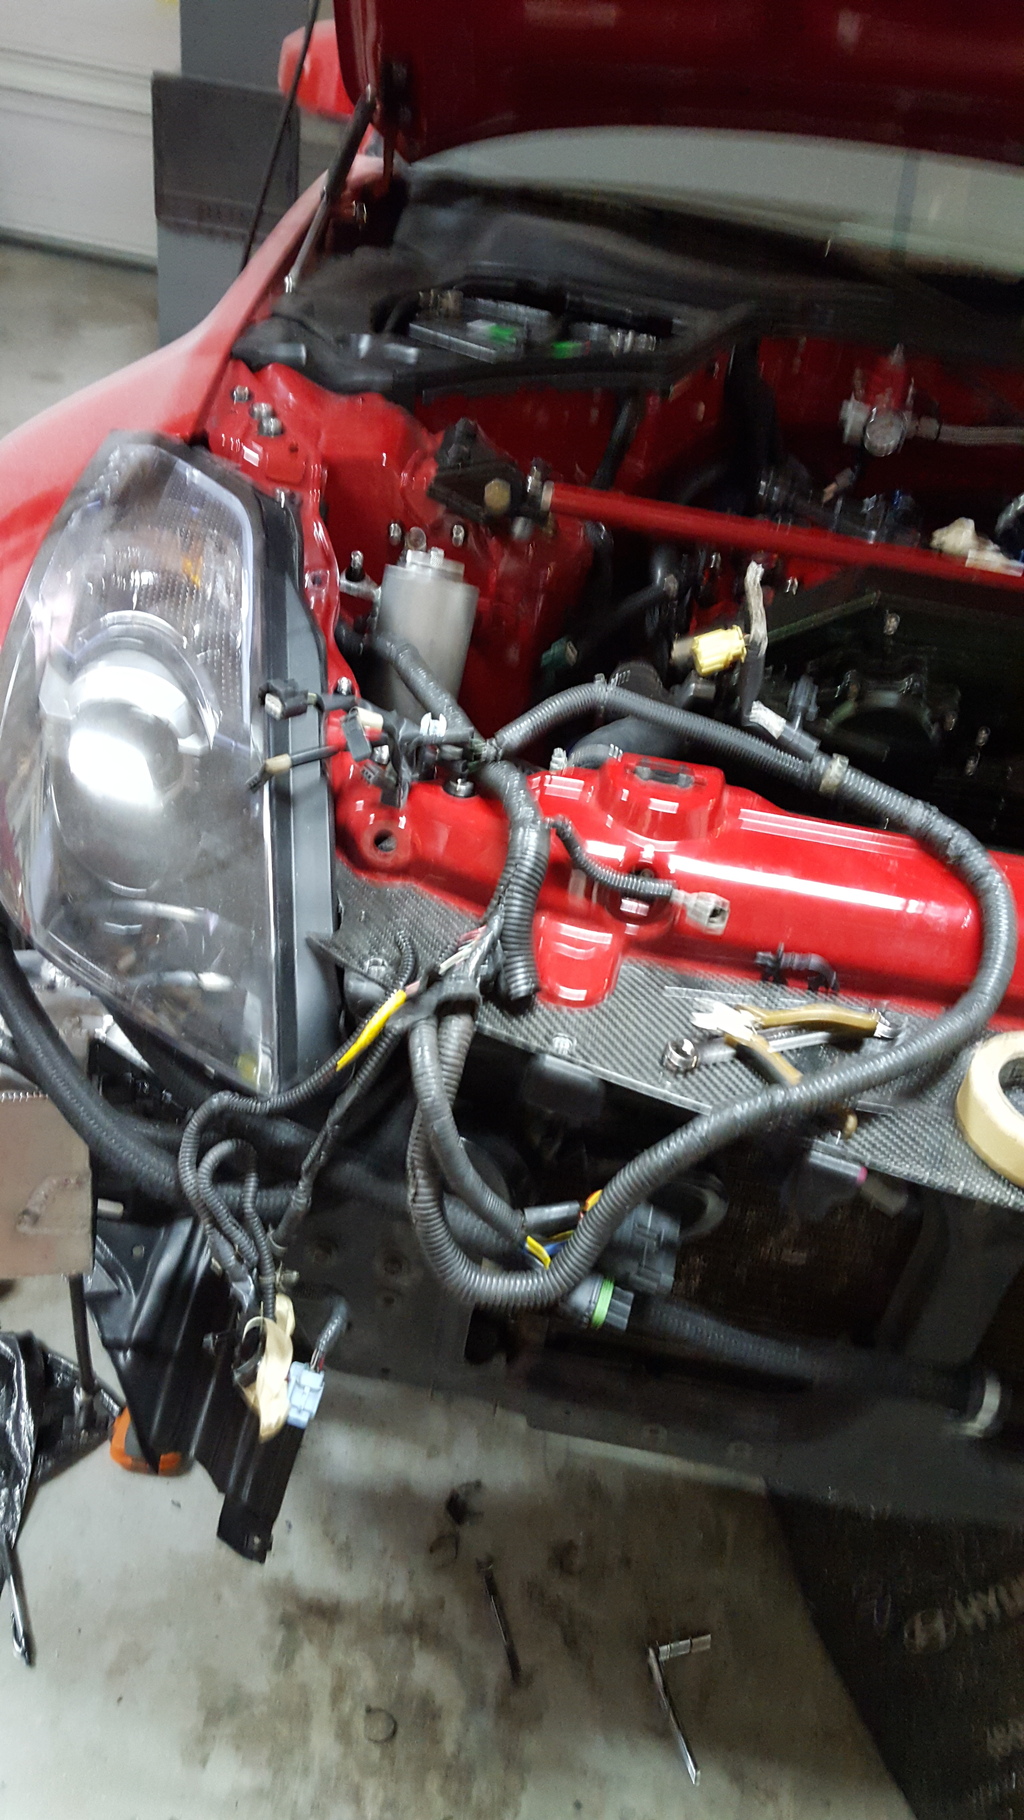

All the crap that nissan used:
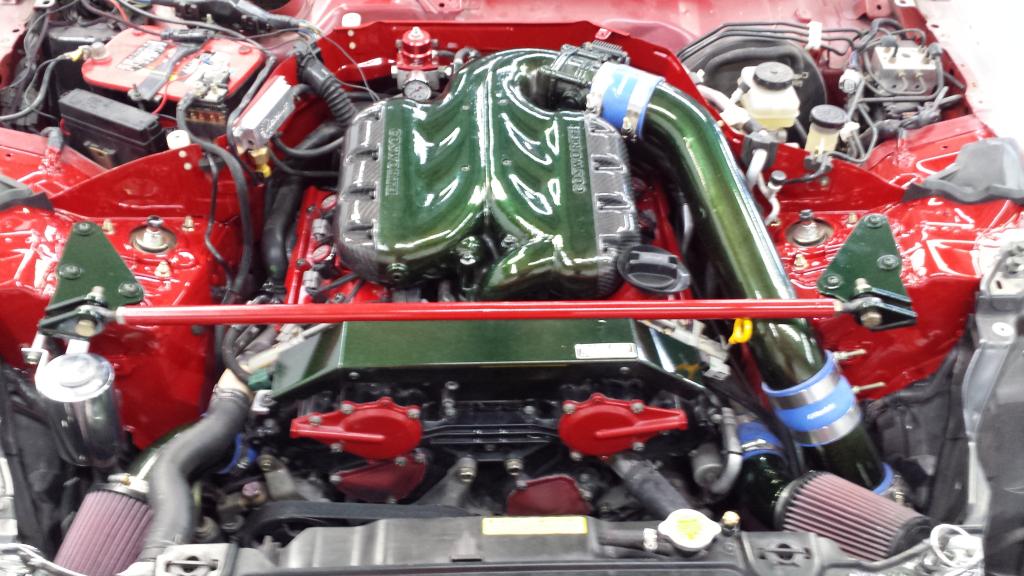
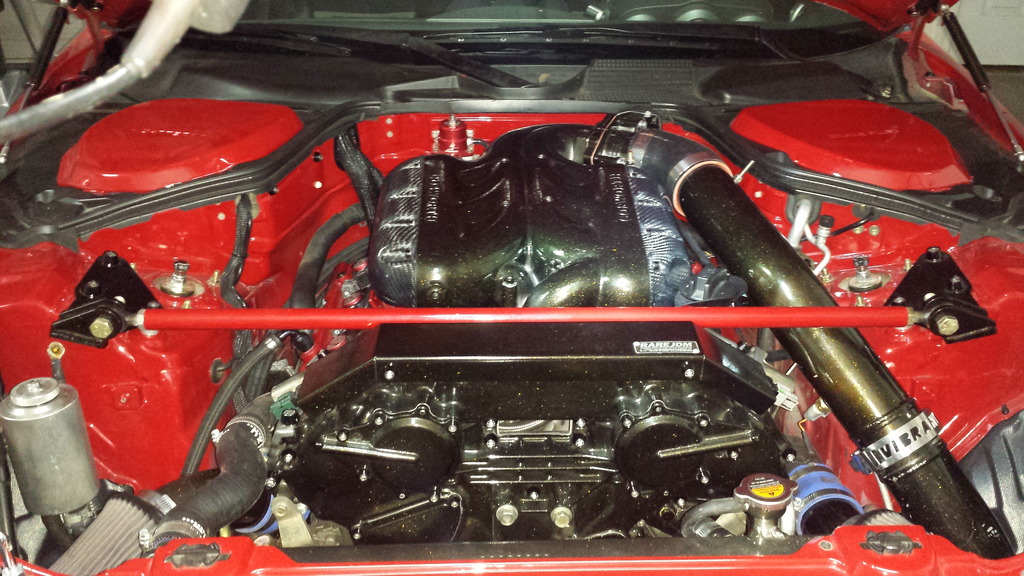
Also my engine bay colors are changing again...
Also deleting the 3 clips for the Washer fluid tank (front, rear and level sensor) and the clip for the hood latch closed. That will remove 8 wires from the harness.
Not done yet...just got all the crap pulled off and ready to de-pin and re-wrap.
All the crap that nissan used:
Also my engine bay colors are changing again...