
Esser's Super Black Z Progress Thread


Everyone else is making progress threads so I figured I would too... I'll keep updating this thread with my build progress as time goes on. I have an overall goal in mind that I plan to eventually accomplish through the rest of this year. This is the story of my Z so far.
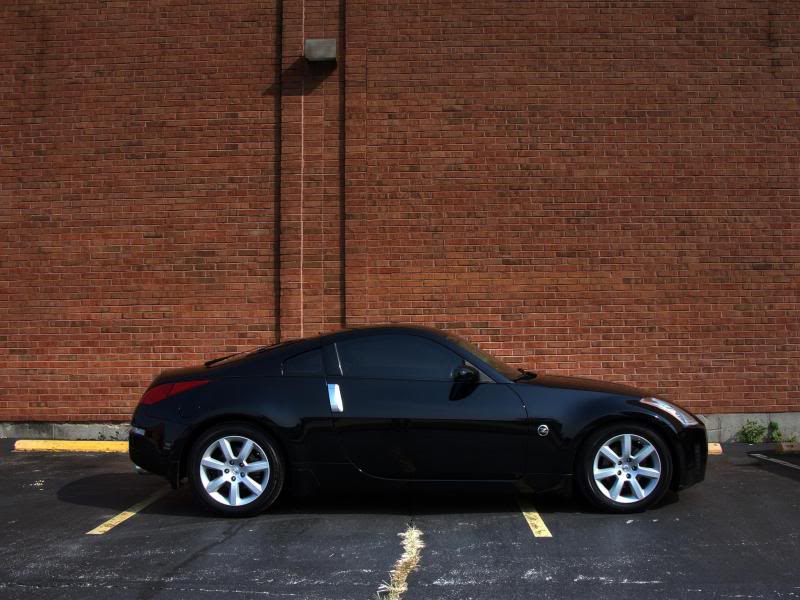
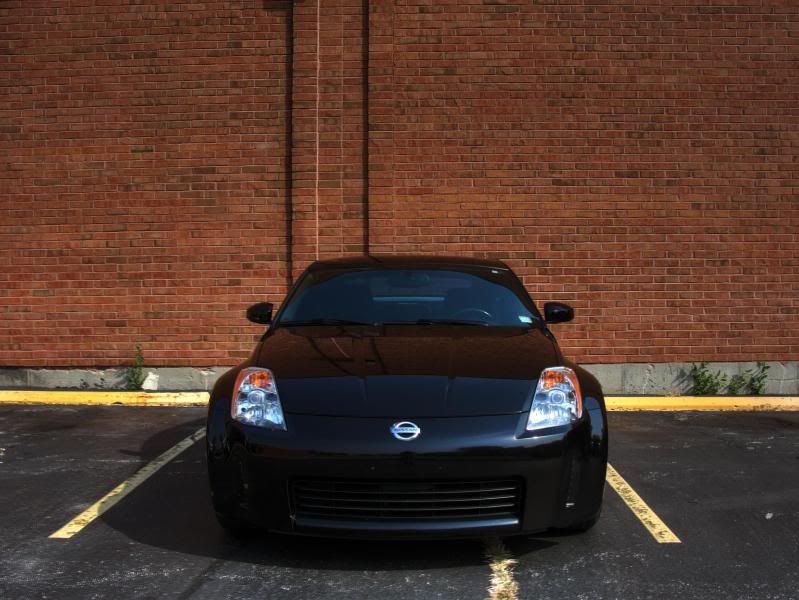
To begin, I bought my 2004.5 Enthusiast Z in Summer of 2010 with 48K miles on her. It was bone stock except for a Kenwood head unit. The paint was in good condition and the price was right. As soon as the add appeared on Craigslist I went and picked it up. I had owned a 2004 redline Z in the past, so I knew what to look for when buying my next Z. I drove her home, gave it a much needed detail, and took some fresh pics:
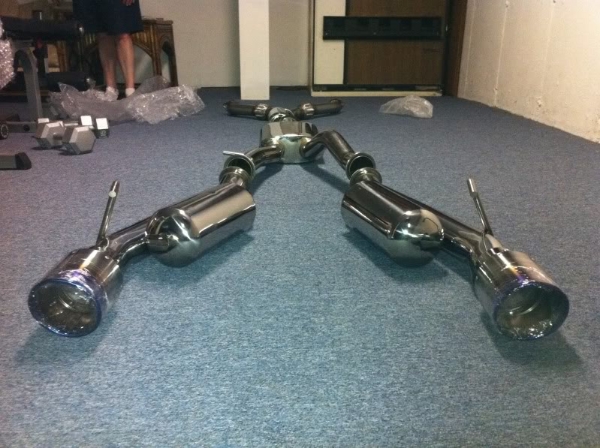
The first priority on my agenda of mods was to get an exhaust. It took me about 6 months of researching and browsing youtube until I heard that sound I just could not live without: the Motordyne Shockwave. I contacted several venders until I was able to own a Shockwave Dual TDX exhaust system with the XYZ Pipe. This was indeed my dream exhaust for the Z:
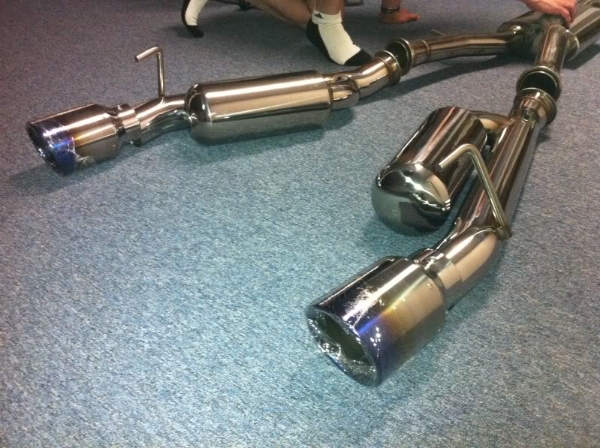
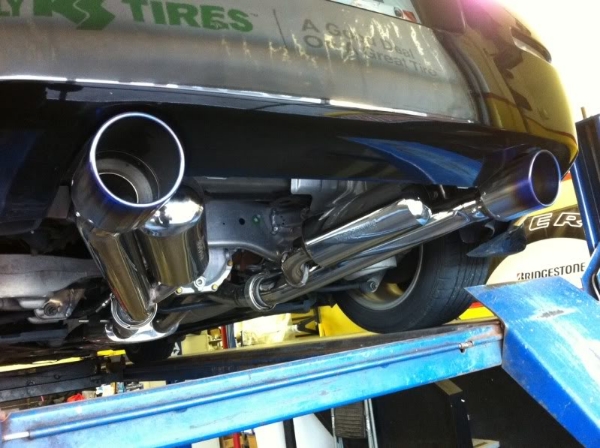
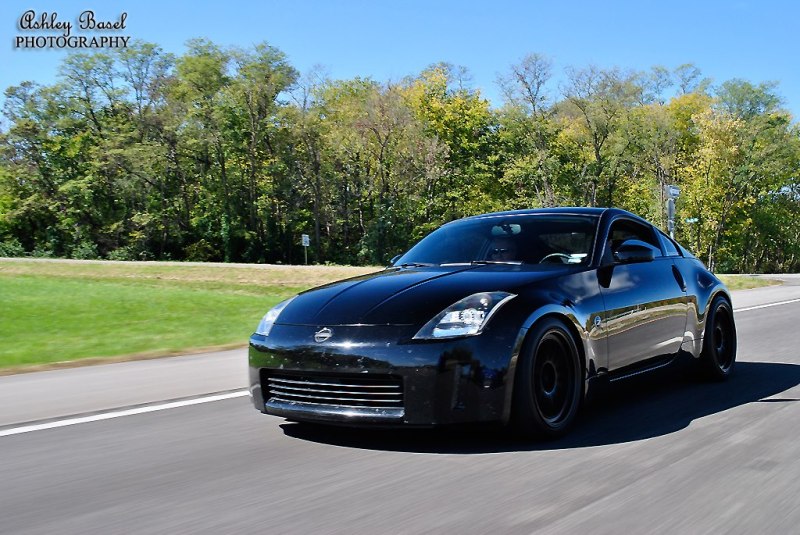
I drove around with this exhaust, and was very pleased with the sound. But I later added Berk test pipes to waken it up a little. The combination of the shockwave and the test pipes create a loud, deep sound that is pure seks! My next move was to take the Z to the dragon at Zdayz 2012, what an awesome experience:

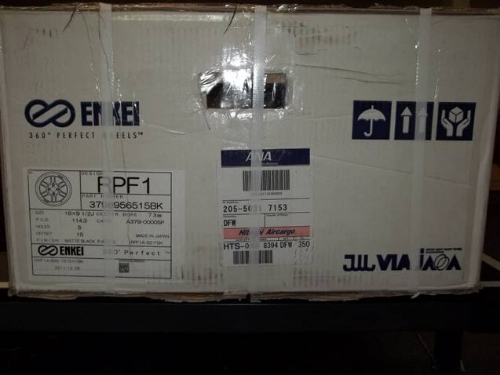
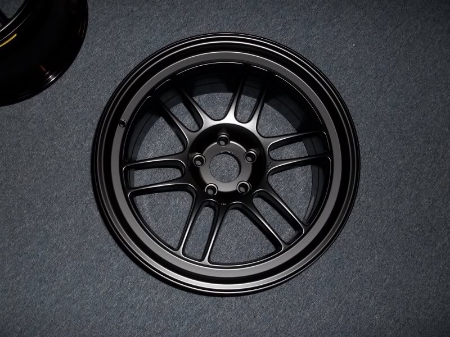
My next priority after tackling the dragon was a good set of wheels/tires and suspension. I realized that the factory wheels were not going to cut it anymore, and it was time to get serious. I have always loved the looks and performance of the Enkei RPF1, and asked around until i was able to jump on a deal on the forum. I picked up the RPF1 in black, as well as some Dunlop Sportmax summer tires:
18 x 9.5 +15 - 245/40/18
18 x 10.5 +15 - 275/35/18
At the same time I installed a set of Tanabe GF210 lowering springs to perfect the stance of the car. I am really happy with the drop that they provided, it's perfect for the style of driving I do and not aggressive to get me stuck anywhere cause i do daily drive my Z:
I also color matched my door handles and got my headlights painted by Diode Dynamics here in St. Louis. The headlights were opened up and painted satin black, and a halo was added as well. The amber strip was replaced with a clear one too to perfect the look:
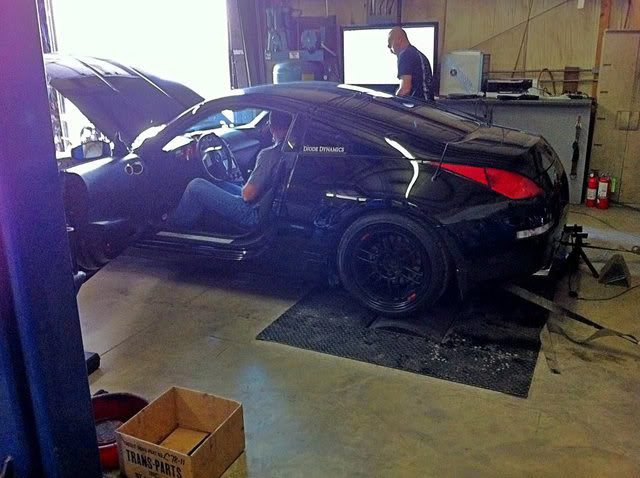
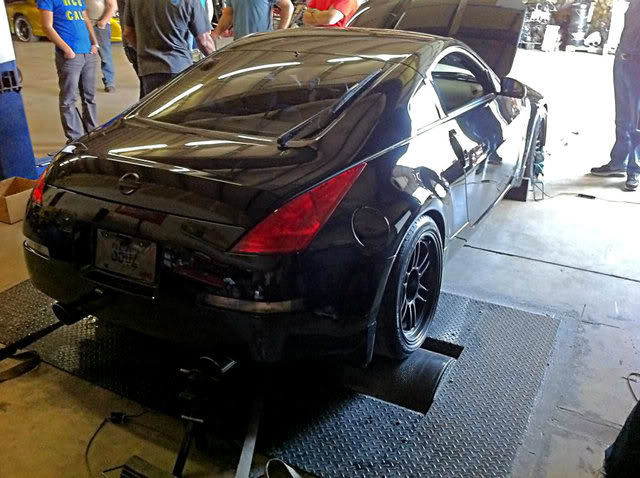
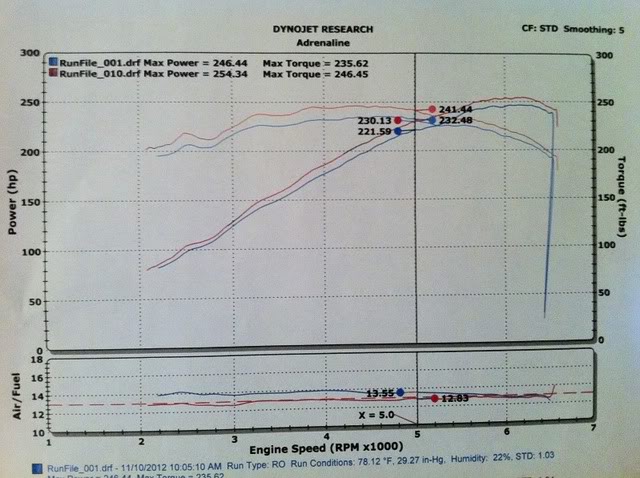
Next on the list was some minor intake mods including a motordyne 5/16 inch plenum spacer and a Z1 performance Z-tube. These bolt-ons were not providing very noticeable gains, so an Uprev tune was needed. Luckily, Specialty Z was coming into town to do a group tune for St. Louis Z owners. I showed up on the dyno day, and got tuned by Sebastian and Gregg. They were very helpful in answering all of my questions, and I was able to pick up a few peak hp and nearly 20 hp/tq in the power band.
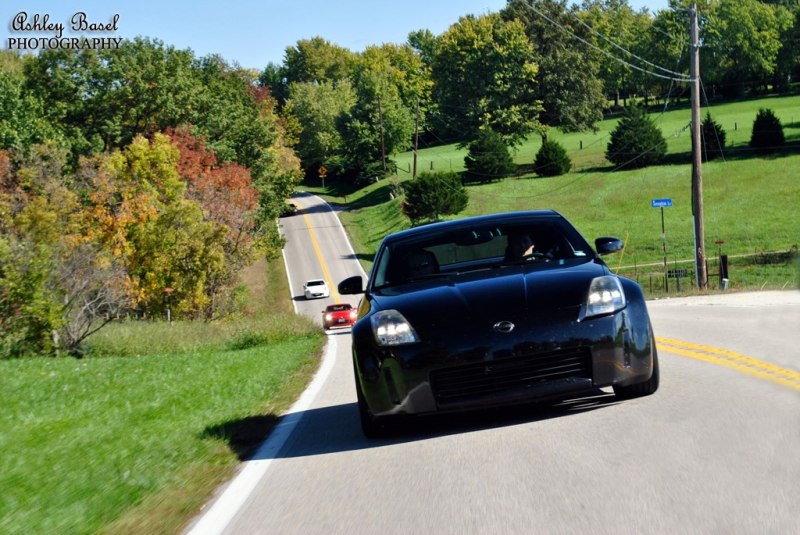
After the tune, a group cruise was in order:
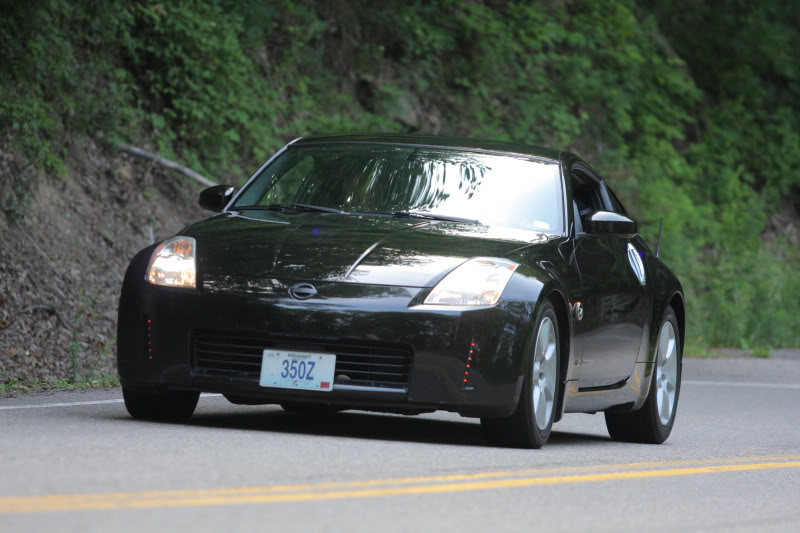
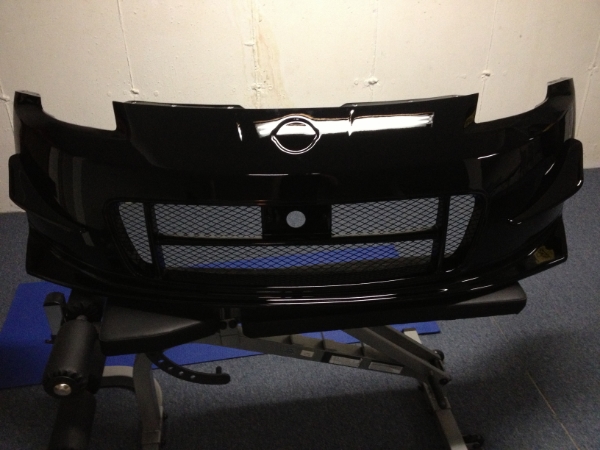
My performance goals for that year were reached, and my new goal for 2013 was to update the exterior. I began with the front bumper, and picked up a Nismo V2 replica:
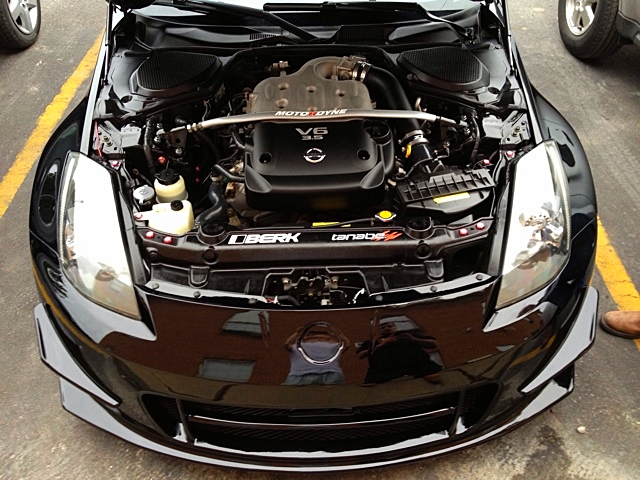
And I took some time and gave the engine bay the attention it deserves. Cleaned it up and added a red bolt kit:
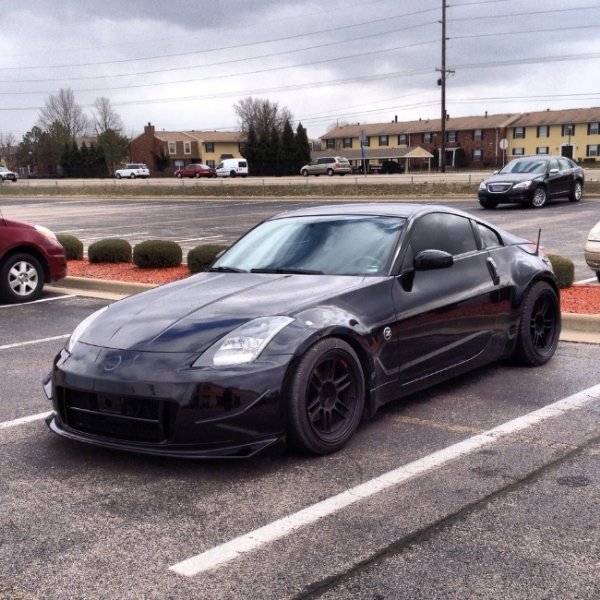
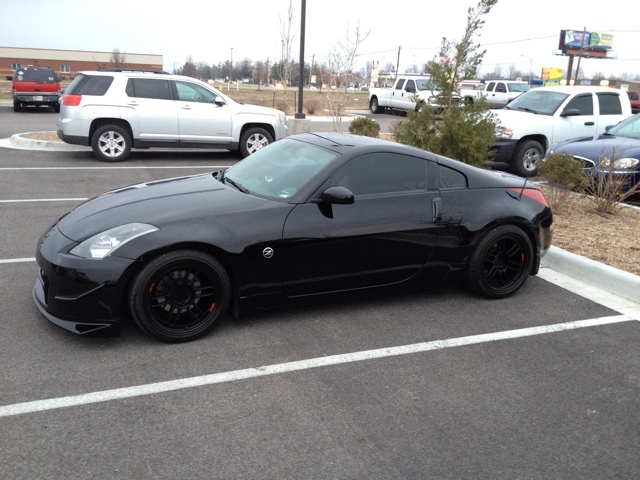
And here is how she sits now:
The paint on the bumper is still less than 30 days cured, so my next step is to get the emblem on after it has been painted. I will continue my progress for the rest of the month as my parts come in, and hopefully it will continue until completion!

To begin, I bought my 2004.5 Enthusiast Z in Summer of 2010 with 48K miles on her. It was bone stock except for a Kenwood head unit. The paint was in good condition and the price was right. As soon as the add appeared on Craigslist I went and picked it up. I had owned a 2004 redline Z in the past, so I knew what to look for when buying my next Z. I drove her home, gave it a much needed detail, and took some fresh pics:
The first priority on my agenda of mods was to get an exhaust. It took me about 6 months of researching and browsing youtube until I heard that sound I just could not live without: the Motordyne Shockwave. I contacted several venders until I was able to own a Shockwave Dual TDX exhaust system with the XYZ Pipe. This was indeed my dream exhaust for the Z:
I drove around with this exhaust, and was very pleased with the sound. But I later added Berk test pipes to waken it up a little. The combination of the shockwave and the test pipes create a loud, deep sound that is pure seks! My next move was to take the Z to the dragon at Zdayz 2012, what an awesome experience:
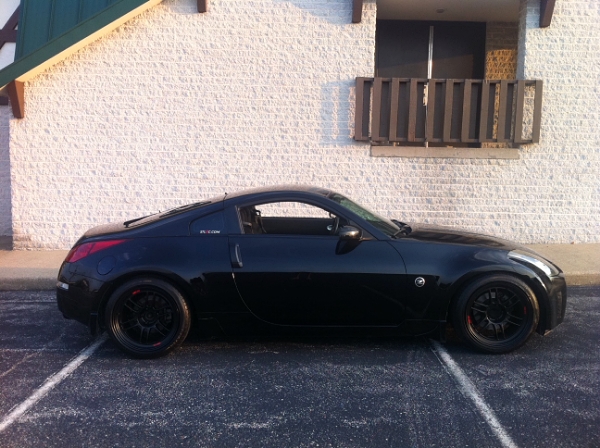
My next priority after tackling the dragon was a good set of wheels/tires and suspension. I realized that the factory wheels were not going to cut it anymore, and it was time to get serious. I have always loved the looks and performance of the Enkei RPF1, and asked around until i was able to jump on a deal on the forum. I picked up the RPF1 in black, as well as some Dunlop Sportmax summer tires:
18 x 9.5 +15 - 245/40/18
18 x 10.5 +15 - 275/35/18
At the same time I installed a set of Tanabe GF210 lowering springs to perfect the stance of the car. I am really happy with the drop that they provided, it's perfect for the style of driving I do and not aggressive to get me stuck anywhere cause i do daily drive my Z:
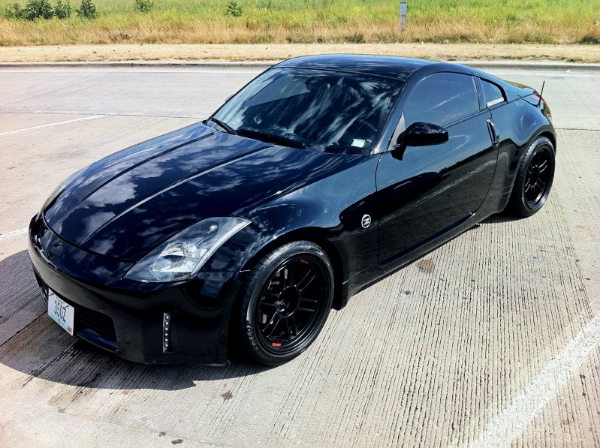
I also color matched my door handles and got my headlights painted by Diode Dynamics here in St. Louis. The headlights were opened up and painted satin black, and a halo was added as well. The amber strip was replaced with a clear one too to perfect the look:
Next on the list was some minor intake mods including a motordyne 5/16 inch plenum spacer and a Z1 performance Z-tube. These bolt-ons were not providing very noticeable gains, so an Uprev tune was needed. Luckily, Specialty Z was coming into town to do a group tune for St. Louis Z owners. I showed up on the dyno day, and got tuned by Sebastian and Gregg. They were very helpful in answering all of my questions, and I was able to pick up a few peak hp and nearly 20 hp/tq in the power band.
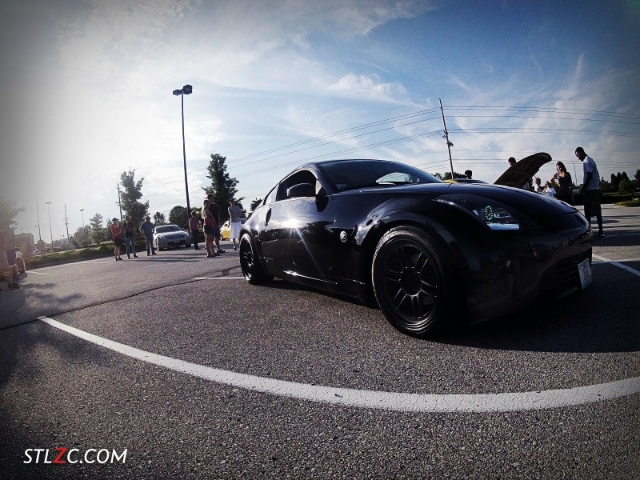
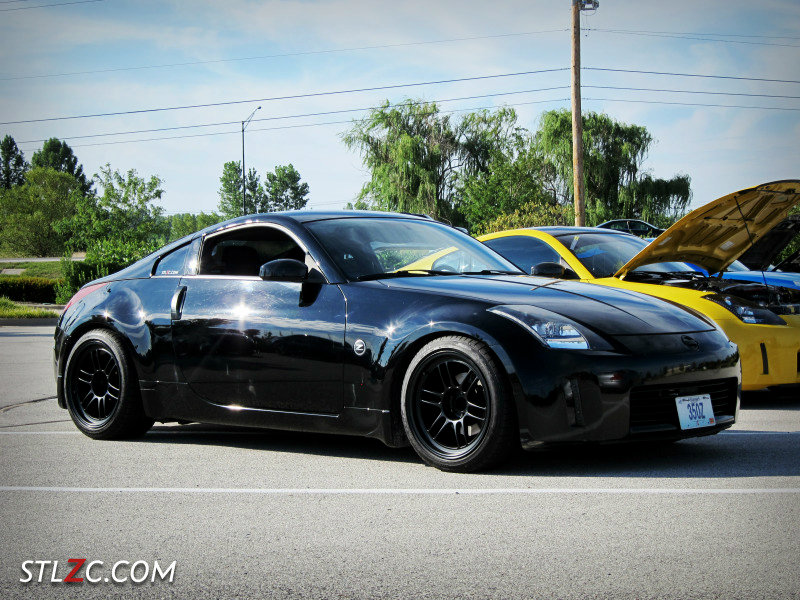
After the tune, a group cruise was in order:
My performance goals for that year were reached, and my new goal for 2013 was to update the exterior. I began with the front bumper, and picked up a Nismo V2 replica:
And I took some time and gave the engine bay the attention it deserves. Cleaned it up and added a red bolt kit:
And here is how she sits now:
The paint on the bumper is still less than 30 days cured, so my next step is to get the emblem on after it has been painted. I will continue my progress for the rest of the month as my parts come in, and hopefully it will continue until completion!
Last edited by Esser; Mar 19, 2013 at 08:06 PM.


Trending Topics


Thanks for the comments 
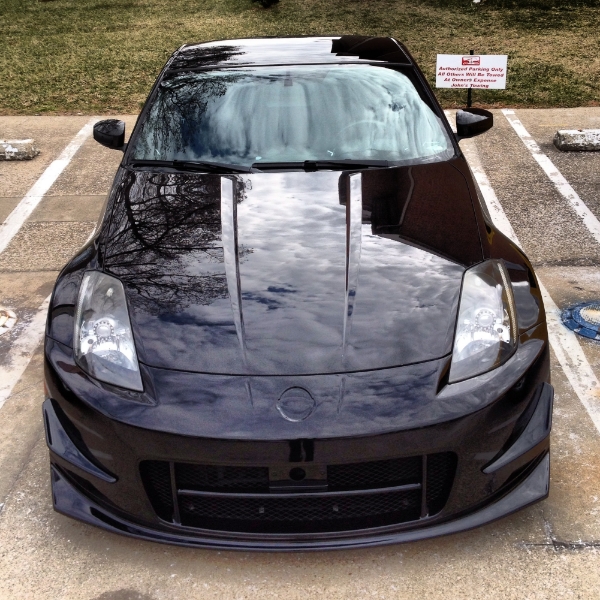
Next I need to get my emblem back on the bumper. I thought about shaving the emblem, but decided against it. I'm just one of those guys that thinks the front end looks a little naked without the hamburger on there. I painted the factory emblem satin black and will put it on this weekend probably:
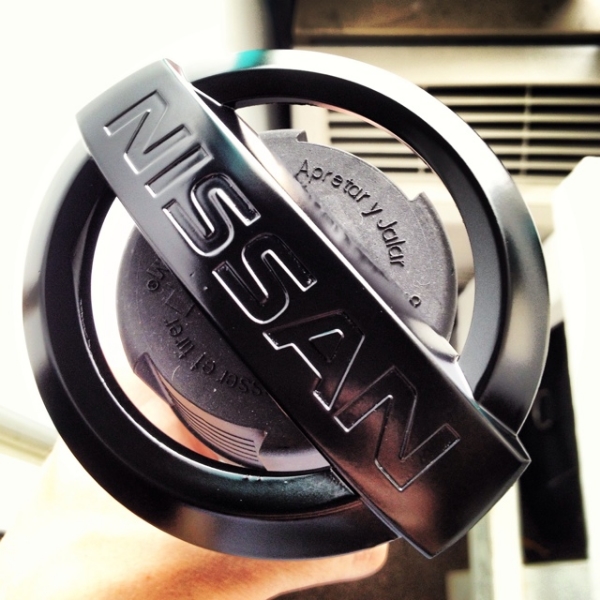
Next I need to get my emblem back on the bumper. I thought about shaving the emblem, but decided against it. I'm just one of those guys that thinks the front end looks a little naked without the hamburger on there. I painted the factory emblem satin black and will put it on this weekend probably:


