
Bullet's Build Thread (Progress and past pics!)


Thread Starter
Registered User
iTrader: (5)
Joined: Feb 2012
Posts: 608
Likes: 0
From: Orange, California
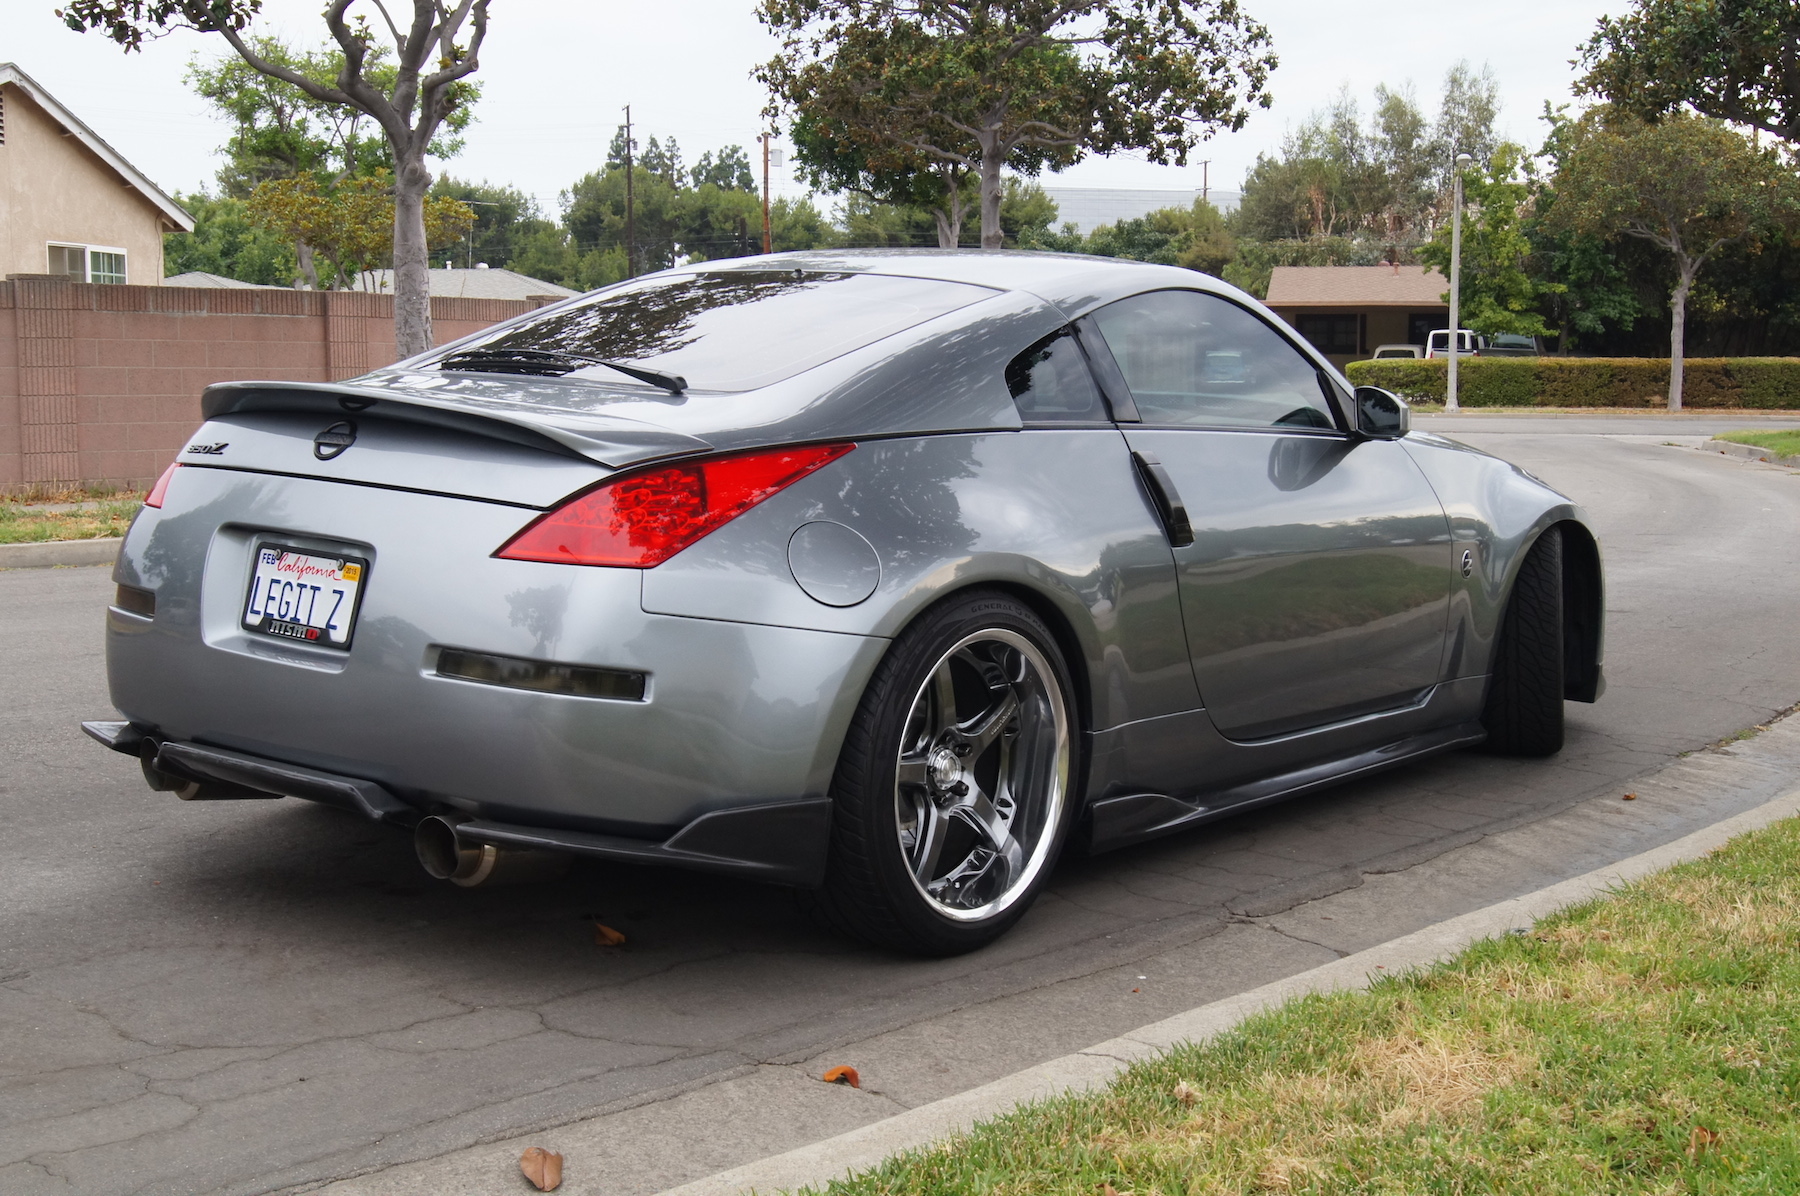
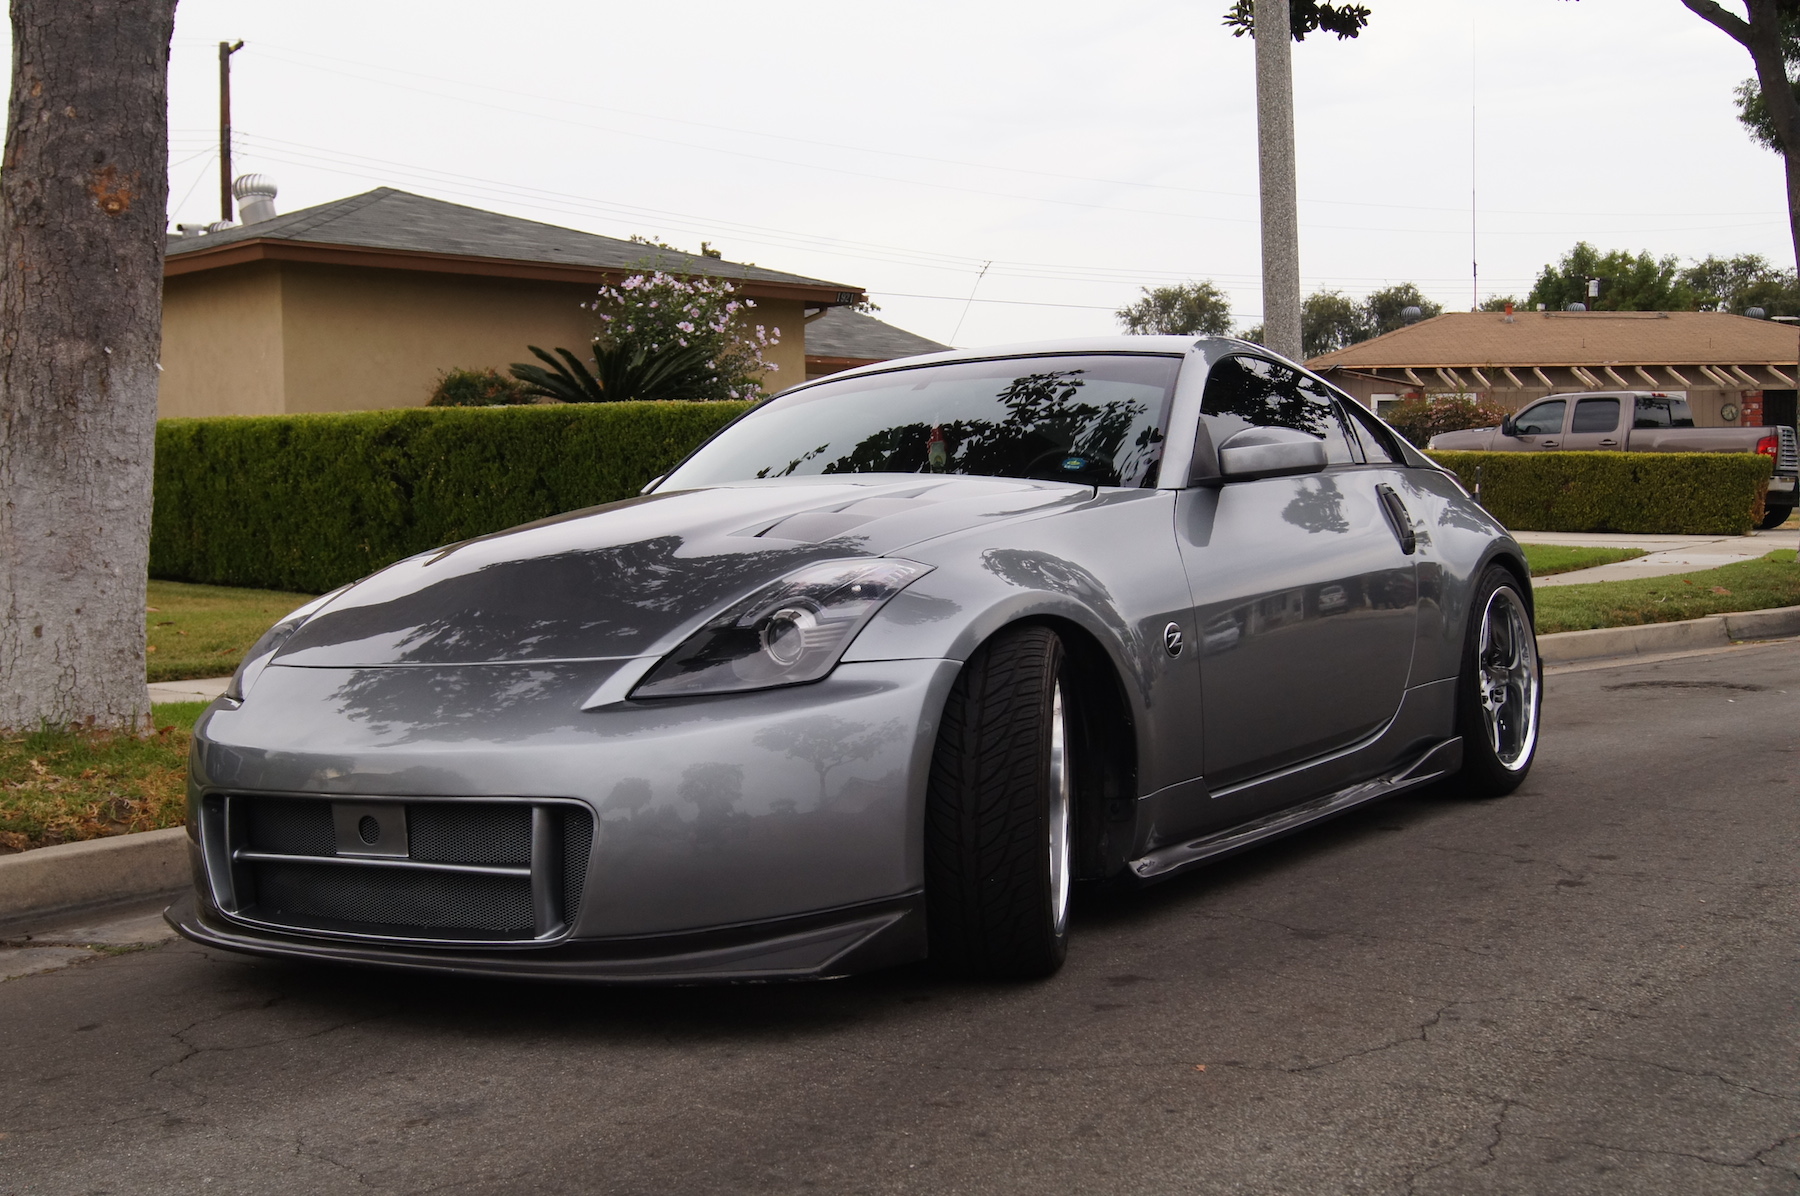
Alright guys, so for those of you who don't know me, I have a 2006 350z. I've loved the Z's ever since they came out in 2003, and I'd always go to car shows to drool over them. I've had my car for 2 years and here's what I've done so far....
Stats when I first got her:
Trim: Enthusiast
Mileage: 60k
BONE STOCK!

And now, 2014
Mileage: 73k
Current Mods:
Interior
Custom Gauge Cluster by Bob @ GaugeCraft
Pioneer Avic z140bh
Leather Seats w/ Red Stitching & Suede Inserts (Interior Innovations)
Leather Shift boot/ebrake boot (Redline Goods)
Burnt Titanium Shift ****
Nismo Floor mats
Exterior
Nismo v2 Front bumper w/ CF Lip (Shine Auto)
Custom Blacked Out Headlights (Yunique L.E.D.)
Tinted rear turn signals
DAMD CF Diffuser
Shorty Antenna
Z1 Aluminum undershroud
Wheels/Suspension
Volk GT-S 19"
Eibach Pro lowering springs
Tokicko HP Blue Shocks
Performance
Cross drilled rotors
Invidia n1 Exhaust
Coming soon
Custom OEM steering wheel
Akebono BBK
After 2 Years....


And the latest look..

Stats when I first got her:
Trim: Enthusiast
Mileage: 60k
BONE STOCK!
And now, 2014
Mileage: 73k
Current Mods:
Interior
Custom Gauge Cluster by Bob @ GaugeCraft
Pioneer Avic z140bh
Leather Seats w/ Red Stitching & Suede Inserts (Interior Innovations)
Leather Shift boot/ebrake boot (Redline Goods)
Burnt Titanium Shift ****
Nismo Floor mats
Exterior
Nismo v2 Front bumper w/ CF Lip (Shine Auto)
Custom Blacked Out Headlights (Yunique L.E.D.)
Tinted rear turn signals
DAMD CF Diffuser
Shorty Antenna
Z1 Aluminum undershroud
Wheels/Suspension
Volk GT-S 19"
Eibach Pro lowering springs
Tokicko HP Blue Shocks
Performance
Cross drilled rotors
Invidia n1 Exhaust
Coming soon
Custom OEM steering wheel
Akebono BBK
After 2 Years....
And the latest look..
Last edited by DrummerGirl; Sep 3, 2014 at 08:11 PM.


Trending Topics
Thread Starter
Registered User
iTrader: (5)
Joined: Feb 2012
Posts: 608
Likes: 0
From: Orange, California

Pulled out the passenger seat so I could work on installing the leather. Went to Autozone, O'reillys, and Ace Hardware but none of them knew what I was talking about when I asked if they had hog ring pliers. I'm going to try Harbor freight tomorrow.

I got my hog ring pliers at harbor freight. However they didn't have hog rings so I had to order those on ebay. Took about a week to show up. Get plenty and also, don't be afraid to use wire ties in place of or along with the hog rings. The wire ties actually allow you a Tighter fit in my opinion. Good luck w the seats.
Thread Starter
Registered User
iTrader: (5)
Joined: Feb 2012
Posts: 608
Likes: 0
From: Orange, California
^ Thanks for the heads up. I heard the hog rings are kind of a pain and that zip ties make it way easier. Would the results be the same or is it going to be obvious if I use zipties? I'm all for making things easier on myself, but not if it's going to sacrifice the quality.


^ Thanks for the heads up. I heard the hog rings are kind of a pain and that zip ties make it way easier. Would the results be the same or is it going to be obvious if I use zipties? I'm all for making things easier on myself, but not if it's going to sacrifice the quality.
Thread Starter
Registered User
iTrader: (5)
Joined: Feb 2012
Posts: 608
Likes: 0
From: Orange, California
The results would be the same. There were some areas on mine where it was difficult to get the hog ring around. I used a zip ties in those areas and was able to get it even tighter than I would have w a hog ring. I have a build thread of when I did my seats last year. I will try to look it up for u later on if u like.

Thread Starter
Registered User
iTrader: (5)
Joined: Feb 2012
Posts: 608
Likes: 0
From: Orange, California
Interior is coming along...I'm loving the double din. It's got all the bells and whistles.
lol btw sorry for the flipped pics. My phone is broken and I took pics with my laptop. I'll take better pics with my phone when it comes in tomorrow.
lol btw sorry for the flipped pics. My phone is broken and I took pics with my laptop. I'll take better pics with my phone when it comes in tomorrow.
Last edited by DrummerGirl; Dec 4, 2013 at 04:44 PM.
Ah cool thanks for the heads up. I found your build thread, I'll definitely be using it for reference. I feel so lazy today but I want to get everything installed lol. I was supposed to do the double din last week but I didn't because my dad got sick and I wanted him to help me. Just decided to do it myself though so I'll have pics of my head unit up soon and hopefully I'll get some energy and work on the seats.
I will give you some advice with the seats - take your time and make sure you do it when you are up to it. There is a lot of tugging and pulling that happens and you need strong hands. A second set of hands comes in very helpful as well.
Also, not sure who you purchased your seats from but I got mine from leather seats dot com. Great product but no installation guide or instructions except for a quick write up on their website which was not very good. I would start with the head rests. Also, do not peel back or cut out the existing head rest material. Instead see if your new covers will fit over the existing. I say this because if they go over they'll give you a really nice tight look. If they don't fit then you can always go back and remove the existing head rest material but try to go over it first. Good luck and post up or PM me with any install questions. I'll help wherever I can.
Last edited by ntwillie1; Dec 4, 2013 at 06:27 PM.
Thread Starter
Registered User
iTrader: (5)
Joined: Feb 2012
Posts: 608
Likes: 0
From: Orange, California
Cool, thanks for the advice. I finally got my phone in so I'll be able to take some better pics tomorrow. Tomorrow I should be able to get out of class pretty early so afterwards I think I might try to tackle the passengers seat. I might just try the zipties since I've been reading up on them and it seems like there's been a lot of good reviews from the people that've used them.
Edit: I tried to slip the headrest covers over the headrests....yeeeaaah there's no freaking way that's going to work, I'll just have to do it the hard way. Here's a semi-decent pic of my interior how it sits. Plans are to repaint the center console, door panel switches, etc so that they look new (I'm going to do it right this time), get a quick release and to friggin CLEAN the interior. It's dirty as hell right now.
Edit: I tried to slip the headrest covers over the headrests....yeeeaaah there's no freaking way that's going to work, I'll just have to do it the hard way. Here's a semi-decent pic of my interior how it sits. Plans are to repaint the center console, door panel switches, etc so that they look new (I'm going to do it right this time), get a quick release and to friggin CLEAN the interior. It's dirty as hell right now.
Last edited by DrummerGirl; Dec 10, 2013 at 08:06 PM.