
DIY total N/A backyard build


 11-23-2008, 07:00 PM
#22

Right now the only results I am looking forward to is not chunks of metal in the oil after the break in oil change. I was happy that all my oil clearances came out acceptable. I will be assembling the short block this week. From there its all rainbows and puppies.

 12-03-2008, 07:33 PM
#24
Bolted in the crank last night
My rod clearances .0018,.0016,.0015,.0017,.0019,.0018
Mains .0013,.0013,.0018,.0016
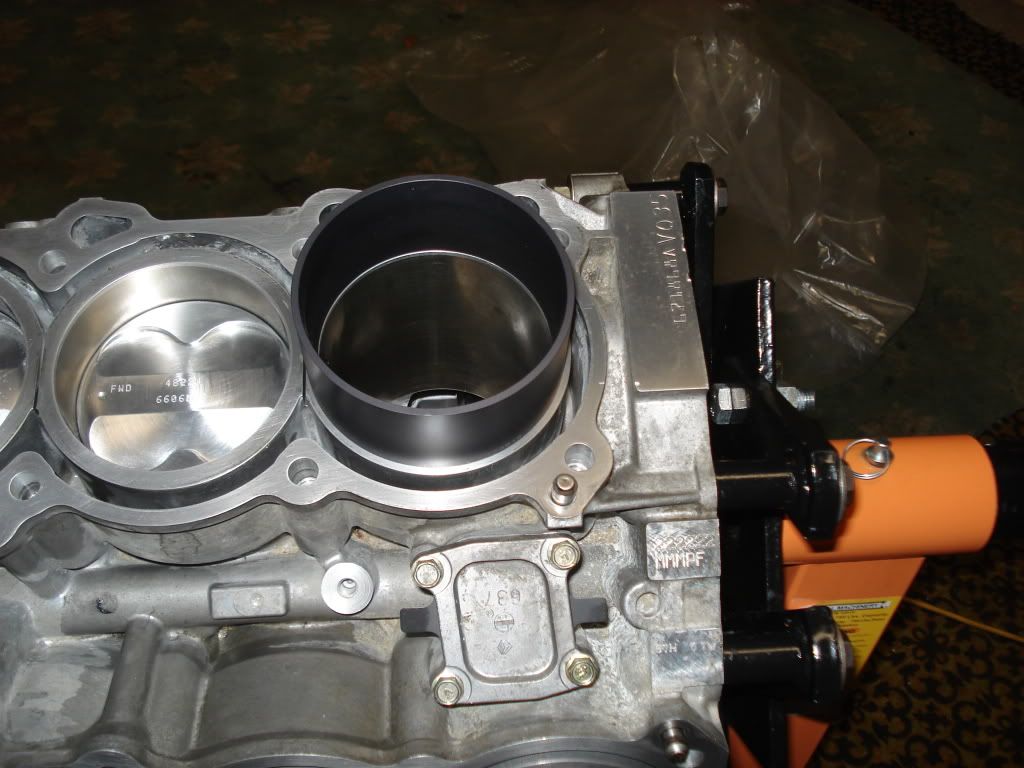
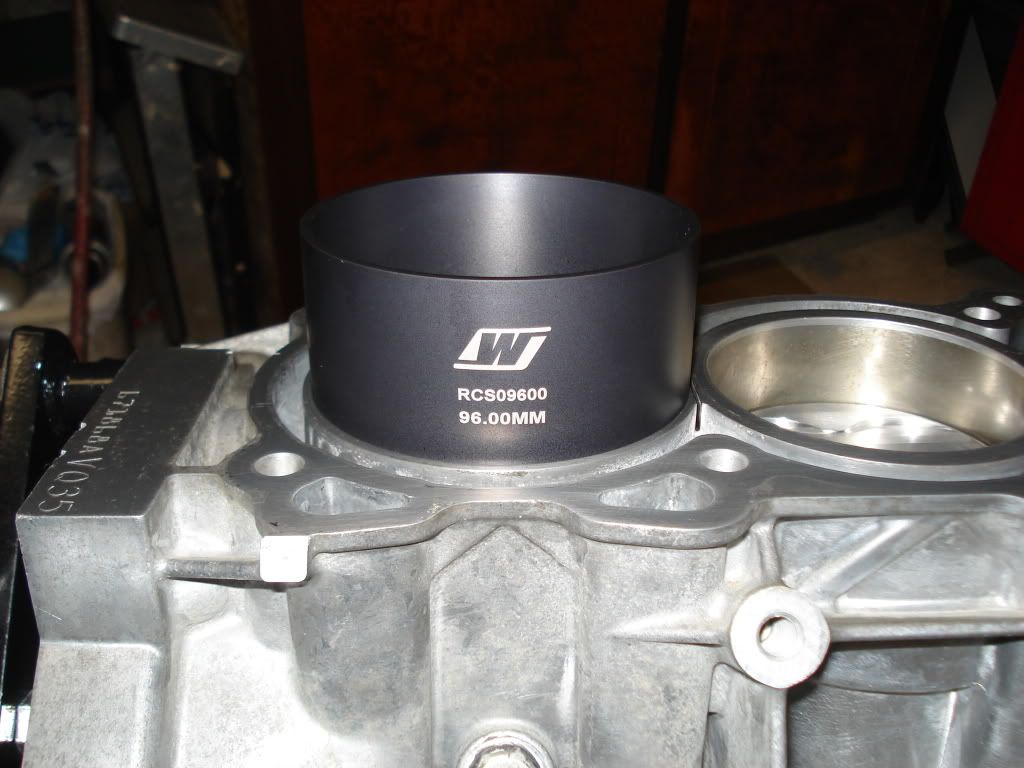
The first 2 main clearances appear tight but coated bearings can be run tight. The coating reduces the clearance about .0005, if run tight the coating will just wear away before the bearing or journals. The measurements were done at the machine shop and then I did it again and again at home to ensure consistency. All measurements were consistent with stock stampings as well. So basically everything was triple checked at a minimum. So tomorrow will be ring filing and fitting. Then my wiseco 96mm tapered ring compressor arrives via fedex next monday and then I can fit the pistons. After watching the cosworth videos on the castrol syntec challenge and they used the tapered ring compressor I just had to have one. Besides I am a tool ***** any excuse I buy a new tool. More pics of my progress tomorrow.
My rod clearances .0018,.0016,.0015,.0017,.0019,.0018
Mains .0013,.0013,.0018,.0016
The first 2 main clearances appear tight but coated bearings can be run tight. The coating reduces the clearance about .0005, if run tight the coating will just wear away before the bearing or journals. The measurements were done at the machine shop and then I did it again and again at home to ensure consistency. All measurements were consistent with stock stampings as well. So basically everything was triple checked at a minimum. So tomorrow will be ring filing and fitting. Then my wiseco 96mm tapered ring compressor arrives via fedex next monday and then I can fit the pistons. After watching the cosworth videos on the castrol syntec challenge and they used the tapered ring compressor I just had to have one. Besides I am a tool ***** any excuse I buy a new tool. More pics of my progress tomorrow.

 12-12-2008, 09:58 PM
#31
Extrude hone is very expensive for just smoothing out casting flaws, I looked into it. I did not take out any engine, I bought this long block on ebay for under $700 shipped. I didn't trust it and tore it down and it turned out to be perfect. I should have put it in the car and built the long block in the car as the one is the car is broke. I will be taking out my engine and doing all labor. Only labor I did not do is machine work. Other than that this is backyard all the way.
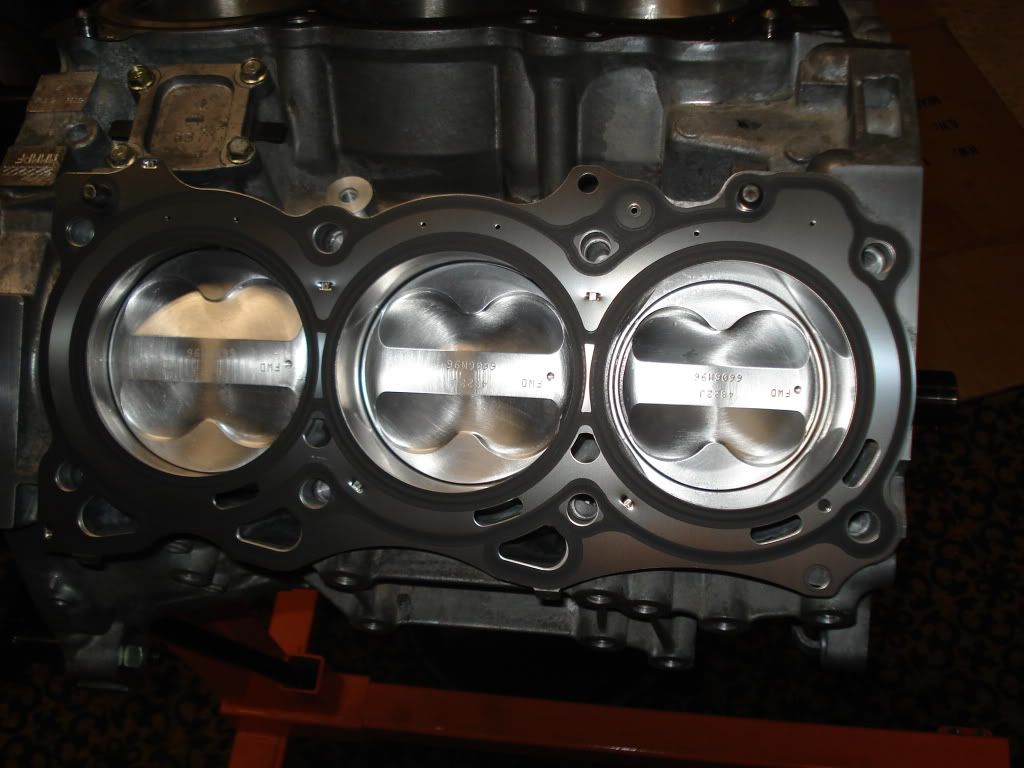
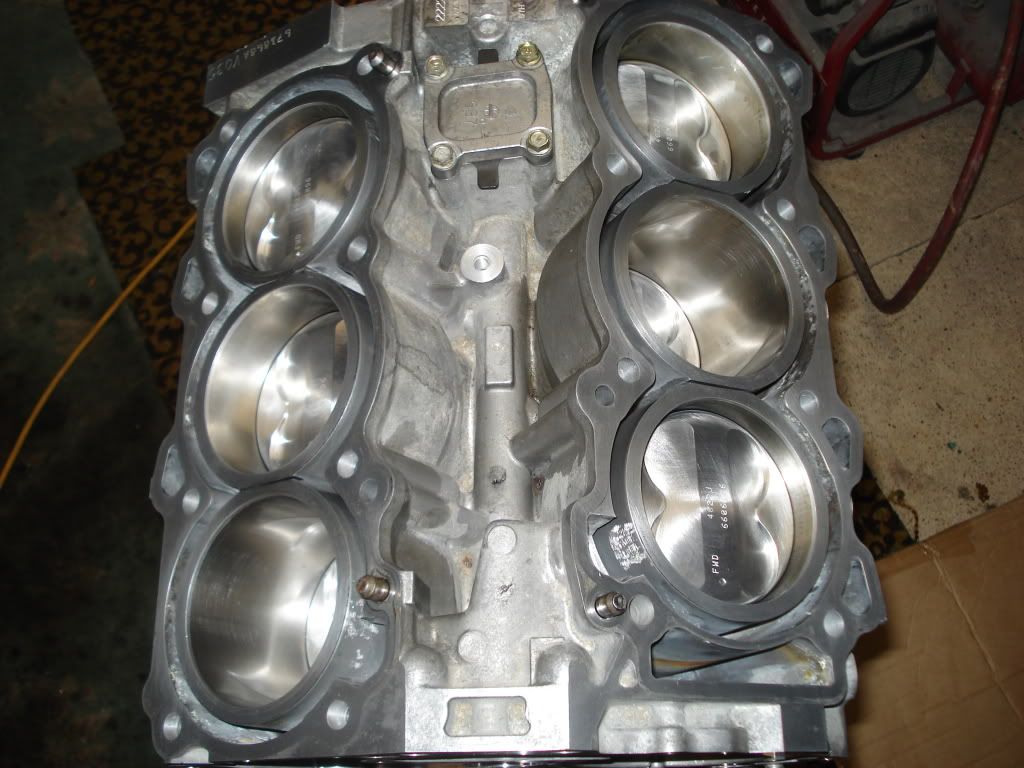
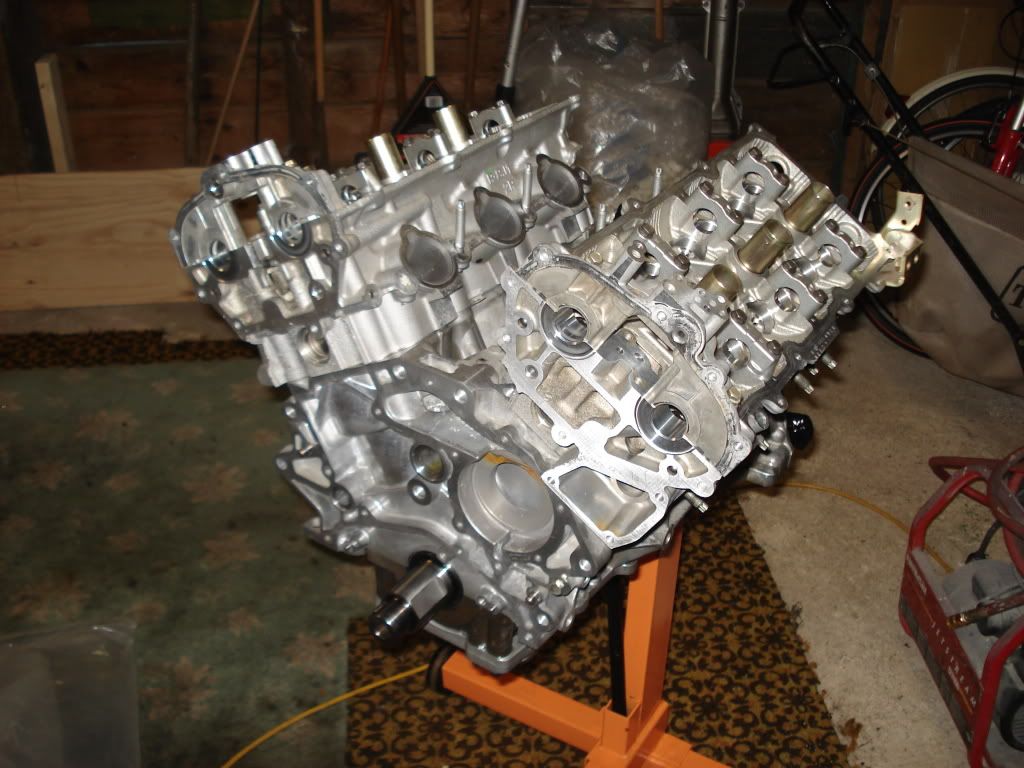
More pics, long block is together. Next is setting up the cams and clearances. The rings gaps were set at .017 for the top ring and .020 for the 2nd ring. I dropped the #5 piston on the floor by accident and got lucky nothing bad happened(a small file and some scotch brite fixed it up). Lesson learned always work over a padded surface when handling expensive engine parts. On to pictures
This baby made it so easy
HR headgasket
Well thats it for this installment.
12-12-2008, 10:59 PM
#32

Thanks for this thread... I've been watching it.
Can you explain a few things. First, can you explain your choice of the HR head gasket -- I assume it's better for some reason?
Second, my engine is at the machinist/builder right now, with wiseco 96mm pistons. Does my builder need that wiseco tool you bought? Or will his normal tools be fine?
Also, somewhat unrelated, but can you (or someone) explain how to prime the VQ35DE oil pump for first-time engine startup? Otherwise, I have read that the engine can run for up to a few minutes (?) with no oil circulating, during that very critical first-few-minutes of the engine's life.
12-12-2008, 11:23 PM
#33
He can use a standard ring compressor. I just wanted to be special. The hr gaskets are explained on the jwt site. I also did it for the bolts. Just overkill. As for priming the engine I dumped a lot of oil down the main galley and hand spun the crank until it was seeping out of the mains and rods. Also before you start the engine pull the fuse for the fuel pump and turn the car over until you have oil pressure. I have read you can pack the pump with assembly lube...I am not there yet but I will do my homework when I get there.
12-12-2008, 11:53 PM
#34
He can use a standard ring compressor. I just wanted to be special. The hr gaskets are explained on the jwt site. I also did it for the bolts. Just overkill. As for priming the engine I dumped a lot of oil down the main galley and hand spun the crank until it was seeping out of the mains and rods. Also before you start the engine pull the fuse for the fuel pump and turn the car over until you have oil pressure. I have read you can pack the pump with assembly lube...I am not there yet but I will do my homework when I get there.
In general, this page had a lot of information on engine building done right: http://www.hastingsmfg.com/ContentDa...nu=AfterMarket
Your engine looks sweet btw!
12-15-2008, 09:24 AM
#35
Registered User

Join Date: Sep 2005
Location: utah
Posts: 84
Likes: 0
Received 0 Likes
on
0 Posts
Its true that extrude honing is relatively expensive. They can generally open up runners quite a bit too, so its more then just smoothing.
I am convinced that the stock intake manifold runners are too narrow around the bends. Most people have heard that you want to keep the speed of gas transversal in the intake runners under mach 0.7. When I do the calculations the stock non revup DE manifold, it reaches that around ~6300 rpms. Which makes sense according to all the dyno's I have seen. There has been totally worked over engines with headwork and cams but with the stock intake manifold. Although they still make significantly more power, it still drops after ~6300 rpms or so. I'm not an expert by any means, but I really think that is the problem. I noticed on the cosworth engine for the castrol syntec challenge that they used their own intake manifold and custom cnc'd the collector that goes from the heads to the intake manfold.
The VQ35HR runners are almost the exact same length as the revup runners, but they have significantly more cross area. So I think even nissan realized and addressed this "problem" (which it really isn't, just the origional non-revup DE's design wasn't emphasized at >6000 rpms)
Anyways, i'm exciting to see your build get running!
12-15-2008, 09:05 PM
#36
I did a lot of clean up work on the lower runners. The area where the runner meets the cylinder head was just horrible. Also if you line up the lower and mid plenums its even worse. There is about an 1/8" of hangover and sadly its supposed to be a straight line. When I put this engine together I will be doing so with the stock nonrev mid plenum, I have a lot of work to do with the revup mid plenum I have but I want to get the car together first. I will do a dyno session with the nonrev and then put on a ported revup and dyno. Then I will choose a tuning path. I have also seen the drop offs over 6200-6300 rpms. When jeremy at performance factory switched from a nonrev to revup midplenum the curve changed drastically around 7k but the midrange power was trashed but I wonder what some cam timing would have done. This all down the road right now its all about getting this build on the road.
12-17-2008, 07:19 PM
#37
Last night I spent a lot of time with the valve clearances and with the valve job and new cams I had to order 6 new lifters(shims, buckets or whatever you want to call them). Nissan calls them lifters so I'll just go with it. Anybody know if you can swap the intake and exhaust lifters, they are the same size and do the same thing.
 12-30-2008, 08:24 PM
#39
Happy new years. Just bolted in the cams after installing all my new lifters. Next step rear timing case cover. I am using toyota rtv because its black like my car. The reddish brown stuff nissan gives you is not as sexy as black.
