VQ35DE Build
#81
Registered User
iTrader: (3)
With similar mods (same cams) I was getting the same error, but I know where mine was coming from... In reassembly, I scored/elongated the cam gear dowel when torqueing it down. So I had a fair amount of "advancement play" on the one bank. Hopefully you didn't do the same thing. You can tell without removing the cam gear by loosening it up, to snug, and then twisting the cam gear by hand... if there is no play...your good. You should be able to get access through the gear port on the cover.
Hell, just about every engine I have worked on had a cam dowel at least 1/4".
Since the cams cost over $1k I will have to weld the hole shut, and re-drill. {as I can't afford to just buy another cam]
I'm going to try to make a jig to drill the hole by using the end of an old cam I have laying around.
If you guys want I will take pics of how I do it.
#82
well lucky you guys know what the problem was..my cam gear was fine.. and the main and secondary timing chains were on correctly.. soo.. i did the math and put bank one back together one tooth retarted, according to my maths that should be about seven degrees. Since it only takes about 4 hours from start to finish for just disassembling the front timing cover, and were allowed to be three teeth off before we start breaking ****. (yes i spun the motor by hand to make sure it had clearance and compression after retarding bank 1) Wish me luck, ill be starting it on Tuesday and see what cipher has to say about it.
#83
Registered User
iTrader: (3)
Here is what I finally got done today, and that was to fix the stupid cam dowel hole in the $$$$$$$$$$$$$ cam.
First I would like to say again f$ck Nissan for making the damned cam dowel so frigging small. I really don't see the cost benefit to doing something like this.
Here is the jig I made from one of my stock VQ35 cams. I cut the end off the old stock cam, then opened up the middle hole so that it would go over the camshaft i was working on. [note: If you could get a machine shop to make this hole just barely fit over the snout of the camshaft it would be easier as it would align everything better, than just using a dowel made from a drill bit]
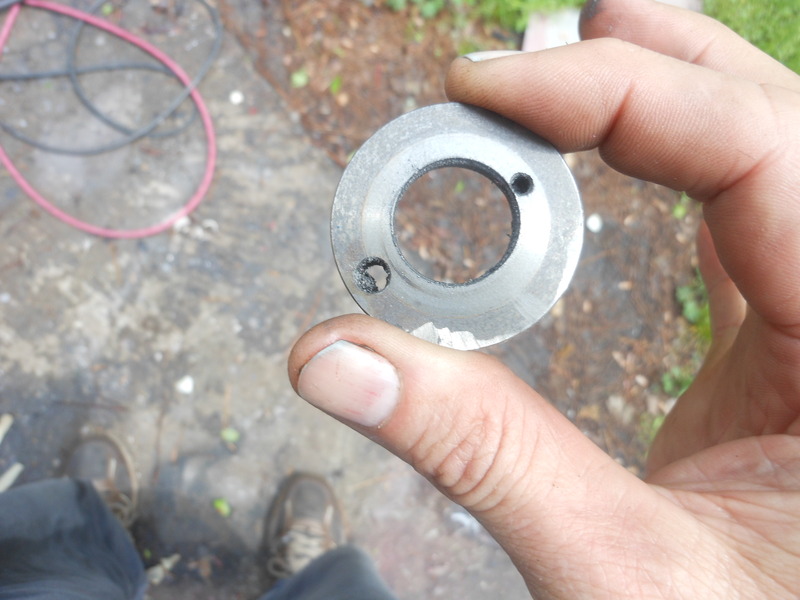
Here is the messed up cam with the dowel hole welded shut.

Here is the finished cam with the hole back in the right spot.
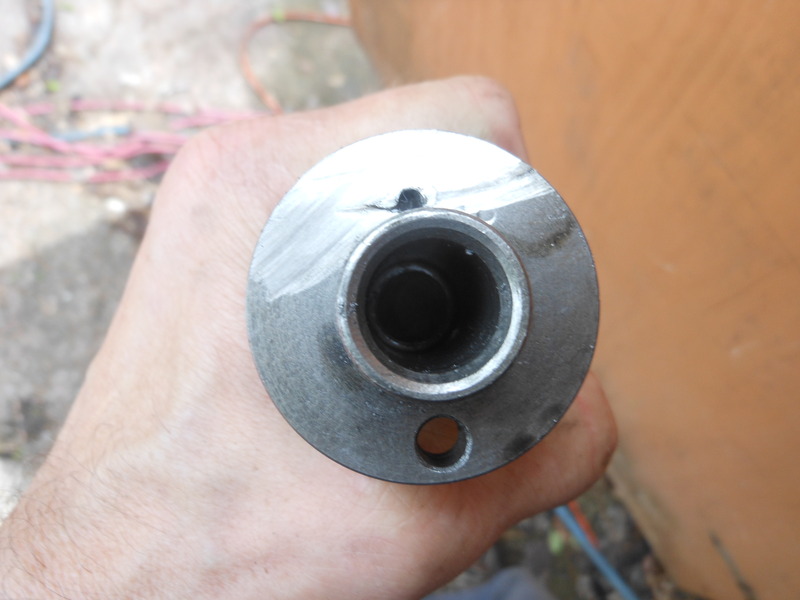
In the last pic you can see what looks like a crack in the new hole. It just where I didn't get the cam welded all the way as I had to be careful not to get weld on the snout.
I used an old drill bit to drive through the big hole in the bottom of the cam on both the jig, and the cam.
Then clamped the jig into a vice, and drilled the small hole all the way though.
First I would like to say again f$ck Nissan for making the damned cam dowel so frigging small. I really don't see the cost benefit to doing something like this.
Here is the jig I made from one of my stock VQ35 cams. I cut the end off the old stock cam, then opened up the middle hole so that it would go over the camshaft i was working on. [note: If you could get a machine shop to make this hole just barely fit over the snout of the camshaft it would be easier as it would align everything better, than just using a dowel made from a drill bit]

Here is the messed up cam with the dowel hole welded shut.

Here is the finished cam with the hole back in the right spot.

In the last pic you can see what looks like a crack in the new hole. It just where I didn't get the cam welded all the way as I had to be careful not to get weld on the snout.
I used an old drill bit to drive through the big hole in the bottom of the cam on both the jig, and the cam.
Then clamped the jig into a vice, and drilled the small hole all the way though.
#84
350Z-holic

iTrader: (13)
^Hero!
#85
Here is what I finally got done today, and that was to fix the stupid cam dowel hole in the $$$$$$$$$$$$$ cam.
First I would like to say again f$ck Nissan for making the damned cam dowel so frigging small. I really don't see the cost benefit to doing something like this.
Here is the jig I made from one of my stock VQ35 cams. I cut the end off the old stock cam, then opened up the middle hole so that it would go over the camshaft i was working on. [note: If you could get a machine shop to make this hole just barely fit over the snout of the camshaft it would be easier as it would align everything better, than just using a dowel made from a drill bit]
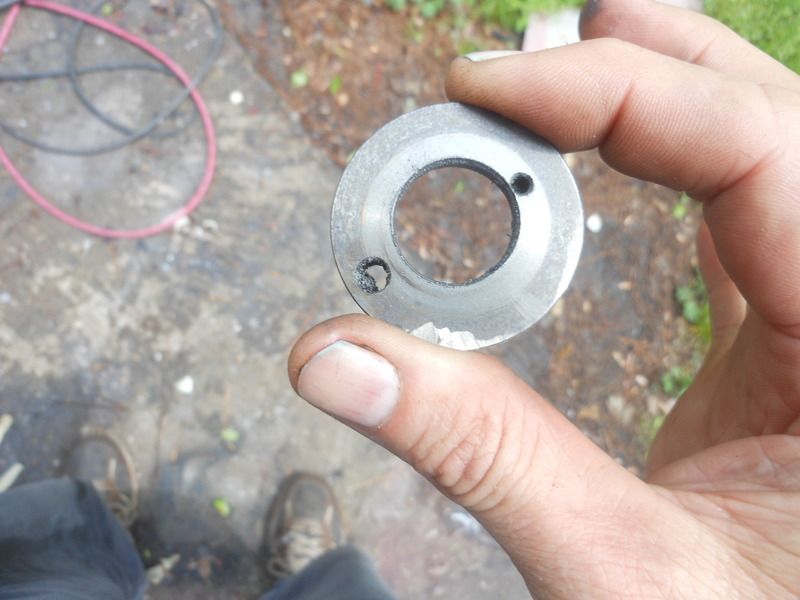
Here is the messed up cam with the dowel hole welded shut.

Here is the finished cam with the hole back in the right spot.
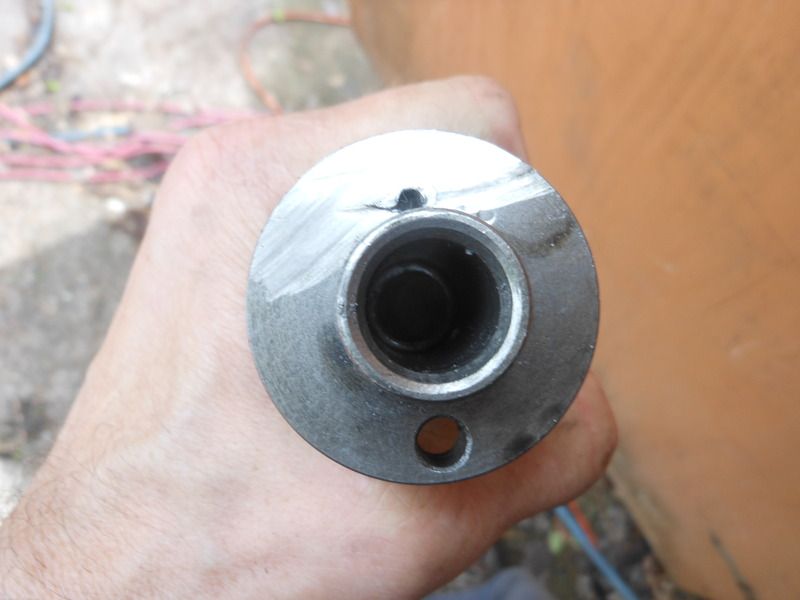
In the last pic you can see what looks like a crack in the new hole. It just where I didn't get the cam welded all the way as I had to be careful not to get weld on the snout.
I used an old drill bit to drive through the big hole in the bottom of the cam on both the jig, and the cam.
Then clamped the jig into a vice, and drilled the small hole all the way though.
First I would like to say again f$ck Nissan for making the damned cam dowel so frigging small. I really don't see the cost benefit to doing something like this.
Here is the jig I made from one of my stock VQ35 cams. I cut the end off the old stock cam, then opened up the middle hole so that it would go over the camshaft i was working on. [note: If you could get a machine shop to make this hole just barely fit over the snout of the camshaft it would be easier as it would align everything better, than just using a dowel made from a drill bit]

Here is the messed up cam with the dowel hole welded shut.

Here is the finished cam with the hole back in the right spot.

In the last pic you can see what looks like a crack in the new hole. It just where I didn't get the cam welded all the way as I had to be careful not to get weld on the snout.
I used an old drill bit to drive through the big hole in the bottom of the cam on both the jig, and the cam.
Then clamped the jig into a vice, and drilled the small hole all the way though.
#86
Registered User
iTrader: (3)
Thanks guys.
If anyone need to borrow the jig, send me a PM. I will take a $20 deposit, refundable on return.
Its better than having to buy another $$$$ cam.
ALSO, I found out today how getting the hole wallowed out can happen.
The way I setup the the timing originally was to have both the intake cam gear, and the exh cam gear left loose with the chain on them. Then I used the cam bolts to pull the gears onto the cam.
This has work for over 30 years doing it that way on many, many engines.
But, for some reason the metal on the intake cam is soft, and if you don't have the tiny, tiny dowel in the tiny, tiny hole when you tighten down the gear the dowel will simply bore into the cam face.
This is why when it happens you don't know its happened as the cam gear isn't cocked as, like I said, the dowel has just made a new hole.
Today, I put the intake cam gear on the cam to make sure the dowel hole was aligned. I tightened down the intake gear with the intake cam already installed on the head.
I then tried to put the exh gear, and chain on.................NOPE, it wouldn't work.
There was no way to get the exh gear, and chain on with the big intake gear already tightened down, and the exh cam already installed in the head.
So I took the exh cam [ec from here on out] main caps off along with the tensioner.
Then I put the ec gear on the cam with the chain, as I was able to move the cam so that the chain would go over both gears, then I was able to put it all back in without disturbing the intake cam gear which was already tightened.
#87
Yeah i just put the intake and exhaust sprockets on at the exact same time withthe tensioner pulled back and the cams in the right spot...My cam faces ended up being fine, what was wrong was that my intake sprocket had broken. The dowel pin in the back of the intake cam had somehow gotten messed up so it would just fall out if the sprocket wasnt bolted down. Replaced the sprocket and all was good. Only problem i have now is a rattle at startup.. i have no clue; i replaced both timing guides. Only other idea i have would be the main tensioner going bad. Or i read about a TSB about first gen intake sprockets and this being a problem. I dont mind the rattle at startup as long as its a documented problem and its not going to hurt anything. Im going to replace the main tensioner for peace of mind and then i should be off to the dyno!
Anybody on here run the Cosworth intake on an NA motor and what were the gains if so?
Anybody on here run the Cosworth intake on an NA motor and what were the gains if so?
#88
Build is on hold for now, work is currently in the way. I also got sidetracked by the suspension that was in need of some TLC. Replaced almost every bushing with Poly in front and rear, also replaced ball joints, tie rod inner/outers and upper control arms. Rear is getting the same treatment with poly bushings and replacing the upper arms. I also added Eibach sways front and rear w/new links, Koni yellows on the way with some COBB tuning springs if I can manage to find a set laying around. Also got new rotors and stop-tech pads because I wont be using carbotechs till she starts seeing the track.
Since my last update, ive been sending logs to Uprev for tuning and its currently running great (AFR's are in healthy ranges) The reason I haven't been to a dyno yet is 1) Im an american in Italy and the only tuner is two hours away, and we speak completley different languages and
2)I am working on a 4" intake/maf combo that is known to make power (if you dont believe me go look for the thread)
Pop-charger- 6"to4" V-stack - 4"MAF tube- 4" silicon piping- 4" 45* to 3" inch reducer. (found all this stuff for around 100 bucks)
I am also working on getting an upper plenum fabricated to fix the volume issues. Planning on having the neck cut off, and replaced with either 3.75 or 3.5 ID piping, along with cutting the posts on the inside of the plenum. Also getting the stock TB bored to 72
After this I WILL be getting a dyno tune if im still in this country ill figure it out OR i will be going to CIN because theyre about an hour away from my house in the states.
Last edited by thekyledeg; 08-09-2015 at 12:37 PM.
#89
Retired Admin
iTrader: (95)
Pop-charger- 6"to4" V-stack - 4"MAF tube- 4" silicon piping- 4" 45* to 3" inch reducer. (found all this stuff for around 100 bucks)
I am also working on getting an upper plenum fabricated to fix the volume issues. Planning on having the neck cut off, and replaced with either 3.75 or 3.5 ID piping, along with cutting the posts on the inside of the plenum. Also getting the stock TB bored to 72
I am also working on getting an upper plenum fabricated to fix the volume issues. Planning on having the neck cut off, and replaced with either 3.75 or 3.5 ID piping, along with cutting the posts on the inside of the plenum. Also getting the stock TB bored to 72
Also, who's doing the work on the fabrication/modification?
The following users liked this post:
thekyledeg (09-27-2015)
#90
That is the only part that is hard to find. I just got all the parts in for the 4" intake and it all fits fine.
after the 3" to 4" 45* adapter all you need to do is get a: 4" aluminum coupler>foot long section of 4" silicon tube>4" maf tube> then a velocity stack> and a 6" filter (I used mine off my pop-charger)
for all of the parts except for the 3" to 4" adaptor I found all the parts on amazon for cheap. Spectre is who makes the 4" maf tube that i used.
For the fabrication im using a company that my friends family runs, is called SkinNBones located in North Carolina
www.skinandbonesinc.com
As for the build, she is still running strong, just installed some KONIs and ARK springs so the suspension is completely re-vamped along with poly bushings. Im still on the fence on getting my car tuned here because the car will be returning to the states in april of 2016 and CIN is right down the road from me, so I dont know if i can trust the the tuners here. She spins tires through second and it runs smoothly for a daily cammed car. No stalling issues, the hardest part to drive smooth is the six puck.
The following users liked this post:
3hree5ive0ero (11-04-2015)
#91
Made some progress with the Z lately. Added an oil cooler, 19 row, along with an oil pan spacer. Also in the mail are some Auto-Meter oil and water temp guages, need the vitals. New tires are up next, going with RS3's. I really need to find a tuner here im interested in the power im making and another tune for peace of mind.
I have also added a Rev-up lower (ported) and i cut the posts off of the upper intake manifold. My fabricator is also going to cut the neck off of an upper intake and weld a 3.25in section with a better bend on it. Along with the 4 inch intake, im hoping there is some decent power to be made.
I have also added a Rev-up lower (ported) and i cut the posts off of the upper intake manifold. My fabricator is also going to cut the neck off of an upper intake and weld a 3.25in section with a better bend on it. Along with the 4 inch intake, im hoping there is some decent power to be made.
#92
350Z-holic

iTrader: (13)
^ def post up some pictures of the intake mod...you should dyno before and after the neck modification -
#93
I will, I should be splitting it apart here in a couple weeks to get a new lower intake gasket on and ill be sure to take pictures. I hope i will be able to dyno before hand. The shitty part here is that i dont have a dyno readily available. As for the neck mod, theres another member on here who did it and he made another 10hp and went a full poin lean on AFR, room for some more power with a new tune it seems
#94
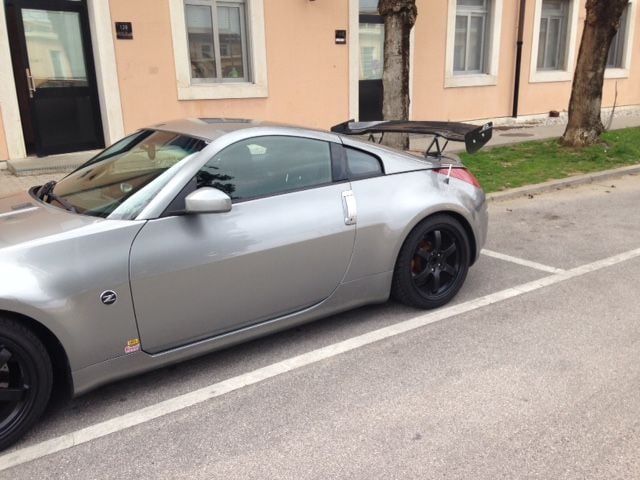
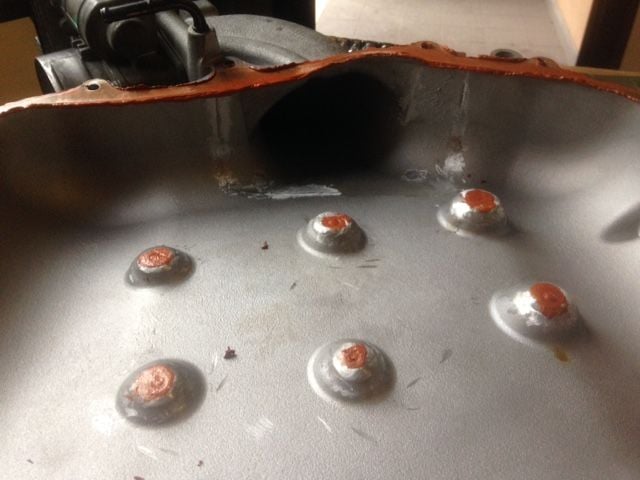
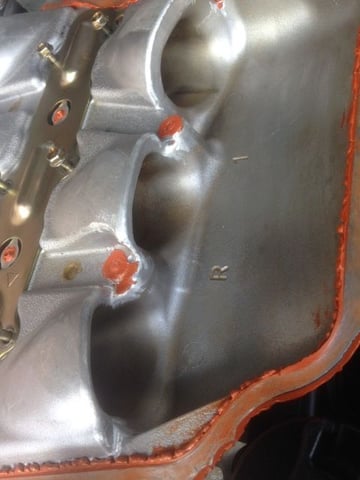
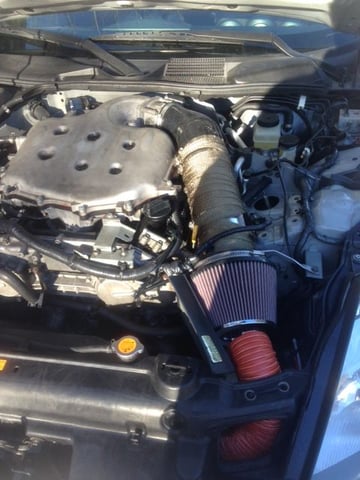
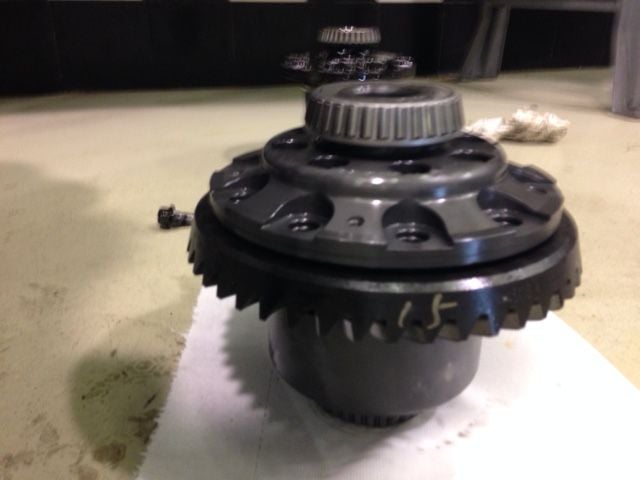
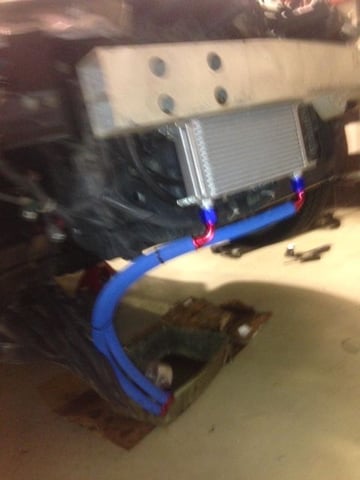
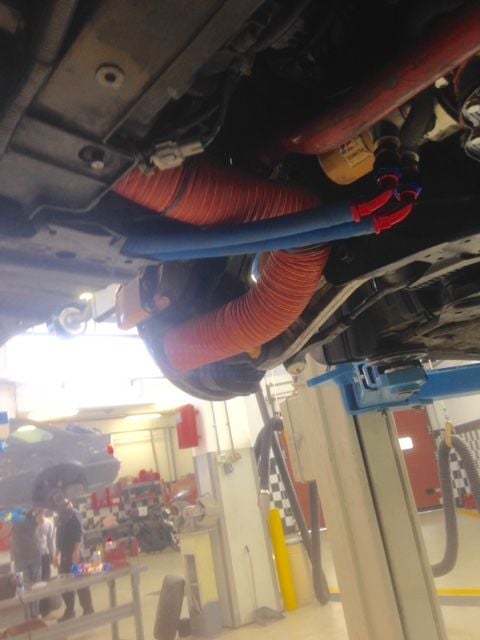
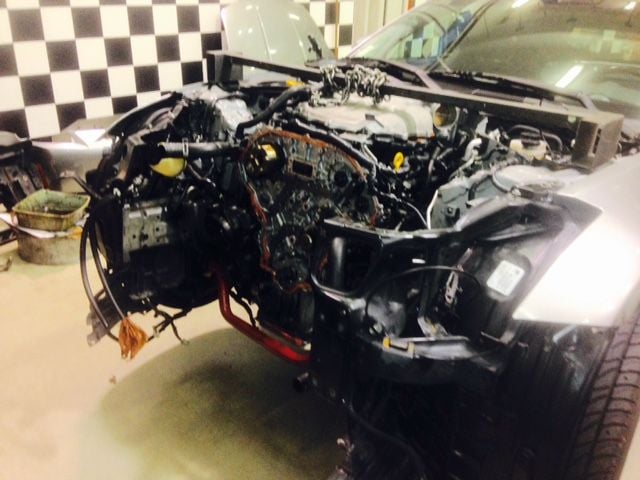
Pictures of the intake work (excuse the RTV, just wanted to make sure the holes werent gonna leak. Ill be getting the neck cut off and replaced with a wider pipe with less angle next few months most likely. Other pictures include the oil cooler, suspension bits, and brake cooling ducts.Once the manifold is completely done, and my car is back in the states, should be by mid may ill be heading to CIN for a final tune. Also I ended up breaking my OEM oil pump, Now running a REV-UP pump... holy oil pressure batman. Had to go to 0w-30 for daily driving and the oil pressure still will be around 30 psi idle (1krpm) when hot. Sorry for the gaps in updates, work has been busy.
#95
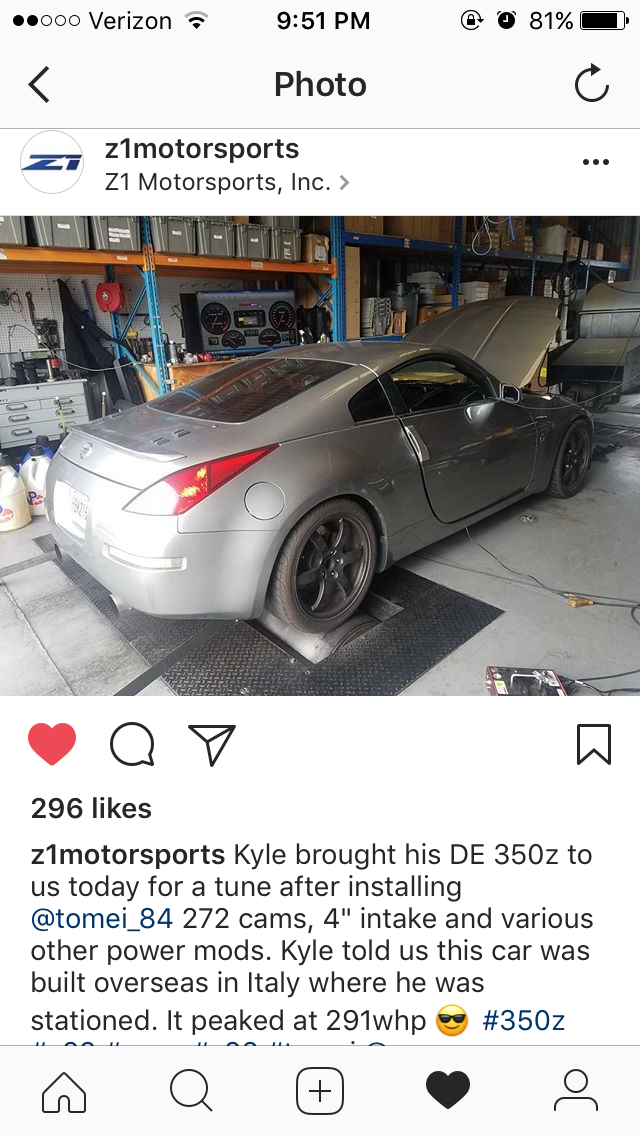
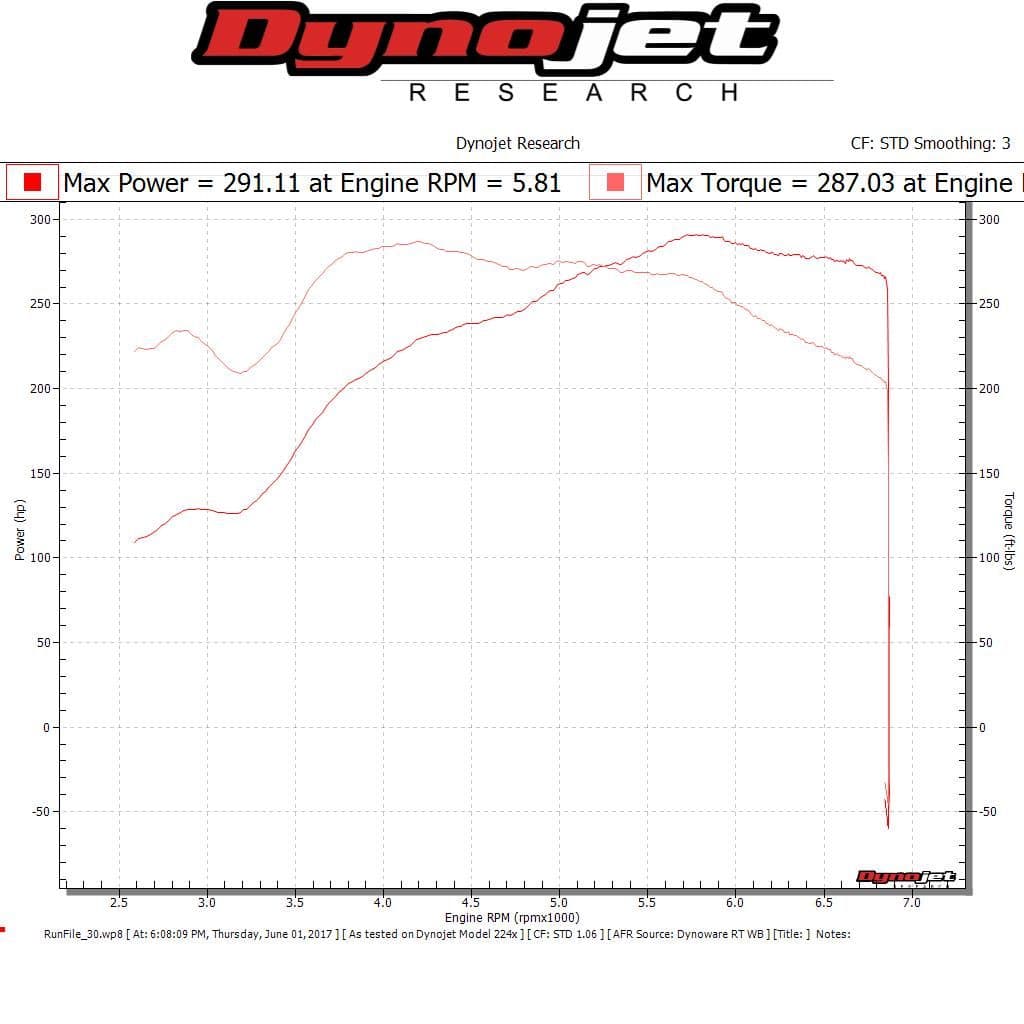
Well as you can see, 291 on the stock bottom end final pull on a heat soaked motor . I am pleased, the dyno was not reading the torque so they are going to set me up for another session free of charge, awesome on Z1 motorsports who did the tuning. They were awesome. Hoping to hit 300 with an 09 max throttle body then hoping to cut open the upper plenum and put a bigger pipe in the bend. Almost at 90% injector duty cycle so those may need attention soon.
#96
Very nice. Is this still with the eBay headers? Adam says it quite a bit, there is a direct correlation between cams and headers..i wonder how a quality header would compare. Regardless tho 290whp must be fun 

#97
This is with the D.C. Headers. The eBay ones cracked. Contrary to popular beliefs they crack when you bottom them out on stuff. Sunday should be the fab day for the upper plenum and maxima throttle body... been thinking of going with GTR injectors and an E85 tune. Anyone with expirience know if the stock fuel pump will be able to support me on 85?
#99
350Z-holic

iTrader: (13)
Great numbers and interested to see how your intake comes together!


