
Wrapping things up...

Thread Starter
Registered User
iTrader: (8)
Joined: Jul 2004
Posts: 2,386
Likes: 0
From: Bellevue, Ne
Well got some rough news today and was figitty. I decided to give it that little extra touch for that finished look.
I sprayed the parts and peices with an epoxy primer and tacked a coat of ultra flat black on the washer pumps to make them a uniform color and they wont stand out where ever I mount them at. I also went to the local hydrolic store and bought 2 X 1 1/4" hydrolic line fastners (1 1/2" was too big)that will clamp down arround the pumps and hold them securely with out any other problems.
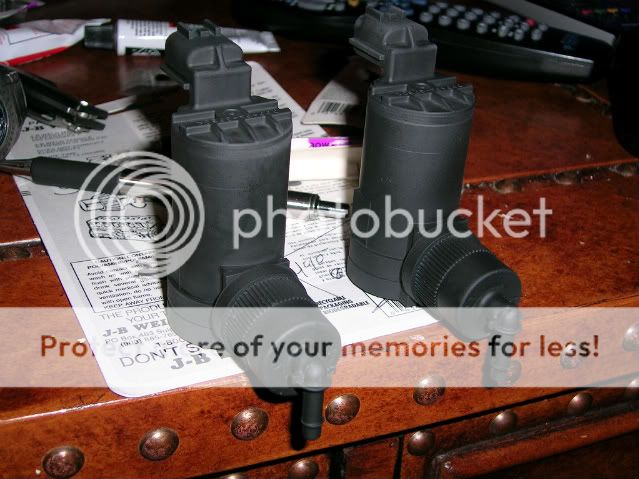
Not too shure where Im going to mount these at. Im thinking out side the engine bay some where. Maybe taking the nose off and putting them up front. I have enought line, I just dont want to make it too far because that will over work the pumps.
I also ordered a Moroso battery Isolator, so when Im on those long trips I just pop the hood and undo the battery so all the little acceseries dont drain the battery like they have in the past. I have the local auto parts store looking into it for me.
I sprayed the parts and peices with an epoxy primer and tacked a coat of ultra flat black on the washer pumps to make them a uniform color and they wont stand out where ever I mount them at. I also went to the local hydrolic store and bought 2 X 1 1/4" hydrolic line fastners (1 1/2" was too big)that will clamp down arround the pumps and hold them securely with out any other problems.
Not too shure where Im going to mount these at. Im thinking out side the engine bay some where. Maybe taking the nose off and putting them up front. I have enought line, I just dont want to make it too far because that will over work the pumps.
I also ordered a Moroso battery Isolator, so when Im on those long trips I just pop the hood and undo the battery so all the little acceseries dont drain the battery like they have in the past. I have the local auto parts store looking into it for me.

Thread Starter
Registered User
iTrader: (8)
Joined: Jul 2004
Posts: 2,386
Likes: 0
From: Bellevue, Ne
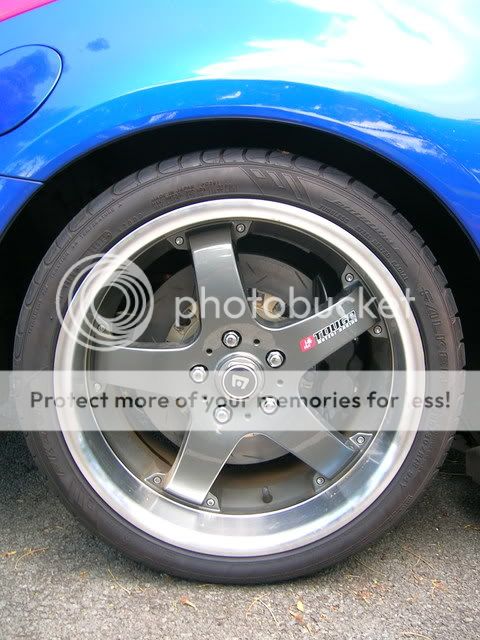
With a little fan fair and head aches the brakes are in. The company misslabled the rear calipers left to right, right to left and gave me 2 left front calipers. That was a pain in the dick to figure out why the brakes were not bleeding down. Once the rears were flipped and the front right turned upside down to put the bleed screw on top, it took only half an hour to bleed everthing out and get the wheels on.
One bad thing though. Well not exactly bad, the front brakes fill up the WHOLE AREA inside the wheel. The calipers have only about a 5 mm clearance from the top of the caliper to the wheel surface. I had to pull off the wheel weights and I need to get the right angle valve stems because the current stems rub on the calipers (as stated in my "brake bleeding woes" post).
So with out further adue.....
BEFORE:
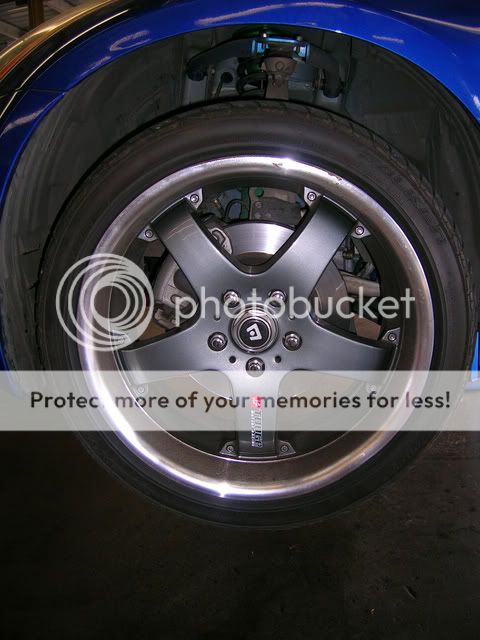
AFTER:
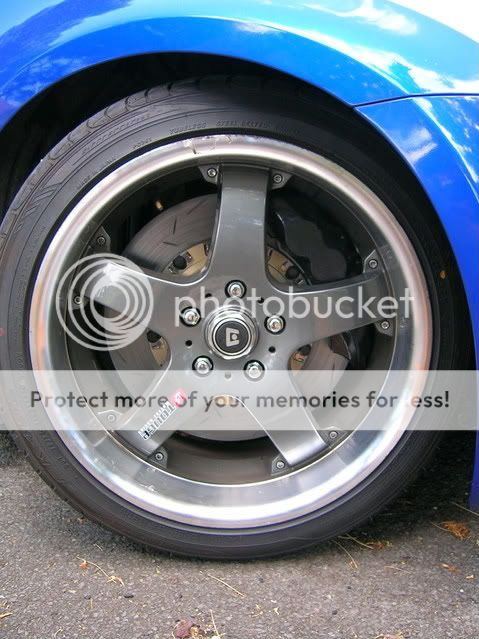
BEFORE:
AFTER:
DAMIT!!! I JUST SAW THIS....
THEY LABLED THE ROTORS WRONG AS WELL!!!! The hatching on the rotors is suposed to be pointing forward not back..... SON OF A BIOTCH!!!! Well that is the last time I trust stickers on parts and working on a car with a bad headache. The attention to detail wasnt there yesterday and today. Well poop. Guess I need to switch the rotors as well. I'll do that tomorrow if I have time.
One bad thing though. Well not exactly bad, the front brakes fill up the WHOLE AREA inside the wheel. The calipers have only about a 5 mm clearance from the top of the caliper to the wheel surface. I had to pull off the wheel weights and I need to get the right angle valve stems because the current stems rub on the calipers (as stated in my "brake bleeding woes" post).
So with out further adue.....
BEFORE:
AFTER:
BEFORE:
AFTER:
DAMIT!!! I JUST SAW THIS....
THEY LABLED THE ROTORS WRONG AS WELL!!!! The hatching on the rotors is suposed to be pointing forward not back..... SON OF A BIOTCH!!!! Well that is the last time I trust stickers on parts and working on a car with a bad headache. The attention to detail wasnt there yesterday and today. Well poop. Guess I need to switch the rotors as well. I'll do that tomorrow if I have time.

Thread Starter
Registered User
iTrader: (8)
Joined: Jul 2004
Posts: 2,386
Likes: 0
From: Bellevue, Ne
Yeah I called arround and checked the rotors, they are definately swapped. No biggie though, it takes about 15 to 20 minutes to switch the rotors to the oposite sides. 4 bolt total (not including the lugs).
With the newer brackets the bolts are super easy to get to and remove the caliper. It will take longer getting the wheels off and on and retourqed than it is to swap the rotors. I can do that easy on my lunch brake. Hell I even know the tools by heart now after this weekend.
13/16 thin wall for the lugs
10mm hex socket for caliper bolts
1/2 to 3/8 adapter (for hex and the thin wall)
Impact gun
Braker bar
Wratchet
Torque wrench
Seth, by the way I need to get in touch with you guys tomorrow. Some things came up and I didnt leave Saturday and wanted to see about the radio.
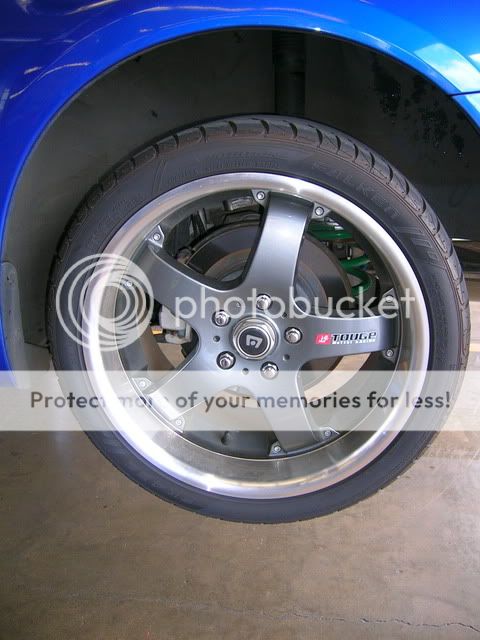
On a side not, I called 5 diffrent wheel stores and they didnt have 90 degree valve stems, so I went with flush mounts. Definately interesting look, I'll get pictures soon.
With the newer brackets the bolts are super easy to get to and remove the caliper. It will take longer getting the wheels off and on and retourqed than it is to swap the rotors. I can do that easy on my lunch brake. Hell I even know the tools by heart now after this weekend.
13/16 thin wall for the lugs
10mm hex socket for caliper bolts
1/2 to 3/8 adapter (for hex and the thin wall)
Impact gun
Braker bar
Wratchet
Torque wrench
Seth, by the way I need to get in touch with you guys tomorrow. Some things came up and I didnt leave Saturday and wanted to see about the radio.
On a side not, I called 5 diffrent wheel stores and they didnt have 90 degree valve stems, so I went with flush mounts. Definately interesting look, I'll get pictures soon.

Thread Starter
Registered User
iTrader: (8)
Joined: Jul 2004
Posts: 2,386
Likes: 0
From: Bellevue, Ne
Nah these do me fine. It will be a LONG while before I get wheels. These 18's are fine by me. Will tear them up any ways with the driving I have planned. I could use wider set though.

Thread Starter
Registered User
iTrader: (8)
Joined: Jul 2004
Posts: 2,386
Likes: 0
From: Bellevue, Ne
cool cool,it will give me a chance to work on my photog skillz. I finaly got CS3 on my faster computer, what took 10 minutes to do on my laptop takes only seconds on my desktop.
Dual 2.7Ghz processor, 4Gb of RAM, dual Crossfirer 1800 video cards, 750GB of storage, running a fairly decent 19" organic LCD monitor.
Dual 2.7Ghz processor, 4Gb of RAM, dual Crossfirer 1800 video cards, 750GB of storage, running a fairly decent 19" organic LCD monitor.

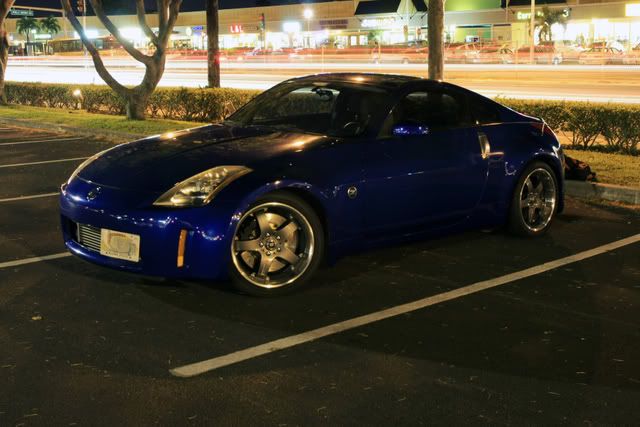
Final??? I dont think you have it in you. Long way from final until it lifts off and flys. Sleeper? uh...with that big azz intercooler in your rear mirror.....not! Car looks good man! not gonna say keep up the work cause you always do!!
Originally Posted by punish_her
I guess you can call this the final product. Can you say sleeper?
Last edited by SILKZ03; Jul 12, 2008 at 12:26 PM.
Thread Starter
Registered User
iTrader: (8)
Joined: Jul 2004
Posts: 2,386
Likes: 0
From: Bellevue, Ne
Alright...
Finaly flipped the rotors; which it took longer to put the wheels on than it did to swap the rotors.
I hooked up a battery disconect so when Im gone for longer periods I dont have to worry about the battery dieing.
I rerouted the catch can lines from my can so they are not kinked like they were.
I found a place to mount my washer pumps under the bumper and it it wasnt for a bad seal they would be running and working now. What I have to put gasket sealent arround the grommet and plastic nipple to stop the small leaks. I'll give it a few days then I will hook up the lines and let her rip.
So as a finally.... Here is the damage total in parts:
ENGINE & DRIVE TRAIN
BILLET LIGHT WEIGHT PULLIES: CRANK, ALTERNATOR, ACCESSORY
WISECO PISTONS 96MM 8.6:1CR CRYO’D
EAGLE H-BEAM RODS
HKS HEADGASKETS SS LAYERED 96MM GASKET
ARP 1/2" HEAD STUDS W/ TIMECERT’S
ARP MAIN STUDS
VQ35DE REV UP OIL PUMP
FERREA +1MM VALVES
FERREA HD VALVE SPRINGS
FERREA TITANIUM RETAINERS
FERREA HIGH ANGLE STAINLESS VALVE LOCKS
FERREA STAINLESS VALVE LOCATORS
FERREA BRASS VALVE GUIDES
FERREA INTAKE AND EXHAUST VALVE STEM SEALS
JIM WOLFE S1 CAMS
FULL PORT AND POLISH AND KNIFE ENDGING
5 ANGLE VALVE JOB
FULL BOWL WORK ON COMBUSTION CHAMBER OF HEAD
BALANCING, POLISH CRANK
PATHFINDER REAR CYLINDER COOLING MODIFICATION
ALTERED ATMOSPHERE FUEL RETURN SYSEM
AEROMOTIVE 1:1 RISING RATE FUEL PRESSURE REGULATOR
WALBRO 250LPH FUEL PUMP
RC 650CC FUEL INJECTORS
EAGLE BILLET VACUUM MANUFOLD
JIM WOLFE LIGHT WEIGHT FLYWHEEL
STAGE 5 SINGLE PLATE 6 PUCK SPEC CLUTCH
TOMEI TECHNICAL TRAX 2WAY LSD
NISMO FINNED DIFFERENTIAL COOLER
DRIVE SHAFT SHOP LEVEL 5 HALF SHAFTS
MOCAL THERMOSTATIC SADWICH PLATE (NEED INSTALL)
19 ROW OIL COOLER (NEED INSTALL)
13 ROW POWER STEERING COOLER9 (NEED INSTALL)
SPEED FORCE RACING CUSTOM FLUID CONTAINER (PS, WASHER, CATCH CAN, RADIATOR OVER FLOW)
FORCED INDUCTION
GREDDY TWIN TURBO KIT
3 CORE GREDDY FRONT MOUNT INTERCOOLER
GREDDY TYPE RS BOV
1BAR SPRINGS
SVR TECH WASTE GATE RELOCATION KIT CERAMIC COATED
SVR TECH ATMOSPHERIC DUMP TUBES
CERAMIC COATED EXHAUST MANIFOLDS
CERAMIC COATED TURBO EXHAUST HOUSING
MODIFIED GREDDY OIL PAN W/ PICKUPS
EXHAUST
SGP RACING 3” CAT DELETE DOWN PIPE
APS 3” DUAL EXHAUST
SUSPENTION & CHASSIS
TEIN FLEX FULLY ADJUSTABLE FRONT AND REAR
CUSCO ADJUSTABLE FRONT UPPER A-ARMS
KENITEX RACING REAR CAMBER ARMS
KENITEX RACING REAR TRACTION ARMS
HOTCHKIS FRONT AND REAR 3 WAY ADJUSTABLE SWAY BARS
GT SPEC FRONT LOWER LATERAL TIE BRACE
GT SPEC MID-CHASSIS LADDER BRACE
GT SPEC REAR LOWER LATERAL TIE BRACE
GT SPEC REAR UPPER LATERAL TIE BRACE
MOTEGIE TOUGES 18X9” FRONT 18X10” REAR
MEGAN RACING 6 PISTON CALIPERS (FRONT) 4 PISTONCALIPERS (REAR)
HATCH SLOTTED ROTORS 14” (FRONT) 13” (REAR)
STAINLESS BRAIDED BRAKE LINES
FLUSH MOUNT VALVE STEMS TO CLEAR CALIPERS (FRONT)
FALCON 452’S FRONT 245/18R35
FALCON 452’S REAR 295/18R35
ELECTRONICS
TURBOXS UTEC
TURBOXS PRESSURE SENSOR
GREDDY TURBO TIMER
BLITZ SBC ID-II BOOST CONTROLER
DEFI GAUGE CONTROL HEAD UNIT
DEFI BOOST GAUGE
DEFI FUEL PRESSURE GAUGE
AEM EUGO WIDE BAND AIR FUEL GAUGE
TEIN ELECTRONIC DAMPENING FORCE CONTROL SYSTEM
PANISONIC D1 DVD NAVIGATION STEREO HEAD UNIT
QUICK BATTERY DISCONECT
MISC
TOPSPEED SHORT SHIFTER
VOODOO SPUN ALUMINUM COUNTERSUNK SHIFT ****
TRIPLE A-PILLAR POD
THE END!!!!
Maybe
Last edited by punish_her; Jul 12, 2008 at 04:43 PM.

Thread
Thread Starter
Forum
Replies
Last Post
Lt_Ballzacki
Brakes & Suspension
39
Aug 6, 2021 06:19 AM