When you click on links to various merchants on this site and make a purchase, this can result in this site earning a commission. Affiliate programs and affiliations include, but are not limited to, the eBay Partner Network.
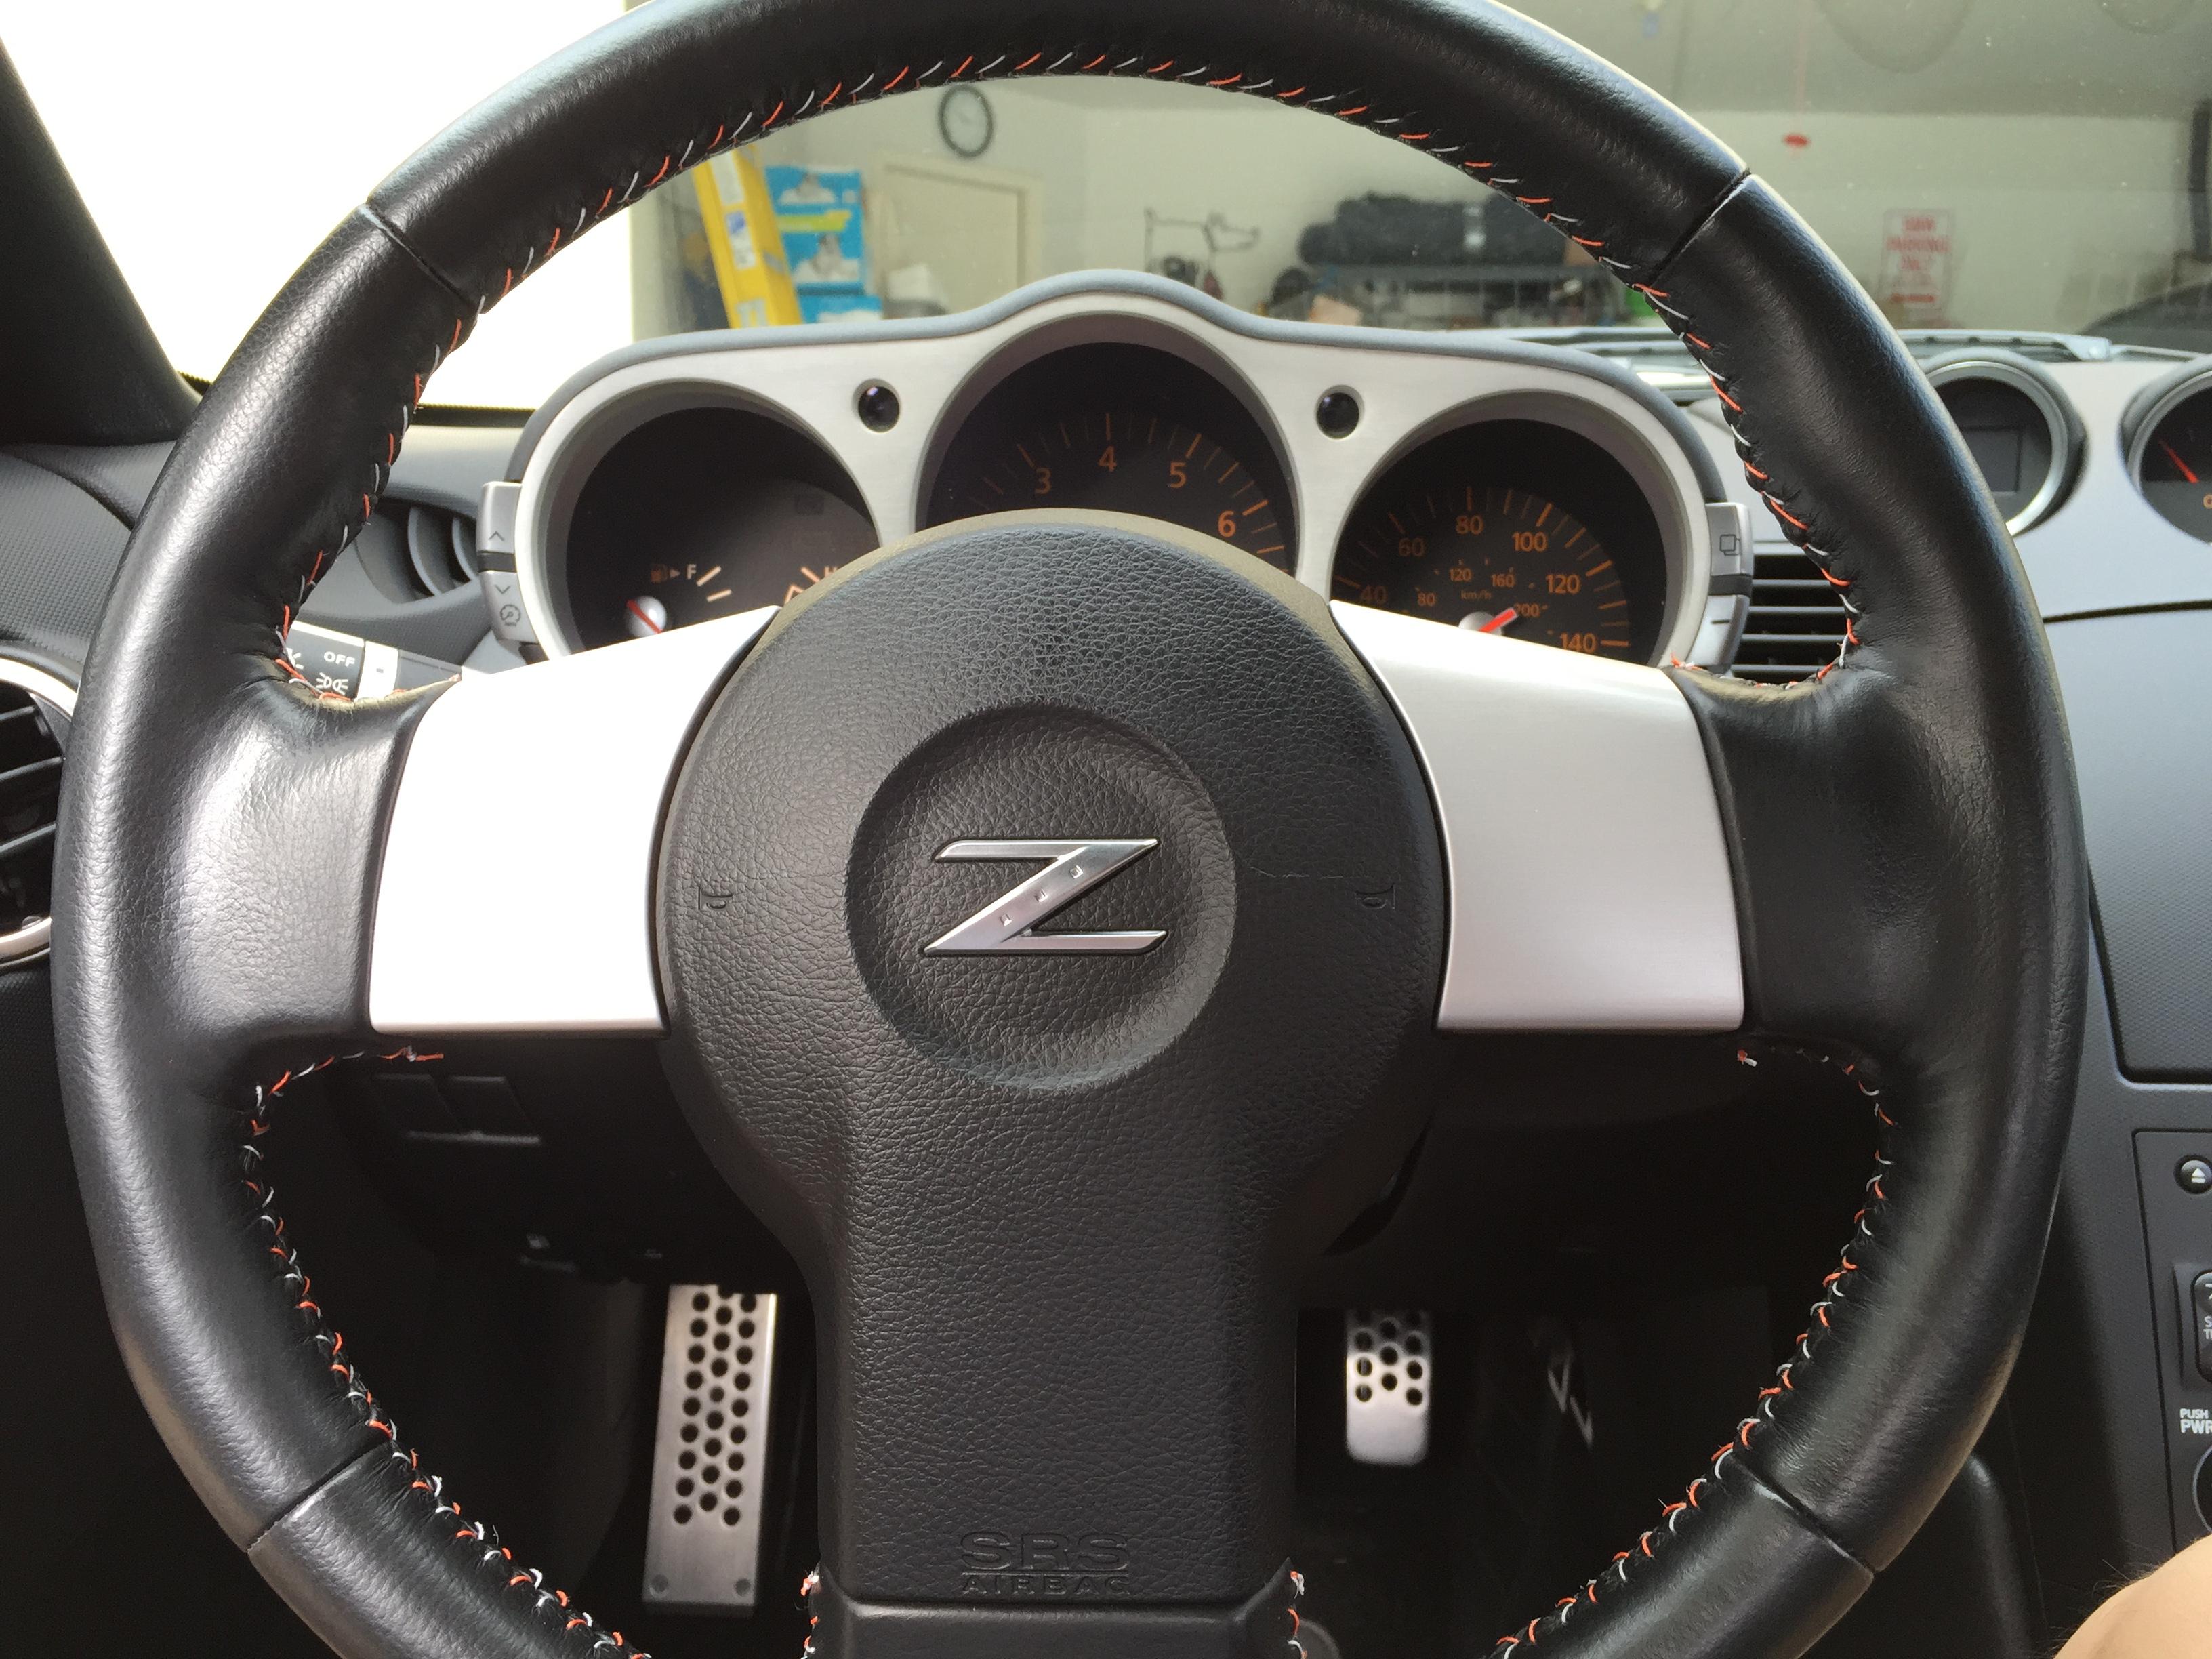
Little lopsided but feels good, will probably remake or replace soon.
Also wet sand and wax, got a little carried away with the 400 grit and couldn't work some of the transition out perfectly, but it's better than it was...
you ask the guy in the black Z what he uses that rack for?
That's a Boofsquire bike rack but it uses Yak load bars so you can actually put other accessory mounts on it. Given that it goes right over the backlight, I've never trusted it for anything other than my road bike, which, logic tells me - right or wrong - would fly off and not break the glass in the event of a tie-down failure. It would probably be fine for skis or a board but who takes a Z to the slopes? Hahahaha.
Oh right, some of y'alls live where that white stuff makes an annual appearance... unlike Wimpy California boy.
I'm positively surprised!, I thought this wheel was only gonna be about the bling but...
The flat bottom isn't that much but it let me readjust my seating position and move my seat a couple inches forward which really helps in spirited driving.
I drove some twisties on my way home from work and the seating adjustment made heel toeing much easier and my arms are more relaxed since I'm closer to the wheel.
Might be something to consider for us tall guys. I'm 6'3 with long legs which means I have to push the seat almost all the way back to avoid my knees hitting the steering wheel. This puts me a little too far away from the wheel for comfort so it's been a compromise so far.
But this little change in the shape of the wheel let me get closer making everything better.
I replaced the rear shock mounts with the KYB mount kit and threw in a pair of homemade gaskets last weekend. The stock gaskets looked like a pair of burnt orange potato chips. Unfortunately, the clunking sound hasn't gone away -- well, it did for about 20 minutes and then came back. I re-tightened everything but I'm still hearing the noise from the rear. I'm going back under the car this weekend to check EVERYTHING. I'll probably end up getting a new suspension before next Spring. I thought I could get 50K out of my factory setup, but that's looking to be less and less likely at this point. My rear end is getting funky after only 40K miles. I've noticed I'm getting some camber wear on the inside ends of both the rear tires as well, so I'll probably get a new bushing kit too. I had a 4 corner laser alignment performed by the best shop in Seattle when the tires were new and the camber wear didn't really start until I started hearing the clunking noise. I may also grab some Moog end-links as a hold-over fix if I'm getting any play out of the OEM ones, which seem next to impossible to find anymore for less than a small fortune.
I installed the Moog sway bar end links on the rear this weekend and now the bumping noise is about 3 times louder. The factory end links were loose as hell. During my inspection, I also noticed that my upper control arm ball joint on the left side is loose, so I ordered a new set for both sides. I'm starting to think that I'm just going to spend the loot and get a new set of aftermarket front and rear sway bars, Prothane bushings and new shocks and struts all the way around the car.
I'm still blown away that the factory set-up only gave me about 40K good miles.
please keep us posted on your findings. i also have a clunk and really want to know what it will take it get rid of it.
Swede...that looks AWESOME. How was installation for you...easy or a total pain in the ***? I love that it uses the existing steering wheel instead of having to take the whole thing off...or do you have to take the whole thing off to fit this on? *Edit...did some research and see you DO have to remove the steering wheel to get this on.*
-Shawn
Originally Posted by The Swede
I'm positively surprised!, I thought this wheel was only gonna be about the bling but...
The flat bottom isn't that much but it let me readjust my seating position and move my seat a couple inches forward which really helps in spirited driving.
I drove some twisties on my way home from work and the seating adjustment made heel toeing much easier and my arms are more relaxed since I'm closer to the wheel.
Might be something to concider for us tall guys. I'm 6'3 with long legs which means I have to push the seat almost all the way back to avoid my knees hitting the steering wheel. This puts me a little too far away from the wheel for comfort so it's been a compromise so far.
But this little change in the shape of the wheel let me get closer making everything better.
please keep us posted on your findings. i also have a clunk and really want to know what it will take it get rid of it.
No problem. I'll let you know how the next project works out. I'm probably going to go with the Prothanes after the ball joint. I want to do this systematically while at the same time upgrading some of the OEM parts of my suspension. Now that the car's 10 years old, it probably deserves some love.
wow- learned something new today after doing an image seach on boofsquire...
i think the best picture was the guy hauling lumber using that rack.....
Originally Posted by MicVelo
That's a Boofsquire bike rack but it uses Yak load bars so you can actually put other accessory mounts on it. Given that it goes right over the backlight, I've never trusted it for anything other than my road bike, which, logic tells me - right or wrong - would fly off and not break the glass in the event of a tie-down failure. It would probably be fine for skis or a board but who takes a Z to the slopes? Hahahaha.
Oh right, some of y'alls live where that white stuff makes an annual appearance... unlike Wimpy California boy.
Swede...that looks AWESOME. How was installation for you...easy or a total pain in the ***? I love that it uses the existing steering wheel instead of having to take the whole thing off...or do you have to take the whole thing off to fit this on? *Edit...did some research and see you DO have to remove the steering wheel to get this on.*
-Shawn
Hey Shawn ill give you the low down....
First you gotta remove the air bag... (this sucks)
The air bag is held on by safety torque head bolts that have factory thread locker on them... (worst part)
Once you get those out you are faced with the oddball wire connectors attached to the air bag... These are like odd yellow plugs that require reverse engineering to figure out.
Once thats out of the way your in the clearing, the big *** nut holding the wheel on, a few harnesses and wheel comes right off...
I just swapped out my steering wheel last month by myself it is fairly easy. I would recommend the following:
1. Make sure you have the proper security torx bit to remove the air bags. I tried using a cheap bike tool and stripped one of my bolts.
2. Rent a free steering wheel remover tool from your local shop. ORiley/AutoZone/etc. There is a chance you won't need this but for most of us this is necessary. I see too many youtube videos of people just yanking on the wheel, i do not recommend it. the tool works and is very easy to use.
3. watch you tube videos. there are lots of them and they go through pretty much everything you need to know on how to do this.
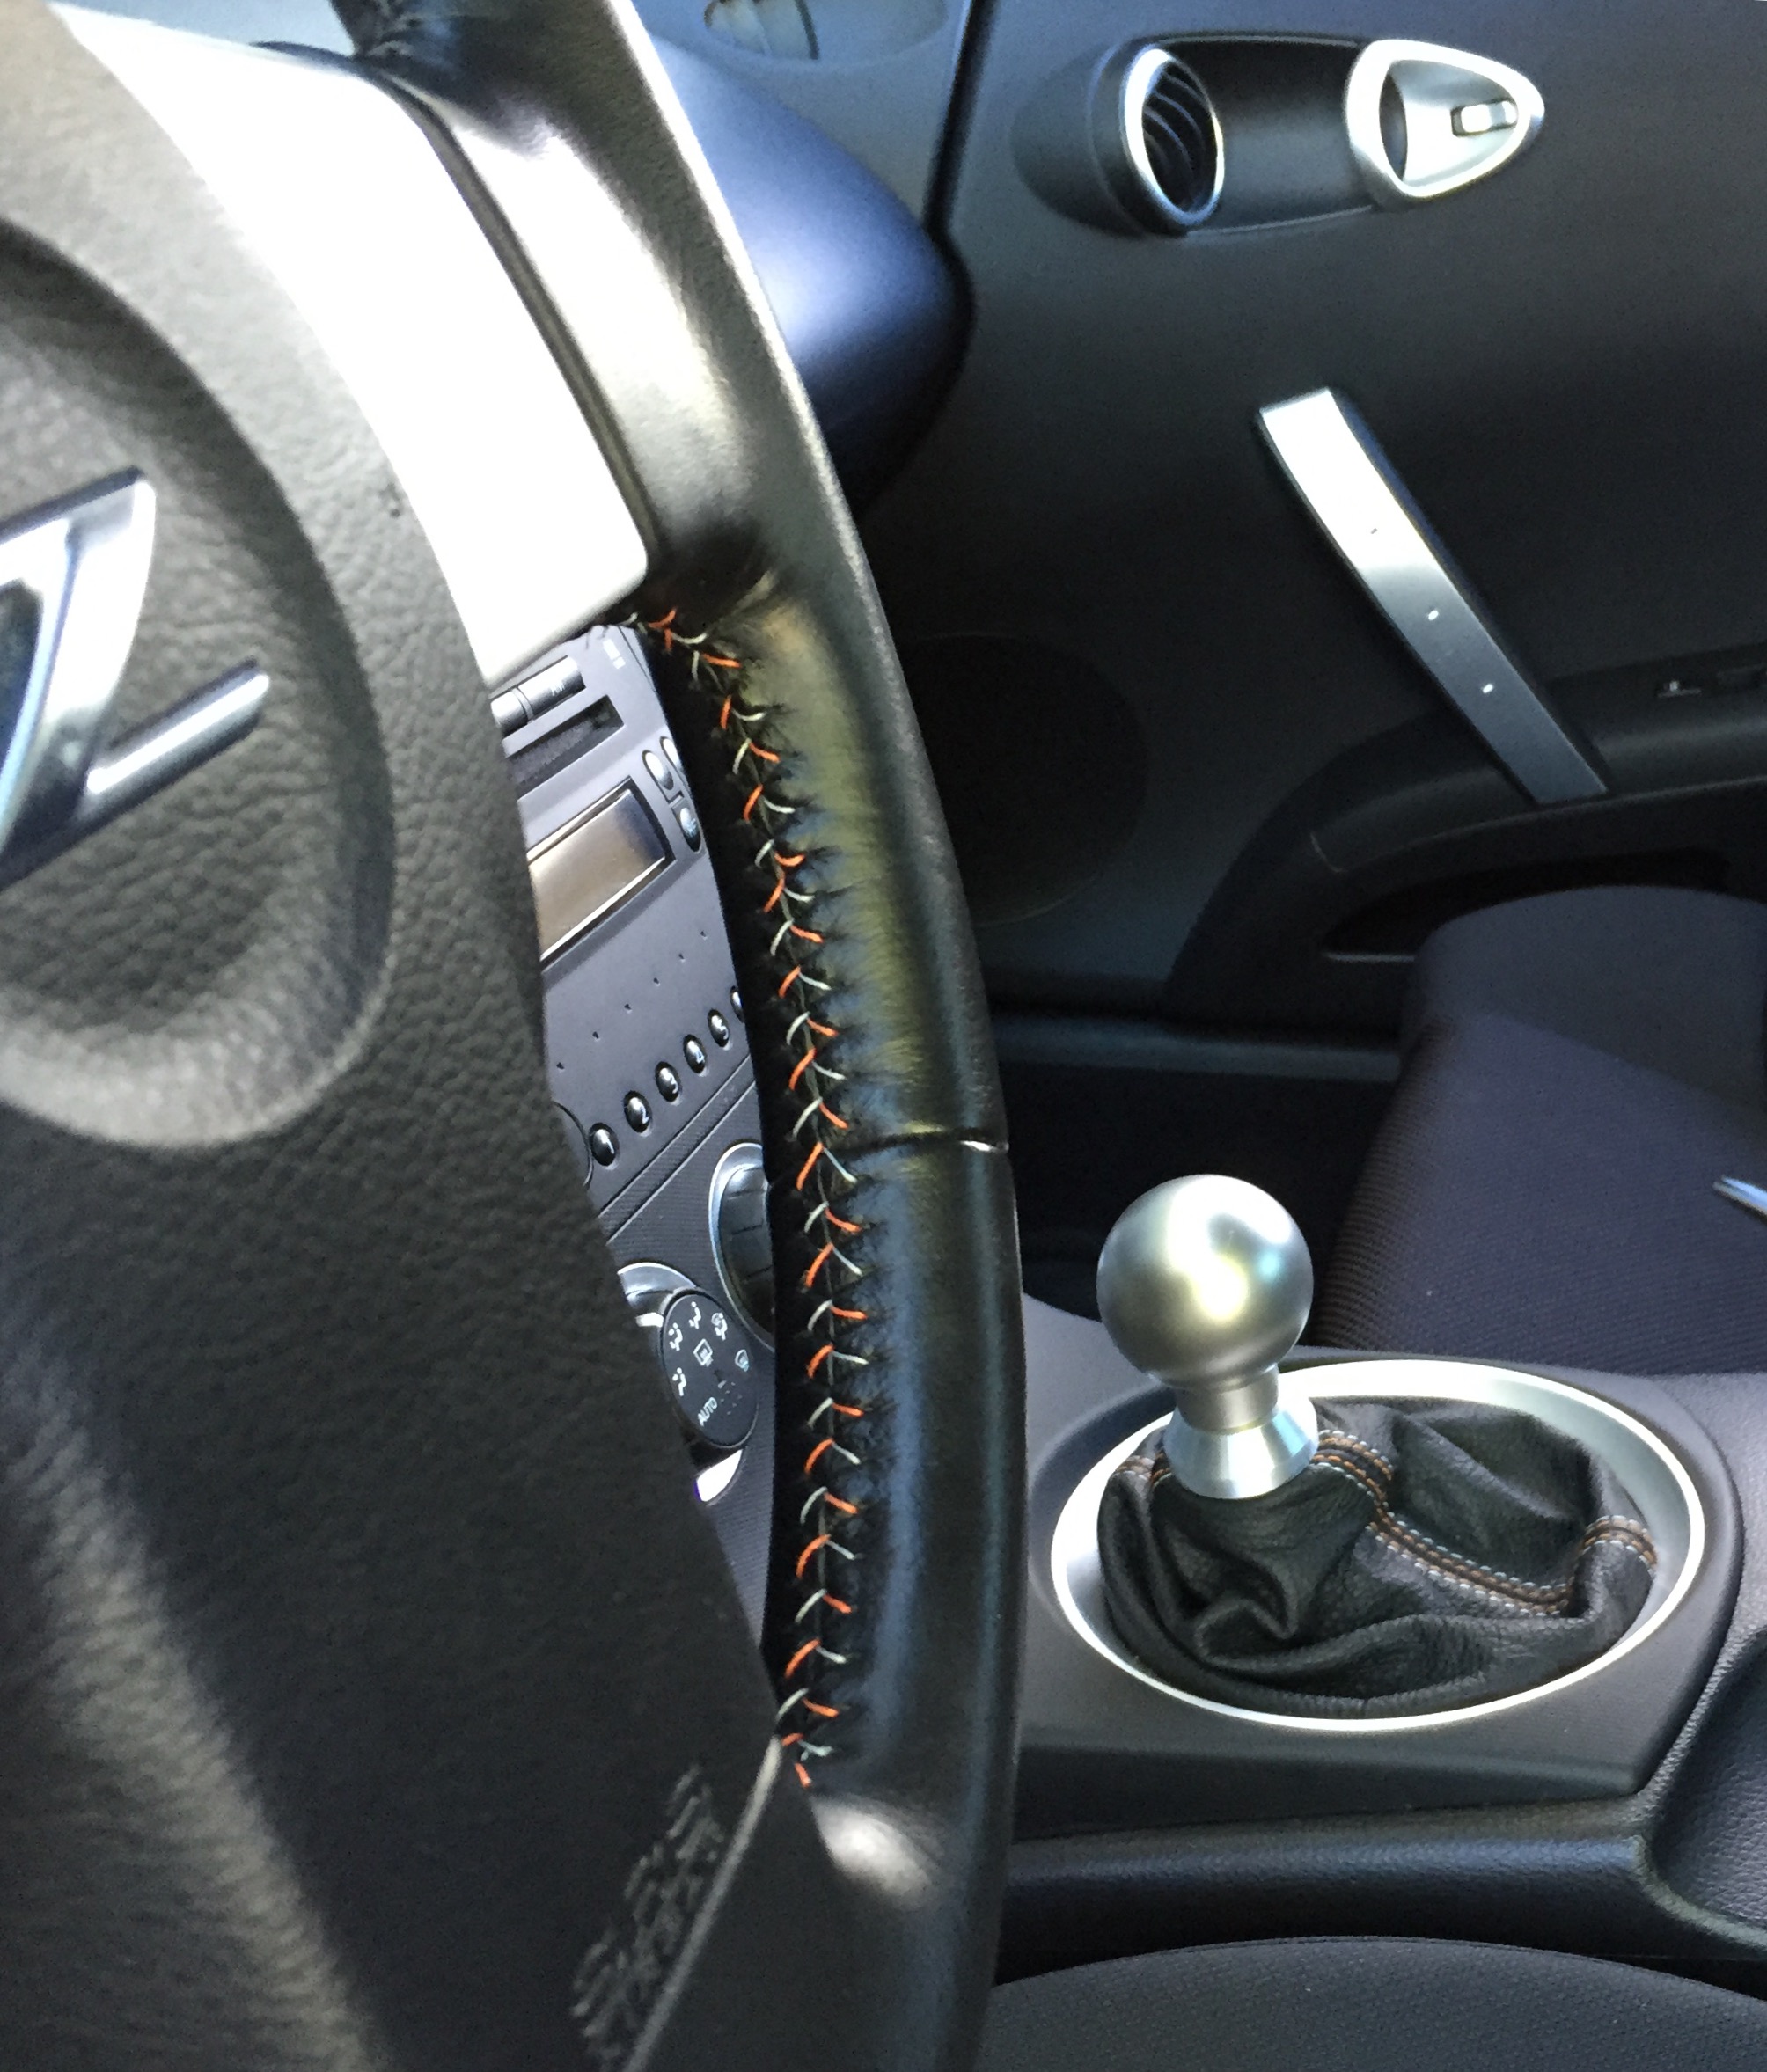
Yeaaahhh...that sounds like WAY to much work for my lazy ***. I think Ima stick with my what I did a few years ago with just restitching the leather cover.
Love that new steering wheel Swede!
Also Shawn, where can you buy a replacement leather cover for the wheel? Is that a Nissan thing?
For my contribution to WHYDFYZT - I did a bit of spruce up to the interior of my car. I removed the center console and the shifter console and repainted them. I used Krylon Dual Superbond matte black paint btw...stuff works great. I also retucked the kneepad things.
Looks like new OEM now...
I was gonna use some 3M carbon fiber-looking wrap but after second consideration I decided 'nah'.
Hey Kauai....I assume Nissan might have them but what I did was just restitch the original one. It was fairly easy to take the OEM black stitching out and then just restitch with the silver and orange thread I bought. The cover is glued on so didn't come off while I did it.
Hey Kauai....I assume Nissan might have them but what I did was just restitch the original one. It was fairly easy to take the OEM black stitching out and then just restitch with the silver and orange thread I bought. The cover is glued on so didn't come off while I did it.
Dude, that's tedious looking work!! Me, this is what I'ma do if that day ever comes...
Heck yeah, it'd match my seat covers and floor mats!! FTW!!
Just bought the Z1 Motorsport Prothane differential bushing kit (front and rear) plus the rear bushing removal tool (since I hate drama when it comes to removing pressed parts.) I noticed last night that the factory rear differential bushing is kaput. I also grabbed some new OEM rear sway bar rubber bushings while I was at it just to keep the whole sway bar setup fresh. Based on the type of wear I'm seeing, I get the distinct impression that city driving up and down big hills is not something this car plays nice with.


 10-21-2017, 02:23 PM