
Speed Star Wheel D5R refresh via center caps makeover

Thread Starter
Joined: Aug 2004
Posts: 28,899
Likes: 1,906
From: Twin Cities, MN
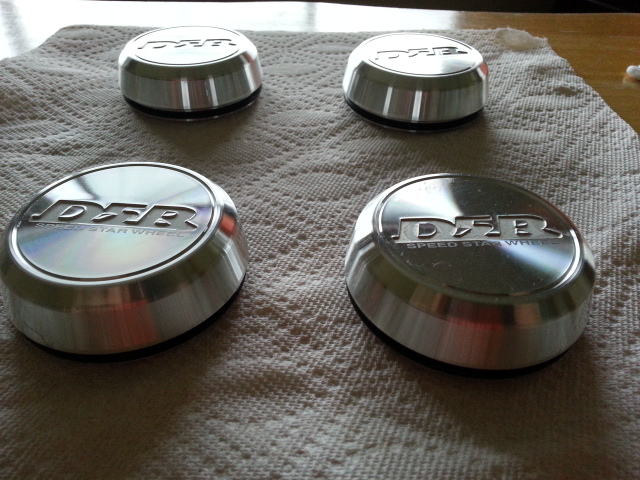
So after some Spring modding sessions in the past few weeks, someone persuaded me to try putting in a little color to my center caps which happened to be a very shiny silver metallic finish. Mind you, I've had these wheels on the Z for at least 5 years and have put thousands of miles on them, so the caps were looking a little aged.
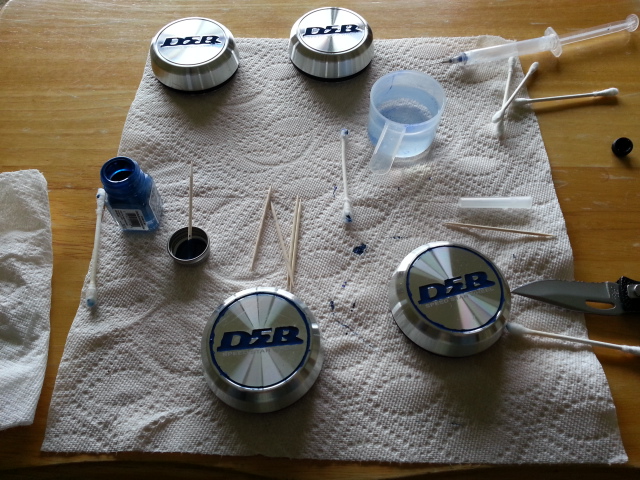
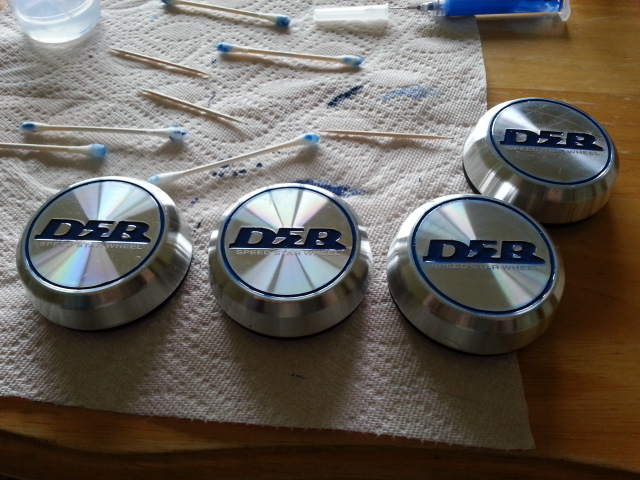
I took the caps off the wheels and washed them up to make sure I got rid of any dirt by using dish soap. After letting them dry overnight, I got things ready.
First of all, I made a terrible mistake and bought acrylic paint. Yeah, I wasn't thinking and was a little tired after a long day of having fun outside.
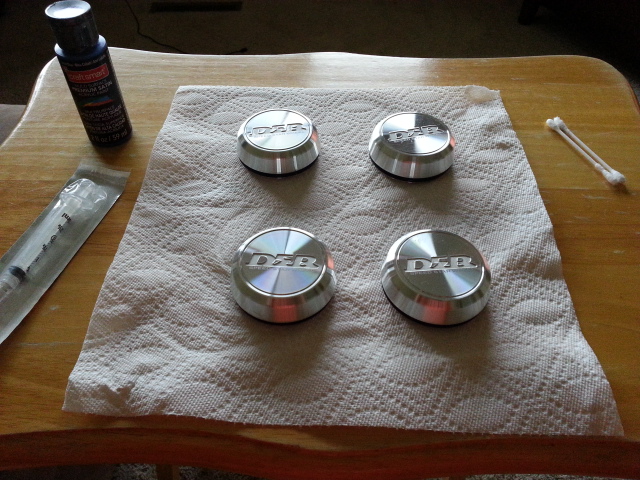
It was also suggested that I use a syringe for the relatively fine detail work that was anticipated on the caps. Because of the acrylic paint, the syringe didn't work. I ended up realizing that I needed to get a different kind of paint. I also needed to replace the syringe idea. After talking to someone at Ace Hardware, I decided to use Tester's modeling paint. I also decided to use toothpicks.
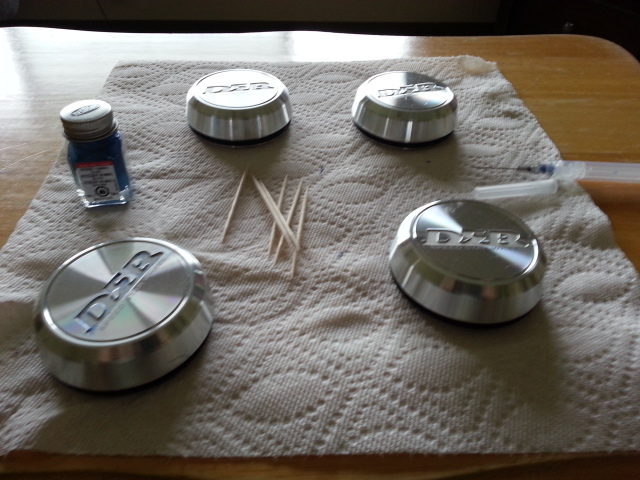
After working on the first cap, I was beginning to have second thoughts about this whole project. I had to tell my kids to put on earmuffs a couple of times. The impression in the caps are easy to see, but it was hard to keep the fine lines of the edges.
Also experimented with the ring at the edge of the caps.
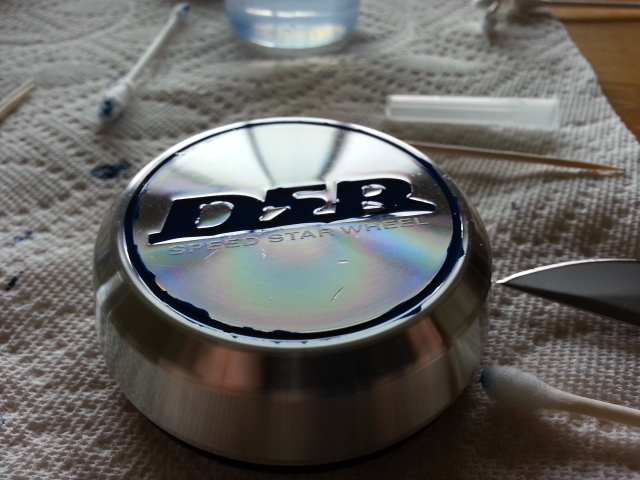
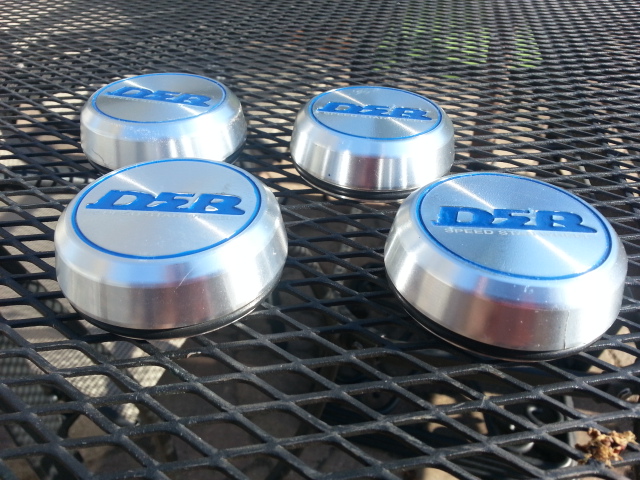
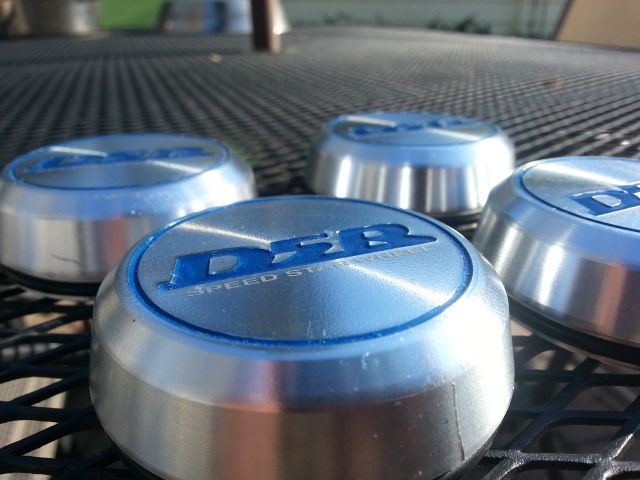
For comparison:

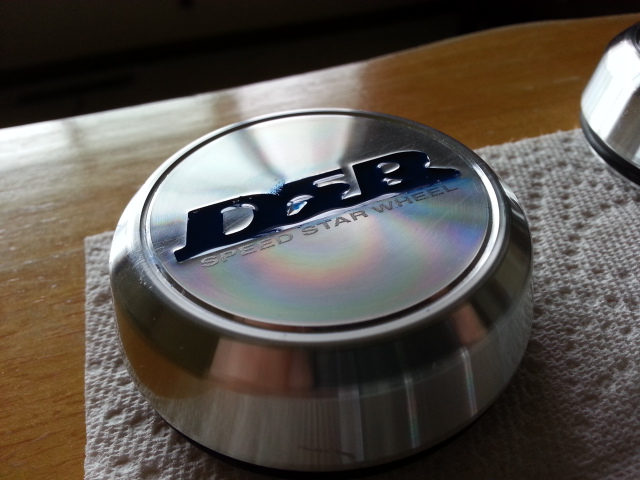
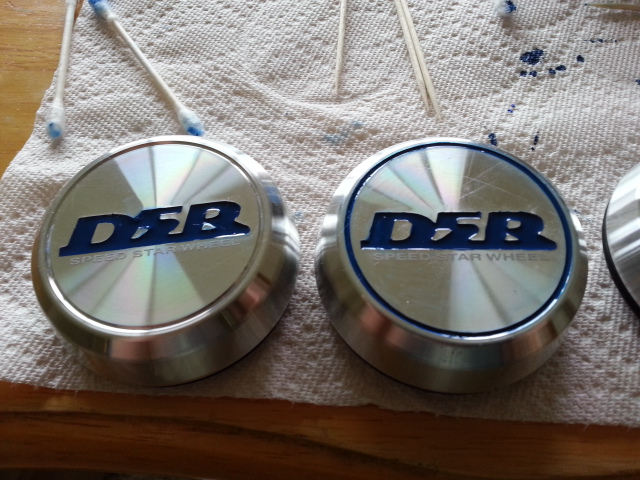
After several painstaking attempts to be very careful, I found out that the qtips and paint thinner were great for cleaning up my unsteady hand. I went through a lot of those cotton sticks and toothpicks, but that doesn't matter if you want to be happy with the end product. I think it turned out okay. My wife thought I was crazy, but she said it turned out good.
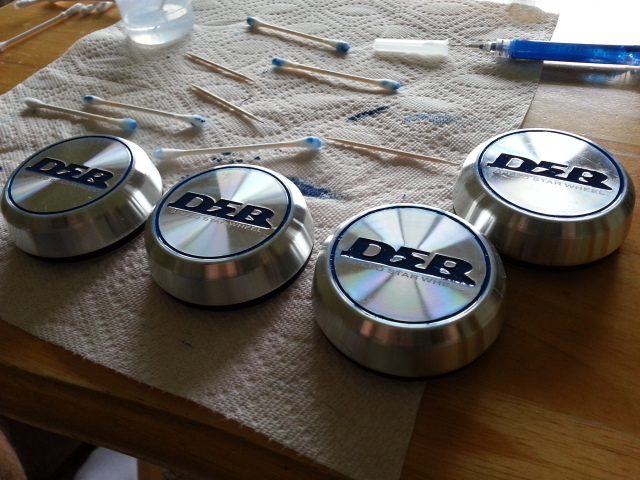

I plan on letting them dry a lot before I use more thinner and Qtips to clean the caps. I learned that toothpicks dipped in thinner also work well for scraping the edges of the letters and rings.
I took the caps off the wheels and washed them up to make sure I got rid of any dirt by using dish soap. After letting them dry overnight, I got things ready.

First of all, I made a terrible mistake and bought acrylic paint. Yeah, I wasn't thinking and was a little tired after a long day of having fun outside.

It was also suggested that I use a syringe for the relatively fine detail work that was anticipated on the caps. Because of the acrylic paint, the syringe didn't work. I ended up realizing that I needed to get a different kind of paint. I also needed to replace the syringe idea. After talking to someone at Ace Hardware, I decided to use Tester's modeling paint. I also decided to use toothpicks.

After working on the first cap, I was beginning to have second thoughts about this whole project. I had to tell my kids to put on earmuffs a couple of times. The impression in the caps are easy to see, but it was hard to keep the fine lines of the edges.

Also experimented with the ring at the edge of the caps.


For comparison:

After several painstaking attempts to be very careful, I found out that the qtips and paint thinner were great for cleaning up my unsteady hand. I went through a lot of those cotton sticks and toothpicks, but that doesn't matter if you want to be happy with the end product. I think it turned out okay. My wife thought I was crazy, but she said it turned out good.


I plan on letting them dry a lot before I use more thinner and Qtips to clean the caps. I learned that toothpicks dipped in thinner also work well for scraping the edges of the letters and rings.
Thread Starter
Joined: Aug 2004
Posts: 28,899
Likes: 1,906
From: Twin Cities, MN
General & Tech Moderator
MY350Z.COM
MY350Z.COM

Joined: Jan 2013
Posts: 10,400
Likes: 2,226
From: ZdayZ
For comparison:
After several painstaking attempts to be very careful, I found out that the qtips and paint thinner were great for cleaning up my unsteady hand. I went through a lot of those cotton sticks and toothpicks, but that doesn't matter if you want to be happy with the end product. I think it turned out okay. My wife thought I was crazy, but she said it turned out good.

I plan on letting them dry a lot before I use more thinner and Qtips to clean the caps. I learned that toothpicks dipped in thinner also work well for scraping the edges of the letters and rings.
Looks great to me, I was gonna suggest paper towel/laquer thinner for the raised portion but you beat me to it. Pics when they're back on!
Agreed, Testors enamel won't hold up to outdoors imho.
After several painstaking attempts to be very careful, I found out that the qtips and paint thinner were great for cleaning up my unsteady hand. I went through a lot of those cotton sticks and toothpicks, but that doesn't matter if you want to be happy with the end product. I think it turned out okay. My wife thought I was crazy, but she said it turned out good.
I plan on letting them dry a lot before I use more thinner and Qtips to clean the caps. I learned that toothpicks dipped in thinner also work well for scraping the edges of the letters and rings.
Looks great to me, I was gonna suggest paper towel/laquer thinner for the raised portion but you beat me to it. Pics when they're back on!
Agreed, Testors enamel won't hold up to outdoors imho.


Trending Topics
Thread Starter
Joined: Aug 2004
Posts: 28,899
Likes: 1,906
From: Twin Cities, MN
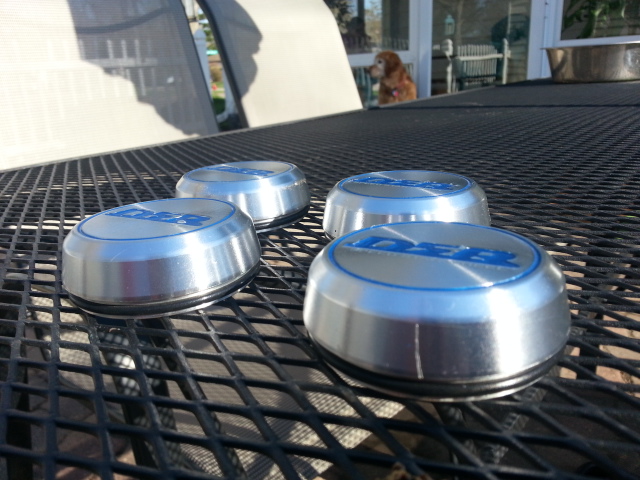
So I waited a few days before using a paper towel and some paint thinner to wipe away any residual paint on the surface of the caps. I knew there was some paint from the first day. Sure enough, there was a slight blue tint left on the towels.
Then I got some automotive clear coat in a spray can. I wasn't too happy about the way it made the caps look "rough" compared to the shiny silver that I was so used to. Oh, well.
Let me know what you think.
Then I got some automotive clear coat in a spray can. I wasn't too happy about the way it made the caps look "rough" compared to the shiny silver that I was so used to. Oh, well.
Let me know what you think.


Thread Starter
Joined: Aug 2004
Posts: 28,899
Likes: 1,906
From: Twin Cities, MN
Thanks guys. I guess after 11 years, there are still cool little things to do with the Z.
The ultimate "mod" would be to take the Z on to the Ring.
The ultimate "mod" would be to take the Z on to the Ring.
I wouldn't bother clearing it personally, just keep some metal polish handy and clean it every once in awhile with it
I got some of this for free from a friend, it works pretty well
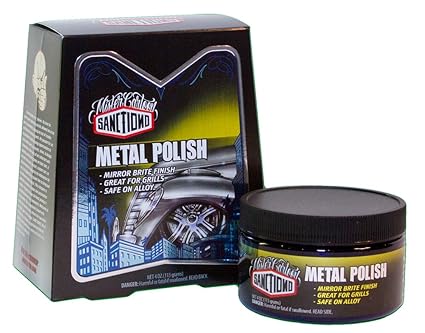
I got some of this for free from a friend, it works pretty well