5AT to 6MT Swap INFO, ***, DIY, GUIDE Thread!
 03-29-2012, 12:39 PM
#1

Hello. I wrote one up for the G guys but I think the Z guys would benefit more.
I didn't have time to take pictures but this swap should take no more than 6-8 hours. I will on the next swap I do.
This is the first revision [on going] of this wright up. I am turning this attempt at a DIY to an FAQ/ info thread. I will make a full writeup on the next swap I do and link it to this thread. Most importantly, follow this at your own risk! Neither I or this forum is responsible for you "messing up your car". now that all the formalities are out the way its time to get this baby started!!
Follow @HEXAGARAGE on Instagram
Parts list:
Hydraulics:
Clutch Pedal - You can use the OEM pedal or go with an aftermarket option (tilton, willwood, summit, etc)
Clutch Master Cylinder - OEM, OE Replacement
Clutch Line - OEM or aftermarket replacement
Clutch Slave Cylinder - OEM, OE Replacement
Drive Train:
6MT Clutch Kit: OEM, Aftermarket
-Pressure Plate
-Pressure Plate Bolts
-Clutch Disk
-Throw out Bearing
-Pilot Bushing
-Alignment Tool
6MT Flywheel - OEM, Aftermarket
6MT Flywheel Bolts - OEM
6MT Transmission - OEM
6MT Shifter - OEM, Aftermarket
6MT Rubber Grommet w/bracket - OEM from any MT Nissan. This is only if you have added the 6MT shifter hole
6MT Drive-line - OEM, Aftermarket
6MT Differential - 5AT works, 6MT works better
Interior:
6MT Brake Pedal - OEM,
6MT Center Console - OEM
6MT Shifter Trim - OEM
6MT E-Brake Setup - OEM, Hydraulic
6MT Shift **** - OEM, Aftermarket
Electronics:
6MT ECU - Keep Existing ECU
6MT EFI Harness - Keep Existing Harness (just wire in reverse and pnp switch)
6MT Hazard Light Switch (03-04 G35) - OEM
*Be sure you have all of this before you get started*
FAQ
What Items don't I have to source?
You do not need the following for your car to run/drive:
-6MT EFI Harness - 5AT works fine you just have to do some simple wiring
-6MT ECU - Use existing 5AT ECU
-6MT Ebrake -
-6MT Differential - 5AT works fine and gets great gas mileage. Just has longer gears.
-6MT Gauge Cluster - 5AT works fine, you will have a "check AT" light on
How easy is this to do?
If you can change a clutch, you can do a 6mt swap.
What custom work needs to be done? (what doesn't bolt in 100% OEM)
The only custom work would be the clutch pedal and making a cut for the shifter.
What is the price for this? If you DIY
The price varies depending on new/used price on the parts listed above.
-I have had good luck finding cheap used parts. The cheapest this has been done for is about $700 (free transmission and interior pieces)
Wiring
You will need to do a bit of wiring for this swap. Specifically the Starting System. Reverse lights and Neutral Position Switch will not need to be wired up if you are using the 6MT Harness.
Starting System
The 5AT Chassis Harness does not have an interlock switch for the clutch. You will need to wire Switched 12V+ directly to the IPDM (Intelligent Power Distribution Module). Now there are two ways of doing this.
Option 1:
You can bridge any Switched 12V+ directly to Terminal 53 (Grey/Red Stripe Wire) on the IPDM. You will be able to start the car without depressing the clutch.
Option 2:
If you purchased a used clutch pedal, It should have come with the interlock switch. You can wire Switched 12v+ to the switch, then from the switch to Terminal 53 (Grey/Red Stripe Wire) on the IPDM... For that OEM Feel.
Neutral Position Switch
*You will only need to do this if your are using the 5AT engine harness**The 6MT harness plugs right in**
The neutral position switch is what controls cruise control. You will not need to wire this in if you have disabled cruise control or are running an aftermarket steering wheel setup.
You will need to wire Pin 102 on the ECU(Green/Orange Stripe) to either spade on the Neutral Position Sensor. The other spade will then need to be grounded to any part of the chassis.
Transmission Removal
First things first. Lets get that trans out.
1) get the car up on jack stands or a lift. the higher the better.
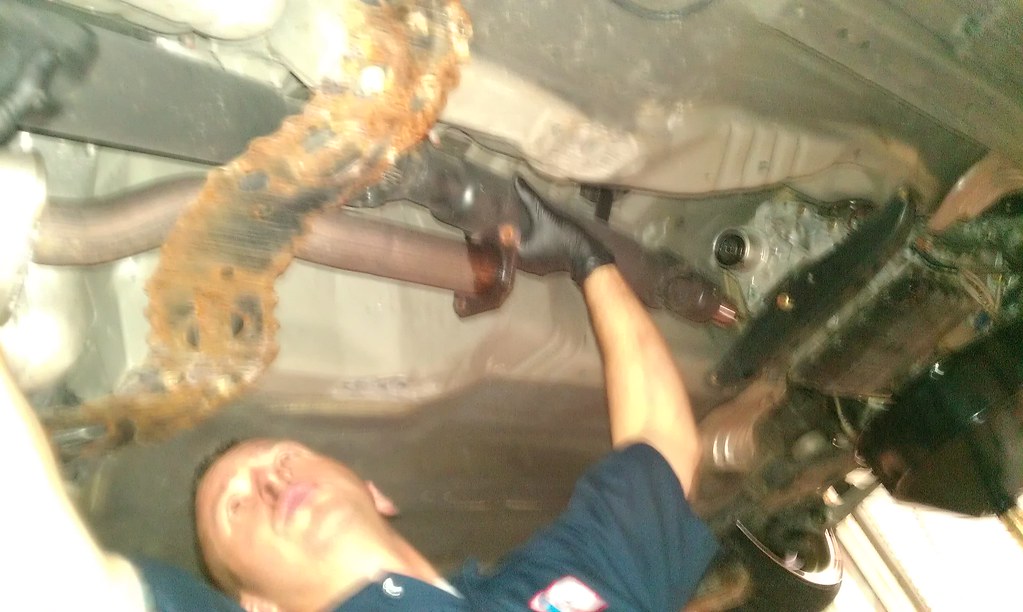
2) remove catalytic converters, y pipe and O2 sensors.
3) drain the oil from the pan

4) remove the driveshaft at the differential and remove the carrier bearing. the driveshaft can then be pulled out.
5) undo transmission mount bold and the transmission will drop into the crossmember
6) unhook all sensors, remove gear selector, transmission cooler hardlines, transmission fluid fill drain.
7) Remove all the bolts from the bellhousing. unhook the starter and set it aside. now unhook the transmission from the chassis by removing the 4 crossmember bolts.
8) you will now be able to pull the transmission out. be careful because this will drain all of the trans fluid that was in the torque converter. make sure you have a large bucket to drain it in.
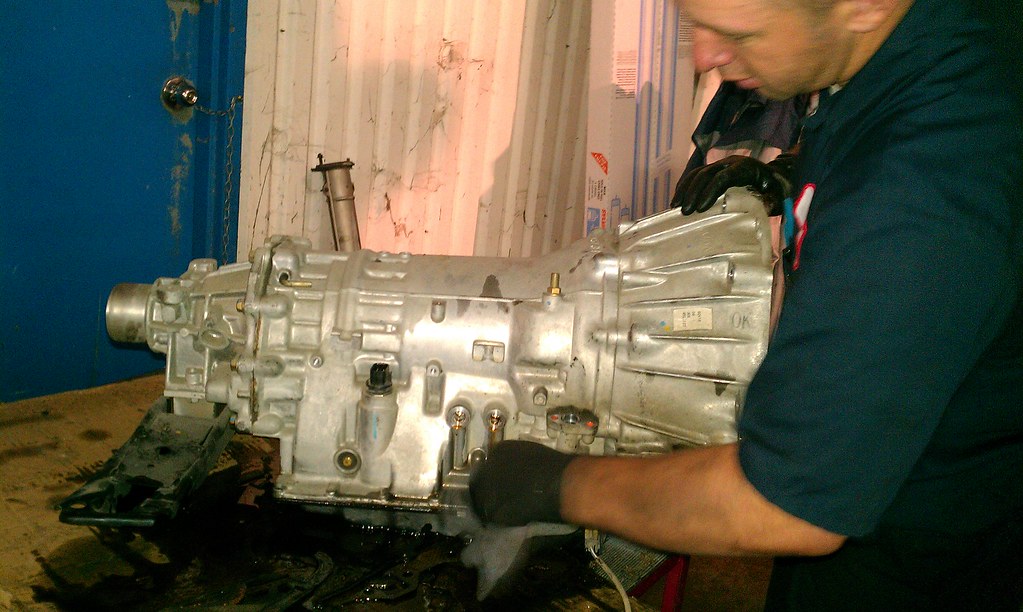
9)remove the giant brace that sandwiches part of the lower compression arm thing.
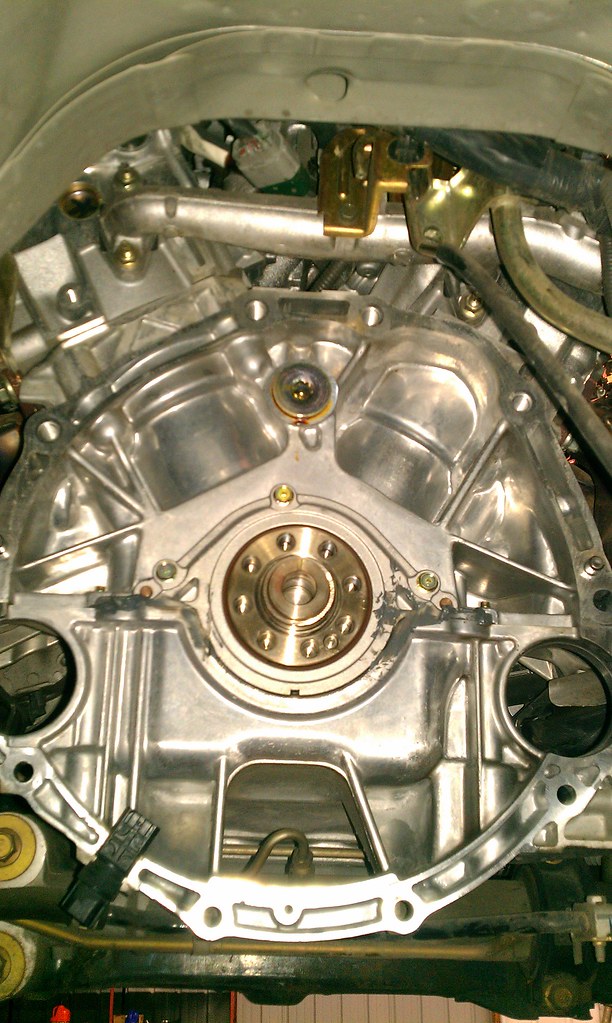
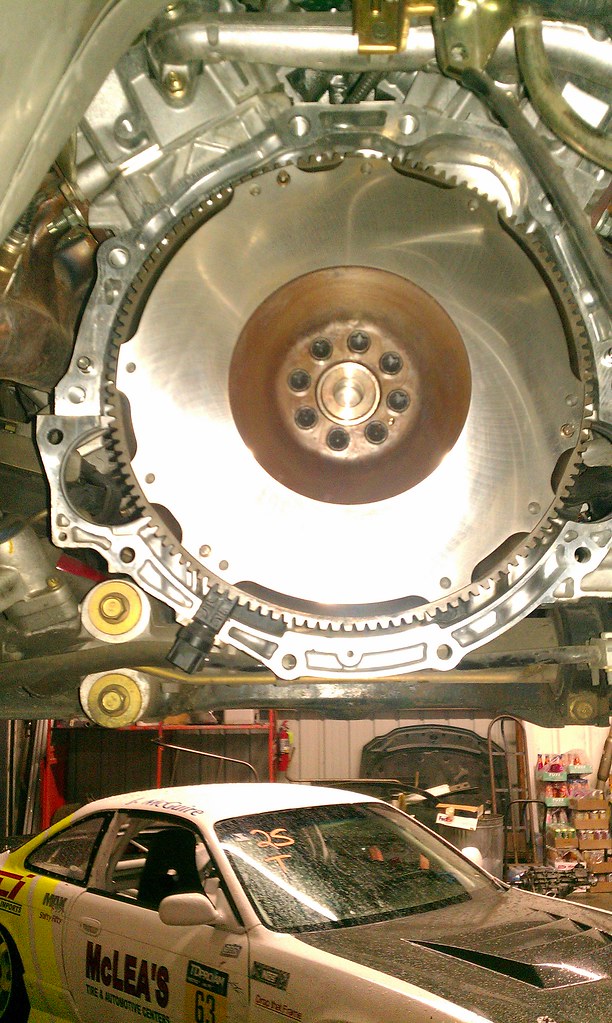
10) you will now be able to remove your torque converter. You just need to get your wrench behind the lip on the block. once the torque converter is out, you can remove the flywheel. It will look like this once completed.
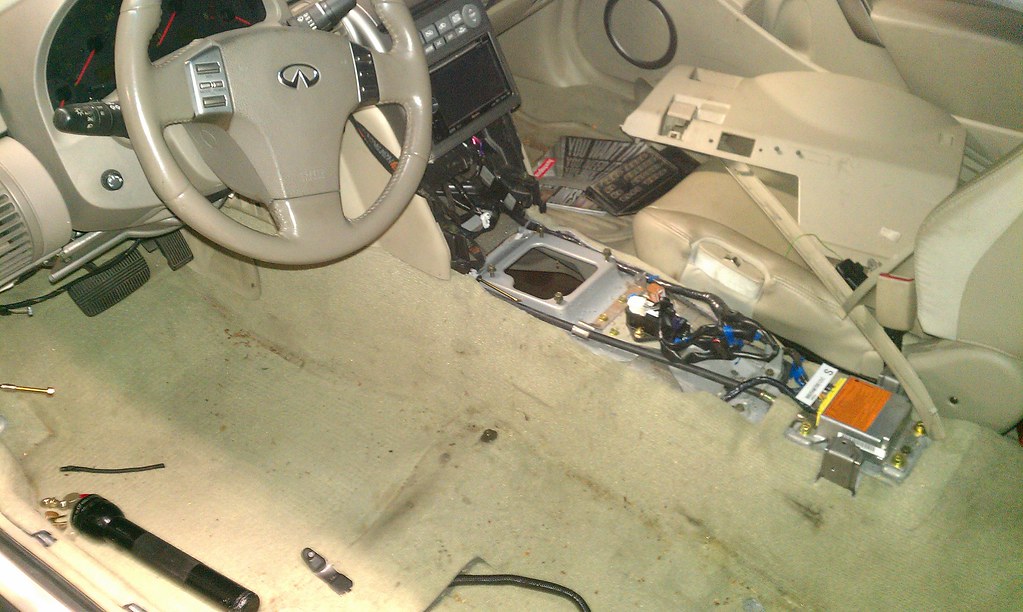
Interior Removal: Center Console
1) Put the shifter in neutral and remove the AT Shift ****.
2)Remove the shifter bezel. It just snaps out of place You will need to disconnect the Seat warmers, Ashtray lights, and hazard Swtich.
3)Remove the rest of the center console by removing the 4 screws. Two under the radio and the other two on the sides.
4)Disconnect the park cable that releases the key. you might find some treasure in between the seats.

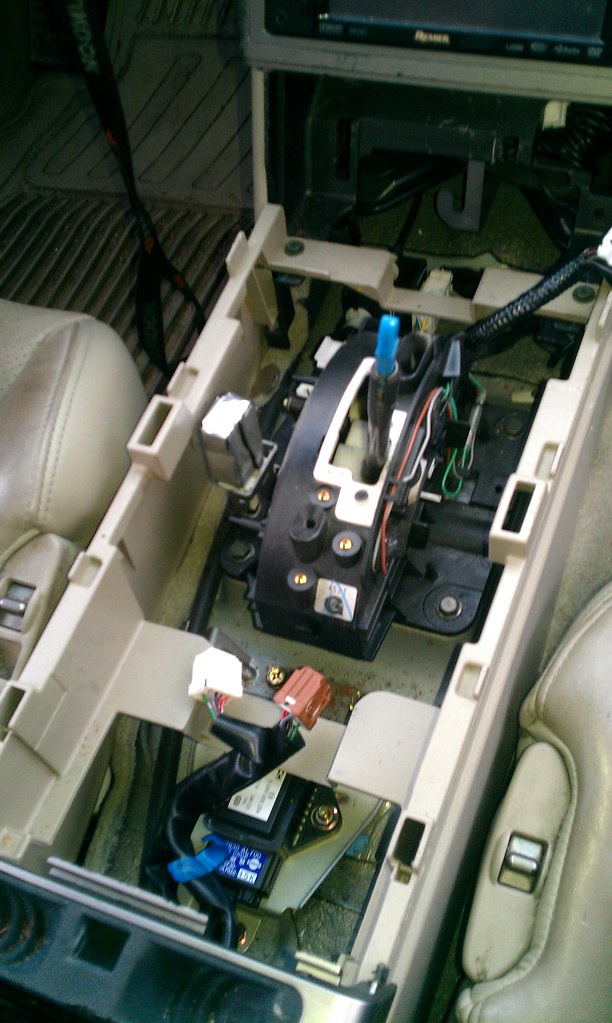
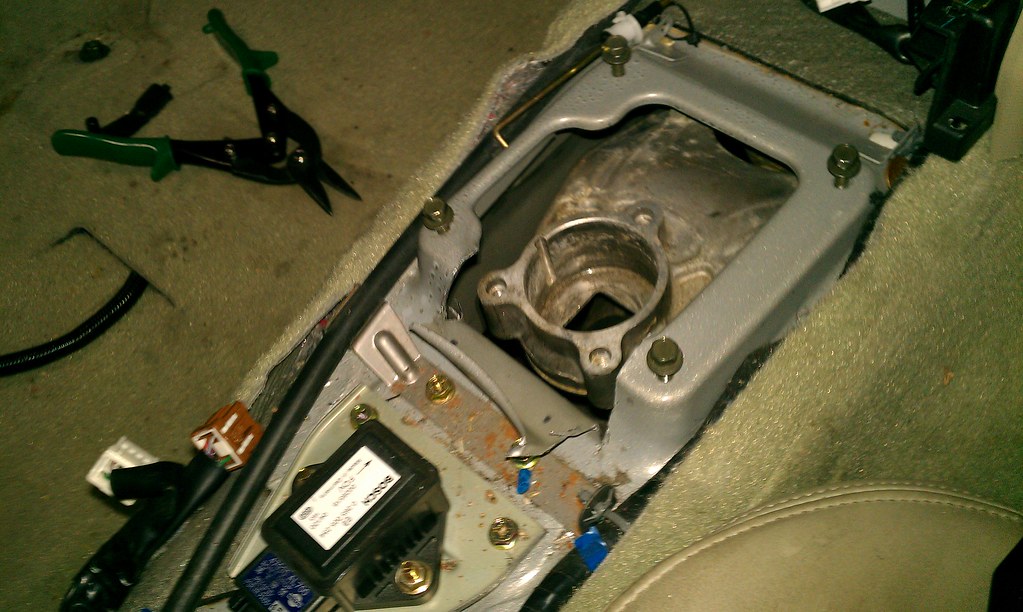
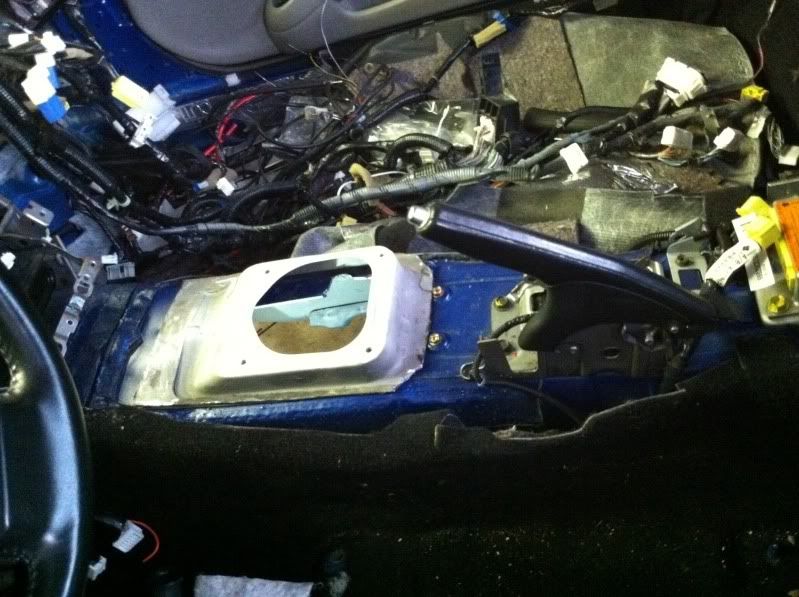
5)Now remove the AT shifter assembly by removing the 4 10mm bolts and disconnecting the harness.
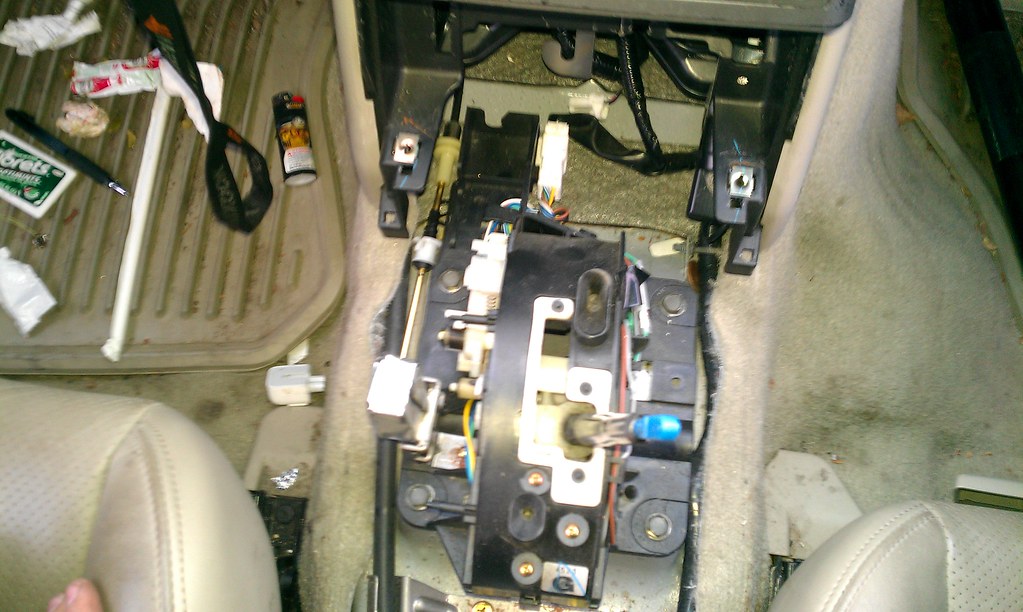
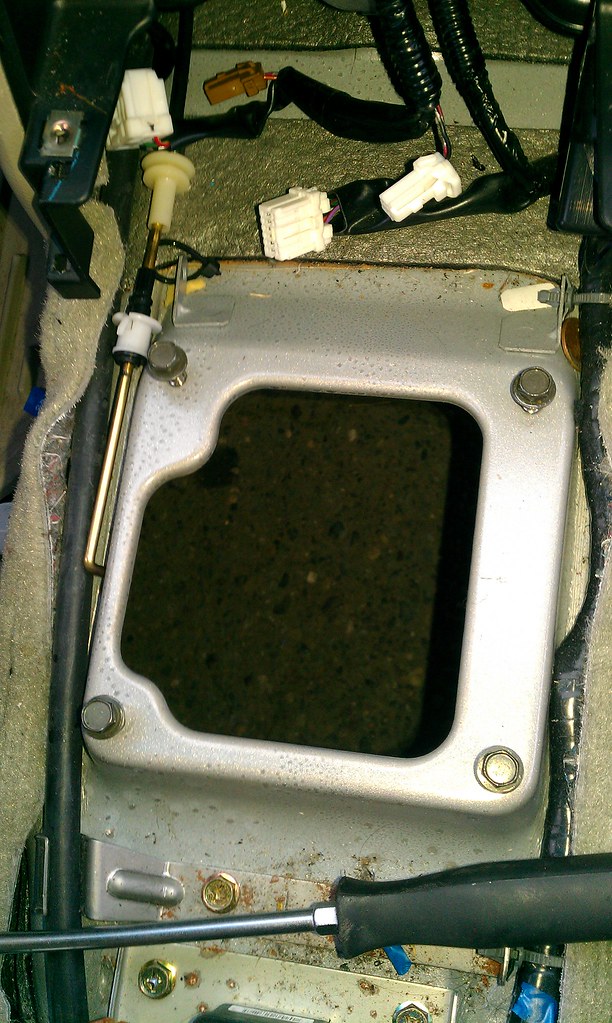
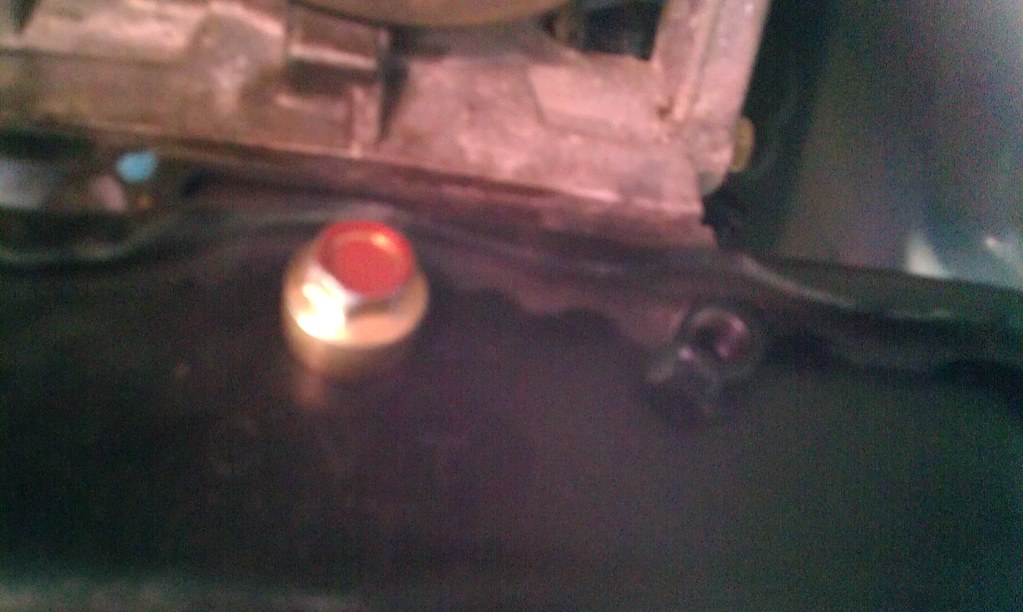
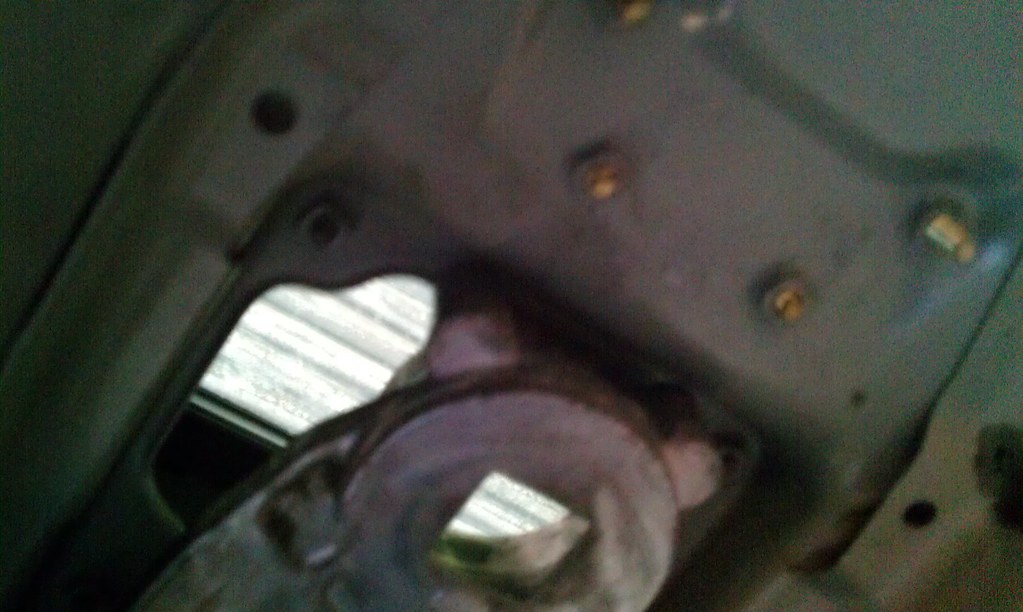
6)you will be left this this
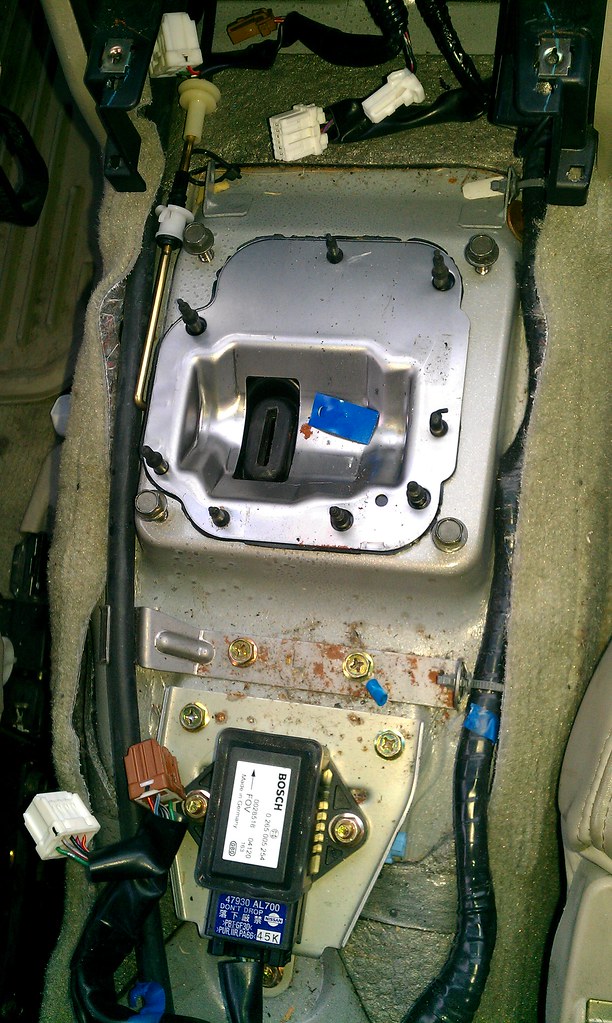
pry it off with a flat head and it comes right off.
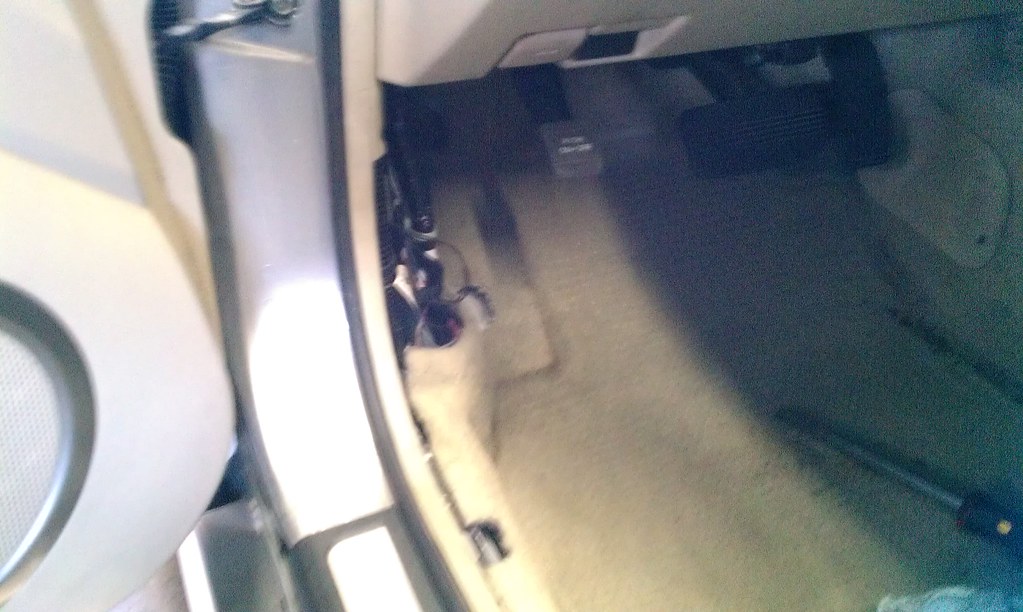
Interior Removal: Seat and Clutch Pedal Prep.
1) Remove the 4 bolt covers and the bolts that hold down the seat. Be sure to unplug the 3 plugs under the seat.
2) Remove kick panel by undoing the bolt in the back and pulling towards the passenger side. Undo the weather stripping and the 'thing' that holds it in. Also take off the cover for the bottom of the dash. Be sure to unplug the interior temp sensor, trunk switch, dimmer, and vdc switch as well as the hood release.
3) get down in there and remove the ebrake assembly. It is being held in by 4 bolts. The top two will require a wrench. ratcheting wrench is a lifesaver. Follow the ebrake cable under the dash and undo it, you won't be needing it.
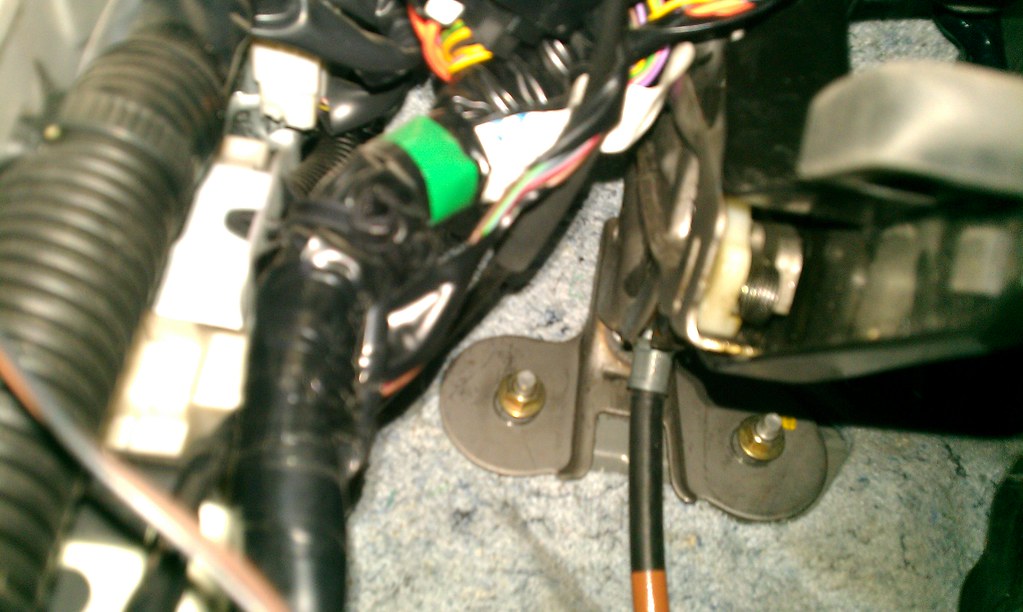
4) 4) Time to remove the VDC/ABS/TCS. It is held up by 4 bolts. Drop it then easily unplug it. (You will need to plug this back in later)
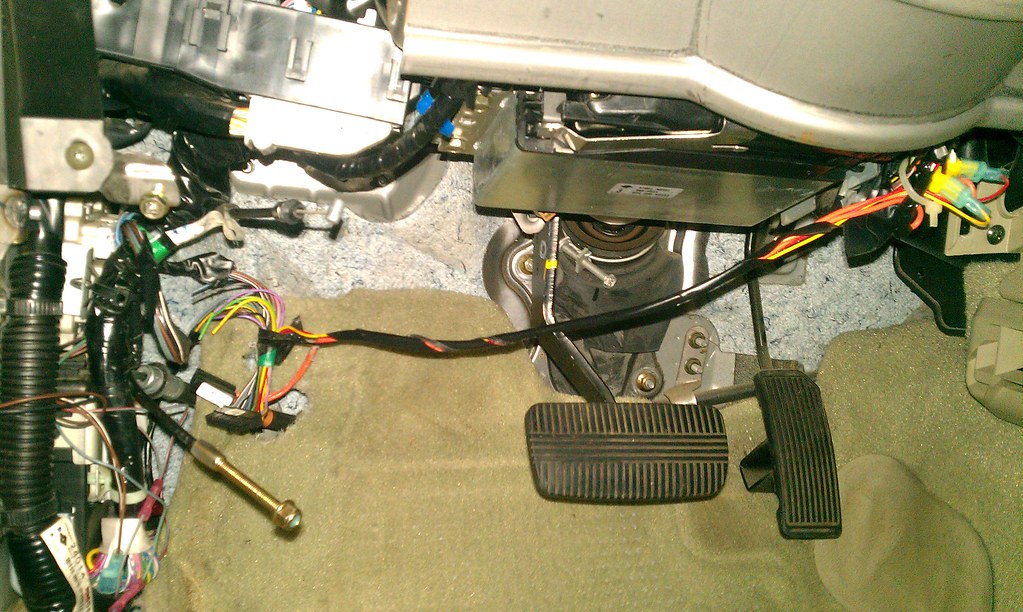
5) Now you can remove the brake pedal. If you are not replacing the pedal, just cut it in half.
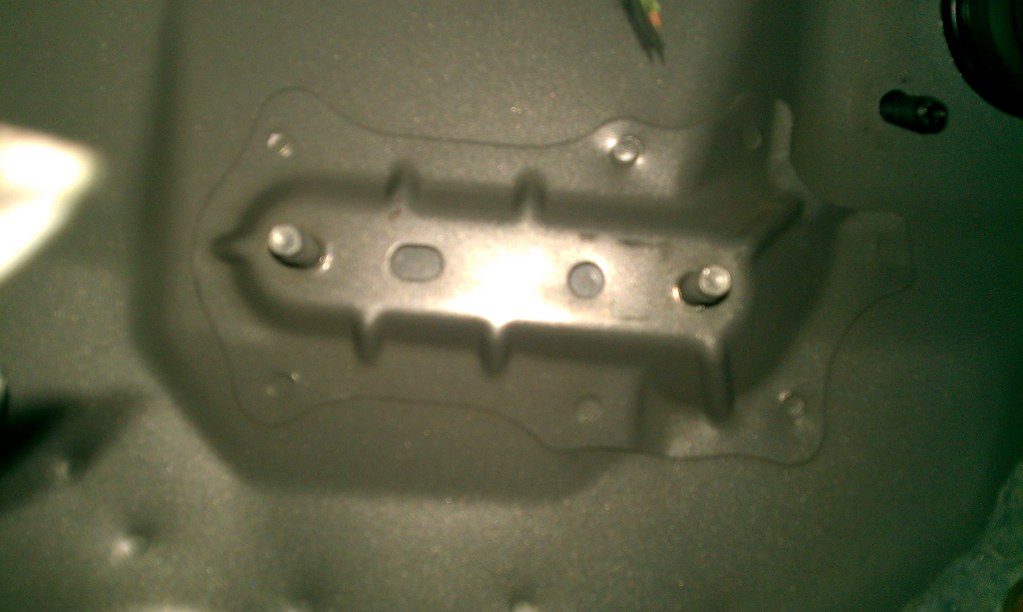
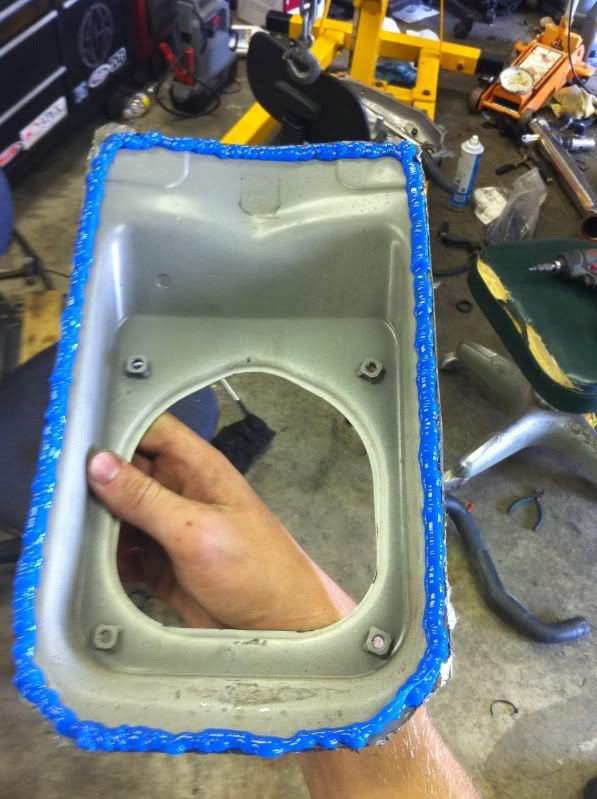
6)peel pack the carpet and cut the insulation to reveal the bracket that holds in the ebrake. get a spot weld drill bit and remove the bracket.
Transmission Install. (sorry for the lack of pics)
**You must index the flywheel properly, the car won't start or run correctly if the flywheel is installed wrong**
Please view for detailed guide on how to index the flywheel.
1) Set the Engine at TDC
2) Install Flywheel in correct position and torque flywheel bolts to appropriate torque
3) Some cranks will not require a pilot bushing - Install if needed
4) Install the clutch using the clutch alignment tool. TQ bolts to appropriate torque.
5) Install Throw-out bearing into clutch bearing sleeve. Make sure everything is good. If you have a 2003-early 04 transmission it is a good time to upgrade the clutch fork and pivot ball to 04-05+
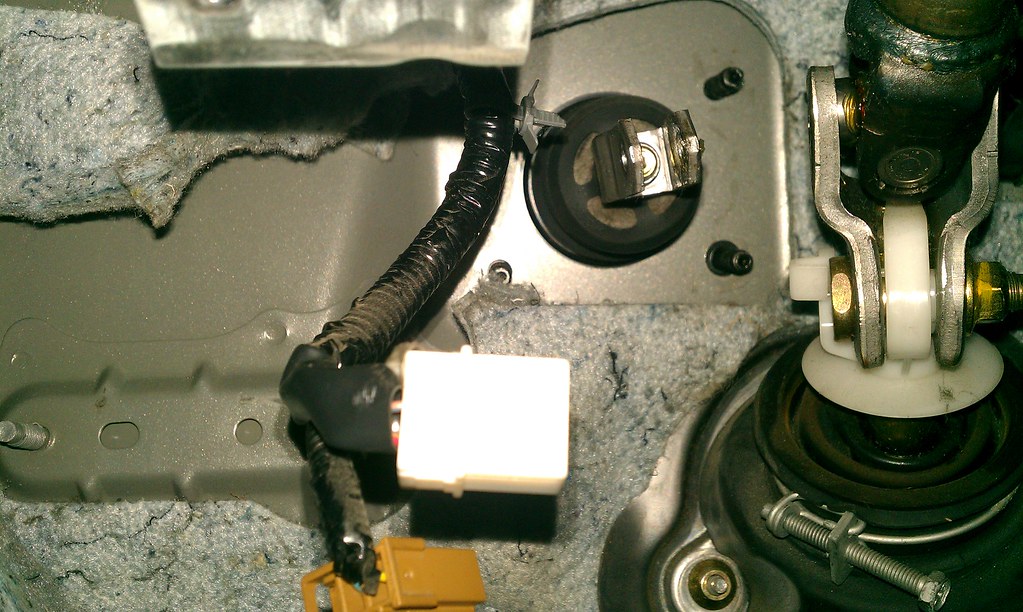
6) Before the transmission goes in, you must modify the transmission cross-member (only if you are using the AT cross-member.)
You must cut our the bracket that is welded inside the cross-member.
7) install transmission and thread in the cross-member bolt also start threading the bell housing bolts. AT bellhousing bolts will work on MT.

8) now that the bracket is cut out, it allows the bolt to go in through the transmission mount
9)Find a nut that will screw in to the transmission mount bolt. Since we are reusing the AT cross-member, Nissan didn't weld a nut to the other side.
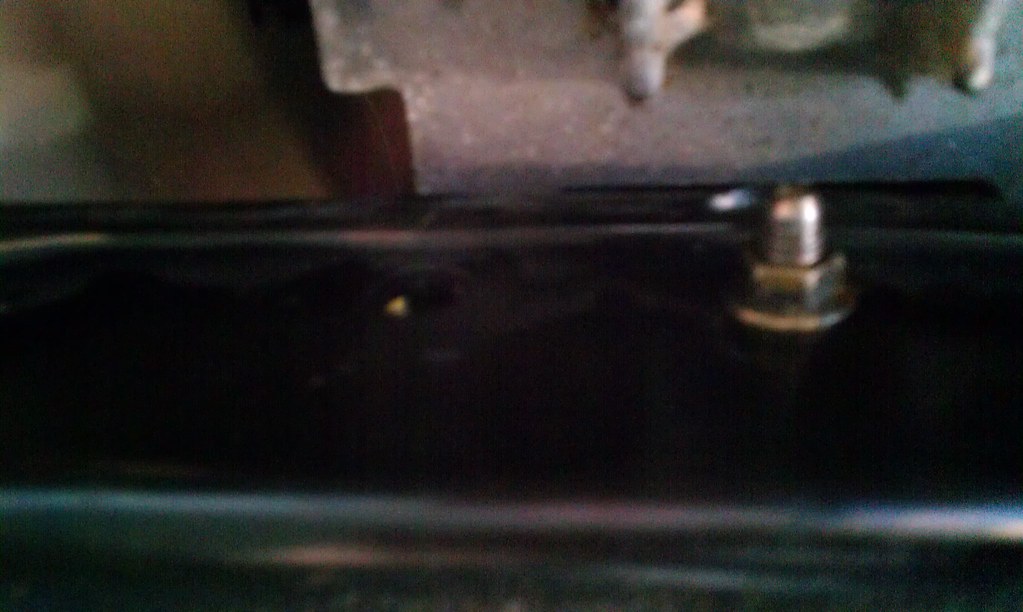
10) time for some cutting
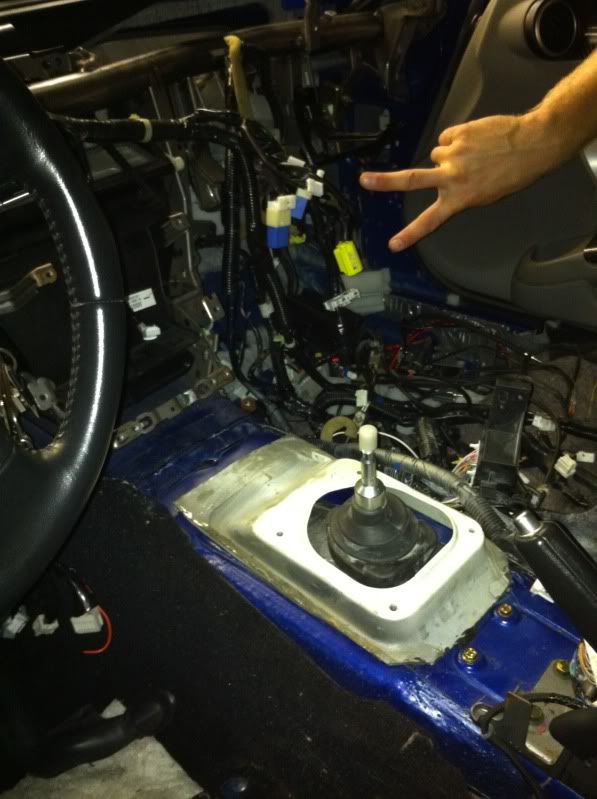
11) You can use your imagination on this one, but be sure you have enough room for the shifter to move freely. I just used tin snips and cut a notch.
I didn't have time to take pictures but this swap should take no more than 6-8 hours. I will on the next swap I do.
This is the first revision [on going] of this wright up. I am turning this attempt at a DIY to an FAQ/ info thread. I will make a full writeup on the next swap I do and link it to this thread. Most importantly, follow this at your own risk! Neither I or this forum is responsible for you "messing up your car". now that all the formalities are out the way its time to get this baby started!!
Follow @HEXAGARAGE on Instagram
Parts list:
Hydraulics:
Clutch Pedal - You can use the OEM pedal or go with an aftermarket option (tilton, willwood, summit, etc)
Clutch Master Cylinder - OEM, OE Replacement
Clutch Line - OEM or aftermarket replacement
Clutch Slave Cylinder - OEM, OE Replacement
Drive Train:
6MT Clutch Kit: OEM, Aftermarket
-Pressure Plate
-Pressure Plate Bolts
-Clutch Disk
-Throw out Bearing
-Pilot Bushing
-Alignment Tool
6MT Flywheel - OEM, Aftermarket
6MT Flywheel Bolts - OEM
6MT Transmission - OEM
6MT Shifter - OEM, Aftermarket
6MT Rubber Grommet w/bracket - OEM from any MT Nissan. This is only if you have added the 6MT shifter hole
6MT Drive-line - OEM, Aftermarket
6MT Differential - 5AT works, 6MT works better
Interior:
6MT Brake Pedal - OEM,
6MT Center Console - OEM
6MT Shifter Trim - OEM
6MT E-Brake Setup - OEM, Hydraulic
6MT Shift **** - OEM, Aftermarket
Electronics:
6MT ECU - Keep Existing ECU
6MT EFI Harness - Keep Existing Harness (just wire in reverse and pnp switch)
6MT Hazard Light Switch (03-04 G35) - OEM
*Be sure you have all of this before you get started*
FAQ
What Items don't I have to source?
You do not need the following for your car to run/drive:
-6MT EFI Harness - 5AT works fine you just have to do some simple wiring
-6MT ECU - Use existing 5AT ECU
-6MT Ebrake -
-6MT Differential - 5AT works fine and gets great gas mileage. Just has longer gears.
-6MT Gauge Cluster - 5AT works fine, you will have a "check AT" light on
How easy is this to do?
If you can change a clutch, you can do a 6mt swap.
What custom work needs to be done? (what doesn't bolt in 100% OEM)
The only custom work would be the clutch pedal and making a cut for the shifter.
What is the price for this? If you DIY
The price varies depending on new/used price on the parts listed above.
-I have had good luck finding cheap used parts. The cheapest this has been done for is about $700 (free transmission and interior pieces)
Wiring
You will need to do a bit of wiring for this swap. Specifically the Starting System. Reverse lights and Neutral Position Switch will not need to be wired up if you are using the 6MT Harness.
Starting System
The 5AT Chassis Harness does not have an interlock switch for the clutch. You will need to wire Switched 12V+ directly to the IPDM (Intelligent Power Distribution Module). Now there are two ways of doing this.
Option 1:
You can bridge any Switched 12V+ directly to Terminal 53 (Grey/Red Stripe Wire) on the IPDM. You will be able to start the car without depressing the clutch.
Option 2:
If you purchased a used clutch pedal, It should have come with the interlock switch. You can wire Switched 12v+ to the switch, then from the switch to Terminal 53 (Grey/Red Stripe Wire) on the IPDM... For that OEM Feel.
Neutral Position Switch
*You will only need to do this if your are using the 5AT engine harness**The 6MT harness plugs right in**
The neutral position switch is what controls cruise control. You will not need to wire this in if you have disabled cruise control or are running an aftermarket steering wheel setup.
You will need to wire Pin 102 on the ECU(Green/Orange Stripe) to either spade on the Neutral Position Sensor. The other spade will then need to be grounded to any part of the chassis.
Transmission Removal
First things first. Lets get that trans out.
1) get the car up on jack stands or a lift. the higher the better.
2) remove catalytic converters, y pipe and O2 sensors.
3) drain the oil from the pan
4) remove the driveshaft at the differential and remove the carrier bearing. the driveshaft can then be pulled out.
5) undo transmission mount bold and the transmission will drop into the crossmember
6) unhook all sensors, remove gear selector, transmission cooler hardlines, transmission fluid fill drain.
7) Remove all the bolts from the bellhousing. unhook the starter and set it aside. now unhook the transmission from the chassis by removing the 4 crossmember bolts.
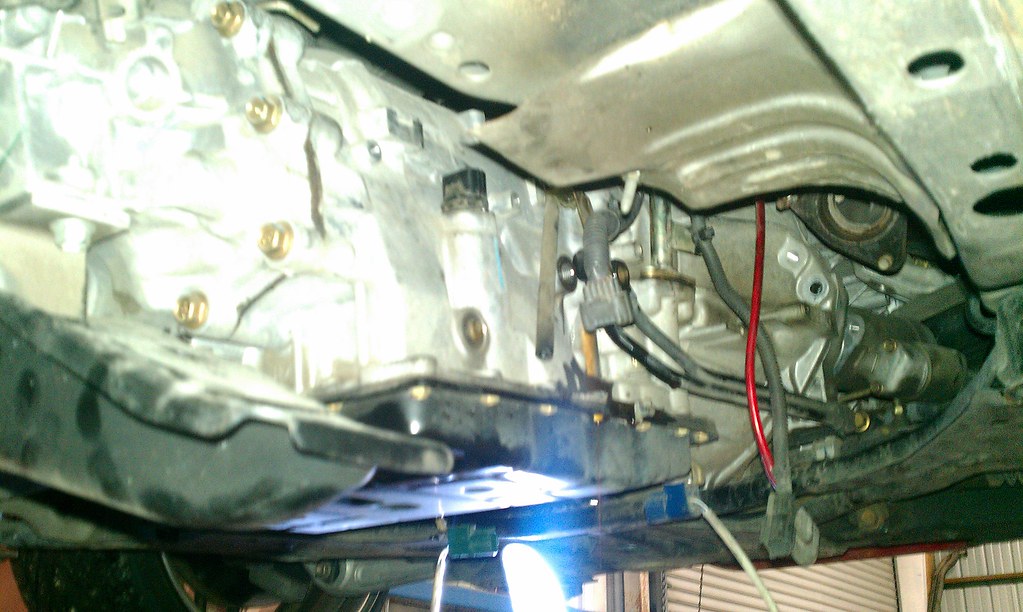
8) you will now be able to pull the transmission out. be careful because this will drain all of the trans fluid that was in the torque converter. make sure you have a large bucket to drain it in.
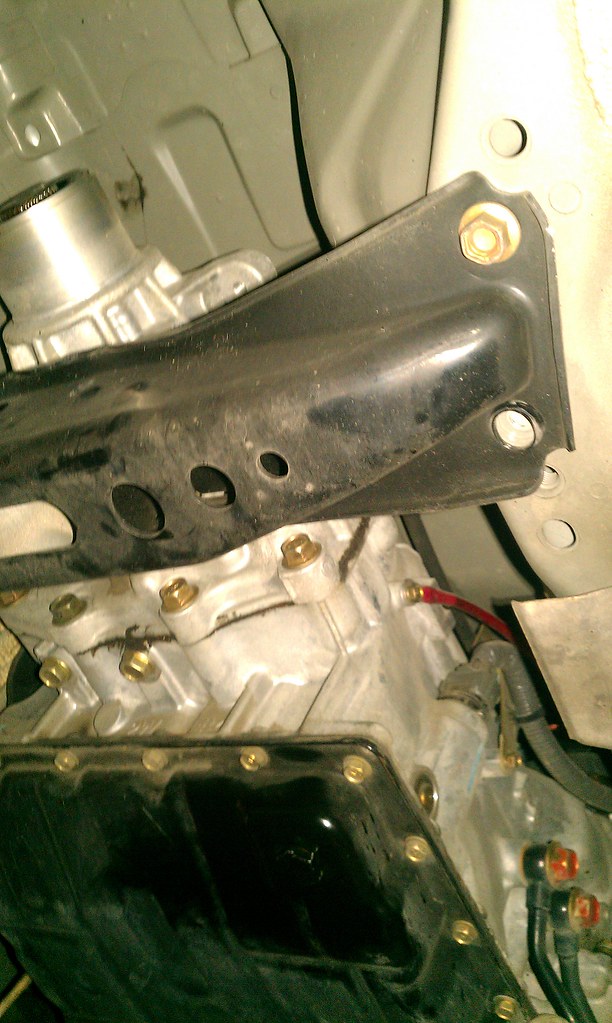
9)remove the giant brace that sandwiches part of the lower compression arm thing.
10) you will now be able to remove your torque converter. You just need to get your wrench behind the lip on the block. once the torque converter is out, you can remove the flywheel. It will look like this once completed.
Interior Removal: Center Console
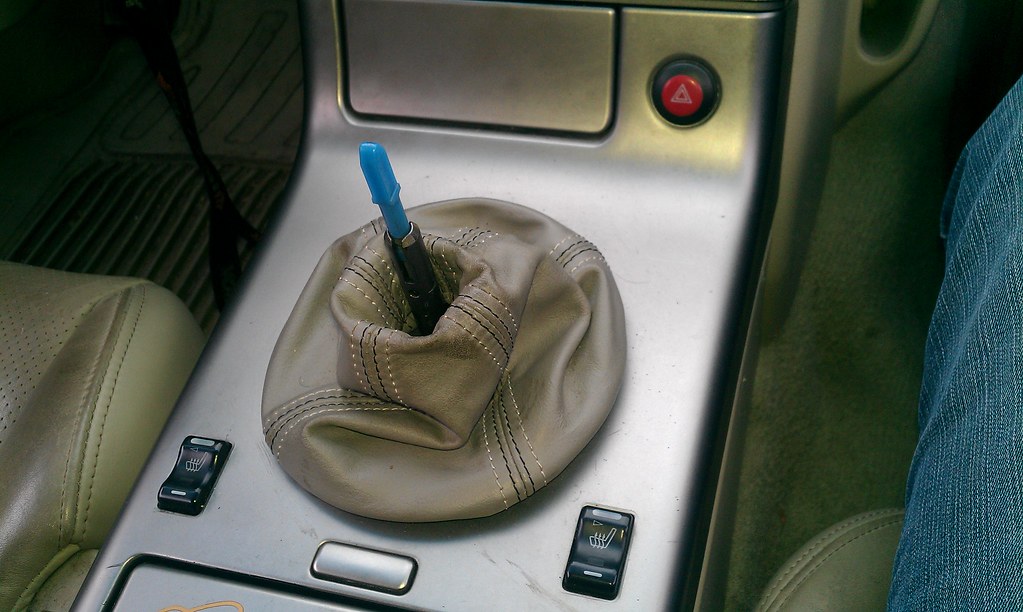
1) Put the shifter in neutral and remove the AT Shift ****.
2)Remove the shifter bezel. It just snaps out of place You will need to disconnect the Seat warmers, Ashtray lights, and hazard Swtich.
3)Remove the rest of the center console by removing the 4 screws. Two under the radio and the other two on the sides.
4)Disconnect the park cable that releases the key. you might find some treasure in between the seats.
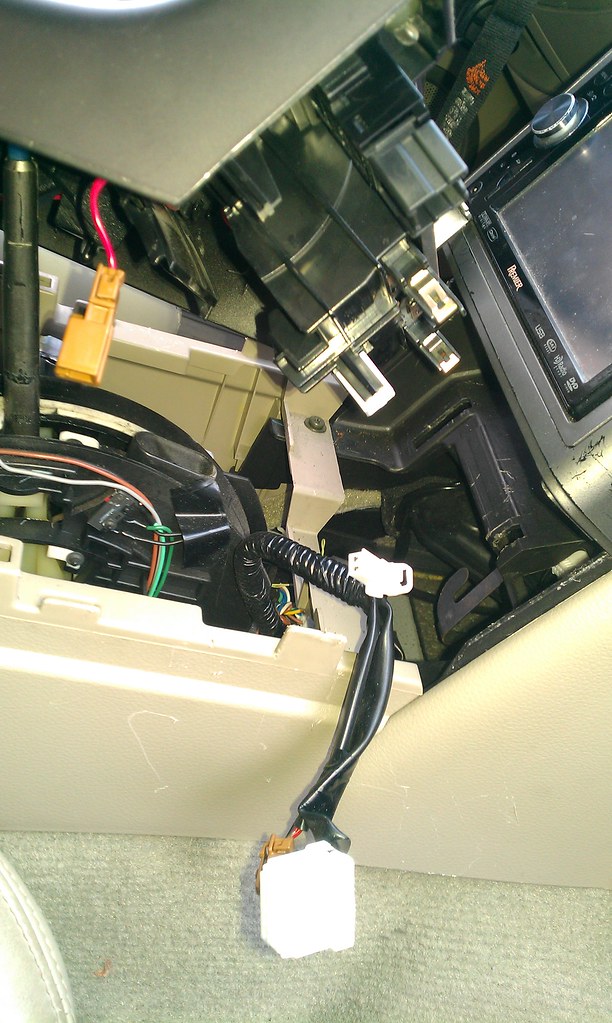
5)Now remove the AT shifter assembly by removing the 4 10mm bolts and disconnecting the harness.
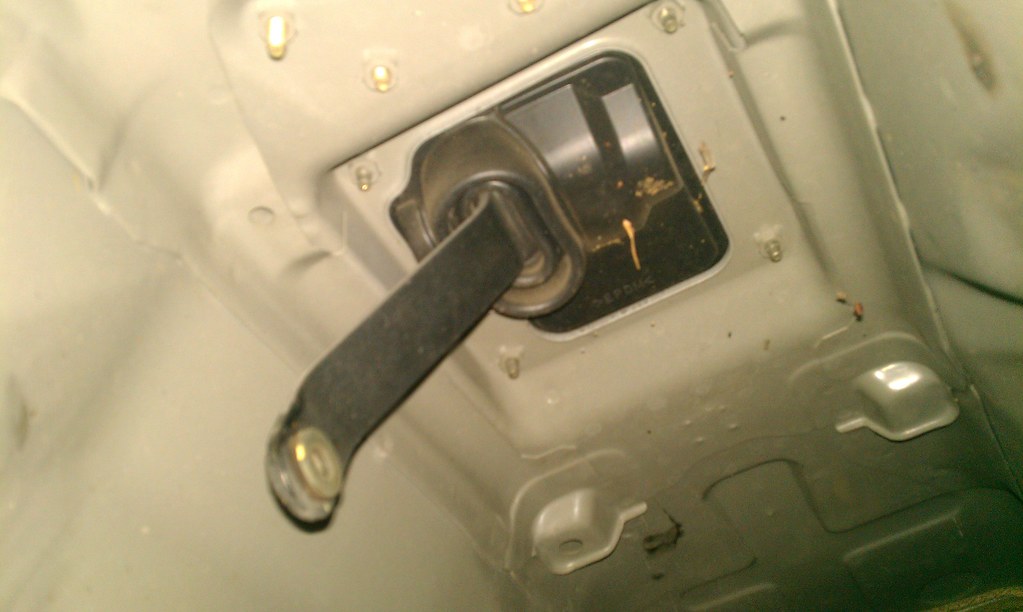
6)you will be left this this
pry it off with a flat head and it comes right off.
Interior Removal: Seat and Clutch Pedal Prep.
1) Remove the 4 bolt covers and the bolts that hold down the seat. Be sure to unplug the 3 plugs under the seat.
2) Remove kick panel by undoing the bolt in the back and pulling towards the passenger side. Undo the weather stripping and the 'thing' that holds it in. Also take off the cover for the bottom of the dash. Be sure to unplug the interior temp sensor, trunk switch, dimmer, and vdc switch as well as the hood release.
3) get down in there and remove the ebrake assembly. It is being held in by 4 bolts. The top two will require a wrench. ratcheting wrench is a lifesaver. Follow the ebrake cable under the dash and undo it, you won't be needing it.
4) 4) Time to remove the VDC/ABS/TCS. It is held up by 4 bolts. Drop it then easily unplug it. (You will need to plug this back in later)
5) Now you can remove the brake pedal. If you are not replacing the pedal, just cut it in half.
6)peel pack the carpet and cut the insulation to reveal the bracket that holds in the ebrake. get a spot weld drill bit and remove the bracket.
Transmission Install. (sorry for the lack of pics)
**You must index the flywheel properly, the car won't start or run correctly if the flywheel is installed wrong**
Please view for detailed guide on how to index the flywheel.
1) Set the Engine at TDC
2) Install Flywheel in correct position and torque flywheel bolts to appropriate torque
3) Some cranks will not require a pilot bushing - Install if needed
4) Install the clutch using the clutch alignment tool. TQ bolts to appropriate torque.
5) Install Throw-out bearing into clutch bearing sleeve. Make sure everything is good. If you have a 2003-early 04 transmission it is a good time to upgrade the clutch fork and pivot ball to 04-05+
6) Before the transmission goes in, you must modify the transmission cross-member (only if you are using the AT cross-member.)
You must cut our the bracket that is welded inside the cross-member.
7) install transmission and thread in the cross-member bolt also start threading the bell housing bolts. AT bellhousing bolts will work on MT.
8) now that the bracket is cut out, it allows the bolt to go in through the transmission mount
9)Find a nut that will screw in to the transmission mount bolt. Since we are reusing the AT cross-member, Nissan didn't weld a nut to the other side.
10) time for some cutting
11) You can use your imagination on this one, but be sure you have enough room for the shifter to move freely. I just used tin snips and cut a notch.

Last edited by DEMoLITIoN; 01-12-2016 at 07:18 AM.


Trending Topics
03-30-2012, 12:55 AM
#9
Registered User
iTrader: (4)

Join Date: Sep 2010
Location: Gilroy, ca
Posts: 641
Likes: 0
Received 0 Likes
on
0 Posts
Inb4 someone says "why not just trade it in? This isint a 240!"
Glad someone did a DIY for the members, nice work, I did this on a couple 240's, it was worth it.
Glad someone did a DIY for the members, nice work, I did this on a couple 240's, it was worth it.
03-30-2012, 02:05 AM
#10

finally a writeup on this! is your car a Z or a G? if it's a Z. you will need a 6MT speedometer and gauges for the shift light.
Last edited by silvertouringz; 03-30-2012 at 02:09 AM.
03-30-2012, 07:01 AM
#12
03-30-2012, 08:28 AM
#13
Registered User
iTrader: (87)

Join Date: Dec 2006
Location: Lexington, KY
Posts: 942
Likes: 0
Received 0 Likes
on
0 Posts
If wired correctly with the 6spd ECU and or reflash, I don't see any reason why it would not. The only thing I do not have wired up besides that is my reverse lights. Been lazy lol.
04-01-2012, 12:02 AM
#14
New Member
iTrader: (8)

Join Date: Jul 2008
Location: Costa mesa :( miss san diego
Posts: 588
Likes: 0
Received 0 Likes
on
0 Posts
Im assuming if one was on sn osiris tune they would have to reflash after this install? Regardless id like to see this diy completed before i go purchasing parts for an awesome winter project


