2004 ivory pearl, undergoing a vk56 swap
 07-20-2016, 05:32 AM
#1
New Member
Thread Starter

So this is a copy over from my build on another forum to get this updated, than I will single out between the 2. Others have seen this in my secondary firewall removal thread.
I am not to sure where to place this, hopefully this area will do since there is not a swap or building thread area.
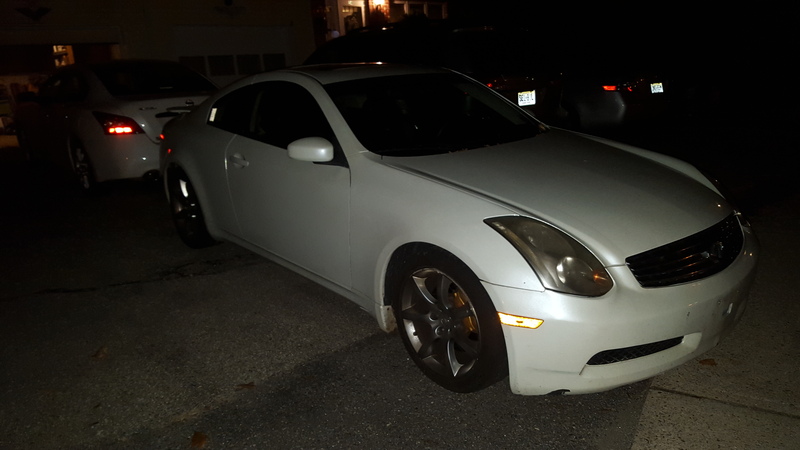
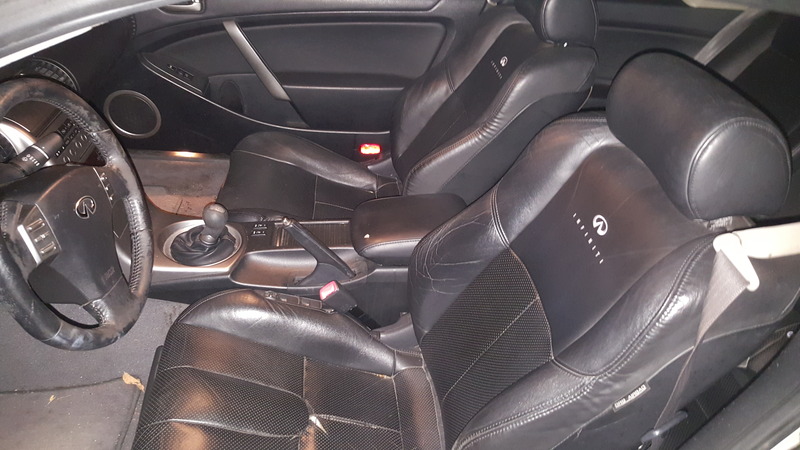
Whats up everyone. After 2 years of searching, mainly due to saving money, I finally found my G35. She is a 2004 Ivory White Pearl with black leather interior 6mt. I always intended on doing an engine swap on this car but I had originally wanted to build a Frankenstein vk45, which is a great but different topic. but due to oil pan location and engine placement in the engine bay. the cost became to great for my needs. I am using a 2011 vk56de out of a titan. I am running a flex fuel engine for some rather specific reasons right now before modifying the engine internally.
I know this swap has been attempted many times and build threads have died out over the years, I have read most of them and seen most of them end in part outs due to part nonavailability. I have been in contact with many shops before getting crazy into this and have found who I need to build what I need so I will start off from the beginning I guess.
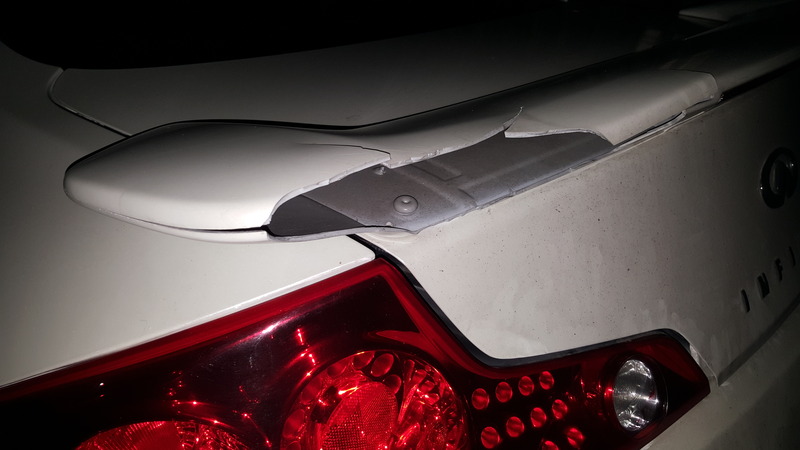
She is a little rough, she was not taken care of well. She was female owned..... The rear bumper and spoiler have damage and I will be replacing them and the front driver fender has damage, I have a new fender for it already. The engine had over 203k miles on it and the person I spoke with about fed me a ton of crap about how good of shape it was in. When I met her she was drinking oil like and alcoholic and what she didn't drink she bled out the nasty rtv covered vlave cover gaskets. She had 5 fuel injectors of one car and a 6th from a different car. The dual mass flywheel was shot and the clutch was basically fuzz in the bell housing.
So here she is what I got her.

She was rough and dirty, I didn't take many pictures because of that.
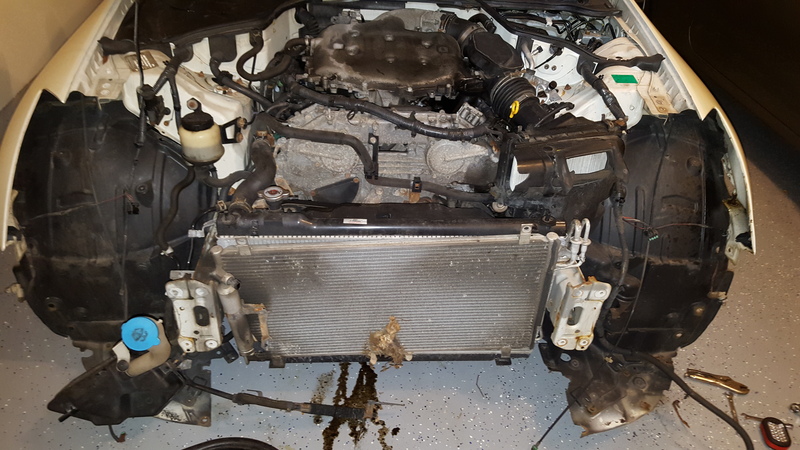
So here is pulling her apart.
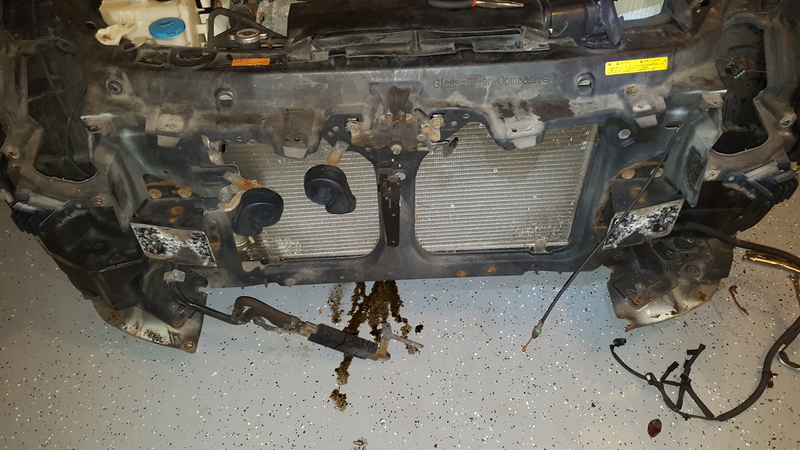
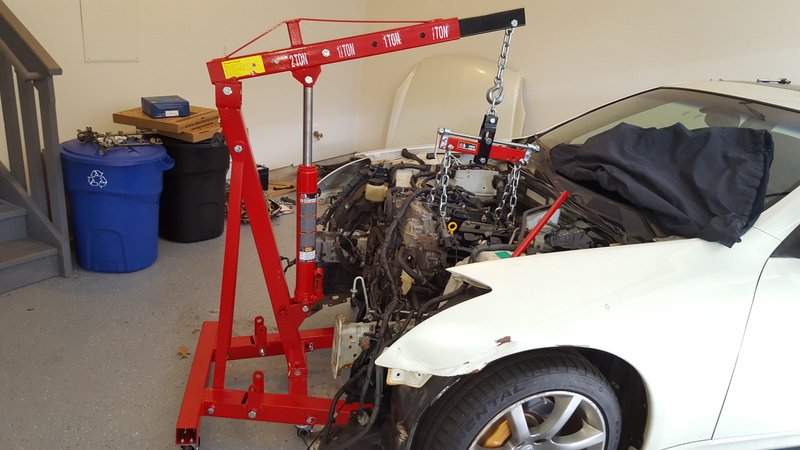
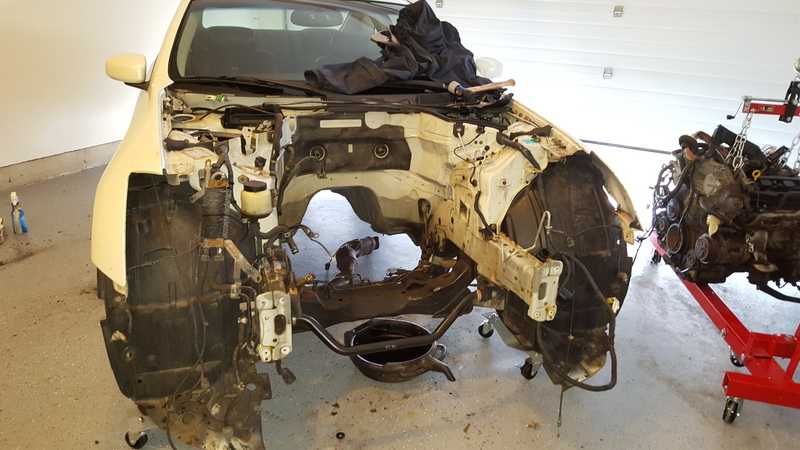
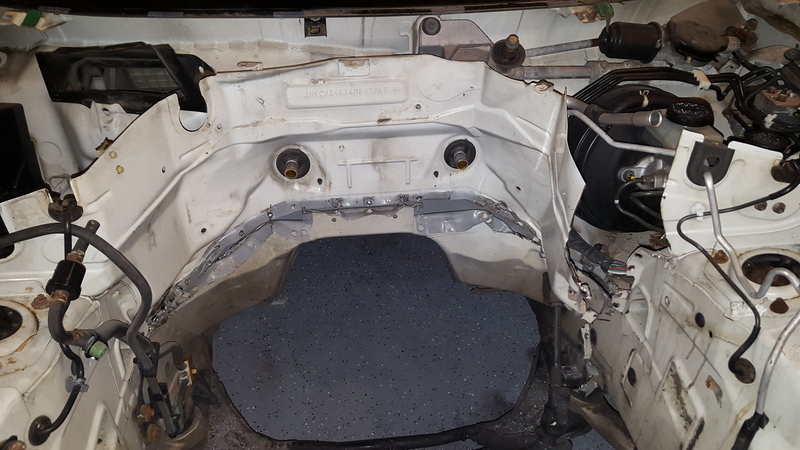
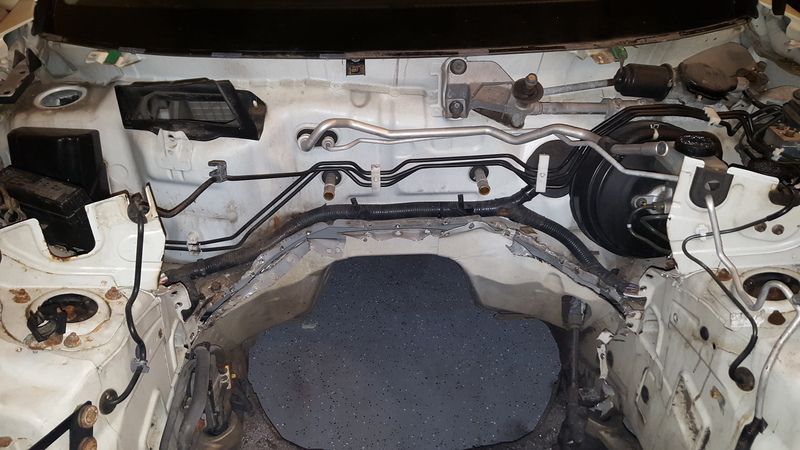
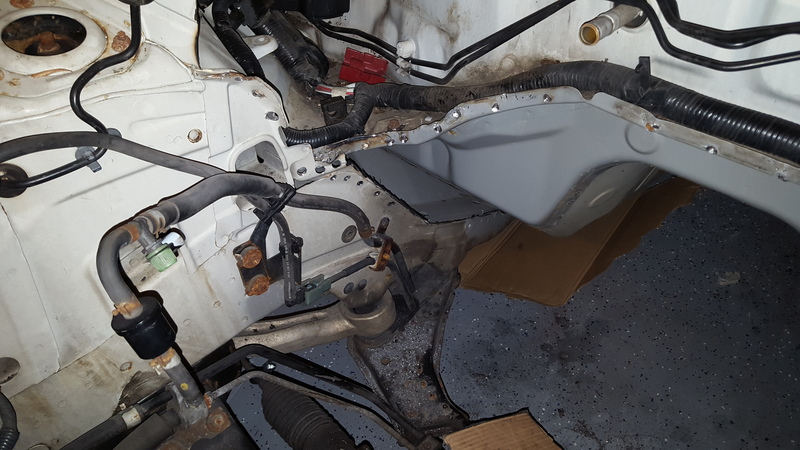
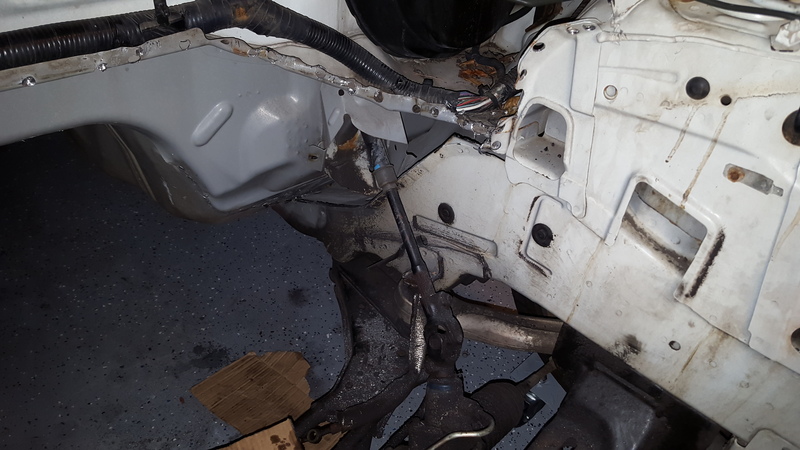
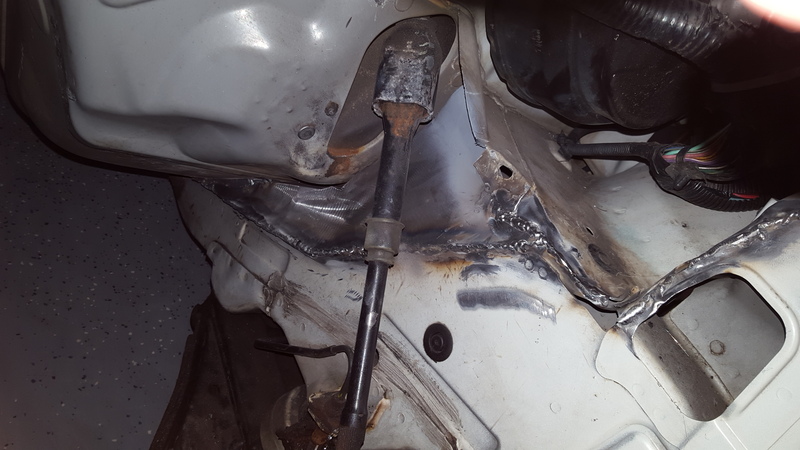
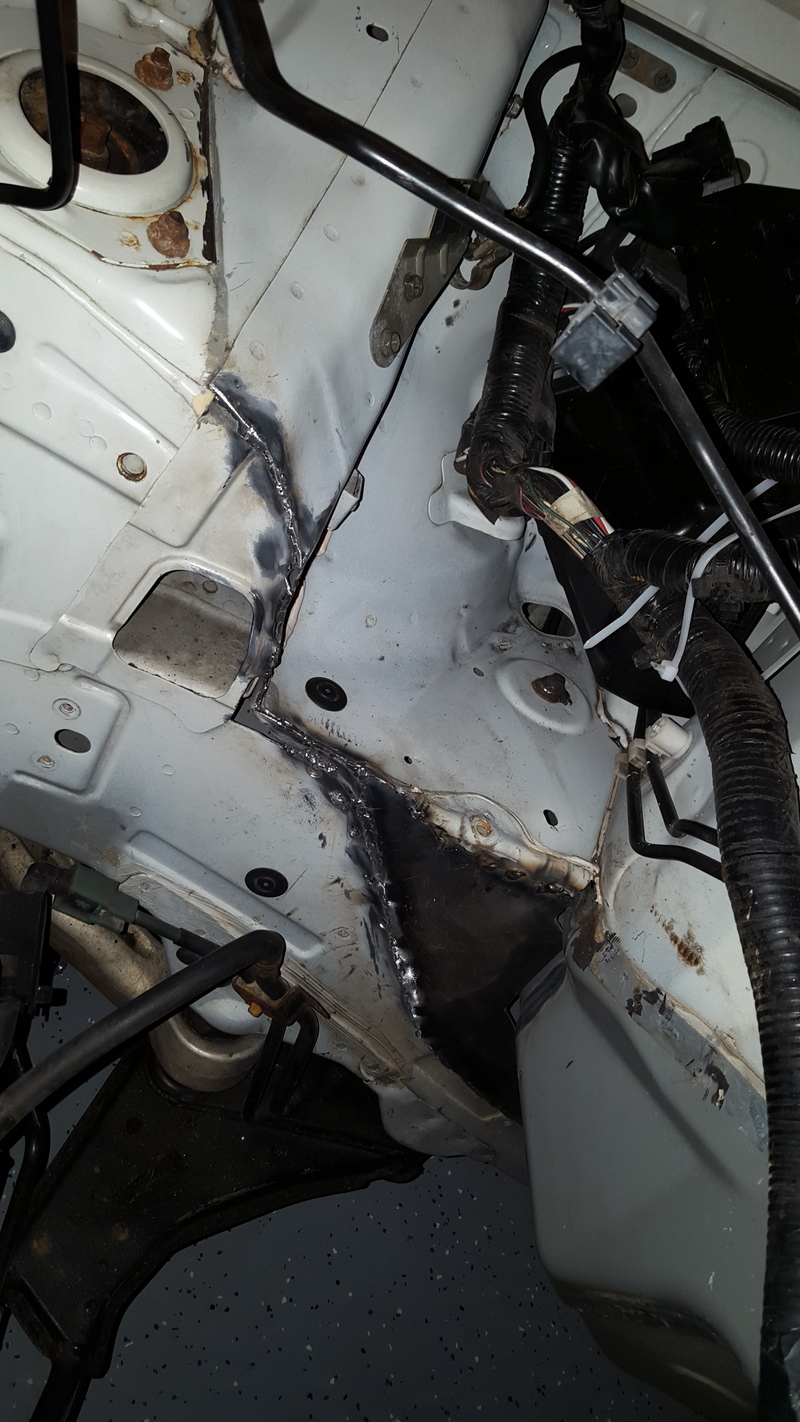
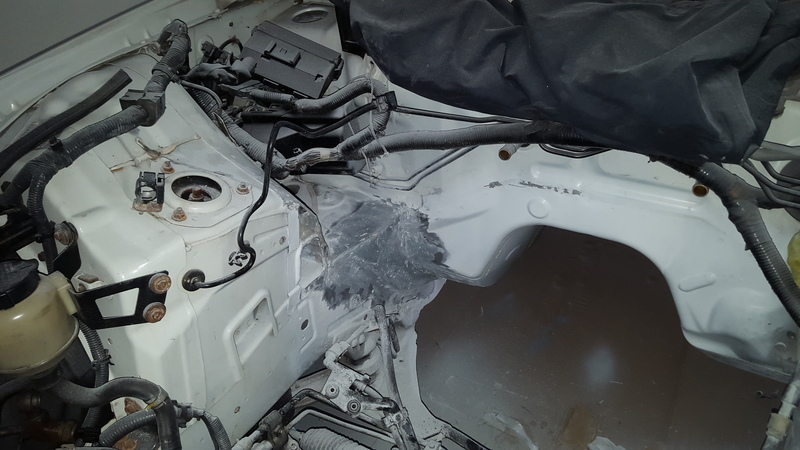
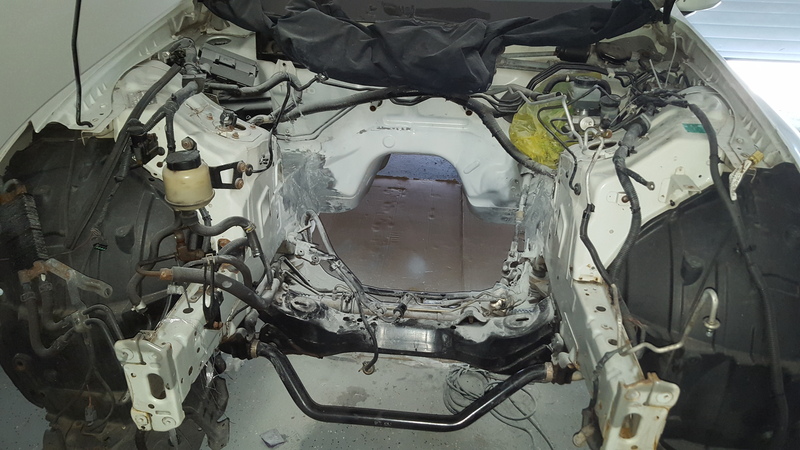
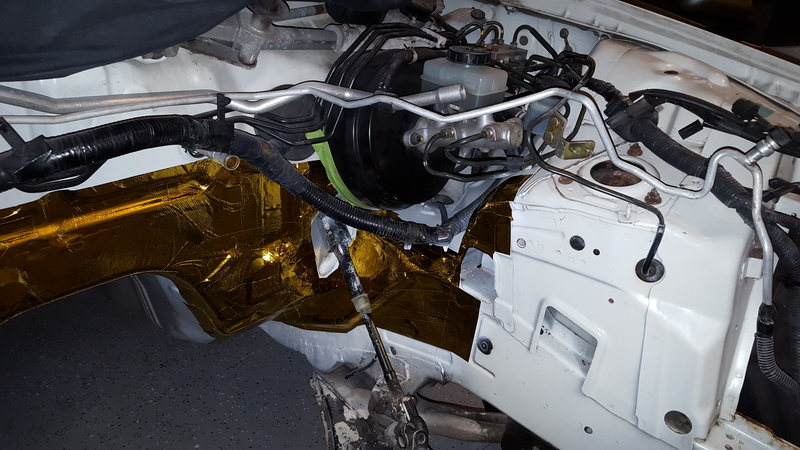
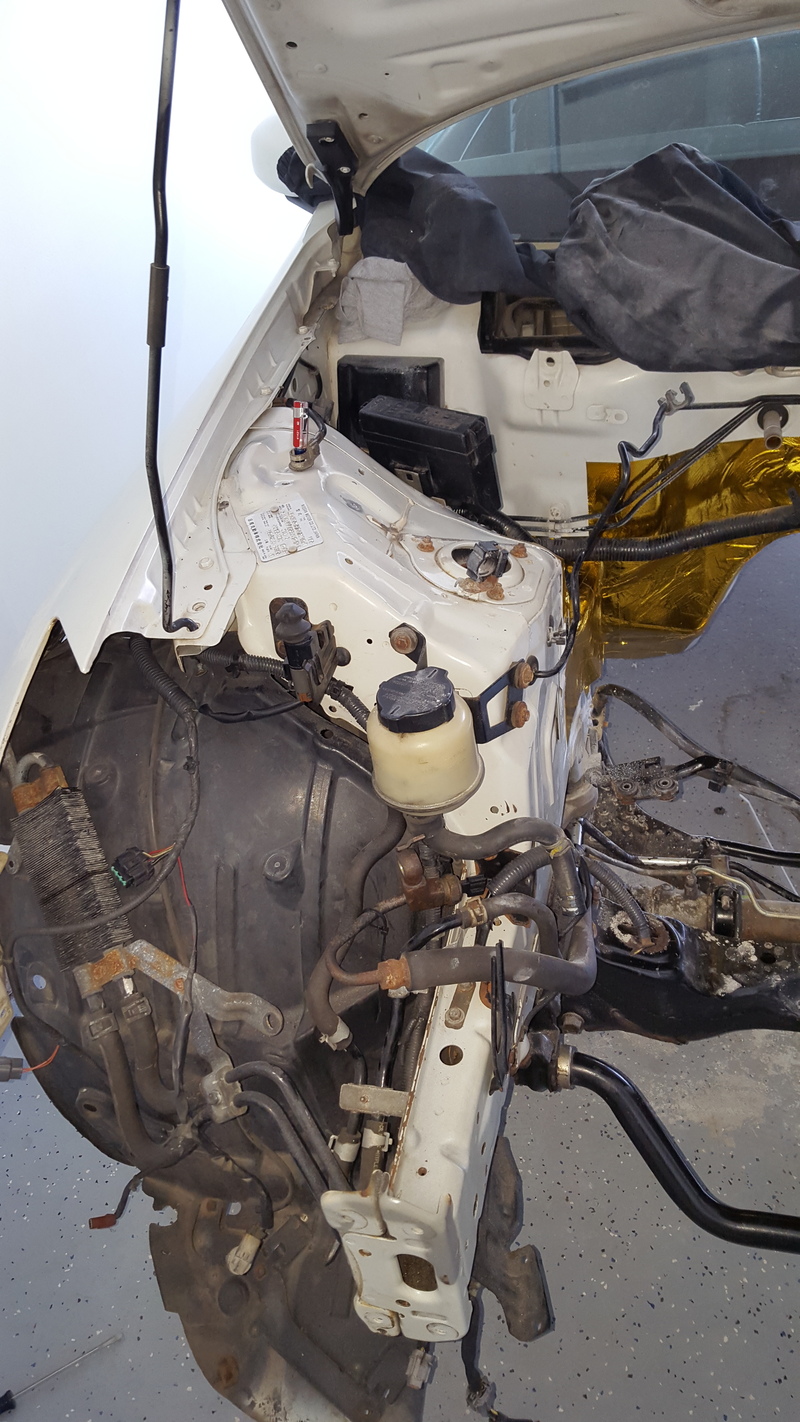
Ok you have mostly all seen this stuff cause your all owners. Here is where it gets fun. Since I am doing a vk56 swap and as I have been reading and learning and studying. There are 2 ways to do this. You can A. Squeeze the motor into that small compartment and push a ton of weight forward, ruining the near perfect weight distribution of the car and basically push it heavily through the corners destroying front wheels. Or you can do B, the correct way and get rid of all that crap in the way. The VQ sits so far forward of the secondary firewall alone, plus the depth of that secondary firewall. Thats a lot of space to be had. SOOOOOOO, I started drilling and cutting.
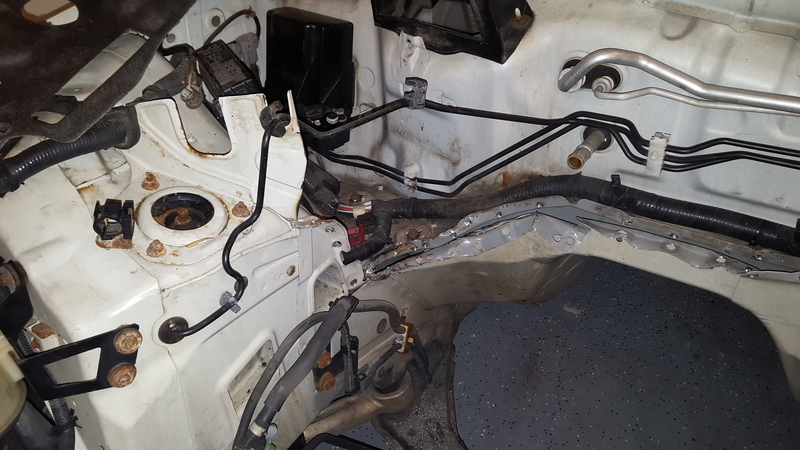

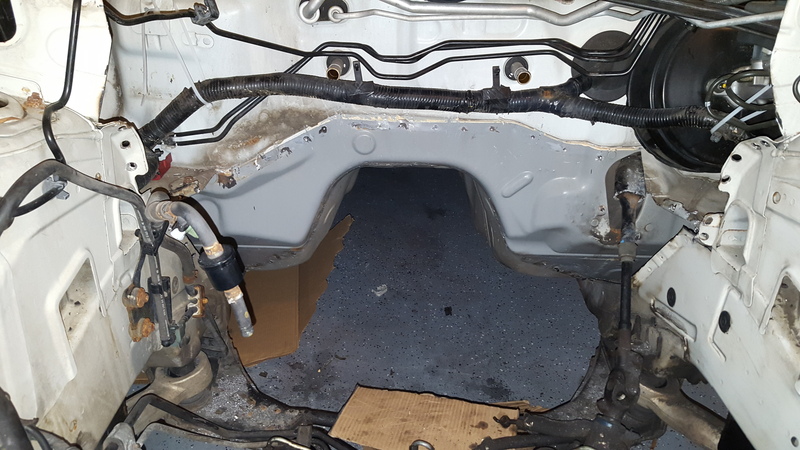
Now that all that crap is out of the way I bring in a friend that welds, since its the only damn thing I can't do. I don't have the equipment. Funny enough I should have taken a picture but I forgot, the cord for the welder was a 100 ft extension we made and ran to the second floor drier outlet. haha good times.
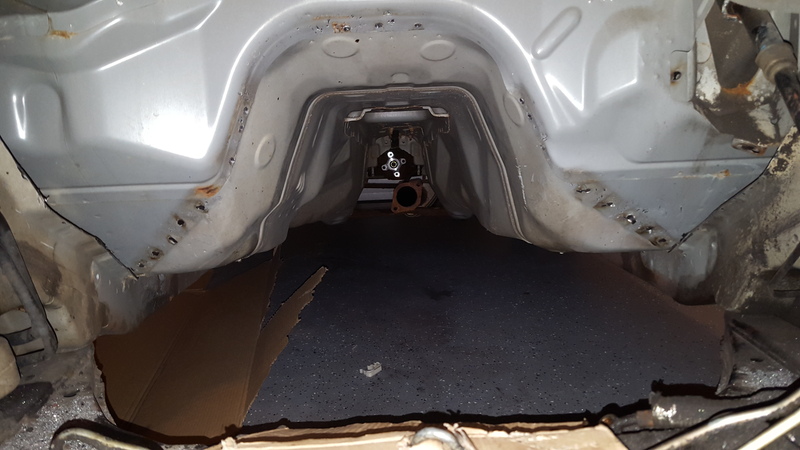
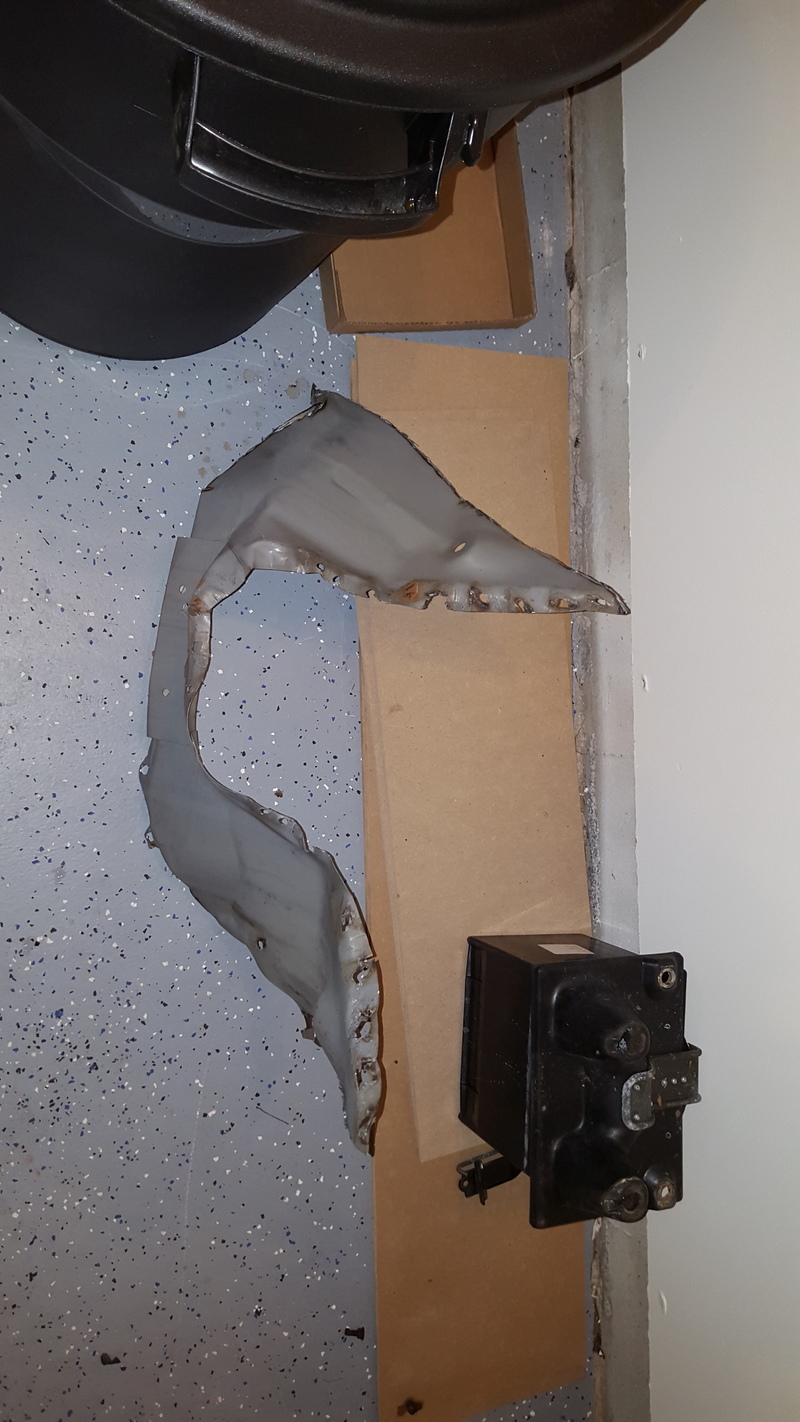
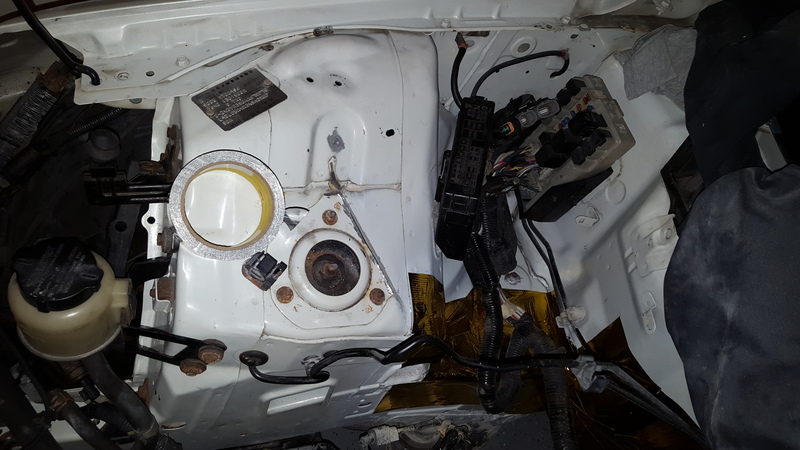
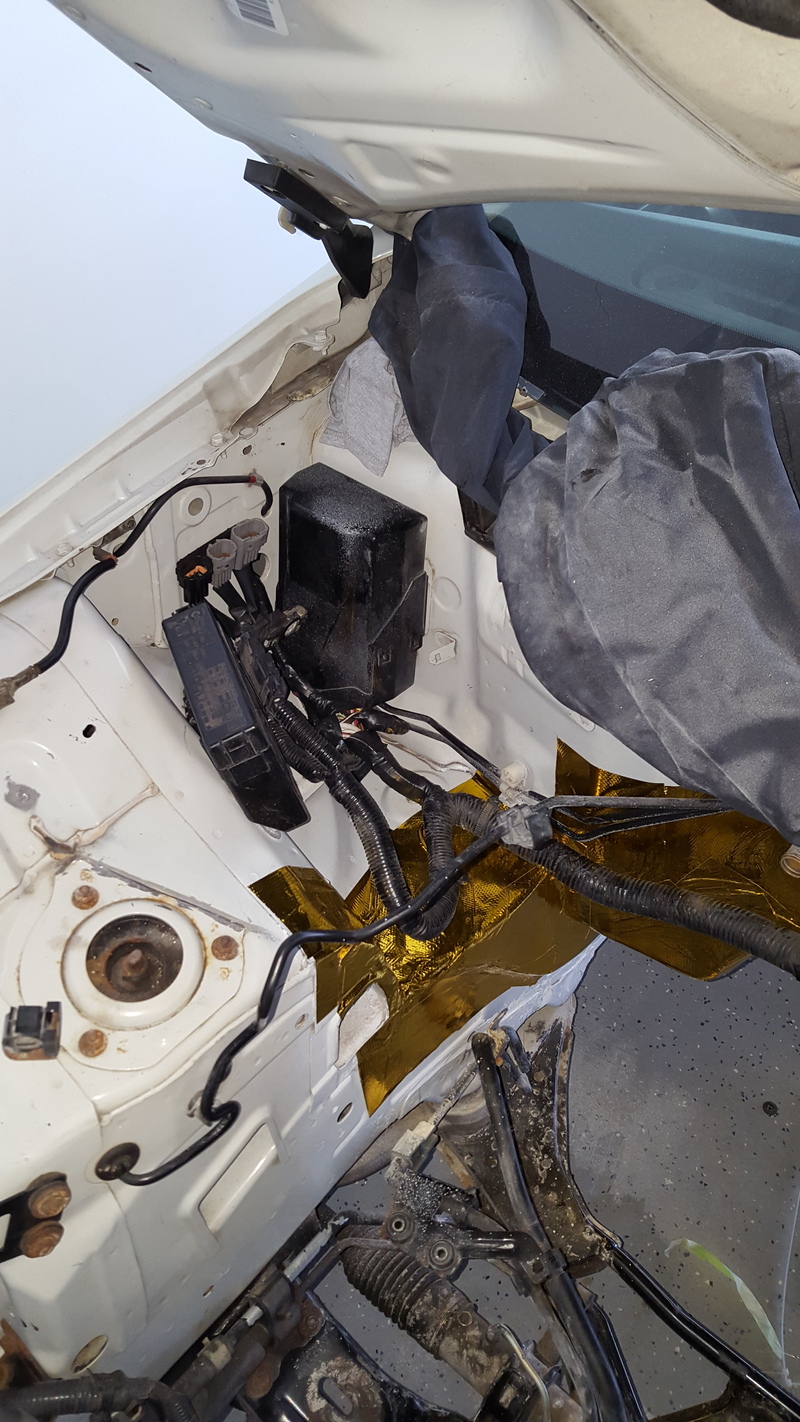
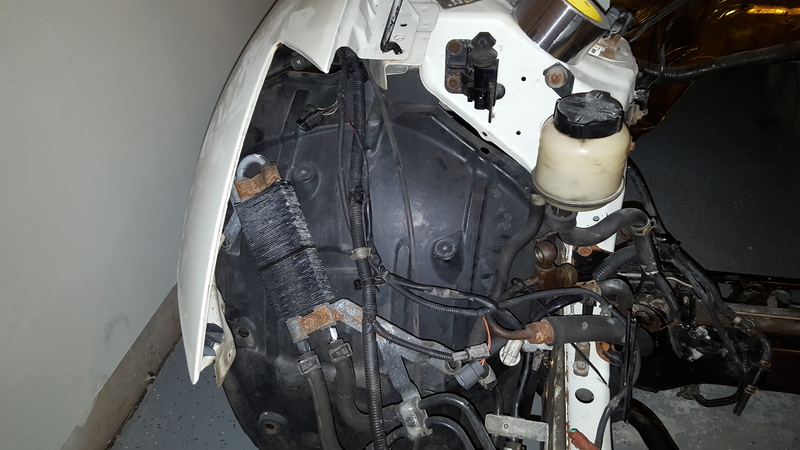
I noticed in builds that I was seeing, these areas were left open, I wanted to close them as reinforcement and than also for looks.
I forgot to get photos of these covers after they were finished.
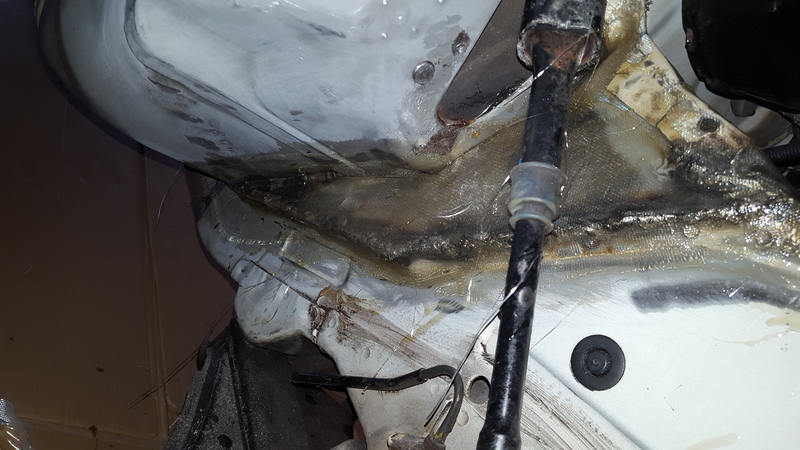
Now I started fibergalssing over them and building up layers so I can sand off extra material to clean them up nicely.

I will have updates on the build up and what it looks like all finished. I am working odd hours this week so won't be at it till the weekend.
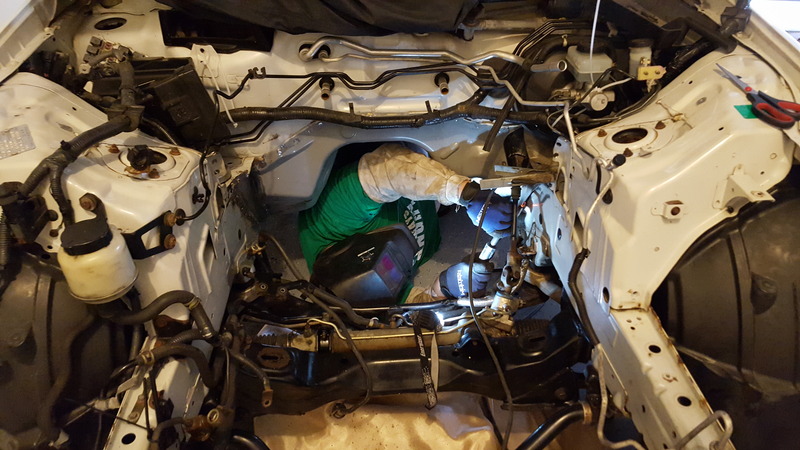
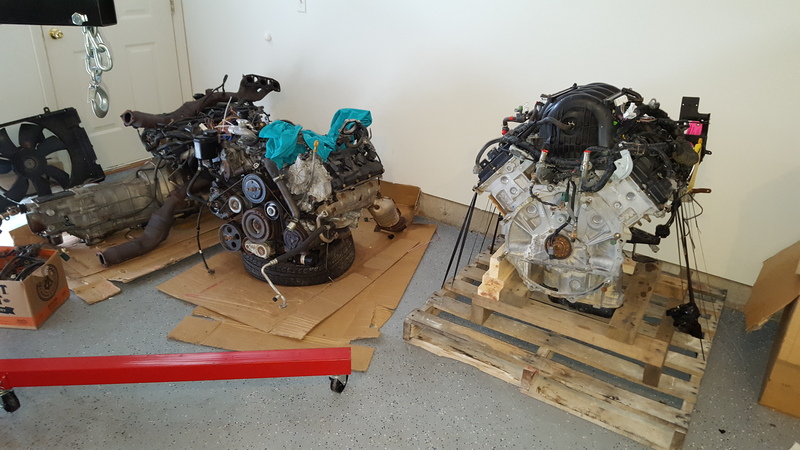
Here is a photo I think you will all enjoy, lets play "Name that engine"
So far I am working more on the car while I save an accumulate parts. I currently have the vk56 auto bell housing, the Zfever adaptor plate which will allow me to run the stock pos sensor and ecu for now while the engine remains in stock form. The headers are underway right now as I caught them at the right time of them doing a swap, so I am having a set made for me as well. I still need to order the internal slave for the auto bell housing. And engines mounts are also currently being made. They are the same that were used in Ryan Kados 350z, well made by the same company and same style to put the motor as far back as possible.
So that's it for now. I will try to update at the beginning of the week to keep any interested parties up to date.
I am not to sure where to place this, hopefully this area will do since there is not a swap or building thread area.
Whats up everyone. After 2 years of searching, mainly due to saving money, I finally found my G35. She is a 2004 Ivory White Pearl with black leather interior 6mt. I always intended on doing an engine swap on this car but I had originally wanted to build a Frankenstein vk45, which is a great but different topic. but due to oil pan location and engine placement in the engine bay. the cost became to great for my needs. I am using a 2011 vk56de out of a titan. I am running a flex fuel engine for some rather specific reasons right now before modifying the engine internally.
I know this swap has been attempted many times and build threads have died out over the years, I have read most of them and seen most of them end in part outs due to part nonavailability. I have been in contact with many shops before getting crazy into this and have found who I need to build what I need so I will start off from the beginning I guess.
She is a little rough, she was not taken care of well. She was female owned..... The rear bumper and spoiler have damage and I will be replacing them and the front driver fender has damage, I have a new fender for it already. The engine had over 203k miles on it and the person I spoke with about fed me a ton of crap about how good of shape it was in. When I met her she was drinking oil like and alcoholic and what she didn't drink she bled out the nasty rtv covered vlave cover gaskets. She had 5 fuel injectors of one car and a 6th from a different car. The dual mass flywheel was shot and the clutch was basically fuzz in the bell housing.
So here she is what I got her.


She was rough and dirty, I didn't take many pictures because of that.
So here is pulling her apart.


Ok you have mostly all seen this stuff cause your all owners. Here is where it gets fun. Since I am doing a vk56 swap and as I have been reading and learning and studying. There are 2 ways to do this. You can A. Squeeze the motor into that small compartment and push a ton of weight forward, ruining the near perfect weight distribution of the car and basically push it heavily through the corners destroying front wheels. Or you can do B, the correct way and get rid of all that crap in the way. The VQ sits so far forward of the secondary firewall alone, plus the depth of that secondary firewall. Thats a lot of space to be had. SOOOOOOO, I started drilling and cutting.


Now that all that crap is out of the way I bring in a friend that welds, since its the only damn thing I can't do. I don't have the equipment. Funny enough I should have taken a picture but I forgot, the cord for the welder was a 100 ft extension we made and ran to the second floor drier outlet. haha good times.
I noticed in builds that I was seeing, these areas were left open, I wanted to close them as reinforcement and than also for looks.


I forgot to get photos of these covers after they were finished.
Now I started fibergalssing over them and building up layers so I can sand off extra material to clean them up nicely.


I will have updates on the build up and what it looks like all finished. I am working odd hours this week so won't be at it till the weekend.
Here is a photo I think you will all enjoy, lets play "Name that engine"

So far I am working more on the car while I save an accumulate parts. I currently have the vk56 auto bell housing, the Zfever adaptor plate which will allow me to run the stock pos sensor and ecu for now while the engine remains in stock form. The headers are underway right now as I caught them at the right time of them doing a swap, so I am having a set made for me as well. I still need to order the internal slave for the auto bell housing. And engines mounts are also currently being made. They are the same that were used in Ryan Kados 350z, well made by the same company and same style to put the motor as far back as possible.
So that's it for now. I will try to update at the beginning of the week to keep any interested parties up to date.
Last edited by quickdiversion; 07-20-2016 at 05:33 AM.

The following users liked this post:
rustyschopshop (07-21-2016)
07-20-2016, 05:34 AM
#2
New Member
Thread Starter
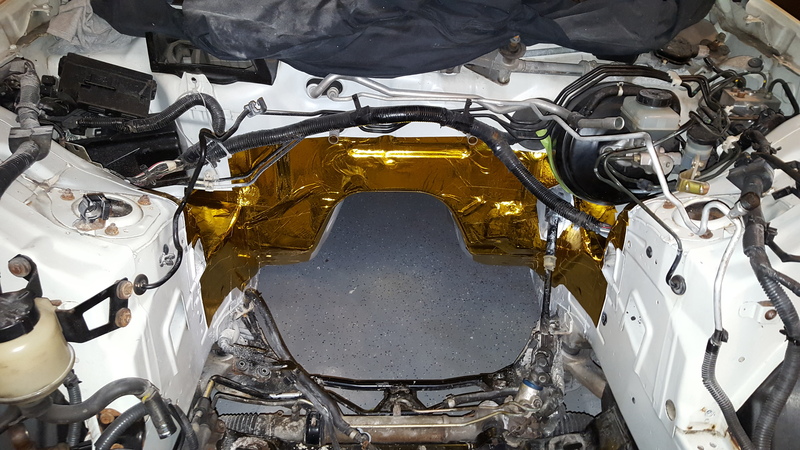
Ok, here is a small update. I busted the pad on my 3 inch D/A and the 6 inch is pretty much useless in this area. So that means I am sanding by hand. I had laid This long hair or Tiger Hair from Evercoat to build up the low area on top of the fiberglass sheet covering the new metal. So build up and heavy removal has been done, hopefully 2 more days or sweating in a hot garage sanding by hand and I will be ready for paint and then hopefully the gold foil will be here by then.

So like I said, heavy removal is done. Still needs more shaping and than a fine coat to even it out. SO hopefully next pictures I post will be GOLD!


So like I said, heavy removal is done. Still needs more shaping and than a fine coat to even it out. SO hopefully next pictures I post will be GOLD!
The following users liked this post:
rustyschopshop (07-21-2016)
07-20-2016, 05:34 AM
#3
New Member
Thread Starter
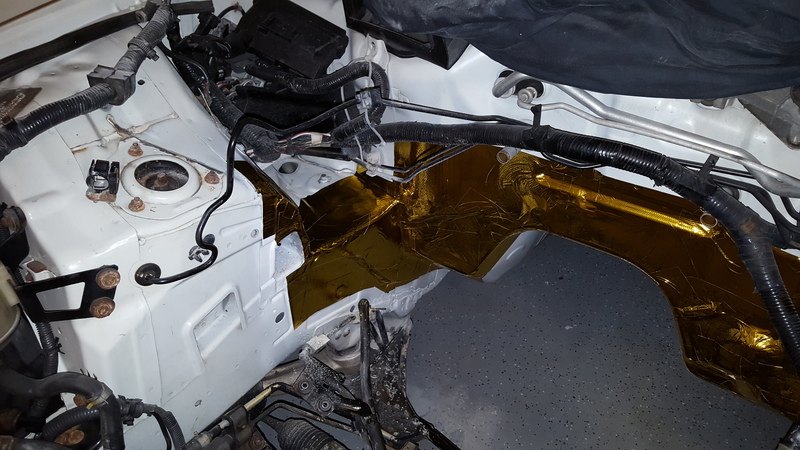
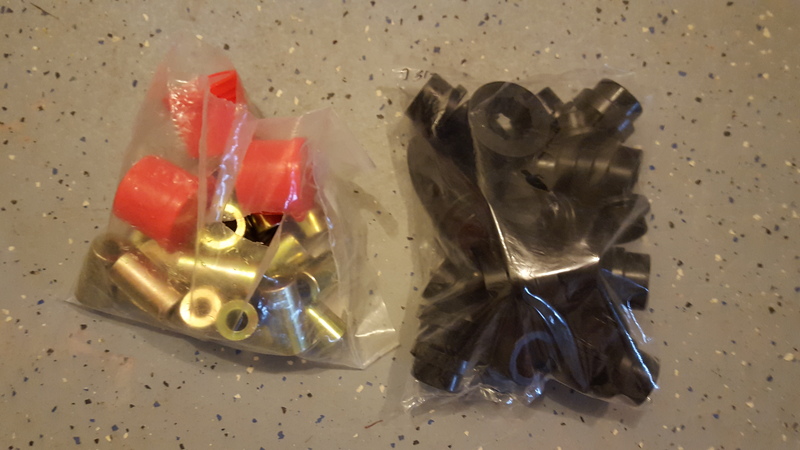
Ok, so hopefully the people following this find my post again. I have finished the gold for now until the first test fit of the motor. Once I see where the height and exactly where the headers will sit, I will be leaving the gold at this amount of coverage. Now that this is complete, I will be pulling the rear subframe along with the diff and all suspension in order to replace the subframe bushings with SPL solid bushings, The Diff will also be getting SPL soild subframe bushings in order to lock it it and give me the type of handling I want. I also have Energy Suspension polyurethane bushings for all the rear control arms. The front will follow.


The following users liked this post:
rustyschopshop (07-21-2016)
07-20-2016, 05:35 AM
#4
New Member
Thread Starter
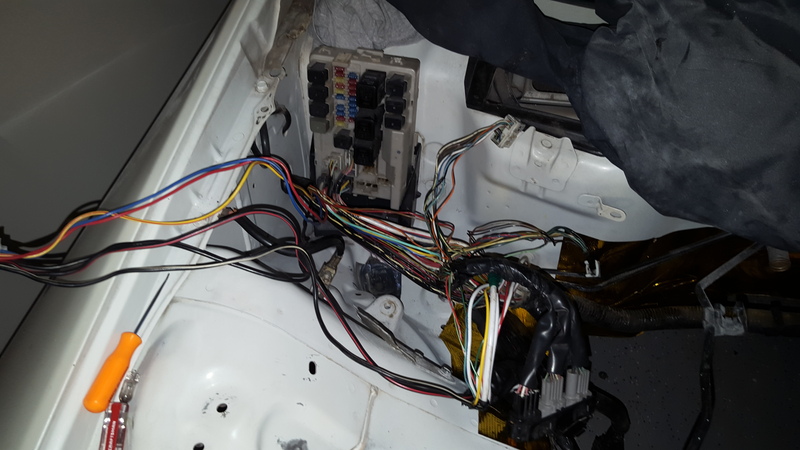
So I was looking through the thread and I kinda got bored with reading it on my phone, but I got the gist. So I did go back and read a bit and noticed that you de-loomed the entire side harness, I decided not to because it is running under the fender so I left it intact and pulled the knot of wires out between all the components where the battery tray is. After I did that. I now have plenty of slack and everything sites right back where it was.


The following users liked this post:
rustyschopshop (07-21-2016)


 07-20-2016, 05:37 AM
#7
New Member
Thread Starter
Sorry, build is on a slight hold due to medical bills and 2 weddings in different states this month. Headers have been started and I spoke with the shop that is doing them, so Hopefully in a week or so I will have pictures of them being jogged and built. Also I now have all the bushings I need to start tearing out the rear subframe and do solids on the subframe and diff, and the energy suspension polyurethane bushings on all rear arms.
SPL solid rear subframe
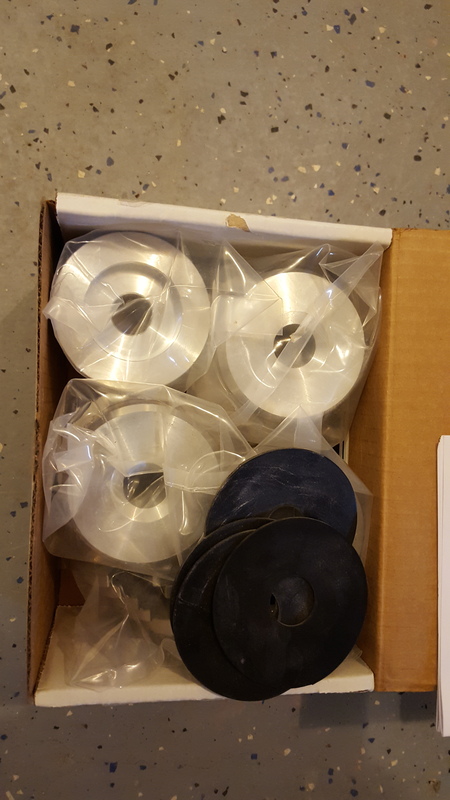
Energy suspension
SPL solid rear subframe

Energy suspension

The following users liked this post:
rustyschopshop (07-21-2016)
Trending Topics
07-20-2016, 05:37 AM
#8
New Member
Thread Starter
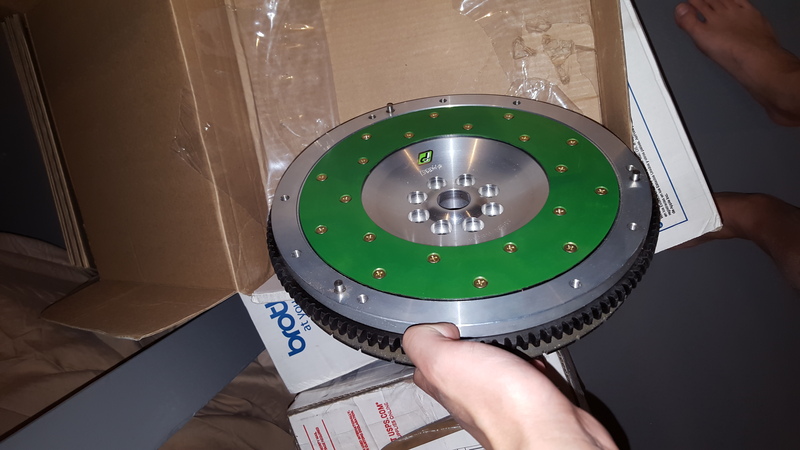
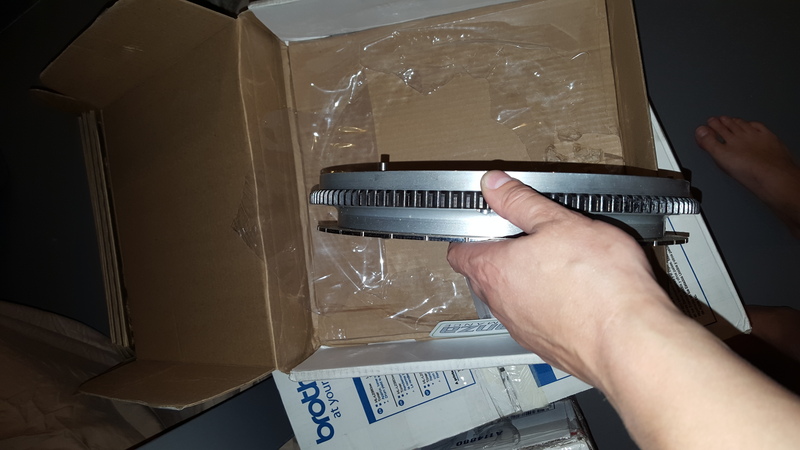
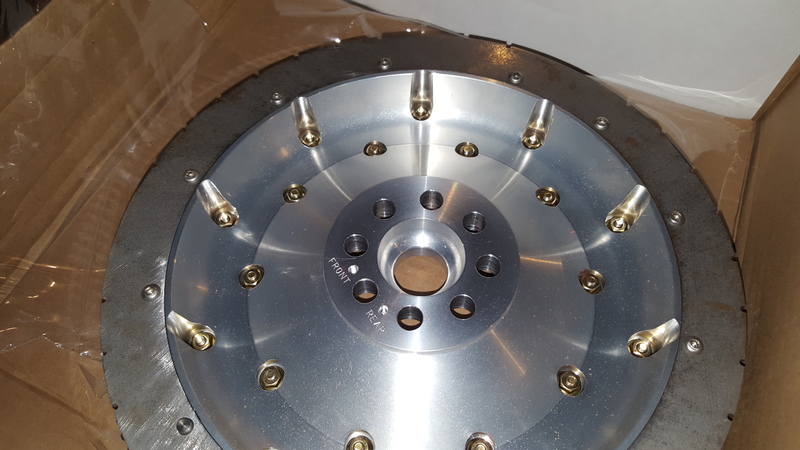
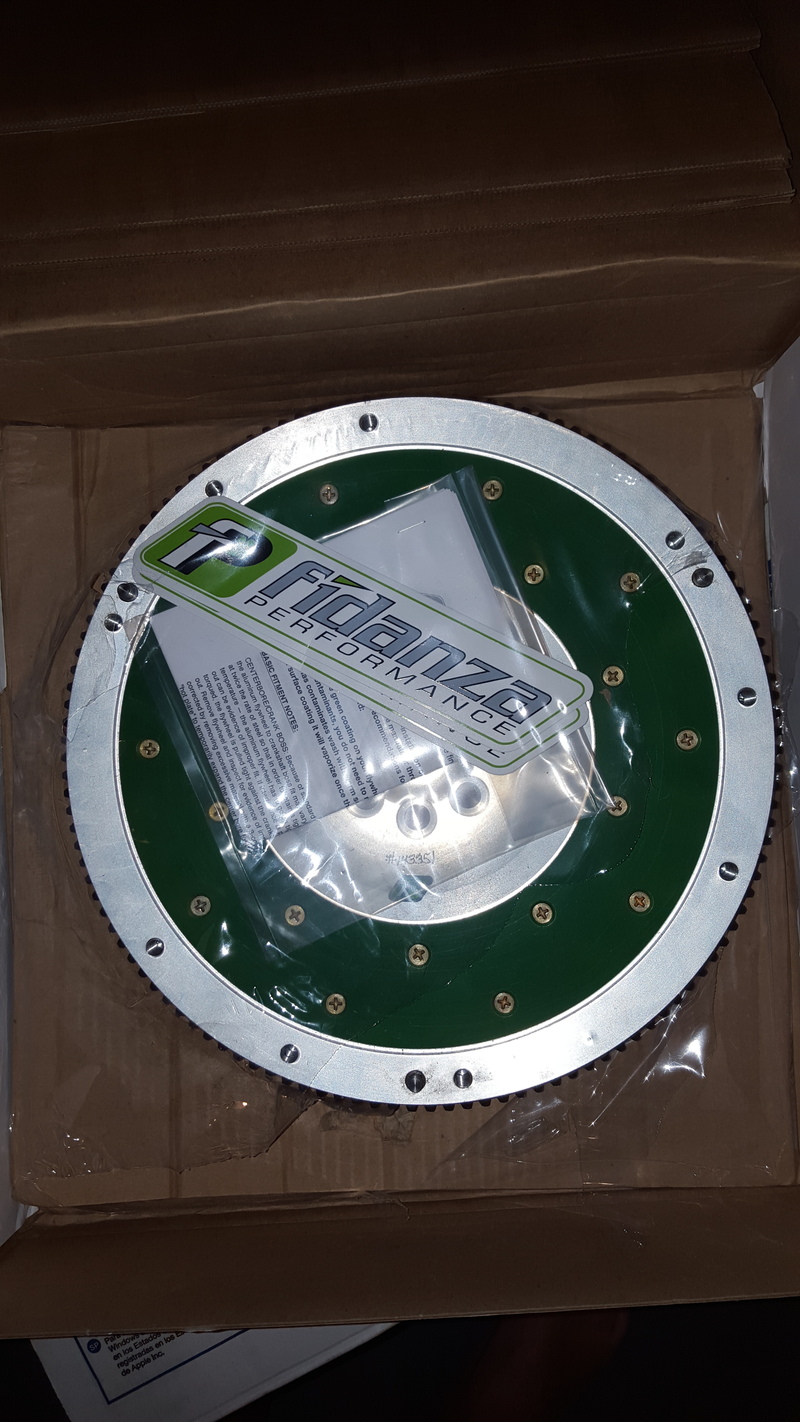
I must apologize that it has been a while since my last update. I was taking care of medical bills so acquiring parts was on temp hold. I have picked up a light wait Fidanza flywheel for a vq35de. 67060 aluminum with a 1050 steel replaceable surface. It is currently at the shop to have the outer lip milled off and will sit onto of the vk56de flex plate and trigger wheel to make up the (3 piece) flywheel haha, here are some pix before it went to the machine shop.
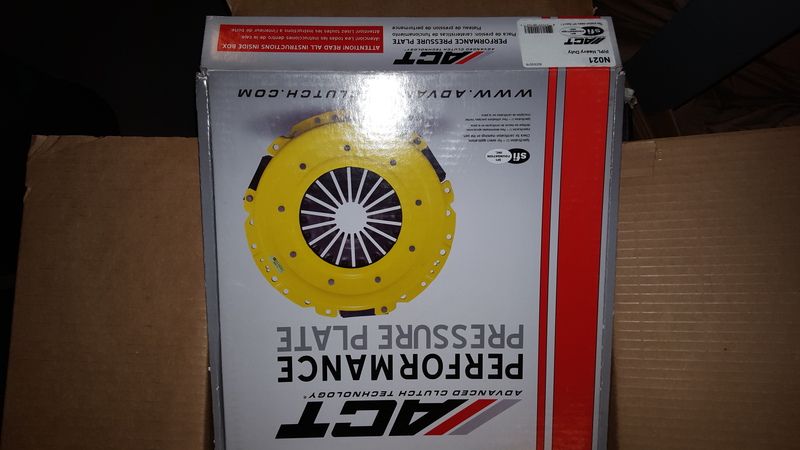
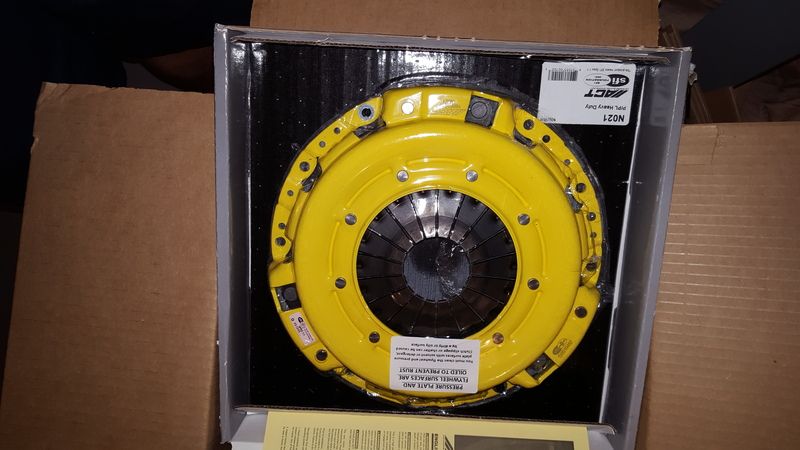
Next item I aquired is the high pressure pressure plate from ACT, also for a vq35de. I am still undecided on which clutch I will run yet, and I found this pressure plate on Amazon for a steel, pix...
Headers are underway and hopefully done soon. I will post up pictures as soon as I obtain them. Also Motor and trans mount are being built, so I will have pictures of those once they are done as well.


Next item I aquired is the high pressure pressure plate from ACT, also for a vq35de. I am still undecided on which clutch I will run yet, and I found this pressure plate on Amazon for a steel, pix...


Headers are underway and hopefully done soon. I will post up pictures as soon as I obtain them. Also Motor and trans mount are being built, so I will have pictures of those once they are done as well.
The following users liked this post:
rustyschopshop (07-21-2016)
07-20-2016, 05:38 AM
#9
New Member
Thread Starter
Another post today. Sorry I am putting it all up now. Photobucket has been down and I could finally get new pictures up.
While I am having mill work done, and custom parts are being made, I have to turned my focus to the rear subframe and suspension. I have been taking out rusted bolts very slowly and with hand tools in order to not snap them. I am just about there. I have one nut left on the subframe, but it is broken loose and it was the easiest to get loose. The side posts and M member are off.
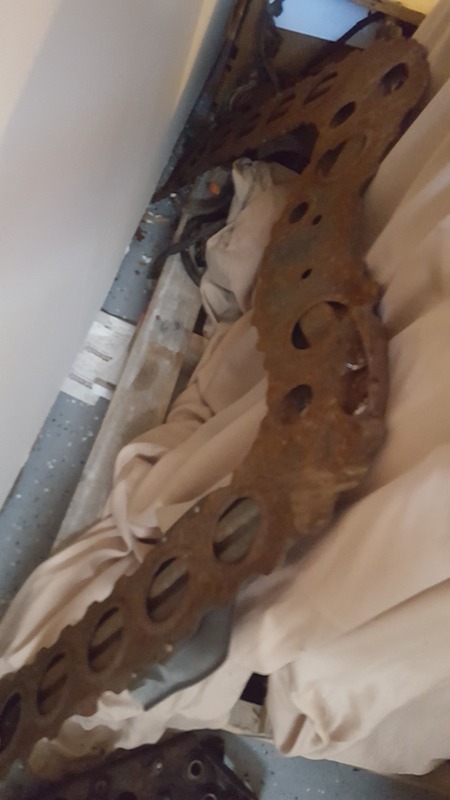
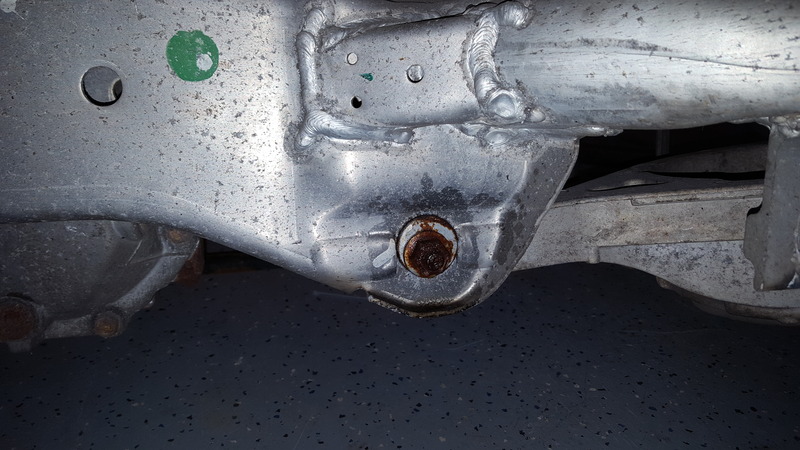
Anyone who lives in the Northeast understands rust, The salt, the rain, the salt, the salt. The rust is so bad and the car has 220k or whatever miles on it. That's a lot of accumulation and it made things hard over the last 2 weeks but its just about there.
Here is an idea of how bad it is.
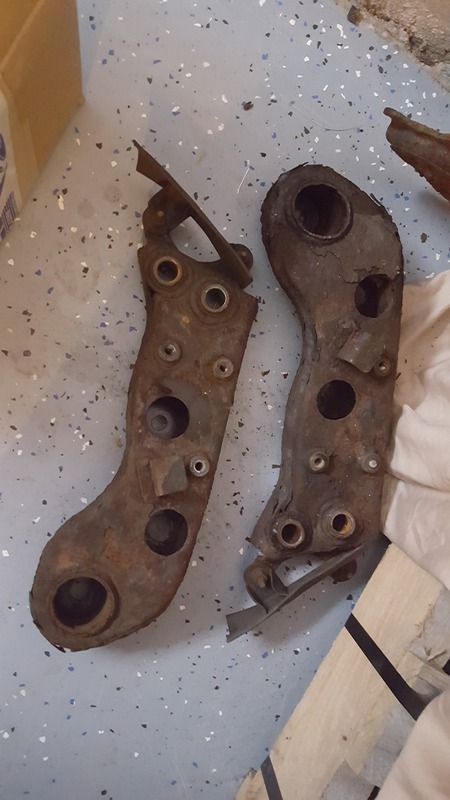
I am replacing all the hardware in the rear, I found a new M member for a great price, oem piece, and I found low mileage cheap side pieces of the side frame like pictured.
I have to take out and replace the rear gas tank firewall because it is rusted through haha, falling apart and I took the bolts out.
While I am having mill work done, and custom parts are being made, I have to turned my focus to the rear subframe and suspension. I have been taking out rusted bolts very slowly and with hand tools in order to not snap them. I am just about there. I have one nut left on the subframe, but it is broken loose and it was the easiest to get loose. The side posts and M member are off.
Anyone who lives in the Northeast understands rust, The salt, the rain, the salt, the salt. The rust is so bad and the car has 220k or whatever miles on it. That's a lot of accumulation and it made things hard over the last 2 weeks but its just about there.
Here is an idea of how bad it is.


I am replacing all the hardware in the rear, I found a new M member for a great price, oem piece, and I found low mileage cheap side pieces of the side frame like pictured.
I have to take out and replace the rear gas tank firewall because it is rusted through haha, falling apart and I took the bolts out.
The following users liked this post:
rustyschopshop (07-21-2016)
 07-20-2016, 02:54 PM
#11
New Member
Thread Starter
Yeah.
It's weird, If you watch the commercials they are putting the vk56 into all kinds of luxury cars and previous years they had the vk45 in a bunch also.
So why is it all the old people cars and luxury cars get a v8 and the sports cars that need them dont?
It's weird, If you watch the commercials they are putting the vk56 into all kinds of luxury cars and previous years they had the vk45 in a bunch also.
So why is it all the old people cars and luxury cars get a v8 and the sports cars that need them dont?
07-21-2016, 09:31 PM
#12
New Member

I used to live in the Adirondacks in upstate New York so I truely understand the rust issue. You may want to take a peak at ultra racing for an upgrade on that rear subframe brace. I like their design much better than the stock and at a fair price. Its in my build thread toward the end if you want to look. Definitely loving the different direction you are taking your build.
07-24-2016, 11:50 AM
#13
New Member
Thread Starter
I am going to take a look now.
I have seen one brace for a 350z but I was not sure if it would fit a g35. I know the "M" brace for the 2 cars have different part numbers. I wonder if they would not. I can always shoot them an email.
And,
Thank you!
I just checked. They only have it listed under there 350 section.
If you happen to get under your car and take some measurements, bolt holes to bolt holes in a few different directions and I could compare.
I could actually use there picture and show you which measuremeants I need
Last edited by quickdiversion; 07-24-2016 at 11:56 AM.


The following users liked this post:
rustyschopshop (07-26-2016)
07-26-2016, 05:40 PM
#16
New Member
Thread Starter
Thanks,
I was supposed to bring the transmission over for an estimate, but I was to tired. I pick up the flywheel after doing all 4 calipers amd brackets on my maxima.
I was supposed to bring the transmission over for an estimate, but I was to tired. I pick up the flywheel after doing all 4 calipers amd brackets on my maxima.
08-01-2016, 07:24 AM
#17
New Member
Thread Starter
Ok so a little off topic, but I think you guys will get a kick out of this. I got bored at work while reprogramming zone distribution equipment, so I took pix to show you guys my work toys...

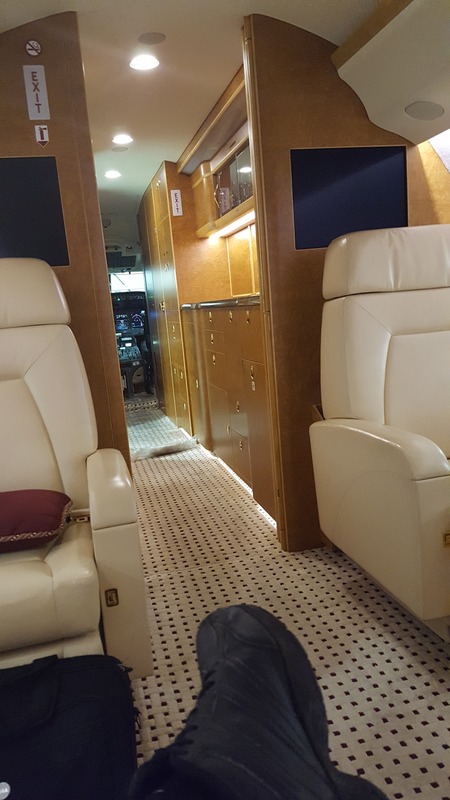

I can't tell you who's plane it is, but I can tell you they own the majority of a pro-football team.


I can't tell you who's plane it is, but I can tell you they own the majority of a pro-football team.
08-01-2016, 07:34 AM
#18
New Member
Thread Starter
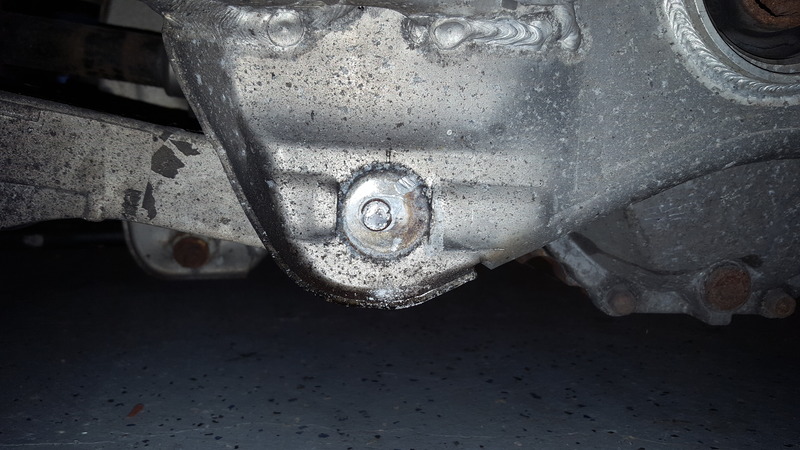
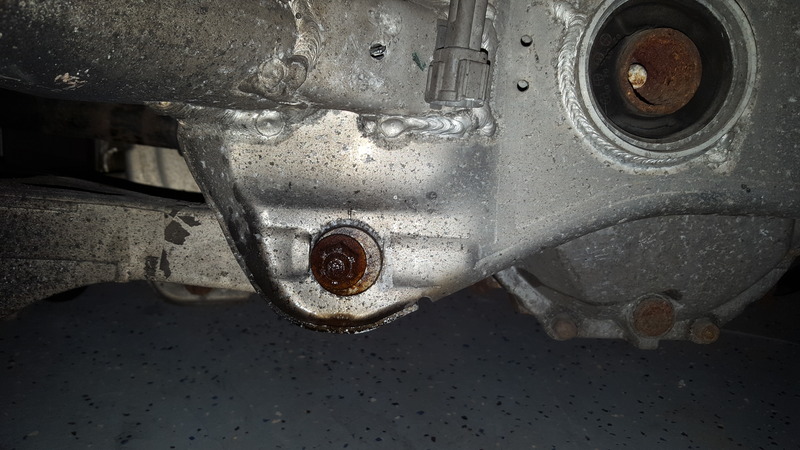
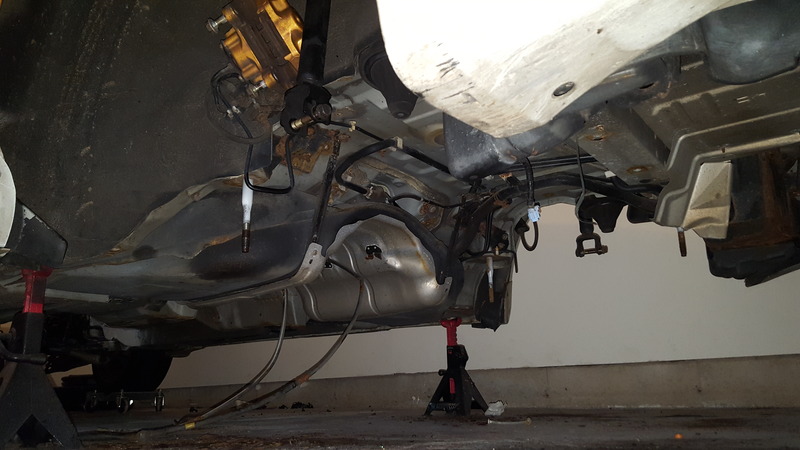
Ok so back to the car, I finally got the rear subframe out and all I have to say is F**k that thing. I am pretty sure I have to replace all the bolts, half of the arm bolts I took out snapped. mainly the to toe arms that mount to the frame, the corroded through the subframe to lock the bolt into the bushings, and had to be cut off both sides and then drill to get the arms out.
So here's the damn thing pulled.
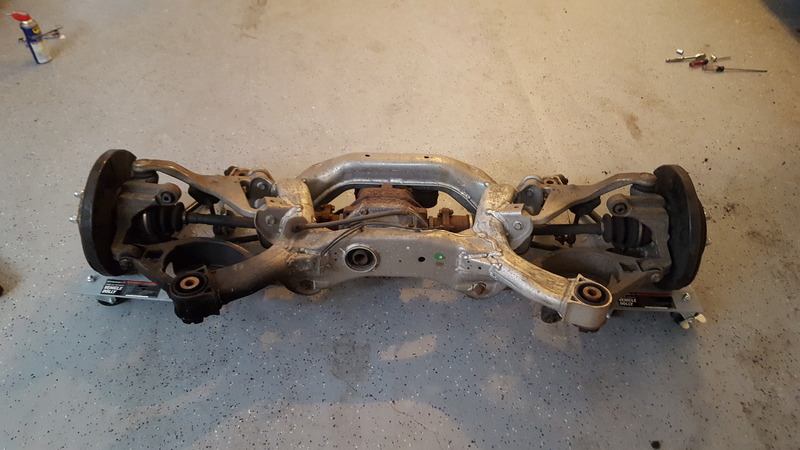
Pulled apart so far. Toe arms off and upper A-arms are started, but I am having a hard time with the cracking the nuts on the ball joints. Any suggestions?
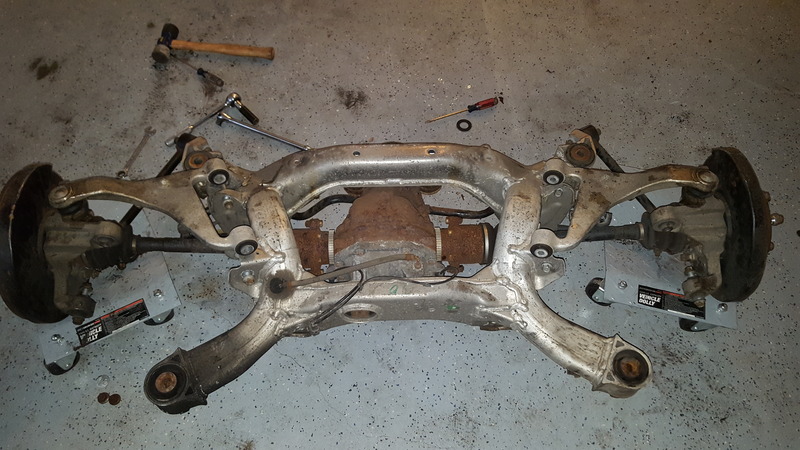
Here is the underside.


So here's the damn thing pulled.

Pulled apart so far. Toe arms off and upper A-arms are started, but I am having a hard time with the cracking the nuts on the ball joints. Any suggestions?

Here is the underside.


