
Install update NEW PICTURES

Thread Starter
Registered User
Joined: Oct 2006
Posts: 253
Likes: 0
From: in the trunk of my dad's buick
I've been working on my install for the last few days, and I thought I would share some of my progress so far.
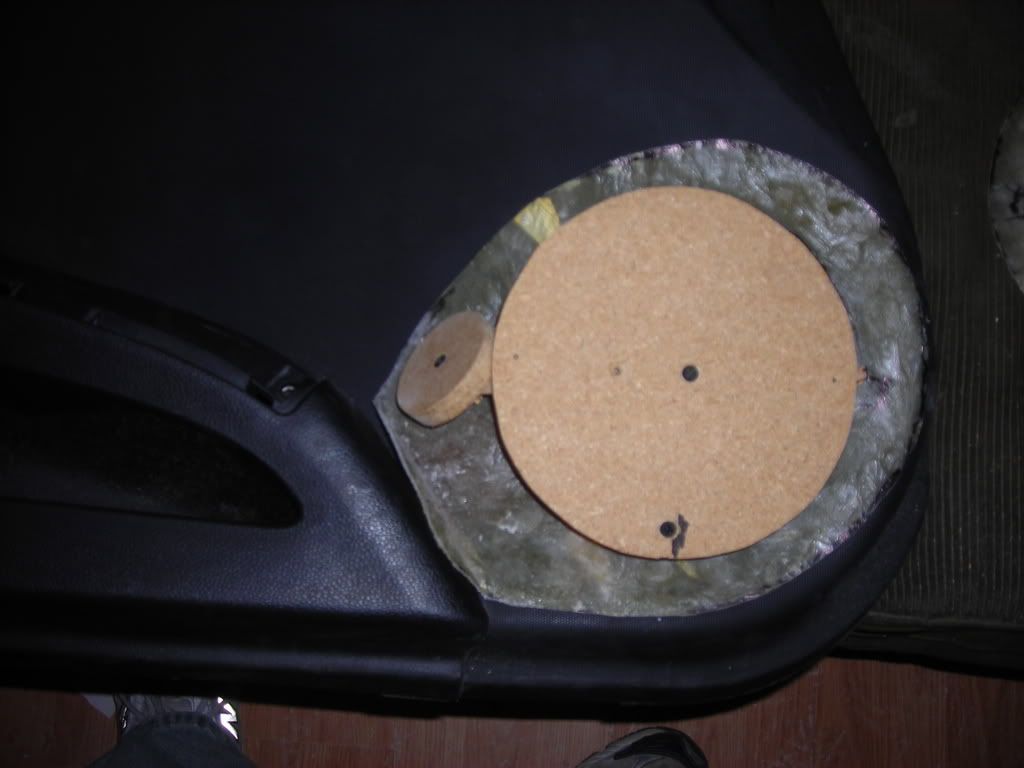
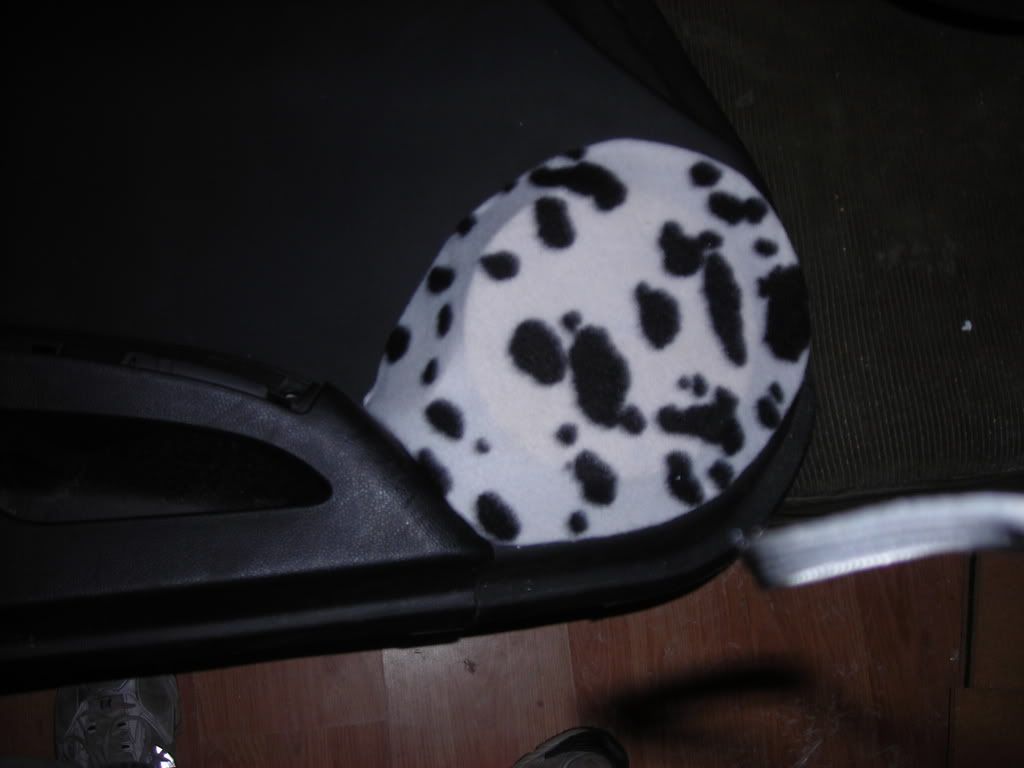
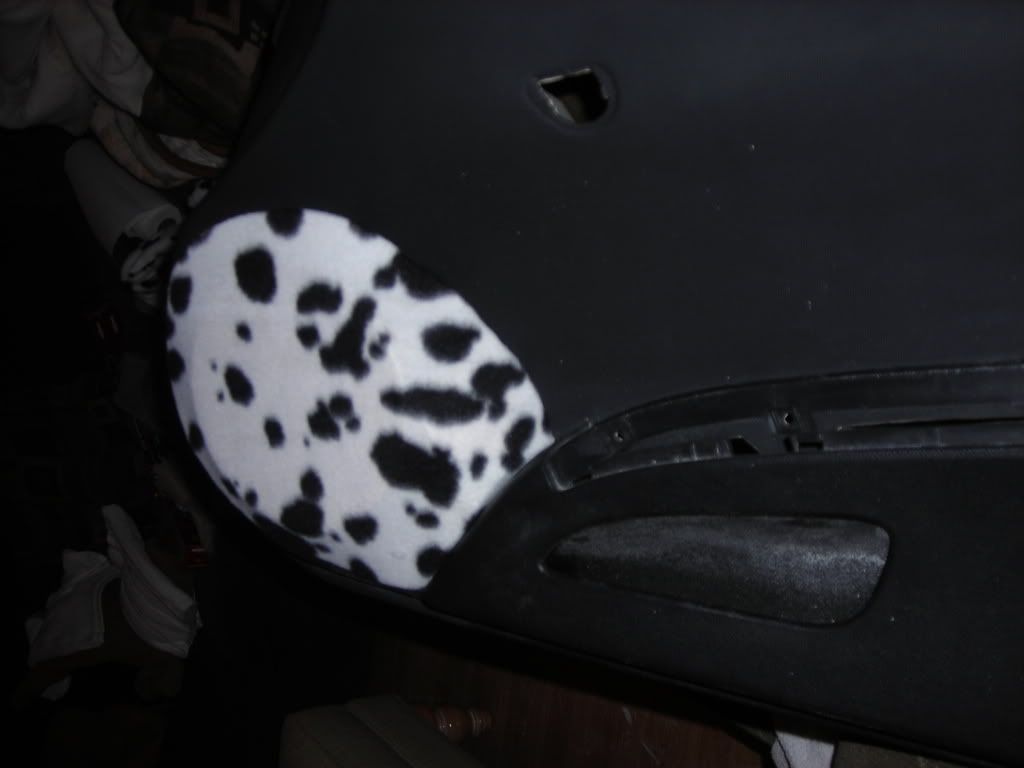
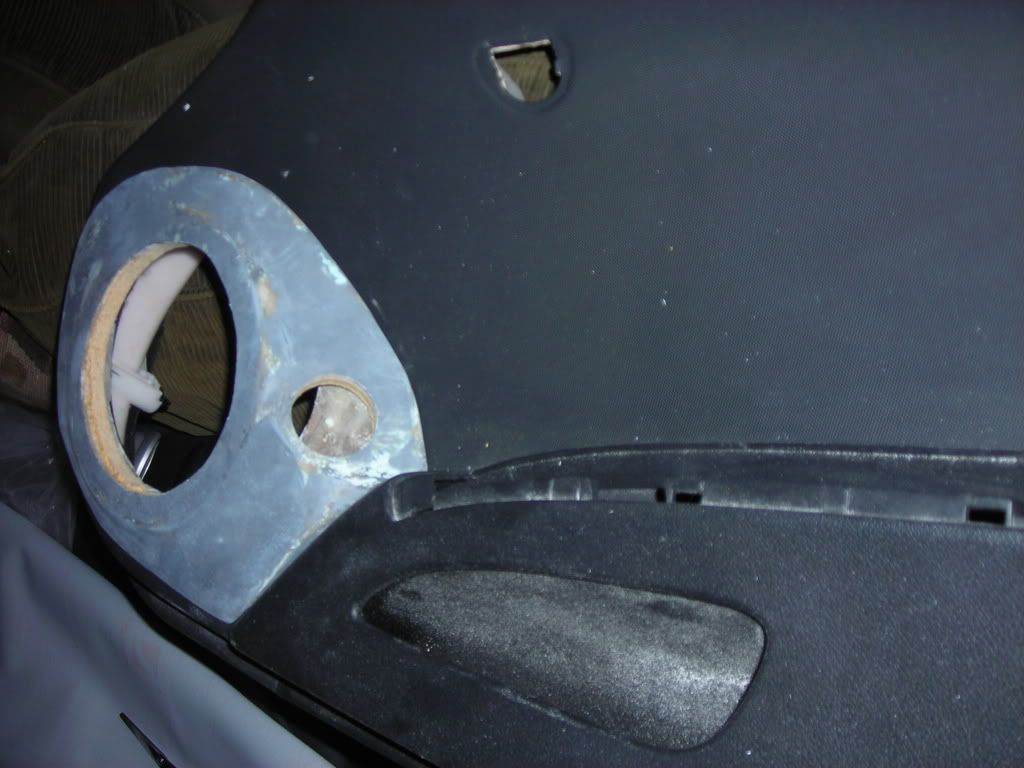
new door pods
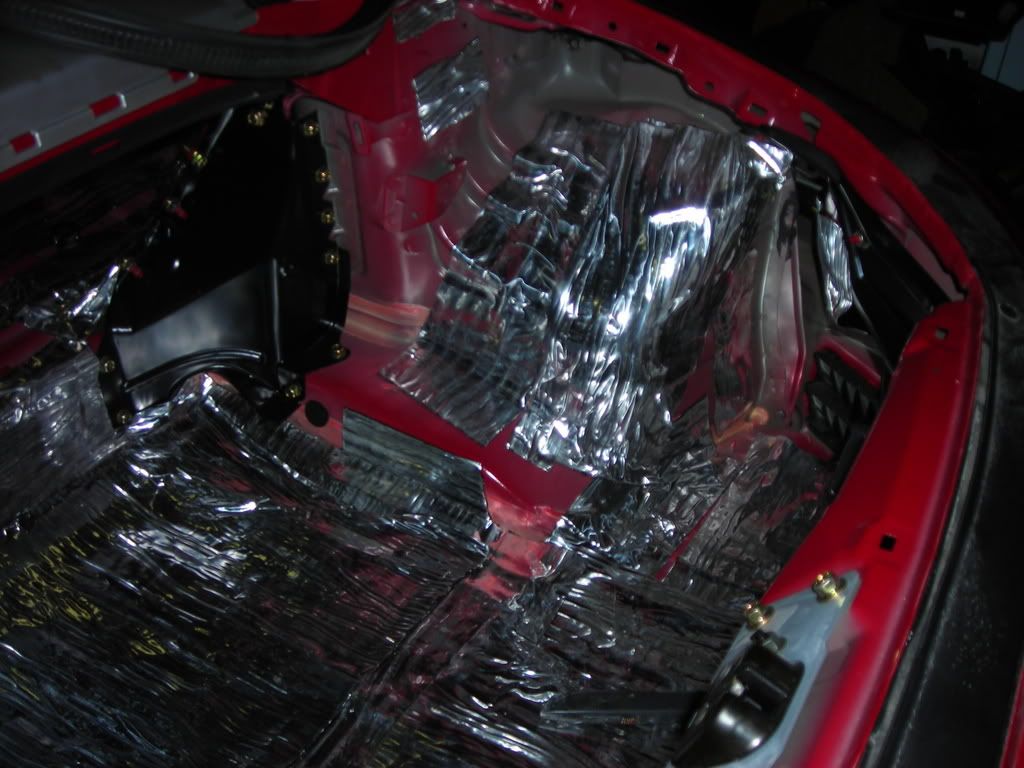
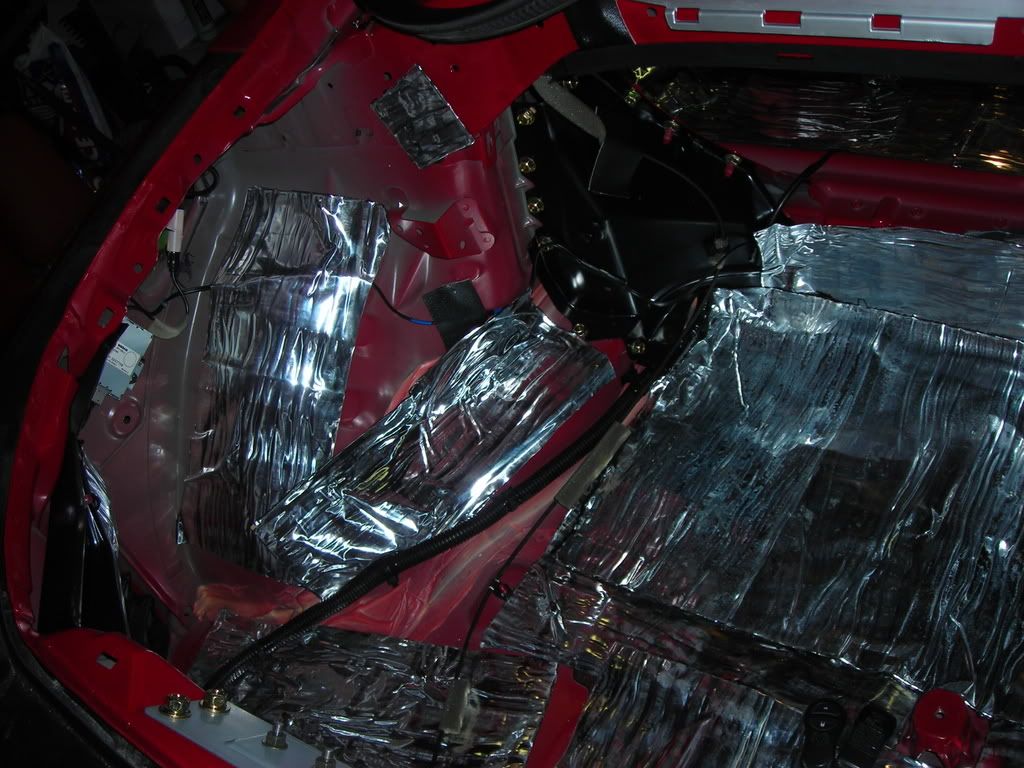
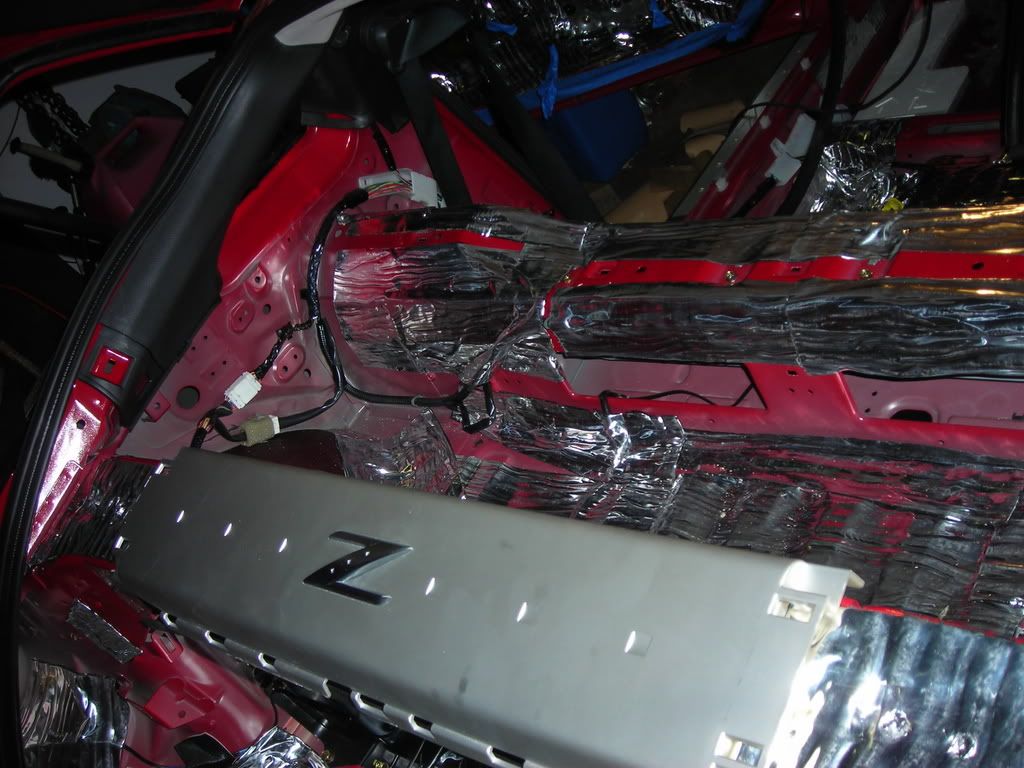
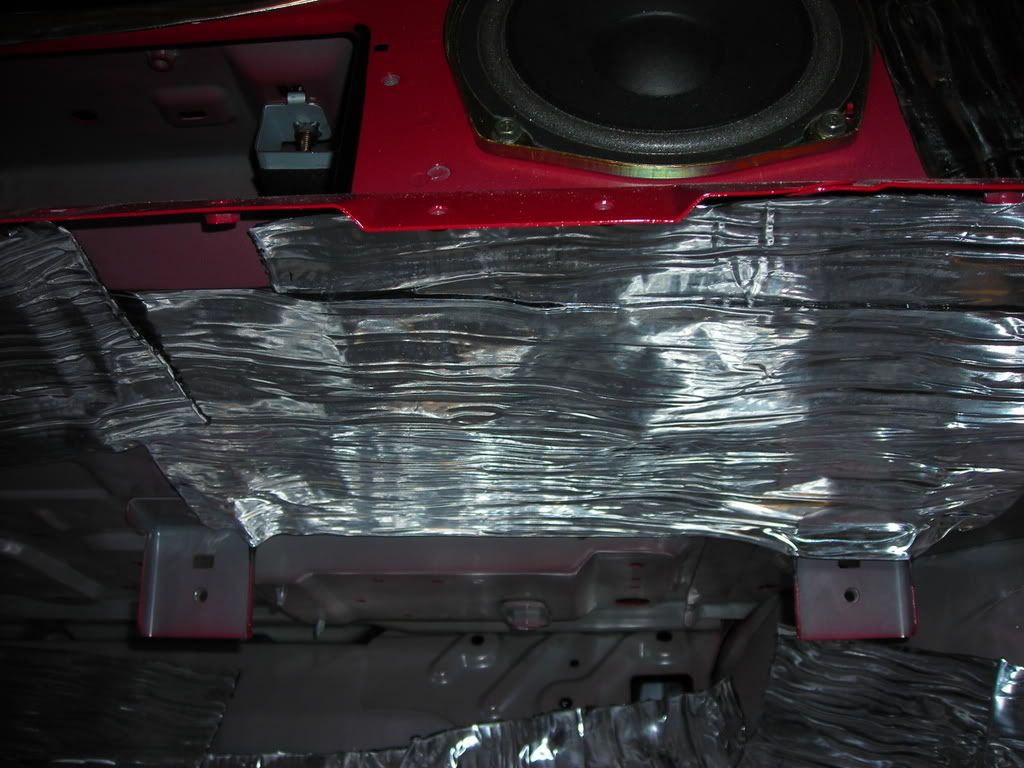
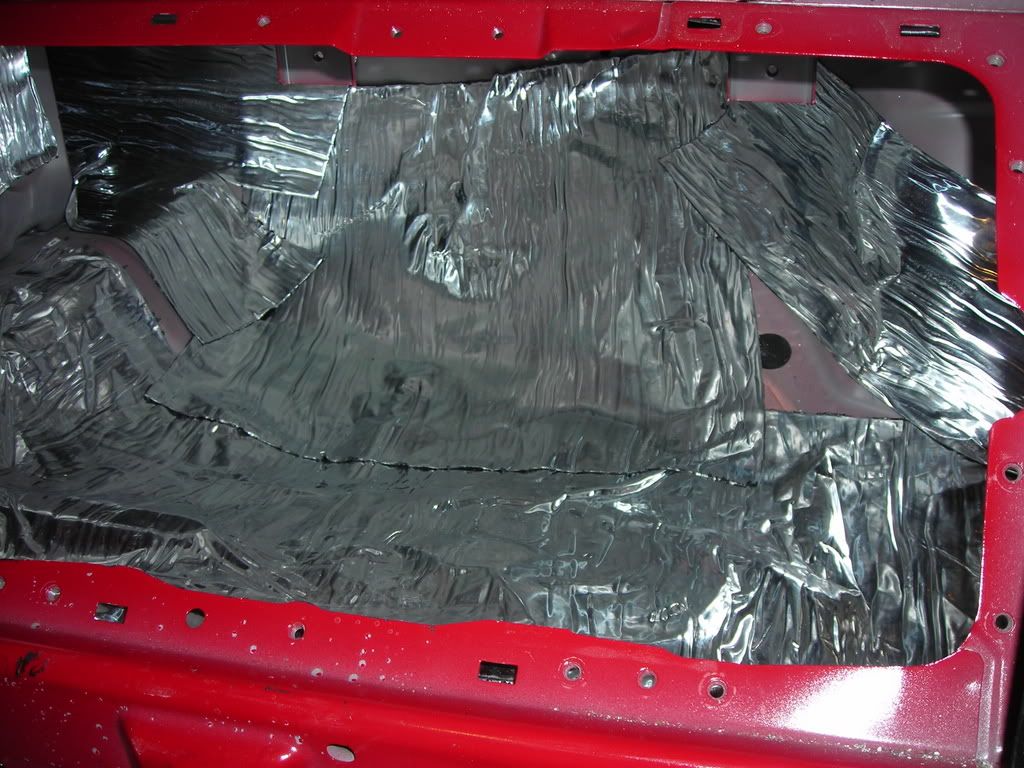
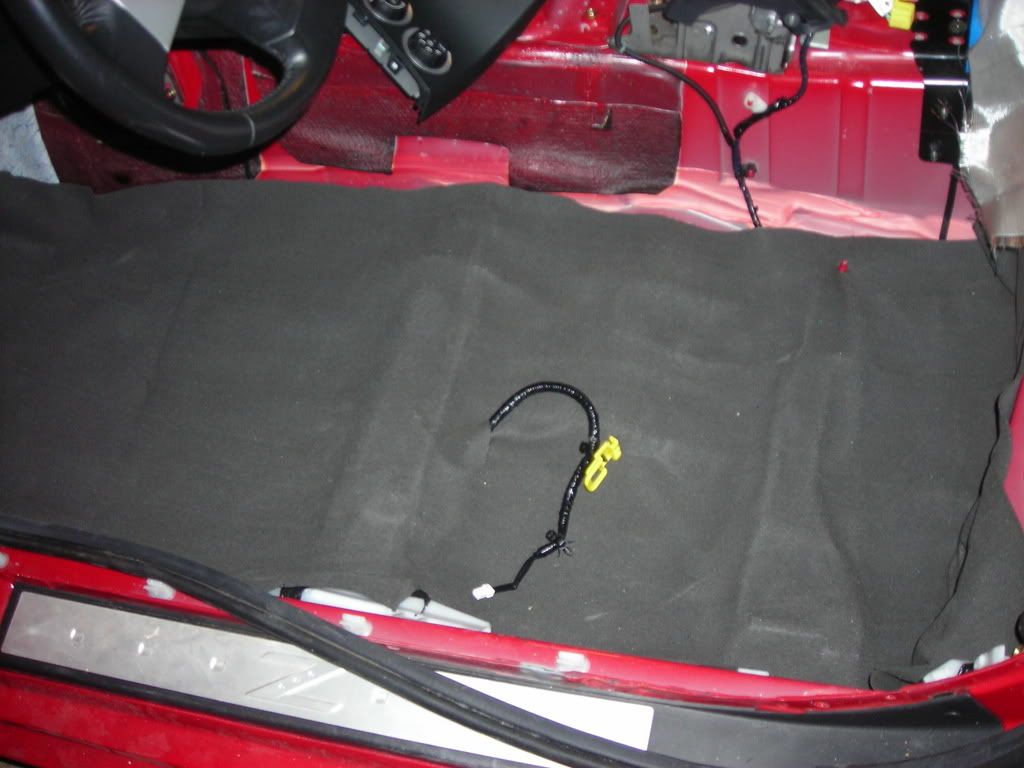
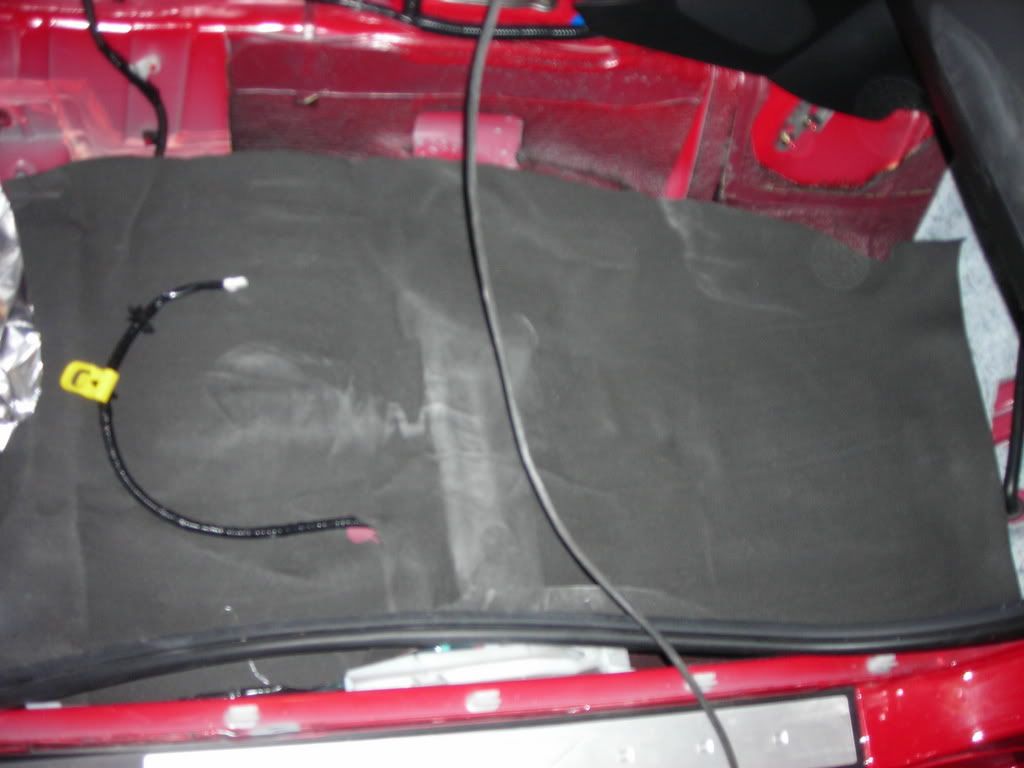
deadening in the hatch
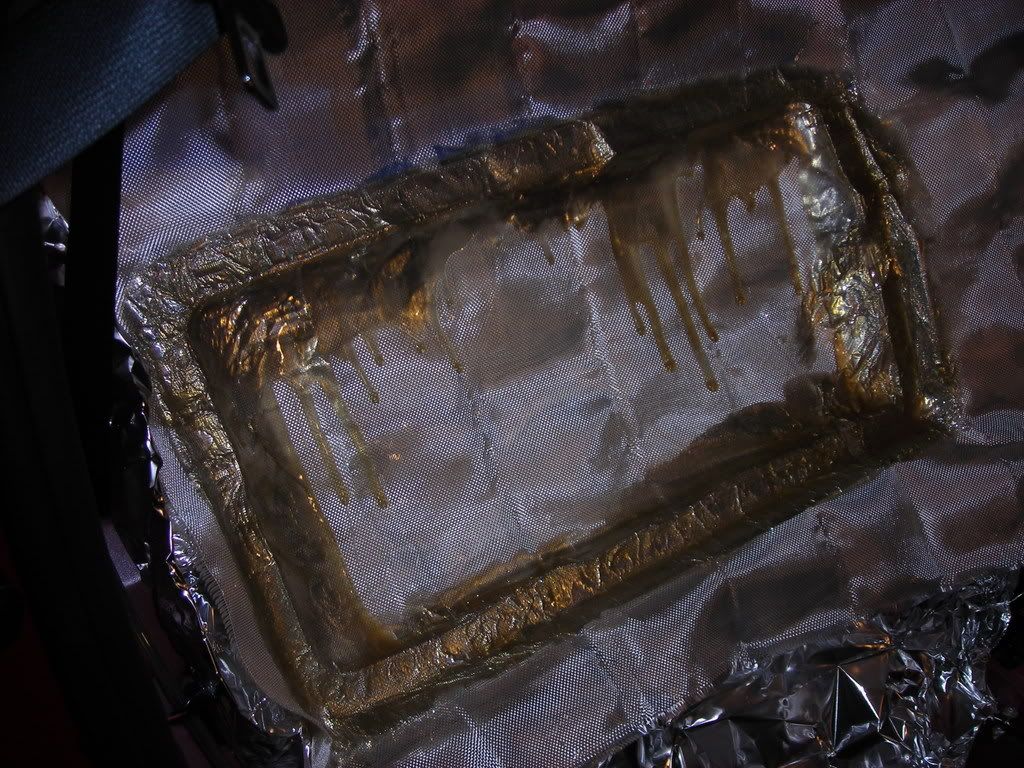
in the glove box
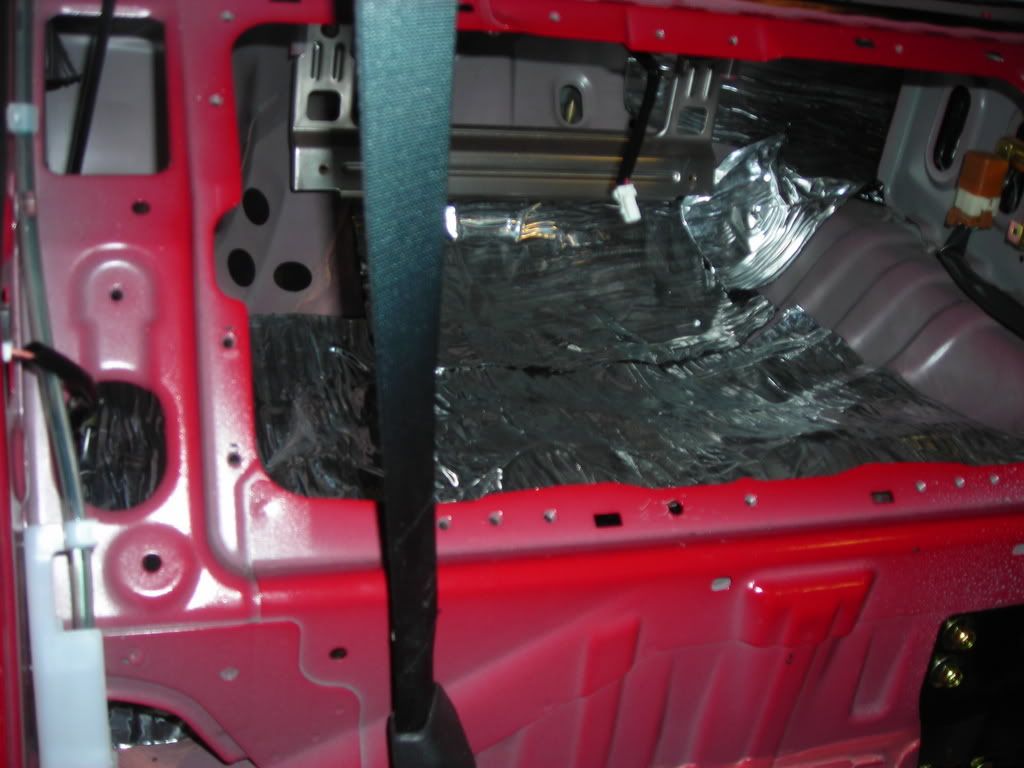
just a bit under the seats


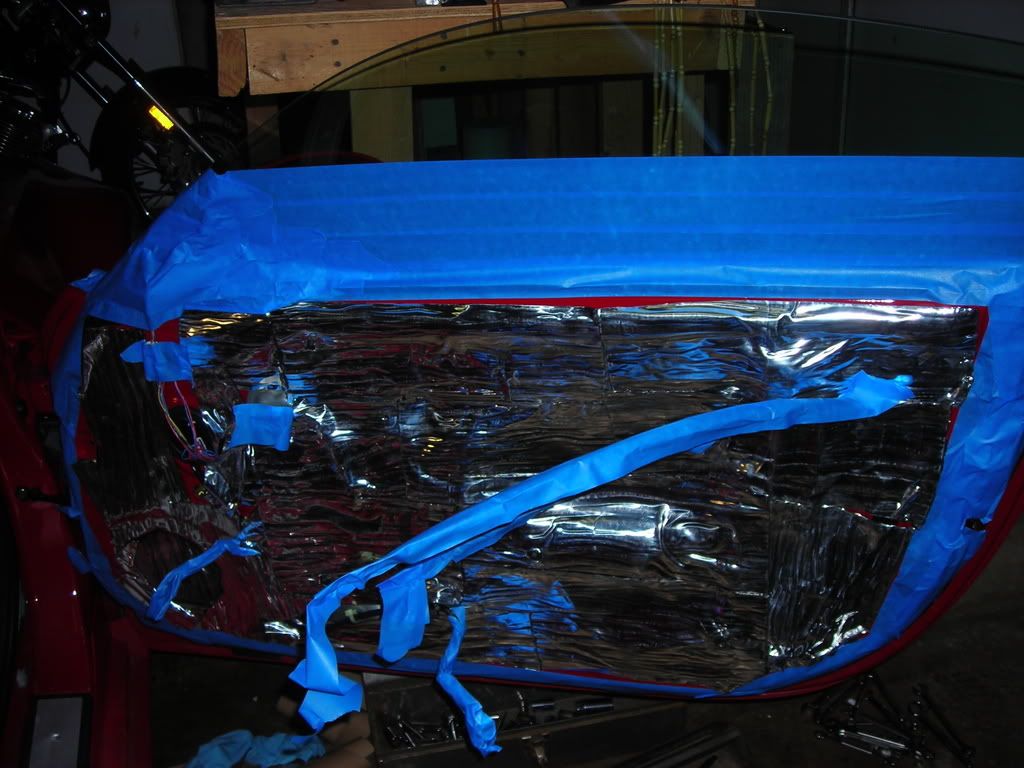
doors
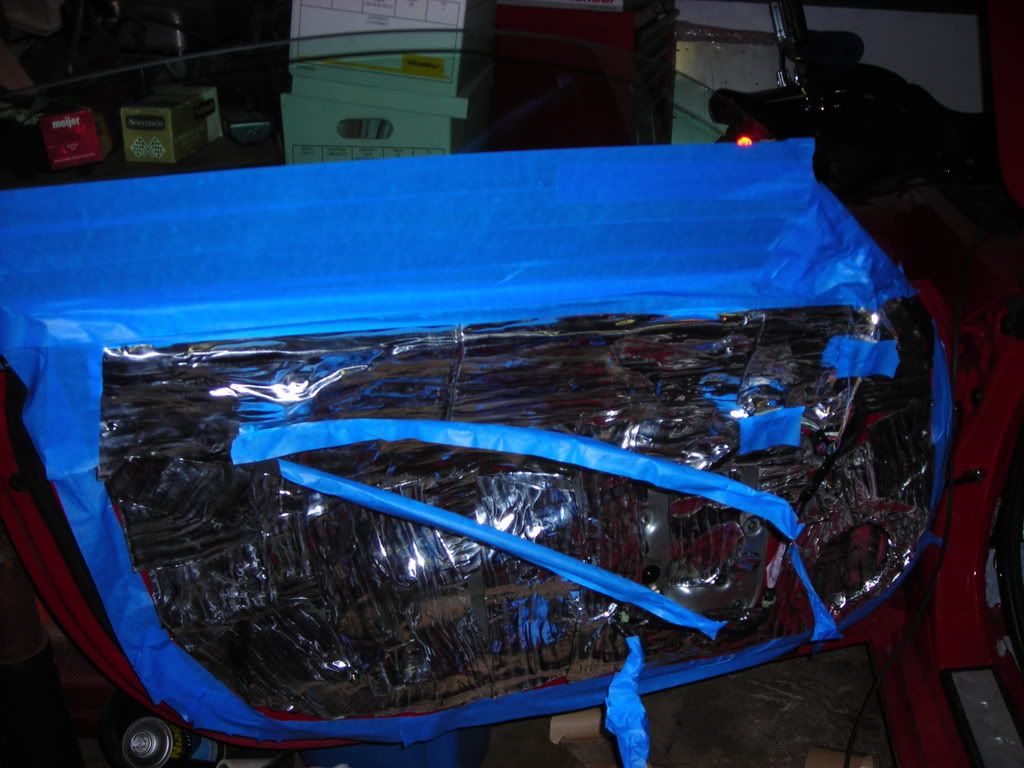
after ensolite on the doors
more pics to come in the near future
new door pods
deadening in the hatch
in the glove box
just a bit under the seats
doors
after ensolite on the doors
more pics to come in the near future

Originally Posted by usmanasif
Those speaker pods are too moooooo-ch for me.
Thread Starter
Registered User
Joined: Oct 2006
Posts: 253
Likes: 0
From: in the trunk of my dad's buick
Originally Posted by behjjeh

how much did you spent on mats?????!?!?!?!?!?!?
Thread Starter
Registered User
Joined: Oct 2006
Posts: 253
Likes: 0
From: in the trunk of my dad's buick
Originally Posted by usmanasif
Those speaker pods are too moooooo-ch for me.
Trending Topics
Thread Starter
Registered User
Joined: Oct 2006
Posts: 253
Likes: 0
From: in the trunk of my dad's buick
Originally Posted by shezzzhot
That's a lot of blue tape!! I love blue tape (track fiend here).
Last edited by tattoo60012; Mar 11, 2007 at 12:47 PM.
Thread Starter
Registered User
Joined: Oct 2006
Posts: 253
Likes: 0
From: in the trunk of my dad's buick
I had a couple of things in mind when I decided to do the deadening to this extent.
First and foremost I didn't like how the car sounded "thin" when i would drive across sand or gravel and it would hit the inside of the wheel well.
Second I wanted the doors to close with a thud as opposed to a thunk, this is of course just a personal preference, but it does serve to make the door speakers sound better also.
Third I decided to "try and do this only once". I really didn't want to have to tear out the interior again to do more deadening, so I figured I was safer going with too much than too little. Of course now that all my deadening is installed into the car I'm just crossing my fingers that it's enough. I'll give the final verdict when the car gets back on the road.
Things left to do:
1: Finish the doorpods, mount the speakers, mount the tweeters, mount everything to the door.
2: Build a sub box to fit in the stock location that will bolt on to the factory mounts.
3: Build a component rack to go behind the passenger seat compartment, mount the rack and wire up all the goodies.
4: Build a shallow glove box to go in the stock location with a lexan back to show off the components.
5: Route the wiring from the battery to the glove box, route the wiring to the doors, route the wiring to the sub. Quick prayer and test.
6: Re-assemble the interior of the car, shampoo the carpeting, final install of the head unit.
7: Go for a ride.
I hope to be done in 2 weeks or less
Thread Starter
Registered User
Joined: Oct 2006
Posts: 253
Likes: 0
From: in the trunk of my dad's buick
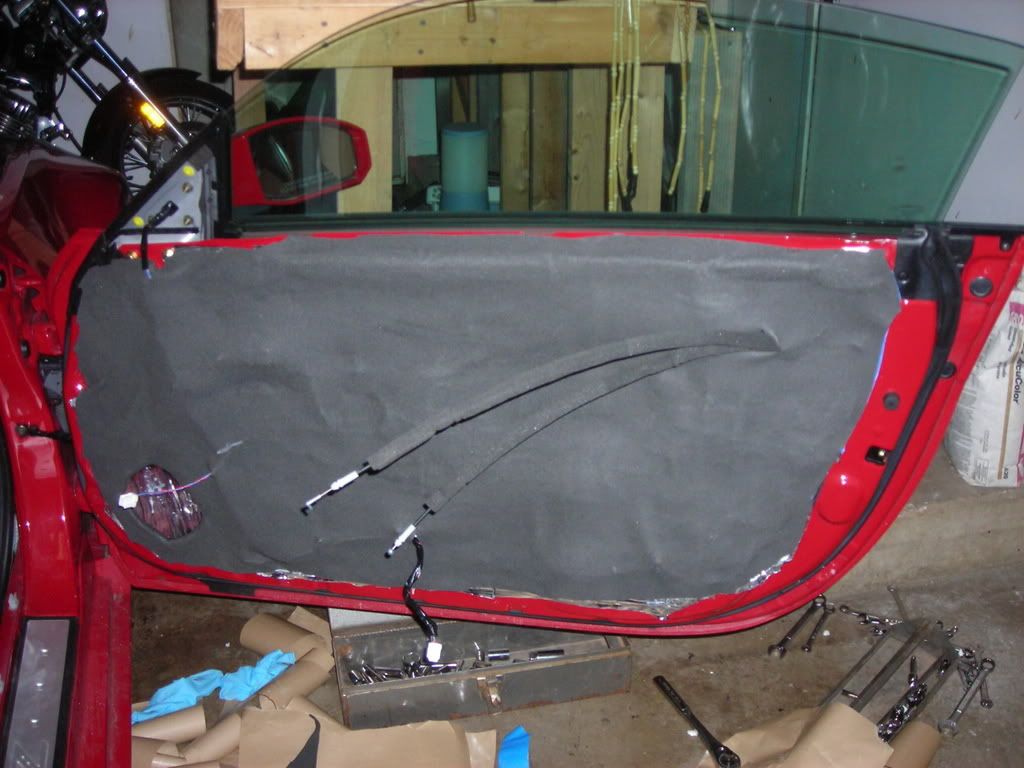
Before being covered in Vinyl
After vinyl and installation of the speakers
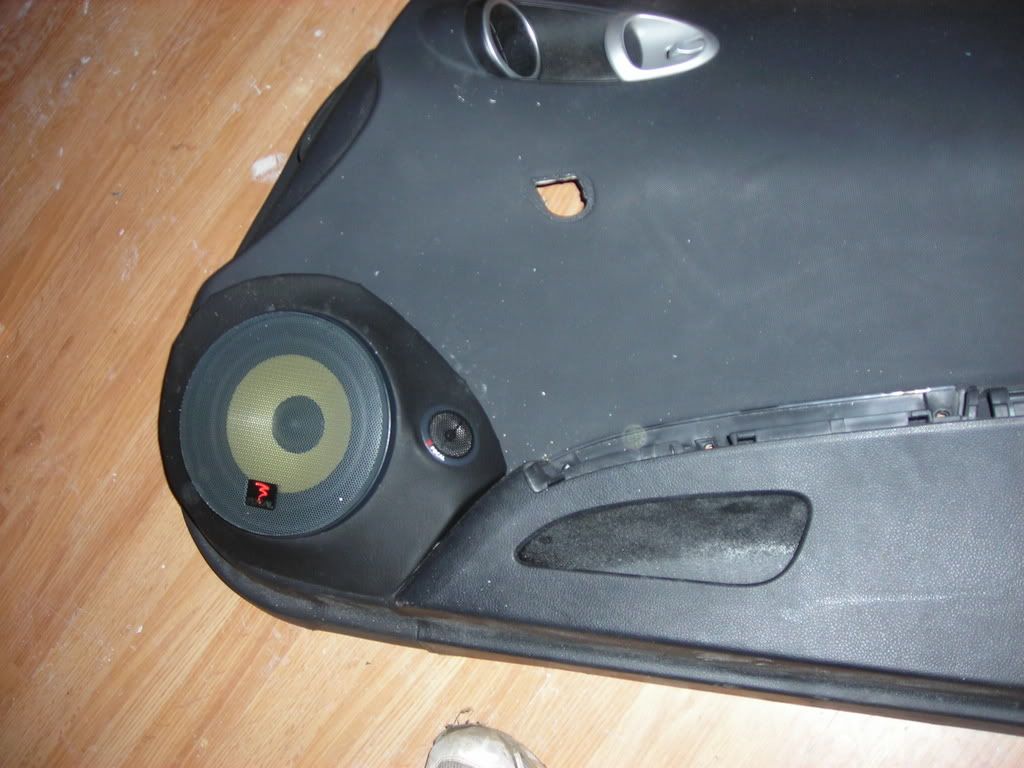
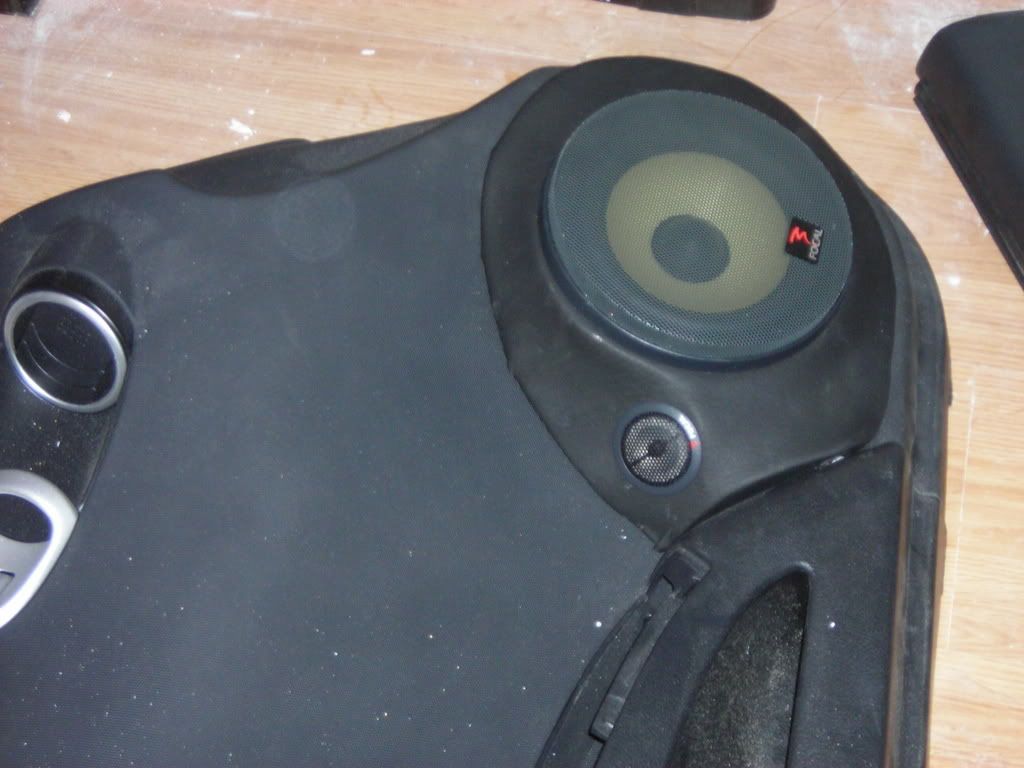
I know the door panels are filthy, but hey they're not even on the car yet. Will post more pics as things progress.
After vinyl and installation of the speakers
I know the door panels are filthy, but hey they're not even on the car yet. Will post more pics as things progress.

Registered User
Joined: Feb 2007
Posts: 58
Likes: 0
From: Seattle
You're doin that all for the same reasons I would. I agree about the way the Z sounds "thin". lol! And the door thing....I LOVE it when you shut a door and it makes that deep solid thump. HAHA! I'm planin on doin the same thing some day. Just have to find the time to do so. Looks very time consuming. What are you using exactly? Is it like Dynamat or something similar? And how much to cover the WHOLE car like you're doin?

Registered User
Joined: Oct 2004
Posts: 332
Likes: 0
From: Baton Rouge, Louisiana
Originally Posted by suv11186
You're doin that all for the same reasons I would. I agree about the way the Z sounds "thin". lol! And the door thing....I LOVE it when you shut a door and it makes that deep solid thump. HAHA! I'm planin on doin the same thing some day. Just have to find the time to do so. Looks very time consuming. What are you using exactly? Is it like Dynamat or something similar? And how much to cover the WHOLE car like you're doin?

Btw, nice job so far!
 Have you ripped up the floor yet? I was having fun with that last night
Last edited by Lancaster; Mar 15, 2007 at 04:59 AM.
I think you should have made the rounded edge that meets the upper part of the door more "perfect"". I mean it doesn't look like it was sanded to a perfect shape, but I like the job you did. It's really easy right?....just a bit messy
Thread Starter
Registered User
Joined: Oct 2006
Posts: 253
Likes: 0
From: in the trunk of my dad's buick
Originally Posted by HARRYPOTTER
I think you should have made the rounded edge that meets the upper part of the door more "perfect"". I mean it doesn't look like it was sanded to a perfect shape, but I like the job you did. It's really easy right?....just a bit messy
Thread Starter
Registered User
Joined: Oct 2006
Posts: 253
Likes: 0
From: in the trunk of my dad's buick
Originally Posted by Lancaster
I'm pretty sure tat is using RaamMat. Great stuff, it's butyl based instead of asphalt so no bad smell + it can handle higher temperatures before it gets slimy. It's a bit thin compared to some other deadening brands but layering in key spots fixes that. Also, just weighs 23 lbs. per roll (60 sq feet), where one roll will cover your back end very liberally or you entire interior conservatively
Btw, nice job so far! Have you ripped up the floor yet? I was having fun with that last night
Btw, nice job so far!
Have you ripped up the floor yet? I was having fun with that last night