
Finally, the Bose system is getting kicked to the curb...


Thread Starter
Registered User
Joined: Mar 2010
Posts: 34
Likes: 0
From: Bergen County NJ
...Or at least until I am ready to sell the car 
My goals are to build a decent sounding system on a budget, using some equipment I already have. I am fairly OCD when it comes to some things, so I want to keep it clean and stealthy. I also would like to be able to revert everything back to stock.
I would like to thank Bing (16psibrick on here) from Simplicity In Sound for the inspiration. I can only dream of having his install skills. Sintaxerror's build log on this forum was extremely helpful. I am definitely taking some cues from his work. Lastly, my buddy Ray for lending a hand.
Headunit: Somewhat undecided at the moment. Will get to that later.
Front Stage: Boston Pro60SE (purchased on ebay at a great price, got very lucky)
Front Stage Amp: SoundStream Rubicon 204 (already had this, came from a friends car years ago). Will be run at 2x100 RMS (bridged).
Rear Stage: None! not needed in this car.
Subs: 2 Infinity Kappa Perfect 10" DVC wired to a final 2 ohms
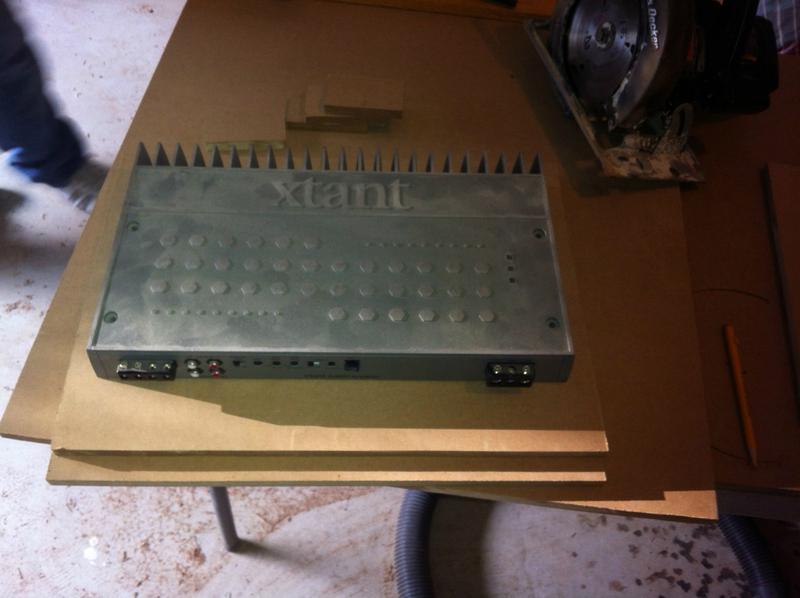
Sub Amp: Xtant A6001 1x600 @ 2 ohms
Wiring: KnuKonceptz power, ground, remote, speaker, and RCA cables. Lots of heat shrink tubing and techflex.
On to the good stuff... pics.
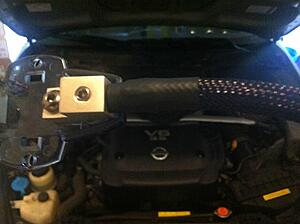
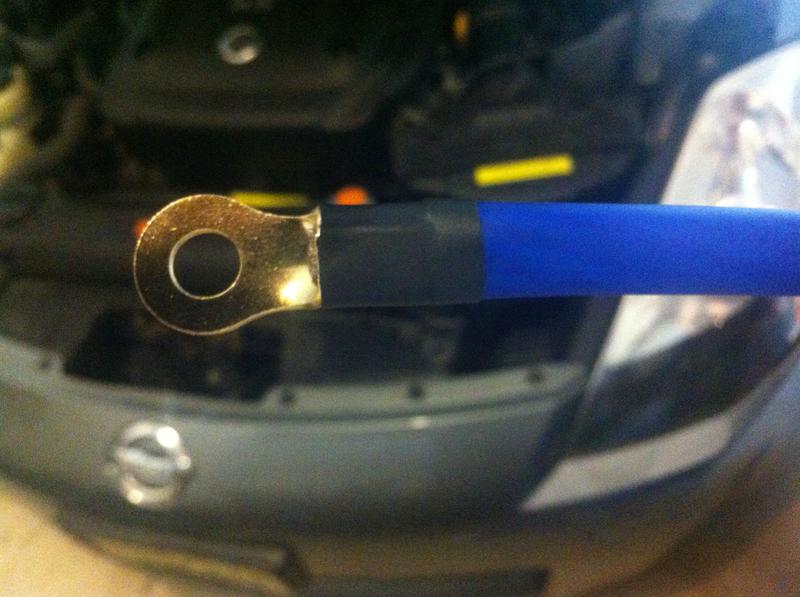
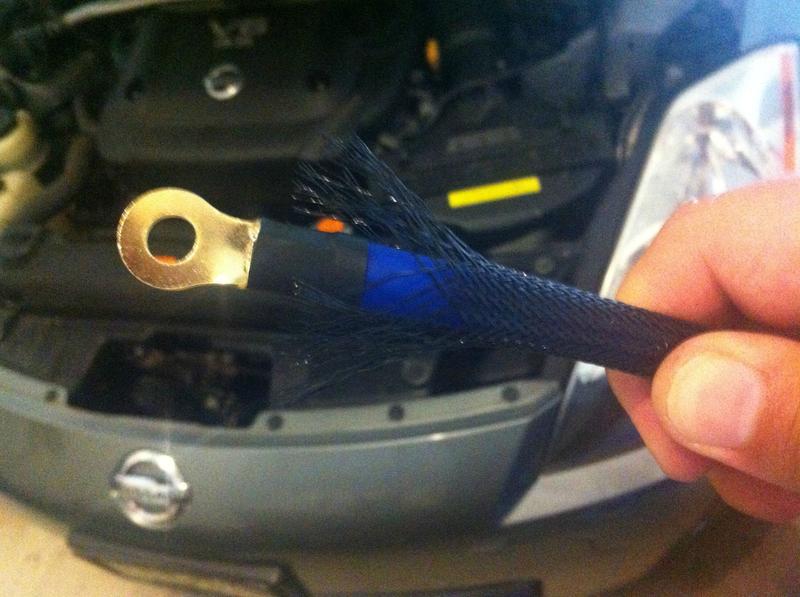
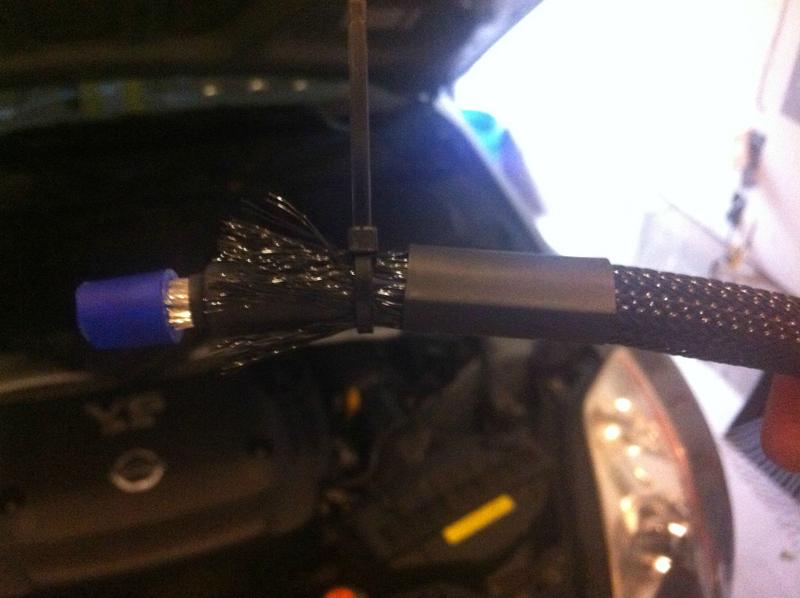
Power cable at the battery end:

First time using tech flex... I got better at it as I went.
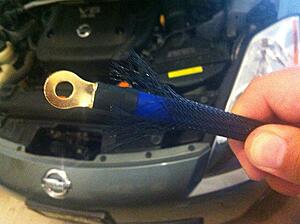
Heat shrunk... this will be a common theme in this build:
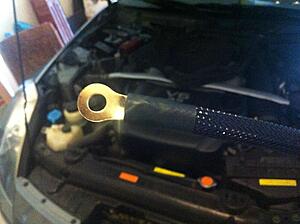
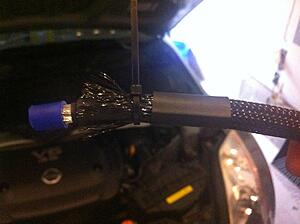
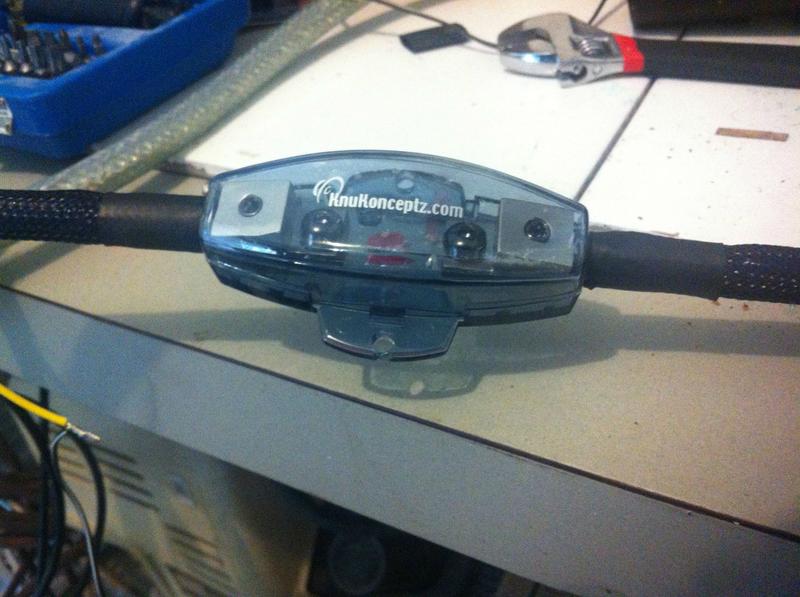
Other end of the cable, at the fuse block:
Attached...
Techflexed... all wiring will be done this way:
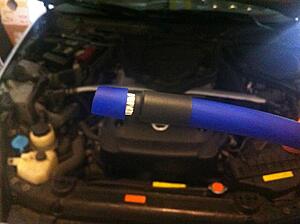
Other end of the fuse block... this is how I kept the techflex in place at the end:
Ready to be installed:
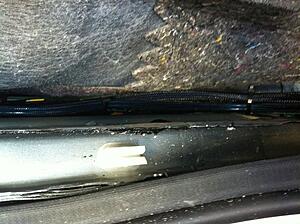
Punched a hole in the huge grommet right near the battery and passed the cable through:
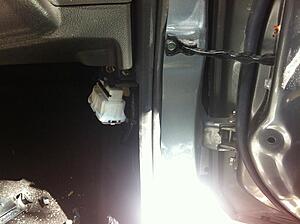
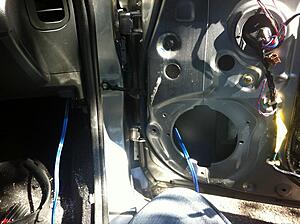
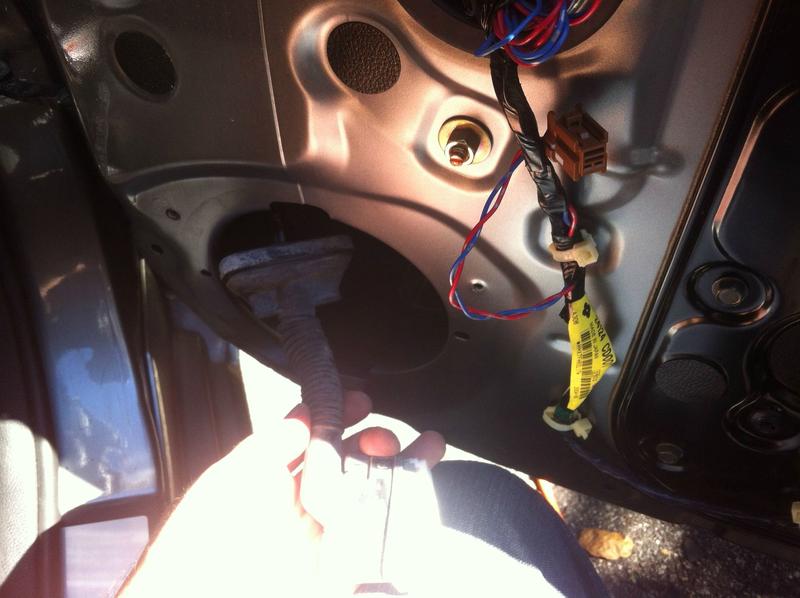
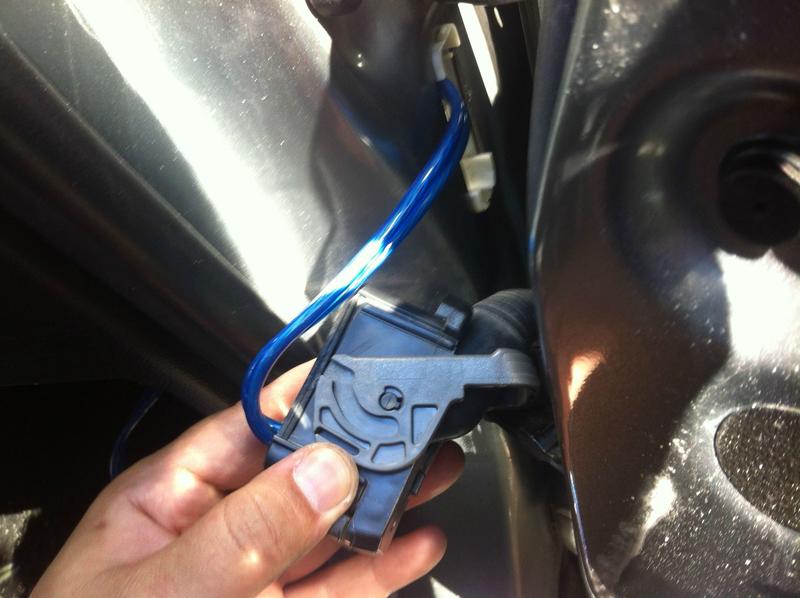
Next, I moved on to the doors. I wanted to pass new speaker wire through. This turned out to be much easier than I had anticipated. Before I started:
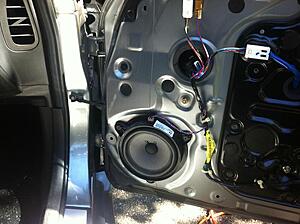
Plug out:
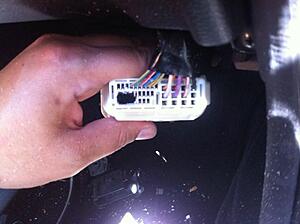
I pulled it through the speaker opening. I found that this gave me much more slack to work with.
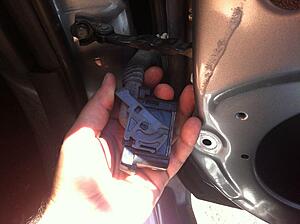
After I used my dremel to open a path for the cable in an unused part of the plug:
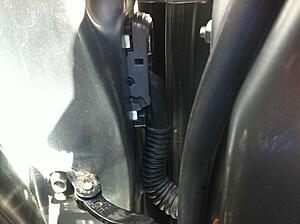
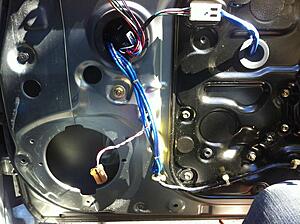
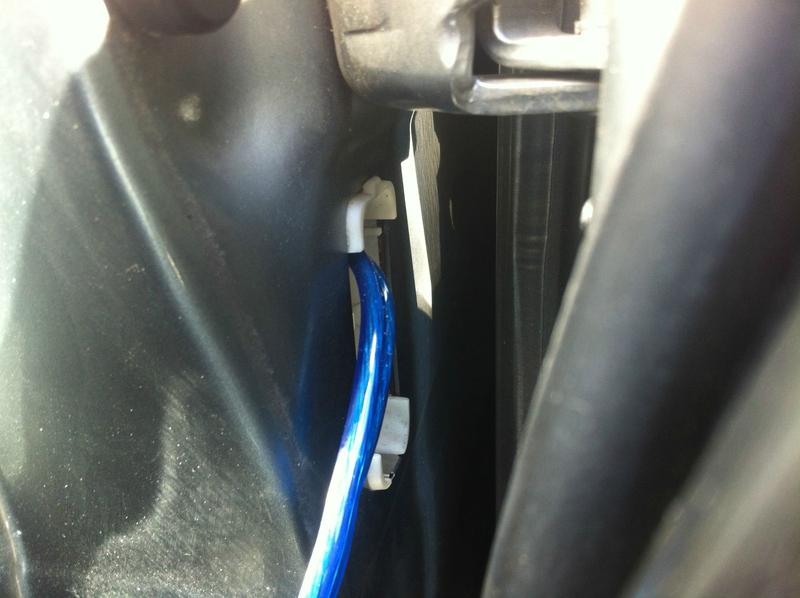
Time to move on to the car side of the plug. This was as far as it could be pulled down from the dash.
This was done very very carefully:
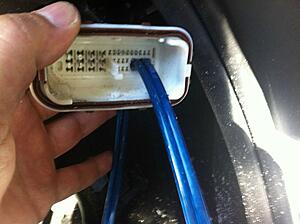
12 ga speaker cable fits through nicely. It should be noted at this point that there is not enough room to twist the wire around in the opening. This means that when putting the plugs back together, careful planning was needed to make sure the wire was aligned, or the plugs would not fit.
Car side put back in place:

Ready to go back together:

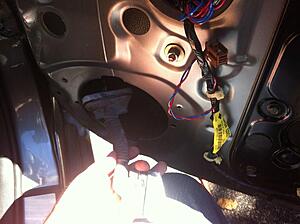
This part was the most difficult by far. There is so little space to work, and I do not have small hands.
Not quite done yet...
Punched the wire through the grommet in the door and zip-tied in place for now. You might notice there isn't any techflex. That will come later. I did not want to make the already thick 12 ga wire impossible to feed through the plugs and the rubber boot. Ill just have to settle for a gap of bare wire through the door jam.
My goals are to build a decent sounding system on a budget, using some equipment I already have. I am fairly OCD when it comes to some things, so I want to keep it clean and stealthy. I also would like to be able to revert everything back to stock.
I would like to thank Bing (16psibrick on here) from Simplicity In Sound for the inspiration. I can only dream of having his install skills. Sintaxerror's build log on this forum was extremely helpful. I am definitely taking some cues from his work. Lastly, my buddy Ray for lending a hand.
Headunit: Somewhat undecided at the moment. Will get to that later.
Front Stage: Boston Pro60SE (purchased on ebay at a great price, got very lucky)
Front Stage Amp: SoundStream Rubicon 204 (already had this, came from a friends car years ago). Will be run at 2x100 RMS (bridged).
Rear Stage: None! not needed in this car.
Subs: 2 Infinity Kappa Perfect 10" DVC wired to a final 2 ohms
Sub Amp: Xtant A6001 1x600 @ 2 ohms
Wiring: KnuKonceptz power, ground, remote, speaker, and RCA cables. Lots of heat shrink tubing and techflex.
On to the good stuff... pics.
Power cable at the battery end:
First time using tech flex... I got better at it as I went.
Heat shrunk... this will be a common theme in this build:

Other end of the cable, at the fuse block:

Attached...

Techflexed... all wiring will be done this way:

Other end of the fuse block... this is how I kept the techflex in place at the end:
Ready to be installed:
Punched a hole in the huge grommet right near the battery and passed the cable through:

Next, I moved on to the doors. I wanted to pass new speaker wire through. This turned out to be much easier than I had anticipated. Before I started:

Plug out:

I pulled it through the speaker opening. I found that this gave me much more slack to work with.
After I used my dremel to open a path for the cable in an unused part of the plug:

Time to move on to the car side of the plug. This was as far as it could be pulled down from the dash.

This was done very very carefully:

12 ga speaker cable fits through nicely. It should be noted at this point that there is not enough room to twist the wire around in the opening. This means that when putting the plugs back together, careful planning was needed to make sure the wire was aligned, or the plugs would not fit.

Car side put back in place:
Ready to go back together:
This part was the most difficult by far. There is so little space to work, and I do not have small hands.

Not quite done yet...
Punched the wire through the grommet in the door and zip-tied in place for now. You might notice there isn't any techflex. That will come later. I did not want to make the already thick 12 ga wire impossible to feed through the plugs and the rubber boot. Ill just have to settle for a gap of bare wire through the door jam.

Last edited by Mike1082; Oct 13, 2012 at 05:33 PM.
Thread Starter
Registered User
Joined: Mar 2010
Posts: 34
Likes: 0
From: Bergen County NJ
Moving right along...
While I had the door apart, I decided to take some pictures and measurements, as I did not have the speakers yet at that point.
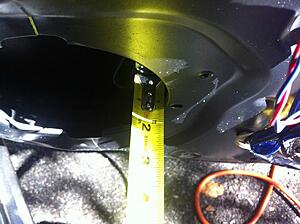
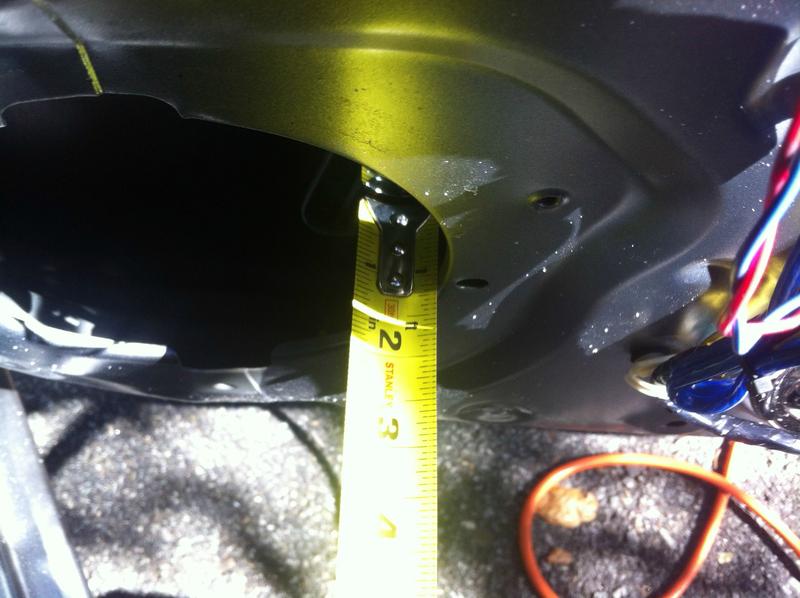
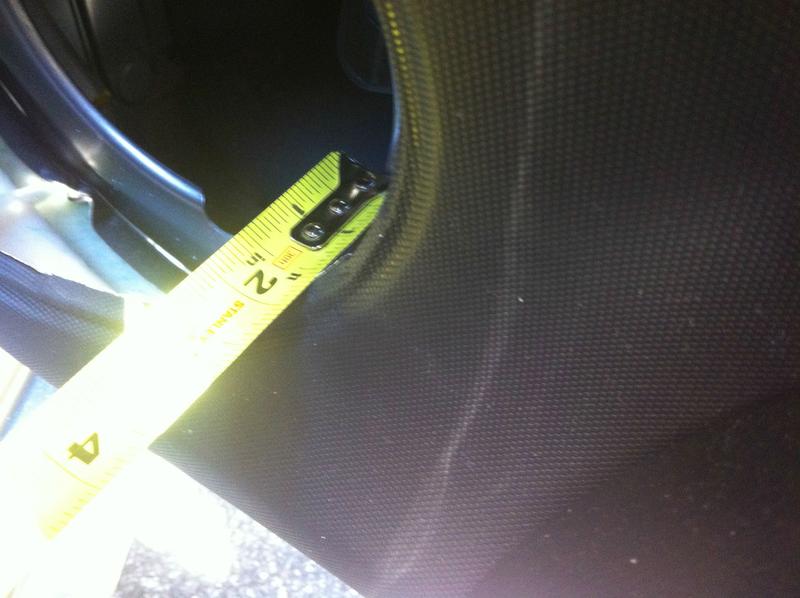
Here you can see the window glass when lowered completely.
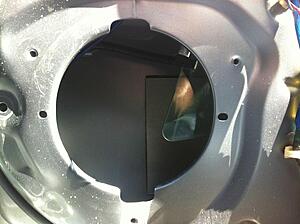
The glass sticks out about 2 1/4" from the edge of the opening:
And only about 1 1/4" deep from the surface of the door:
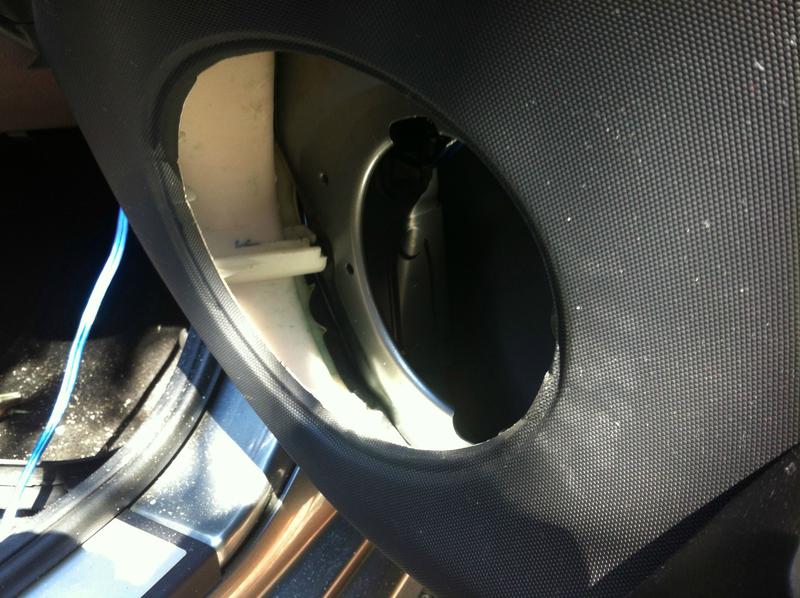
With the panel in place:
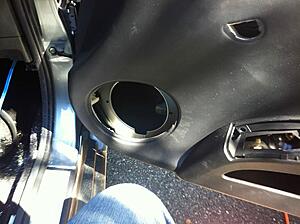
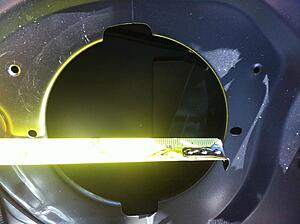
Much more room toward the front of the car between the door card and the door:
Bout 1 1/2" of room at the shortest place toward the back of the car:

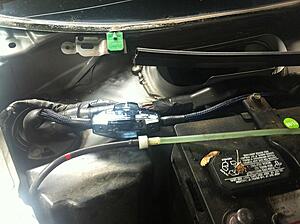
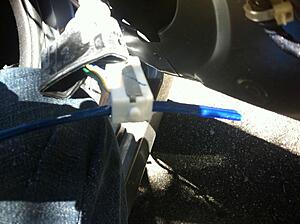
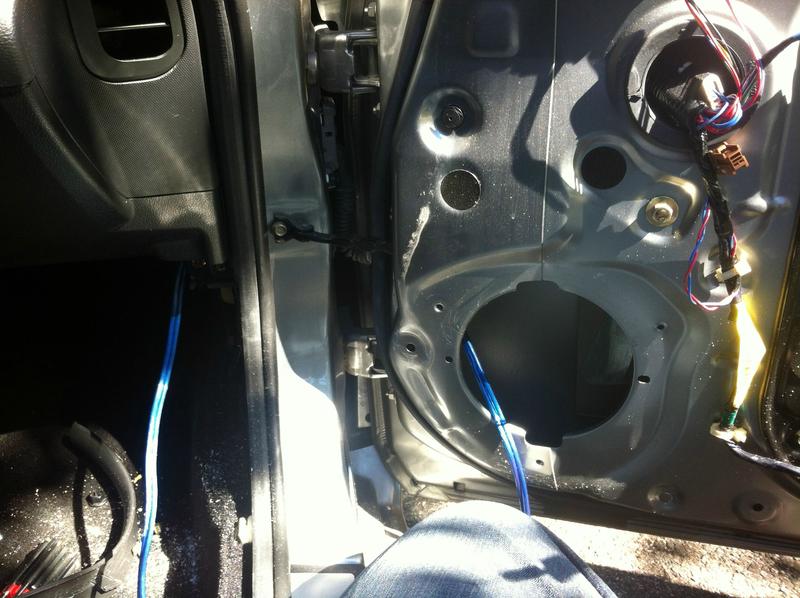
Moving on again, running power and speaker cable down the passenger side:
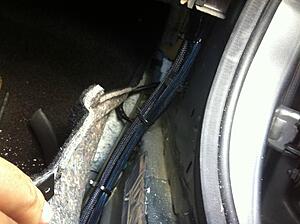
Ziptied to the stock harness every few inches:
For now, the wiring bundled under the glove box behind the passenger seat. The amps will be mounted behind the drivers seat.

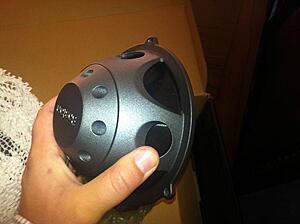
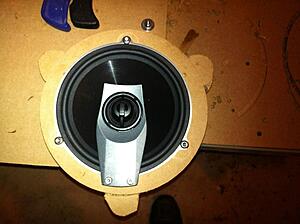
My speakers arrived! The Boston Acoustics Pro60SE. The neo magnets mean great power handling with much better clearance than conventional speaker designs.
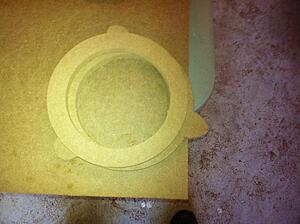
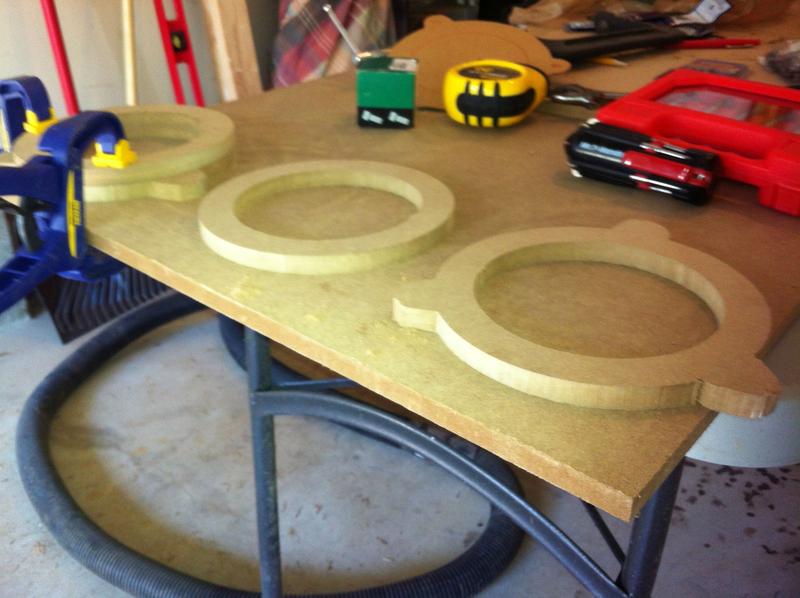
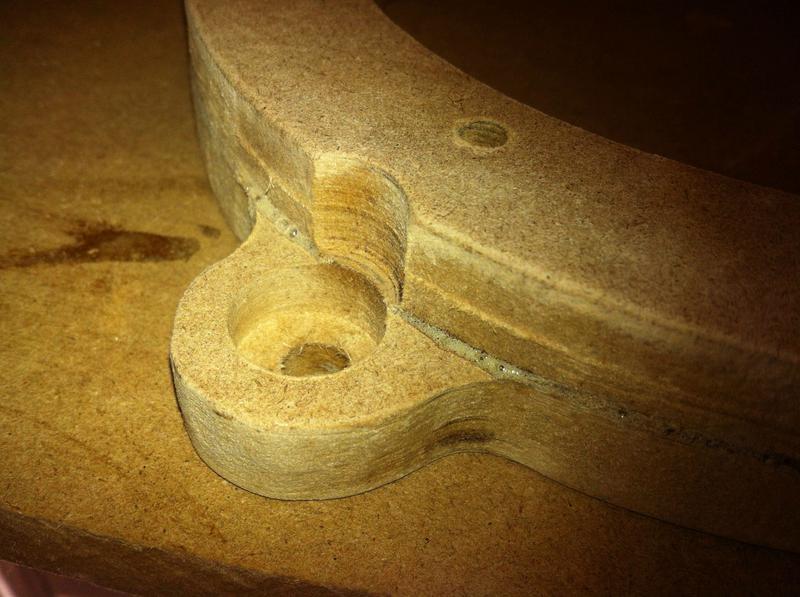
Cut up some spacer rings with the plunge router and a Jasper 200 circle jig. Used 1/2" MDF, which will be stacked to make a 1" spacer.

The lower half of the spacer has a flange to use the stock speaker mounts.
I will be recessing the t-nuts into the back of the spacers using a forstner bit.
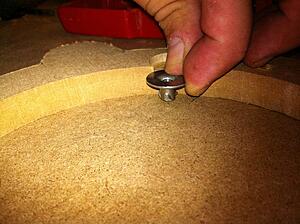
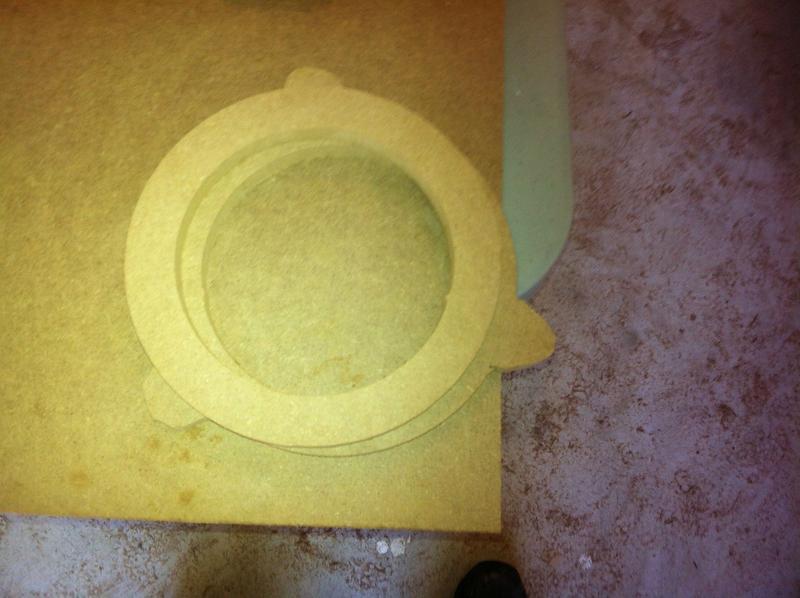
Used a dab of Gorilla Glue, then stacked an upside-down t-nut and a very large C clamp to squeeze the nut in place.
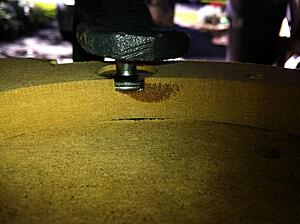
Long story short, once all the nuts were in place, the speaker holes did not align properly. Trial and error. I ended up having to scrap one of the rings and start over. Once I had routed a new ring, I found that the best answer was to glue the rings together first, then mark the BACK of the ring with speaker mounting holes. I then used the forstner bit FIRST for the recess, and followed that up with the 1/4" drill bit for the bolt. This yielded much more accurate results, and the t-nuts lined up perfectly. I mounted the speakers in the rings temporarily to allow the glue to set. Tomorrow (or whenever I have time to work on it again) I will be coating them with bedliner to protect them from moisture.
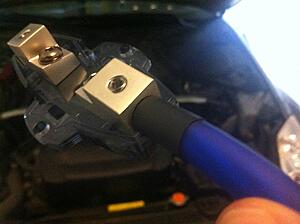
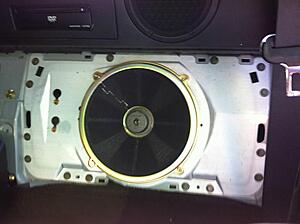
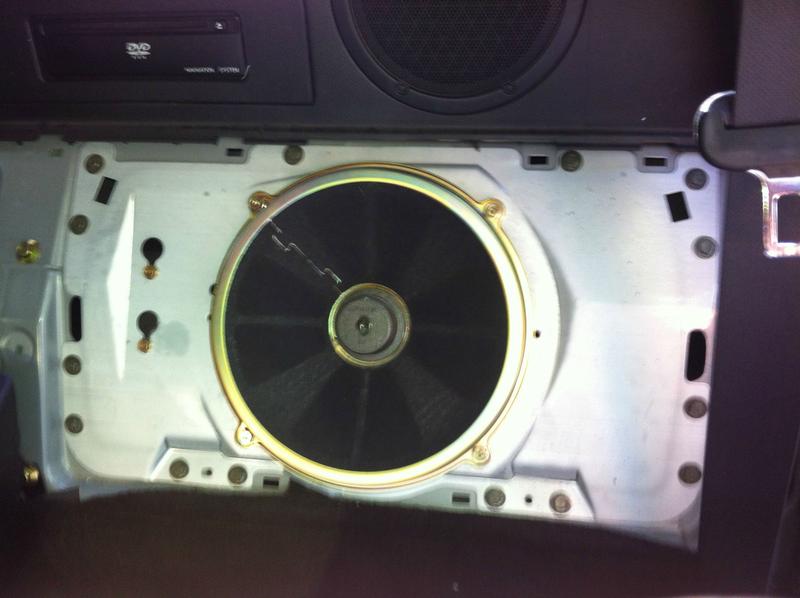
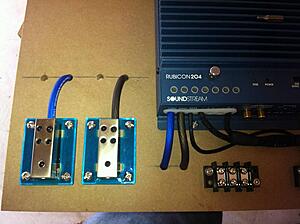
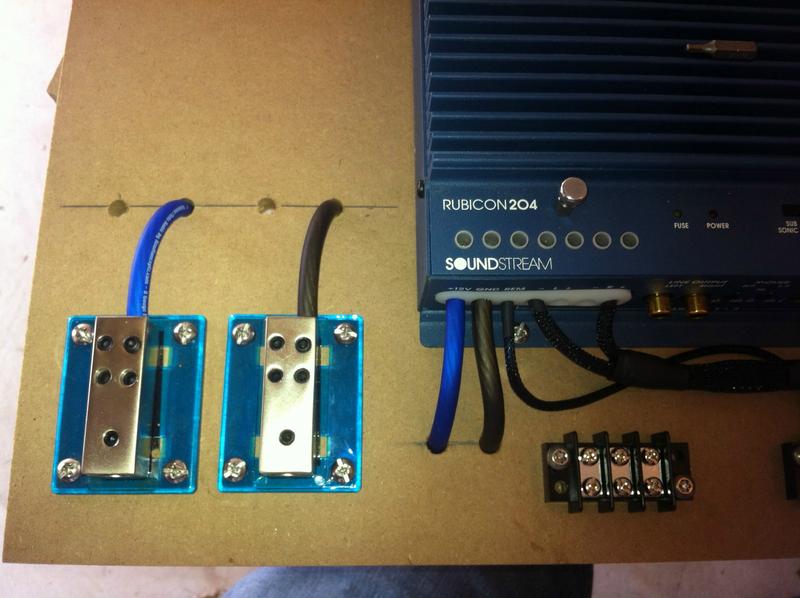
Here is the stock Bose "sub". This thing sucks, but you already knew that. I didnt get any other pics of it, but there is a lot of room behind this for the amp rack to be completely hidden. I took out the sub and its plate, took some measurements, and got started on the amp rack.
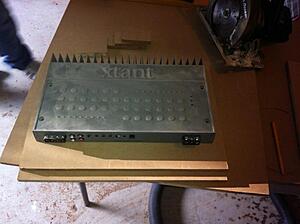
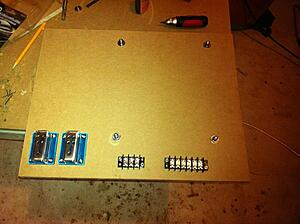
The amp rack will be 2-tiered. After some planning, I decided the Xtant will be on top. The amps, and distribution/barrier strips will be mounted using t-nuts and machine screws, just like the speakers.
The bottom tier will house the SoundStream amp, along with the power and ground distribution, as well as 2 barrier strips. I laid out everything where I wanted it, then reversed it so I could press in the t-nuts. I recessed the t-nuts again with my trusty forstner bit. This is totally not necessary.

Glued and pressed into place:
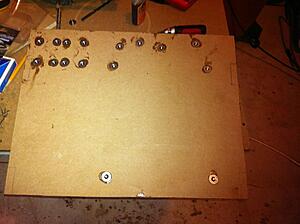
I mounted the distro blocks and the barrier strips in the front, so they were easily accessible. The other 4 bolts you see here will hold the SoundStream in place. This is all temporary, to let the glue set.
Thats all for now, more to come. Thanks for looking.
While I had the door apart, I decided to take some pictures and measurements, as I did not have the speakers yet at that point.
Here you can see the window glass when lowered completely.

The glass sticks out about 2 1/4" from the edge of the opening:

And only about 1 1/4" deep from the surface of the door:
With the panel in place:

Much more room toward the front of the car between the door card and the door:
Bout 1 1/2" of room at the shortest place toward the back of the car:
Moving on again, running power and speaker cable down the passenger side:

Ziptied to the stock harness every few inches:

For now, the wiring bundled under the glove box behind the passenger seat. The amps will be mounted behind the drivers seat.

My speakers arrived! The Boston Acoustics Pro60SE. The neo magnets mean great power handling with much better clearance than conventional speaker designs.

Cut up some spacer rings with the plunge router and a Jasper 200 circle jig. Used 1/2" MDF, which will be stacked to make a 1" spacer.
The lower half of the spacer has a flange to use the stock speaker mounts.
I will be recessing the t-nuts into the back of the spacers using a forstner bit.

Used a dab of Gorilla Glue, then stacked an upside-down t-nut and a very large C clamp to squeeze the nut in place.

Long story short, once all the nuts were in place, the speaker holes did not align properly. Trial and error. I ended up having to scrap one of the rings and start over. Once I had routed a new ring, I found that the best answer was to glue the rings together first, then mark the BACK of the ring with speaker mounting holes. I then used the forstner bit FIRST for the recess, and followed that up with the 1/4" drill bit for the bolt. This yielded much more accurate results, and the t-nuts lined up perfectly. I mounted the speakers in the rings temporarily to allow the glue to set. Tomorrow (or whenever I have time to work on it again) I will be coating them with bedliner to protect them from moisture.

Here is the stock Bose "sub". This thing sucks, but you already knew that. I didnt get any other pics of it, but there is a lot of room behind this for the amp rack to be completely hidden. I took out the sub and its plate, took some measurements, and got started on the amp rack.
The amp rack will be 2-tiered. After some planning, I decided the Xtant will be on top. The amps, and distribution/barrier strips will be mounted using t-nuts and machine screws, just like the speakers.
The bottom tier will house the SoundStream amp, along with the power and ground distribution, as well as 2 barrier strips. I laid out everything where I wanted it, then reversed it so I could press in the t-nuts. I recessed the t-nuts again with my trusty forstner bit. This is totally not necessary.
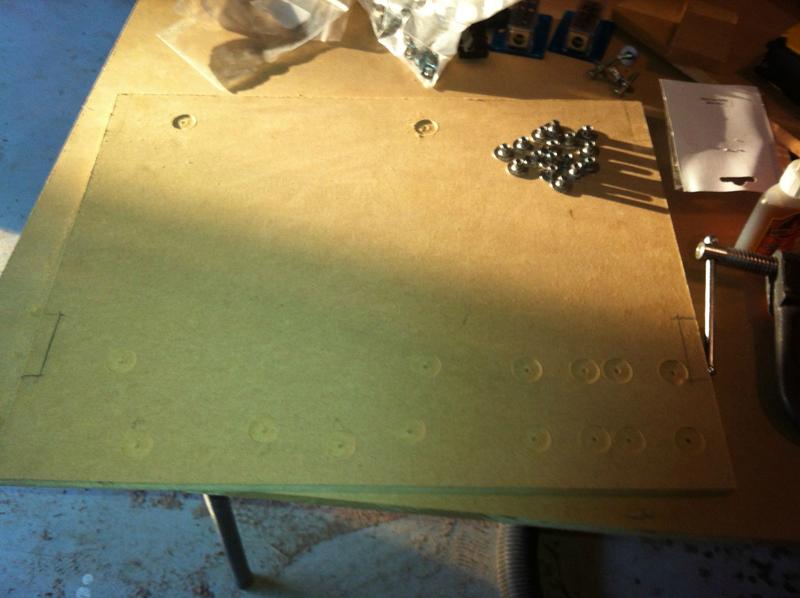
Glued and pressed into place:

I mounted the distro blocks and the barrier strips in the front, so they were easily accessible. The other 4 bolts you see here will hold the SoundStream in place. This is all temporary, to let the glue set.

Thats all for now, more to come. Thanks for looking.
Last edited by Mike1082; Oct 13, 2012 at 05:11 PM.
Thread Starter
Registered User
Joined: Mar 2010
Posts: 34
Likes: 0
From: Bergen County NJ
Some more pictures... this is where I am at now.
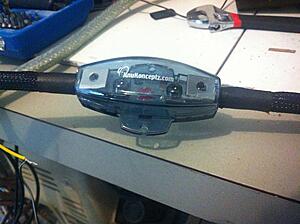
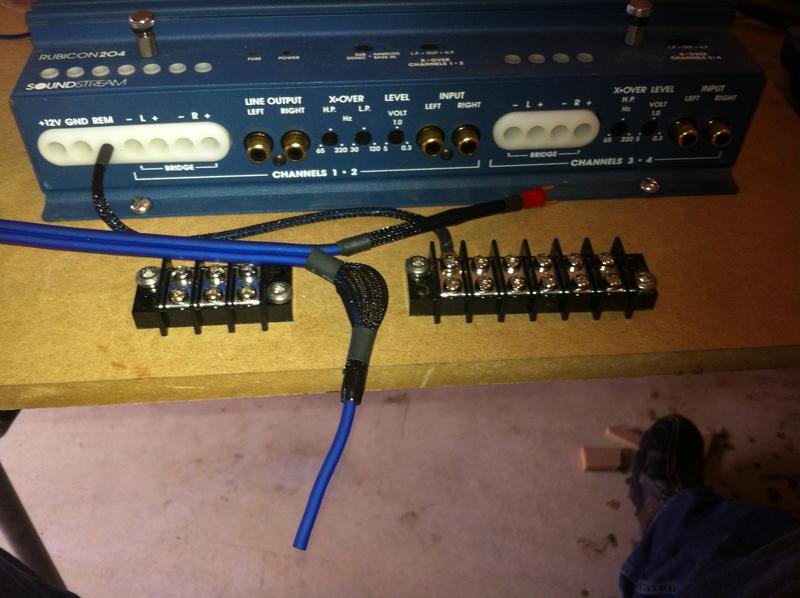
I began mocking up the wiring on the amp rack. Committing to techflex and heatshrink makes this all take a lot longer than it needs to, but I am going to stick to the plan.
Remote wire fab'd up and connected. Working on the left channel wiring between the barrier strip and the front stage amp.
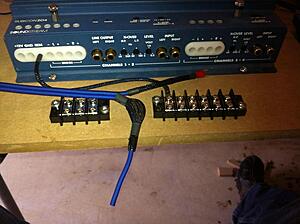
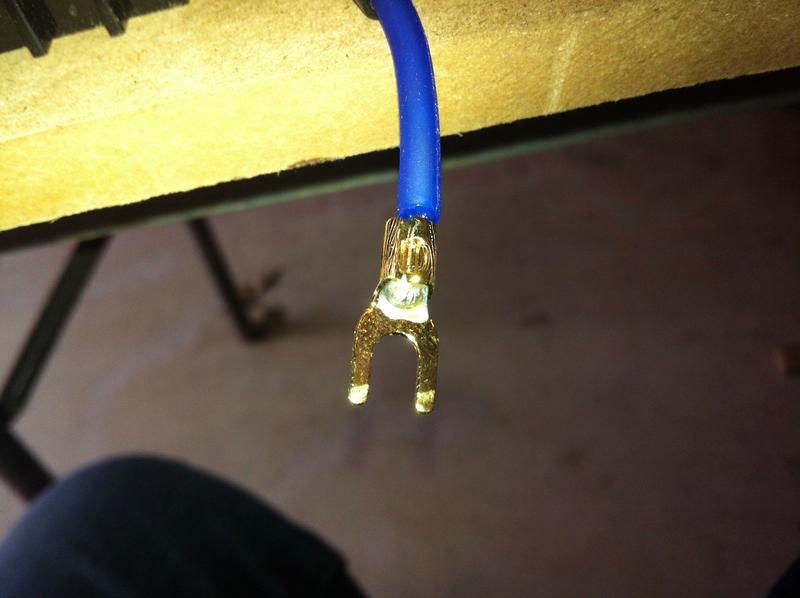
Crimped and soldered
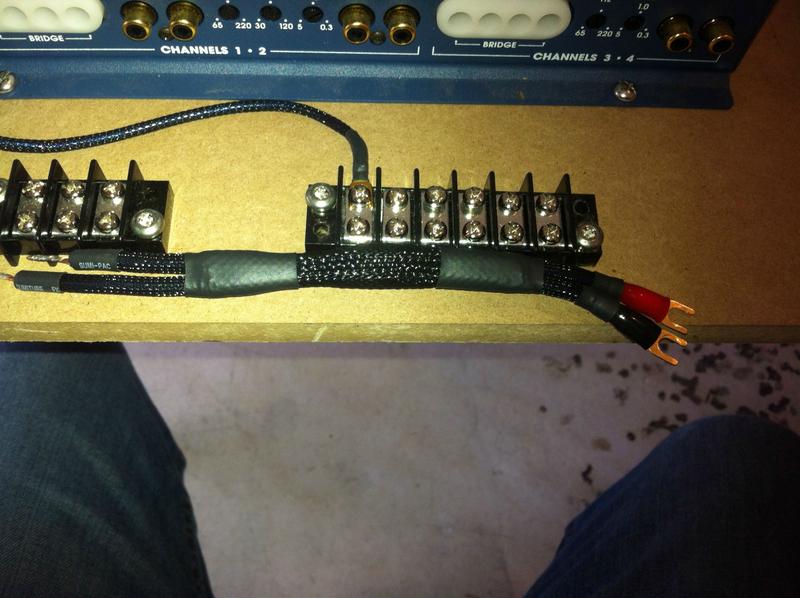
Starting to take shape. You can see that I am using the red and black terminal covers here. While it may not fit with the other wiring, I decided to do this to make it clear when connecting the other end to the barrier strip.
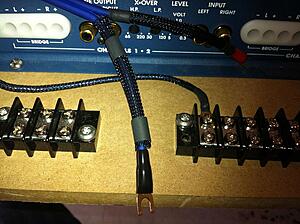
Ready to be installed
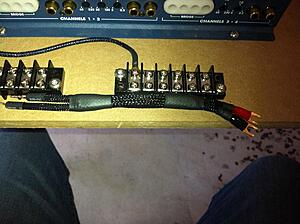
One side wired up. It's at this point when my OCD tells me to shorten the remote wire. Maybe later...

The other channel was much simpler. Still trying to ignore that remote wire. And the fact that the longer barrier strip is at a slight angle. Oh well, itll be less noticeable when the MDF is sprayed with bed liner later.

Power and ground will look something like this...
Taking a break from the amp rack, I decided to clean up the speaker rings.
You can see here that I gave the mounting tabs some much needed shaping and sanding. I also knocked down the sharp edges with some sand.

The OEM speaker spacers are much thinner than the 1/2" MDF. In order to make use of the stock mounting hardware, I needed to recess the mounting screw about halfway through. Out came the ol Forstner bits again. The Dremel was used to sand out that little notch.

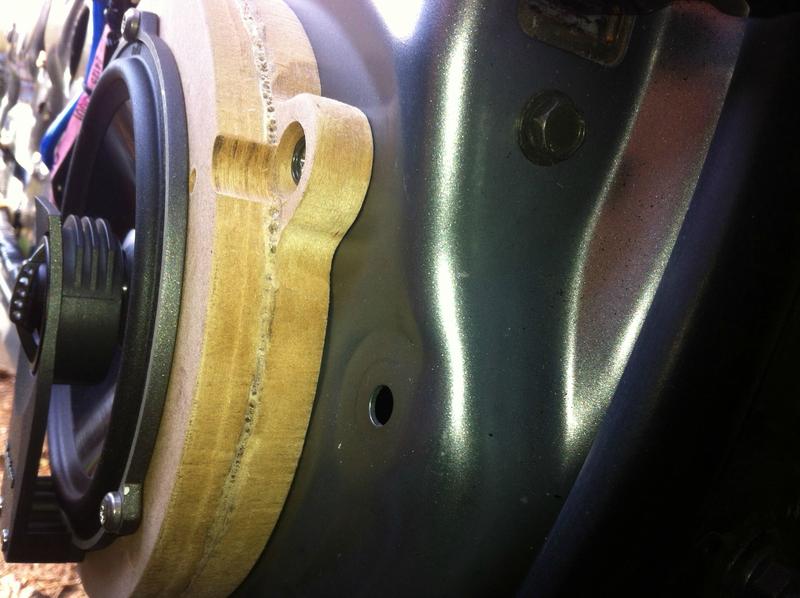
Test fitted to the door. Stock speaker screws fit perfectly.
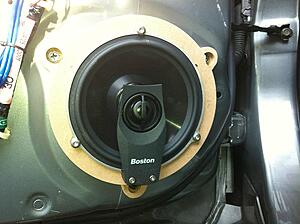
I'm very happy with how these came out. Any small gaps will be gone, as I will be using some deadener on the door, mostly around the speaker opening.

Next on my plate is to seal up and strengthen the rings with some resin, and cover in bed liner. Then finish mocking up the amp rack, seal it up, and figure out a good way to brace it (I have something in mind, thanks to sintaxerror's build log). That's all for tonight, hopefully more updates this weekend.
I began mocking up the wiring on the amp rack. Committing to techflex and heatshrink makes this all take a lot longer than it needs to, but I am going to stick to the plan.
Remote wire fab'd up and connected. Working on the left channel wiring between the barrier strip and the front stage amp.
Crimped and soldered
Starting to take shape. You can see that I am using the red and black terminal covers here. While it may not fit with the other wiring, I decided to do this to make it clear when connecting the other end to the barrier strip.

Ready to be installed
One side wired up. It's at this point when my OCD tells me to shorten the remote wire.
Maybe later...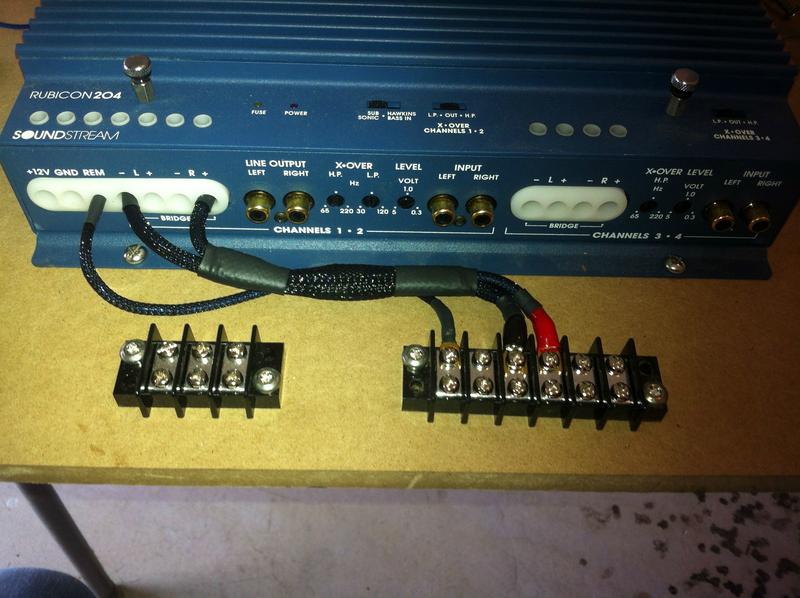
The other channel was much simpler. Still trying to ignore that remote wire. And the fact that the longer barrier strip is at a slight angle. Oh well, itll be less noticeable when the MDF is sprayed with bed liner later.

Power and ground will look something like this...
Taking a break from the amp rack, I decided to clean up the speaker rings.
You can see here that I gave the mounting tabs some much needed shaping and sanding. I also knocked down the sharp edges with some sand.

The OEM speaker spacers are much thinner than the 1/2" MDF. In order to make use of the stock mounting hardware, I needed to recess the mounting screw about halfway through. Out came the ol Forstner bits again. The Dremel was used to sand out that little notch.
Test fitted to the door. Stock speaker screws fit perfectly.

I'm very happy with how these came out. Any small gaps will be gone, as I will be using some deadener on the door, mostly around the speaker opening.
Next on my plate is to seal up and strengthen the rings with some resin, and cover in bed liner. Then finish mocking up the amp rack, seal it up, and figure out a good way to brace it (I have something in mind, thanks to sintaxerror's build log). That's all for tonight, hopefully more updates this weekend.

Thread Starter
Registered User
Joined: Mar 2010
Posts: 34
Likes: 0
From: Bergen County NJ
Sorry, but I am keeping everything so that I can revert back to stock when I sell the car. Trust me, you are better off just upgrading than using stock Bose anything. I would highly recommend NOT paying for it... but to each his own, and I am sure you have your reasons.

Registered User
Joined: Nov 2008
Posts: 51
Likes: 0
From: PA
So i have been searching this forum and i notice that a lot of people go with 2 way speakers for the front instead of component. Why did you chose that route instead of component like that stock speakers were???
Trending Topics
Thread Starter
Registered User
Joined: Mar 2010
Posts: 34
Likes: 0
From: Bergen County NJ
These speakers come with the option to run coax, but I am running them as component. I actually got a lot more done, I will make an update tonight after work. If you have questions specifically related to the 350z, feel free to ask in the thread, but I will PM you anyway.


Thread Starter
Registered User
Joined: Mar 2010
Posts: 34
Likes: 0
From: Bergen County NJ
Sorry for the delay guys! I took a break from taking the car apart for the winter, as it spent most of the time in the garage. Unfortunately with a 1 car garage, there is no room to work on it inside. I did get more work done since my last post, so I have a lot of pictures coming. The deck is installed (Pioneer 8400BH), speaker rings are sealed and mounted, tweeters installed, amp rack sealed and installed, and 2nd glove box door attached. Full disclosure: I skimped a bit on keeping the amp rack area clean looking, since it is covered by the door. But once everything was back together, it looks great. I will get pictures up as soon as I can.
I have to say, I am very pleased with the Boston Pro60SE components. Very tight mid-bass. Enough that I need to go back and deaden my doors a bit more. I have more deadener, as well as a roll of Ensolite to isolate the plastic door panels from the inner door. I will be installing those soon. That being said, the tweets are VERY bright. I have the jumper set to attenuate as much as possible, but they still scream. Since they are mounted in the stock location behind the sails, this ended up not being an issue.
Next will be either a custom sub box, or a prefab under-strut setup. Also, my fiance accidentally "recycled" one of my interior trim panels, so that has to be replaced. =(

Thread
Thread Starter
Forum
Replies
Last Post