
Ccfl diy


Thread Starter
Registered User
Joined: Jun 2008
Posts: 205
Likes: 0
From: Tarpon Springs, FL
Ok. So after several readings on CCFL's in the corner reflectors, I decided to give it a shot and take pictures along the way for a DIY write up. The first side took 1.5 hours (trying to figure out how things go) and the other side took only 45 minutes, because I knew what was going on already. So to save all of you time if you try it, here's the write up.
Supplies:
1. CCFL's (obviously)
2. wire cutters
3. electrical tape
4. razor blade
5. Small Flathead screwdriver
5. Ratchet set
6. Pliers
7. Wire taps
8. Strong double-sided tape (Got it at wal-mart, package says waterproof and 6" holds 11lbs!)
9. having access to a lift so you can take the wheels off is key to easiness!
So, In addition to the CCFL's I decided to exchange my turn signals with the chrome plated bulbs and I changed the small halogen parking light with bright white led bulbs.
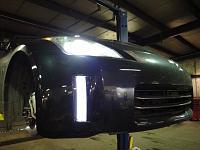
Before:
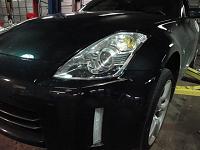
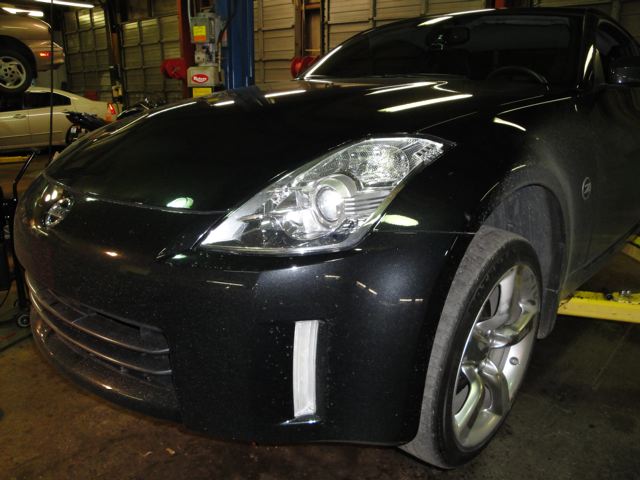
After jacking up the car, remove the wheels, belly pan and wheel wells. This allows full exposure of the headlights and corner reflectors.

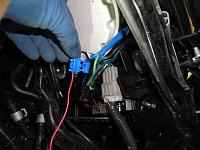
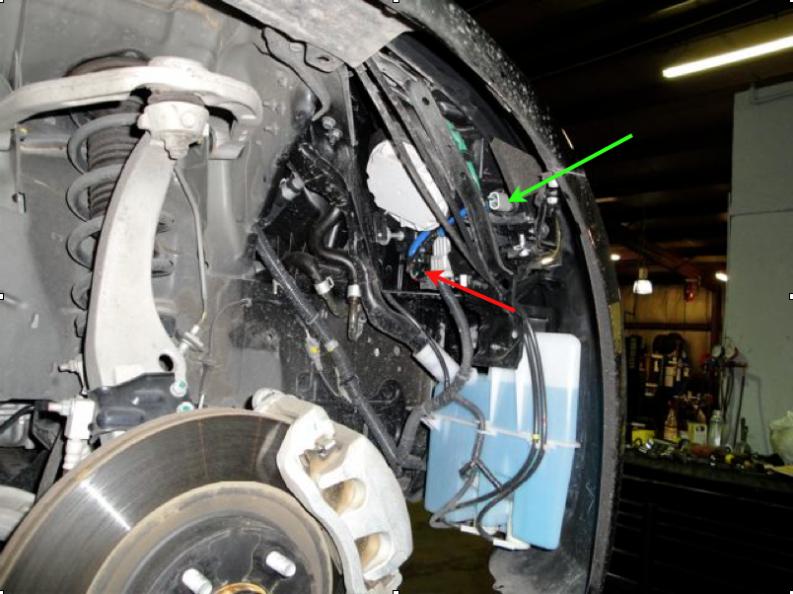
I've already changed the bulbs which is a simple plug n' play so I didn't take any pictures. This was the harder side because of that huge washer bottle covering the reflector. I'll have a final picture of the driver's side too. The green arrow is the parking light. This is the light you want to tap into. The white arrow is the bundle of wires that the parking light comes from. They're all wrapped in electrical tape. I thought this was the best approach because the plastic wire taps take up some room and there isn't enough up at the parking light.
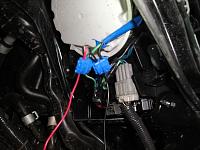
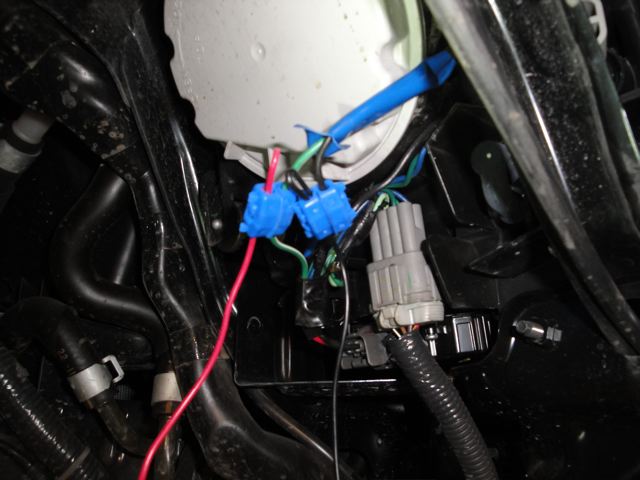
The nifty thing about the CCFL's that I got, they were made for the inside of computers so there's the CCFL's with wires that plug into the inverter box, then the power wires plug into the box as well. So, I was able to work with the parts without having them hanging all over the place. I cut the computer plug off the wires and put the wire taps on. The wire just lays in it and you snap one half shut with a pair of pliers. Then you do the same thing with the wire on the parking lights. My CCFL's used red and black, and the parking lights use Green (with a white stripe) and black. Here's the red wire tap to the green wire.
And here's both.
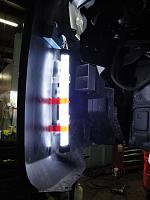
Then I attached the CCFL's to the reflector (see the bottom where there's a good picture of how it is taped. I used denatured alcohol to prep everywhere the tape would touch and used the heavy duty double sided tape as if it were single sided and taped it across the reflector.
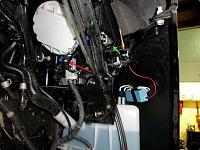
Double sided tape held the inverter box. I plugged all the wires in. Done! I used electrical tape to cover up all the wiring at the connectors (red arrow) and I wrapped the wires with electrical tape for extra protection as I wove the wire to the front bumper (green arrow) where the box is. Then I taped the white wires from the CCFL's to the box.
Supplies:
1. CCFL's (obviously)
2. wire cutters
3. electrical tape
4. razor blade
5. Small Flathead screwdriver
5. Ratchet set
6. Pliers
7. Wire taps
8. Strong double-sided tape (Got it at wal-mart, package says waterproof and 6" holds 11lbs!)
9. having access to a lift so you can take the wheels off is key to easiness!
So, In addition to the CCFL's I decided to exchange my turn signals with the chrome plated bulbs and I changed the small halogen parking light with bright white led bulbs.
Before:

After jacking up the car, remove the wheels, belly pan and wheel wells. This allows full exposure of the headlights and corner reflectors.
I've already changed the bulbs which is a simple plug n' play so I didn't take any pictures. This was the harder side because of that huge washer bottle covering the reflector. I'll have a final picture of the driver's side too. The green arrow is the parking light. This is the light you want to tap into. The white arrow is the bundle of wires that the parking light comes from. They're all wrapped in electrical tape. I thought this was the best approach because the plastic wire taps take up some room and there isn't enough up at the parking light.
The nifty thing about the CCFL's that I got, they were made for the inside of computers so there's the CCFL's with wires that plug into the inverter box, then the power wires plug into the box as well. So, I was able to work with the parts without having them hanging all over the place. I cut the computer plug off the wires and put the wire taps on. The wire just lays in it and you snap one half shut with a pair of pliers. Then you do the same thing with the wire on the parking lights. My CCFL's used red and black, and the parking lights use Green (with a white stripe) and black. Here's the red wire tap to the green wire.

And here's both.
Then I attached the CCFL's to the reflector (see the bottom where there's a good picture of how it is taped. I used denatured alcohol to prep everywhere the tape would touch and used the heavy duty double sided tape as if it were single sided and taped it across the reflector.
Double sided tape held the inverter box. I plugged all the wires in. Done! I used electrical tape to cover up all the wiring at the connectors (red arrow) and I wrapped the wires with electrical tape for extra protection as I wove the wire to the front bumper (green arrow) where the box is. Then I taped the white wires from the CCFL's to the box.

Last edited by Pete5150; Jan 23, 2010 at 03:26 PM.
Thread Starter
Registered User
Joined: Jun 2008
Posts: 205
Likes: 0
From: Tarpon Springs, FL
Here's the other side how I taped the CCFLs.
I didn't peel the double backing on the bottom two pieces. No particular reason. I should have left them on all of the pieces, but whatever.
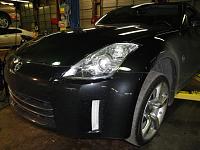
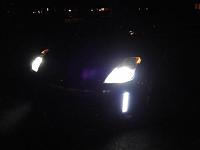
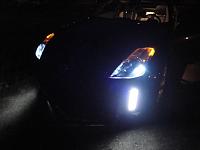
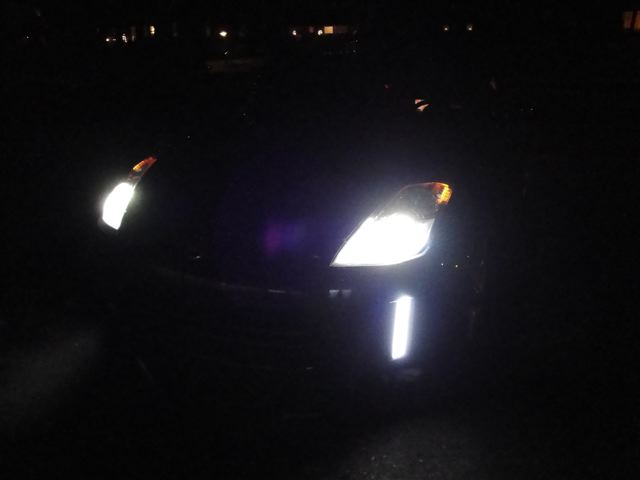
Final pictures (lights off to show the new turn signals (bye bye amber!)
Good luck! It's easier once you see it!

I didn't peel the double backing on the bottom two pieces. No particular reason. I should have left them on all of the pieces, but whatever.
Final pictures (lights off to show the new turn signals (bye bye amber!)


Good luck! It's easier once you see it!


Thread Starter
Registered User
Joined: Jun 2008
Posts: 205
Likes: 0
From: Tarpon Springs, FL
I ended up finding them online by searching 'CCFL 12" white'. I found several sites when I was searching and forgot which one I bought from, but I think it's http://www.svc.com/clk12wt2.html. When I rechecked the search now, Amazon has pretty much the same lights as well.

Trending Topics
Thread Starter
Registered User
Joined: Jun 2008
Posts: 205
Likes: 0
From: Tarpon Springs, FL
Yea!
Chrome turn signals - $12 for pair
LED Parking lights - $10 for pair
CCFL's - $10 + $10 shipping
Super Strong tape - I don't remember, $6?
Wire tapps - $2
So the whole modification was about $50. Can't beat that!
Chrome turn signals - $12 for pair
LED Parking lights - $10 for pair
CCFL's - $10 + $10 shipping
Super Strong tape - I don't remember, $6?
Wire tapps - $2
So the whole modification was about $50. Can't beat that!

I know this is a strong bump but I want to know if this is correct
Clear corner reflectors:
http://www.amazon.com/gp/product/B00...80GH5VE2PVSD2C
the CCFL's
http://www.svc.com/clk12wt2.html
and the rest I can just buy in store anywhere right?? Thanks
Clear corner reflectors:
http://www.amazon.com/gp/product/B00...80GH5VE2PVSD2C
the CCFL's
http://www.svc.com/clk12wt2.html
and the rest I can just buy in store anywhere right?? Thanks

Registered User
Joined: Jan 2009
Posts: 26
Likes: 0
From: Seattle
I did this mod last summer. A few of suggestions:
1) After you squeeze a wire splice connector, use a small screw driver and carefully open up the connector. Fill the center compartment and both ends of the splice connector with silcone sealant. Re-close the connector. These connectors are notorious for failing due to moisture getting in and corroding the splice. The silicone should keep the moisture out.
2) Once the CCFLs were in place, I covered the "back" side of the CCFLs, the side away from the reflector, with aluminum duct tape. NOT cloth duct tape. I didn't want the CCFLs illuminating the inside of my wheel wells.
3) The CCFLs put out RF (radio Frequency) interference. If you listen to AM radio, (I know nobody will admit they do.) there will be noticeable "noise" when the CCFLs are on.
Thread Starter
Registered User
Joined: Jun 2008
Posts: 205
Likes: 0
From: Tarpon Springs, FL
Good ideas Skeefy. I ended up wrapping lots of electrical tape around the taps to keep out moisture. I figure the inverter boxes and plugs will fail before the taps do (which would be an easy fix/replacement if it happens). I don't have any problems with the wheel well illumination since the covers and the under belly panel take care of any excess light. I do look forward to testing the AM, though!! 
Registered User
Joined: Jan 2009
Posts: 26
Likes: 0
From: Seattle
Thanks pete5150. I agree the connections to the voltage converter also looked like a corrosion problem wating to happen. After I plugged the wires onto the converter, I coated them with silicone sealant too. Kinda ugly, and messy, but who's gonna see it? 


Sorry for the massive bump but I have a question. I bought my 07 2 years ago and luckily the previous owner had these CCFL lights done. Occasionally an inverter would go bad and I would replace it with an Oracle 1000v unit. All would be fine. Recently it went out again and even a new inverter wouldn't fix the issue, which led me to believe the actual CCFL tube went bad.
Now my mechanic was the one who would usually swap the inverter out (tsk tsk I know I should be wrenching on it instead - I don't have a trusty jack though). I don't know which kind of CCFL tubes were in there before so I figured I have to start fresh. Have a look below:

Is this all I need? The CCFL I bought came with that blue inverter that's pictured. But I have two extra Oracle inverters too (1 is pictured). Can the Oracle inverter be used with these tubes? The inverters that came with these are 680v and the Oracle is 1000v so I'd prefer to use the Oracle. Can anyone let me know if I have the right stuff so far and if i need anything else other that the double sided tape to mount these? I bought TWO sets by the way. I'm assuming 2 tubes per side marker?
My car looks retarded at night with only 1 functional side marker so I'd like to fix it soon. Thanks in advance!
Now my mechanic was the one who would usually swap the inverter out (tsk tsk I know I should be wrenching on it instead - I don't have a trusty jack though). I don't know which kind of CCFL tubes were in there before so I figured I have to start fresh. Have a look below:
Is this all I need? The CCFL I bought came with that blue inverter that's pictured. But I have two extra Oracle inverters too (1 is pictured). Can the Oracle inverter be used with these tubes? The inverters that came with these are 680v and the Oracle is 1000v so I'd prefer to use the Oracle. Can anyone let me know if I have the right stuff so far and if i need anything else other that the double sided tape to mount these? I bought TWO sets by the way. I'm assuming 2 tubes per side marker?
My car looks retarded at night with only 1 functional side marker so I'd like to fix it soon. Thanks in advance!
Last edited by pbn85; Feb 9, 2013 at 07:45 PM.

Thread Starter
Registered User
Joined: Jun 2008
Posts: 205
Likes: 0
From: Tarpon Springs, FL
The setup on the right with the blue box is what I use. I put both lights taped together for one reflector. It doesn't look like the plugs are the same for the black inverter and the lights so I don't think they'll work together. Not sure why you would want the 1000v instead. The lights may not be able to handle that? LED's would be more reliable, but I don't like seeing the individual LED's that some people have set up on here. I like how the whole reflector lights up on the 07-08's.
Speaking of reliability, I've had to recently do some maintenance (after a good 2 years + of use). The driver's side stopped working. After trouble-shooting, the inverter and lights were both ok, it was the connection of the wire tap to the parking light, so took it all apart and worked the connection and it fired back up. On the passenger side, one of the CCFL's burned out and only half the other was lighting up. Unplugged them and pulled the tape off (apparently the heavy Florida rains got them wet and they had some water in them). It was a quick and easy change out, though. Took 2 new bulbs, plugged them into the inverter and secured them up like the old ones and done!
Speaking of reliability, I've had to recently do some maintenance (after a good 2 years + of use). The driver's side stopped working. After trouble-shooting, the inverter and lights were both ok, it was the connection of the wire tap to the parking light, so took it all apart and worked the connection and it fired back up. On the passenger side, one of the CCFL's burned out and only half the other was lighting up. Unplugged them and pulled the tape off (apparently the heavy Florida rains got them wet and they had some water in them). It was a quick and easy change out, though. Took 2 new bulbs, plugged them into the inverter and secured them up like the old ones and done!
thanks for the reply! In the past I've used the Oracle black inverter whenever the old one would go bad, so I'm not quite sure how my mechanic wired it up, but it did work. So it looks as if I have all that's needed this time around. I'm going to replace even the side that's working right now because if I just do the one side then there might be a difference in the color.
I see you used tape around both of the CCFLs. Will that suffice?
I see you used tape around both of the CCFLs. Will that suffice?

Thread
Thread Starter
Forum
Replies
Last Post