
new audio stuff for the Z, install begins (pics)


http://liljerk.morpheus.net/350Z/
--- CLICK ON ---- "Speaker Installation Tips"
hope that helps
Last edited by XERMAN2001; Oct 16, 2008 at 06:21 PM.


anyone need crossovers for tweeters by anychance? payed 150 for each wen i got them, they are mint condidion, mb quart, used them for 2 months on old car now they just lying in closet lol
UPDATE:
Now that it�s all snowy and crappy and I am less busy I finally have time to post an update
I finished installing most of the build but because it was so time consuming I decided to finish the rest in the spring. The car was put back together around the 1st week of October.
This is what I have done so far:
-installed front speakers
-installed rear speakers
-installed deck
-installed 100 sq feet of fat mat
-Installed all audio wiring
What still needs to be done in the spring:
-Build custom sub box
-installed sub
-install amps
-Build custom trim plate/false floor
-----------
After the front speakers were in I finished installing the fat mat in the rear and I ran all of the wiring.
BEFORE:

AFTER:


Then I had to trim the plastic panel covering the rear speakers so the would clear.

All of the wires in the rear ready to go


Tucking the wires away so the spare tire can go back in. (until spring when it will be removed and I can finish the project)

Now that it�s all snowy and crappy and I am less busy I finally have time to post an update
I finished installing most of the build but because it was so time consuming I decided to finish the rest in the spring. The car was put back together around the 1st week of October.
This is what I have done so far:
-installed front speakers
-installed rear speakers
-installed deck
-installed 100 sq feet of fat mat
-Installed all audio wiring
What still needs to be done in the spring:
-Build custom sub box
-installed sub
-install amps
-Build custom trim plate/false floor
-----------
After the front speakers were in I finished installing the fat mat in the rear and I ran all of the wiring.
BEFORE:
AFTER:
Then I had to trim the plastic panel covering the rear speakers so the would clear.
All of the wires in the rear ready to go
Tucking the wires away so the spare tire can go back in. (until spring when it will be removed and I can finish the project)
Deck installed. I had to modify the plastic adaptor plate and the mounting bracket to get the deck to fit correctly but it got it to work.
BEFORE:

AFTER:


The rear back together. While the car was apart I also decided to install a 2nd glove box door since that�s location was not being used anyway.


And just to show how much extra space I have just acquired. I use this bag to carry my cleaning supplies, believe it or not I can get it to fit in the 2nd glove box.


---------------------------------------
Well that�s it for now.
After these pics were taken I was able to enjoy the car for another 4 weeks or so then it went away for the winter.
When I have fully completed the install I will post pics of the final product.
BEFORE:
AFTER:
The rear back together. While the car was apart I also decided to install a 2nd glove box door since that�s location was not being used anyway.
And just to show how much extra space I have just acquired. I use this bag to carry my cleaning supplies, believe it or not I can get it to fit in the 2nd glove box.
---------------------------------------
Well that�s it for now.
After these pics were taken I was able to enjoy the car for another 4 weeks or so then it went away for the winter.
When I have fully completed the install I will post pics of the final product.


all mounting hole are all there and ready to go. you can install just the door, just have to slide the 2 hinge pins in the cover. Or a whole glove box, just have to bolt it all in just like on the passenger side, its all ready to go.
Last edited by XERMAN2001; Nov 21, 2008 at 08:49 PM.
UPDATE UPDATE
Well its spring time now, so its time to start working on my 350Z audio project again.
This is what I have done so far:
-installed front speakers
-installed rear speakers
-installed deck
-installed 100 sq feet of fat mat
-Installed all audio wiring
What still needs to be done
-Build custom sub box
-installed sub
-install amps
-Build custom trim plate/false floor
Since I am not a professional audio installer I didn�t want to risk damaging the audio equipment so I made replicas out of cardboard. Pros could probably complete this job in less than a 3rd of the time it�s going to take me but because I am not a pro I wanted to take me time and mock the complete system in cardboard before cutting the MDF.
I started this a few weeks ago and this is what I have so far.
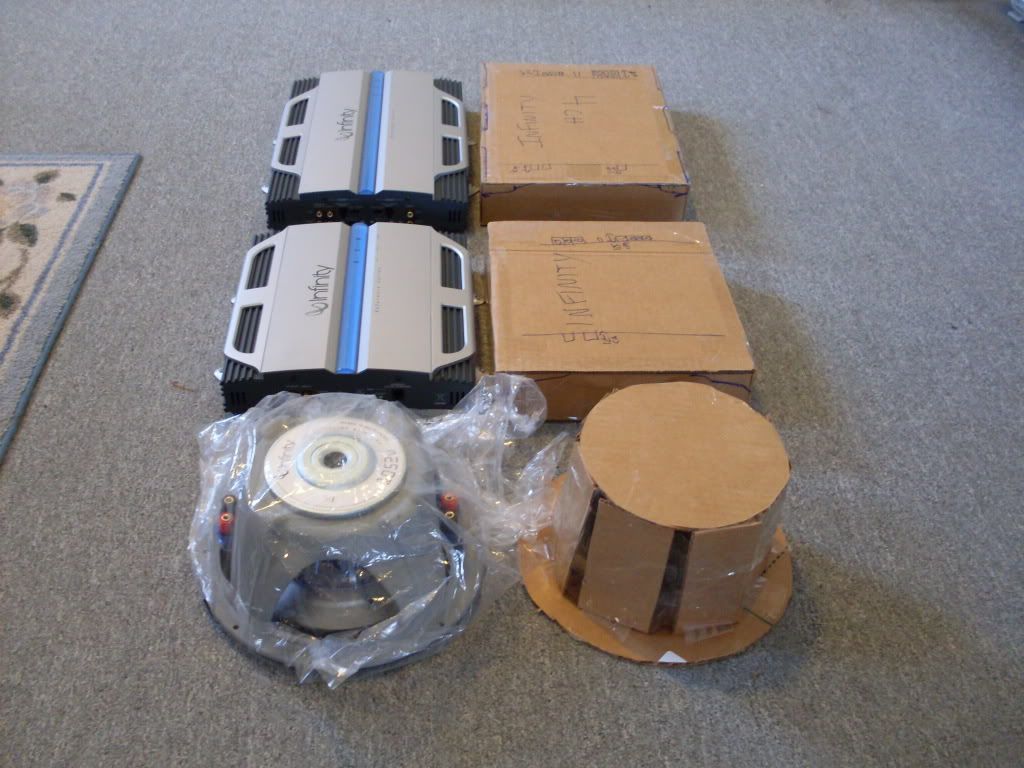
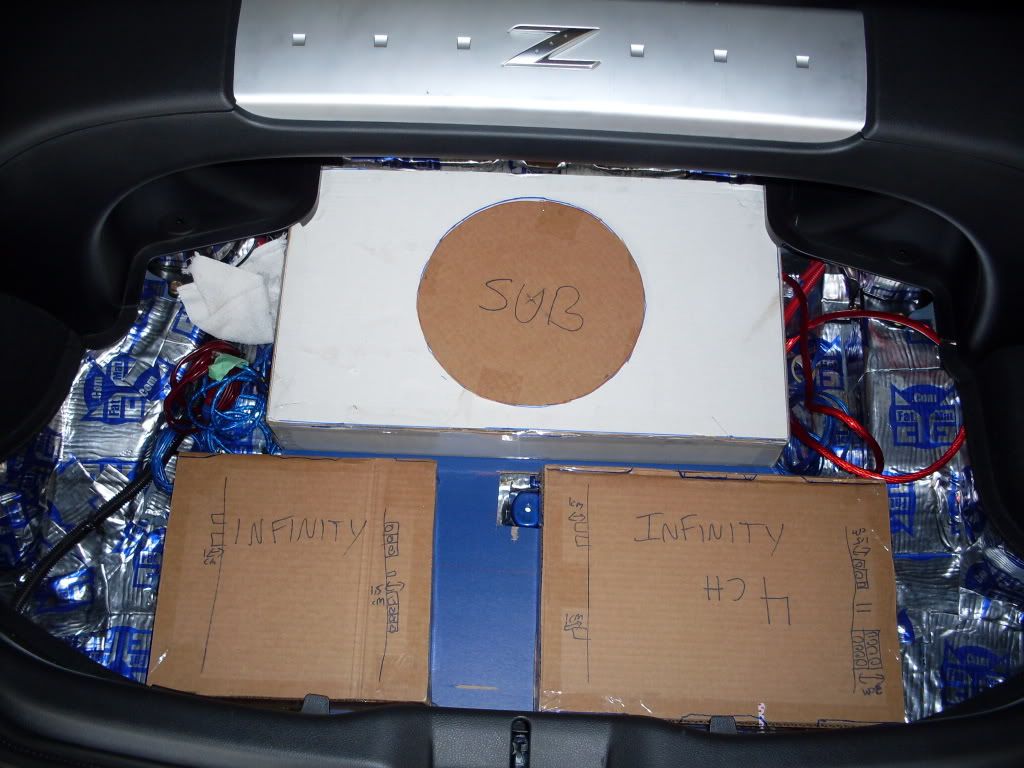
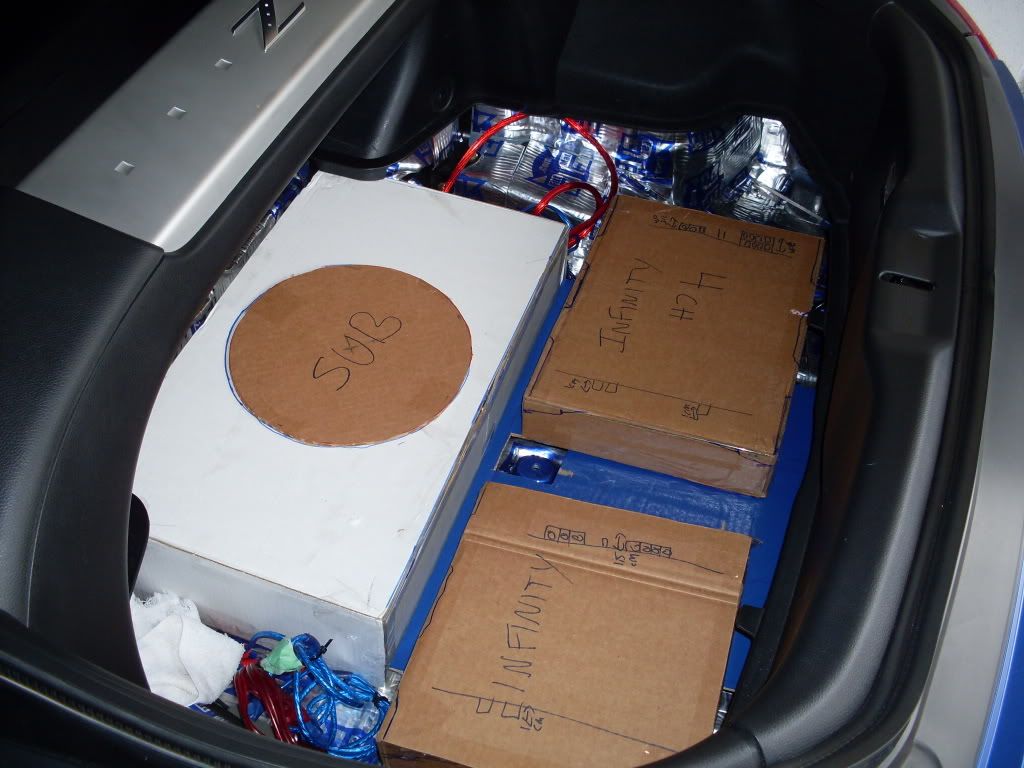
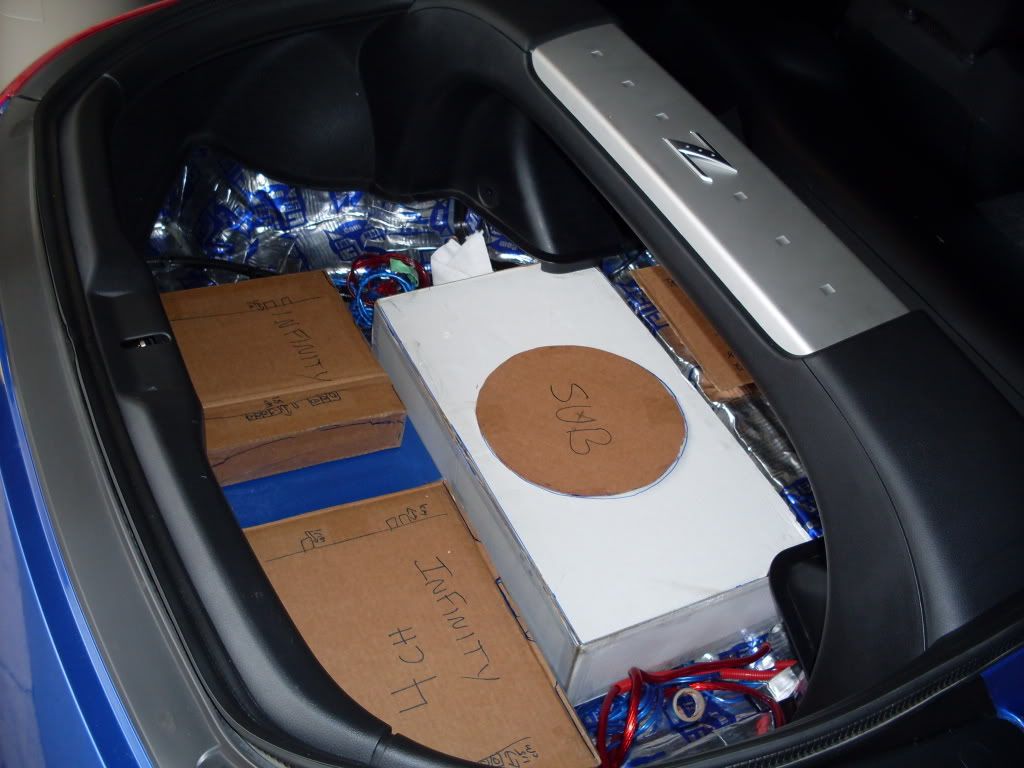
Scale cardboard replicas of the Infinity amps and sub.
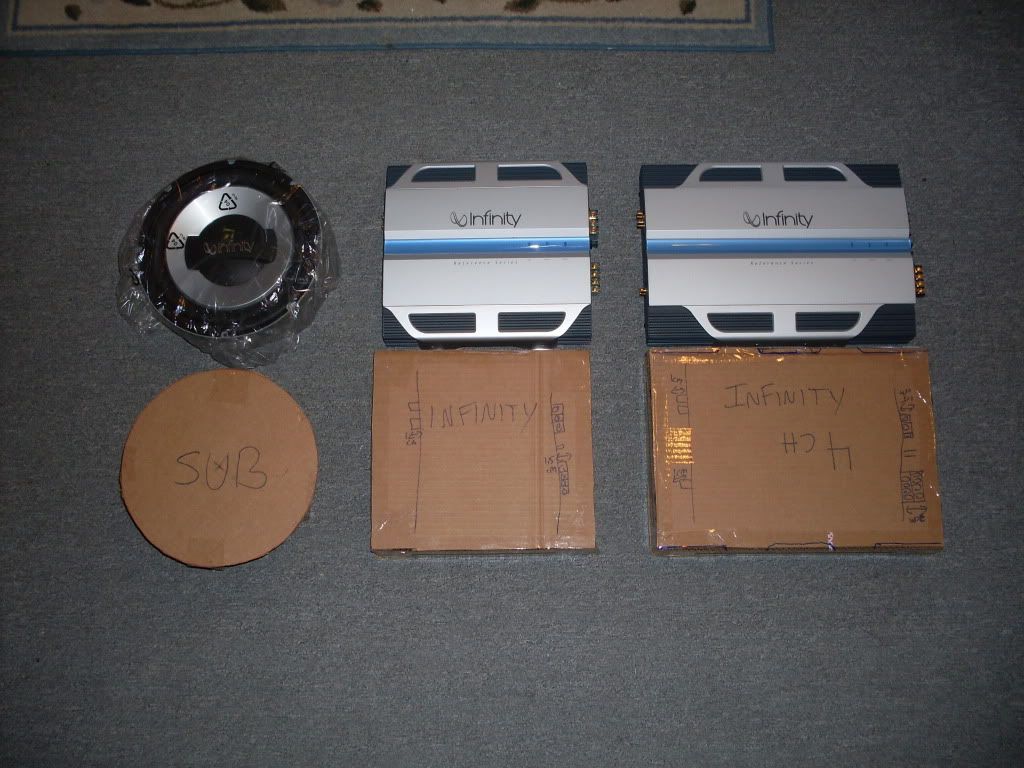
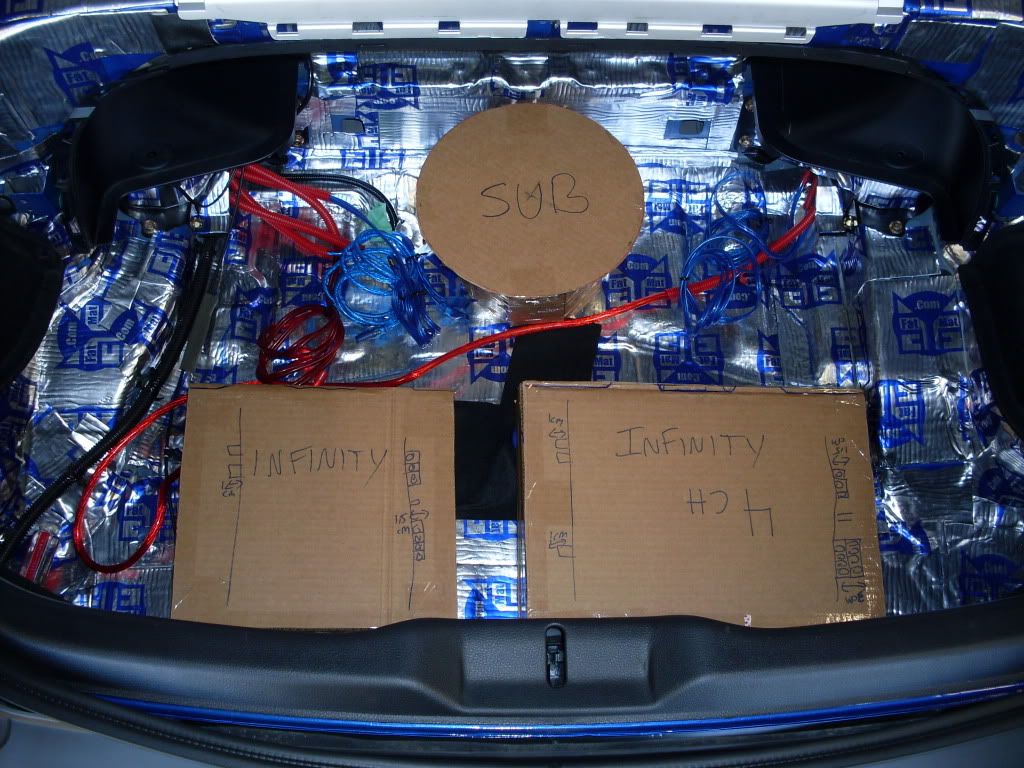
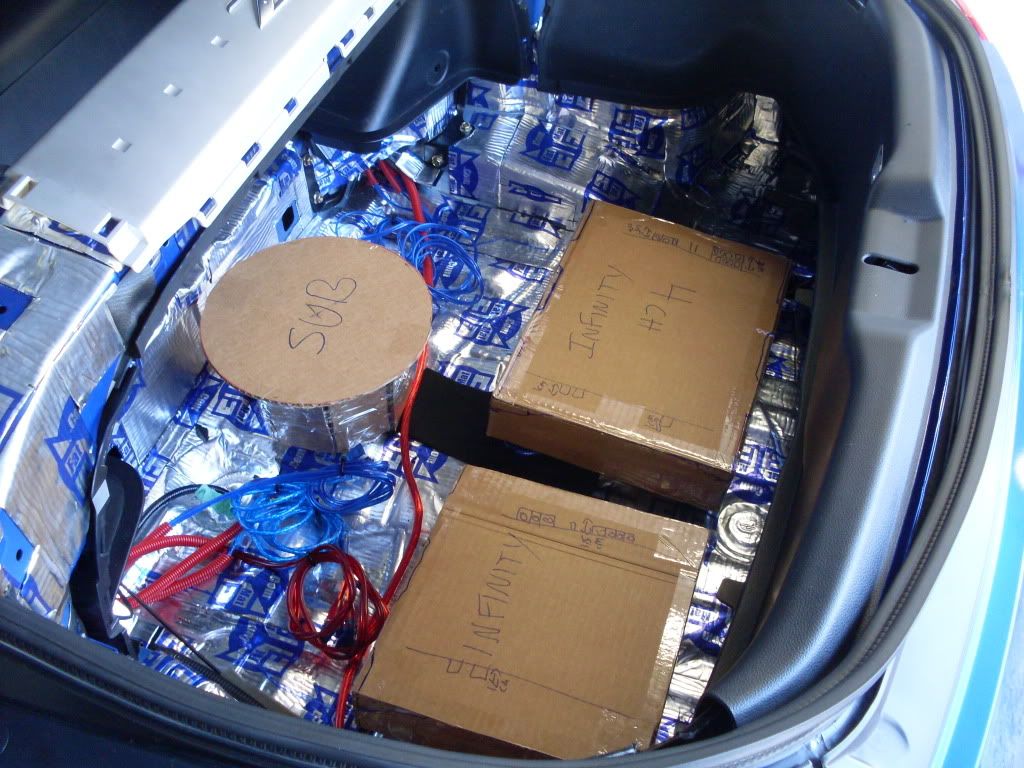
Thinking about placement.
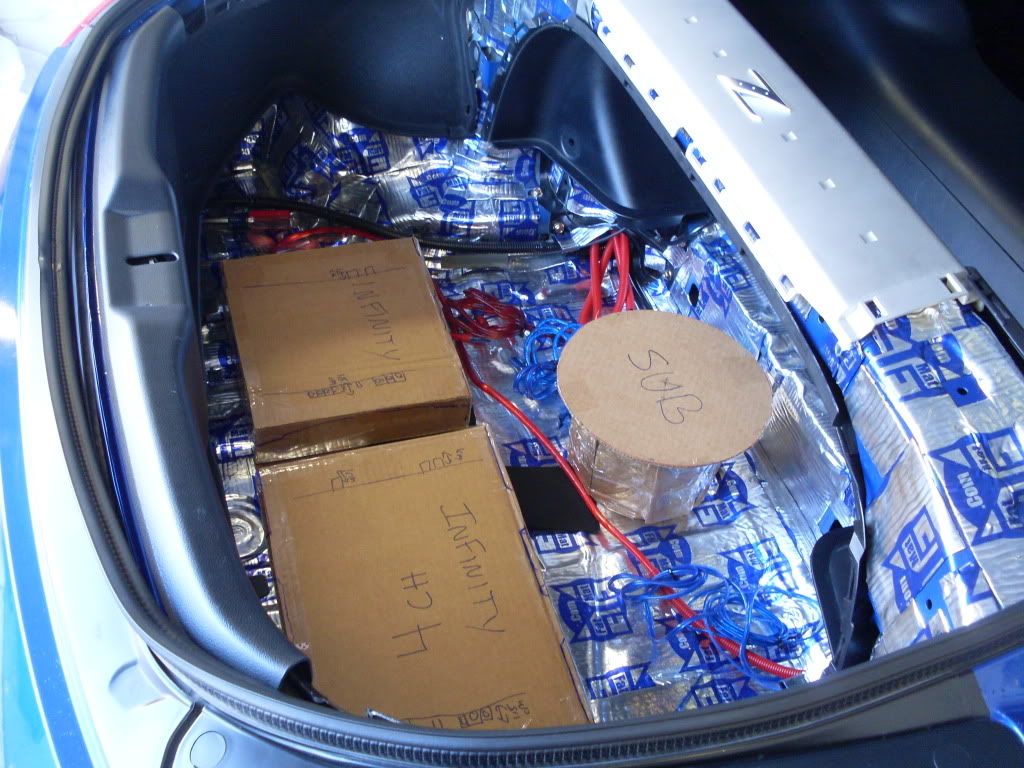
Given the cubic air space requirements of the sub and space available to me I made a scale replica of the box out of cardboard. The recommended air space for the sub is .75 cubic sq feet, the box will measure around 22inch x 6 inch x 13 inch x � think mdf = .72 cubic sq feet.
I also started to make the area that the amps will mount on.
Pics
Well its spring time now, so its time to start working on my 350Z audio project again.
This is what I have done so far:
-installed front speakers
-installed rear speakers
-installed deck
-installed 100 sq feet of fat mat
-Installed all audio wiring
What still needs to be done
-Build custom sub box
-installed sub
-install amps
-Build custom trim plate/false floor
Since I am not a professional audio installer I didn�t want to risk damaging the audio equipment so I made replicas out of cardboard. Pros could probably complete this job in less than a 3rd of the time it�s going to take me but because I am not a pro I wanted to take me time and mock the complete system in cardboard before cutting the MDF.
I started this a few weeks ago and this is what I have so far.
Scale cardboard replicas of the Infinity amps and sub.
Thinking about placement.
Given the cubic air space requirements of the sub and space available to me I made a scale replica of the box out of cardboard. The recommended air space for the sub is .75 cubic sq feet, the box will measure around 22inch x 6 inch x 13 inch x � think mdf = .72 cubic sq feet.
I also started to make the area that the amps will mount on.
Pics
Damn you have a lot of patience and/or time on your hands. I am not exactly a pro either, but I personally would never build mock subs and amps. I am sure your finished product would come out better than anything I could make though.
Goodluck.
Goodluck.
i don't have a ton of time, i work 40 works a week. But after work or on the weekends in my free time i work on it, I don't have any kids or anything so that frees up some time. I made the mocks because i didn't want to risk damaging the amps and sub, took me around 2 1/2 hours to make them. If i wasn't patience i would have shot myself by now, overall the entire audio project posted on here has around 40 hours of my time. Its a learning process and a hobby so its ok. I am also very meticulous about my car (within my financial limitations) i am particular about how things are. If you have seen some of my other threads you will see, shining, polishing and painting ect ect. i want to know exactly how the finished product is going to look to make sure it satisfies me, another reason for my mock up.
Last edited by XERMAN2001; Apr 21, 2009 at 04:59 PM.

cool man. can't wait to see the end product.
i'm sure u're on top of this already, but make sure your sub box is the right size as per manufacturer recommendations for the sub so it'll sound nice.
are you going to make a fiberglass enclosure?
i'm sure u're on top of this already, but make sure your sub box is the right size as per manufacturer recommendations for the sub so it'll sound nice.
are you going to make a fiberglass enclosure?

