
my LS swap thread - RHD, LS3, T101


Thread Starter
New Member
iTrader: (8)
Joined: May 2004
Posts: 2,105
Likes: 15
From: Rock Hill, South Carolina
Been super busy with work and real life and haven't had a lot of time to put into the Z.
I got the DXD clutch and Flywheel (Thanx Dave!) and spent a Saturday making it all work. I want to give mad love and shout out to Dave for all of his input on helping me make these decisions. Not only is he a friend he is a hell of a guy to do business with, if you need a clutch, call him.
so basically started with the bare *** of the motor
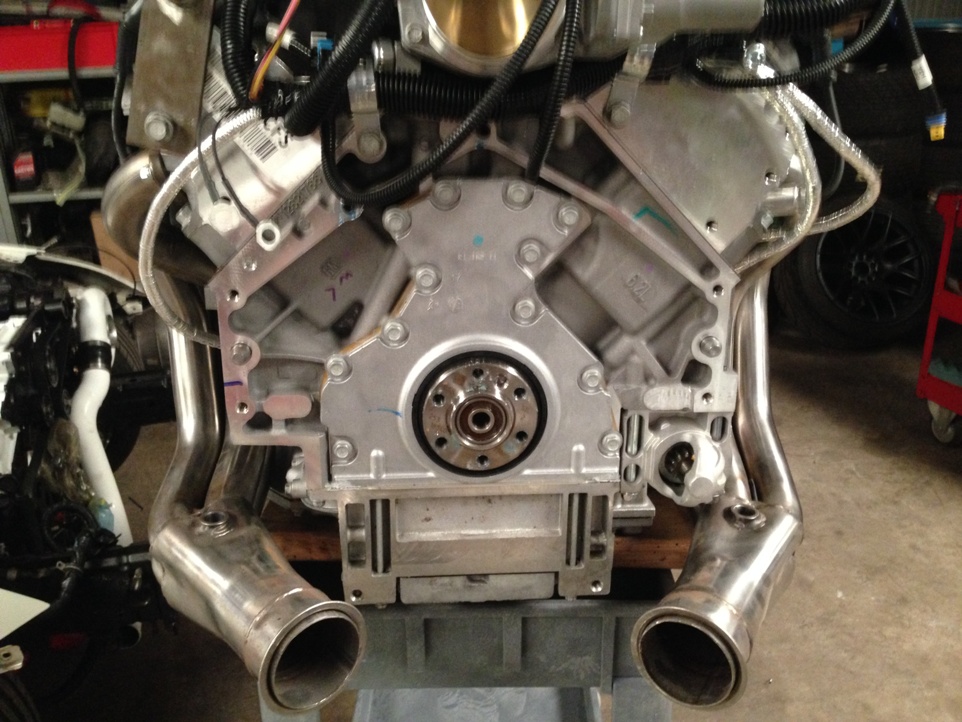
installed the front plate of the scatter shield
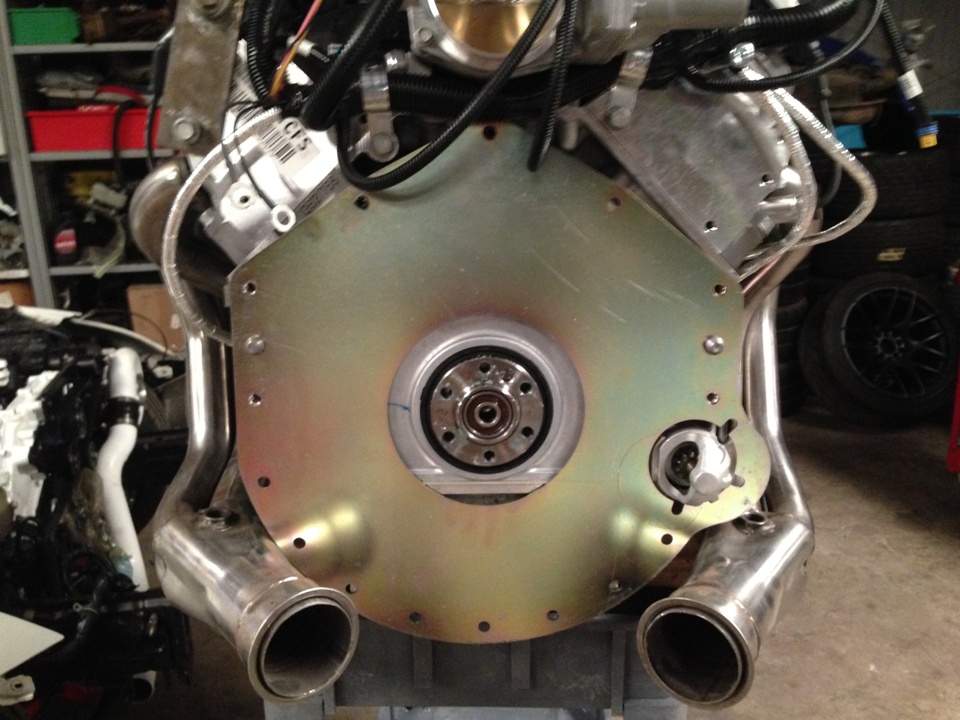
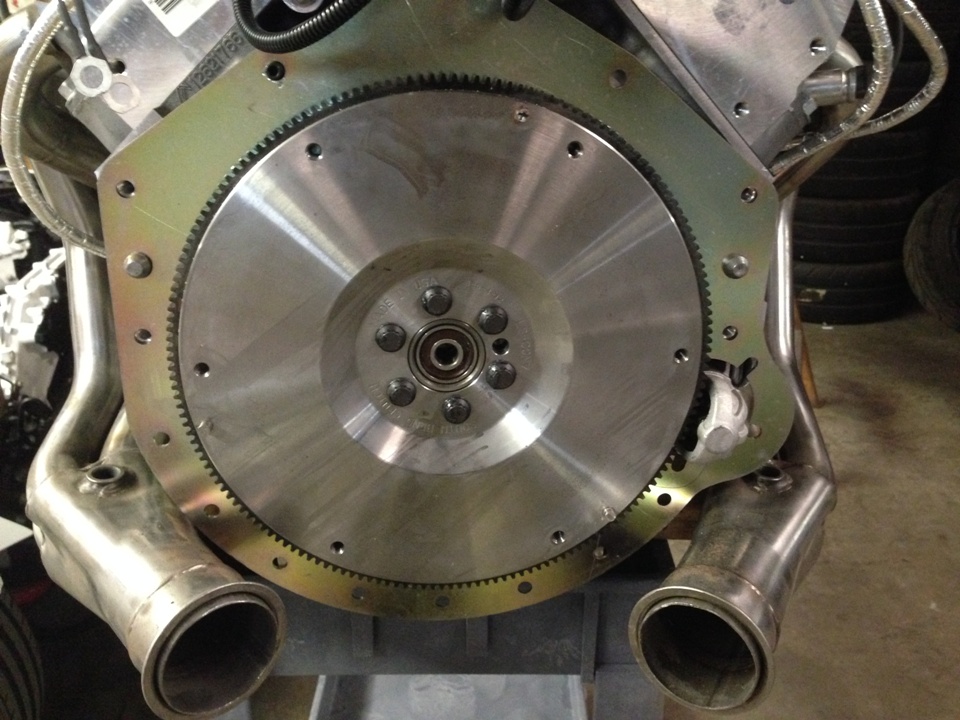
Installed the DXD Flywheel with ARP fasteners and torqued to spec
Installed the friction disc
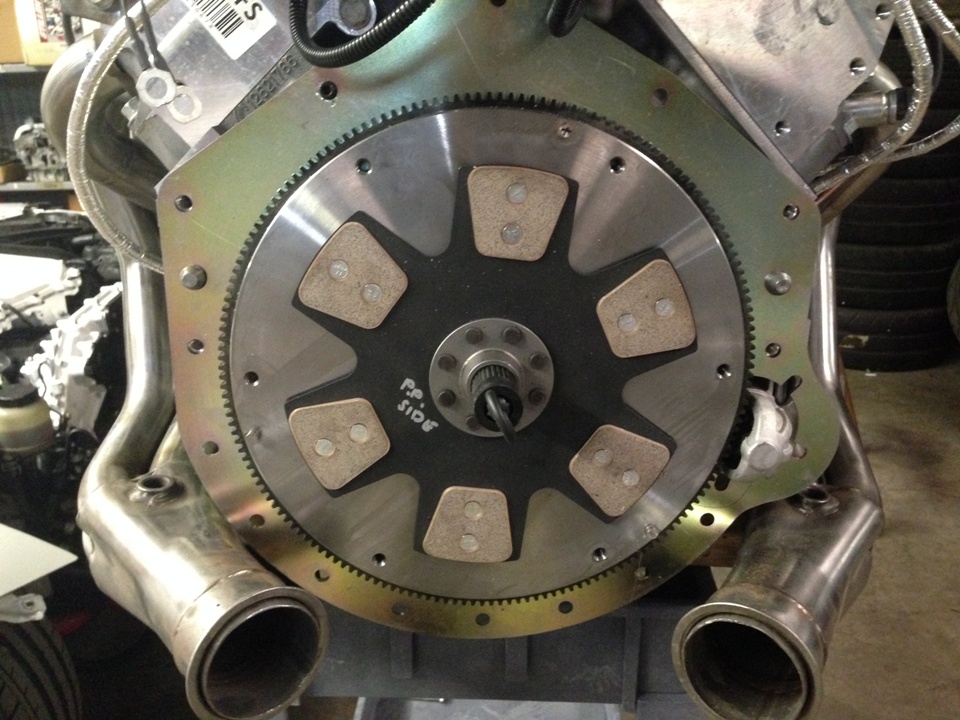
Installed the pressure plate
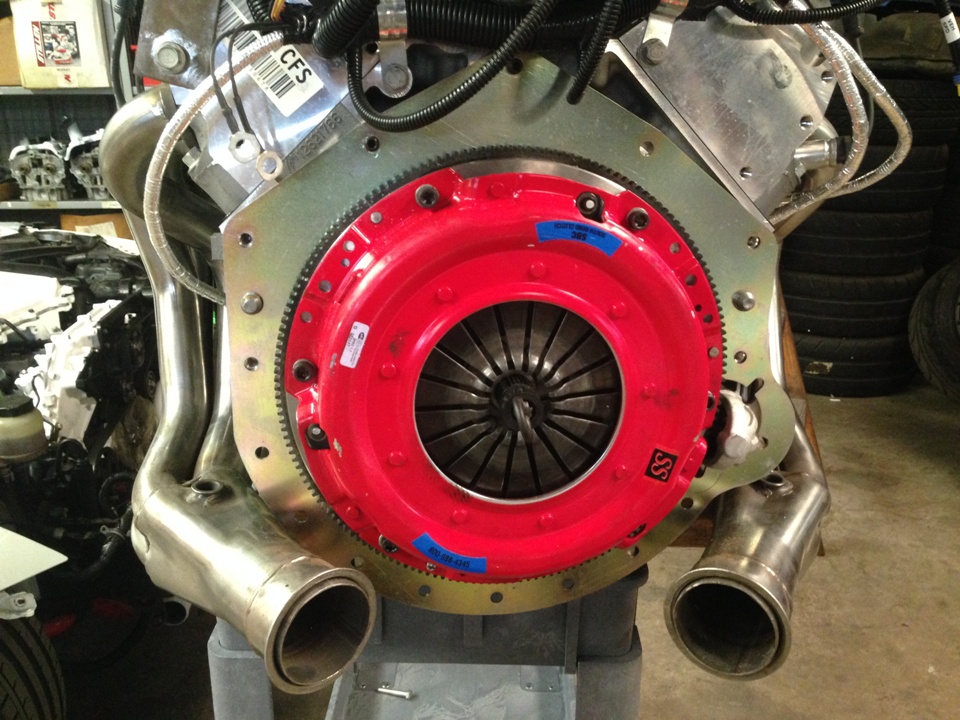
This is where things got 'interesting', i wanted to use a Lakewood bellhousing and originally was planning on running an external slave cylinder, but after installing the headers, there was a serious clearance issue, so I changed my mind and went internal. Well I had to remove the bracket that was for the external slave cylinder, nice 1/4" plate and serious weld beads and a few cutting wheels and sanding discs later, it is removed.

This is the Tilton Hydraulic release bearing. I emailed Tilton and told them what tranny, bell housing, motor, and clutch style i was running and they recommended this.
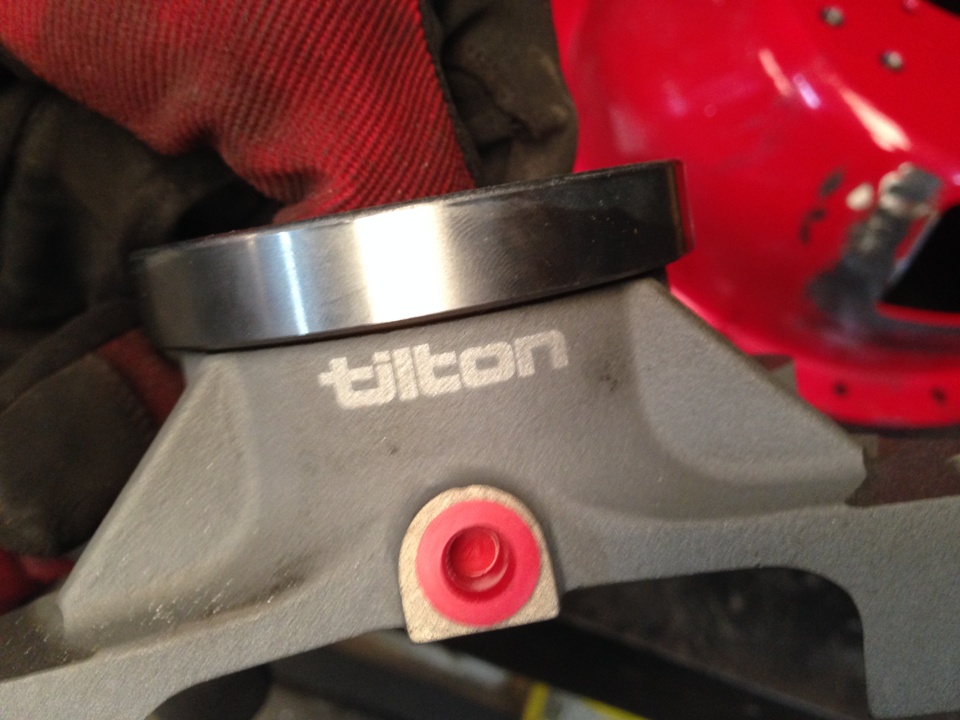
It literally fit, no modification, not used to that with this project. I've had to modify damn near everything on this project, something that actually fit...
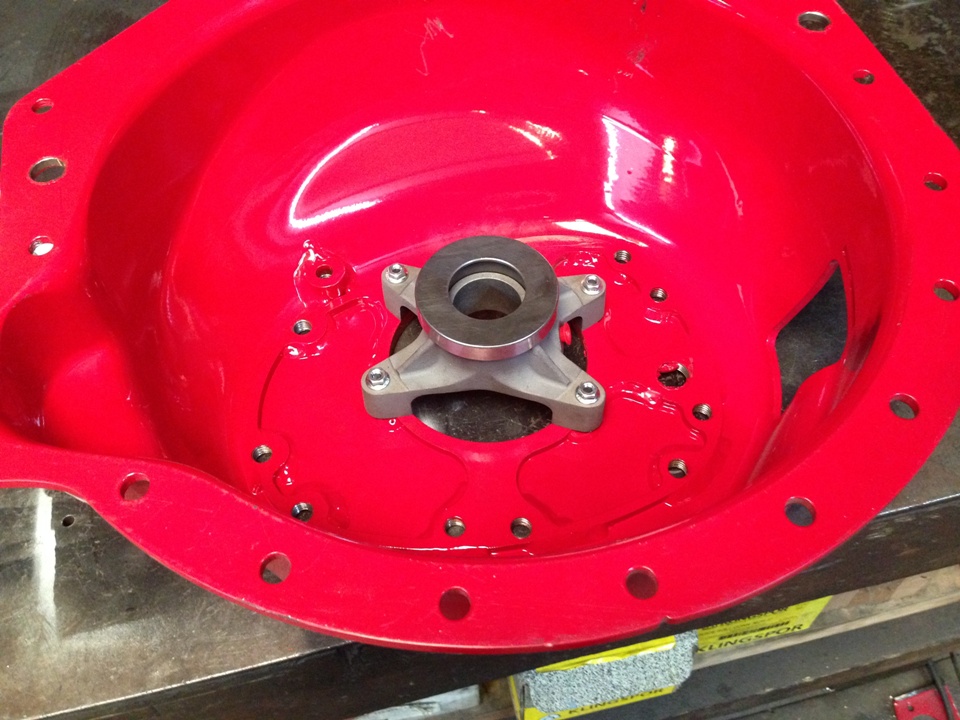
Bolted teh bellhousing to the motor and this is what it looks like.
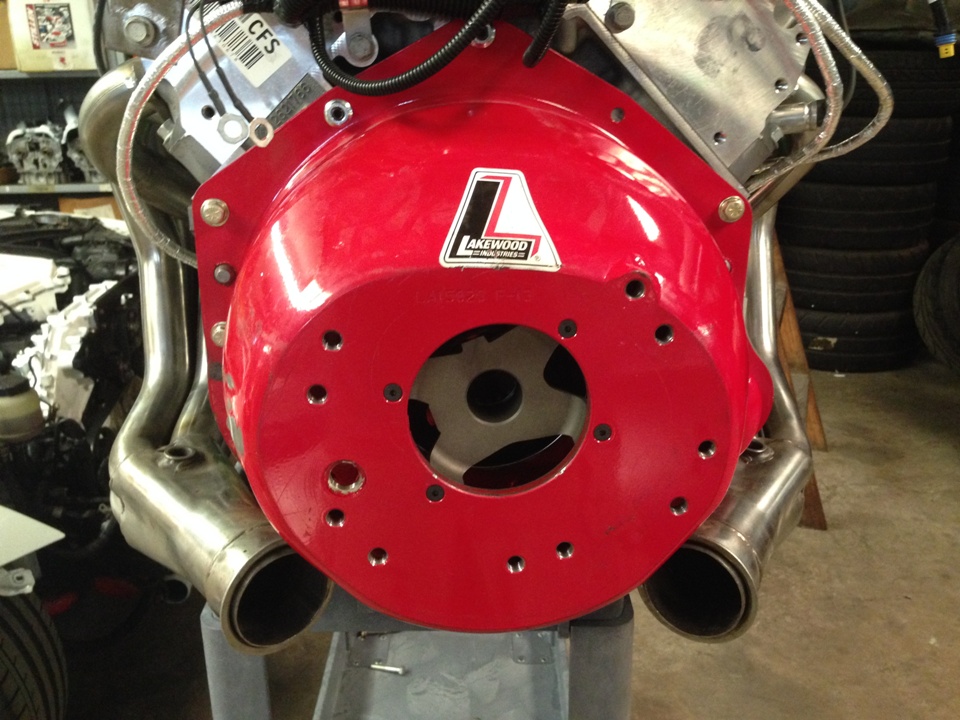
I need the tiniest of shims, something like 0.050" to be perfect, might be good enough.
All that is left is to plumb it. I bought some double hydraulic quick disconnects so I"ll never have to bleed it after the first time.
I got the DXD clutch and Flywheel (Thanx Dave!) and spent a Saturday making it all work. I want to give mad love and shout out to Dave for all of his input on helping me make these decisions. Not only is he a friend he is a hell of a guy to do business with, if you need a clutch, call him.
so basically started with the bare *** of the motor
installed the front plate of the scatter shield
Installed the DXD Flywheel with ARP fasteners and torqued to spec
Installed the friction disc
Installed the pressure plate
This is where things got 'interesting', i wanted to use a Lakewood bellhousing and originally was planning on running an external slave cylinder, but after installing the headers, there was a serious clearance issue, so I changed my mind and went internal. Well I had to remove the bracket that was for the external slave cylinder, nice 1/4" plate and serious weld beads and a few cutting wheels and sanding discs later, it is removed.
This is the Tilton Hydraulic release bearing. I emailed Tilton and told them what tranny, bell housing, motor, and clutch style i was running and they recommended this.
It literally fit, no modification, not used to that with this project. I've had to modify damn near everything on this project, something that actually fit...
Bolted teh bellhousing to the motor and this is what it looks like.
I need the tiniest of shims, something like 0.050" to be perfect, might be good enough.
All that is left is to plumb it. I bought some double hydraulic quick disconnects so I"ll never have to bleed it after the first time.
Thread Starter
New Member
iTrader: (8)
Joined: May 2004
Posts: 2,105
Likes: 15
From: Rock Hill, South Carolina
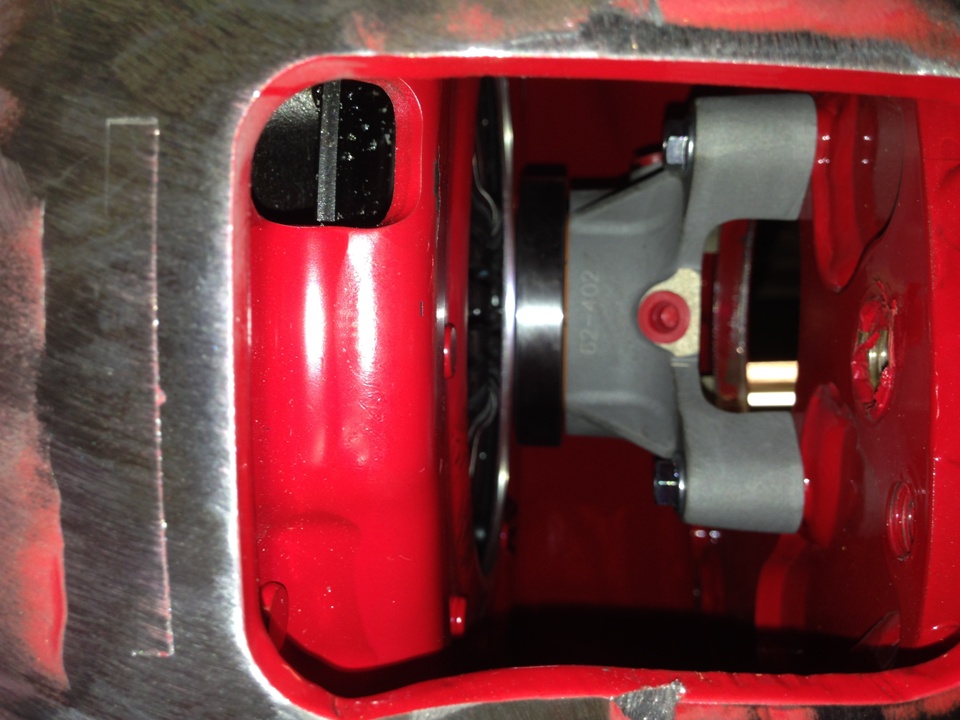
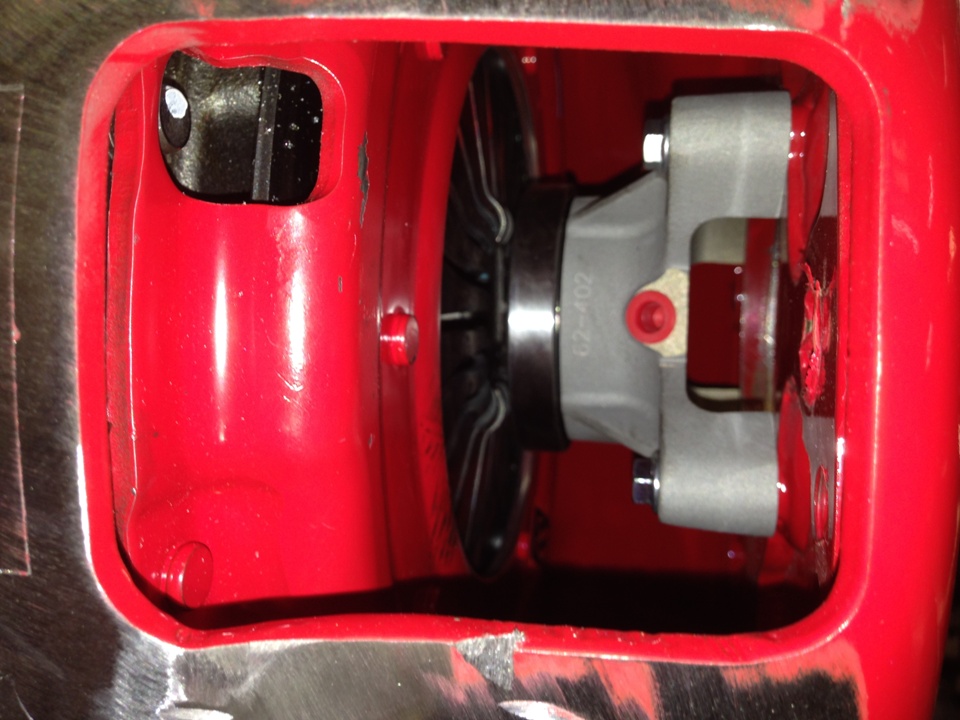
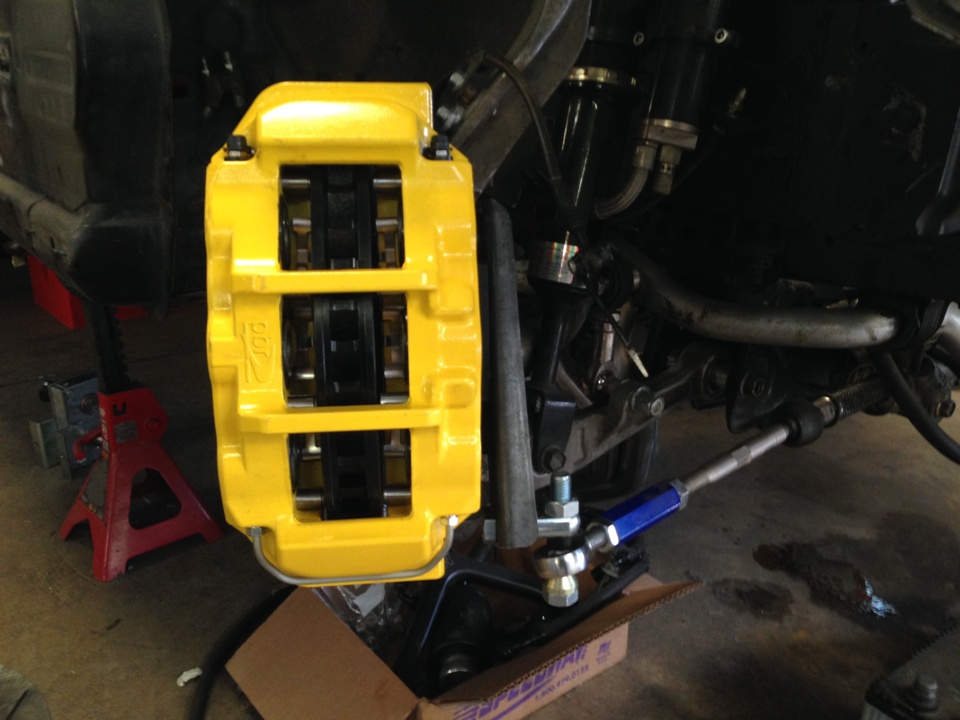
The brakes are more or less done, at least at the wheels. the calipers have been modified, the brackets have been made, and everything is back from the anodizer.
The front caliper bracket, please ignore the extra long bolts, those were part of a mockup that was later changed.
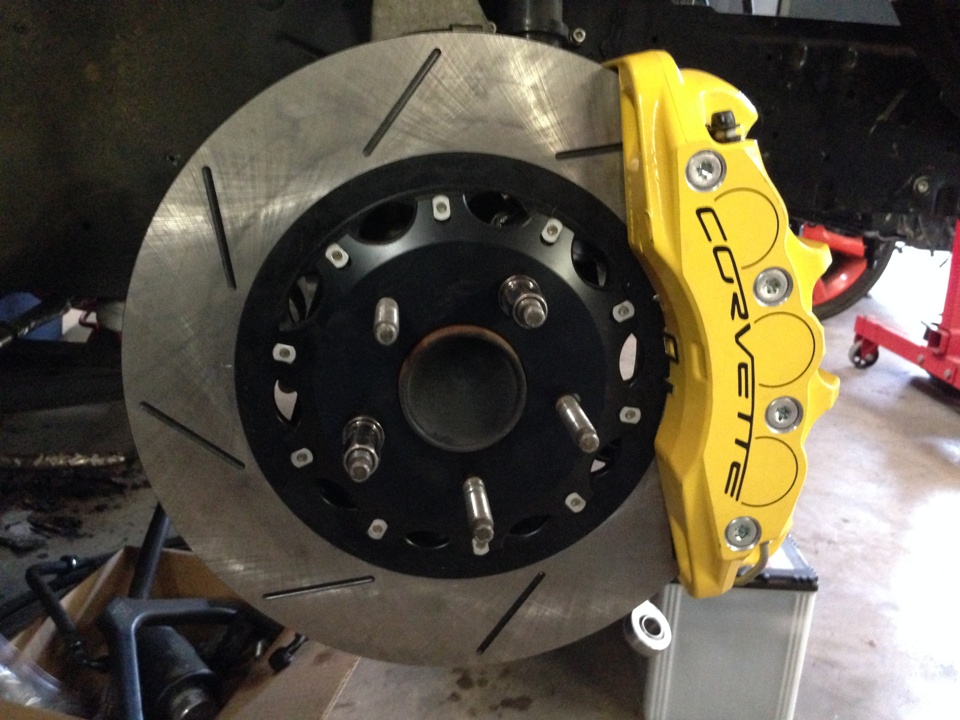
We are running a 355x32 rotor on the Z06 PBR caliper in the front. remember the comment about ignoring the long bolts on the caliper bracket, that was for mocking up the Ackerman for the RHD conversion.
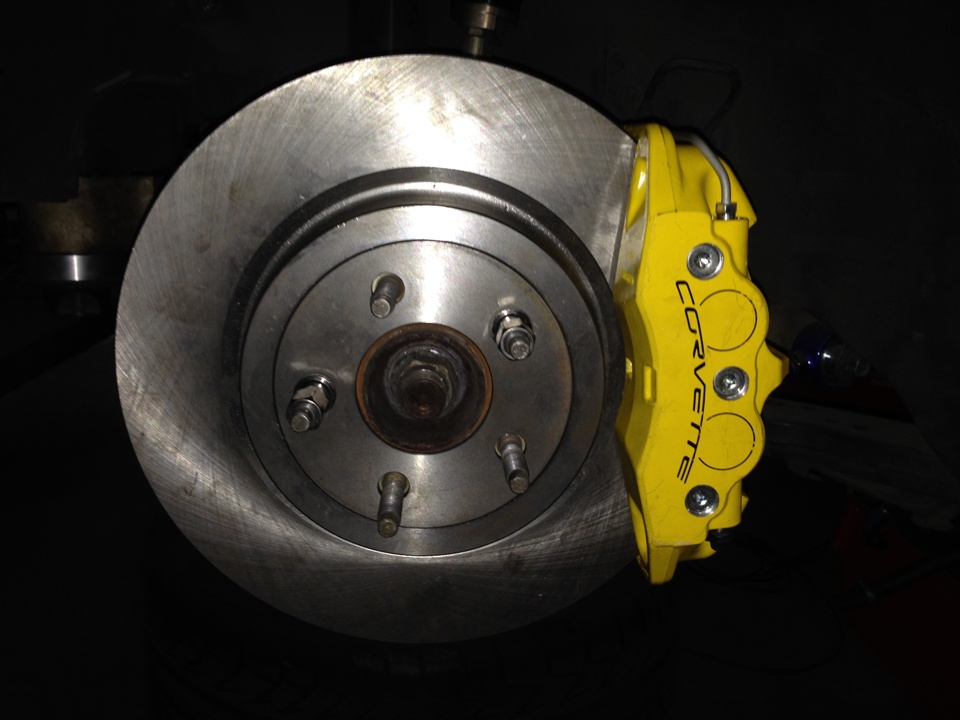
We are running a 350x26 rotor on the Z06 PBR caliper in the rear.

We learned a lesson on the anodizing, we really should have polished the surface more than we did, but lesson learned. This will never fade or change color as powder coat does. but since Anodizing is only 0.002" thick it doesn't cover blemishes at all, so the next set will get put in the bridgeport and polished.
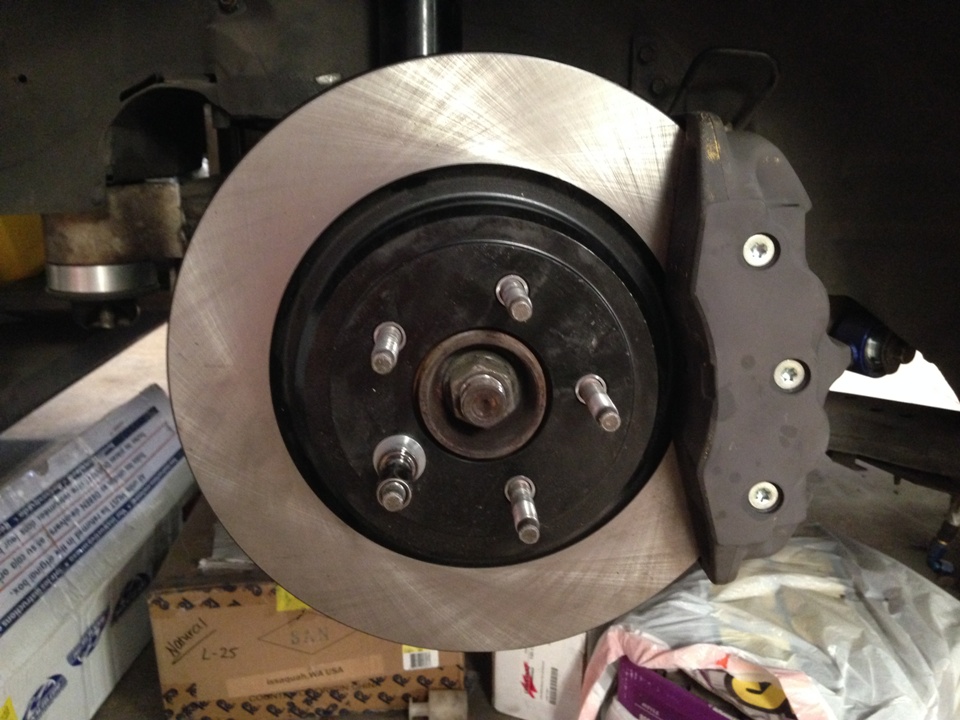
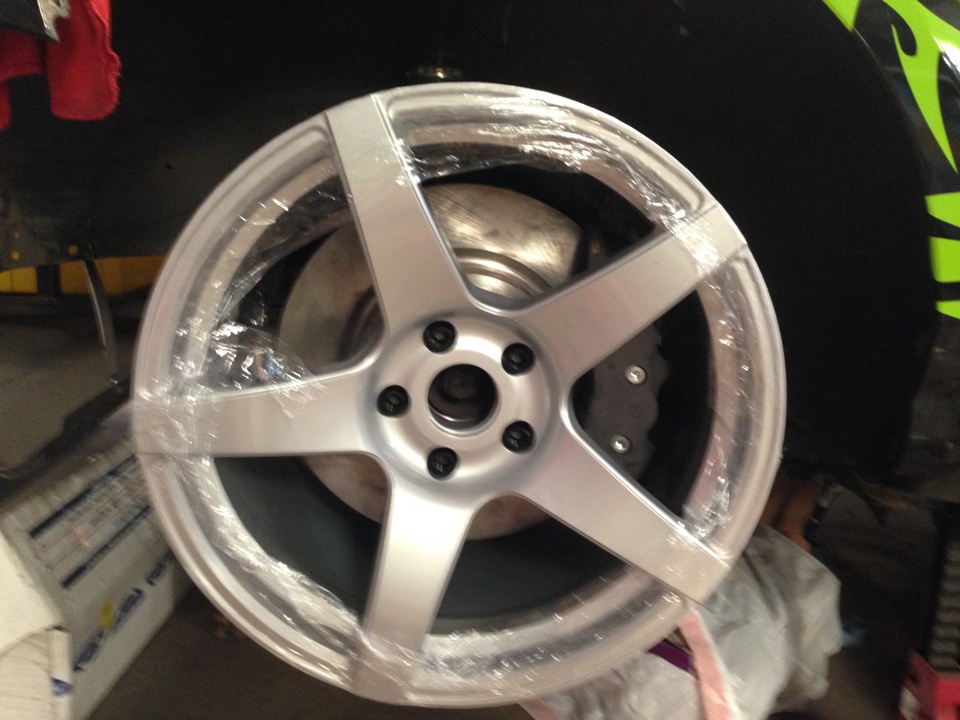
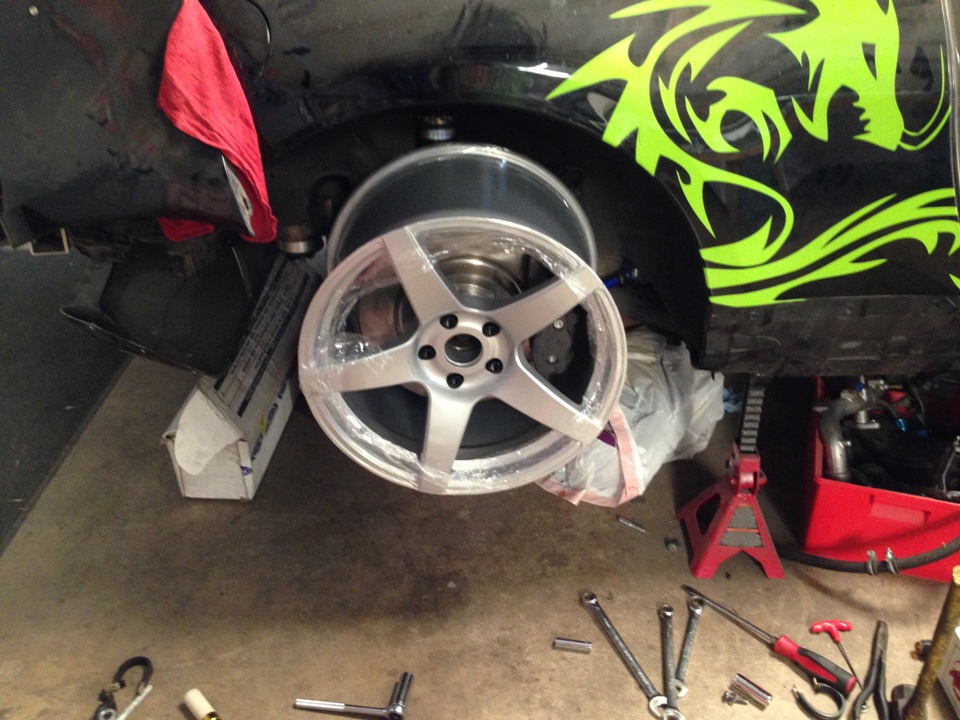
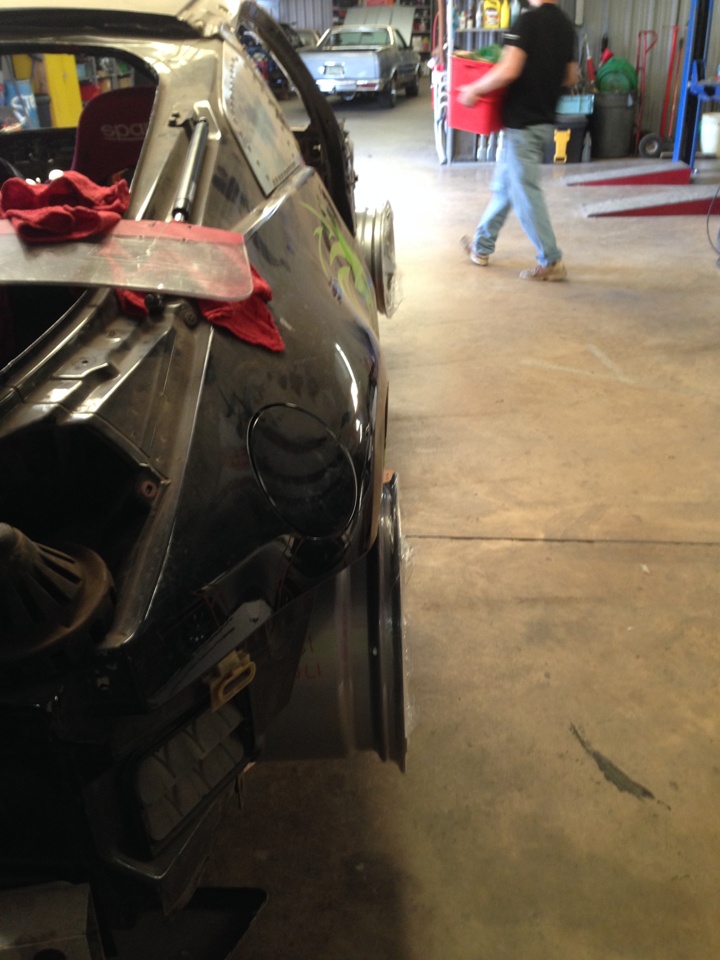
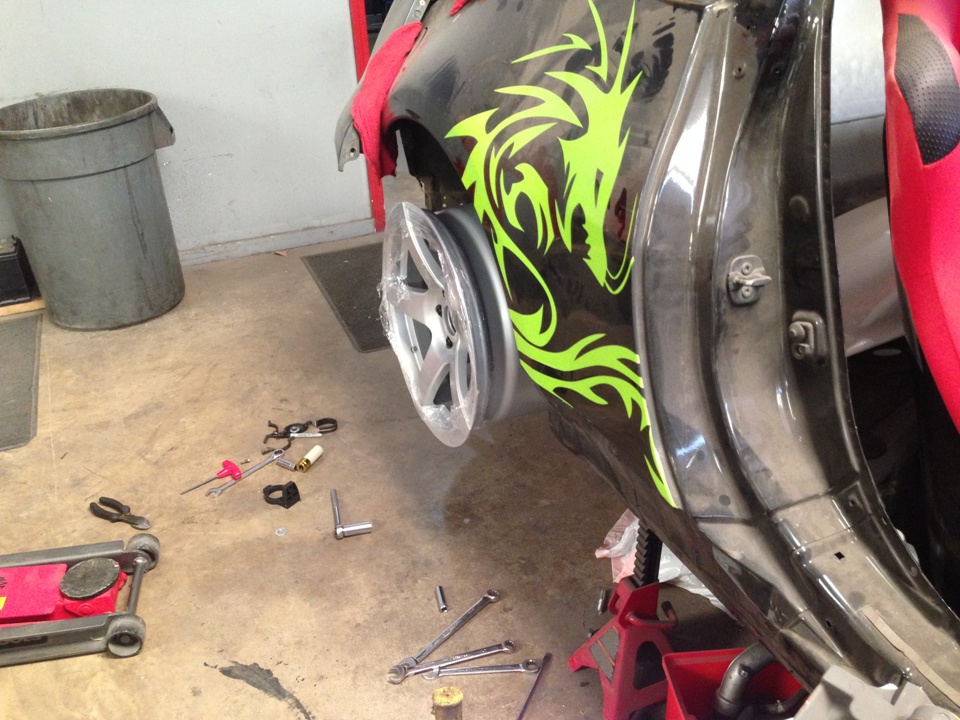
A quick sneak, 18x12 wheels in the rear over the 14" brakes. I think its starting to look like a car
The front caliper bracket, please ignore the extra long bolts, those were part of a mockup that was later changed.
We are running a 355x32 rotor on the Z06 PBR caliper in the front. remember the comment about ignoring the long bolts on the caliper bracket, that was for mocking up the Ackerman for the RHD conversion.
We are running a 350x26 rotor on the Z06 PBR caliper in the rear.
We learned a lesson on the anodizing, we really should have polished the surface more than we did, but lesson learned. This will never fade or change color as powder coat does. but since Anodizing is only 0.002" thick it doesn't cover blemishes at all, so the next set will get put in the bridgeport and polished.
A quick sneak, 18x12 wheels in the rear over the 14" brakes. I think its starting to look like a car
Thread Starter
New Member
iTrader: (8)
Joined: May 2004
Posts: 2,105
Likes: 15
From: Rock Hill, South Carolina
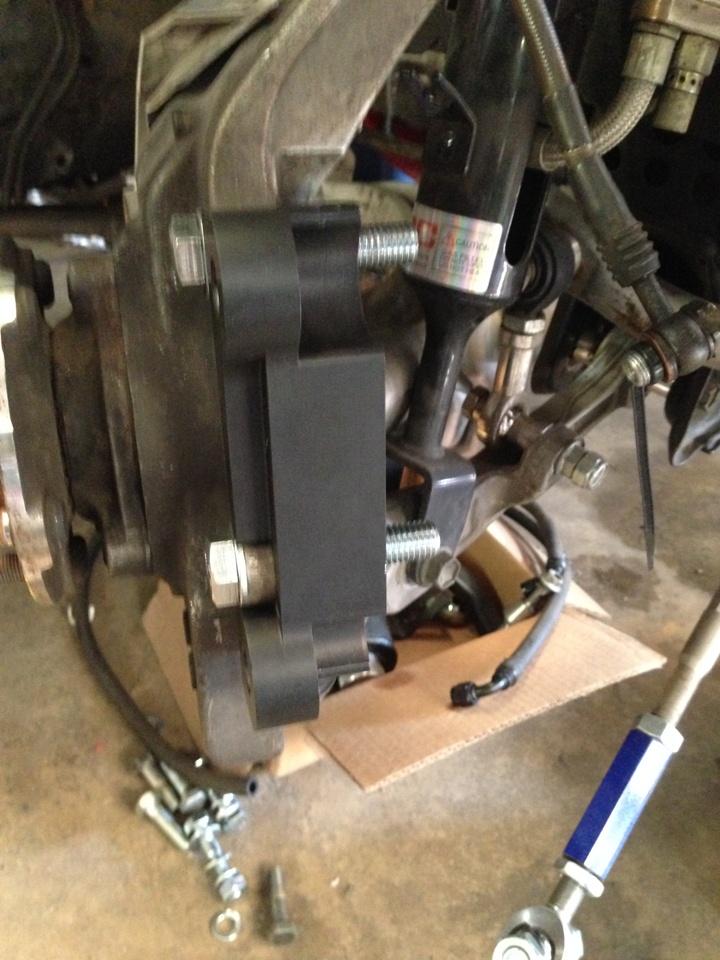
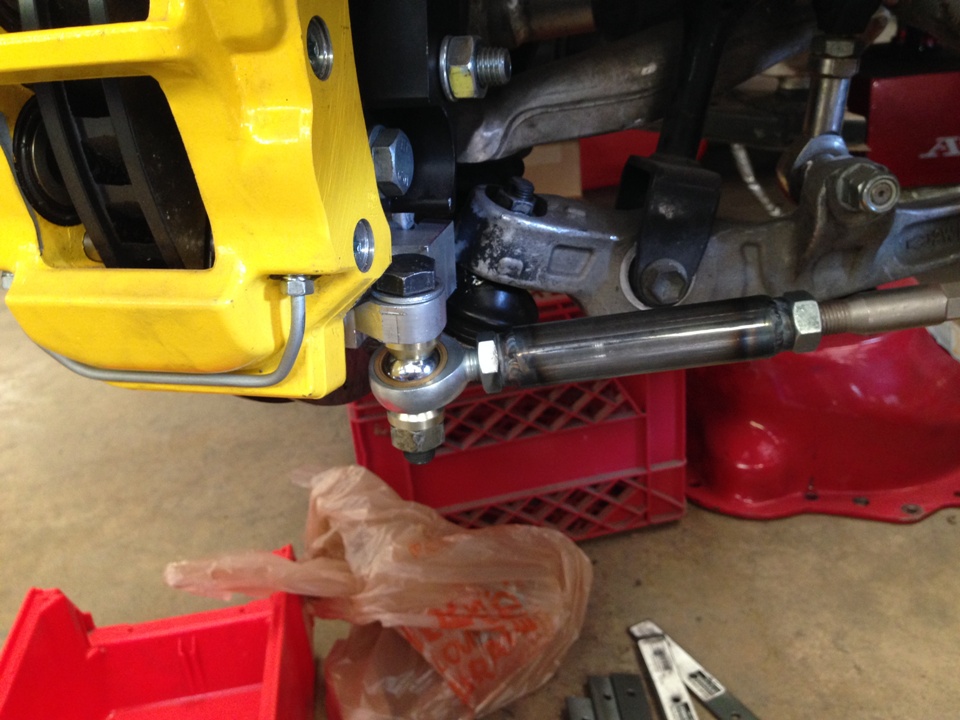
the RHD conversion:
So basically what we have done for the RHD conversion was to flip the fron XMember 180 degrees and put a JDM rack on it. so now the steering rack is in front of the xmember. Really made somethings harder, but many things way easier. For instance I am a C5 Z06 batwing oil pan and off the shelf JBA long tube headers, but I spent a good deal of time on the steering, so it is a trade for sure.
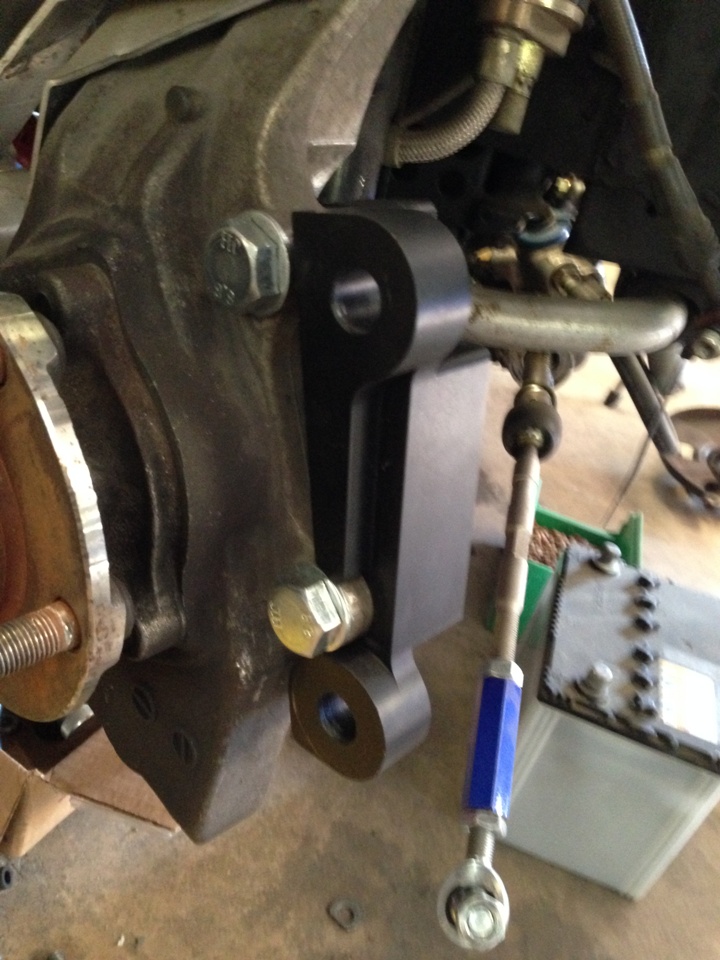
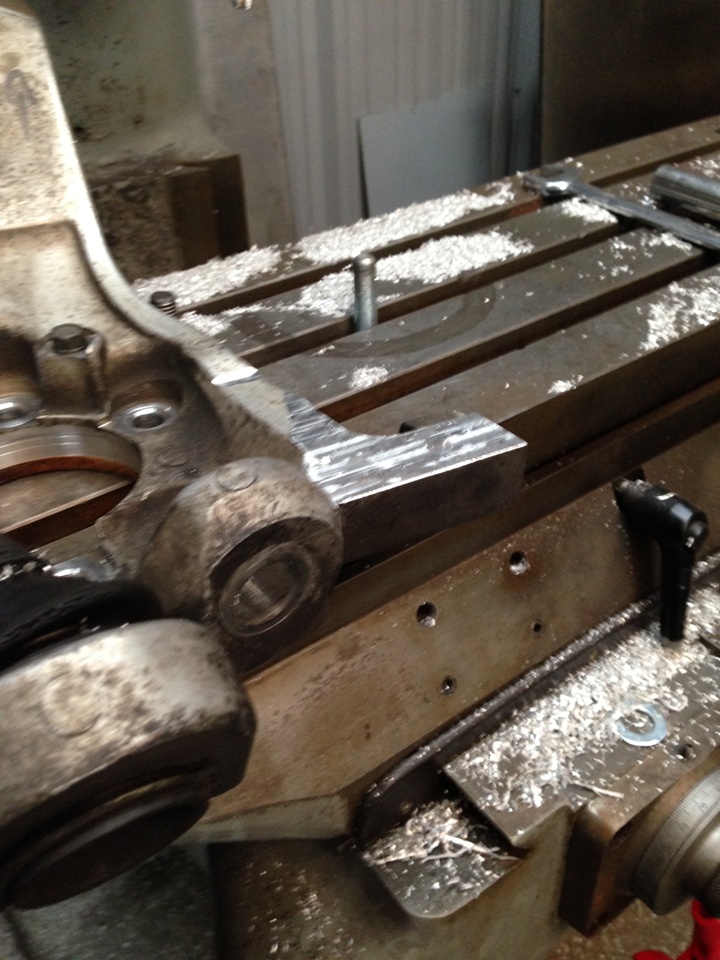
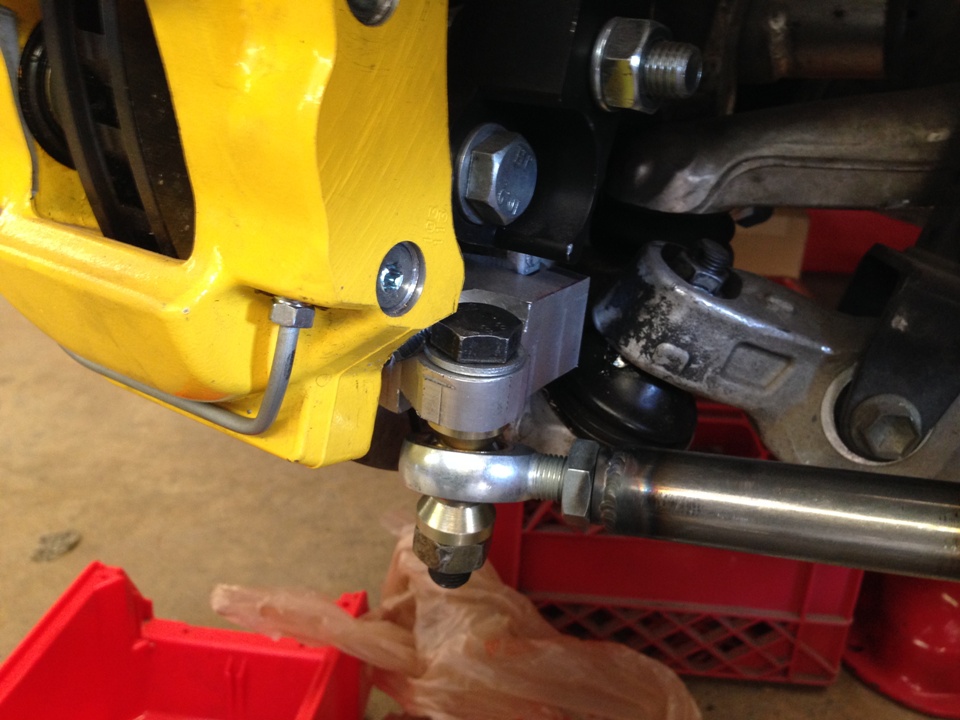
So in this pic you can see where I milled the upright for a bolt hole to install the clevis for the tie rod end, also I milled off the OEM tie rod pickup as it was not going to be touching anything anyway.
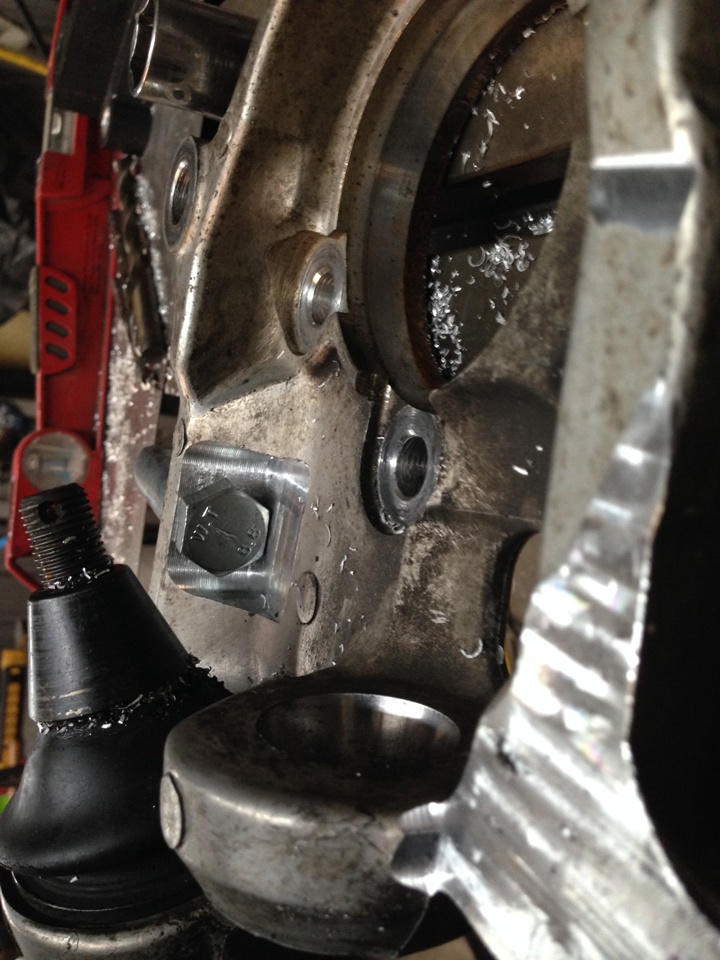
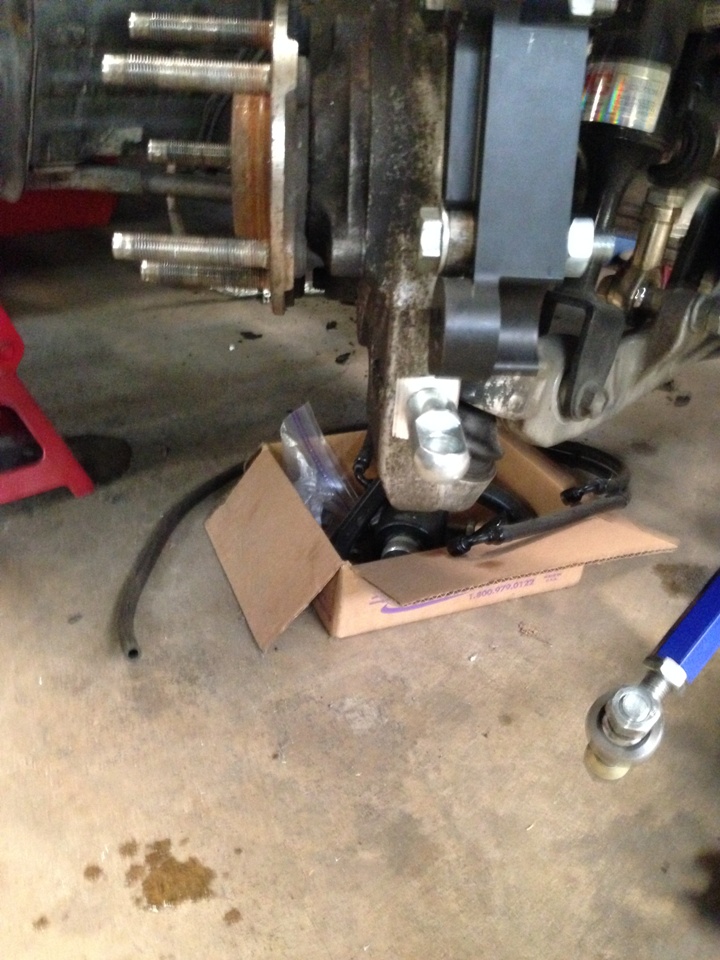
This clevis was temporary but a needed step to verify and adjust things like roll center and Ackerman.
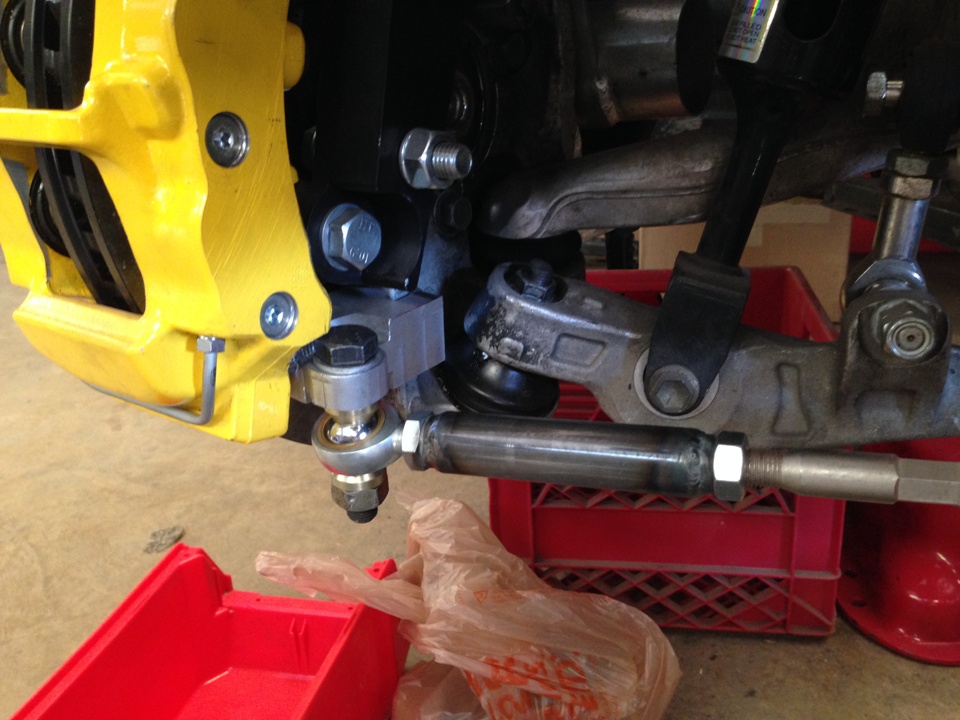
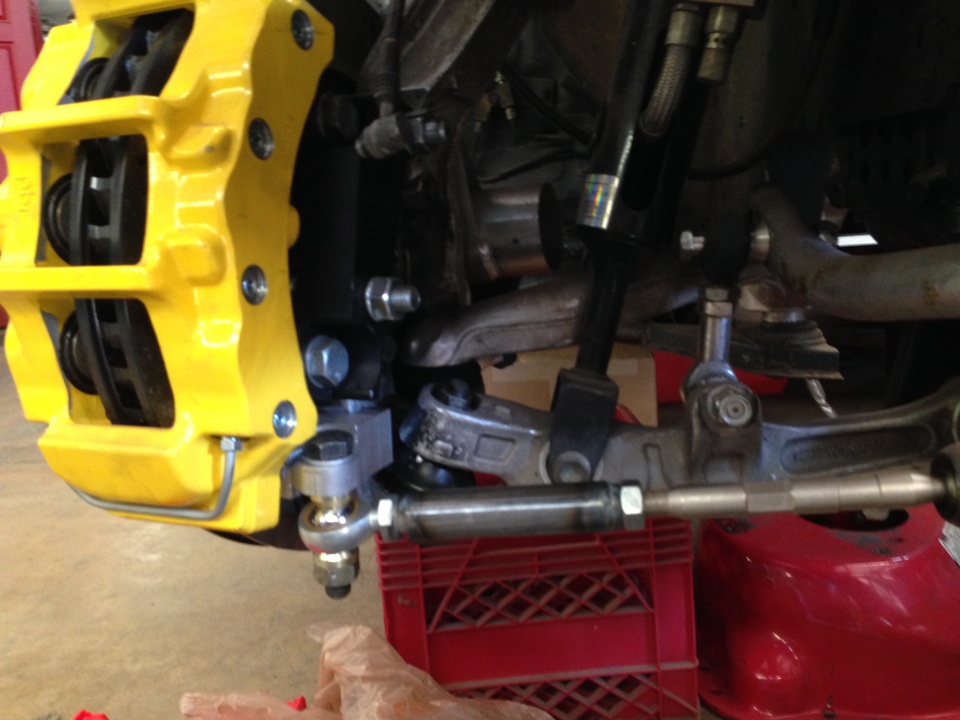
Here you can see the clevis in relation to the ball joint
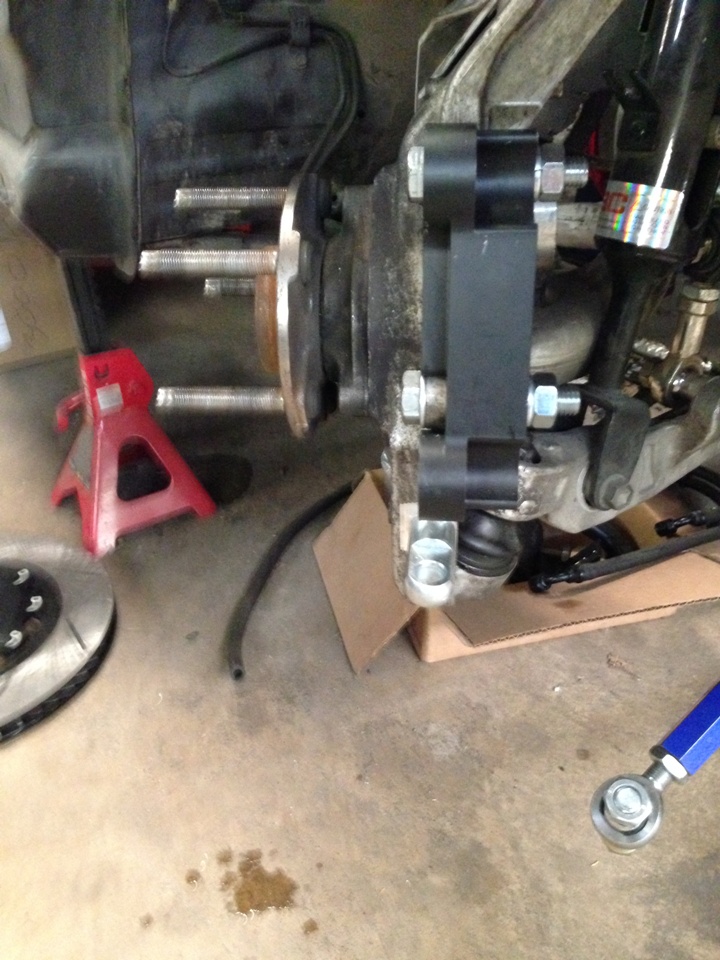
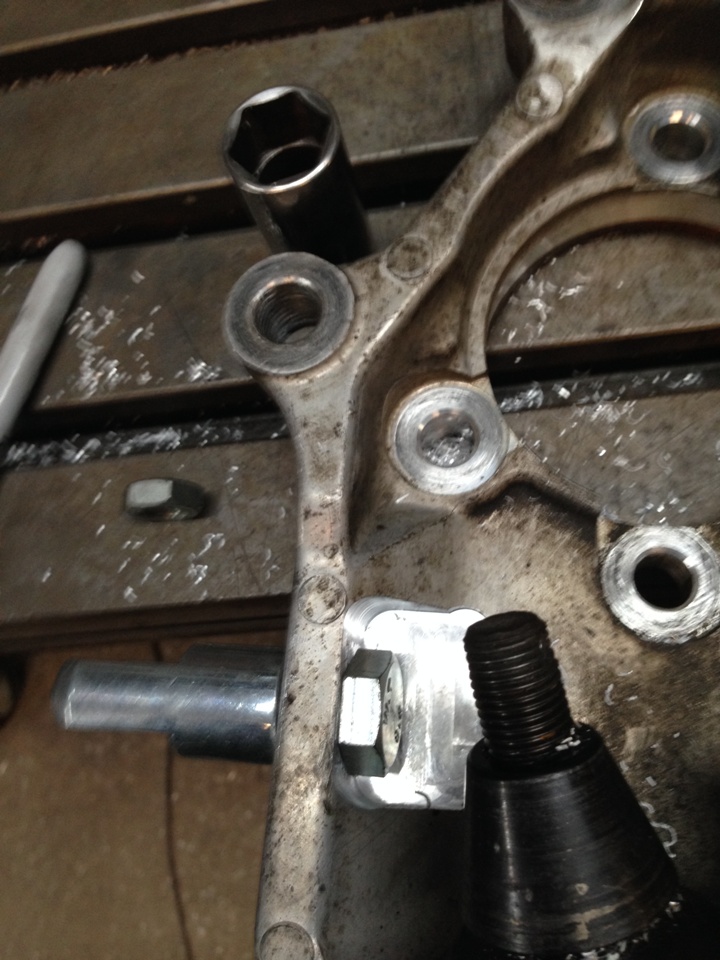
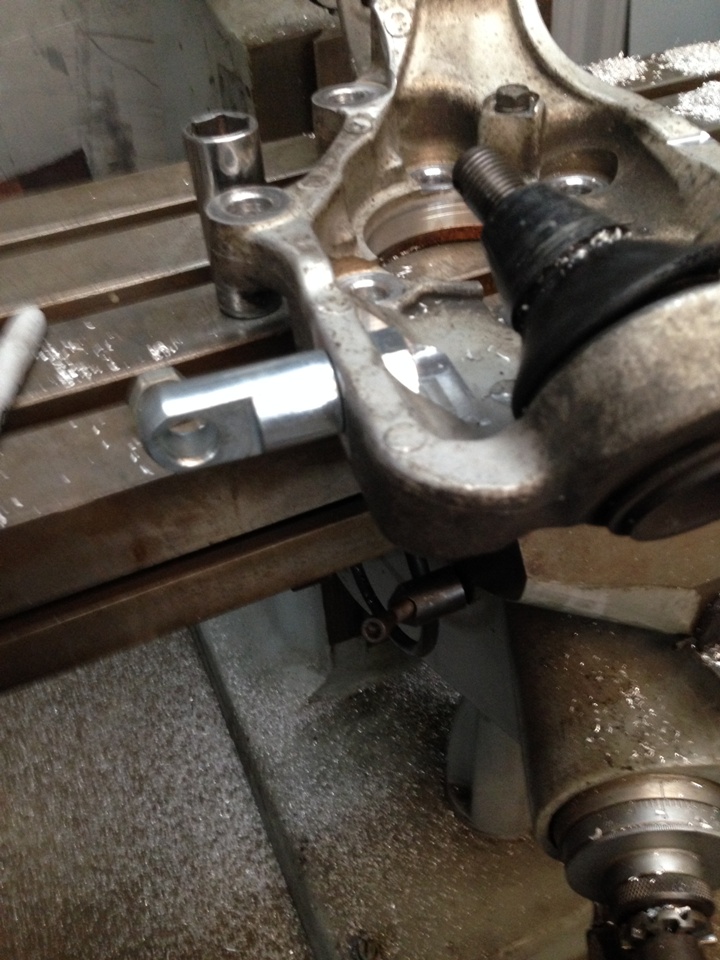
Here you can see things coming together, from this assembly i was able to make my measurements for roll center and Ackerman.
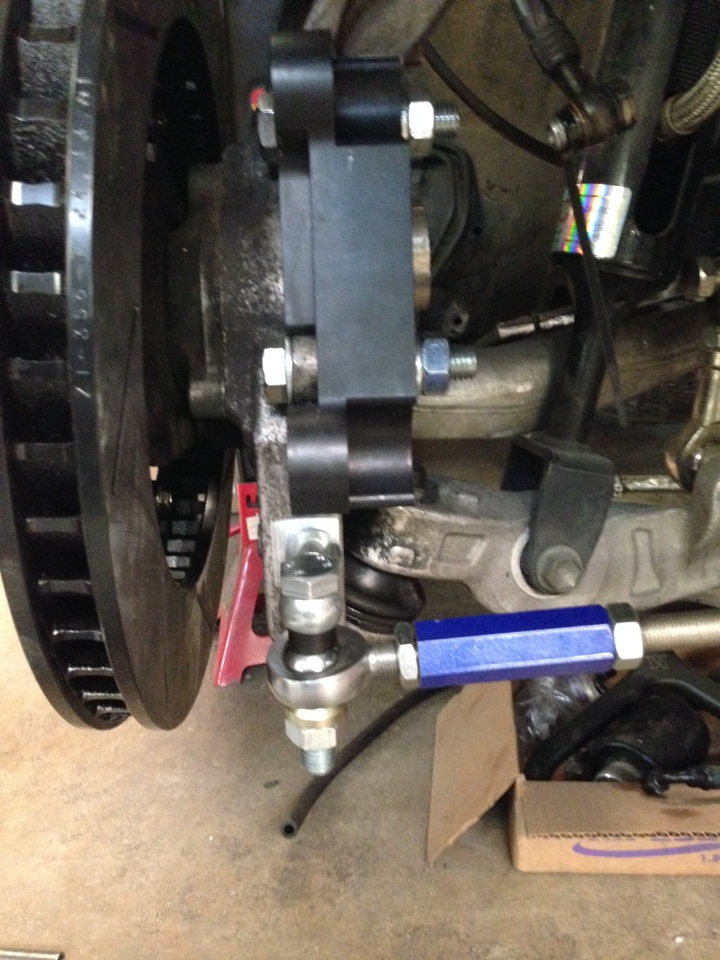
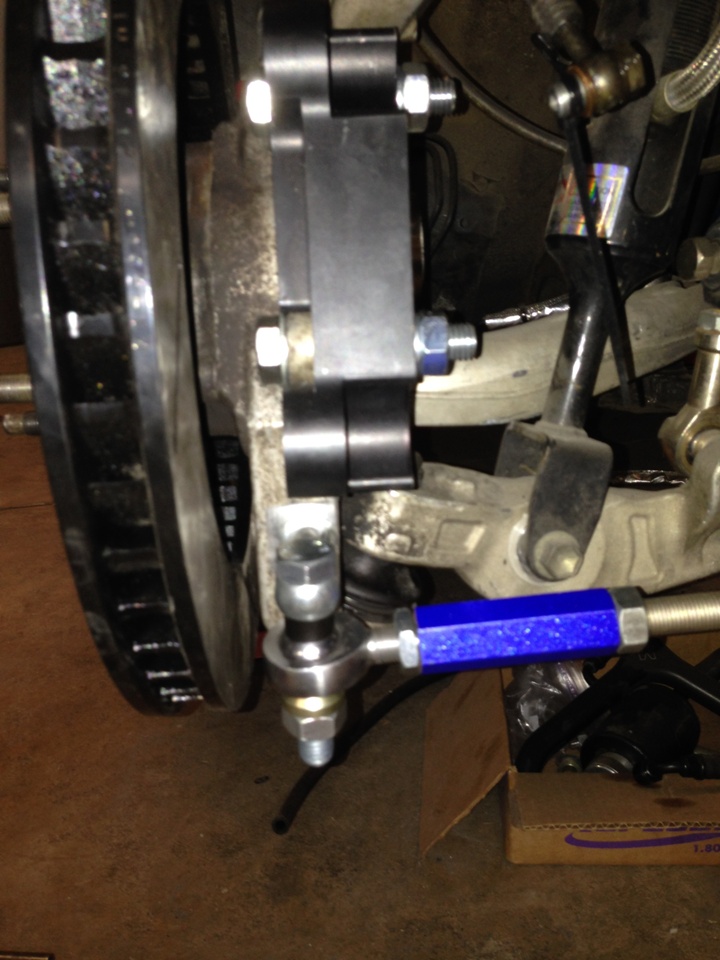
I made the last piece and its fairly complex, it will not rotate or clock due to the applied torque of the tie rod, and it sets the Ackerman pretty damn close to OEM and the roll center is the same as OEM. the best part is the Toe adjustment, very simple and elegant. Both Thread pitches are 1.5mm, so it is very easy to dial in toe as needed.
So basically what we have done for the RHD conversion was to flip the fron XMember 180 degrees and put a JDM rack on it. so now the steering rack is in front of the xmember. Really made somethings harder, but many things way easier. For instance I am a C5 Z06 batwing oil pan and off the shelf JBA long tube headers, but I spent a good deal of time on the steering, so it is a trade for sure.
So in this pic you can see where I milled the upright for a bolt hole to install the clevis for the tie rod end, also I milled off the OEM tie rod pickup as it was not going to be touching anything anyway.
This clevis was temporary but a needed step to verify and adjust things like roll center and Ackerman.
Here you can see the clevis in relation to the ball joint
Here you can see things coming together, from this assembly i was able to make my measurements for roll center and Ackerman.
I made the last piece and its fairly complex, it will not rotate or clock due to the applied torque of the tie rod, and it sets the Ackerman pretty damn close to OEM and the roll center is the same as OEM. the best part is the Toe adjustment, very simple and elegant. Both Thread pitches are 1.5mm, so it is very easy to dial in toe as needed.
Thread Starter
New Member
iTrader: (8)
Joined: May 2004
Posts: 2,105
Likes: 15
From: Rock Hill, South Carolina
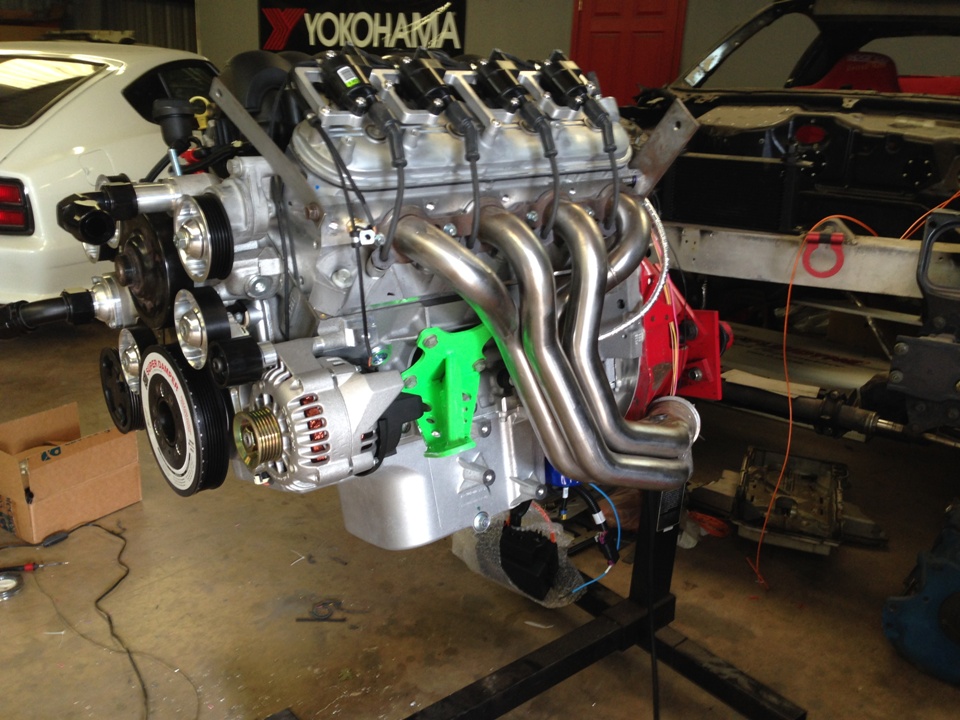
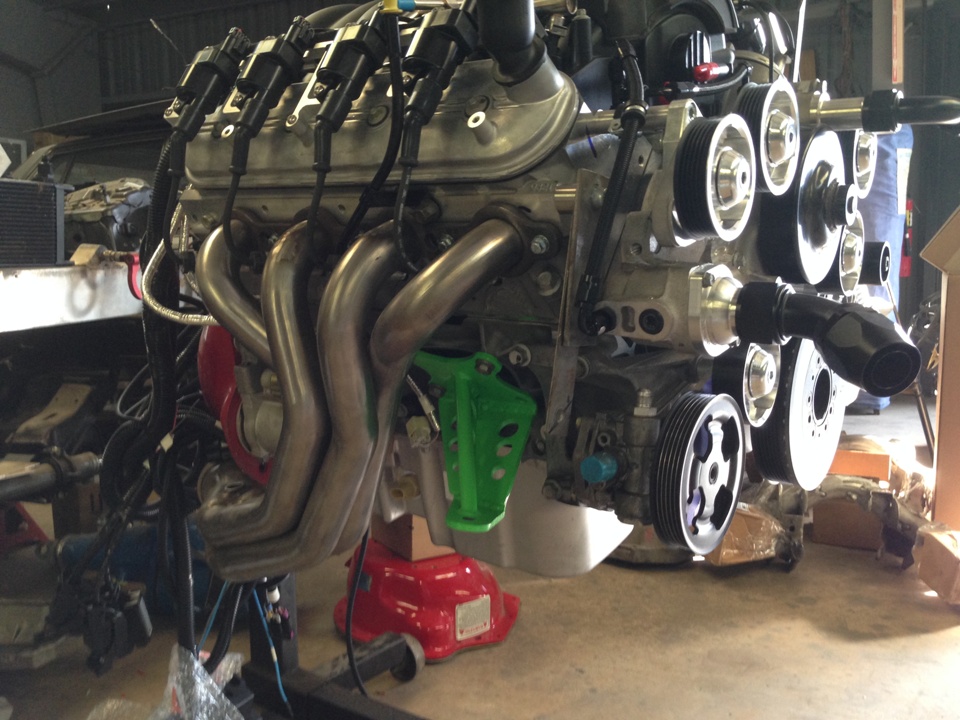
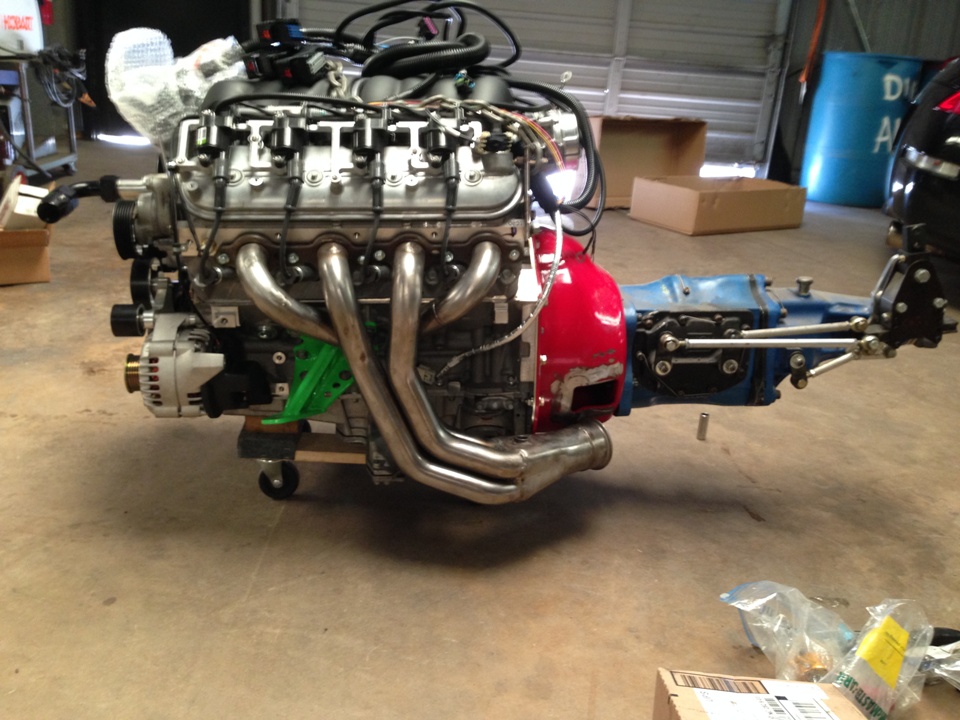
a few teaser shots of the fuel to noise converter
I had to make every bracket for every pulley except the alternator!
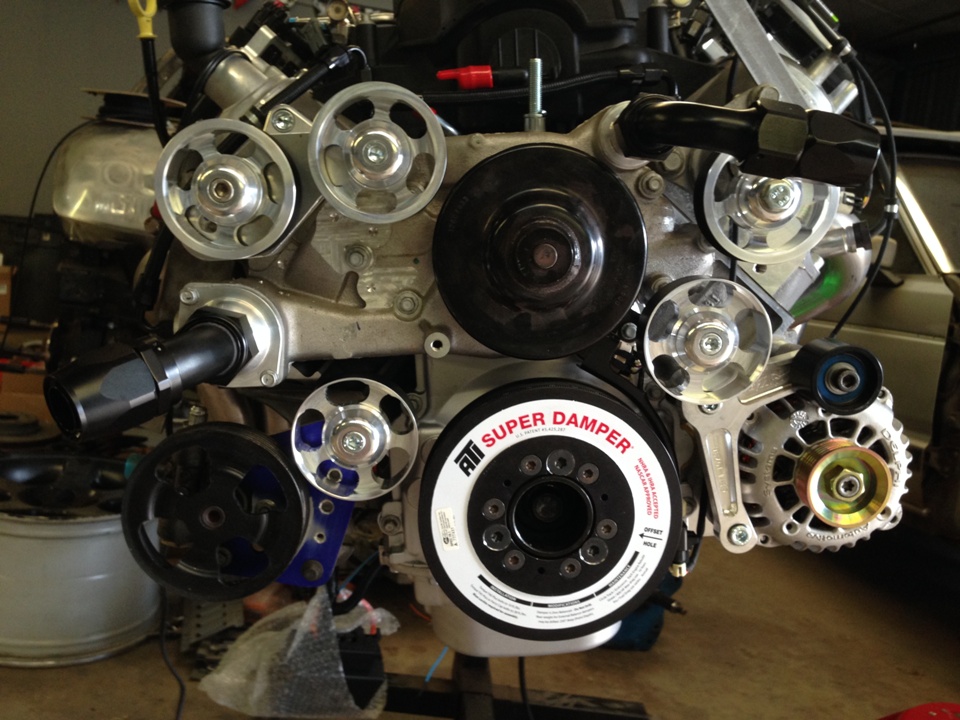
started wiring the motor up, big shout out to Mike Golding, the powder coater, the green motor mount color is my color he made for me. Look to see many more green things to come on this project.
That is a 350Z power steering pump in a RHD bracket made from a C5 AC bracket and a harbor freight jack.
I am doing an inverted intake, why not!
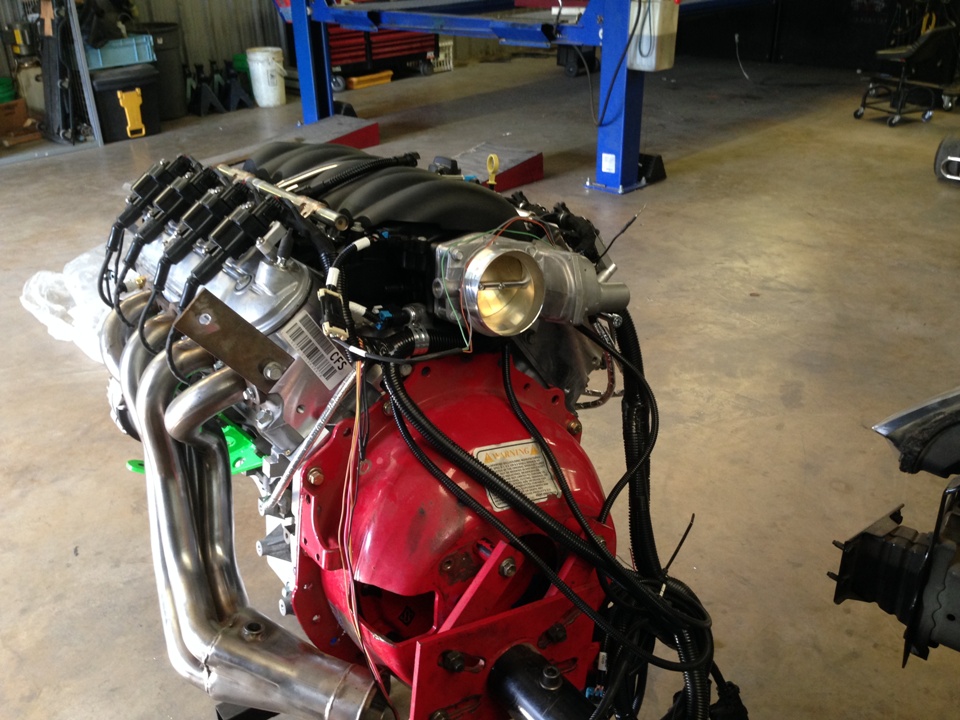
the fuel to noise converter fairly complete, still need to finish wiring and work on the oiling system and a few million other things.
I had to make every bracket for every pulley except the alternator!
started wiring the motor up, big shout out to Mike Golding, the powder coater, the green motor mount color is my color he made for me. Look to see many more green things to come on this project.
That is a 350Z power steering pump in a RHD bracket made from a C5 AC bracket and a harbor freight jack.
I am doing an inverted intake, why not!
the fuel to noise converter fairly complete, still need to finish wiring and work on the oiling system and a few million other things.
Thread Starter
New Member
iTrader: (8)
Joined: May 2004
Posts: 2,105
Likes: 15
From: Rock Hill, South Carolina
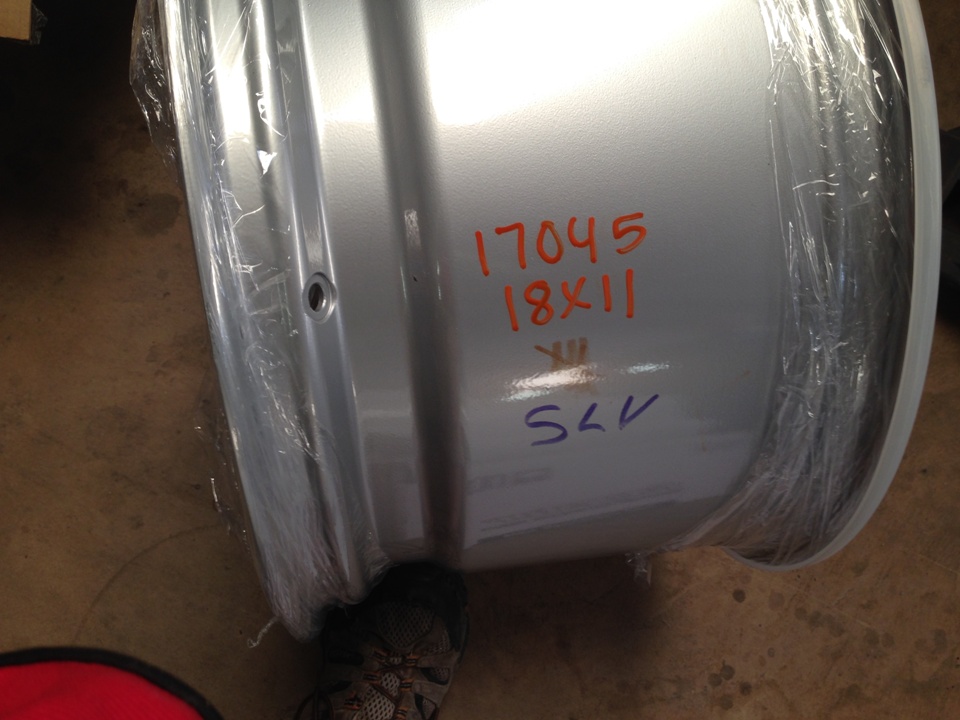
So I got my ForgeStars in and wow..... I ordered the wheels with the wrong offsets because they did not list an offset low enough and I knew I was going to have to run spacers to get them right, but for the money I figured it was worth it. Well low and behold not only did they fix the offset, (without asking) they nailed (close enough)
So I'll be running an 18x11 up front, I'll start off with a 295 and see how things fit but I'm planning on 315/30 Hoosier R6 up front. I am going to need to run a 3mm spacer in the front, simply because I could nopt find a 2mm spacer on the interwebz.
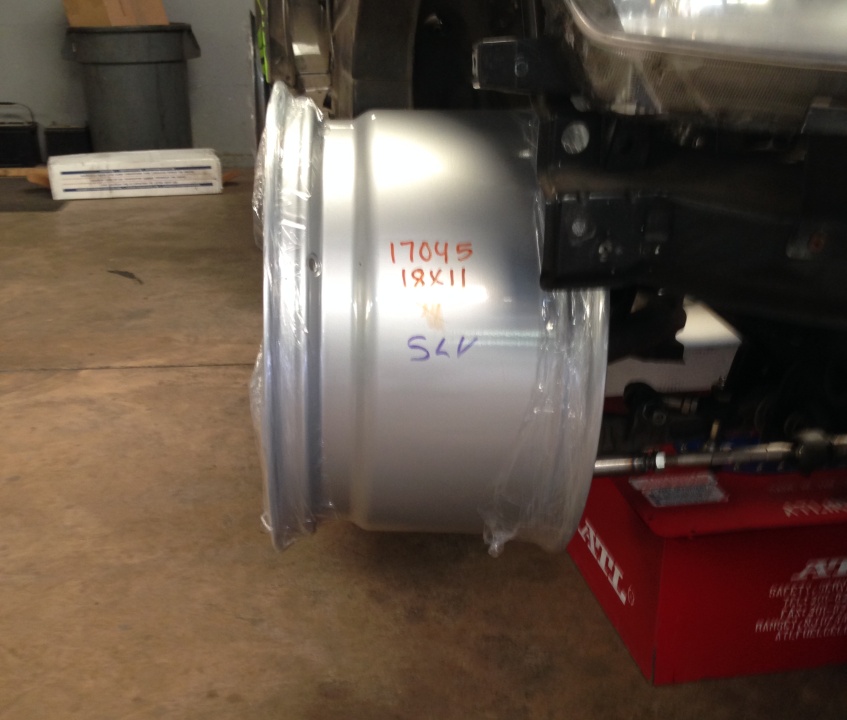
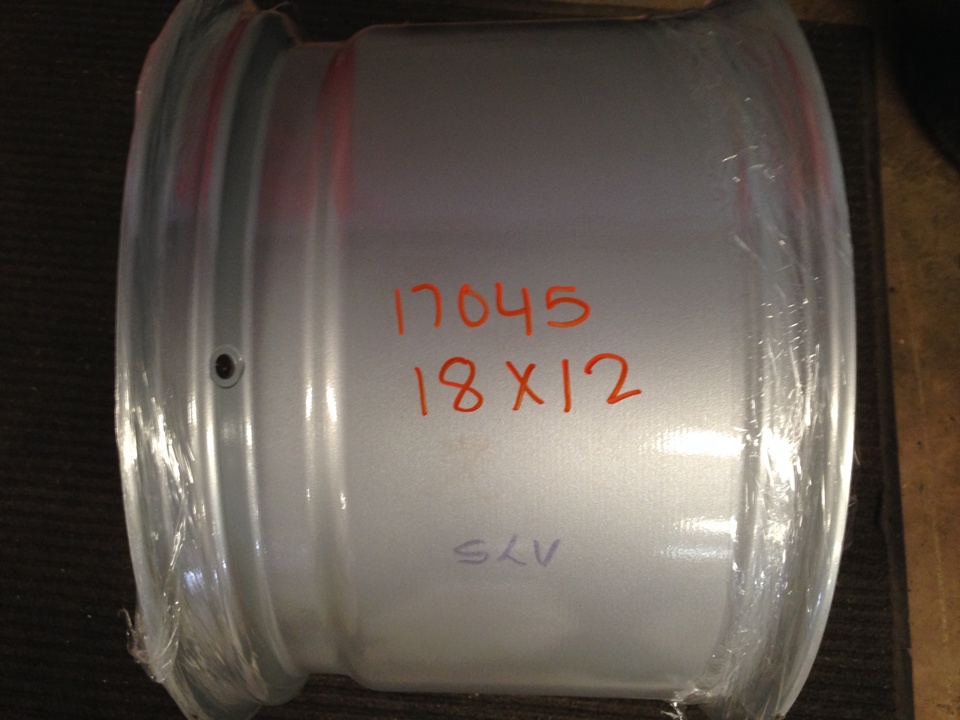
and an 18x12 in the rear, again starting off with a 315 but planning on a 335 in the rear.
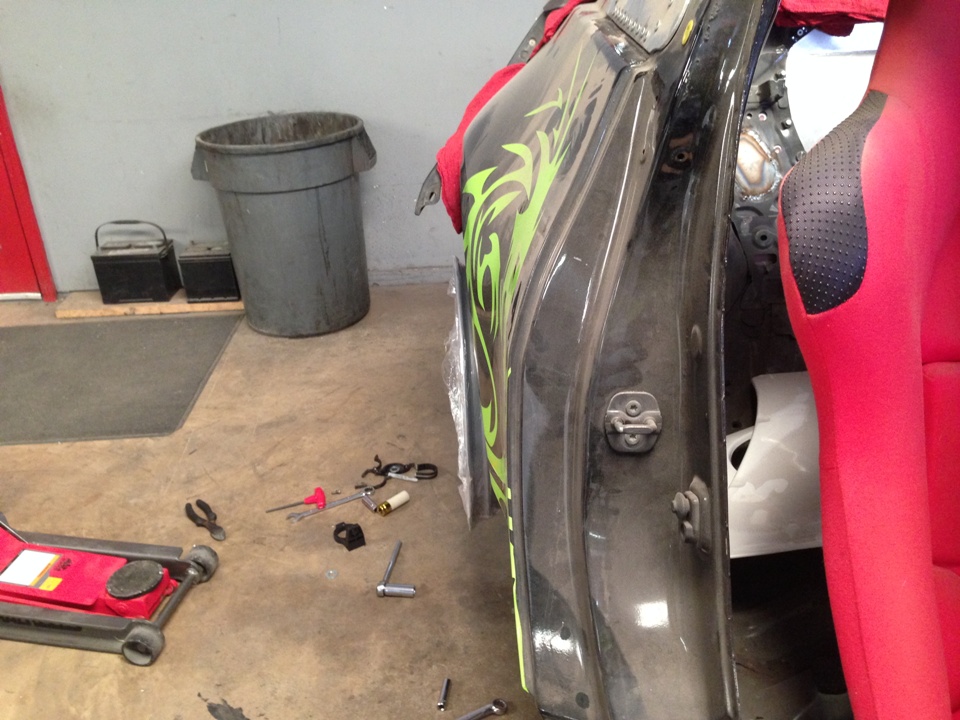
I might have to pull the fenders a smidge but its a race car and the suspension is completely unloaded
So I'll be running an 18x11 up front, I'll start off with a 295 and see how things fit but I'm planning on 315/30 Hoosier R6 up front. I am going to need to run a 3mm spacer in the front, simply because I could nopt find a 2mm spacer on the interwebz.
and an 18x12 in the rear, again starting off with a 315 but planning on a 335 in the rear.
I might have to pull the fenders a smidge but its a race car and the suspension is completely unloaded


I made the last piece and its fairly complex, it will not rotate or clock due to the applied torque of the tie rod, and it sets the Ackerman pretty damn close to OEM and the roll center is the same as OEM. the best part is the Toe adjustment, very simple and elegant. Both Thread pitches are 1.5mm, so it is very easy to dial in toe as needed.
Fine job sir

Thread Starter
New Member
iTrader: (8)
Joined: May 2004
Posts: 2,105
Likes: 15
From: Rock Hill, South Carolina
and thank you

Thread Starter
New Member
iTrader: (8)
Joined: May 2004
Posts: 2,105
Likes: 15
From: Rock Hill, South Carolina

Thread Starter
New Member
iTrader: (8)
Joined: May 2004
Posts: 2,105
Likes: 15
From: Rock Hill, South Carolina

Thread Starter
New Member
iTrader: (8)
Joined: May 2004
Posts: 2,105
Likes: 15
From: Rock Hill, South Carolina
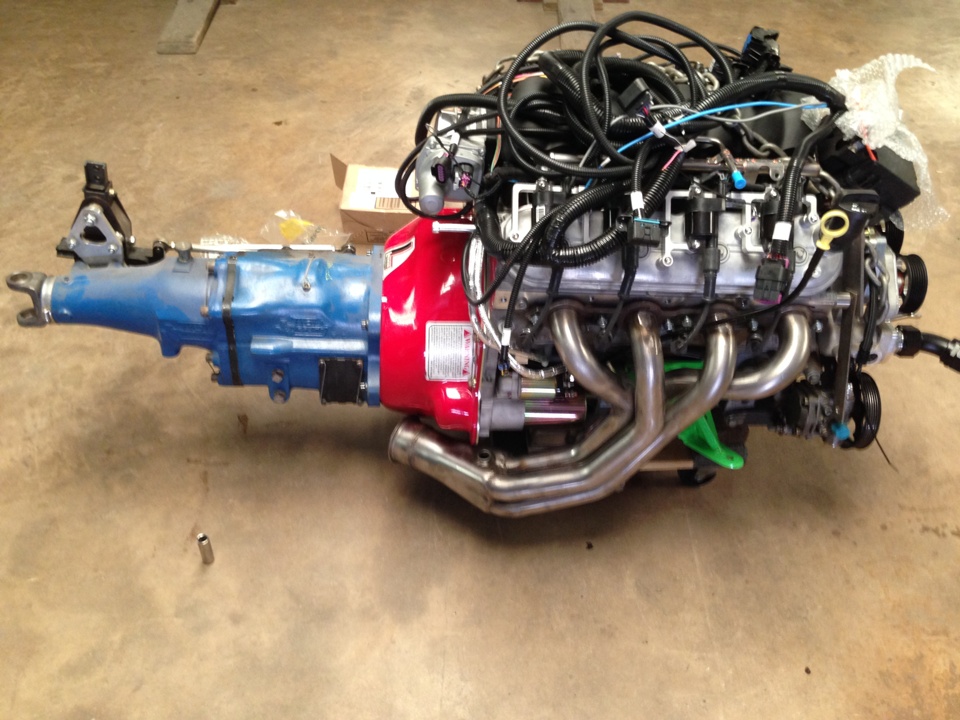
I have a MKiii supra with an LS1 in it, and it had a T56 which I dislike. Poorly geared and kind of clunky.
So when I started this project I had a bead on the T101, and after driven several of them in our race cars, I jumped at the chance. The only negative to the t101 is it only has 4 gears and all 4th gears are 1:1, so I may end up being top end limited (168mph by my math) and if that happens then I can run a taller tire of have a custom 4th gear made. the benfits to the T101 is strength and weight. It takes 1000 HP all day long in cup races and it only weighs 38 pounds.
With everything else custom i was undertaking I really didn't want to have to shake down the drive train, so I went with the T101. In a few years I expect to see a kit out there for the CD00x and LSx combo. After all Supra guys are mating it to the 2JZ because it is better than the Toyota tranny, there are a lot of swap kits for it, just not LSx, yet.