
Adding the AAM Surge Tank & Fuel Pump (Modified)

LOTS of PICS!!!
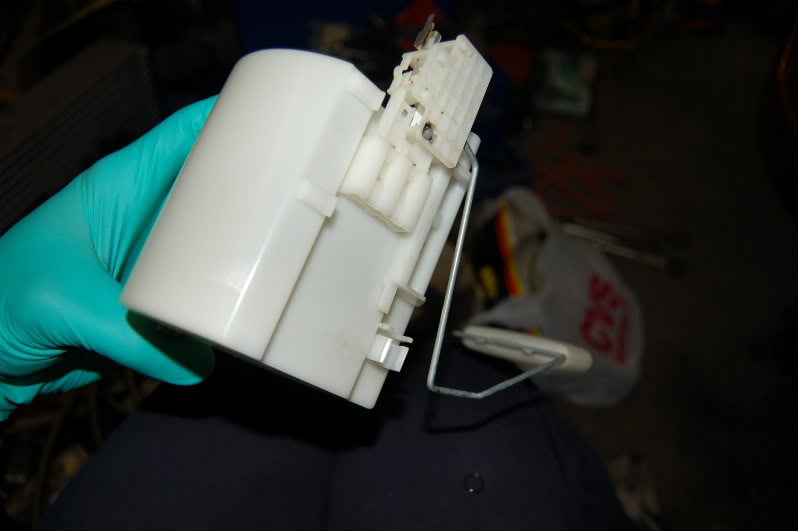
I purchased this AAM Surge Tank and Pump set-up from another forum member.
It came with only what you see here:
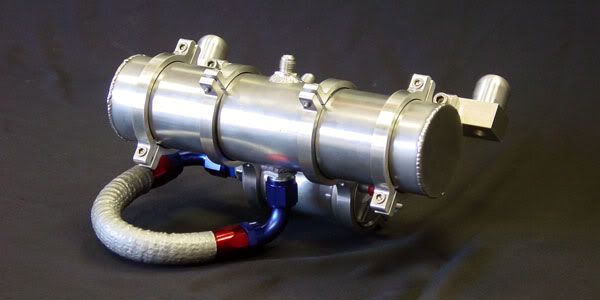
No Fuel Lines, No electrical Connectors, you get the idea. This was OK because I planned to plumb my own lines anyway.
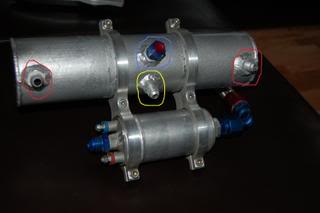
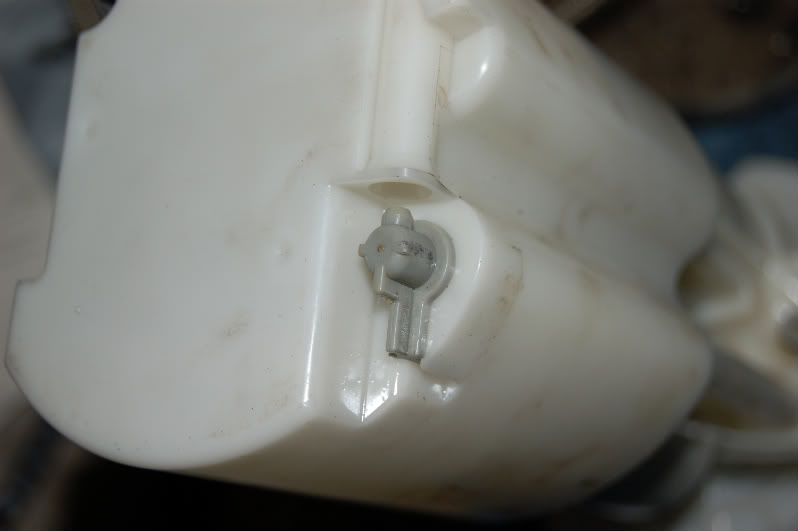
Turning the pump over reveals 2 -6an sized ports;
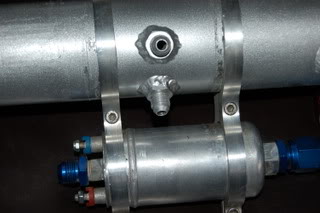
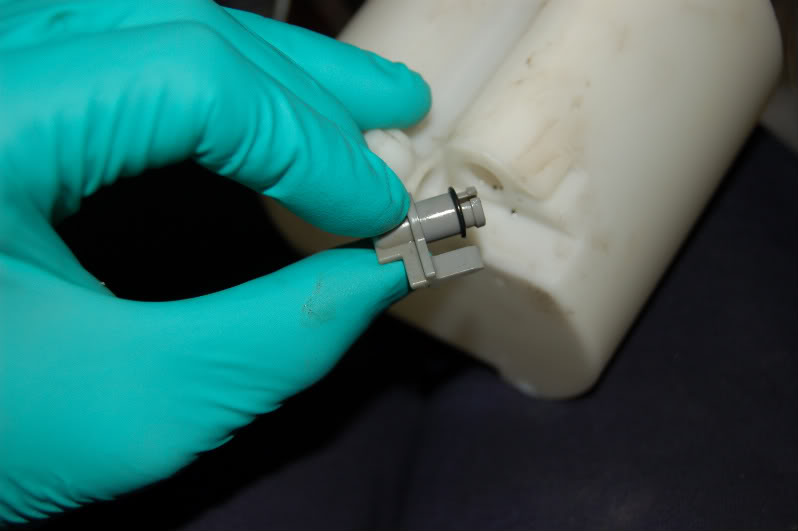
The problem here is that the 2 -6an ports are in a location directly opposite that of the feed -8an that the Bosch pump pulls from. So what does this mean...Whichever -6an port you choose to feed the surge tank will be dumping fuel right on top of the feed port to the pump. Well if we were able to see what was happening inside the pump, you would probably see a lot of bubbles aka turbulence right on top of the -8an feed. This can create problems with consistency in your fuel/air mix (aka bubbles in the surge tank).
This is illustrated better in the first photo. You can see the 2 -6an ports directly above the -8an feed to the Bosch.
Now if the -6an feeds...that fill the surge tank were moved to the sides, there would be ZERO turbulence above the Bosch feed line and you would see much more consistent fuel being fed into the pump...
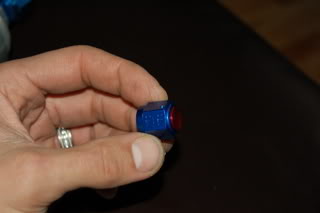
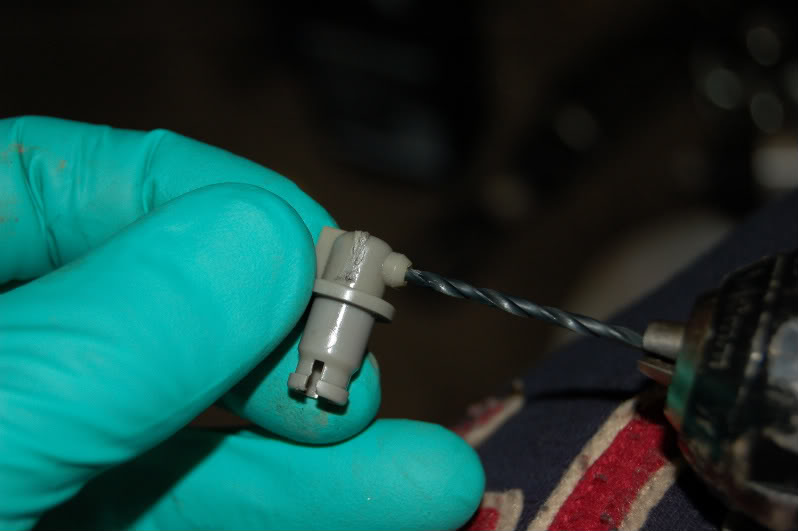
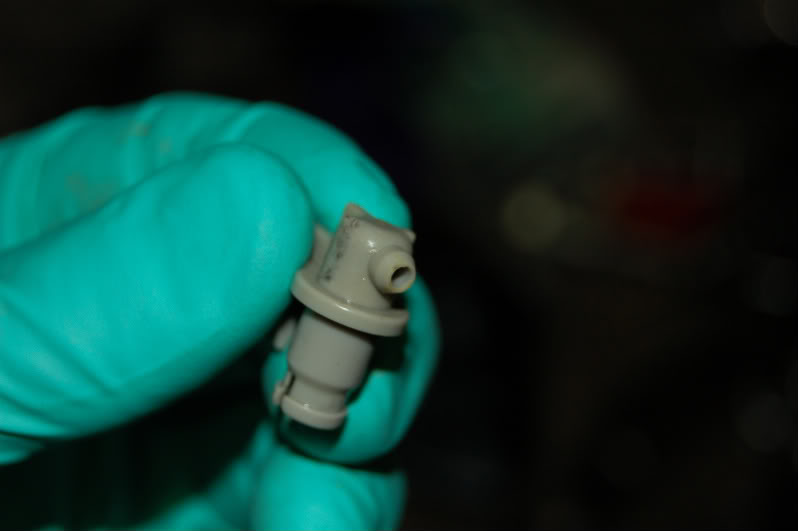
I will keep one of the 2 poorly placed ports and use it as an overflow going back to the OEM tank. The second will be capped off as shown below.
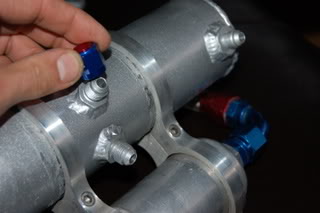
So the 2 feed sources for the surge tank will be:
1) the Walbro in-tank as primary feed for the Bosche pump.
2) the fuel return will also dump excess fuel sent to the rails back into the surge
These 2 feeds for the surge are circled in RED.
The overflow going back to the OEM tank is circled in Yellow.
The extra port that is getting capped off is circled in Blue.
I owe great thanks to the guys at Turbo Trix for helping me with this little project.
Soon I will be installing this tank/pump and testing it out.
I'll let you guys know how it works out.
I purchased this AAM Surge Tank and Pump set-up from another forum member.
It came with only what you see here:
No Fuel Lines, No electrical Connectors, you get the idea. This was OK because I planned to plumb my own lines anyway.
Turning the pump over reveals 2 -6an sized ports;
The problem here is that the 2 -6an ports are in a location directly opposite that of the feed -8an that the Bosch pump pulls from. So what does this mean...Whichever -6an port you choose to feed the surge tank will be dumping fuel right on top of the feed port to the pump. Well if we were able to see what was happening inside the pump, you would probably see a lot of bubbles aka turbulence right on top of the -8an feed. This can create problems with consistency in your fuel/air mix (aka bubbles in the surge tank).
This is illustrated better in the first photo. You can see the 2 -6an ports directly above the -8an feed to the Bosch.
Now if the -6an feeds...that fill the surge tank were moved to the sides, there would be ZERO turbulence above the Bosch feed line and you would see much more consistent fuel being fed into the pump...
I will keep one of the 2 poorly placed ports and use it as an overflow going back to the OEM tank. The second will be capped off as shown below.
So the 2 feed sources for the surge tank will be:
1) the Walbro in-tank as primary feed for the Bosche pump.
2) the fuel return will also dump excess fuel sent to the rails back into the surge
These 2 feeds for the surge are circled in RED.
The overflow going back to the OEM tank is circled in Yellow.
The extra port that is getting capped off is circled in Blue.
I owe great thanks to the guys at Turbo Trix for helping me with this little project.
Soon I will be installing this tank/pump and testing it out.
I'll let you guys know how it works out.
Last edited by rrmedicx; Mar 8, 2008 at 12:07 AM.

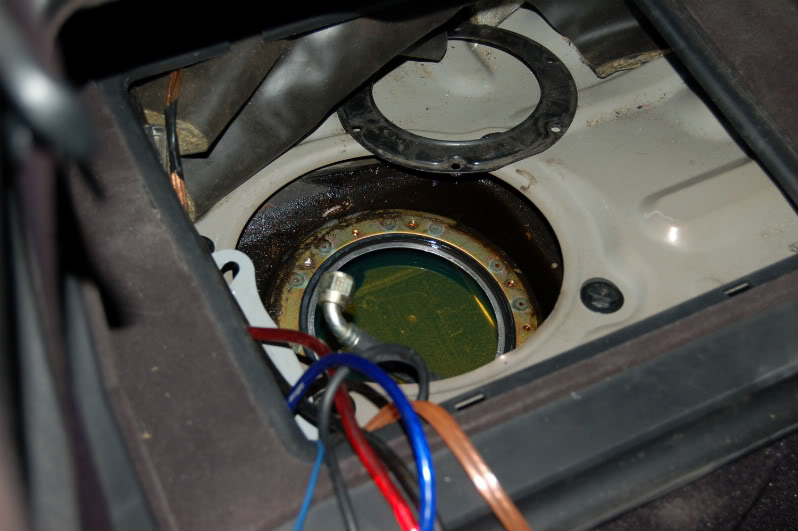
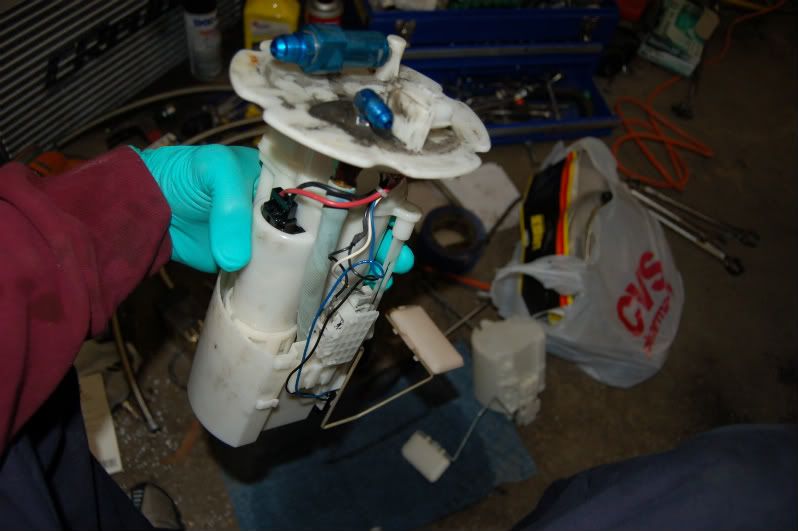
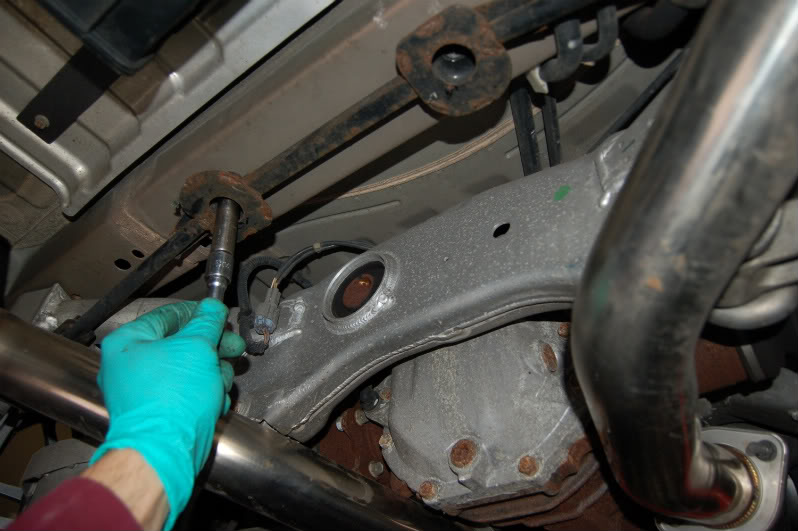
Well I decided today was the day to go for the install. I hoped to have everything I needed on hand, and I was almost right. I decided to get back to basics, by disconnecting all of the existing lines to the OEM/Walbro pump and remove the basket to make the correct modification to the basket.
Dumb *** that I am, I forgot to keep the fuel level low before starting this project. I made a mess with a little excess fuel spillage, but that was resolved when I lowered the driver side and kept the passenger side elevated. This moved the fuel to the driver side and allowed me to do my work without losing or spilling any more precious fuel @ $3.75/gallon.
*******Note to Self, Never do this again on a full tank.
Here I disconnected the Feed and Return line:
That involved pulling off the plug at the bottom of the catch basket and drilling it out appropriately as Phunk recommended.
Plug compliments of eagletangreen...Thanks Luie.

Time to drill it out.
Much Better now. Put it back and I should be good. Don't forget the tiny rubber gasket that goes in the hole before you put the plug back it.
That dirty job is now done!
Moving on...
Remove the 2 bolts that hold up this black bracket to make room for the new AAM Surge Tank and Pump:
Up it goes:
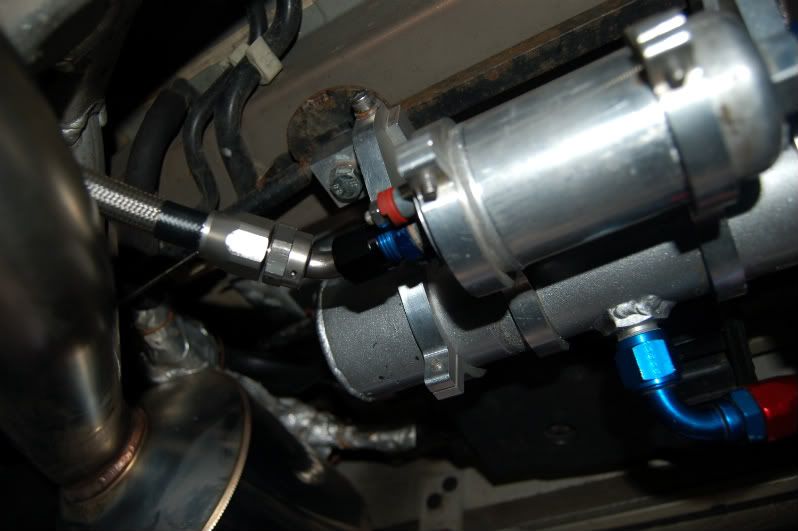
I created a bunch of SS lines...Here are the 2 going to the actual in-tank pump. One will be the feed to the Surge Tank and the other here will be the new return.
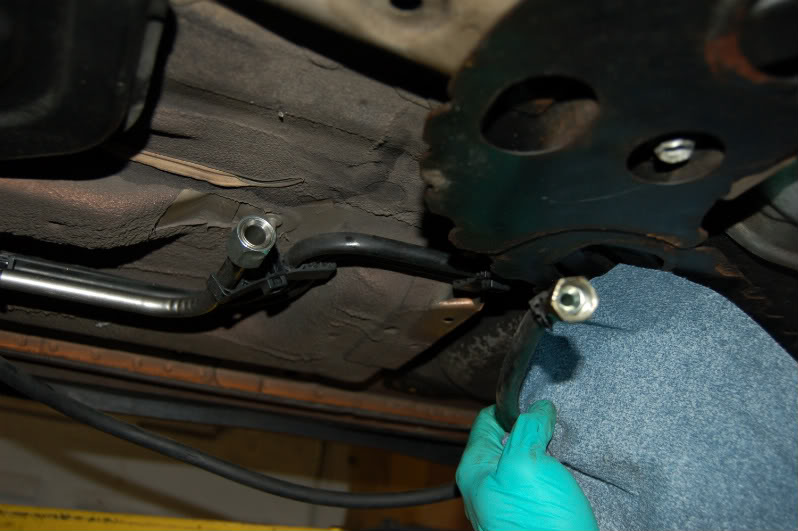
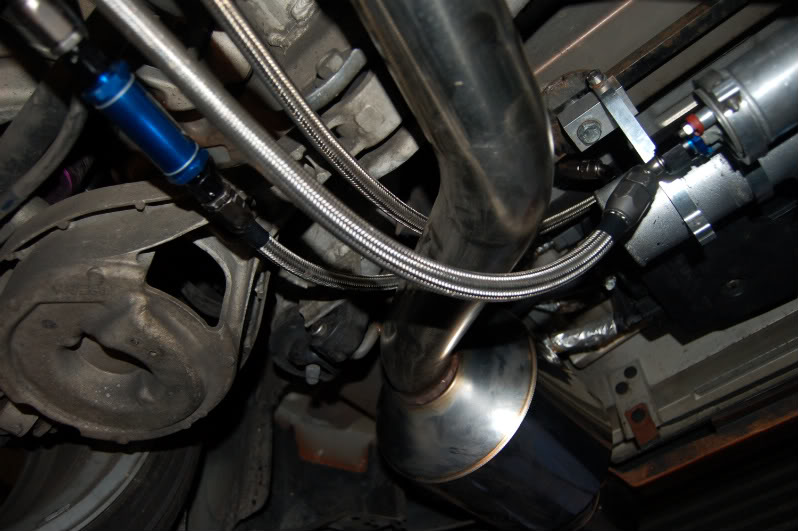
Below you will see a new -8an line coming from the Bosch to meet the CJ-Motorsports Stage 2 -8an sized Hard line which will go up to feed the Y-line that feeds the Injectors.
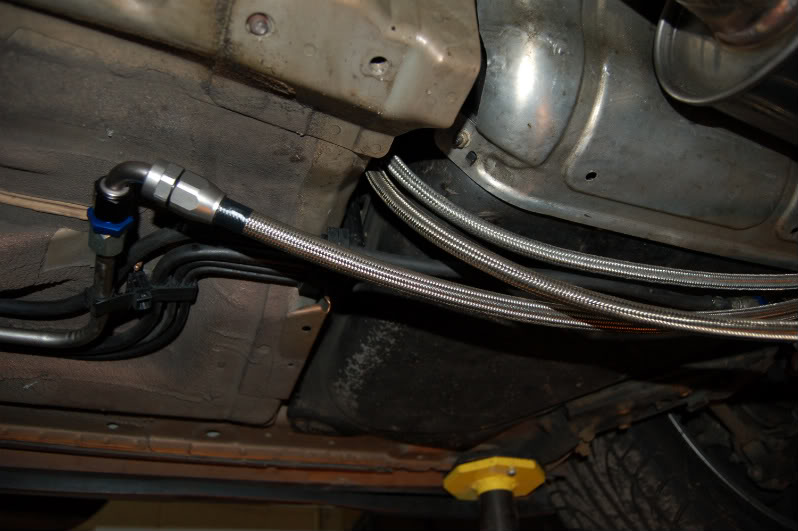
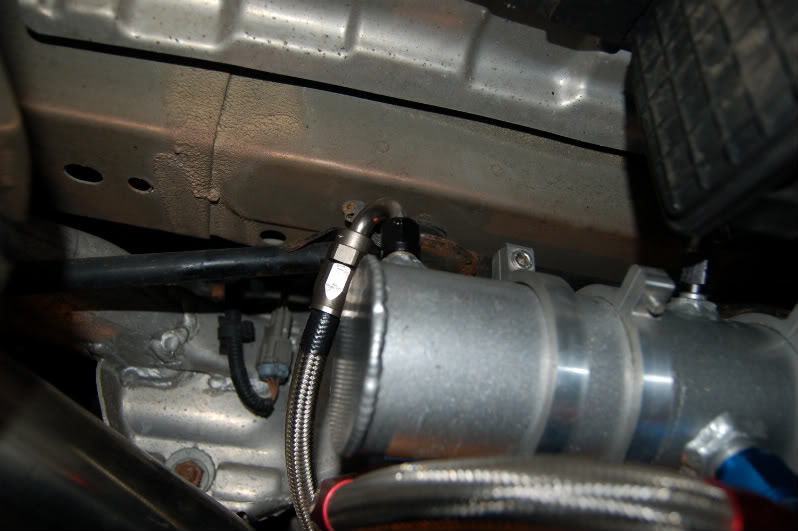
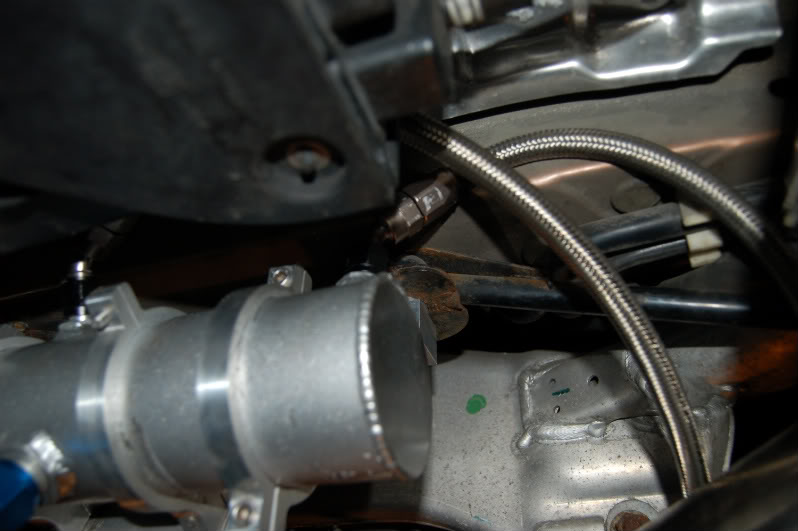
Here I am trying to figure out the best and safest path to run the lines, so they are clear from suspension/moving as well as hot parts.
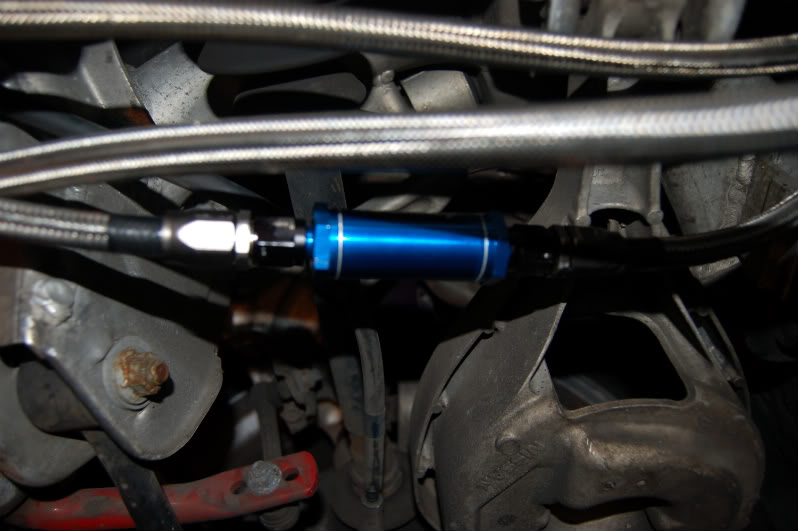
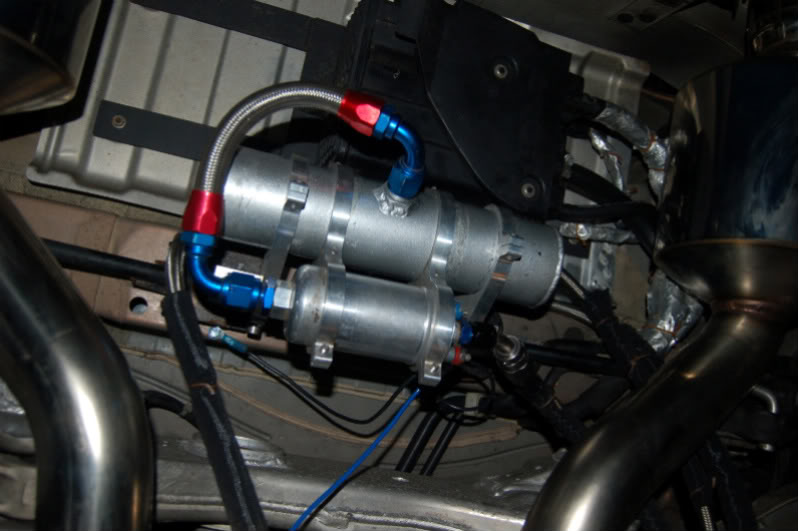
I used an Earl's -6AN fuel filter in between the Walbro and the Surge just to make sure nothing that got in the tank clogs up anything from that point forward.
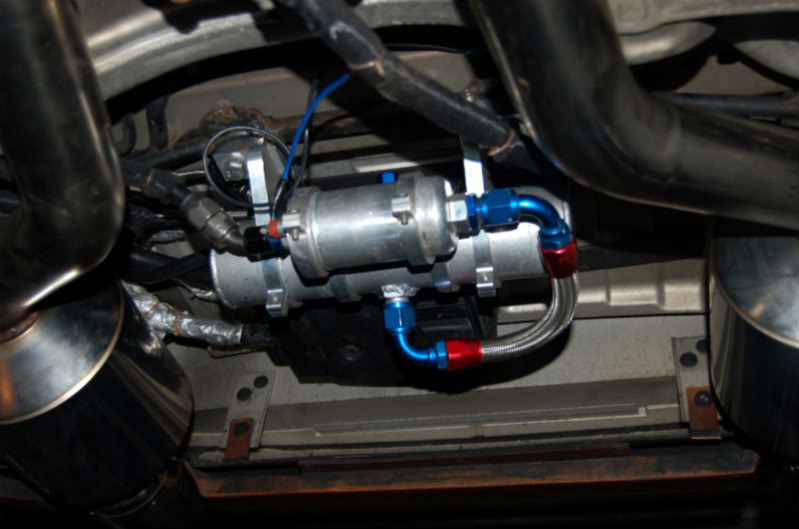
I tried running the -8AN feed line under the exhaust, but ended up moving it above...it seemed too low for my taste.
Just as it is coming together...I think I actually reversed the set-up of the tank because in this picture it just didn't look right.
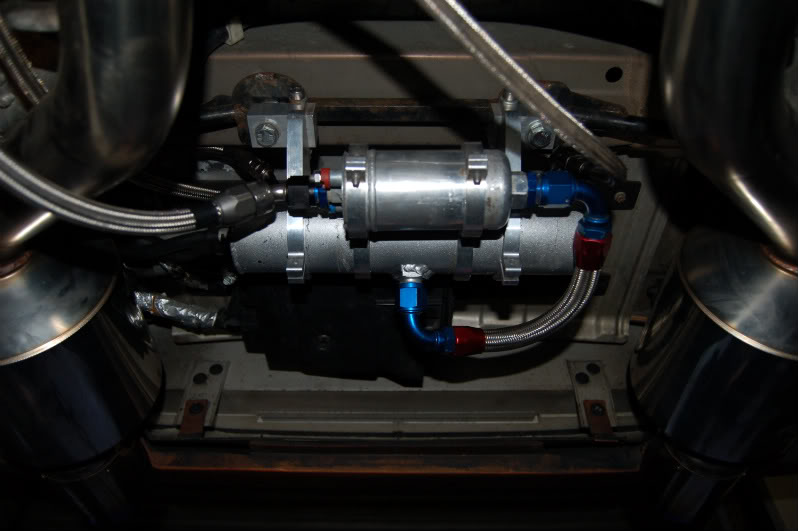
Much better now...I reversed the position of the tank and pump here.
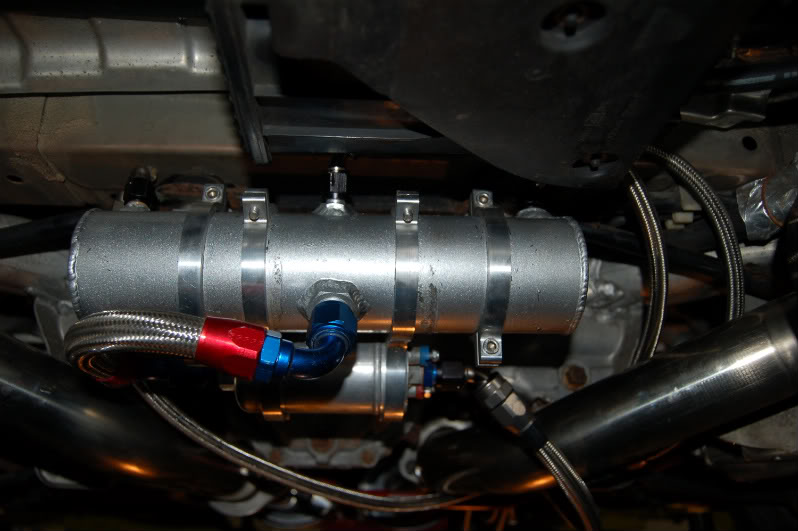
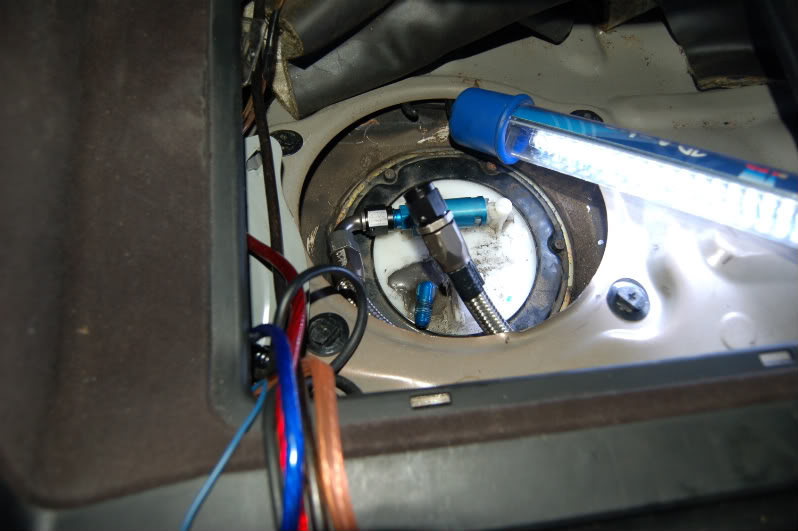
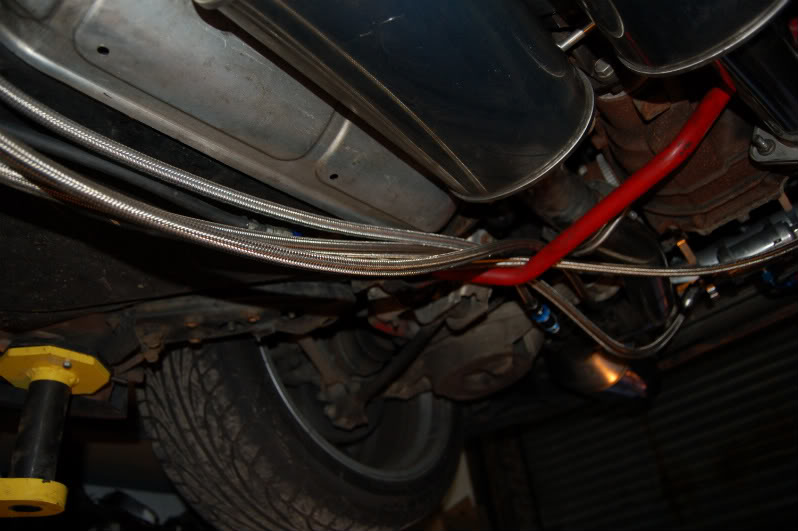
On the extreme left (driver's side) is the overflow coming back from the rails.
On the right end of the surge tank (passenger side) is the feed from the Walbro:
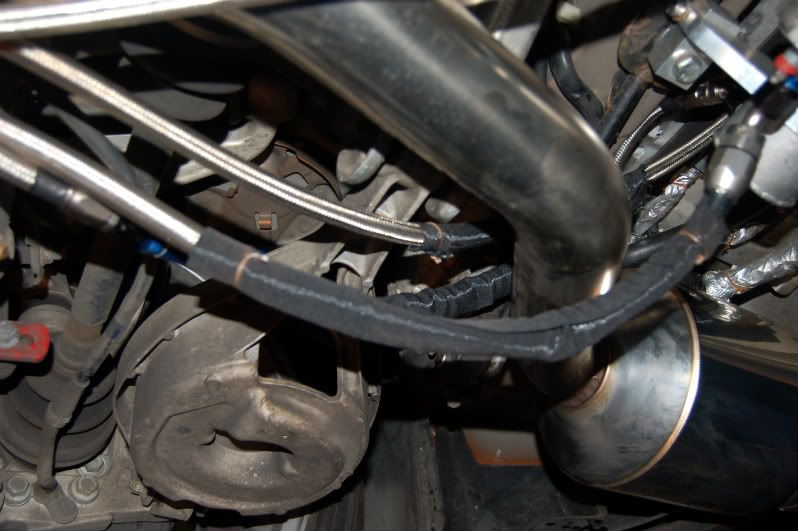
I took some time to heat wrap all of the lines just because they were in the neighborhood of the exhaust. You see the big -8AN line still below the muffler, I did eventually move it above. But you can see the heat wrap and I used safety wire to secure it on each individual line. Don't have to worry about melting zip ties.
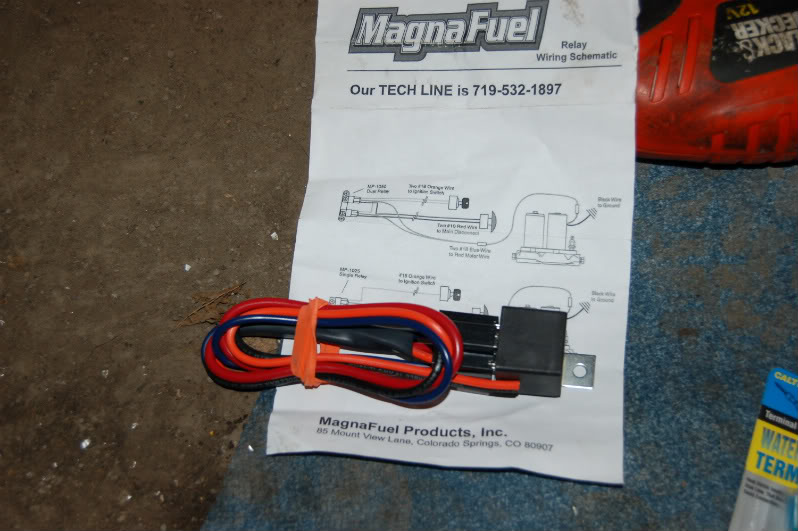
To power it up I purchased a nice relay from summit racing. Very straight forward...Red is hot from Battery, Orange is the switch power, borrowed from the OEM pump (look for the black & yellow stripe wire), the Blue lead is the power to the new pump (Bosch) and the black is ground.
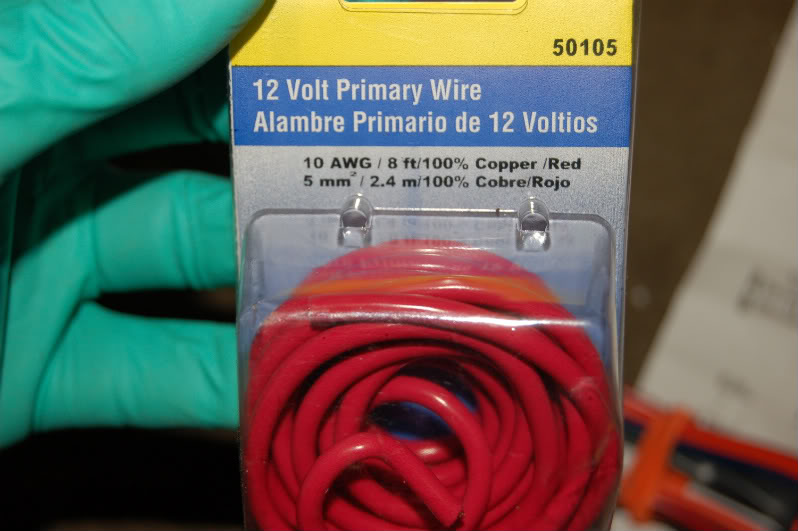
Buy some quality 10awg gauge wire and an inline fuse by the battery.
Just about done:
All finished:
Pump is rather quiet for a racing pump (for not being submerged like the walbro)
Car started with a slight hesitation...I guess the surge tank had to fill first before the engine got any fuel. Now it runs beautifully.
The Walbro used to whine...now is absolutely silent and the Bosch has a mild high pitched hum, like that of a race car. Nice! I Like! Sexy Time!
Dumb *** that I am, I forgot to keep the fuel level low before starting this project. I made a mess with a little excess fuel spillage, but that was resolved when I lowered the driver side and kept the passenger side elevated. This moved the fuel to the driver side and allowed me to do my work without losing or spilling any more precious fuel @ $3.75/gallon.
*******Note to Self, Never do this again on a full tank.
Here I disconnected the Feed and Return line:
That involved pulling off the plug at the bottom of the catch basket and drilling it out appropriately as Phunk recommended.
Plug compliments of eagletangreen...Thanks Luie.
Time to drill it out.
Much Better now. Put it back and I should be good. Don't forget the tiny rubber gasket that goes in the hole before you put the plug back it.
That dirty job is now done!
Moving on...
Remove the 2 bolts that hold up this black bracket to make room for the new AAM Surge Tank and Pump:
Up it goes:
I created a bunch of SS lines...Here are the 2 going to the actual in-tank pump. One will be the feed to the Surge Tank and the other here will be the new return.
Below you will see a new -8an line coming from the Bosch to meet the CJ-Motorsports Stage 2 -8an sized Hard line which will go up to feed the Y-line that feeds the Injectors.
Here I am trying to figure out the best and safest path to run the lines, so they are clear from suspension/moving as well as hot parts.
I used an Earl's -6AN fuel filter in between the Walbro and the Surge just to make sure nothing that got in the tank clogs up anything from that point forward.
I tried running the -8AN feed line under the exhaust, but ended up moving it above...it seemed too low for my taste.
Just as it is coming together...I think I actually reversed the set-up of the tank because in this picture it just didn't look right.
Much better now...I reversed the position of the tank and pump here.
On the extreme left (driver's side) is the overflow coming back from the rails.
On the right end of the surge tank (passenger side) is the feed from the Walbro:
I took some time to heat wrap all of the lines just because they were in the neighborhood of the exhaust. You see the big -8AN line still below the muffler, I did eventually move it above. But you can see the heat wrap and I used safety wire to secure it on each individual line. Don't have to worry about melting zip ties.
To power it up I purchased a nice relay from summit racing. Very straight forward...Red is hot from Battery, Orange is the switch power, borrowed from the OEM pump (look for the black & yellow stripe wire), the Blue lead is the power to the new pump (Bosch) and the black is ground.
Buy some quality 10awg gauge wire and an inline fuse by the battery.
Just about done:
All finished:
Pump is rather quiet for a racing pump (for not being submerged like the walbro)
Car started with a slight hesitation...I guess the surge tank had to fill first before the engine got any fuel. Now it runs beautifully.
The Walbro used to whine...now is absolutely silent and the Bosch has a mild high pitched hum, like that of a race car. Nice! I Like! Sexy Time!
Last edited by rrmedicx; Mar 8, 2008 at 01:06 AM.

Trending Topics
Those lines are approximately 3 feet. I build that set-up over 1 year ago and have since sold it. But while I had it,m the set-up worked well to support upwards of 640 rwhp while using 800cc injectors.


Thread
Thread Starter
Forum
Replies
Last Post
Tochigi_236
Feedback & Suggestions for Our Forum
8
Sep 27, 2015 03:40 PM