

Seibon hood owner: I need help installing Seibon CF hood
 08-13-2007, 02:39 PM
#1

I know, I know. I thought it would be easy too.
But for all of you who have received a Seibon hood, the part where you would connect to the car's hood latch doesn't work quite the same way as the OEM does.
My question is what did you guys do? Did you used the screws that came with the wood and went with a washer? The screws are a bit flimsy looking.
I really need help with this guys.
Thanks.

 08-13-2007, 05:21 PM
#5
The screws they use are just generic bolts/screws and I dont recommend them being used. I've heard of them being too long and going through a hood (Seibon takes into consideration the wood piece). I'd suggest getting some screws/bolts and washers from your local hardware store for a couple bucks.
Where is your fitment off? Have any pictures? I'd gladly give out some pointers.
Jim
Where is your fitment off? Have any pictures? I'd gladly give out some pointers.
Jim
08-13-2007, 05:46 PM
#6
psychedelic one

Mine went on just fine, but closing it was a definite problem with the 5/16 spacer. Before you crack the clear coat, take lots of blue masking tape and put it all over your upper plenum, engine cover, and any where else that seems high.
I had to file the undersides of mine in several places to allow easy closing.
I had to file the undersides of mine in several places to allow easy closing.
08-13-2007, 06:13 PM
#7
Thanks, guys.
I went out and got some washers and the same type of screws/bolt but new and less rusty The fitment is a bit off, but I think from reading a lot of post, that was expected.
Note for people who will install a Seibon CF hood, make sure you don't have those after-market aluminum/carbon fiber air sheet that goes on top of your front bumper (around the front latch). You have to take it off since Seibon's hood won't go all the way down if you have them. I had to take mine off.
Another question. Does anyone have the VT style Seibon hood with a popcharger? Do you have any issues in the rain/washing the car? For some reason, I thought my side vents were further to the end of the hood, but in real life, the left side vent is directly over my popcharger and electrical wires!
Next step is to get a bodyshop to install my Aerocatch hood pins.
I went out and got some washers and the same type of screws/bolt but new and less rusty
The fitment is a bit off, but I think from reading a lot of post, that was expected.Note for people who will install a Seibon CF hood, make sure you don't have those after-market aluminum/carbon fiber air sheet that goes on top of your front bumper (around the front latch). You have to take it off since Seibon's hood won't go all the way down if you have them. I had to take mine off.
Another question. Does anyone have the VT style Seibon hood with a popcharger? Do you have any issues in the rain/washing the car? For some reason, I thought my side vents were further to the end of the hood, but in real life, the left side vent is directly over my popcharger and electrical wires!
Next step is to get a bodyshop to install my Aerocatch hood pins.
Last edited by ZlleH; 08-13-2007 at 06:15 PM.
Trending Topics
08-13-2007, 06:51 PM
#8
Jim I unfortunately bought my hood before looking at your prices but I will take some pictures of my fitment issues "it is not all that far off". thank you for being willing to point me in the right direction? I will be talking to you about the other carbon pieces I need though.
thanks
thanks
08-13-2007, 06:56 PM
#9
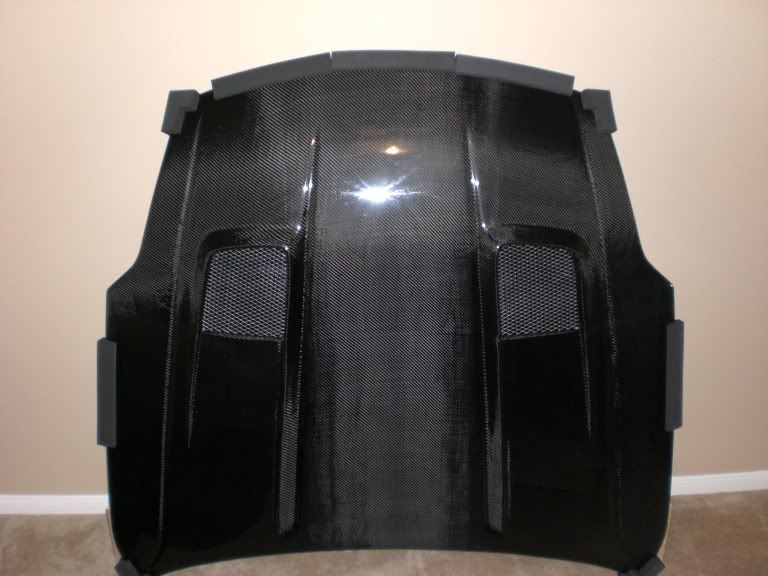
Here is a couple of pics. Sorry for the 1.8 megapixil camera It was late by the time I got my hood on so took it into the garage for some light.


As you might notice, my fitment issue is the edges that goes towards the hadlights, it dips down. I can live with it since this is my second VT hood, the first one came damaged.
It was late by the time I got my hood on so took it into the garage for some light.As you might notice, my fitment issue is the edges that goes towards the hadlights, it dips down. I can live with it since this is my second VT hood, the first one came damaged.
Last edited by ZlleH; 08-13-2007 at 07:03 PM.
08-13-2007, 07:50 PM
#11
No, I was shocked, when I rested the hood on the front latch befor pressing down, I looked through the crack with a light and it was ample room.
It's because the VT hood is definitely raised a bit higher then the OEM hood. I'm guessing it's for the angled side vents.
Anyways, I decided to do a test, I used doubled sided foam tape, I made sure the side that was on the struts bar still had it's plastic waxy seal on as to not stick to the struts bar, and I remove the waxy film from the top part. So when I shut the hood all the way down, I would know how much foam tape would be needed to be layered before the top stuck to the hood.
I layered on one at a time and stopped at the 4th layer because I figured that would be enough space for anyone needing it and I was getting tired. I measured the 4 layers of foam tape and it's a whopping 14mm in height. And if anyone has worked with double sided foam tape, the tape is very sticky so it would have stucked to the bottom of the hood if it came in contact.
I put the foam tape in the middle and to the end of the struts bar and they didn't stick to the bottom of the hood.
Hope that helps, 14mm of space between the struts bar and the hood is pretty huge when you think about it.
Hope that helps.
Originally Posted by MustGoFastR
Looks good to me. Did you have to cut or file anything underneath to accomodate your plenum spacer?
Last edited by ZlleH; 08-13-2007 at 07:54 PM.
08-28-2007, 12:23 AM
#12
Banned
iTrader: (-1)

Join Date: Nov 2004
Location: Houston, Texas
Posts: 78
Likes: 0
Received 0 Likes
on
0 Posts
i had a clearance problem with the ts-II version i have.......by the way did you all have to use washers on the hinges to allow it to latch....i got it to latch the first click but not the second.....though it was the stock strut bar or battery covers, but removed them and it still didnt work... i will post pics so you can see what im workin with..... I appreciate any help in advance....more than likely will take to a body shop to fix minor shipping crack and install....
PICS: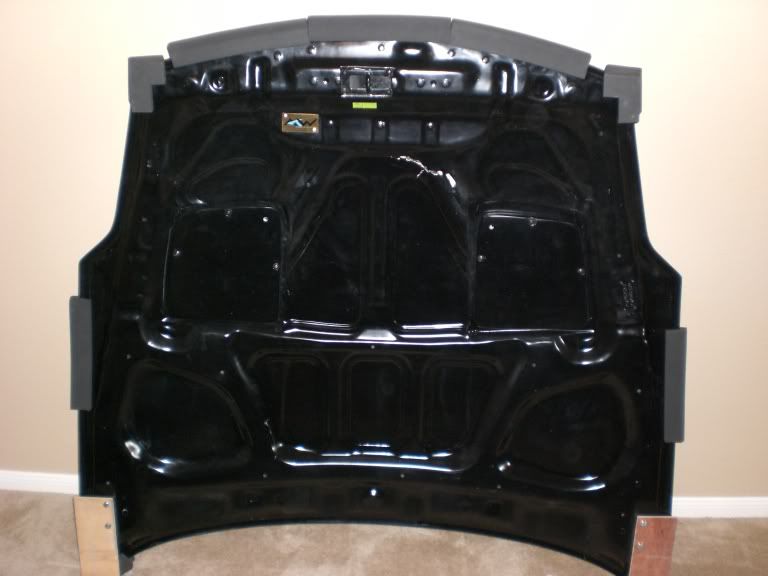
And yes i bought it with the small crack on the underside....
PICS:
And yes i bought it with the small crack on the underside....
Last edited by bwoodballa; 08-28-2007 at 12:33 AM.
08-28-2007, 04:00 AM
#13
Do you have a cooling plate on your 350Z? Aluminum or CF, it doesn't matter:

If you do, the area around the latch could be preventing you from being able to close your hood all the way down. Remove it and try closing the hood again. Seibon for some reason has this bulge around that area.
If you do, the area around the latch could be preventing you from being able to close your hood all the way down. Remove it and try closing the hood again. Seibon for some reason has this bulge around that area.
Originally Posted by bwoodballa
i had a clearance problem with the ts-II version i have.......by the way did you all have to use washers on the hinges to allow it to latch....i got it to latch the first click but not the second.....though it was the stock strut bar or battery covers, but removed them and it still didnt work... i will post pics so you can see what im workin with..... I appreciate any help in advance....more than likely will take to a body shop to fix minor shipping crack and install....
08-28-2007, 04:35 AM
#14
Originally Posted by bwoodballa
i had a clearance problem with the ts-II version i have.......by the way did you all have to use washers on the hinges to allow it to latch....i got it to latch the first click but not the second.....though it was the stock strut bar or battery covers, but removed them and it still didnt work... i will post pics so you can see what im workin with..... I appreciate any help in advance....more than likely will take to a body shop to fix minor shipping crack and install....
PICS:
And yes i bought it with the small crack on the underside....
PICS:
And yes i bought it with the small crack on the underside....
Thats not a seibon ts2
 08-29-2007, 08:07 PM
#20
New Member
iTrader: (46)
Join Date: Jun 2002
Location: Amherst NY
Posts: 1,068
Likes: 0
Received 0 Likes
on
0 Posts
I got the Seibon TS hood and it rubs against the Crawford plenum. Also have the CF cooling panel and the hood close fine. The only problem is the latch came with the hood hit the opening of the cooling panel when close it down.