
Carbon Fiber Vinyl Pattern Wrap Thread


Registered User
Joined: Mar 2007
Posts: 44
Likes: 0
From: New Zealand
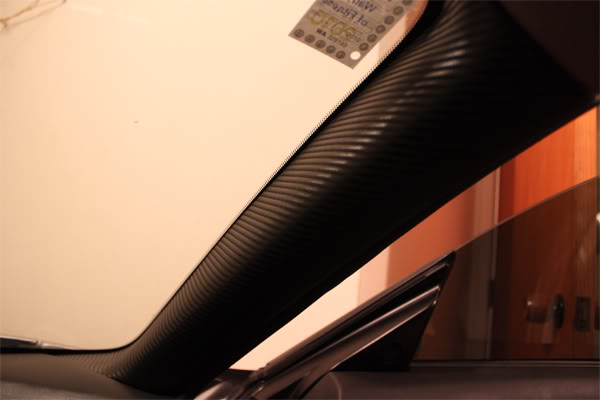
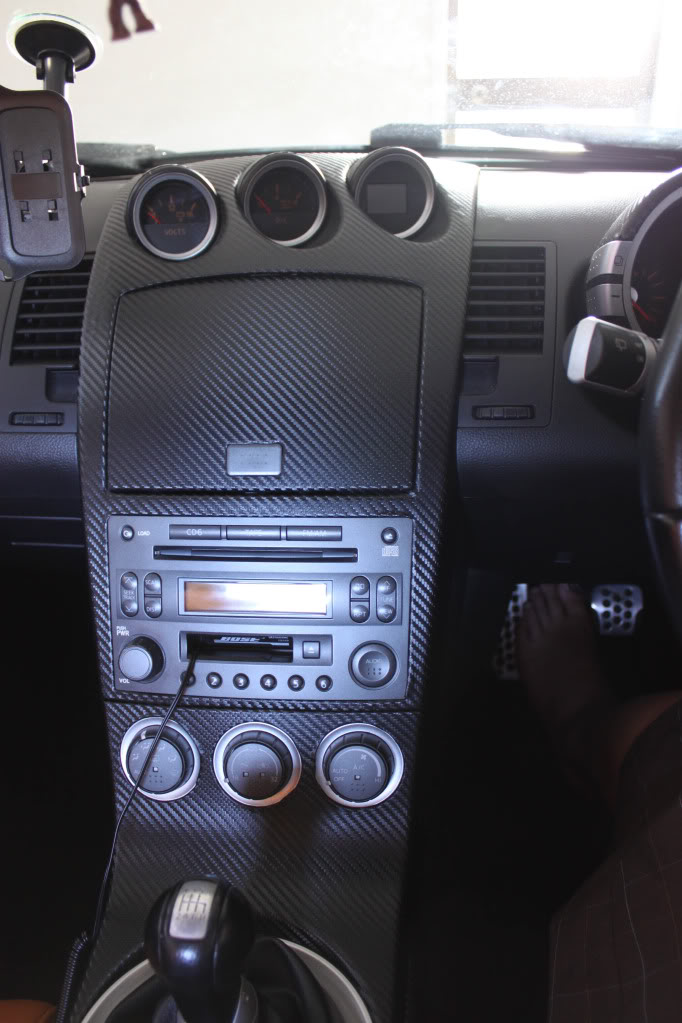
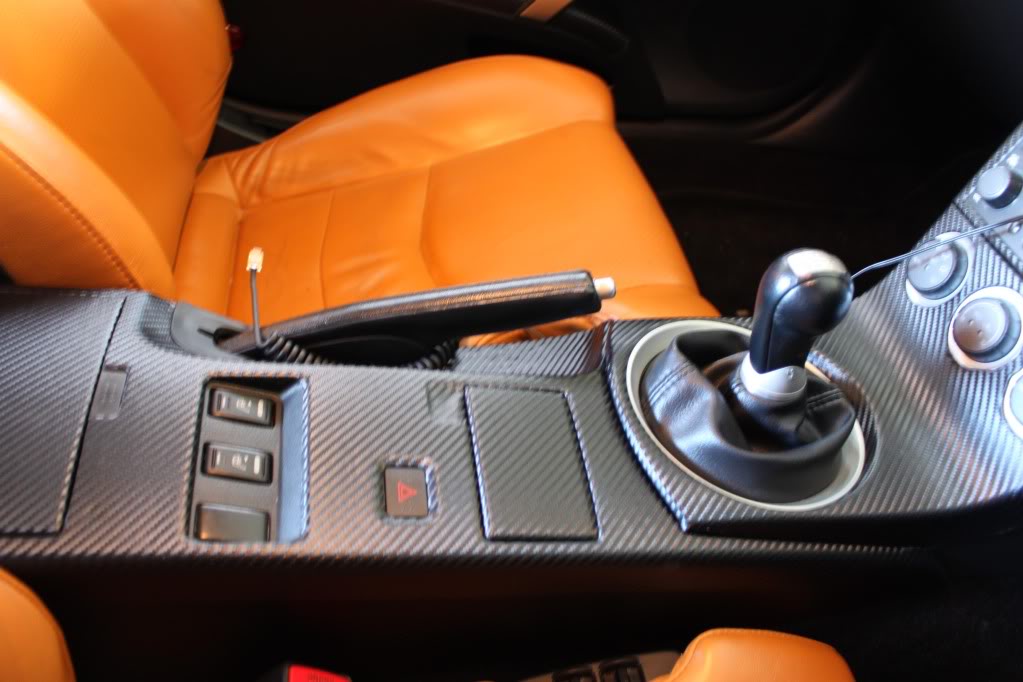
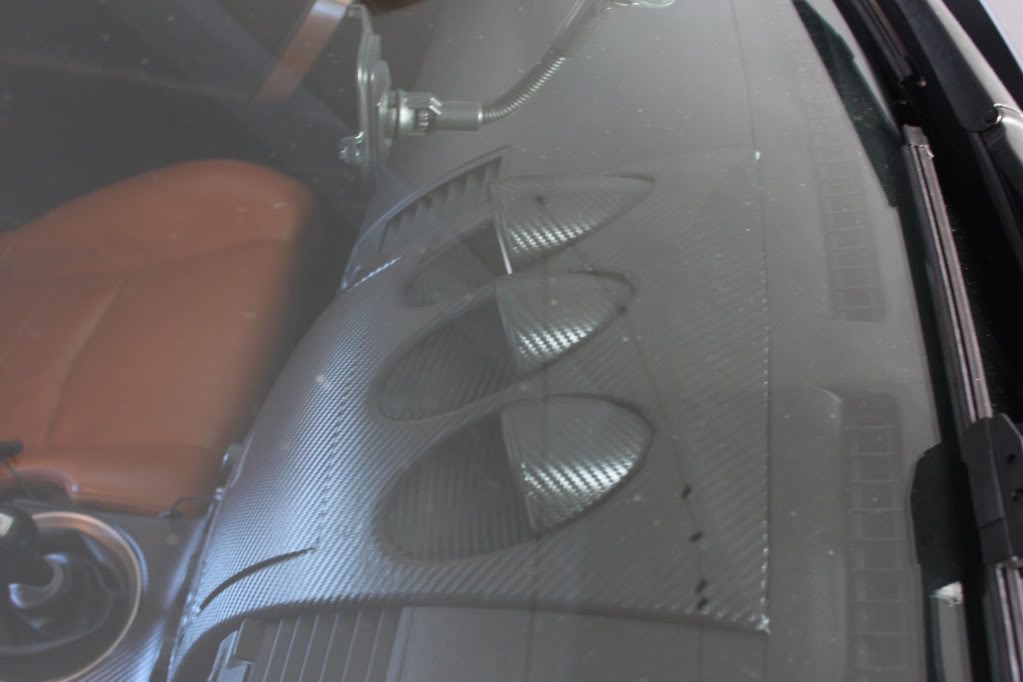
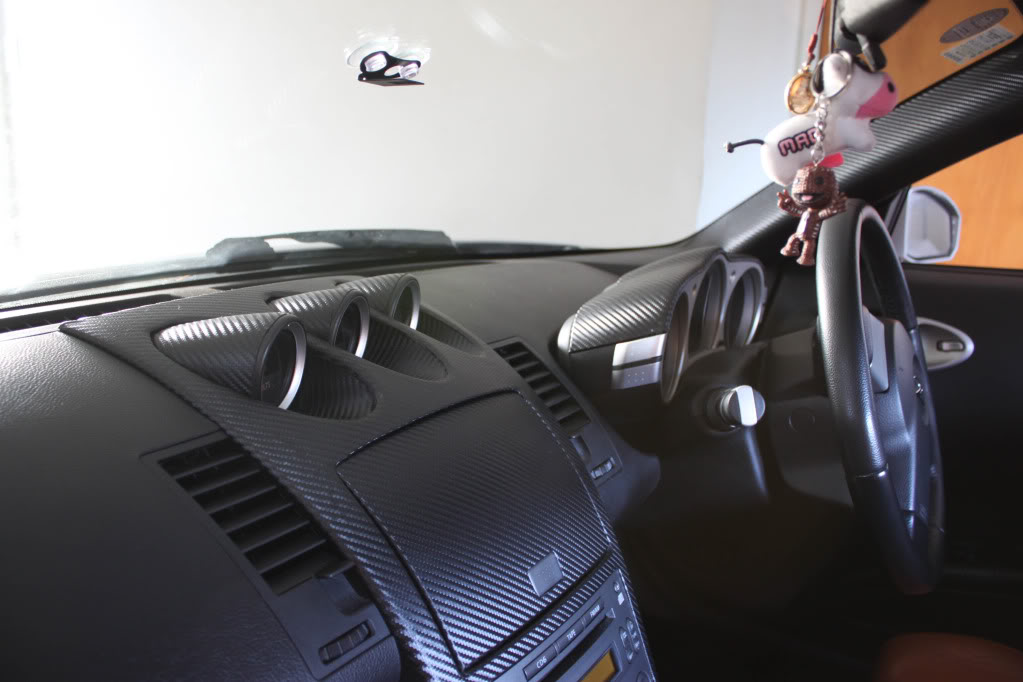
Picked up 5 yards from somebody, he was good enough to send it all the way to New Zealand. I've just finished my A-pillar, side stepping bits, rear strut, speedo top, door button switch plate, center console.... more pics to come. I'm having trouble removing the gearknob! spent more than an hour on it and it still wont budge! anyone got some tips? I"ve got an 03 model.
The fabric quality is amazing! really durable against scratch etc, seems really good. Hardest part would be the driver side door button switch plate where the screw is located.
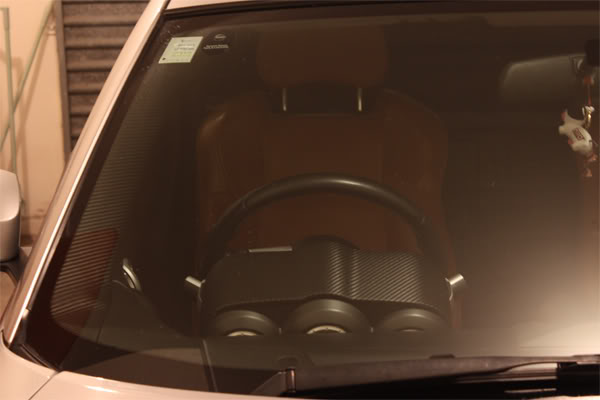

centre console and side door trims to come.
The fabric quality is amazing! really durable against scratch etc, seems really good. Hardest part would be the driver side door button switch plate where the screw is located.
centre console and side door trims to come.
Last edited by RICHIZ; Jan 20, 2010 at 05:53 PM.

Picked up 5 yards from somebody, he was good enough to send it all the way to New Zealand. I've just finished my A-pillar, side stepping bits, rear strut, speedo top, door button switch plate, center console.... more pics to come. I'm having trouble removing the gearknob! spent more than an hour on it and it still wont budge! anyone got some tips? I"ve got an 03 model.
The fabric quality is amazing! really durable against scratch etc, seems really good. Hardest part would be the driver side door button switch plate where the screw is located.
centre console and side door trims to come.
The fabric quality is amazing! really durable against scratch etc, seems really good. Hardest part would be the driver side door button switch plate where the screw is located.
centre console and side door trims to come.
nice.
Need quick tips, how to snap off the plastic peices of the steering wheel? speedo top? rear strut bar silver plastic?
Regarding shiftknob heres alittle tutorial from 350ztech
1. Wrap the tip of your screwdriver in a small piece of electrical tape to prevent it from marring the interior trim piece.
2. Insert the screwdriver tip under the boot finisher at the rear and pry up the finisher. There are several clips holding this piece on that will take a fair amount of force to pop loose.
3. Once the finisher is free of the retaining clips, disconnect the white ribbon cable for the climate control *****. Pull on the connector, not the cable.
4. The finisher will still be attached to the shifter-shaft by the shift boot at this point. It's helpful to have a second person that can hold the finisher up while rotating the *****, but it's not necessary.
5. Cut the radiator tubing into two 3 inch lengths and slice each one lengthwise down one side.
6. Place one piece of radiator tubing around the metal shifter-shaft underneath the finisher. Be careful not to pinch the boot or tear the white filler-pad sitting on the top of the transmission.
7. Clamp the vice-grips onto the radiator tubing covering the shifter-shaft as tightly as you can. It is important that you get this tight enough so that you can use the vice-grips to provide counter torque when twisting the **** off and the shaft doesn't turn inside the rubber tubing.
8. Take the other piece of tubing and place it around the base of the stock shift ****.
9. Place the channel-locks on the radiator tubing covering the stock shift **** and turn the **** counter-clockwise while applying counter-torque to the vice-grips. The goal is to prevent the counter-clockwise torque from being transferred into the shifter assembly, as this can damage the transmission. If the vice grips slip on the shaft, set the grip tighter. You will not hurt the shifter-shaft by doing so. The boot and finisher will turn initially until the **** is backed off a turn or two. Ensure that the boot does not twist or tear away from the ring under the shift boot.
10. Once the shifter is loose enough to turn by hand, remove the **** and the brass-ring underneath it. This ring is not needed on the new shift-****, and if you are using a Nismo variant, the ring will actually rattle if you keep it in place because the new **** does not seat against the ring.
11. Once the stock **** is removed, clean up the threads of the shifter shaft and install the new **** onto the shaft. If the new **** came with a rubber finisher, this finisher goes above the boot to cover the metal ring that holds the boot leather in place. Most aftermarket shifters have a nylon insert that you will thread onto the shifter shaft. This might take some force the further you get it threaded onto the shaft.
12. Tighten the shift **** down so that it's tight against the boot ring (or rubber finisher, if equipped) while holding the vice-grips to prevent torque from being applied to the shifter assembly. If equipped with rubber finisher, do not tighten the **** to the point that it distorts the finishers shape. Hold the shift-boot ring in place while tightening. When complete, remove the vice-grips.
13. Re-attach the white ribbon cable for the climate controls.
14. Snap the shift-boot finisher in place.
http://www.XXXX-tech.com/w/images/4/42/Shiftboot014.jpg <-- Replace XXXX with 350z
PLease reply back with tips on removal of interior parts!
Last edited by Kiriller; Jan 20, 2010 at 07:11 PM.
Registered User
Joined: Mar 2007
Posts: 44
Likes: 0
From: New Zealand
To take off speedotop piece, use your hand to grip the top middle part above centre gauge, pull upwards and it will come off half to one inch, there are 4 small screws holding the plate down on 4 corners, use a small screwdriver to remove screws. becareful not too loose the screws, if you drop it, you'll need to take off the whole speedo to shake it out.
Rear strut brace top cover, just use a flat head screwdriver and pry the two side black pieces off, its just clipped on, and then the centre silver piece should just come out with a tug, you'll need to take off the Z badge to wrap the silver part as its plastic welded at the back.
Thanx for the gearknob removing tip, i've tried all that, but its still holding on tight. i prob just need an extra hand. haha.
All the above only took an afternoon to wrap after removing them, it is far easier compared to the centre console and door buttons.
Has anyone tried the plastic piece between the door opener and aircon vent? Does it really require taking the whole door panel apart?
Thanx again somebody for the awesome fabric.
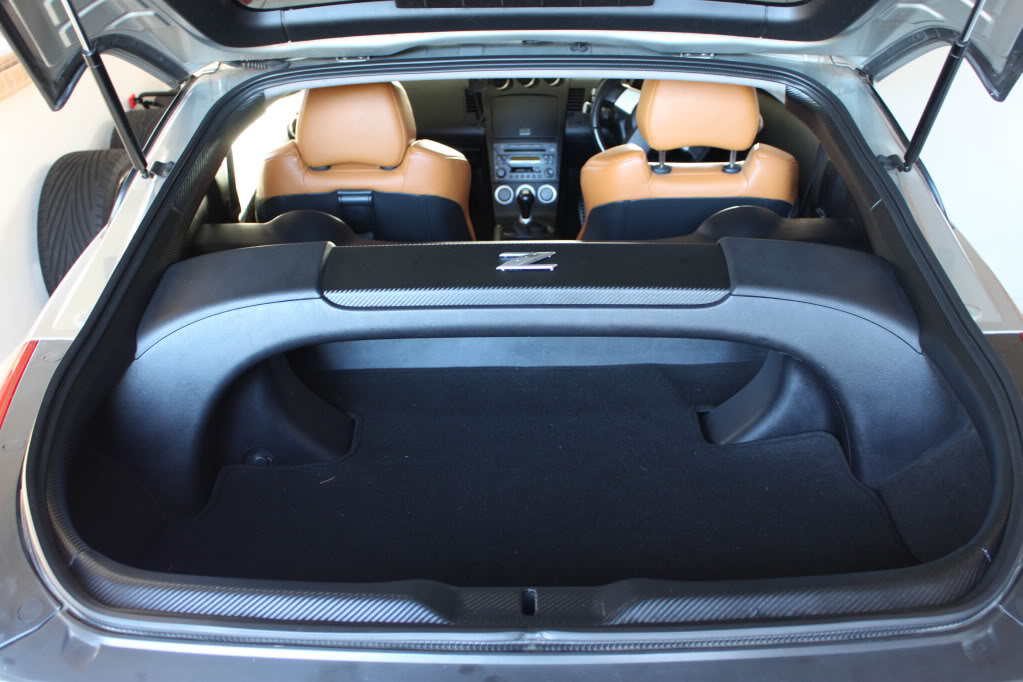
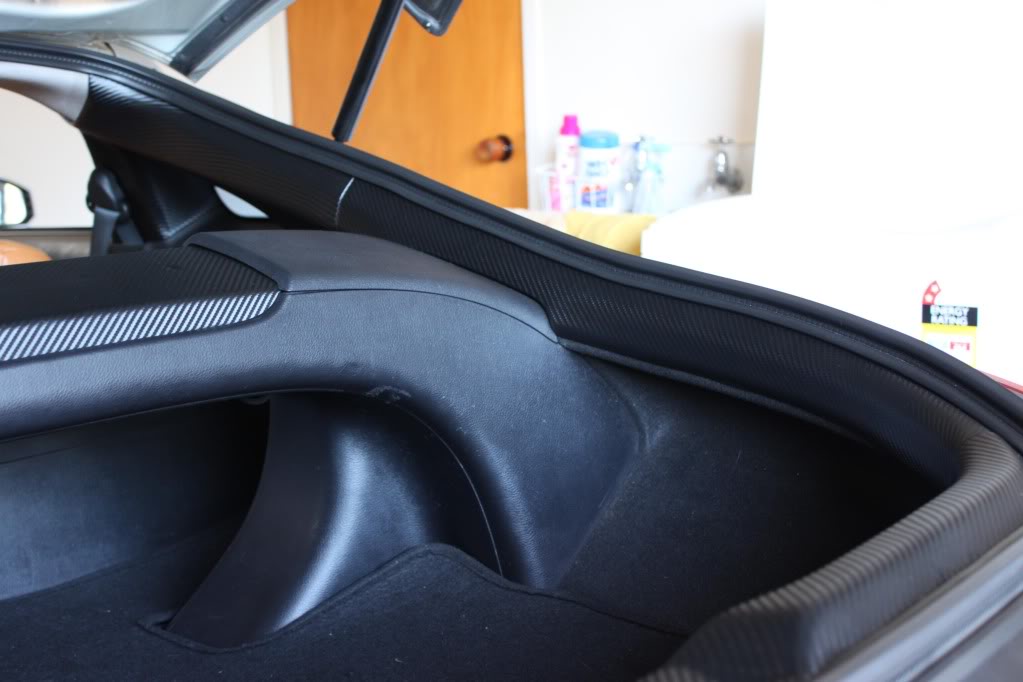
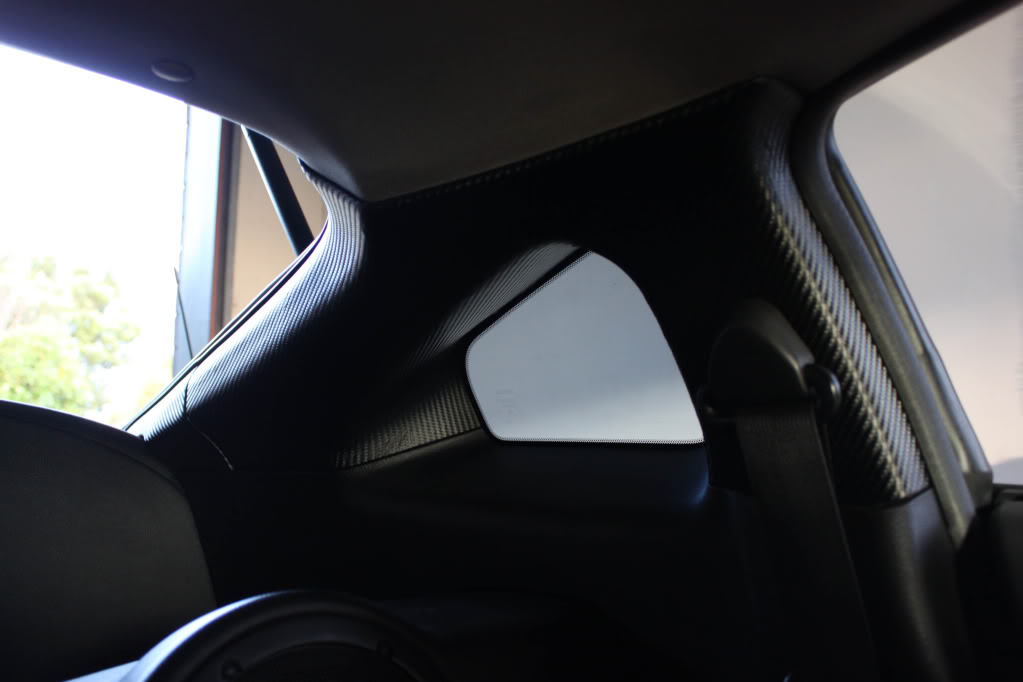


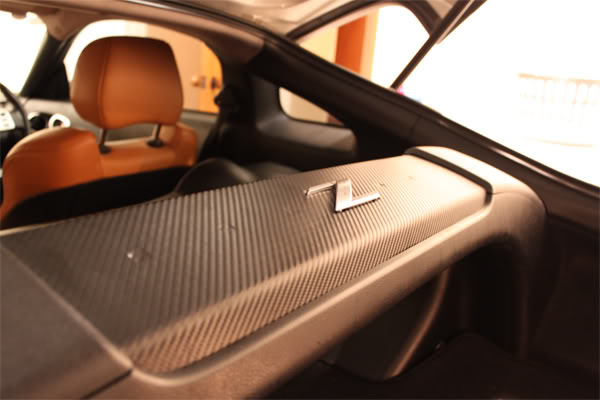
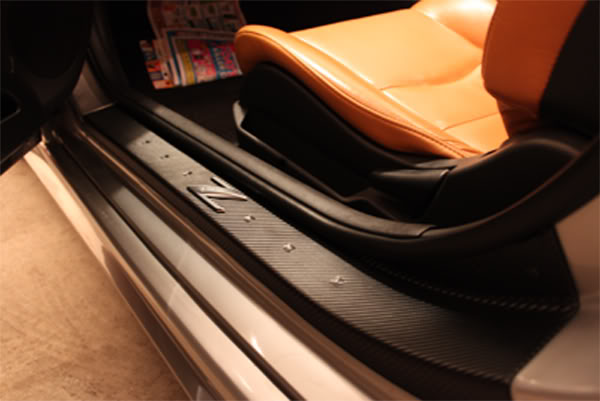
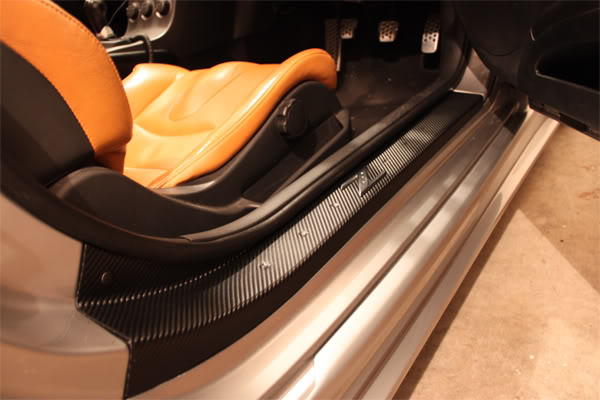
My masterpiece
more to come.PS just a FYI, learned this the hard way, before applying fabric on the driver side piece i have in the picture, remove the rubber coating (on 06+ only i believe) first because if you do not, it will bubble up and you will not be able to glue anything there, happend to me i was wondering if i was doing something wrong, turns out the rubber spray/compound that was applied simply started coming off.

Registered User
Joined: Aug 2009
Posts: 254
Likes: 0
From: Irvine, CA
My masterpiece
more to come.PS just a FYI, learned this the hard way, before applying fabric on the driver side piece i have in the picture, remove the rubber coating (on 06+ only i believe) first because if you do not, it will bubble up and you will not be able to glue anything there, happend to me i was wondering if i was doing something wrong, turns out the rubber spray/compound that was applied simply started coming off.
 Also, did you take the grayish primer off also?
Primer stayed, you can do it the way I did and with out knowing spray it down with the 3m 80 andputbthe cloth on it, move it around a bit, it will start to bubble up, then you simply scarch and pull it off, I believe acetone should work as well?

A little tip to people just starting this out-It's not hard to remove the shifter boot + 3 temp control ***** from the bottom half of the center console. After you remove the bottom half(somebody posted a link on how to do this around pages 3-8? of this thread) all you have to do is remove the 8 gold screws from the underside of the shift boot. The boot will slide right out+you just snap the silver ring out. As far as removing the 3 *****, there are 4 plastic tabs behind the *****(look like they will break) just be gentle, start with one of the tabs on the left or right, and push the ***** from the front. Once the first clip is cleared, the rest are cake. Now you don't have to mask anything on the bottom piece.
My advice....don't try this unless you want a big headache! I tried starting from the bottom, then the top, tried 2x times-each time I thought that I had it the other side was bunched up-I don't know how somebody did his with the gauges in-now I got a piece of my car covered in glue! Open to any advice-

Is anybody doing this for a small fee lol? I need to do some of this on my a pillers, defrost ducts, and door handle window control covers.
What would you rate this of difficulty? I just dont wanna screw up a bunch and go through a ton of material.
What would you rate this of difficulty? I just dont wanna screw up a bunch and go through a ton of material.
I'd rate it at a 10-I'm good with taking things apart+putting them back together-- detailing too-- but when it comes to working with fabric it's a whole new ball game- It started off really good, but there was always a section that was kinked or bunched up on one side of the console-when I would pull the kinked side strait, the good(perfect) side would pull+look just like the other side did. It wasn't fun-some things are best left to professionals-I'm going to talk to a shop that does a lot of fabric work-gonna see if I bring them the stripped pieces how much it would be to apply the fabric-hope I didn't waste too much on my attempts-
I'd rate it at a 10-I'm good with taking things apart+putting them back together-- detailing too-- but when it comes to working with fabric it's a whole new ball game- It started off really good, but there was always a section that was kinked or bunched up on one side of the console-when I would pull the kinked side strait, the good(perfect) side would pull+look just like the other side did. It wasn't fun-some things are best left to professionals-I'm going to talk to a shop that does a lot of fabric work-gonna see if I bring them the stripped pieces how much it would be to apply the fabric-hope I didn't waste too much on my attempts-