
"Paint" from the center unit chipping.. how to fix?


I was wondering how I could repaint or somehow cover up the white marks that appear since it seems that the old rubber/paint coat is kinda scratched off. I am talking about the center unit, the one with the 3 gauges at the top, that holds on the headunit and cubby in place. I will try to post a picture of these white marks by tomorrow so you guys can see what I'm talking about..
thanks
thanks

I have the same problem. Im just about to say *** it and get a c/f dash kit to replace the plastic peices. (not the lay-overs)
There has been many things discussed, from c/f "neffy-wrap" ( i think) layovers, to dash kits, to replacing with OEM peices, to touchup painting flat black.
There has been many things discussed, from c/f "neffy-wrap" ( i think) layovers, to dash kits, to replacing with OEM peices, to touchup painting flat black.


looks really good.. so you used something like this?
http://www.summitracing.com/parts/SHW-HVP106
and how many coats?
http://www.summitracing.com/parts/SHW-HVP106
and how many coats?
Boomfranco - yes, that's what I used. It has a little bit more sheen than stock but the match is real close. I pulled the center console all out, painted it outside the car and then used a soaking wet tshirt and some rubbing compound to clean it up. A soft bristle brush is good to have to make sure that none of the rubbing compound gets stuck in the texture. I also did the drivers side door handle where the window/lock controls are as that was all scratched to kingdom come. I picked up a can at the local Pep Boys.
GeauxLadyZ - I blacked out all the silver trim pieces, including the rings around the AC controls, on the interior with the exception of the door releases. I changed out the shift **** to the black Nismo one and really like the results, particularly the silver (now black) speedo face plate.
GeauxLadyZ - I blacked out all the silver trim pieces, including the rings around the AC controls, on the interior with the exception of the door releases. I changed out the shift **** to the black Nismo one and really like the results, particularly the silver (now black) speedo face plate.

Trending Topics
No sanding because the surface is textured. However I would recommend an adhesion promoter which is a clear spray that is supposed to help the paint stick.
I did wash it down with a very mild soap and water solution to make sure no dust, oil, etc was on there. Dried if off with a towel and let it sit for a bit to make sure it was really dry.
My understanding of the forumlation of that type of paint helps it stick to surfaces that one might not normally be inclined to sand.
I think I only used one coat. I didn't want to risk creating a run and when I saw the first coat looked pretty good, I stopped.
If I was going to do it again, I would pay more attention to the little depressions in front of the gauge faces, I don't think I covered those as evenly as I could have.
Last edited by lbz; Aug 13, 2009 at 06:10 PM.

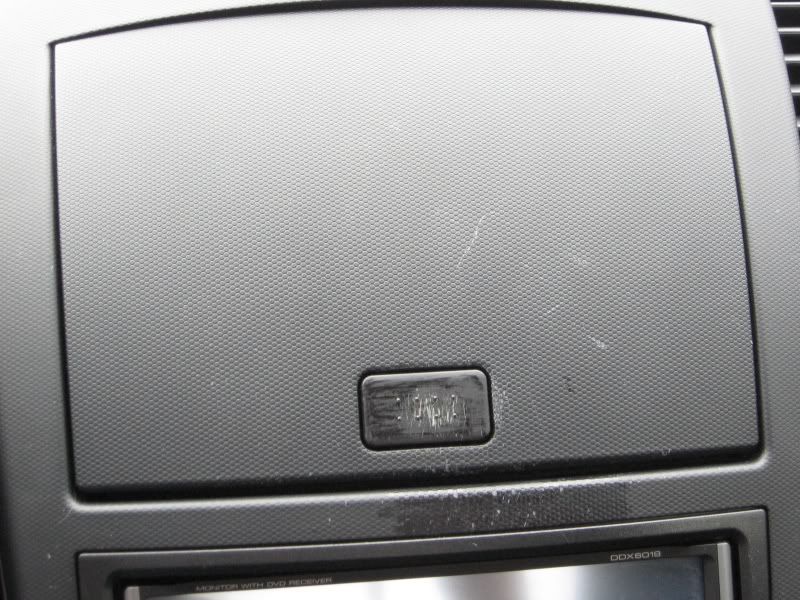
Thanks for this info lbz. My console is mega-scratched and this info helps me out greatly. Check out my pic and you'll see why. Scratched the poo out of it putting in my HU (as well as the HU  ).
).

).
Yep. You might consider including your HU dash kit, that will even out the appearance a bit. Remove it when you take your HU out and shoot it separately.
Forgot to mention, I took the cubby door release button out, sanded it smooth, put it back in before painting the whole console with the door still attached but closed.
I think its different for 06 and above but for my 05, I just got under the edge of the button with a small flat blade wrapped in electrical tape and popped it out. There is a spring behind the button so be sure you are in an area where you can find the spring easy if it pops out very far.

it looks so clean that its really tempting, but putting in the center unit after my hu installation and doing the grounding was a pain in the ***, so I will wait a while before painting it

Registered User
Joined: Jul 2009
Posts: 5
Likes: 0
From: Little Rock AR
My 08 has the door switch panels scratched up and the dealer has agreed to replace them under warranty. They will not replace the scratched up button on the cubby door since someone tried to touch it up and did a poor job. A replacement door is $152 plus installation...too much.
Is it possible to remove the button without taking the entire console out?
Is it possible to remove the button without taking the entire console out?

Registered User
Joined: Jun 2009
Posts: 138
Likes: 0
From: North Jersey
OH MY LORD.. you didnt do all that installing ur HU did you? Im assuming it was pretty bad before the install...

Thread
Thread Starter
Forum
Replies
Last Post

