
3M ScotchPrint Black Carbon Fiber Vinyl on Interior!


Registered User
Joined: Nov 2006
Posts: 56
Likes: 0
From: la
You sure that is 60 by 60 sq ft and not 5 by 5 ft?
Also, what made you go with the Di Noc 3M Carbon Fiber material over the other materials? Seems the Di Noc is the priciest?
Thank you for the information and pictures. I am definitely doing this.
Also, what made you go with the Di Noc 3M Carbon Fiber material over the other materials? Seems the Di Noc is the priciest?
Thank you for the information and pictures. I am definitely doing this.
Last edited by knkw98; May 16, 2011 at 09:37 PM.


Question for you Diesel. On the switch plates, you seemed to get really far down into the recess under the window switches. Is that all one piece just stretched down in? I have seen others that weren't able to cover that much of the indent.
Oh, and one more thing... Did you remove the black coating? I have also read somewhere that it tends to lift. But I may be wrong since I believe that was talking about using the spray adhesive for fabric wrapping.
Oh, and one more thing... Did you remove the black coating? I have also read somewhere that it tends to lift. But I may be wrong since I believe that was talking about using the spray adhesive for fabric wrapping.
Last edited by TPete19; May 17, 2011 at 03:06 PM.
Question for you Diesel. On the switch plates, you seemed to get really far down into the recess under the window switches. Is that all one piece just stretched down in? I have seen others that weren't able to cover that much of the indent.
Oh, and one more thing... Did you remove the black coating? I have also read somewhere that it tends to lift. But I may be wrong since I believe that was talking about using the spray adhesive for fabric wrapping.
Oh, and one more thing... Did you remove the black coating? I have also read somewhere that it tends to lift. But I may be wrong since I believe that was talking about using the spray adhesive for fabric wrapping.

Wow. I am really impressed with how good this looks. The interior on my 2003 is starting to look its age (although not nearly as scratched up as yours), and I think this looks way better than the stock black plastic. Honestly, it looks better than most of the real carbon overlays people have installed. Thanks for the pics and info, I'll have to look into this some more.
Will
Will

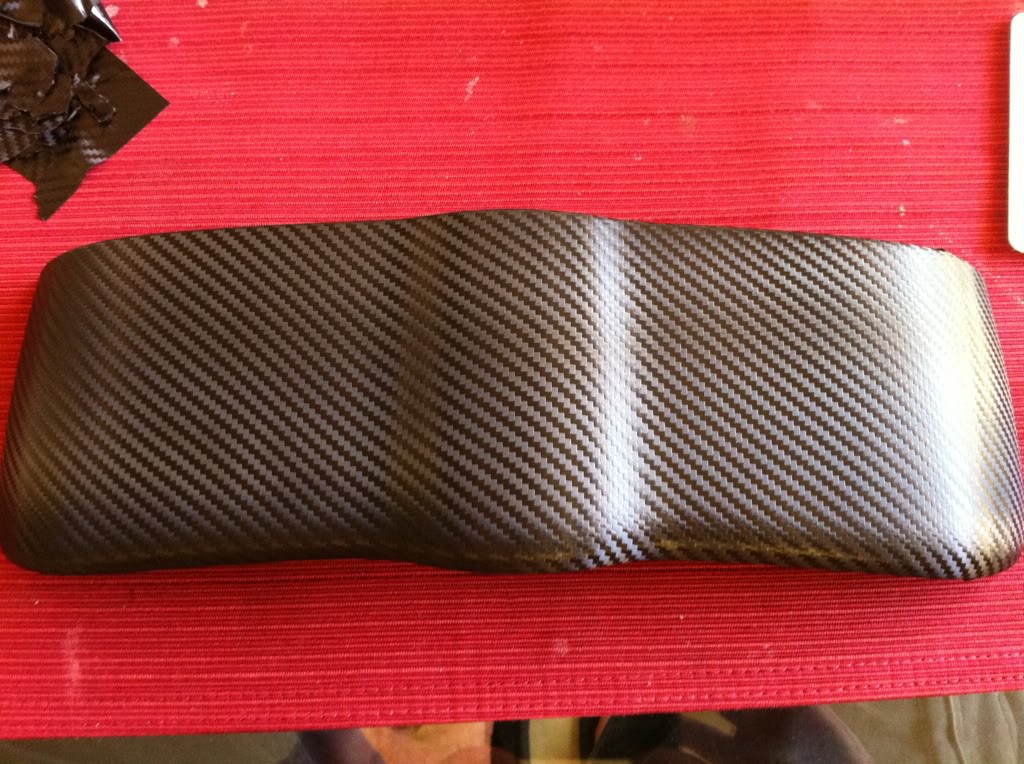
Decided to do another piece on my car. This piece was EXTREMELY difficult due to the curves on this trim piece. Unfortunately it did not come out as perfect as I would have like to.

Joined: Aug 2004
Posts: 28,899
Likes: 1,906
From: Twin Cities, MN
Still looks great. Thanks to you, I'm seriously considering doing this to parts of the interior that are plain plastic such as the door sill parts. How hard were those parts? I have no problem taking the door panel apart and what not.
The door consoles and what not were not that hard. I've learned today that putting constant heat from your blow dryer while applying the vinyl to the corners is much easier than putting heat for a few seconds. I think that is key when getting the corners and curves to come out looking good. I did the piece above twice since the first time I failed miserably on the corners by not applying enough heat to stretch the material on the curves and corners.
Joined: Aug 2004
Posts: 28,899
Likes: 1,906
From: Twin Cities, MN
I don't know if I'd want to do the gauge cluster cover, but I definitely want to do the doors. Did I miss the link of your source for the material, or is it pretty easy to find? I could use google. 
It's funny, but this morning I just mentioned doing this with a friend of mine.
It's funny, but this morning I just mentioned doing this with a friend of mine.
I don't know if I'd want to do the gauge cluster cover, but I definitely want to do the doors. Did I miss the link of your source for the material, or is it pretty easy to find? I could use google.
It's funny, but this morning I just mentioned doing this with a friend of mine.
It's funny, but this morning I just mentioned doing this with a friend of mine.
http://www.metrorestyling.com/?Click=2881
I tried the door switch panel yesterday with a blow dryer. it started out easy enough, but when I got to the switch holes, I had touched the adhesive side so much trying to stretch it that ther was none left. This is HARD to do and I was using a decent blowdryer. I gave up and tore it off. 