When you click on links to various merchants on this site and make a purchase, this can result in this site earning a commission. Affiliate programs and affiliations include, but are not limited to, the eBay Partner Network.
Well another great start to the new year ........ more F^$%kin Covid and to top that off a @*!# load of heavy snow !!!!
Which for me means shoveling and little or no access to the Falcata shop in the Forest , I have been trying to make the best of it with working on drawings for the small parts to 3D print .
So here is what I do have to update , on the rear bumper . This is how much snow we got , three times , the world is changing we never used to get snow like this in Victoria .
Sorry back to the beast
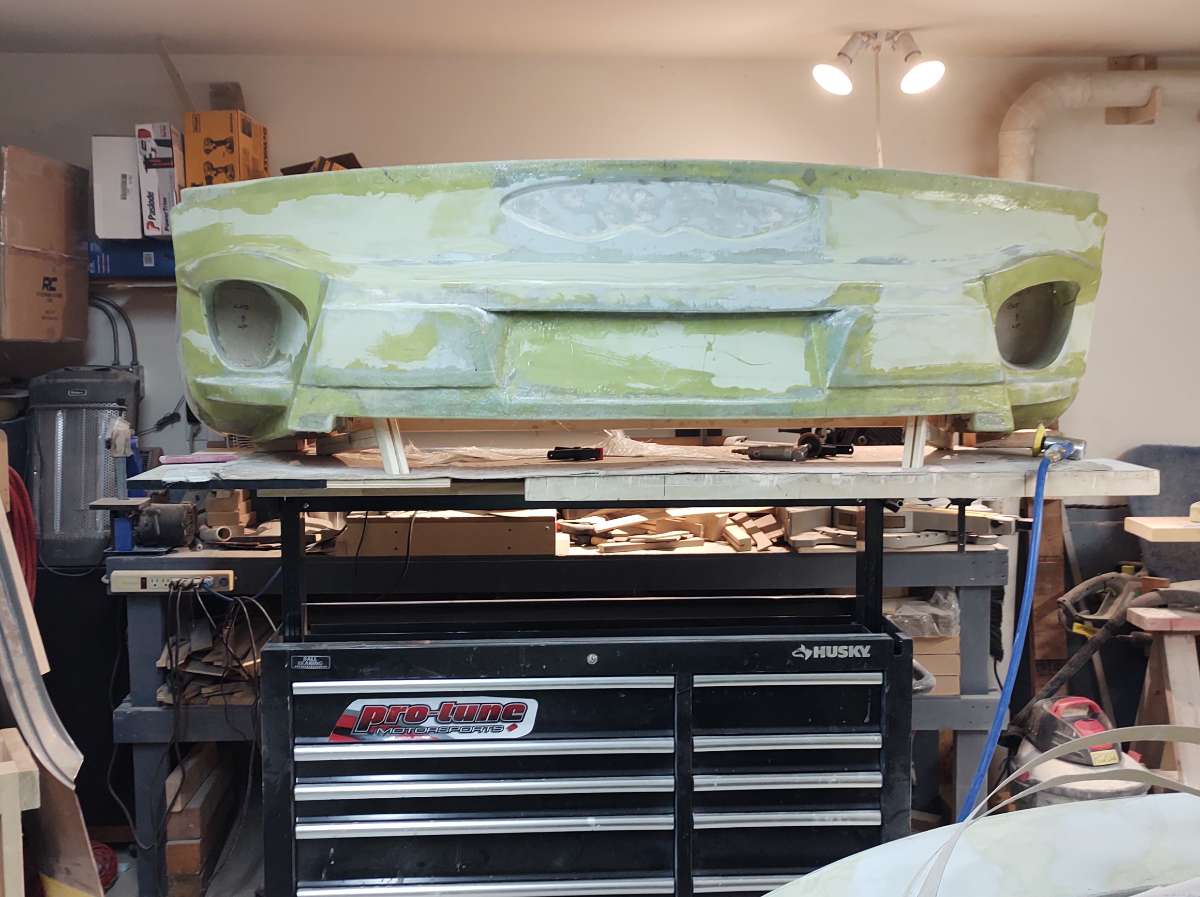
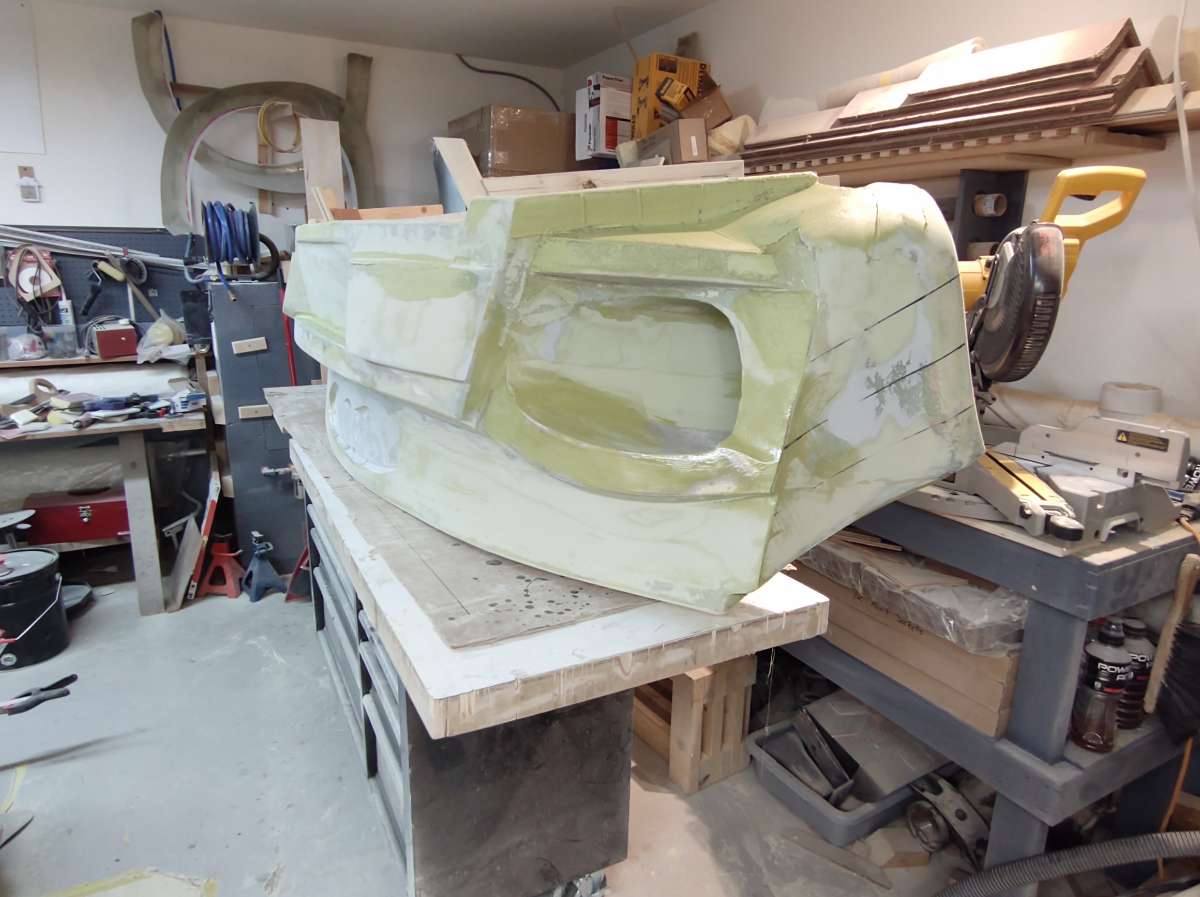
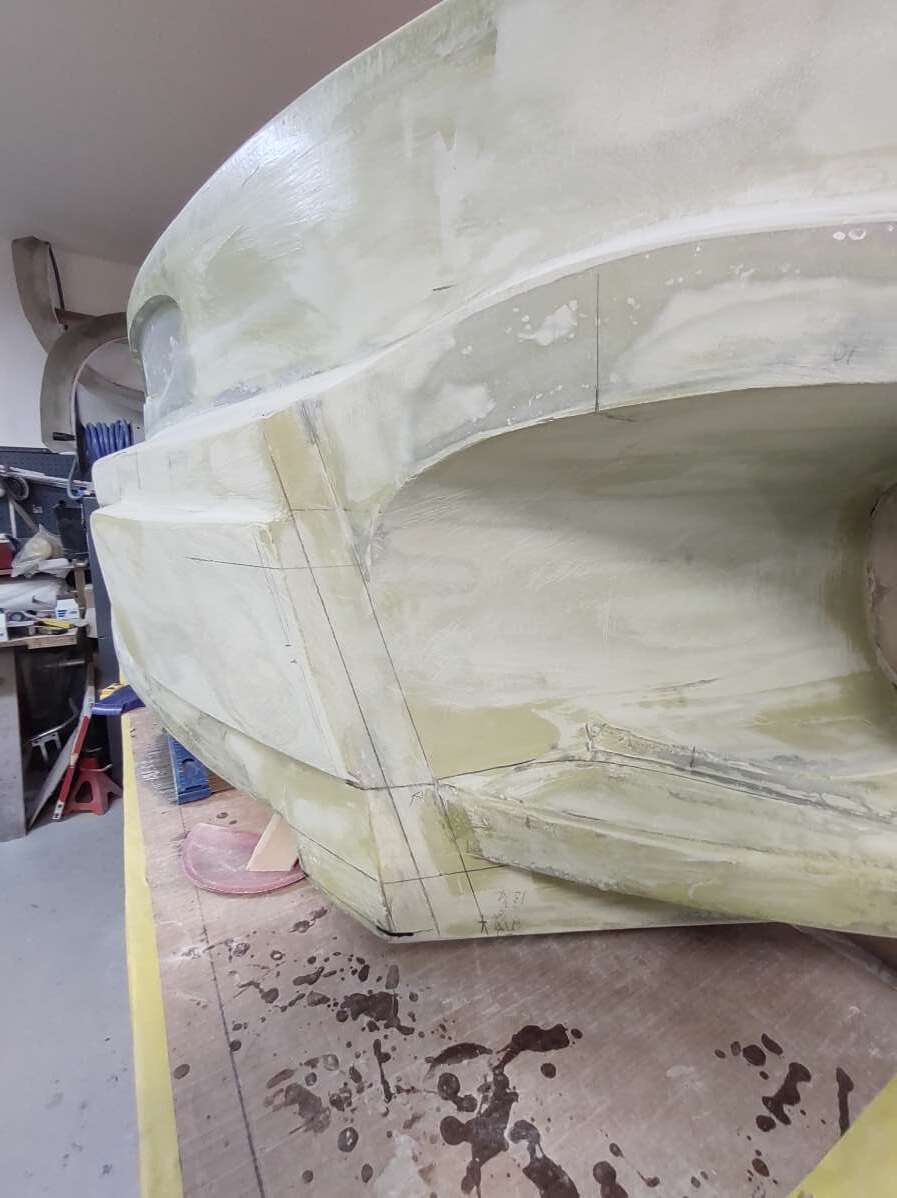
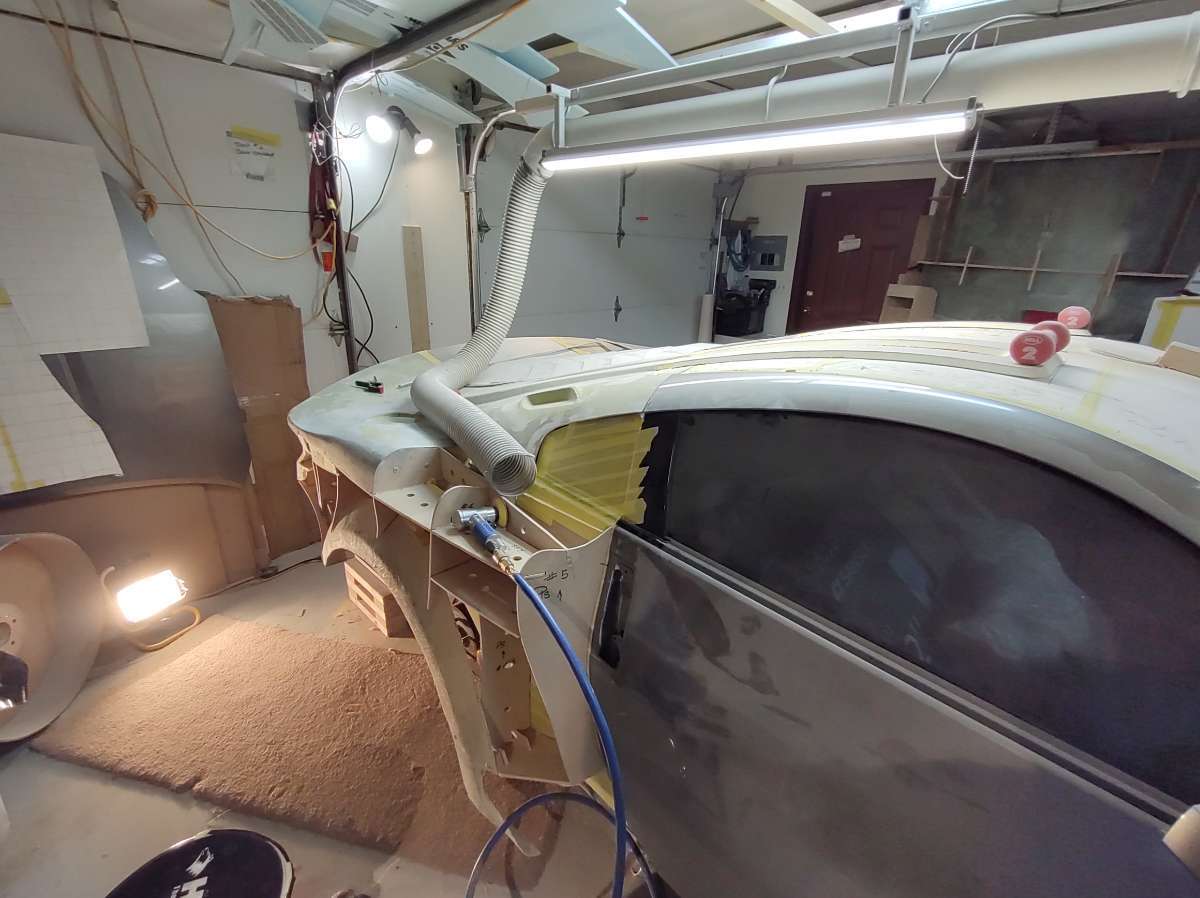
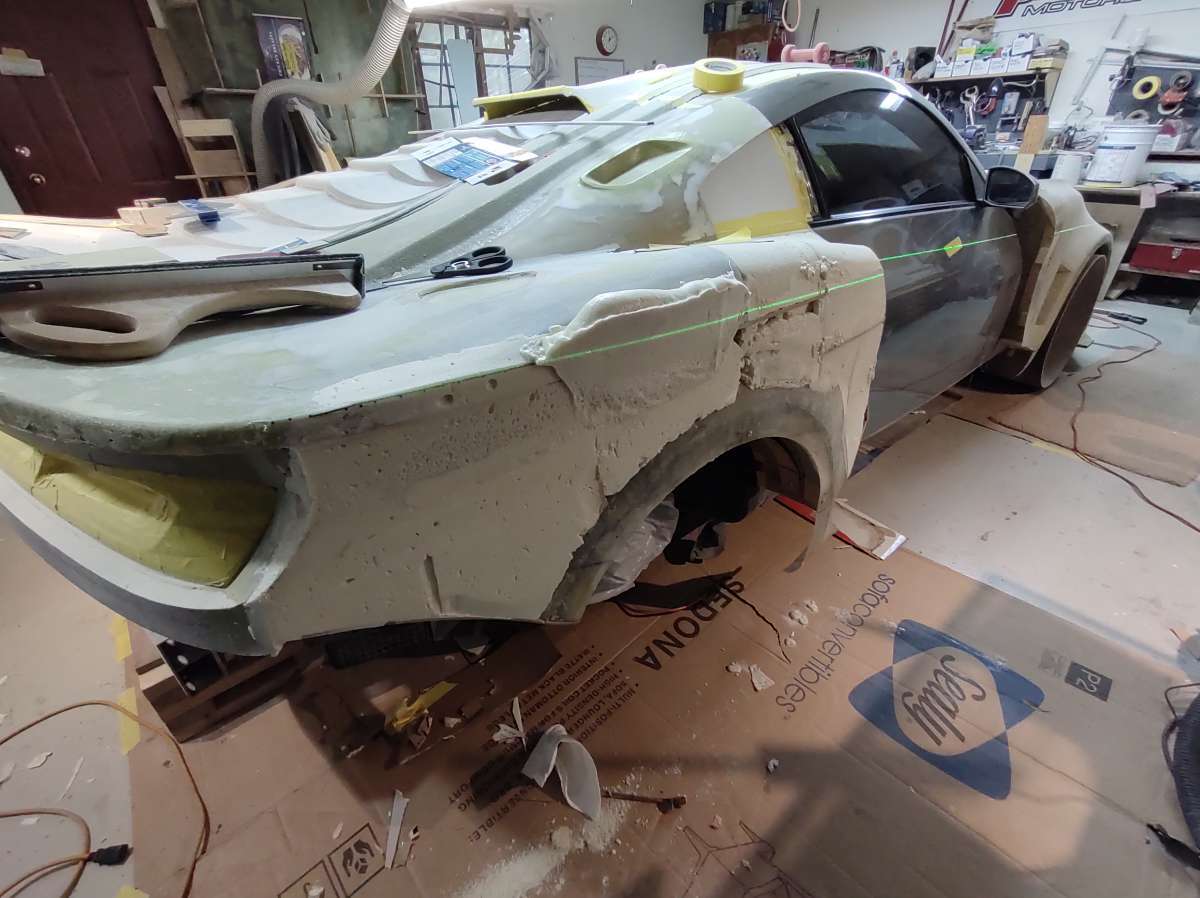
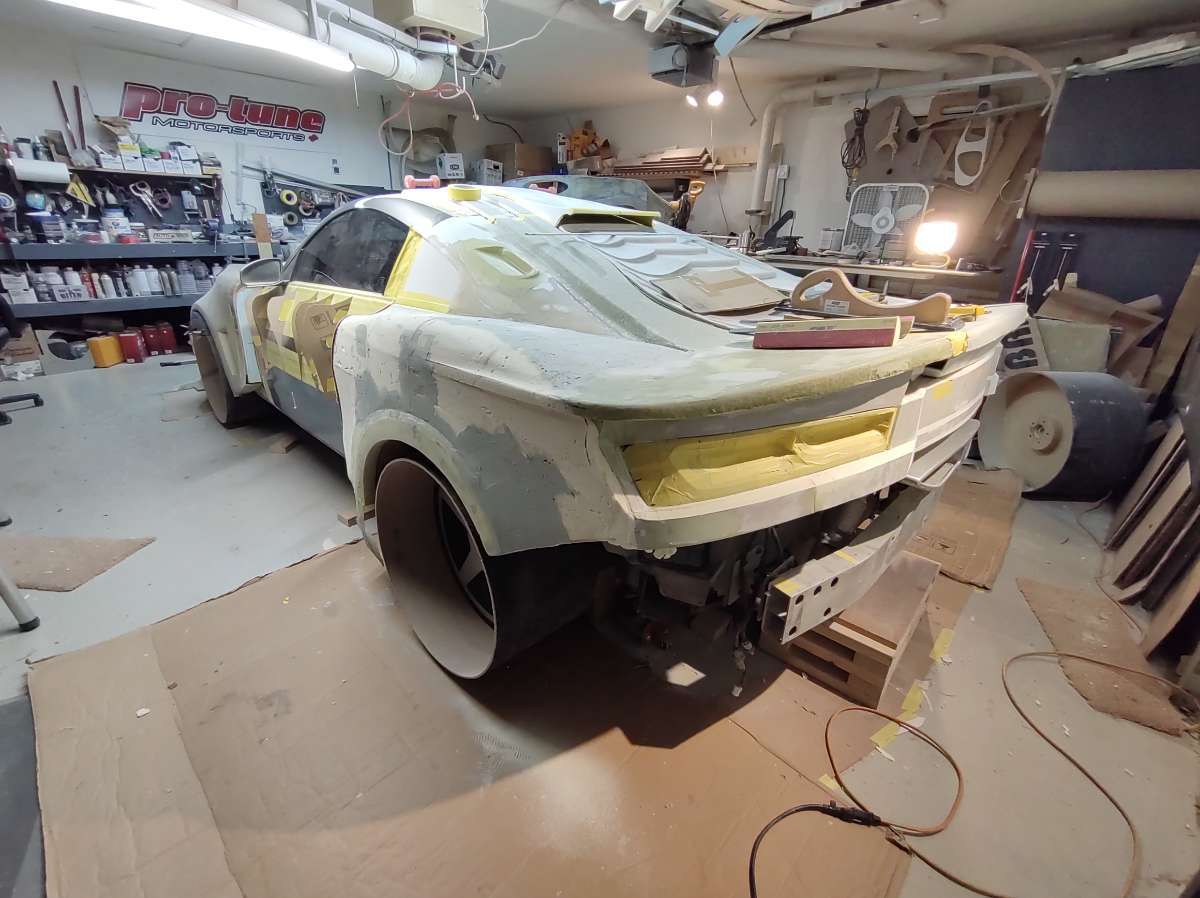
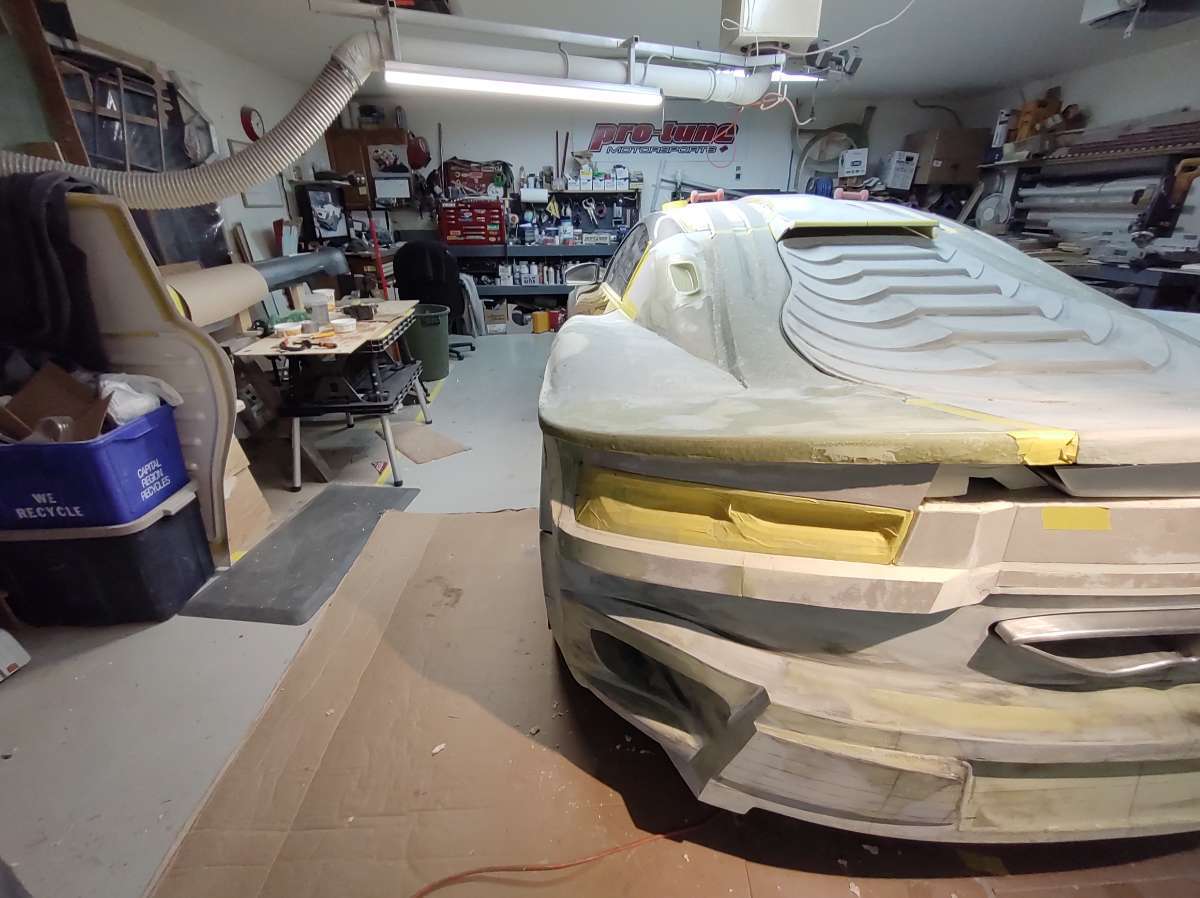
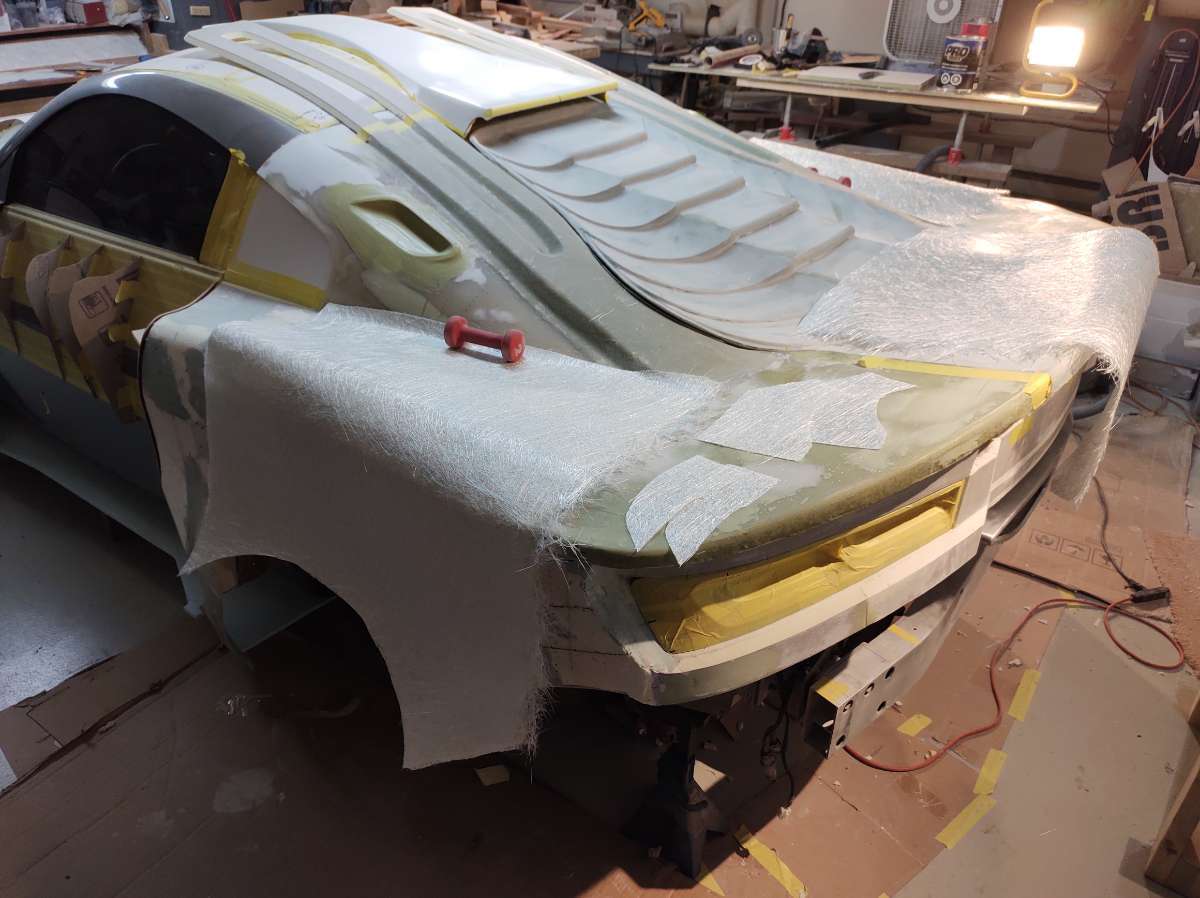
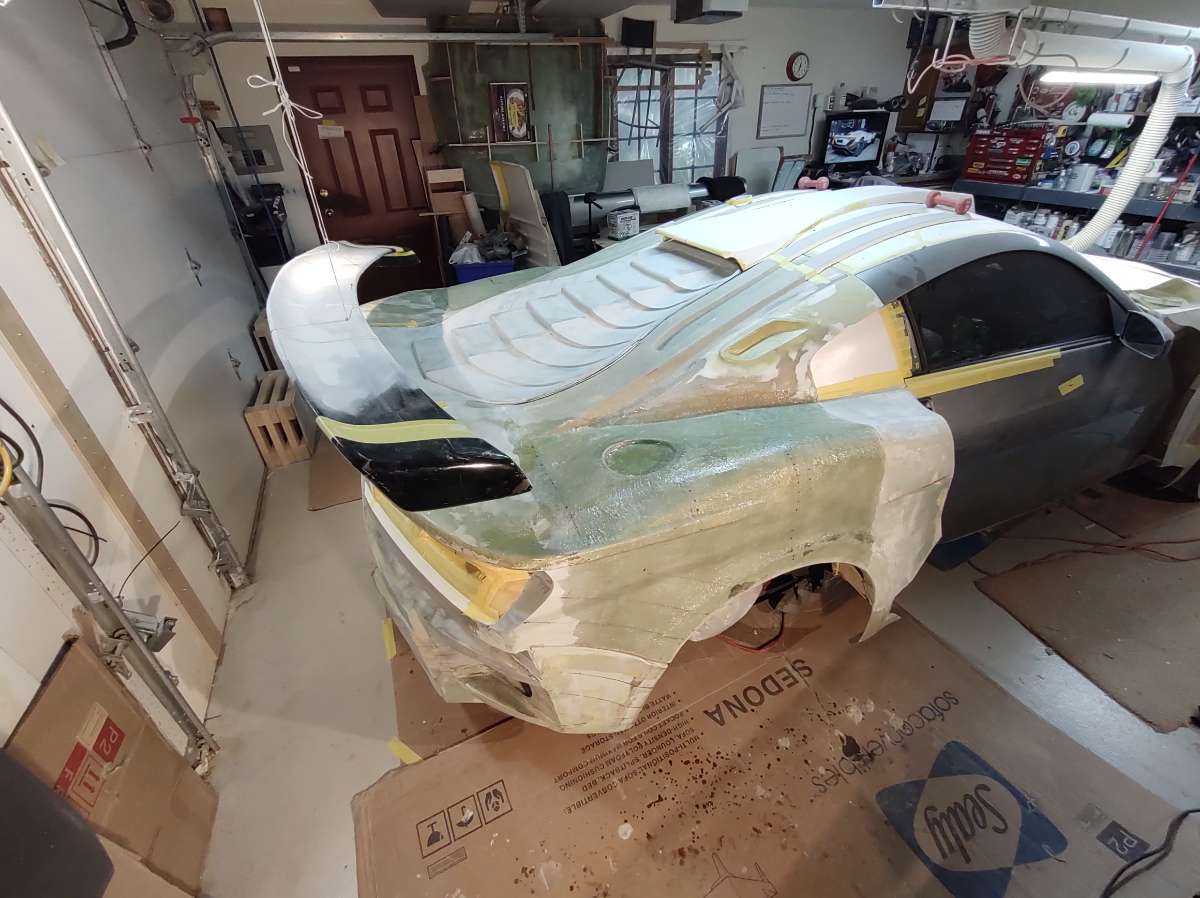
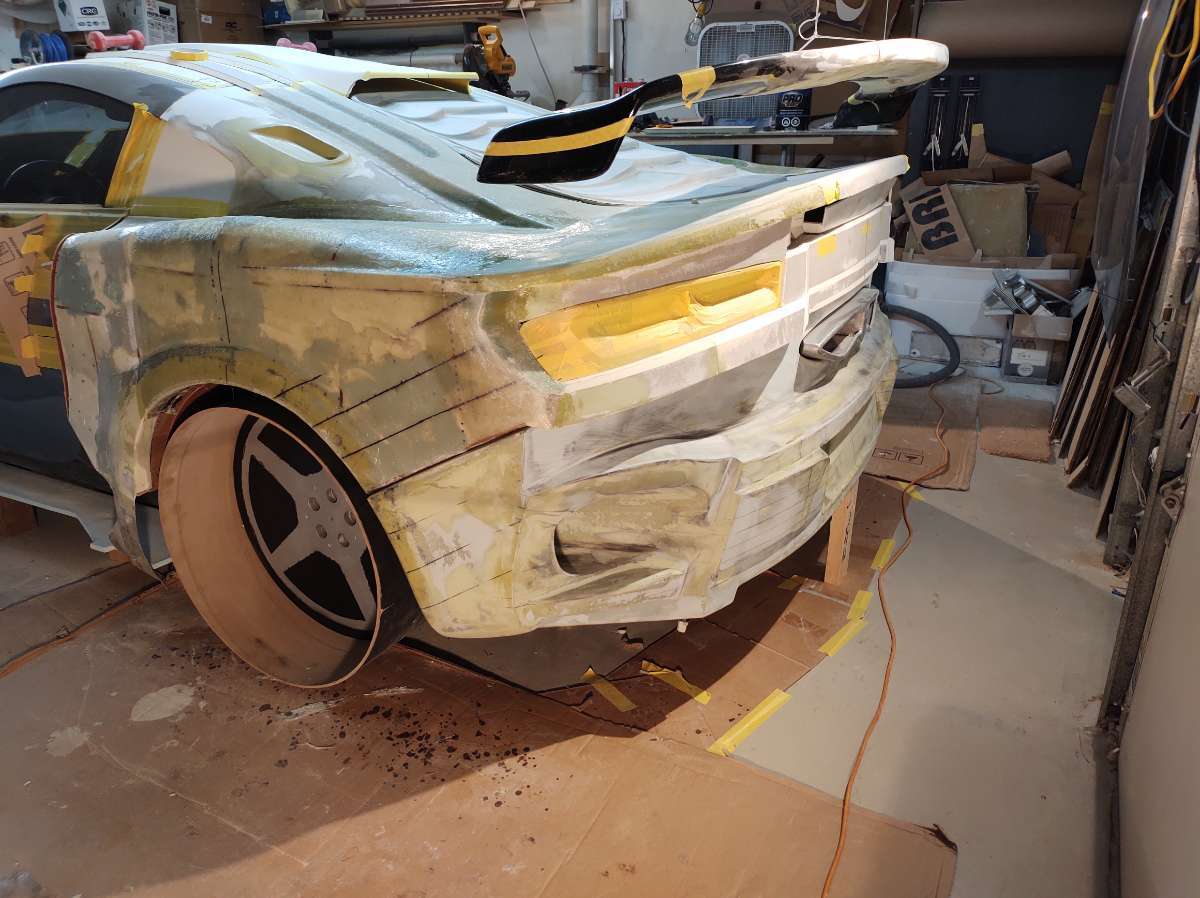
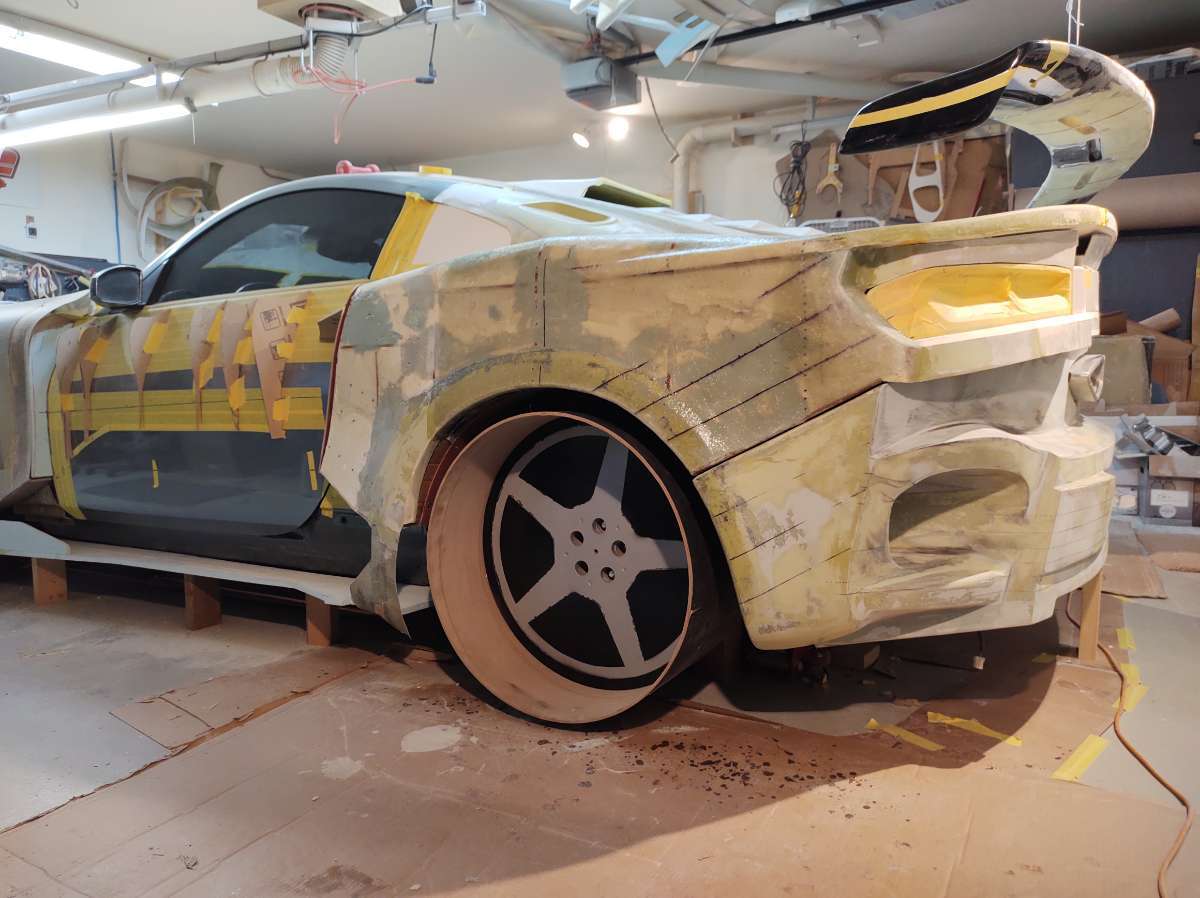
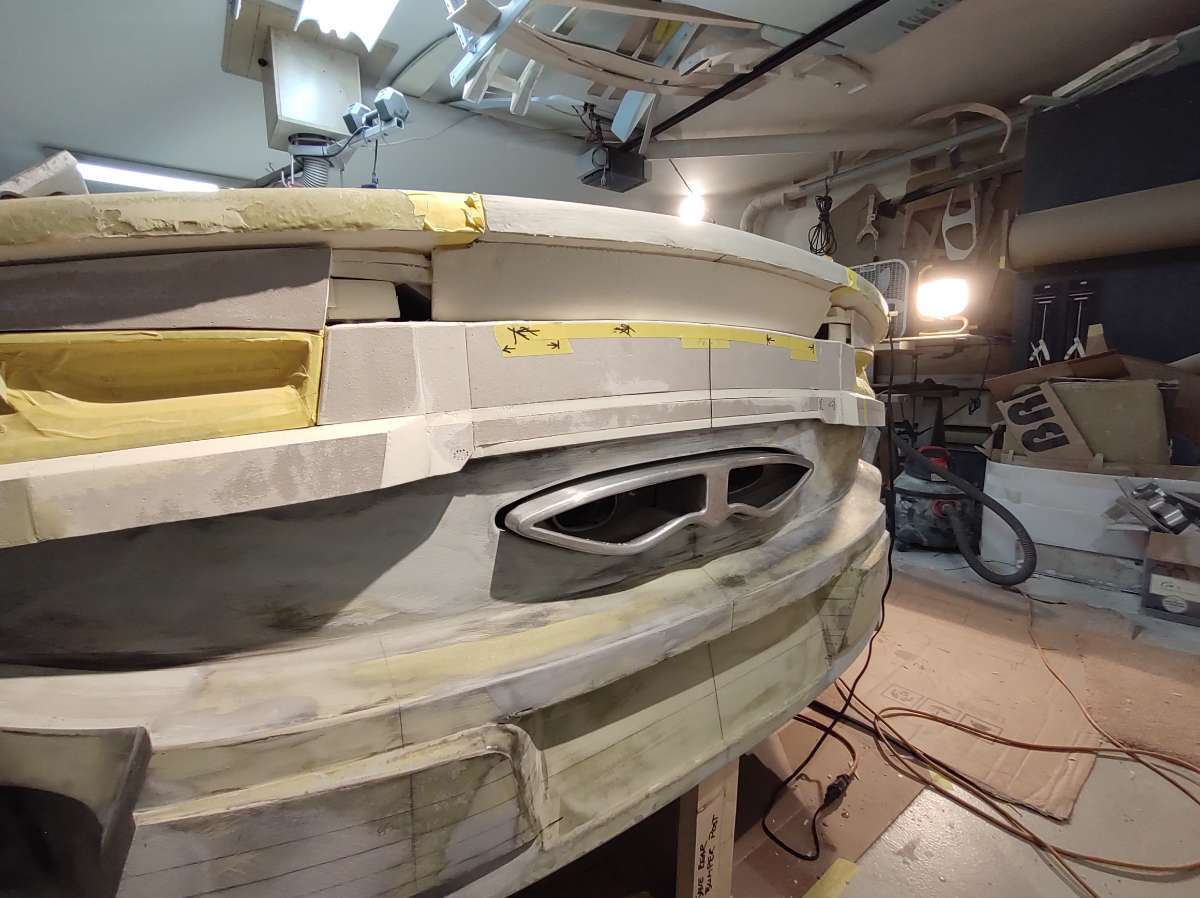
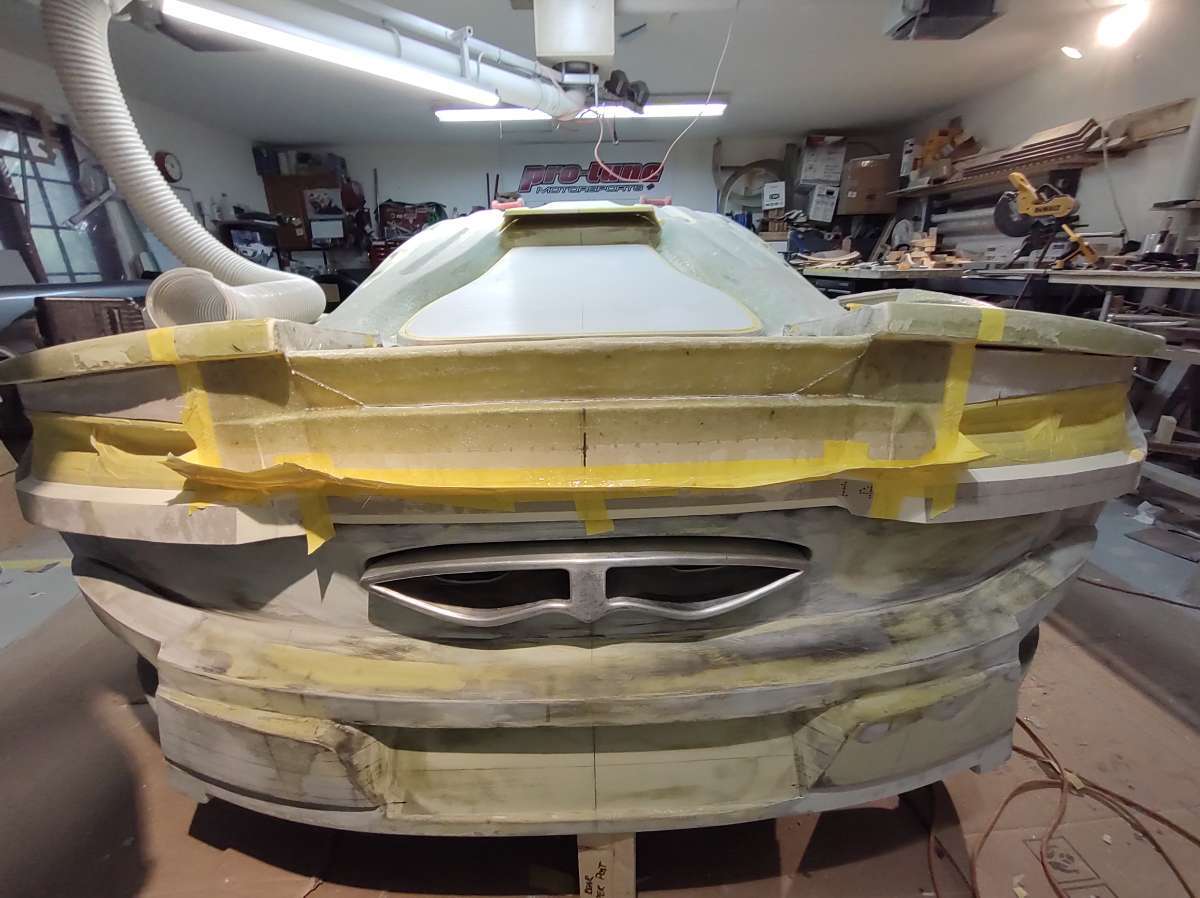
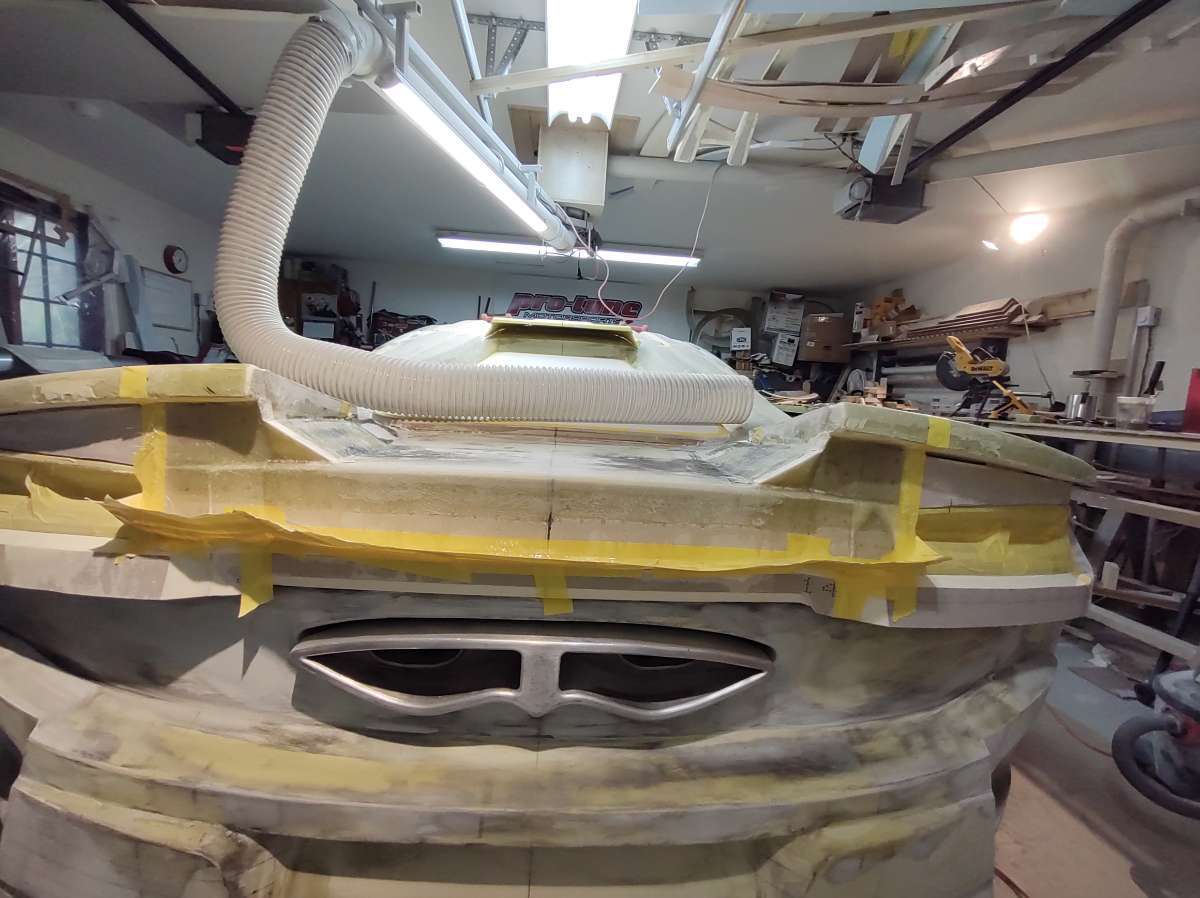
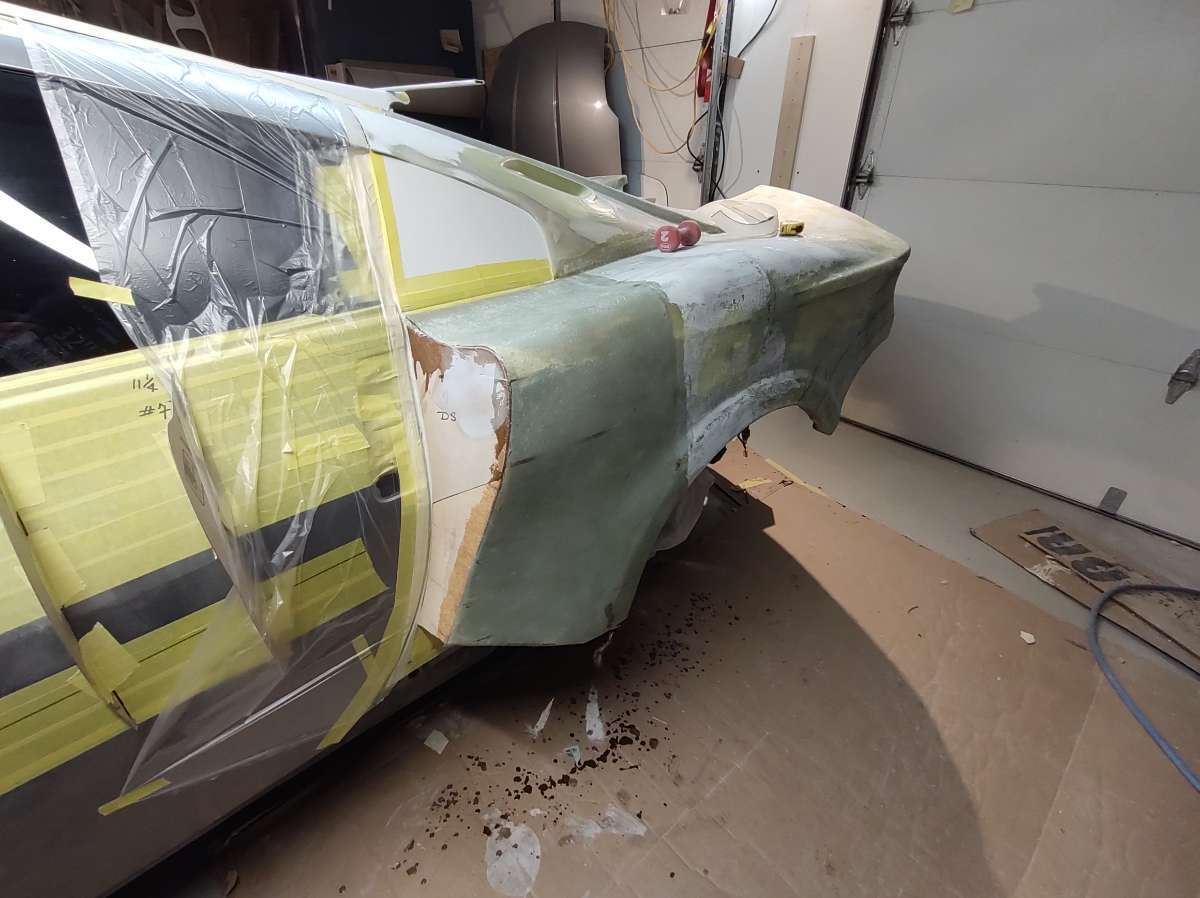
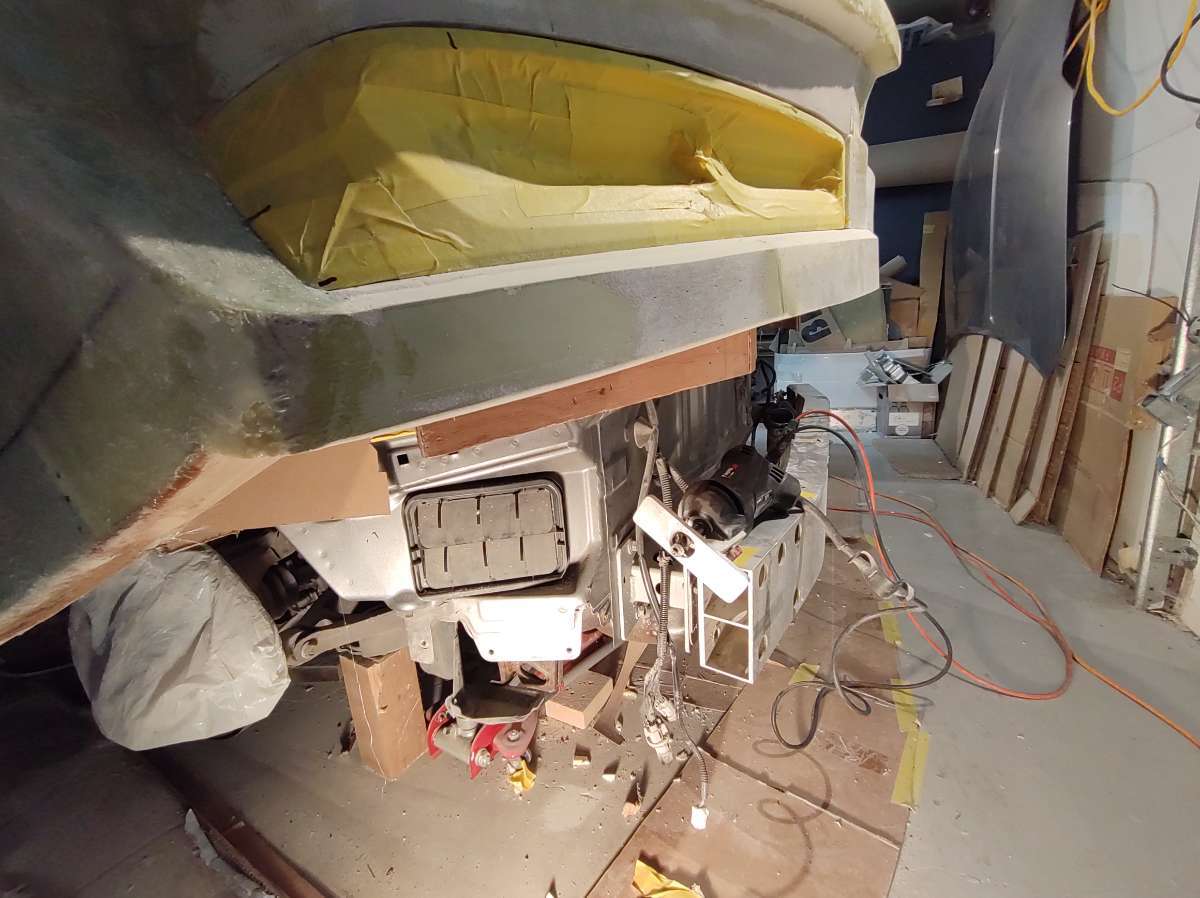
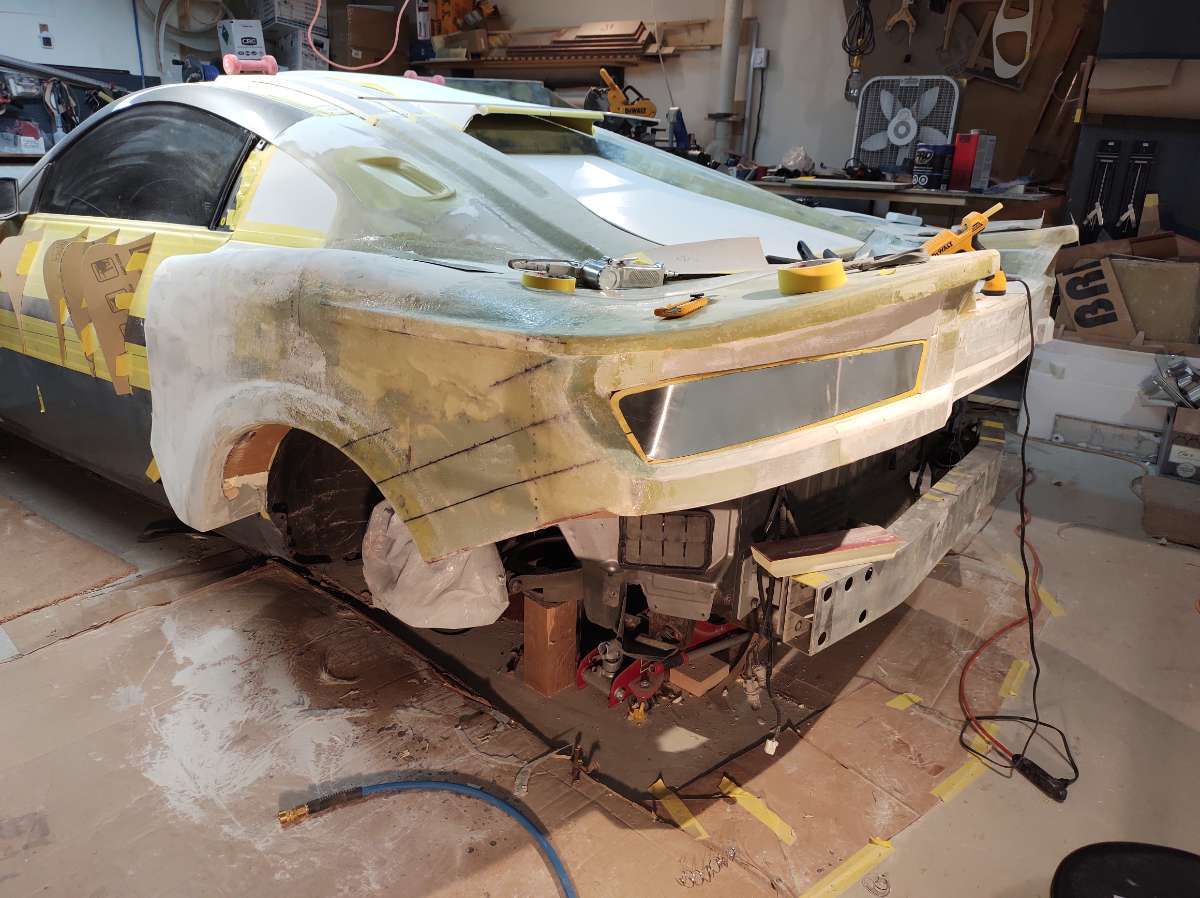
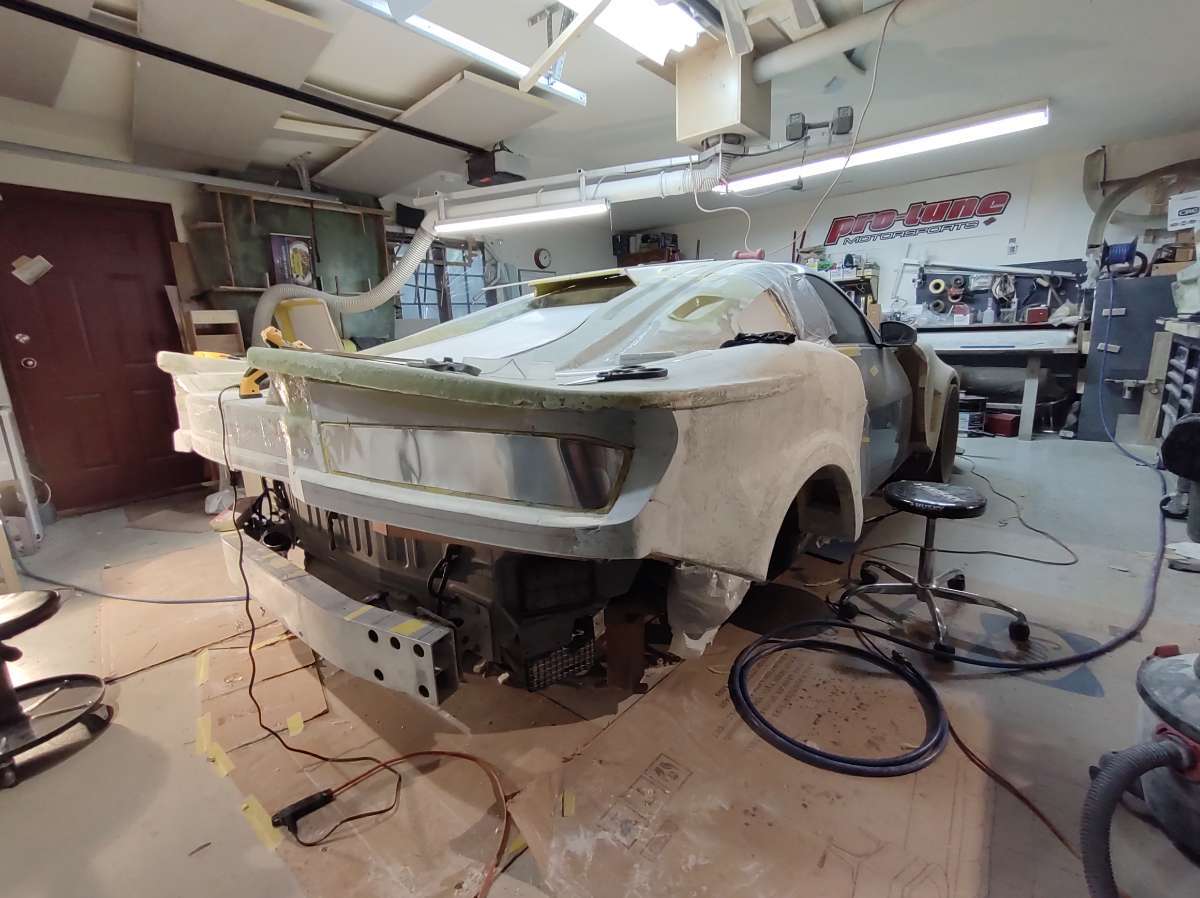
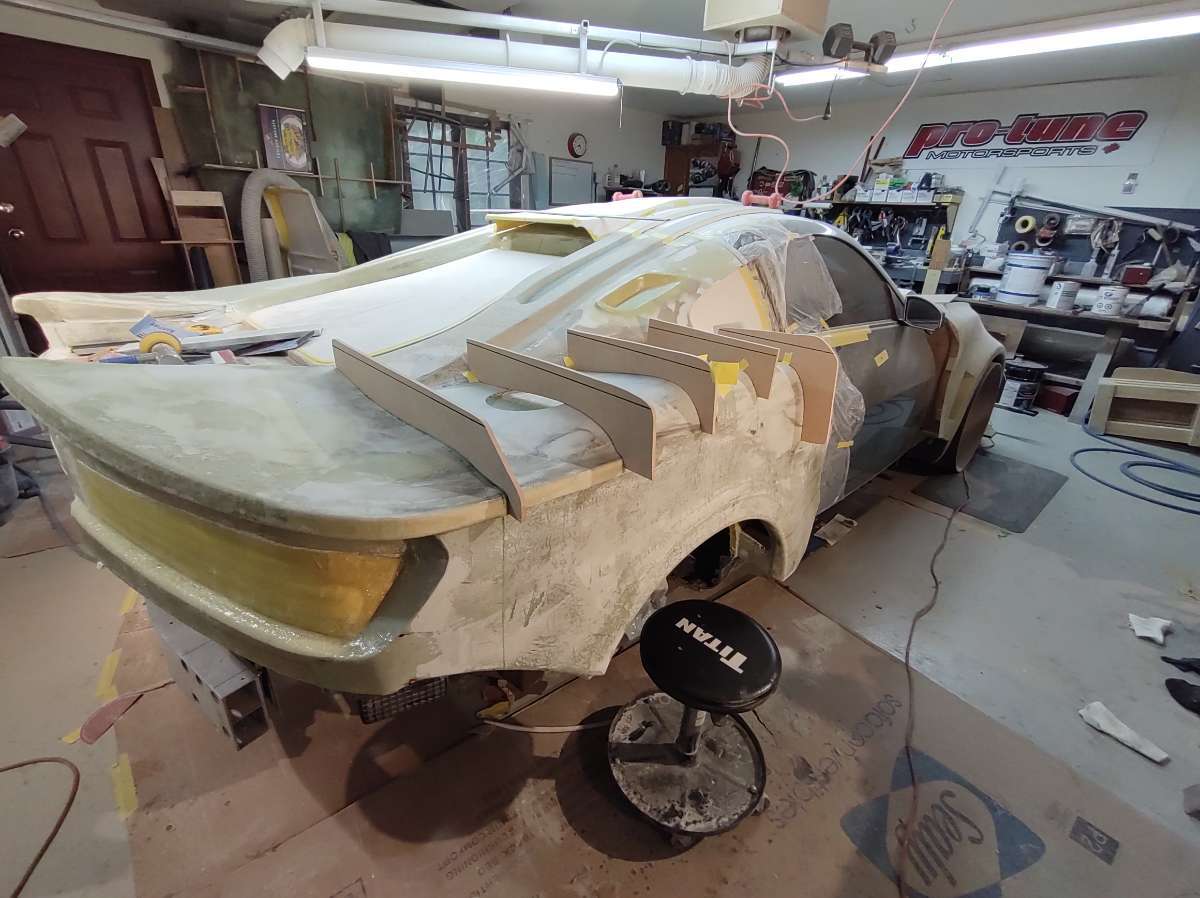
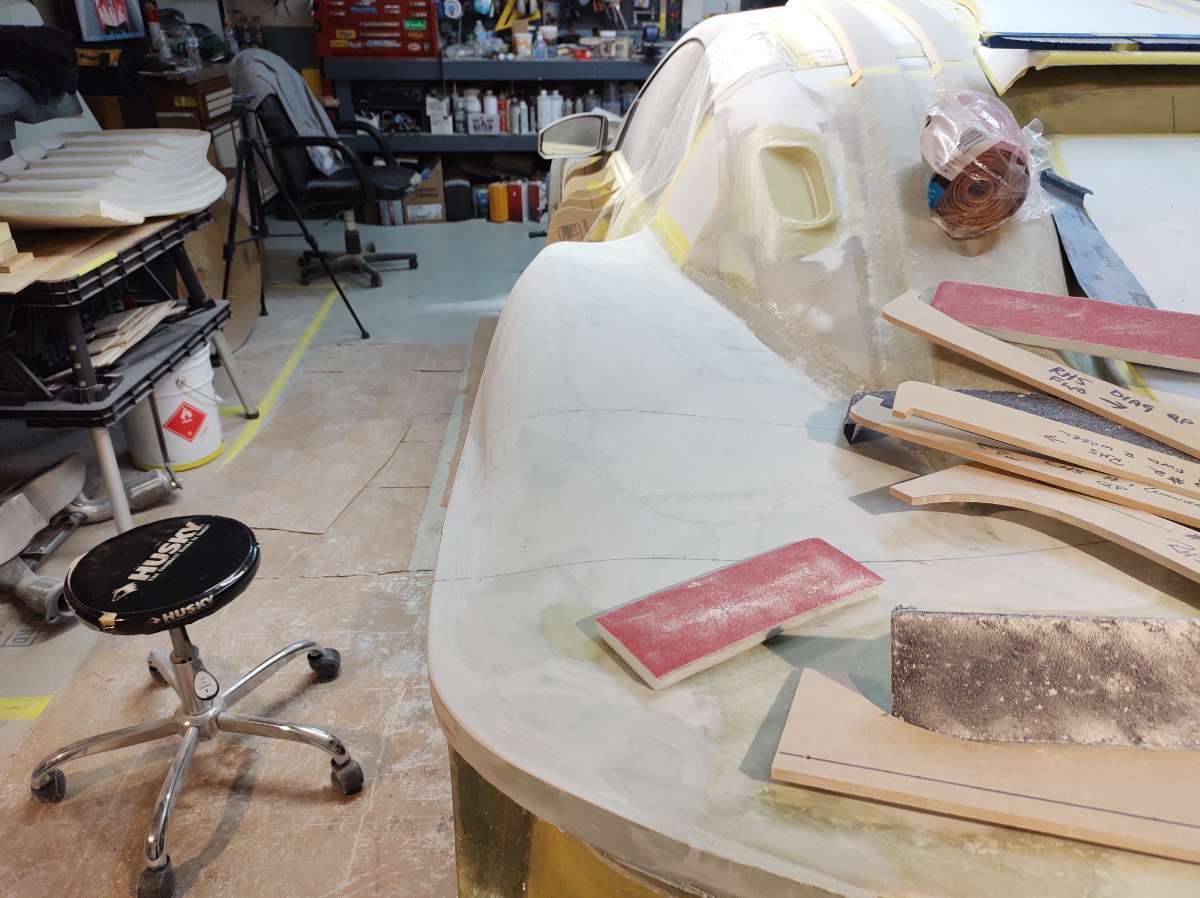
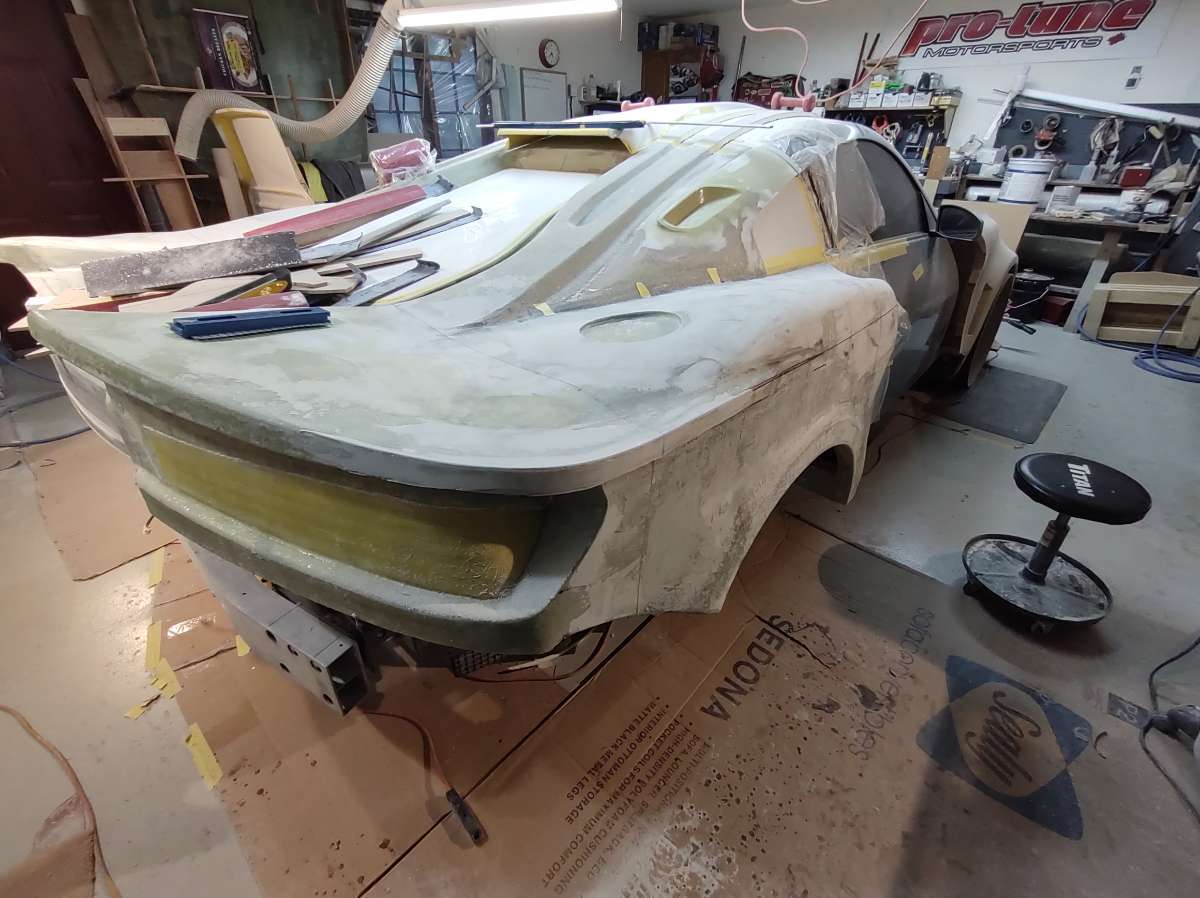
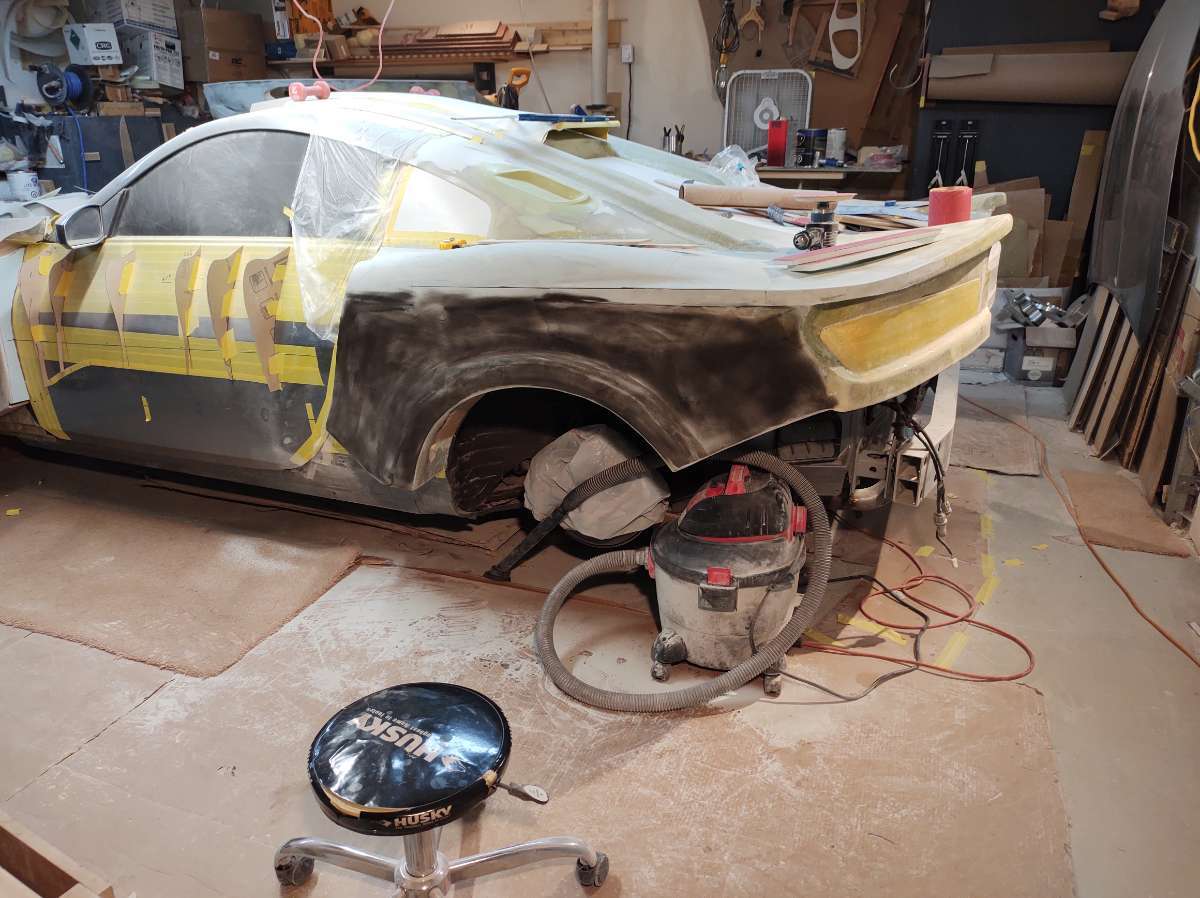
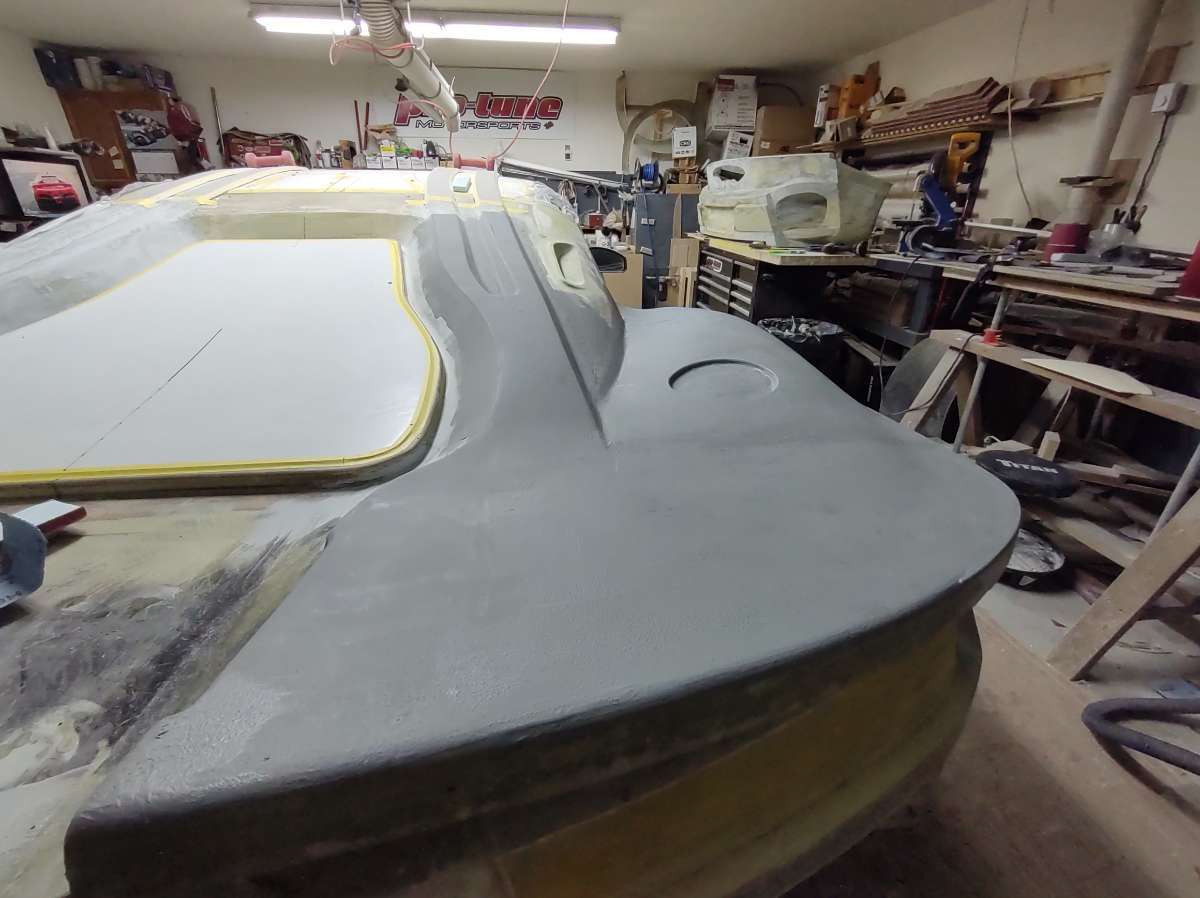
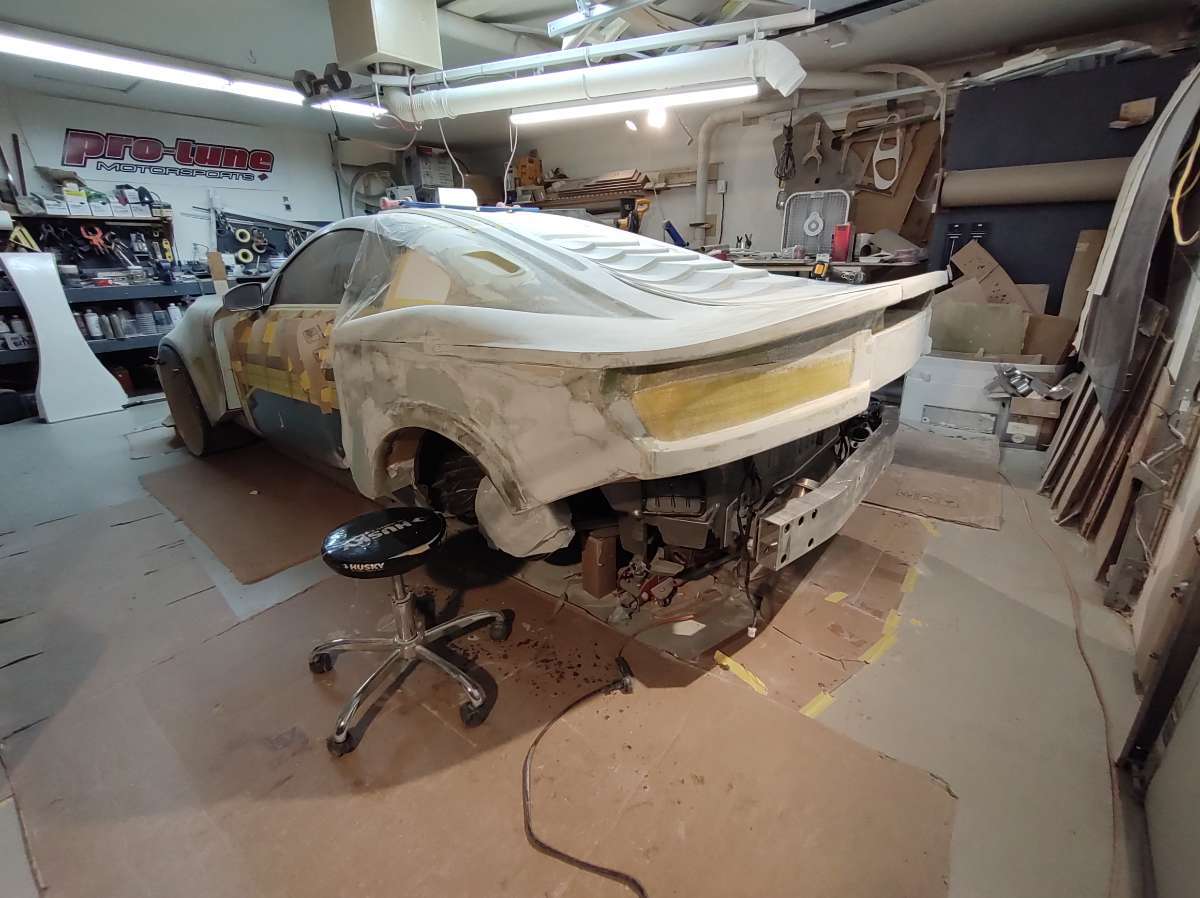
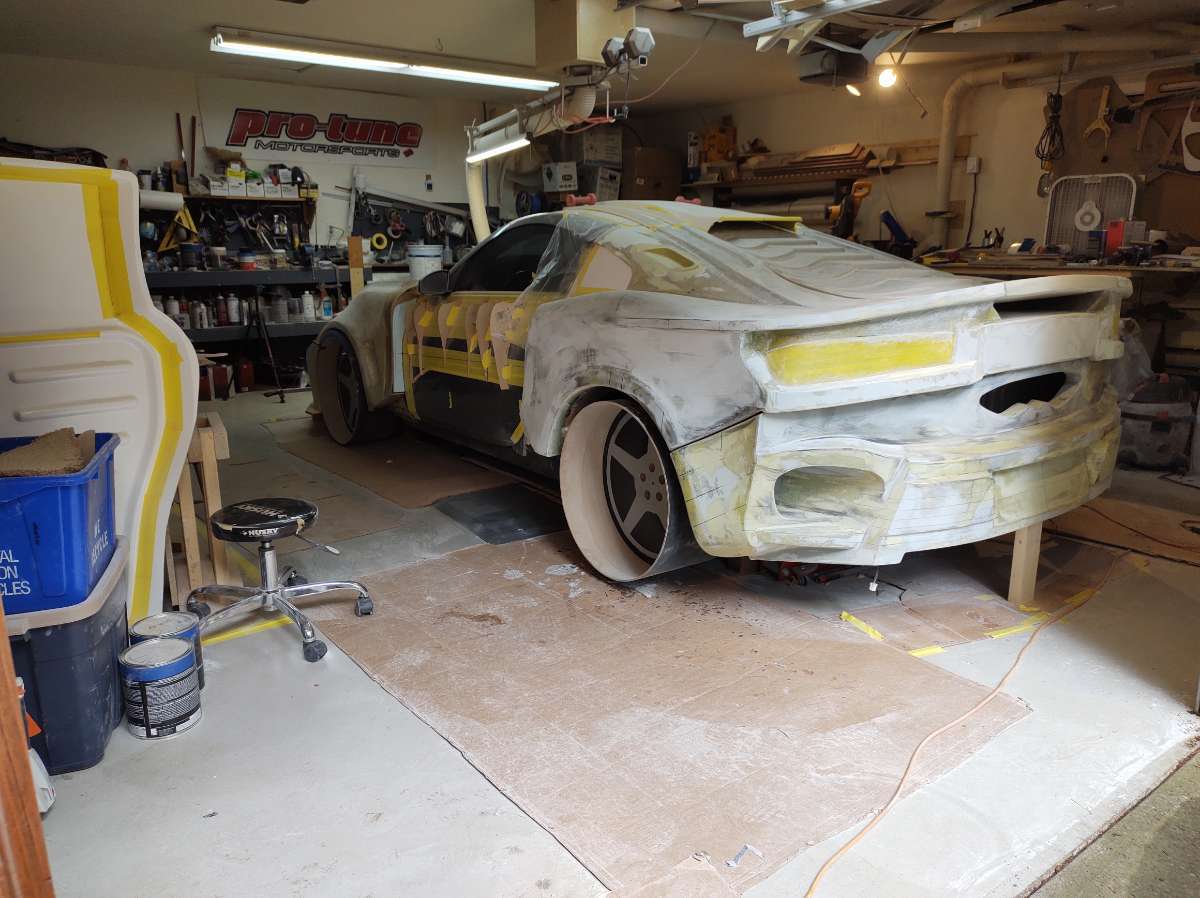
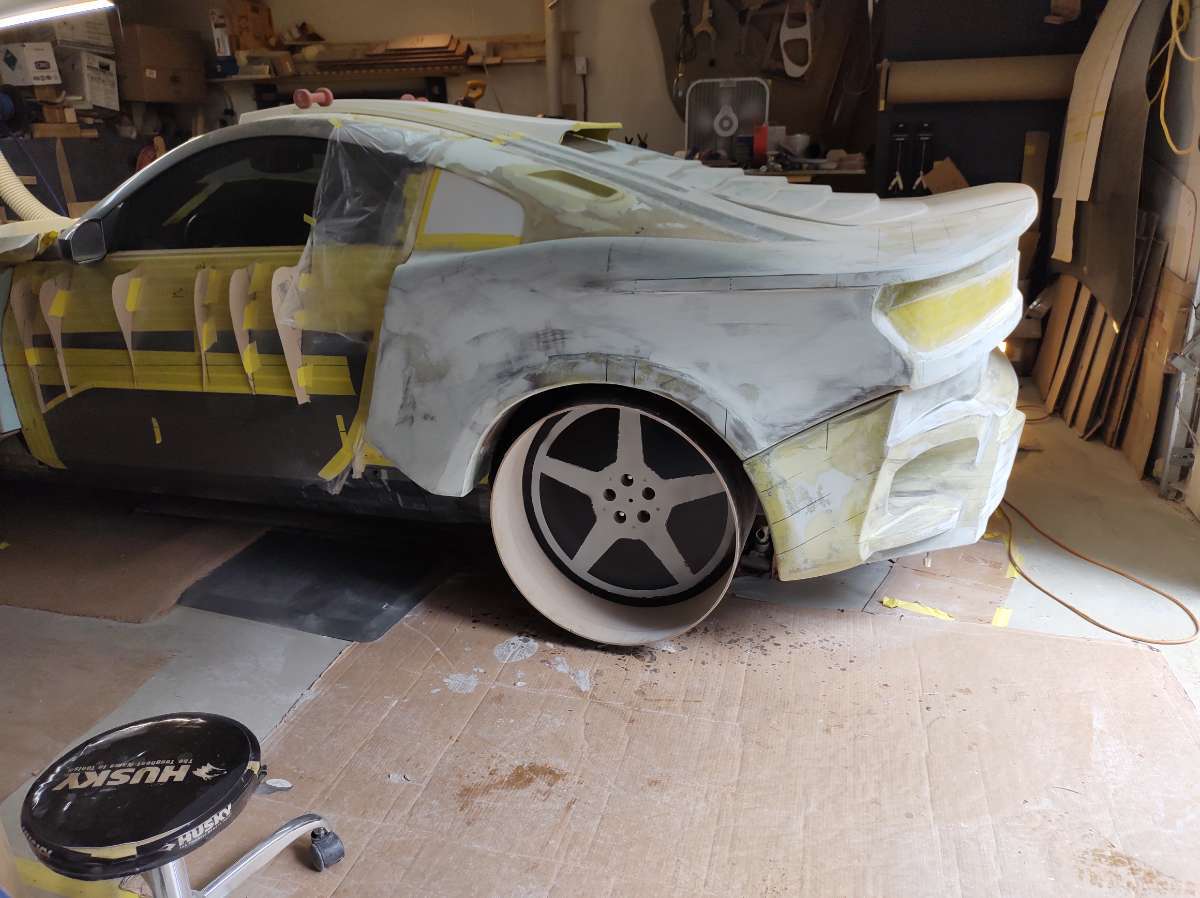
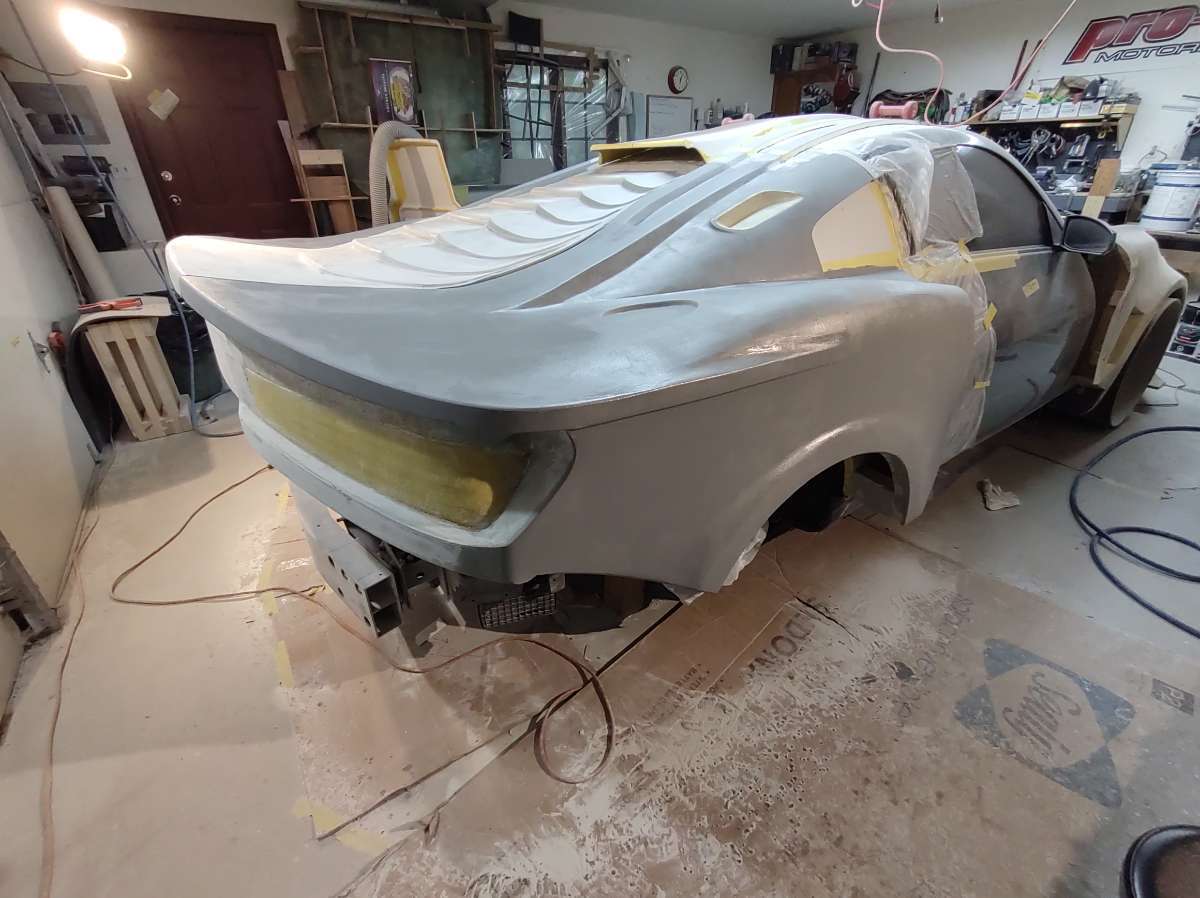
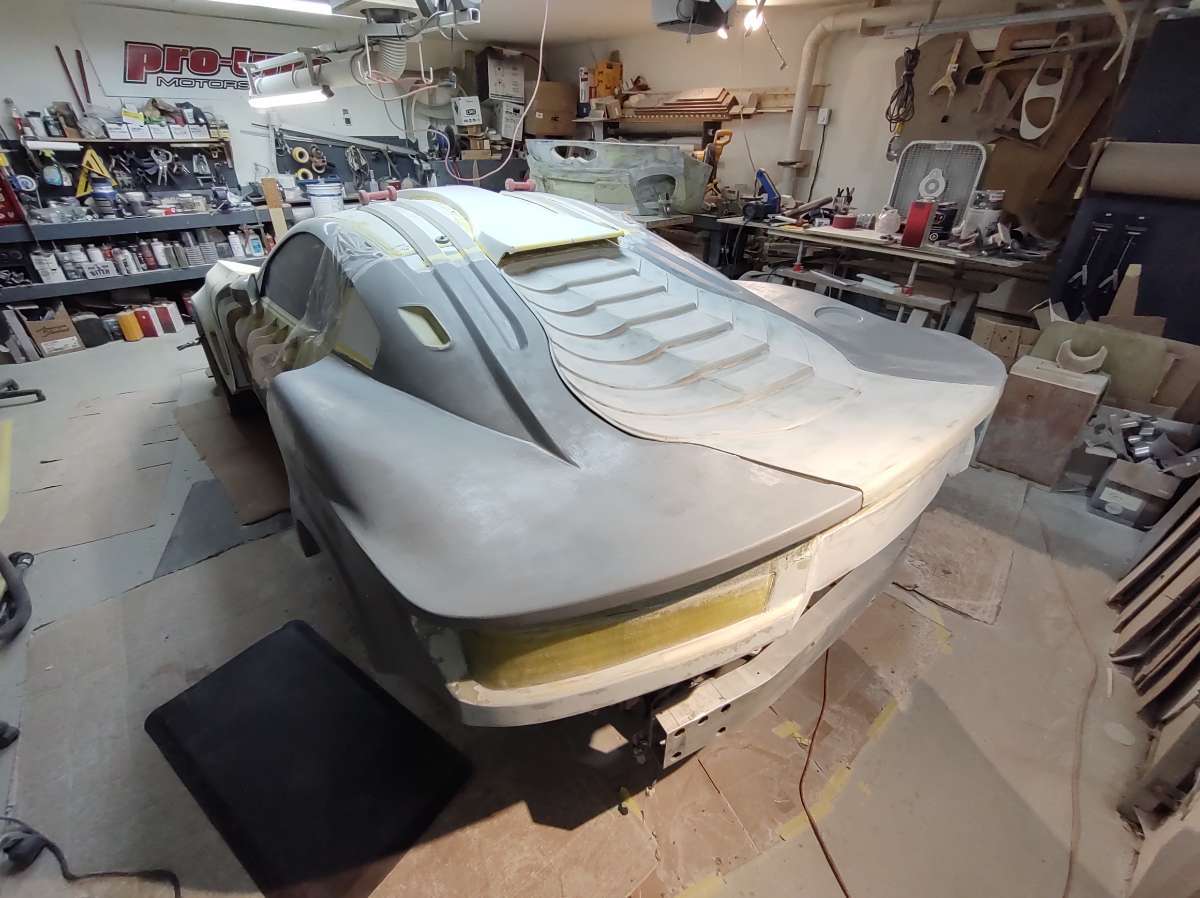
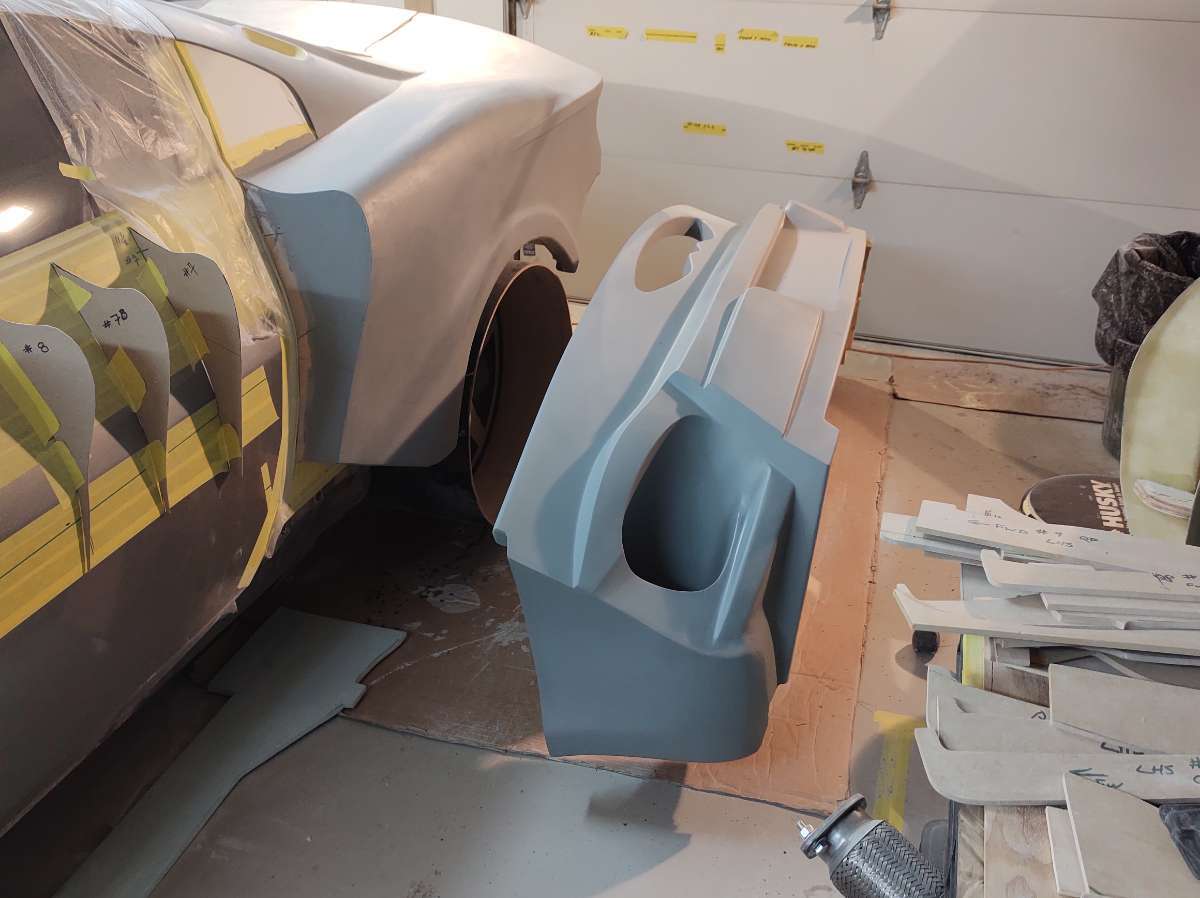
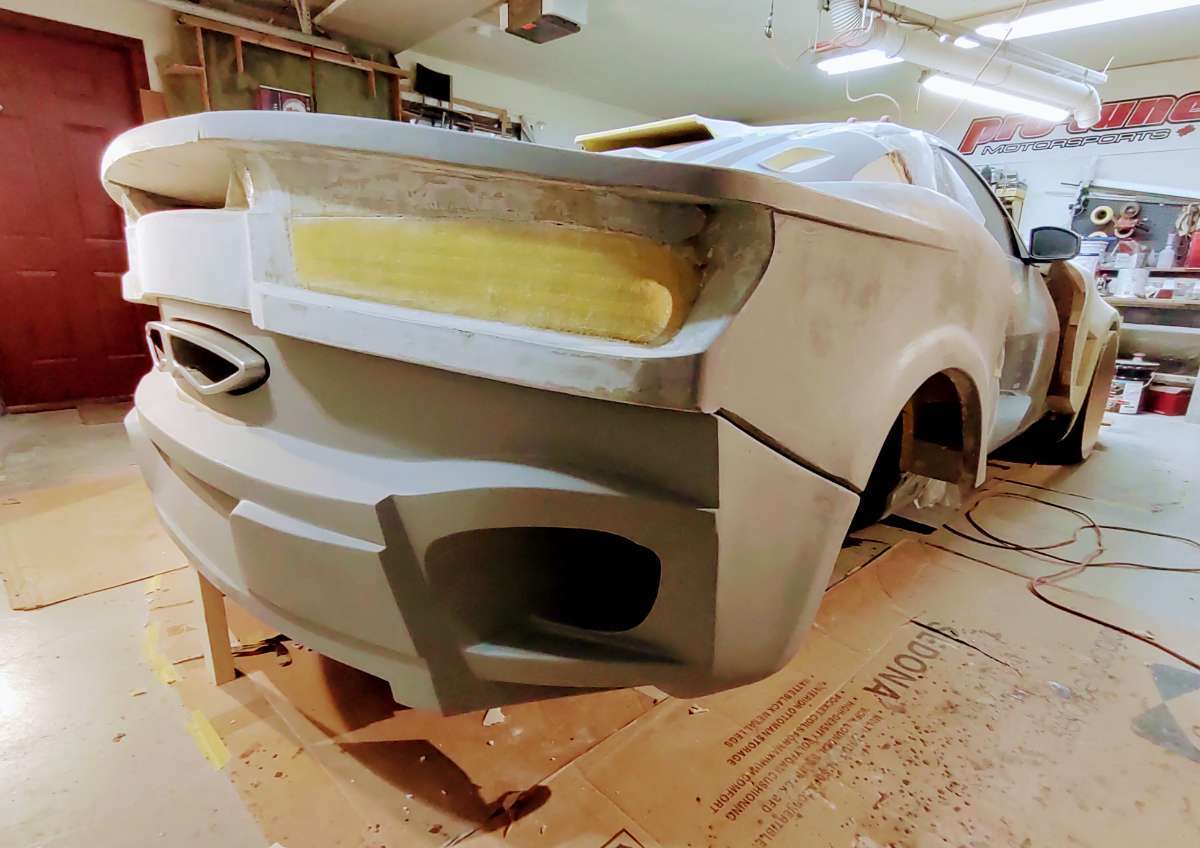
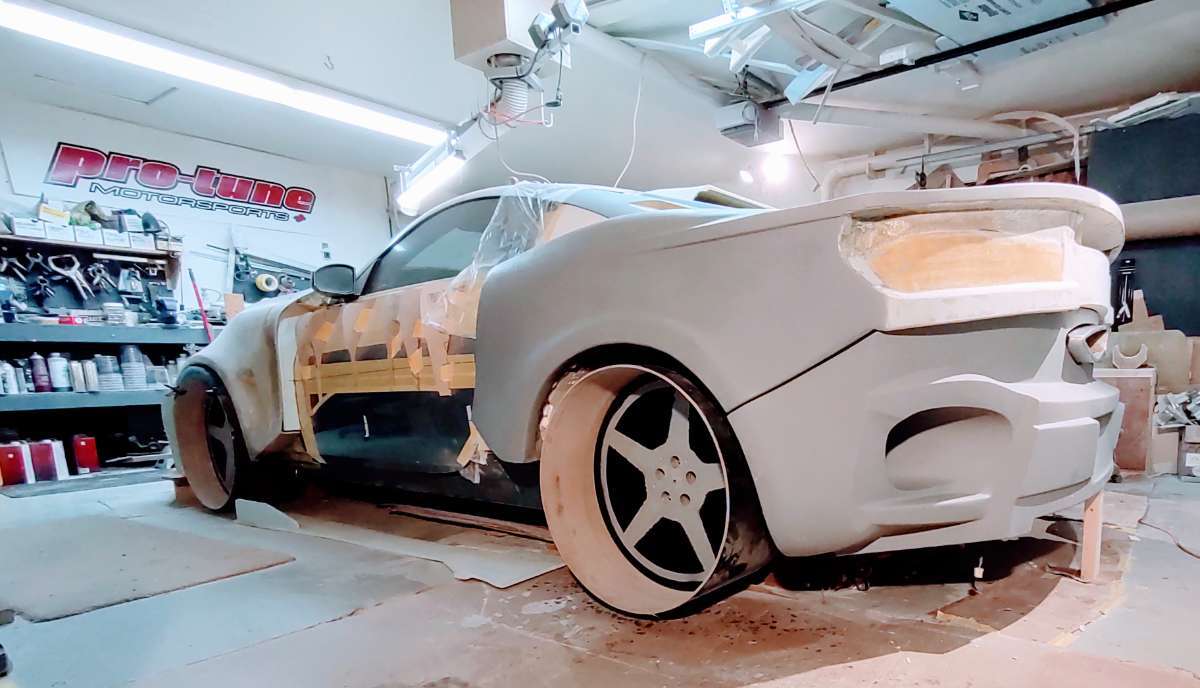
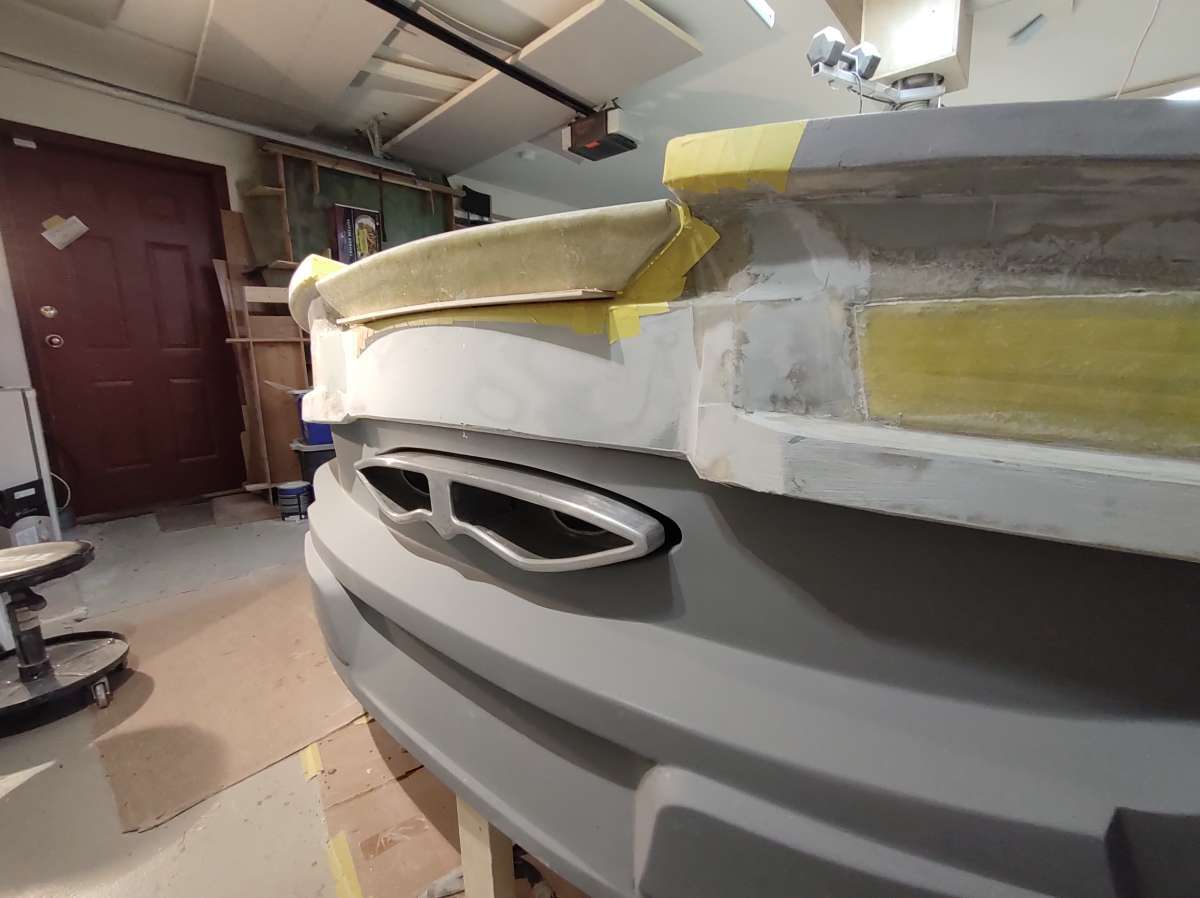
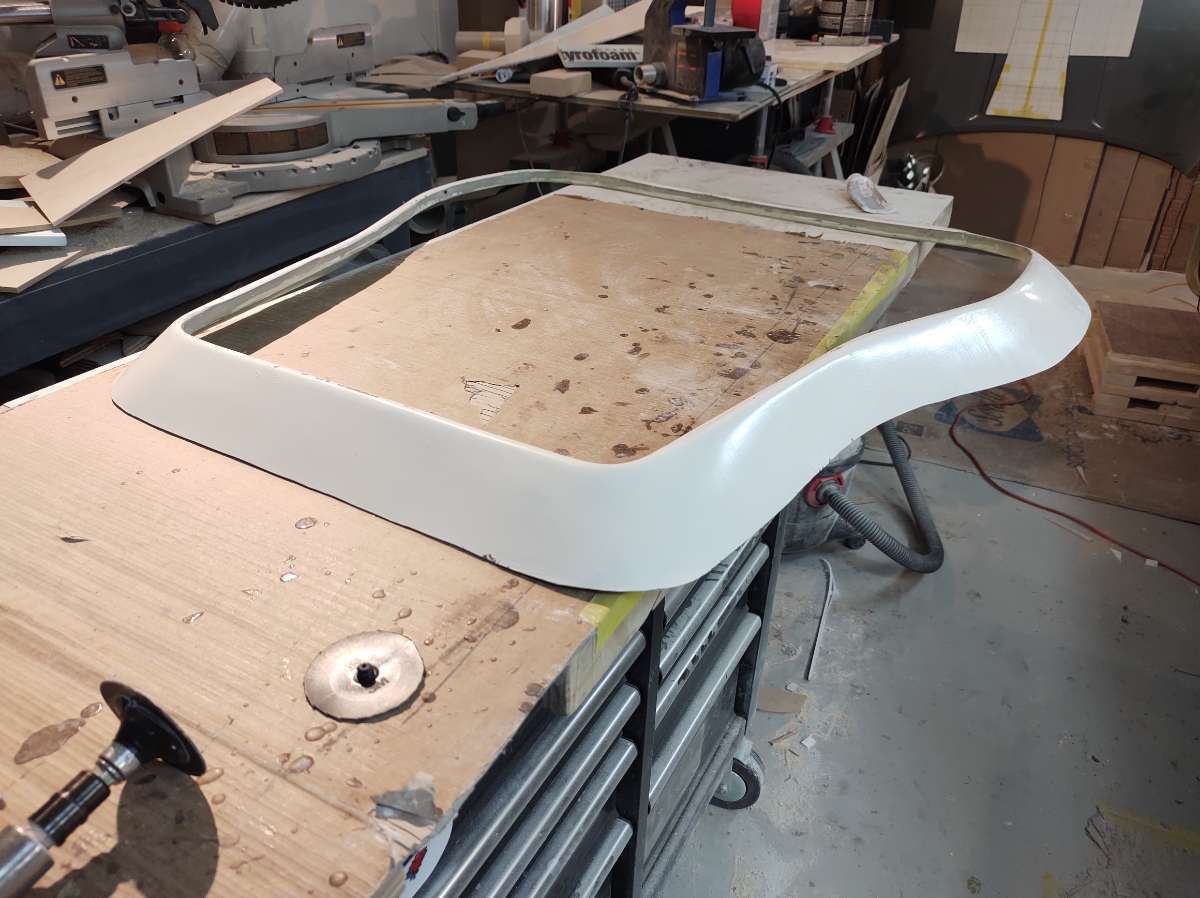
I like this pic , I am glad I made the rear bumper cover come off in one large piece , this makes it easier to access other stuff , like the exhaust , taillights , fuel filler , trunk latch , and suspension .
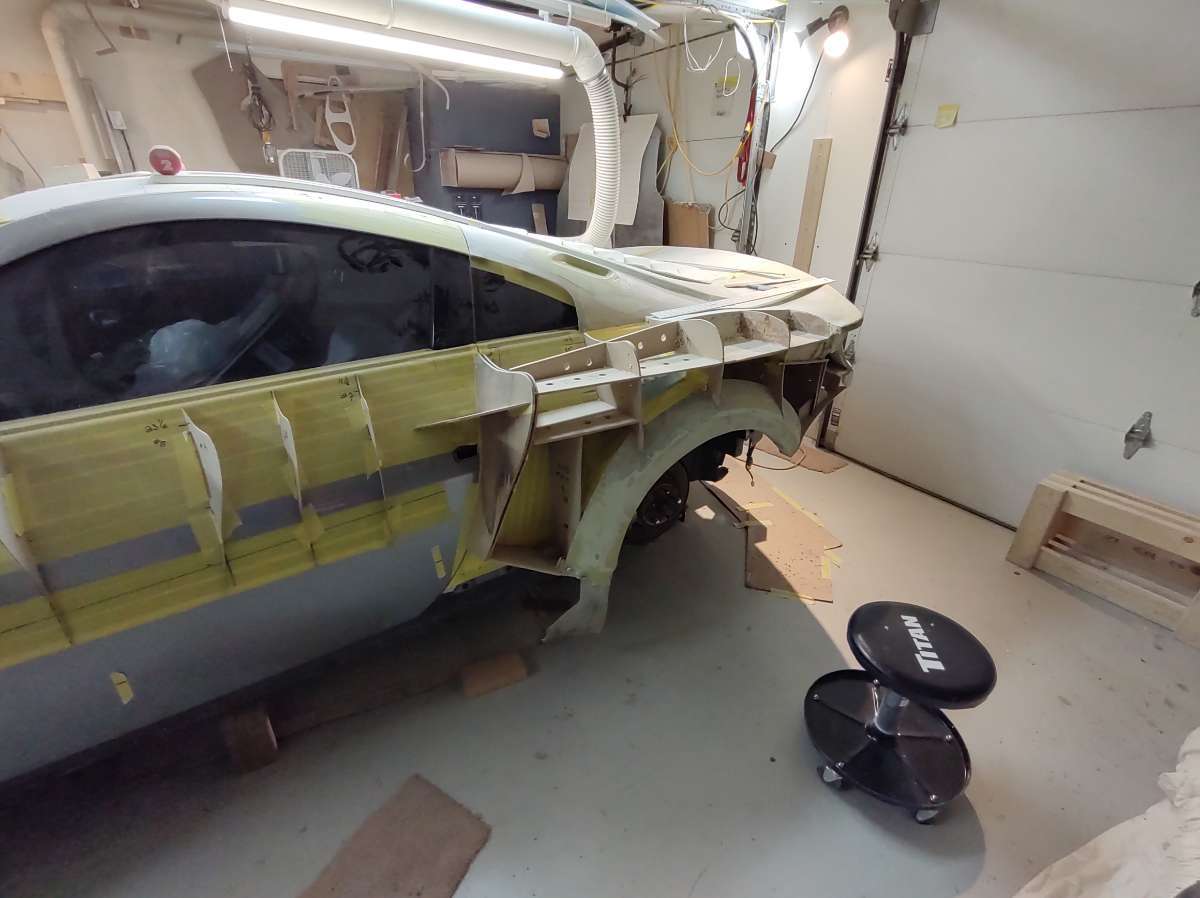
I was going to add some curved out foam to the little winglets at the top , but decided to delete them , they will just add to the list of time eating stuff to bodywork .
they would have gone here to help with not having to sand in a tight corner .
I have a deadline to meet and need to simplify some of the parts , don't worry it will still be insane !!!
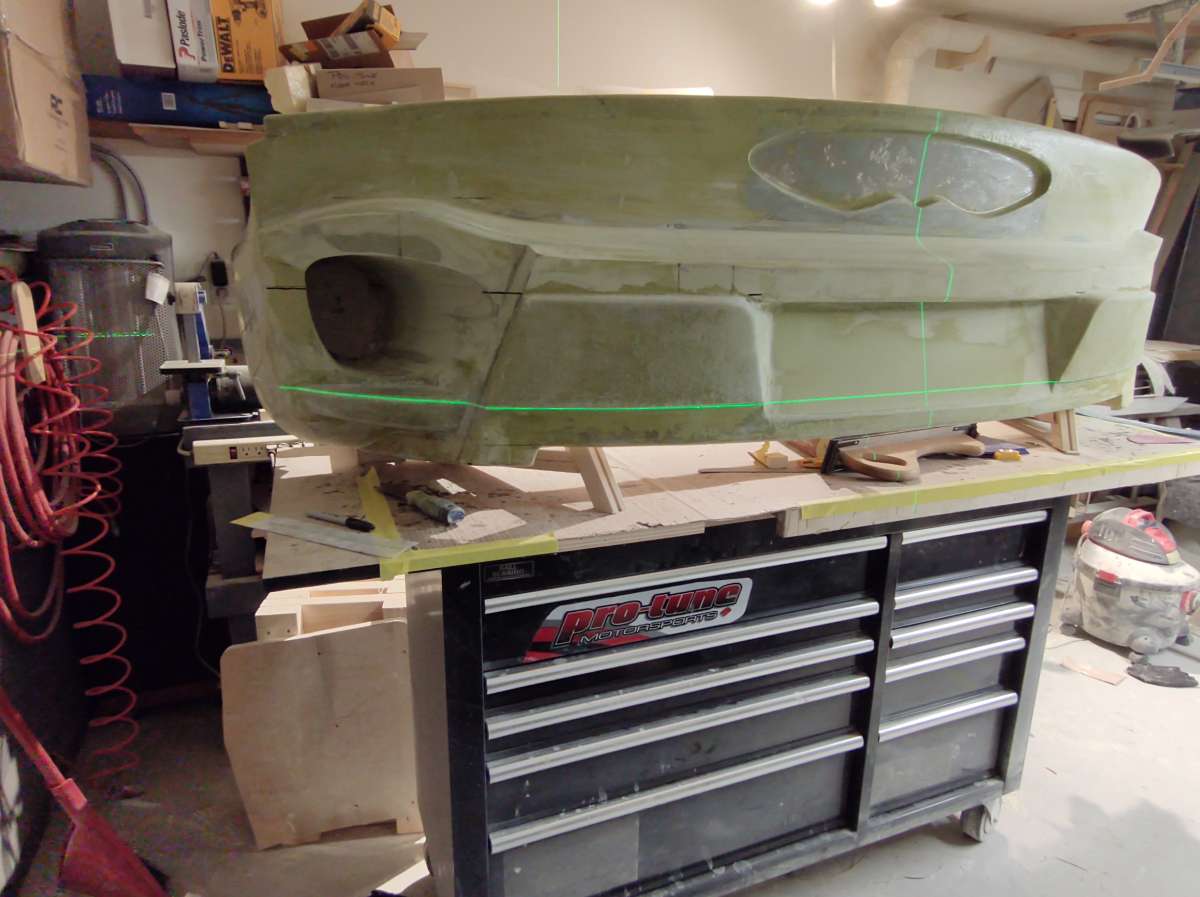
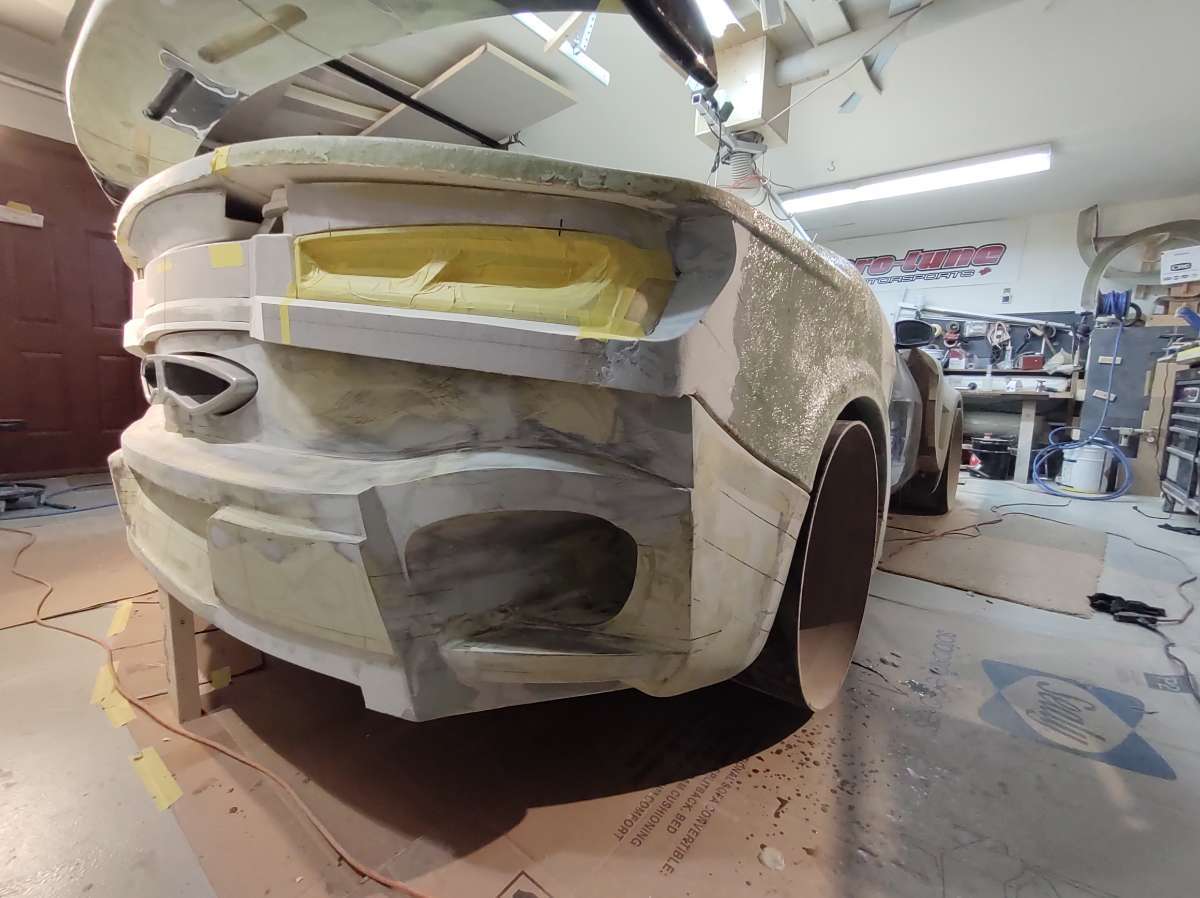
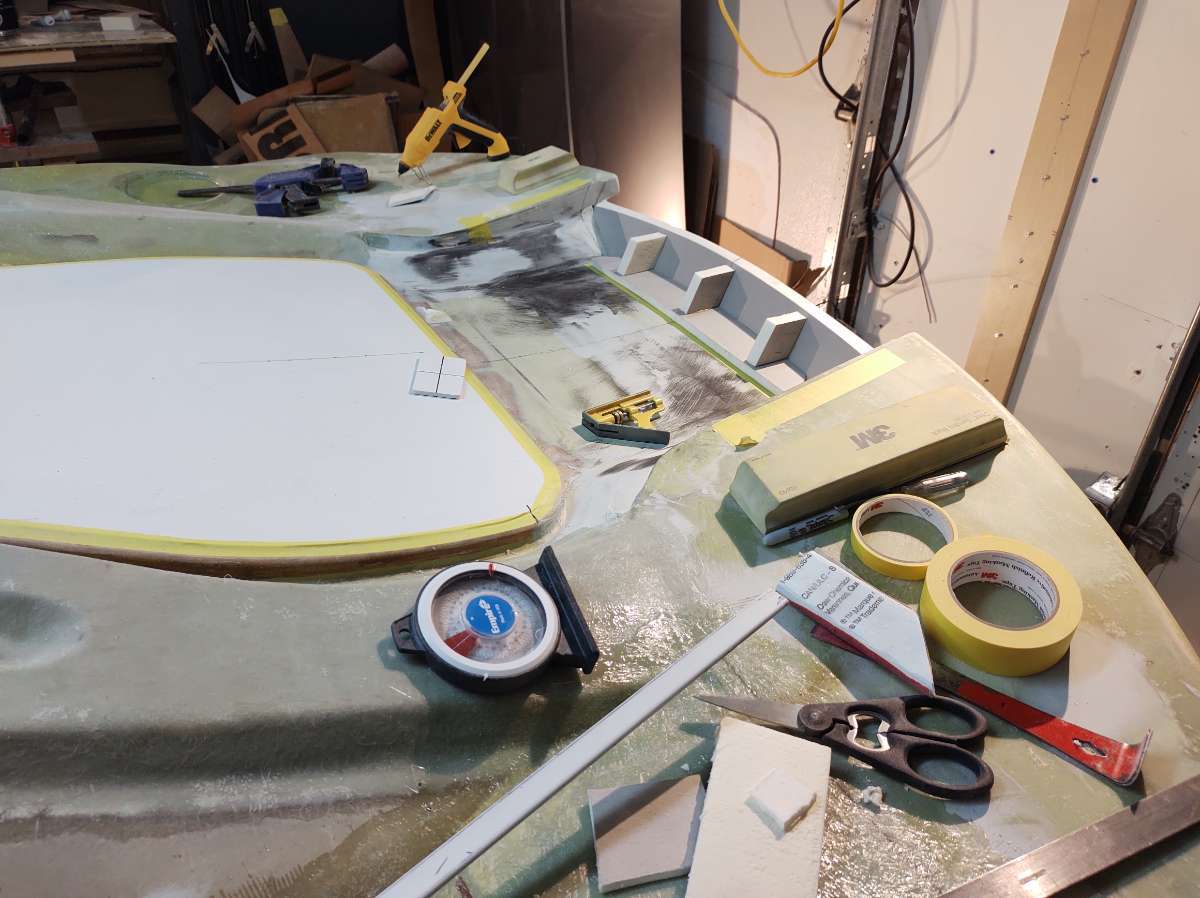
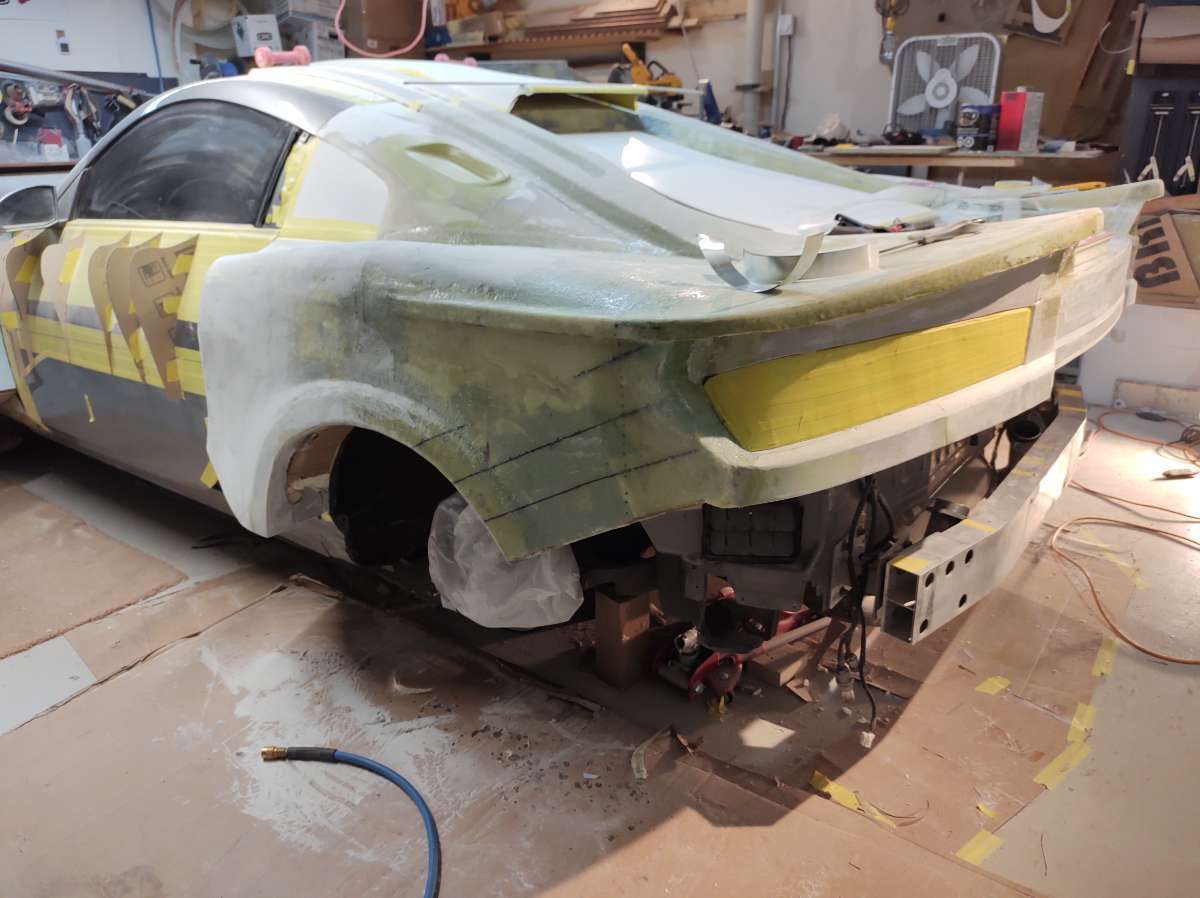
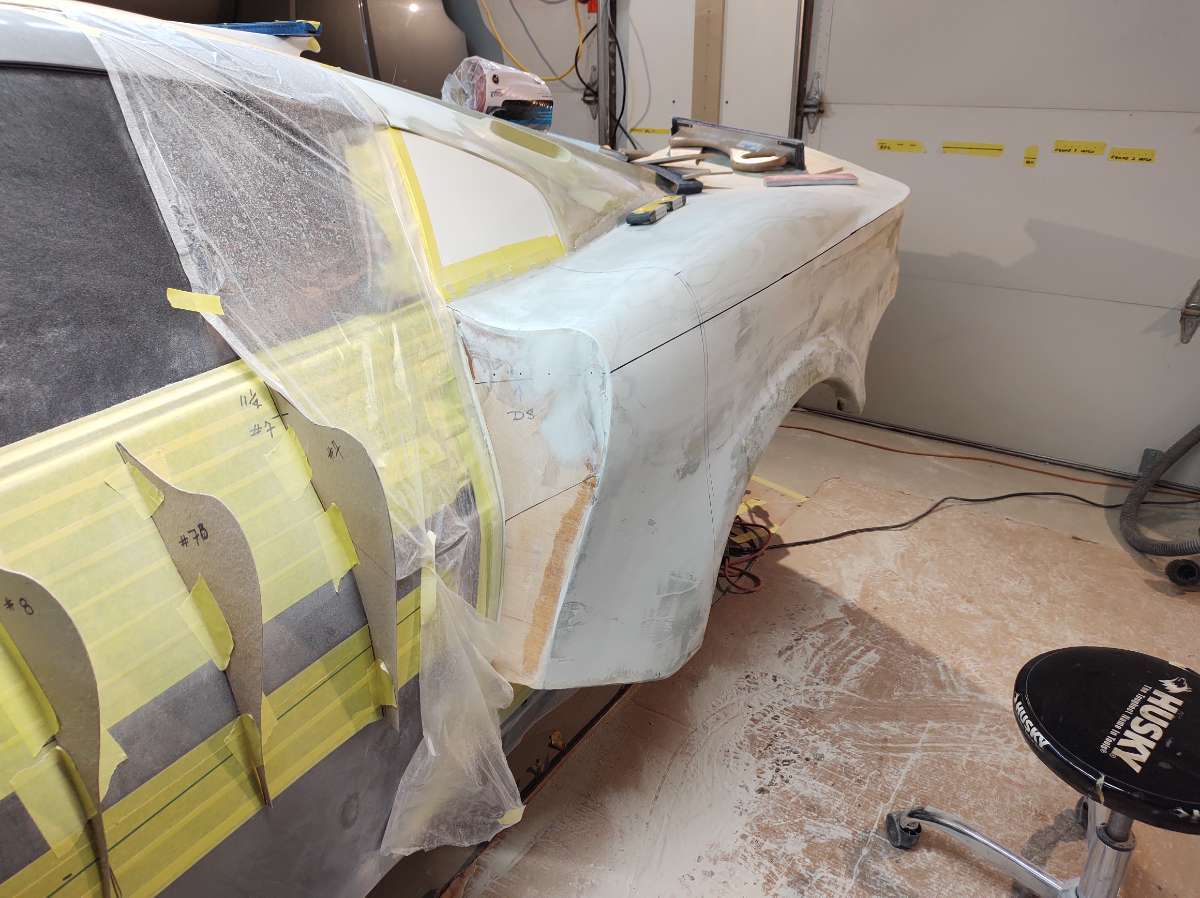
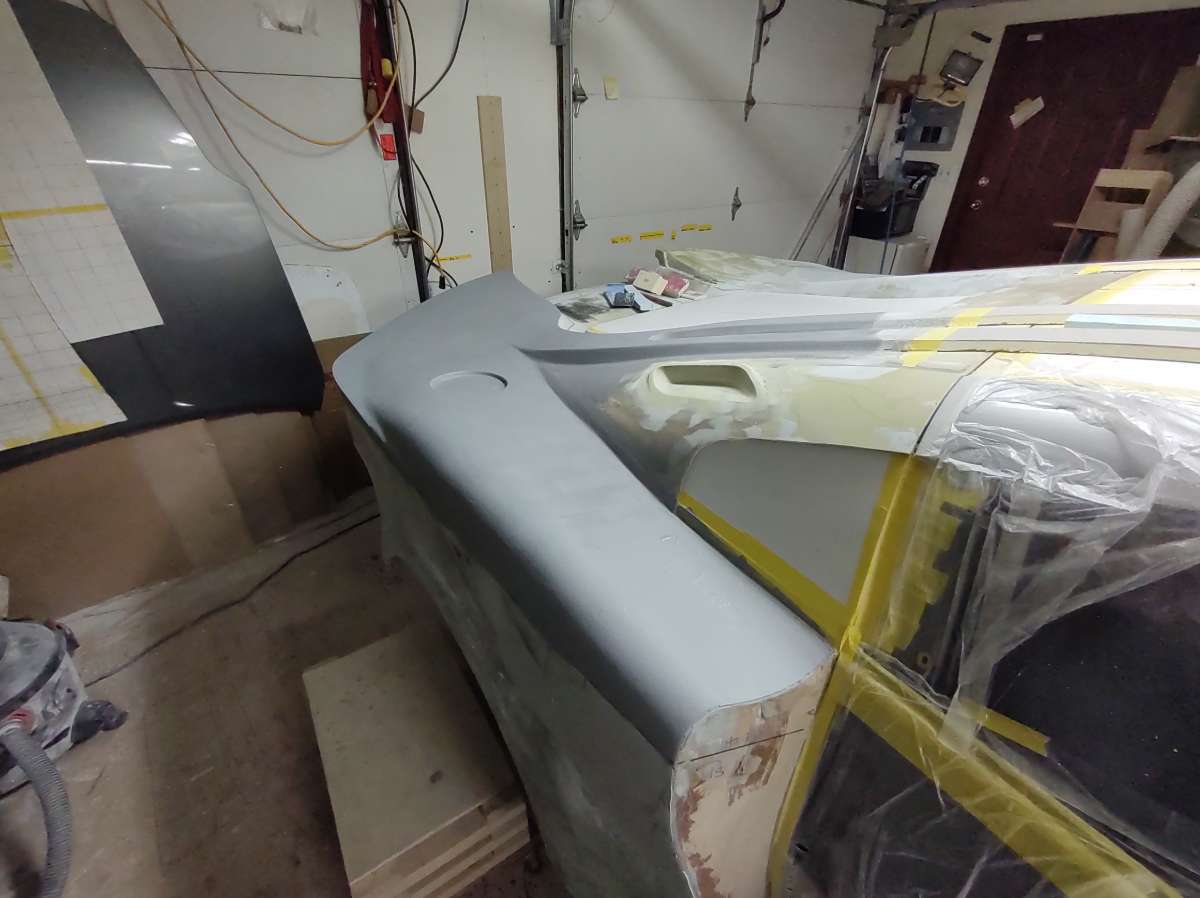
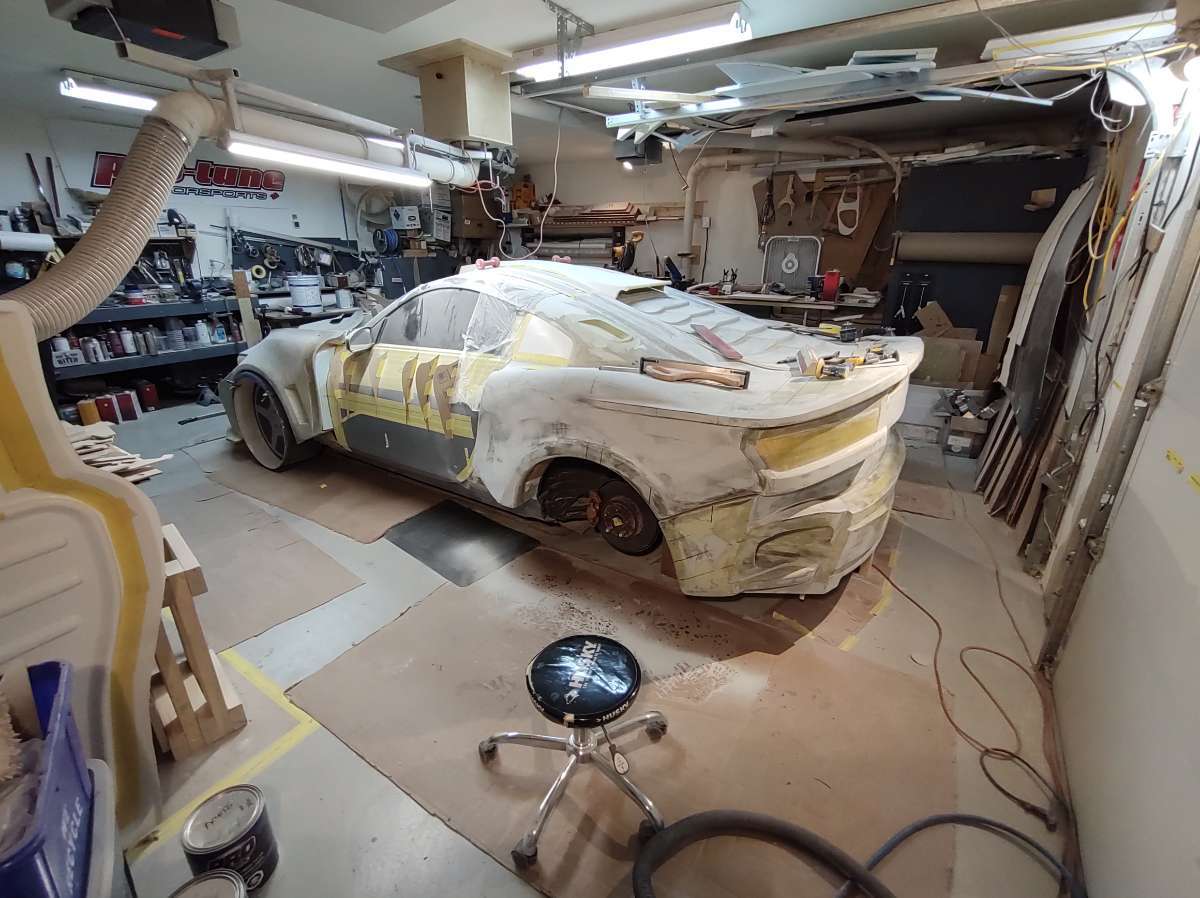
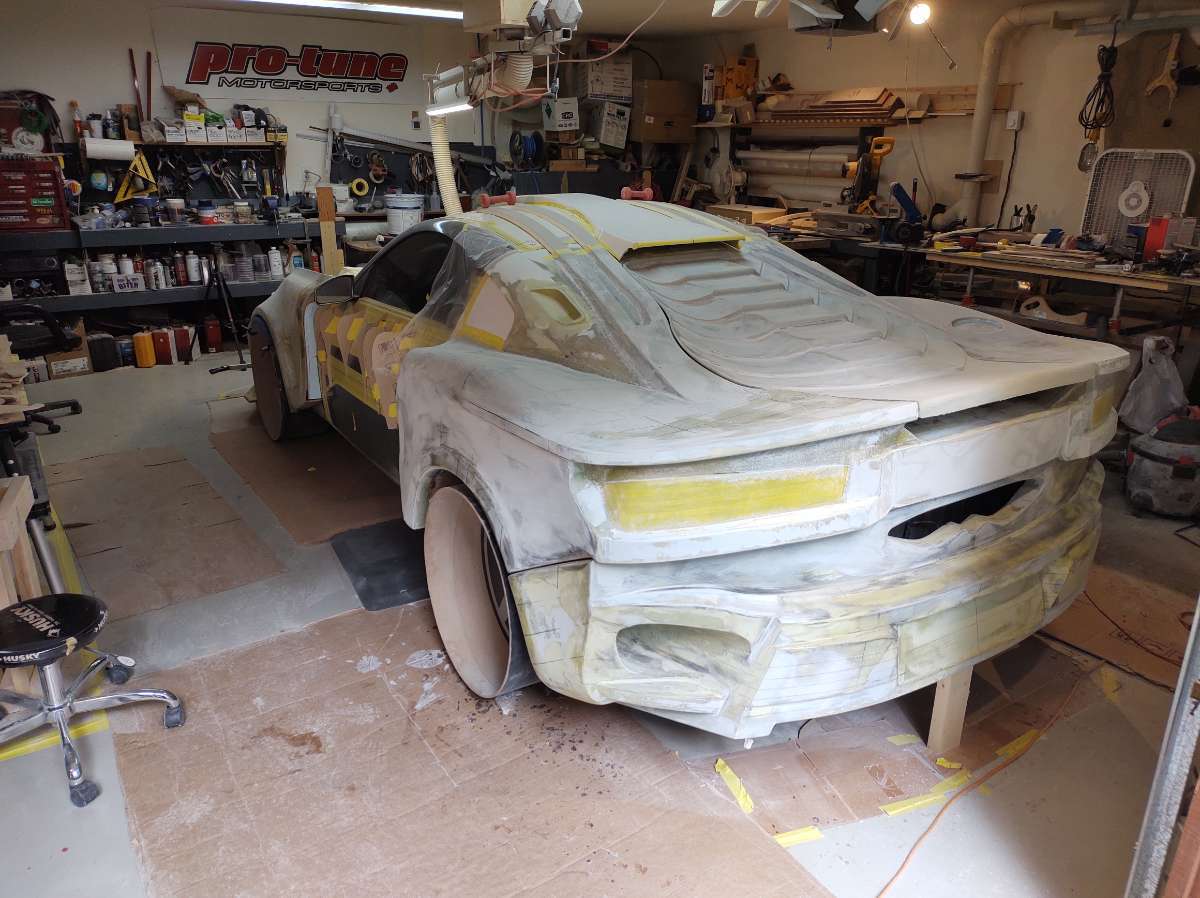
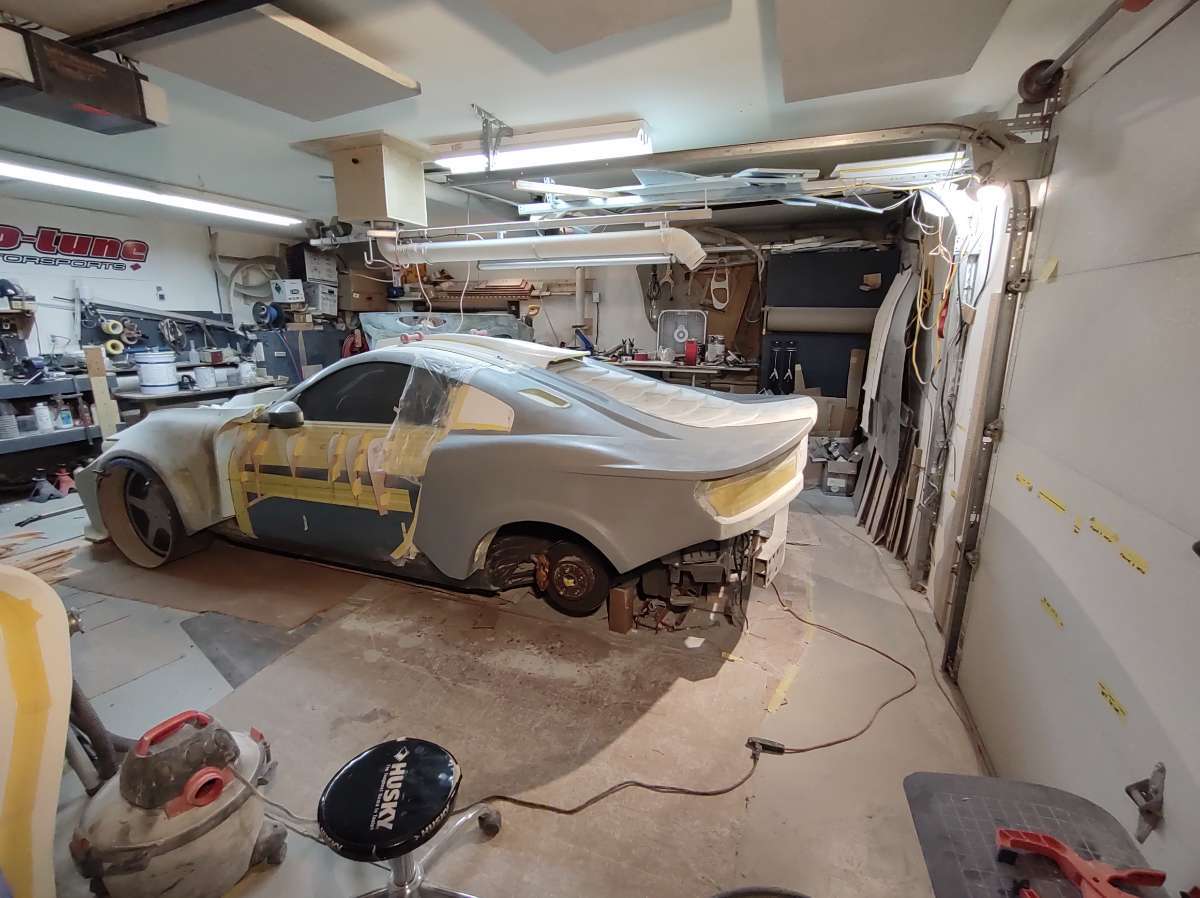
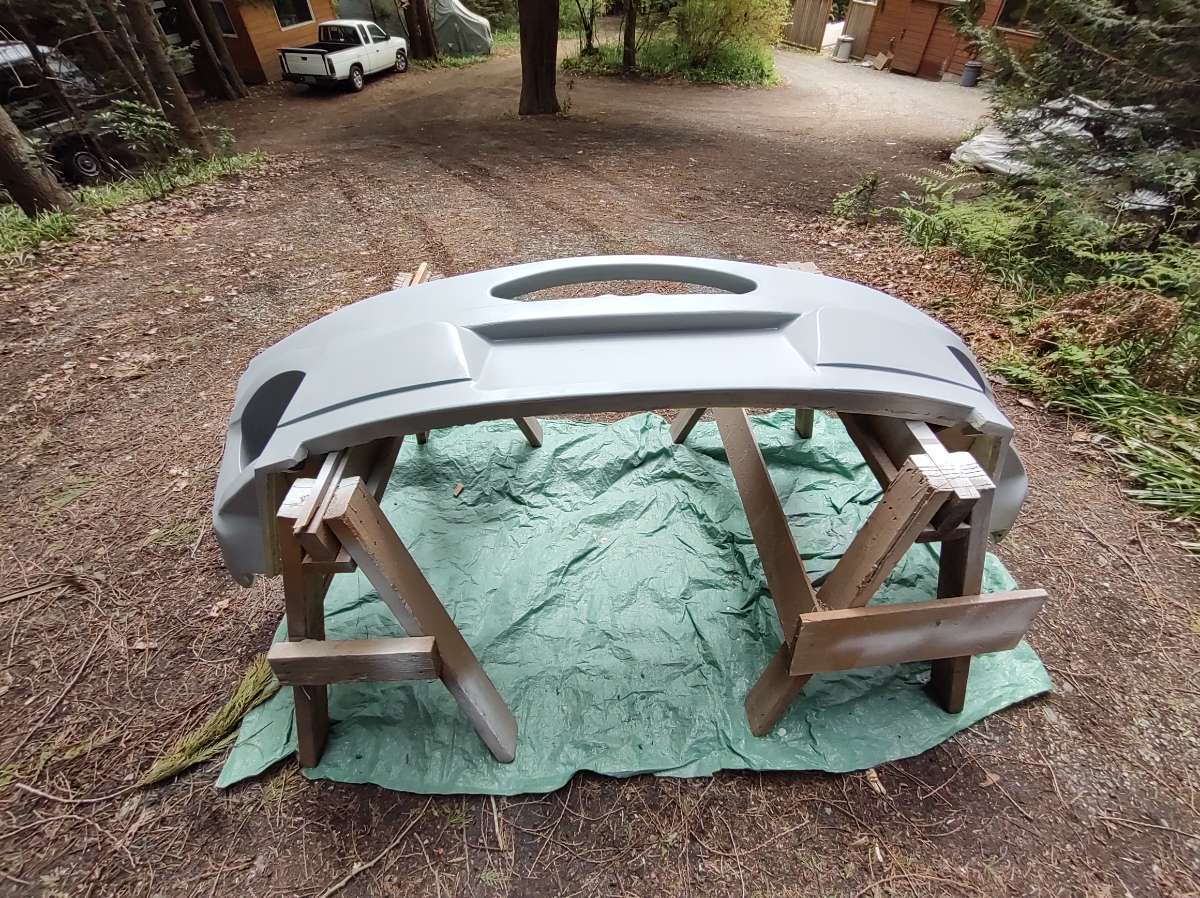
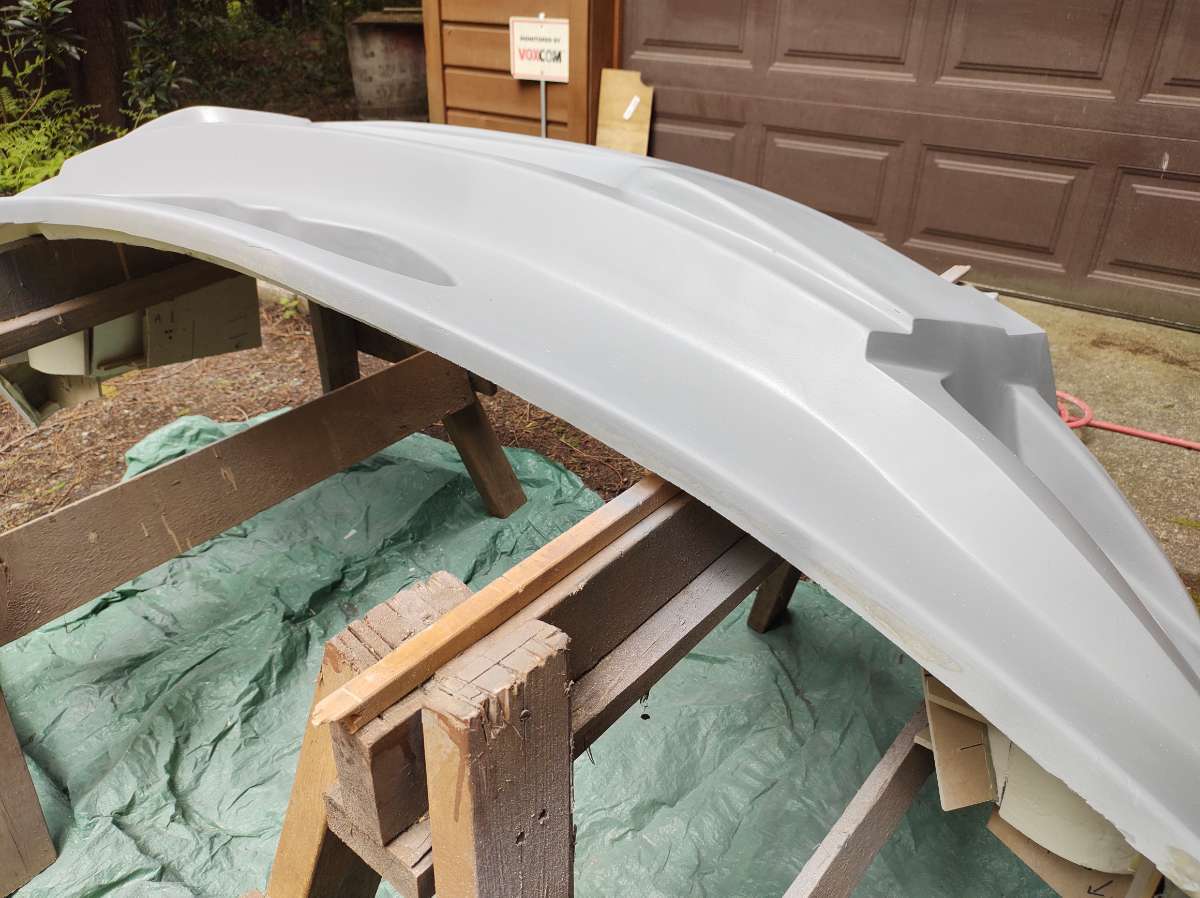
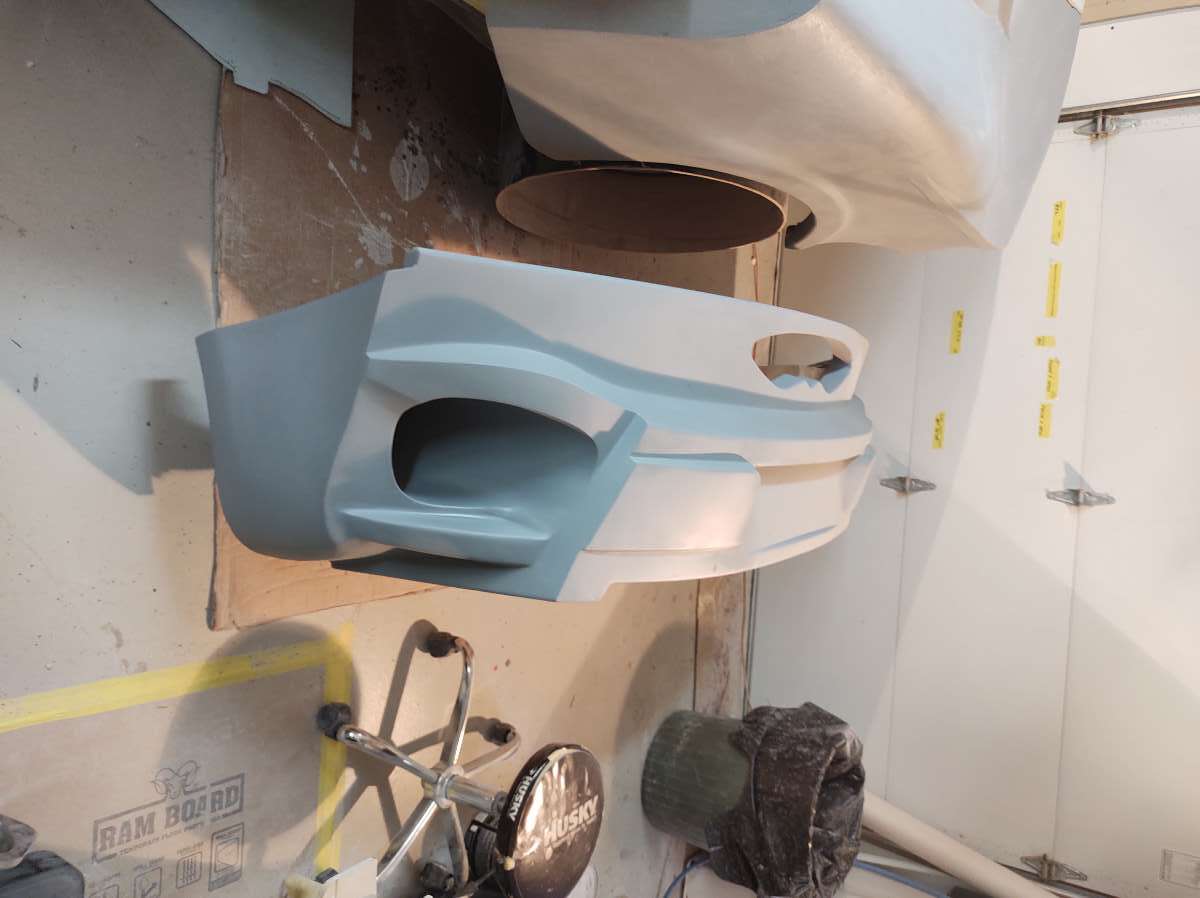
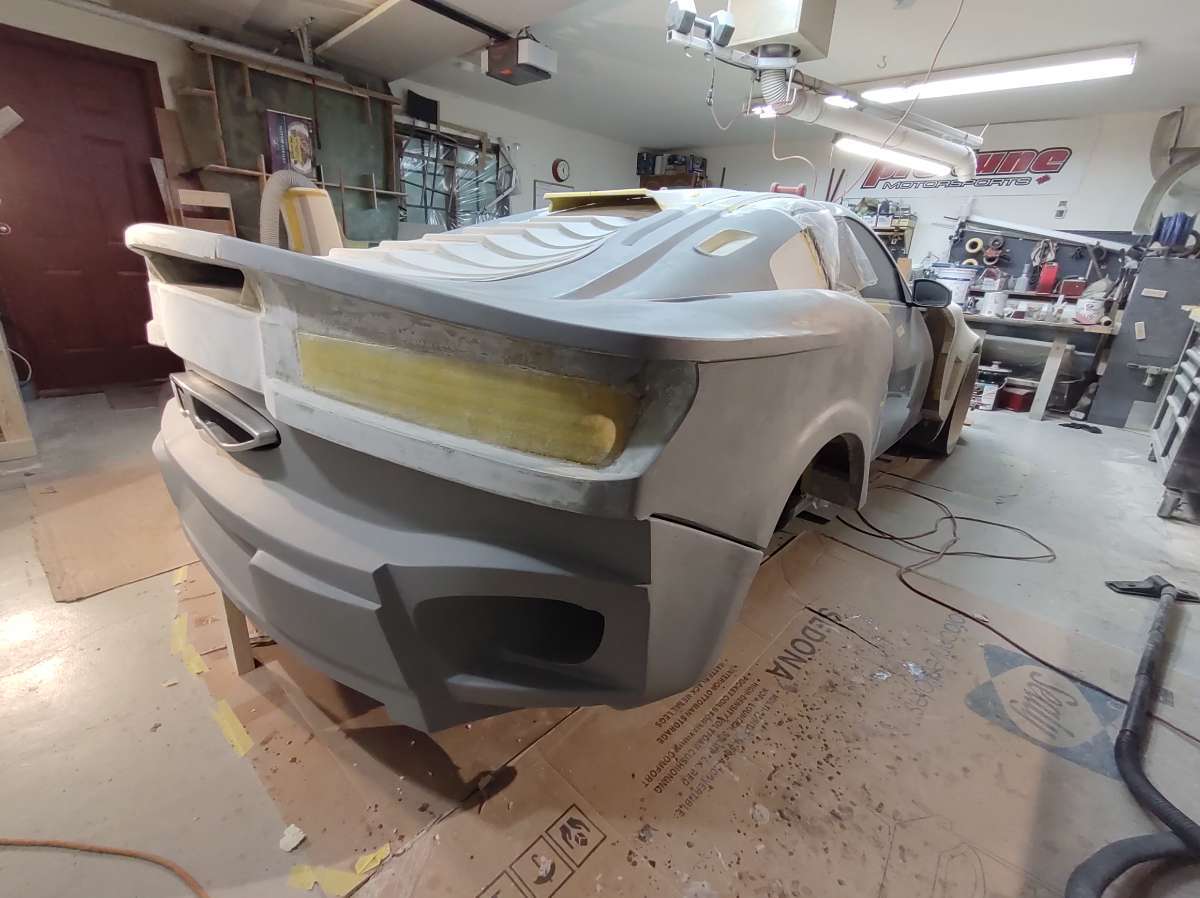
So I cut the little winglets off , way faster to sand and saves time . I think it still looks hot like this .
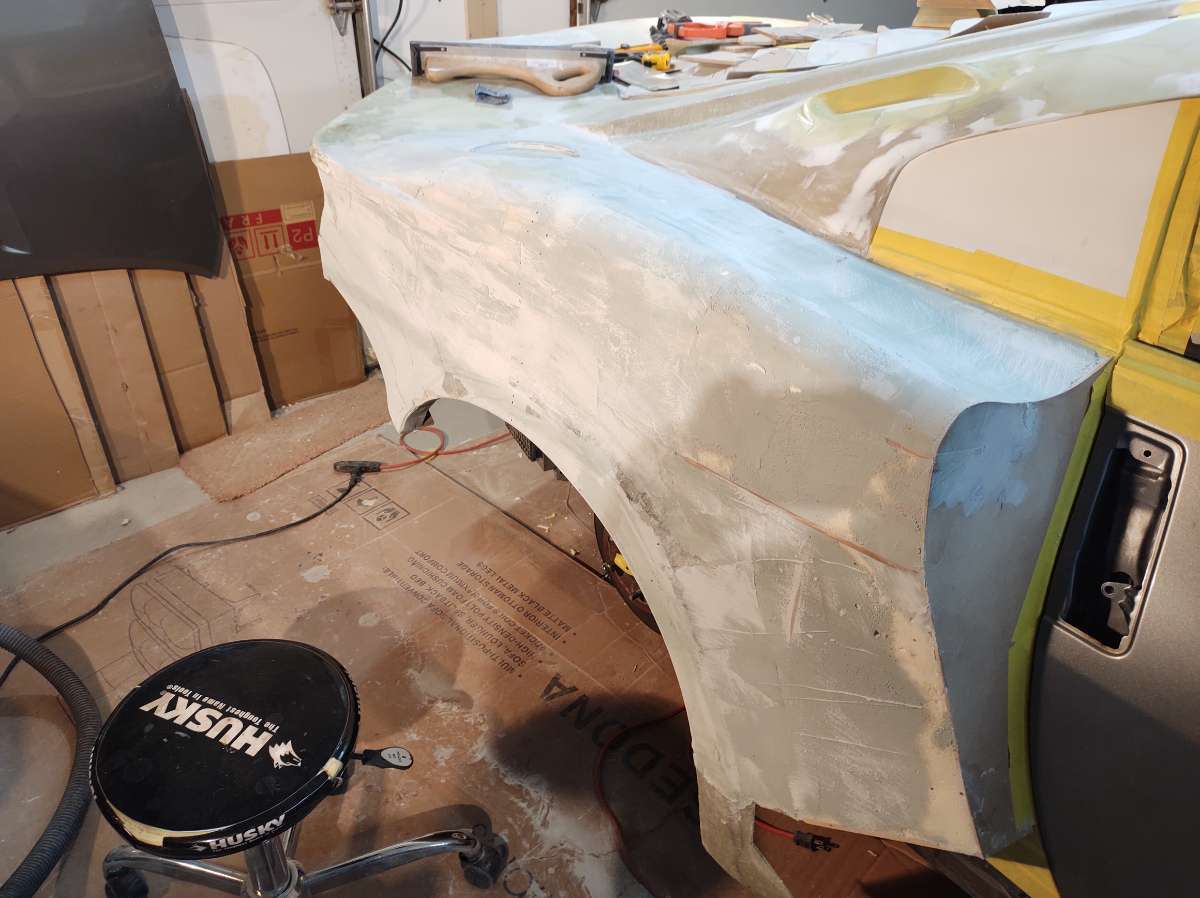
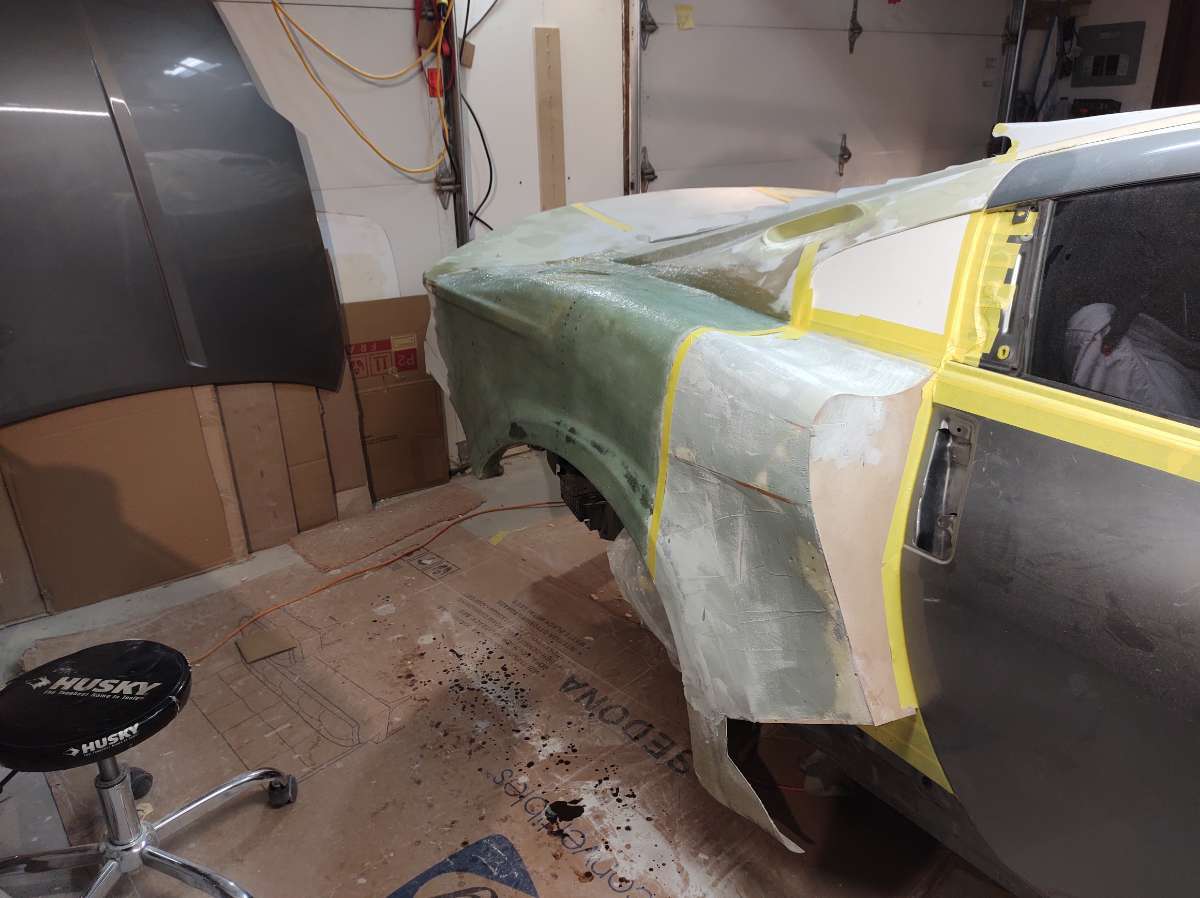
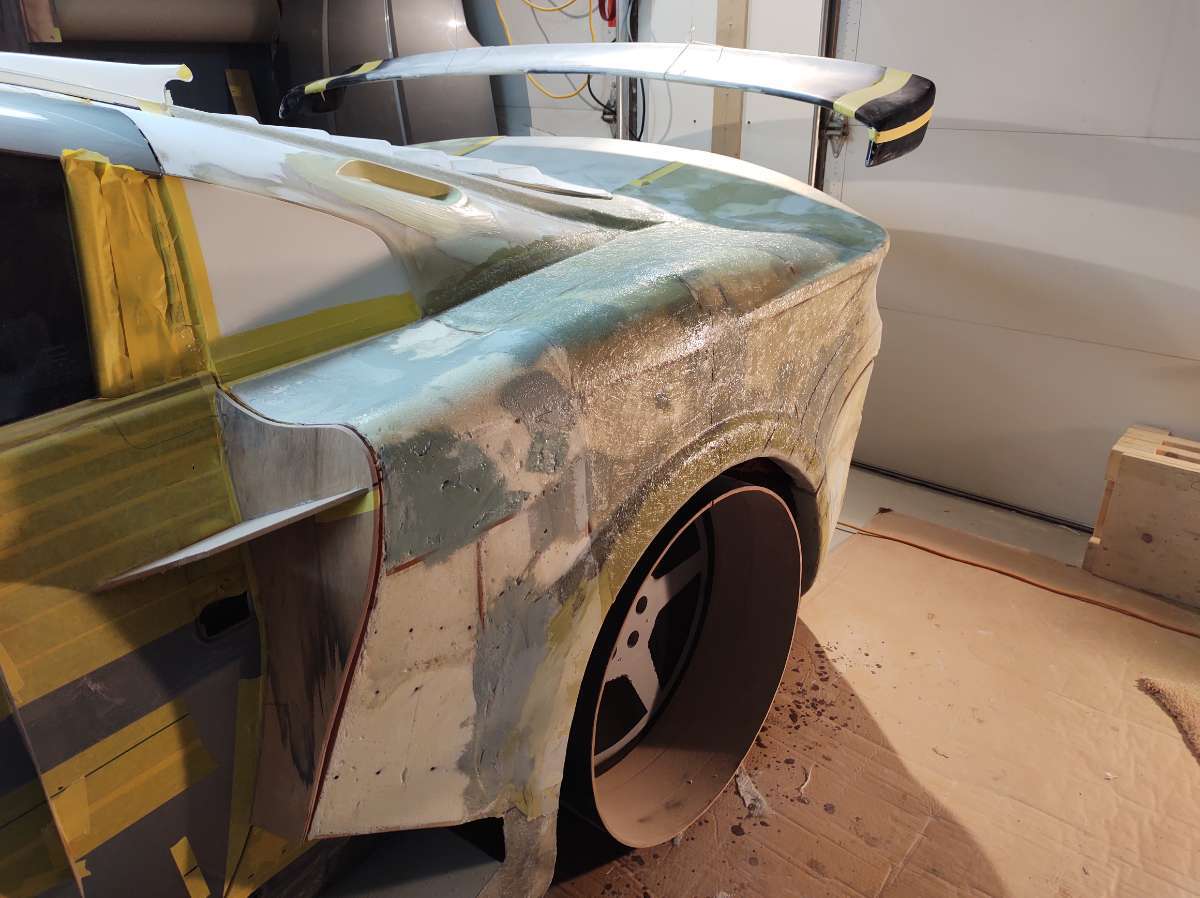
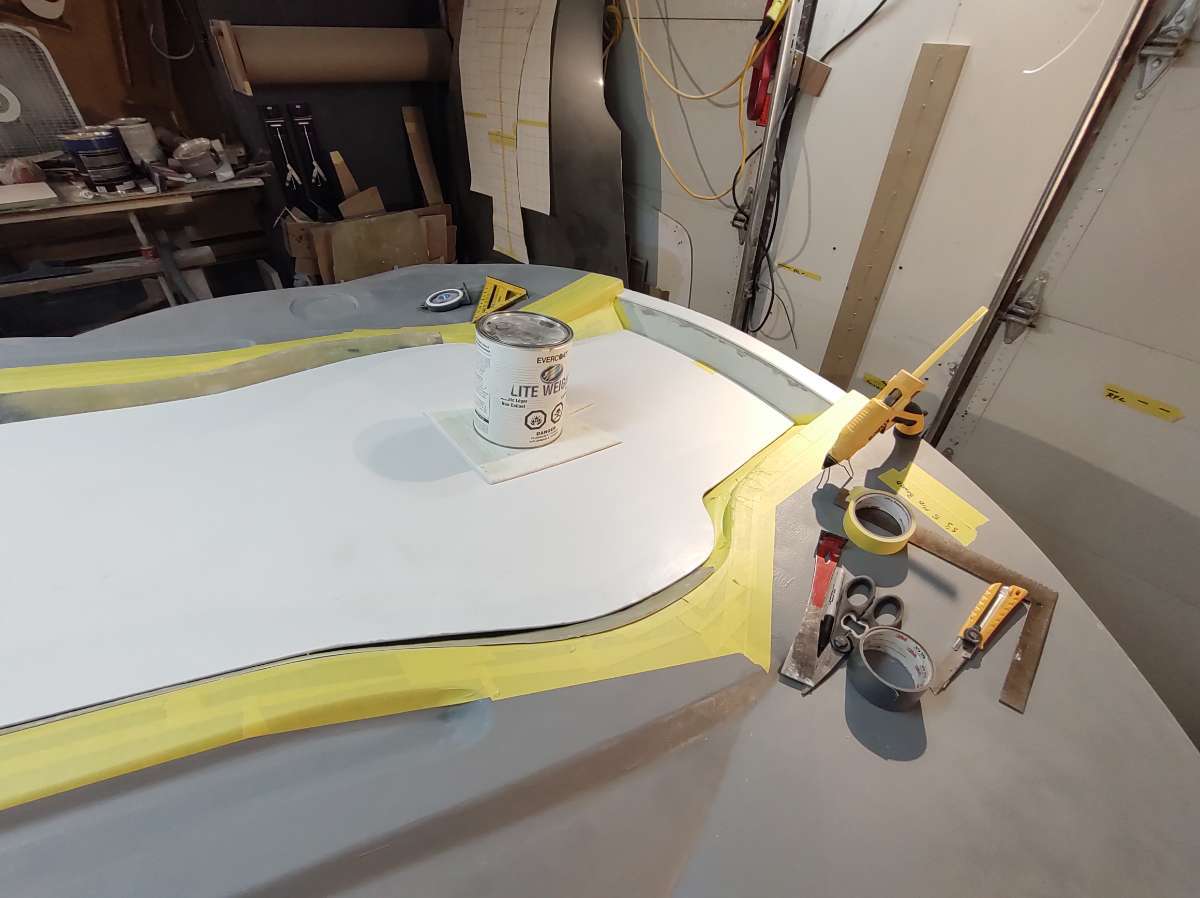
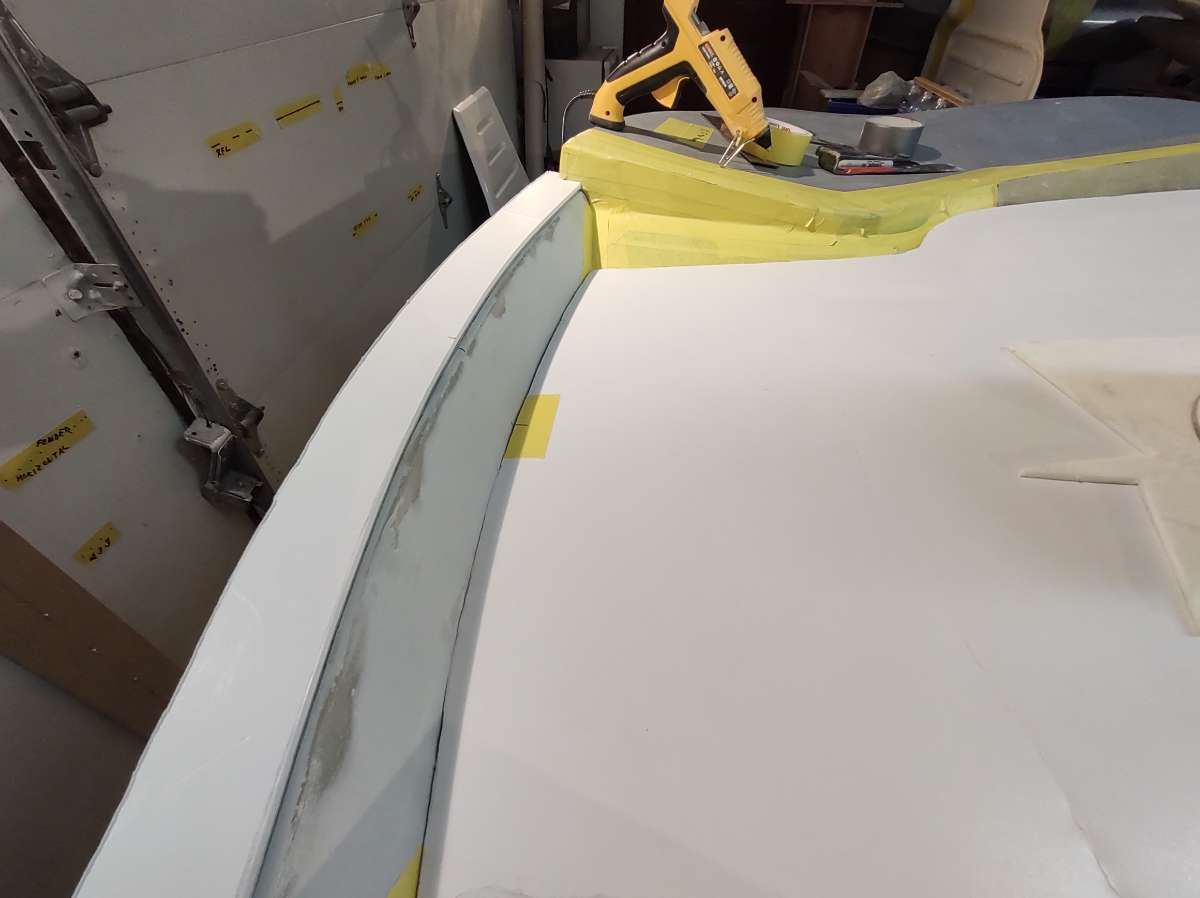
I also added a flange to the top of fender ark matting surface . this will give me a distinct line to trim the part later .
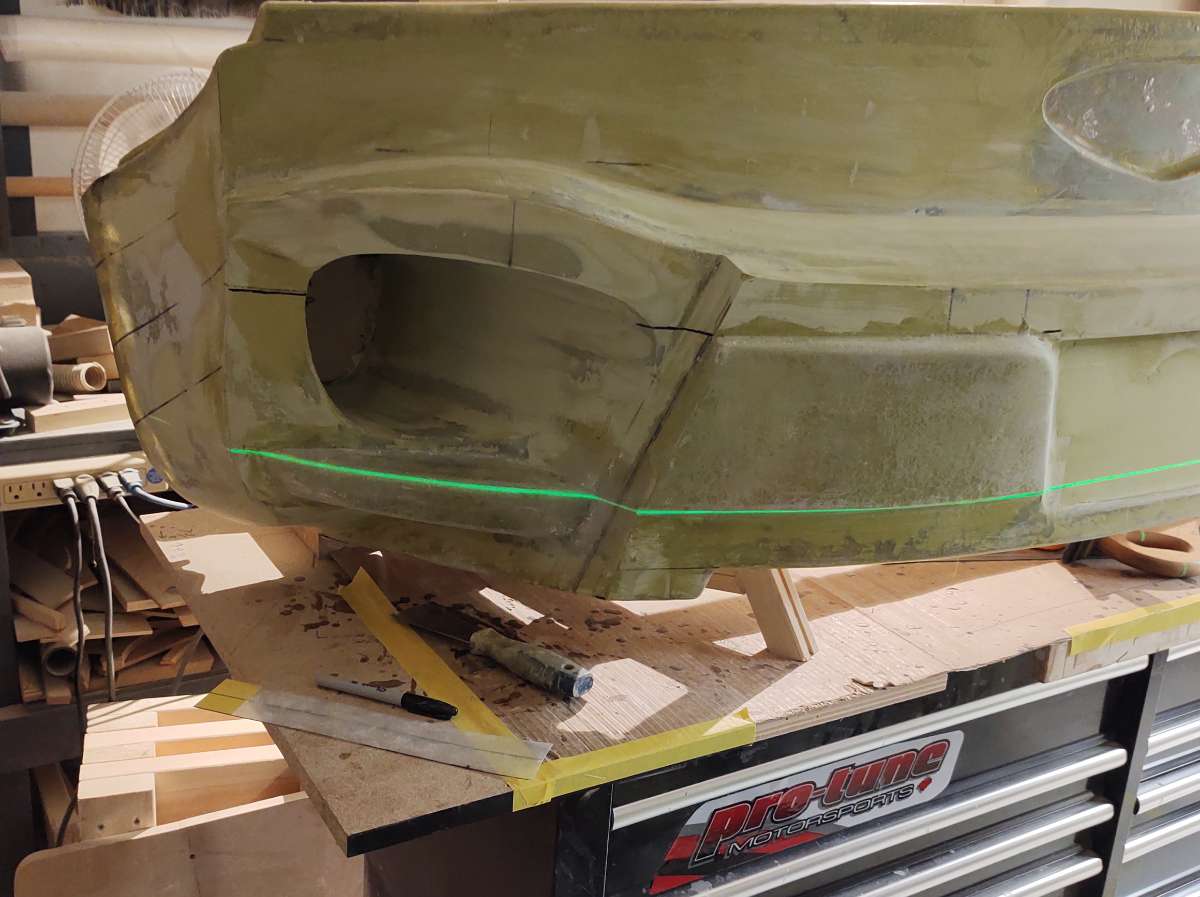
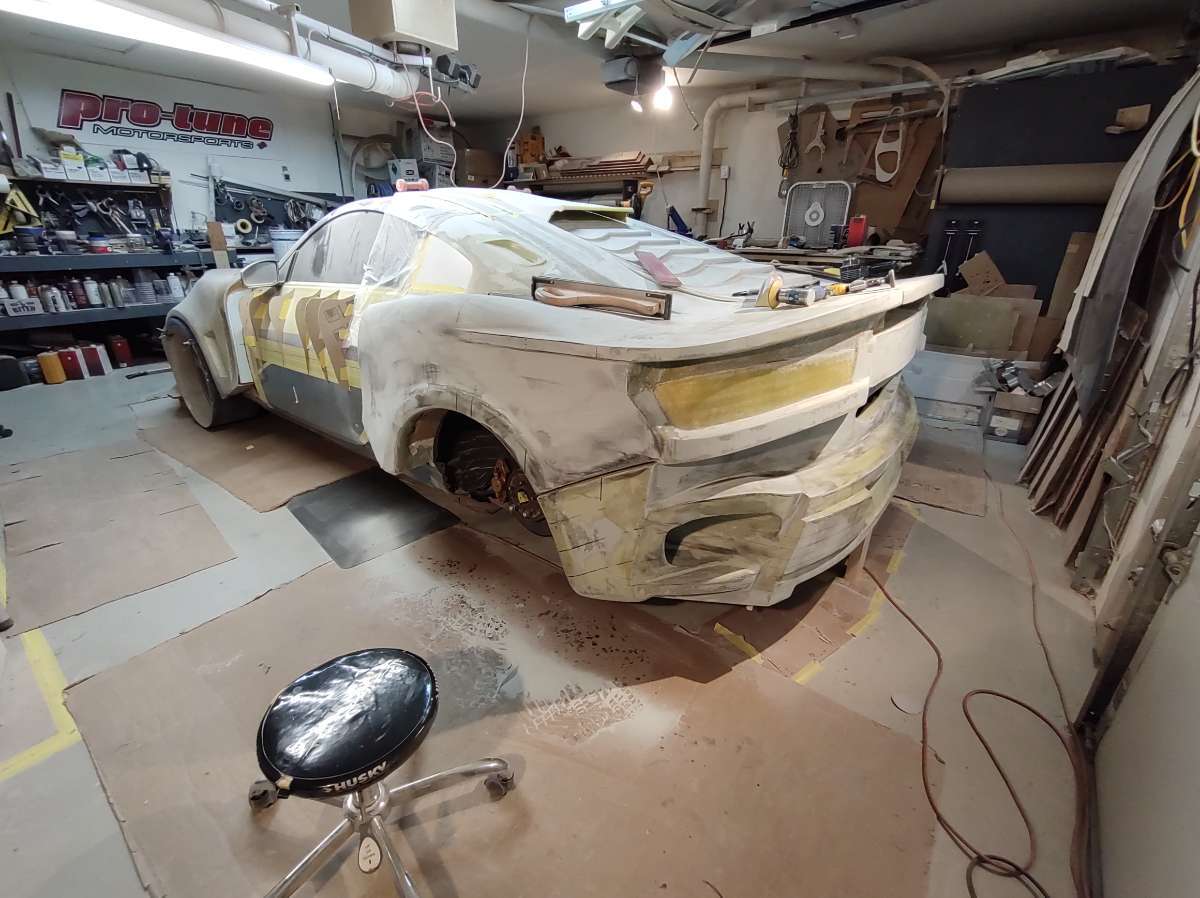
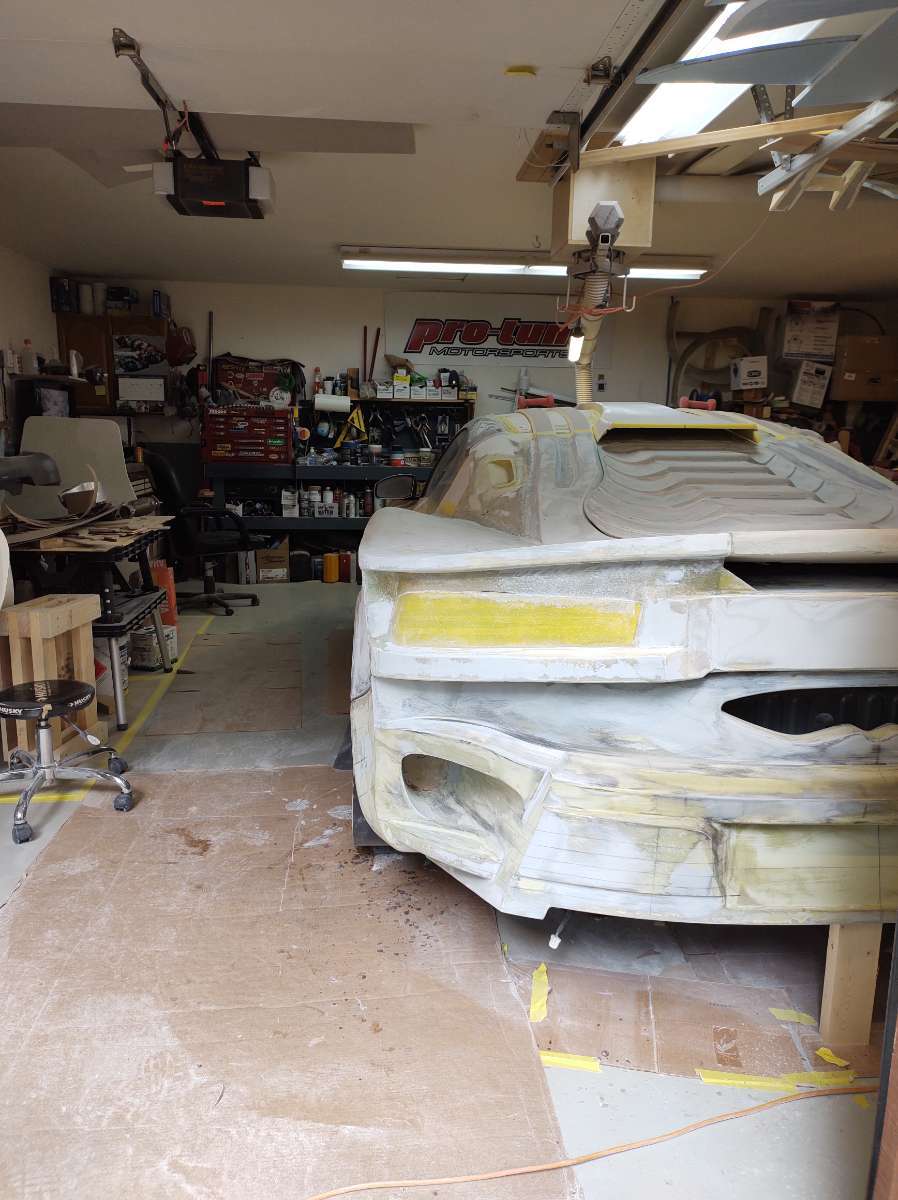
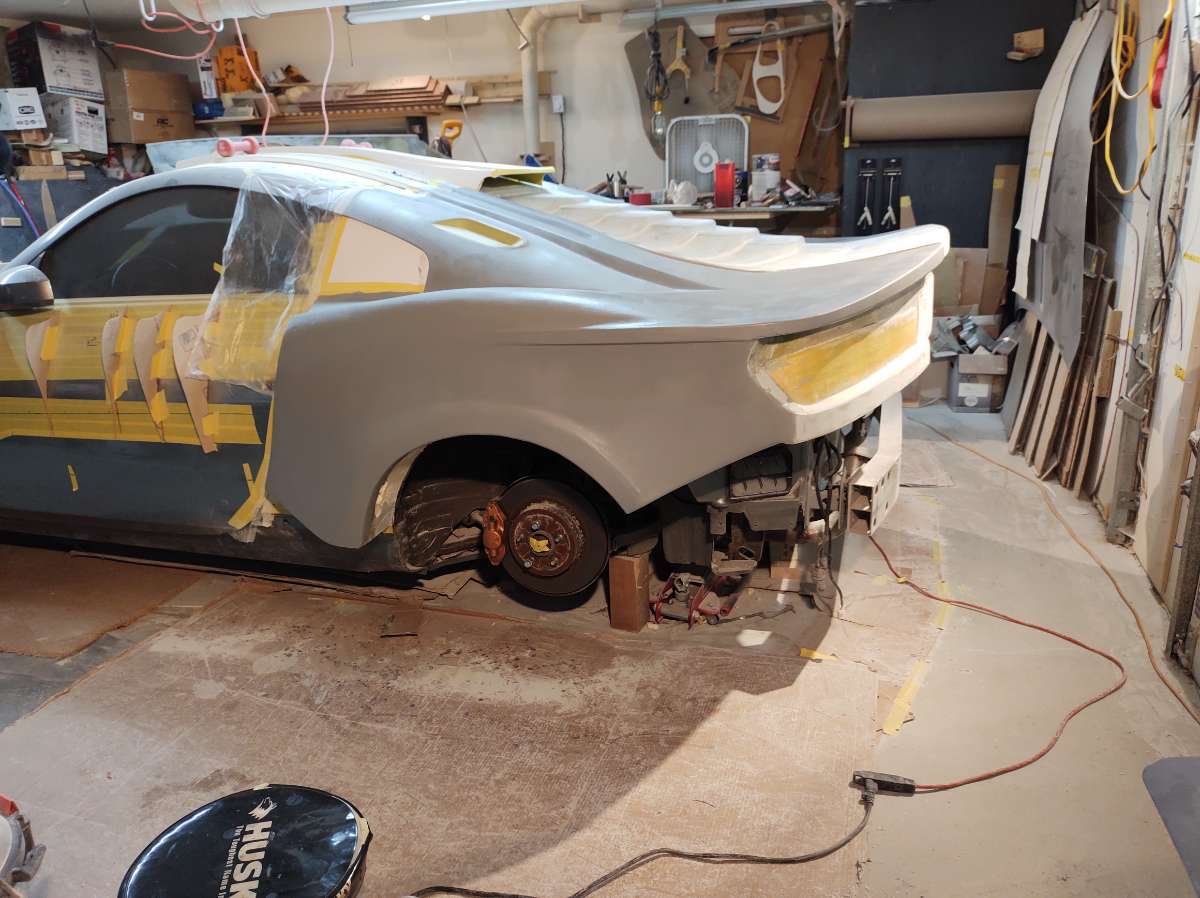
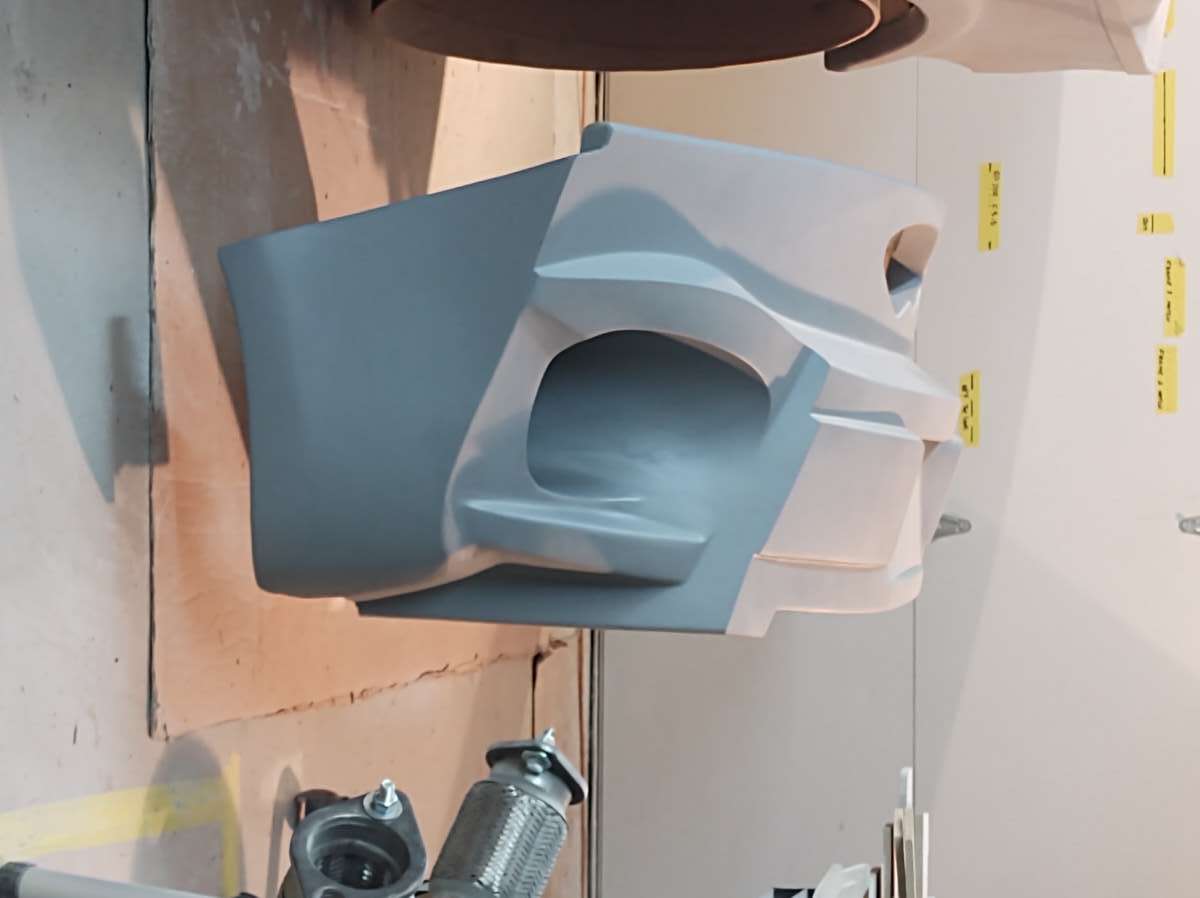
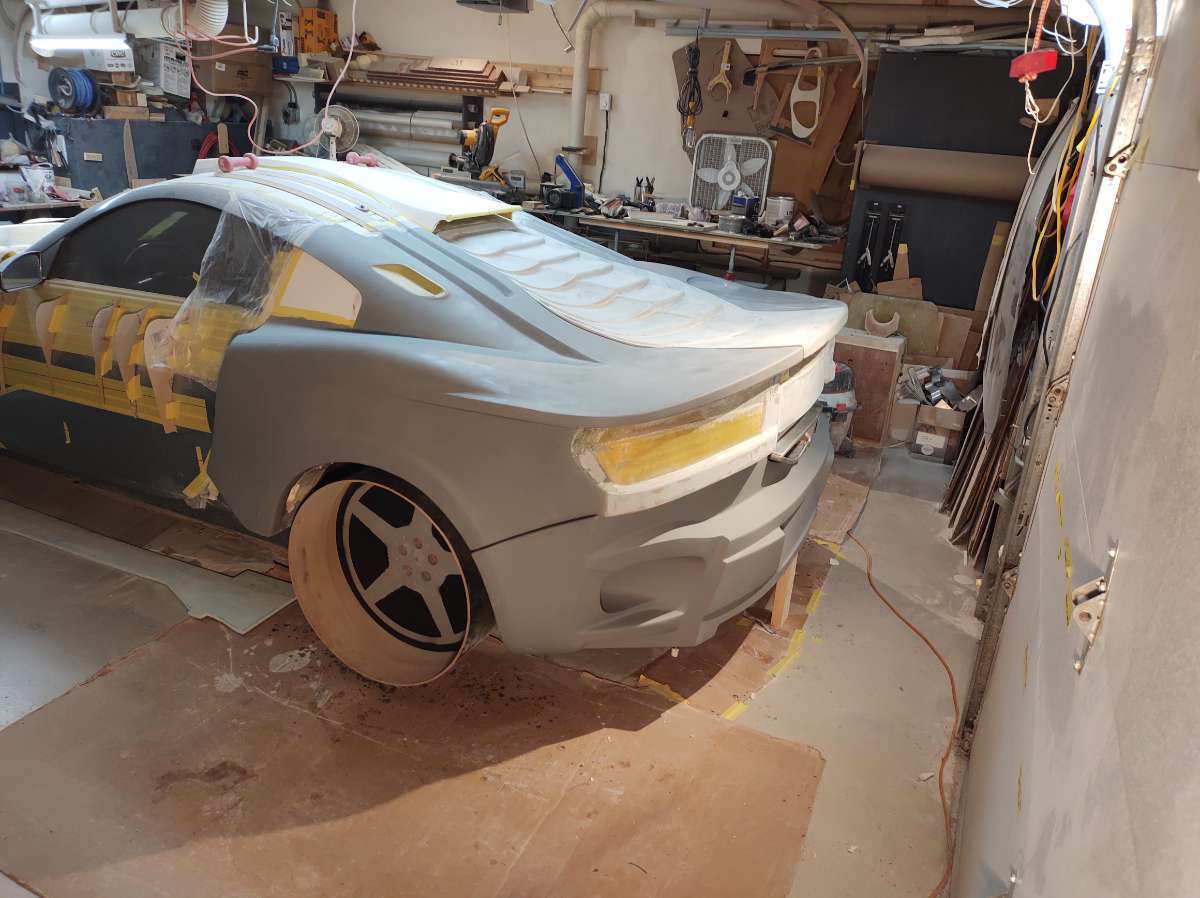
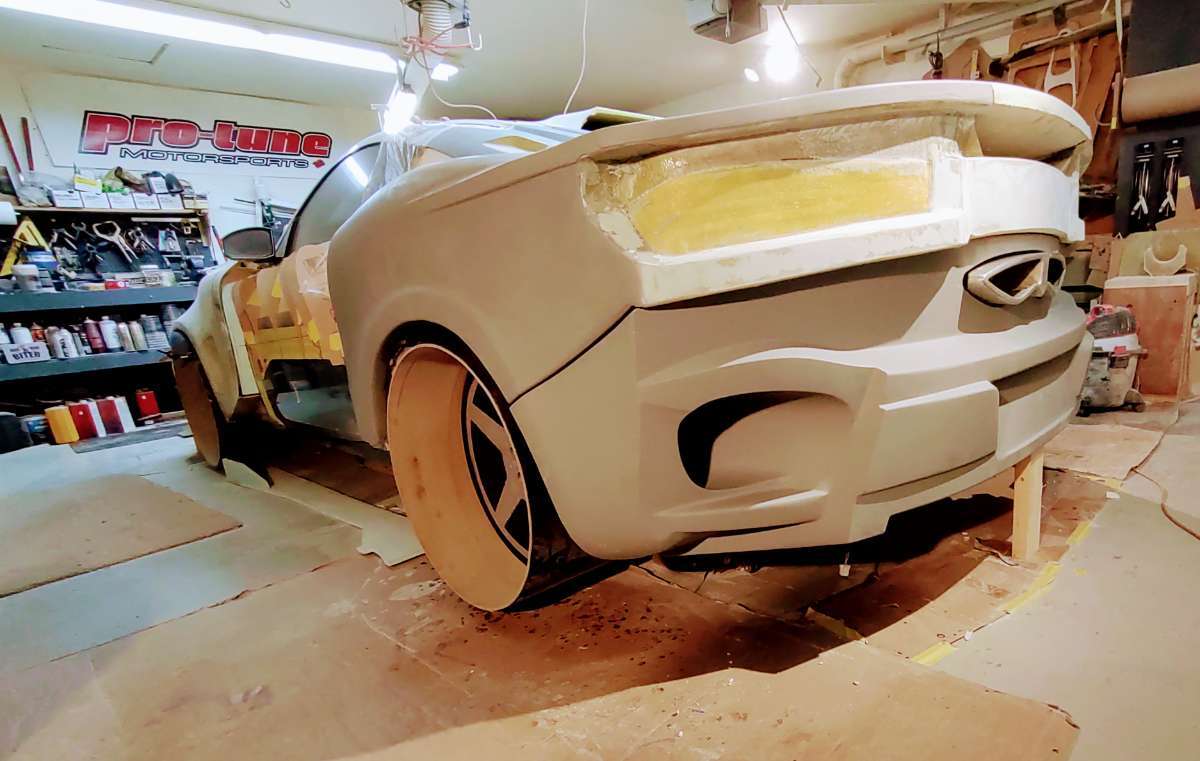
Here is the passenger side
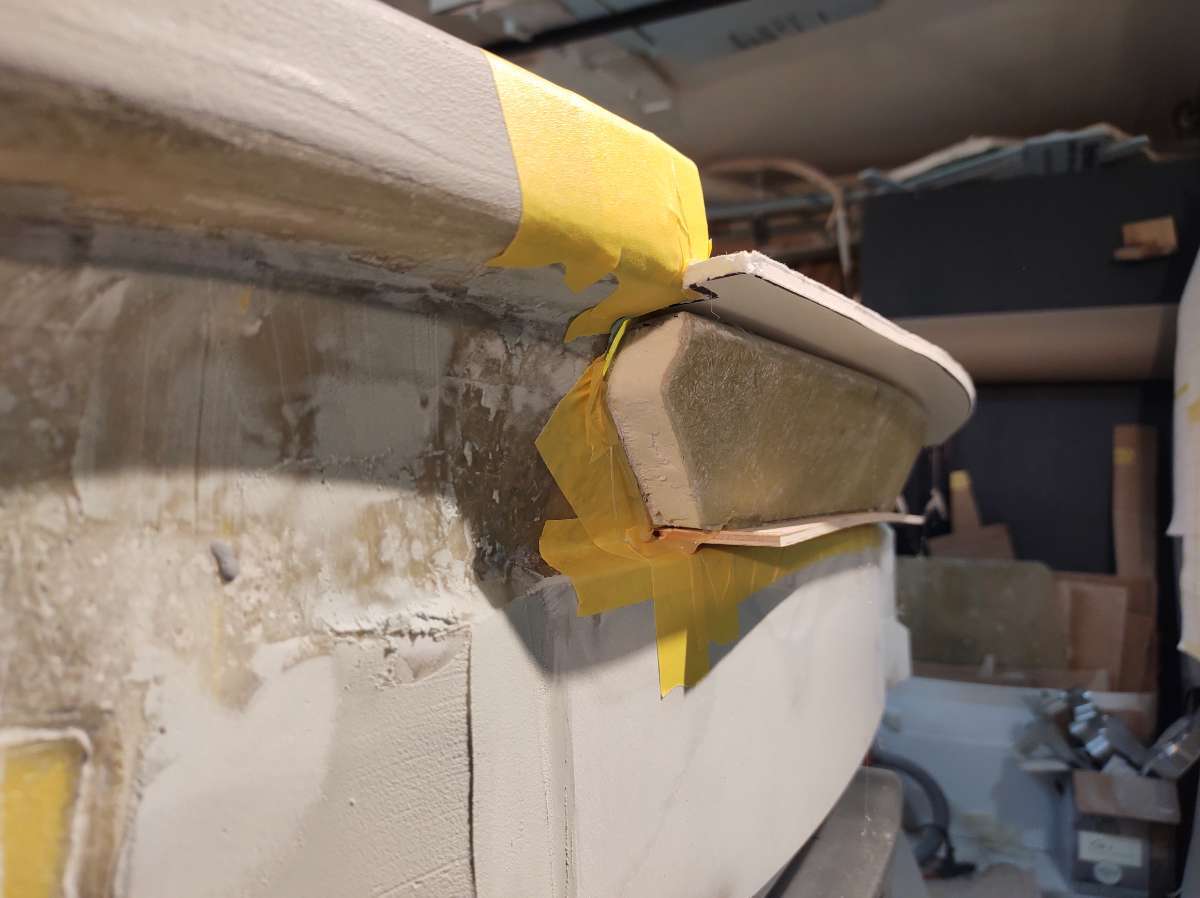
next I closed off ( filled in ) the bottom corners .
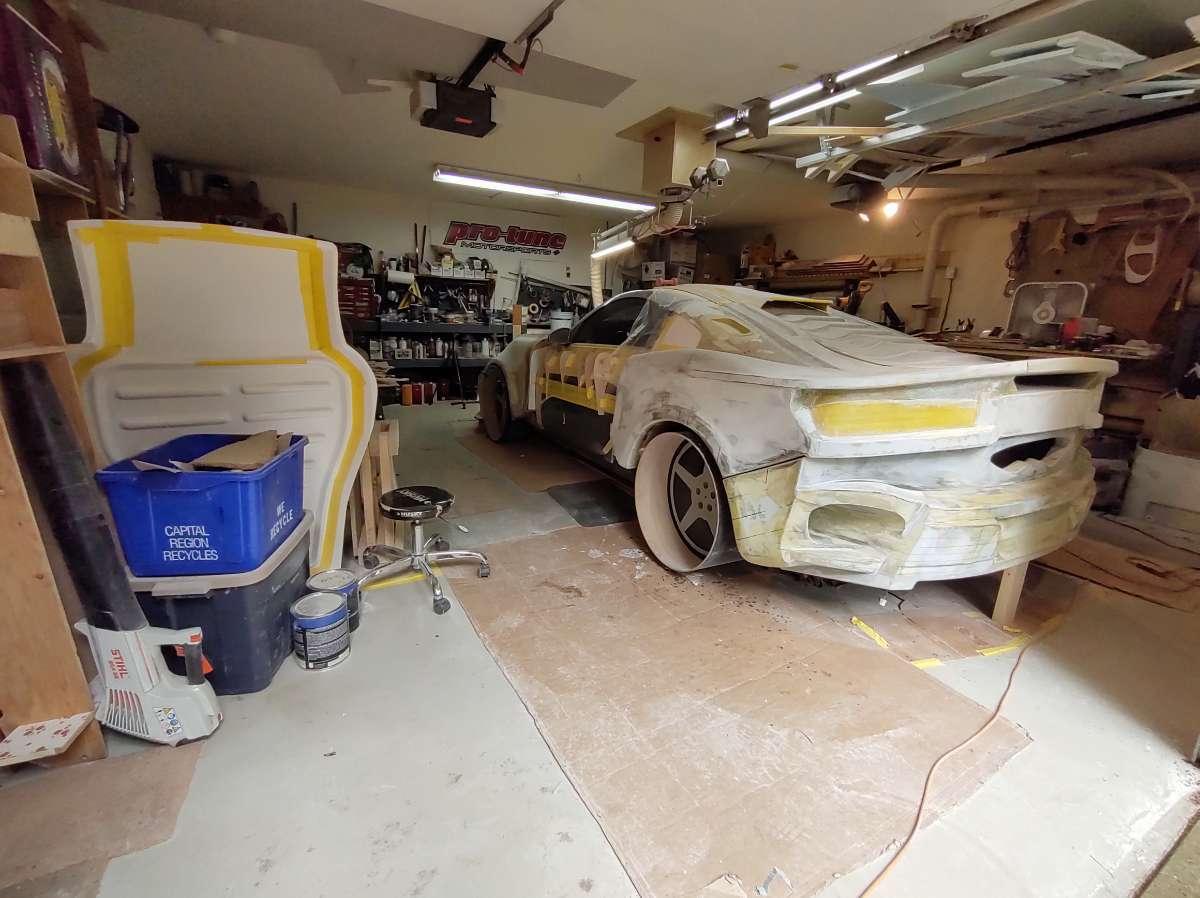
Well that's it for today , sorry there isn't more , waiting for the phone to ring , with the guy telling me they plowed the road into the shop .
Been working on the beast as usual here's what I have been up too .
I added some extra to the bottom where the diffuser will eventually go the inside of the other side
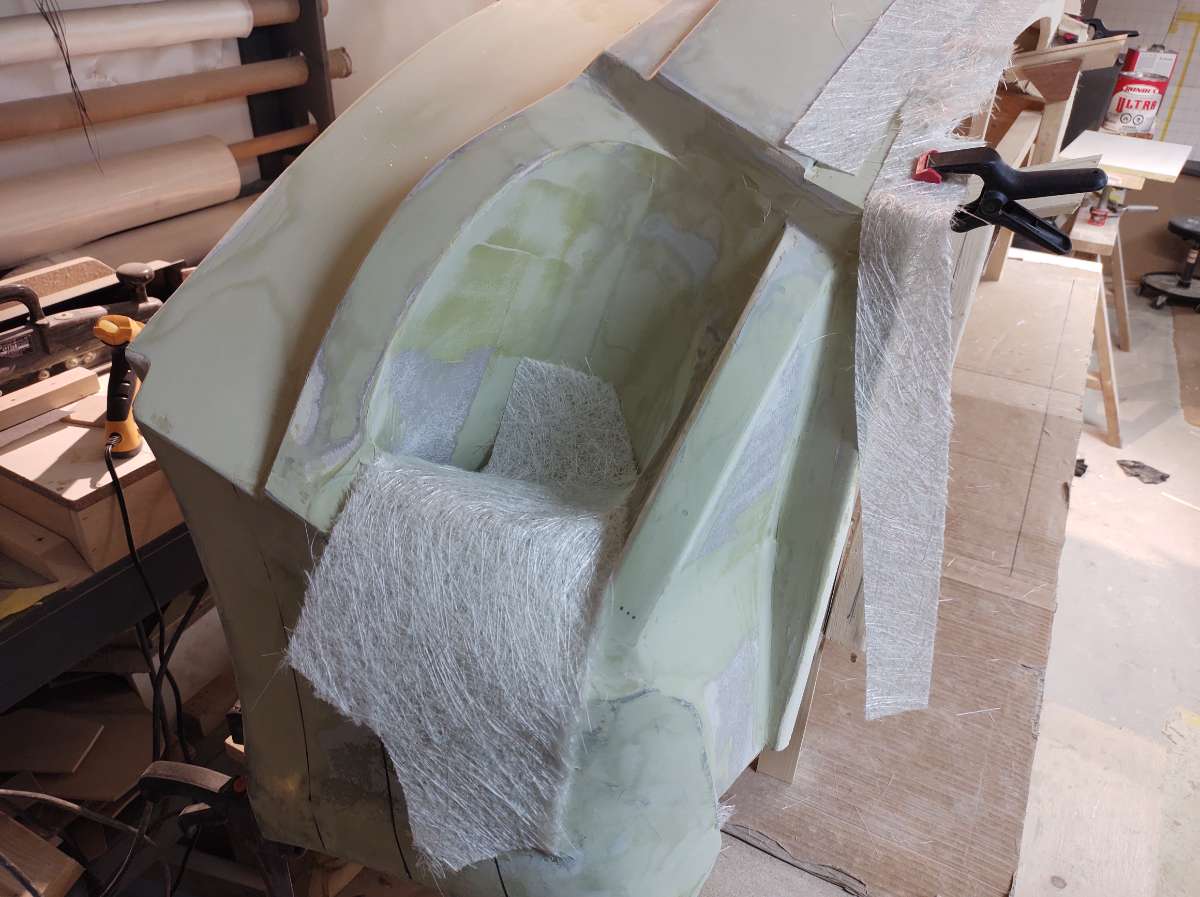
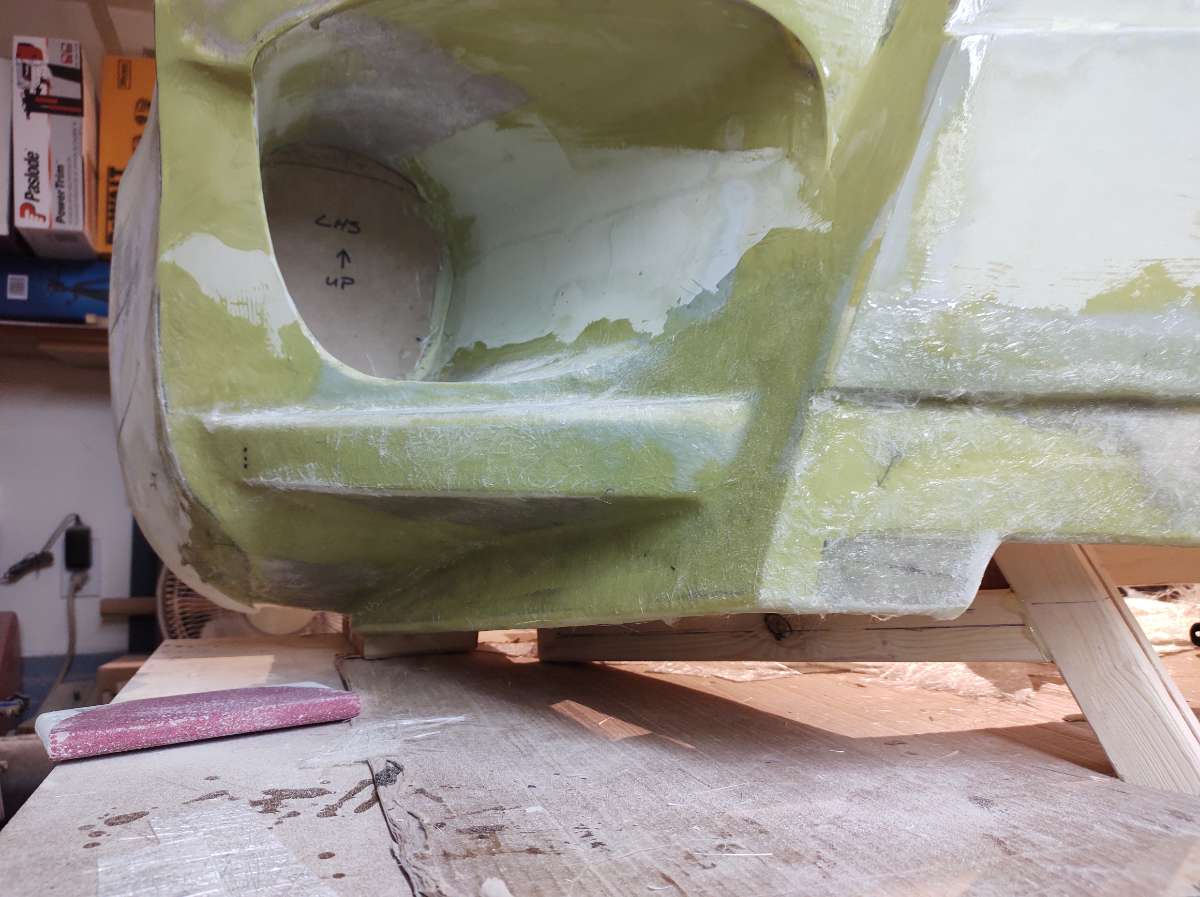
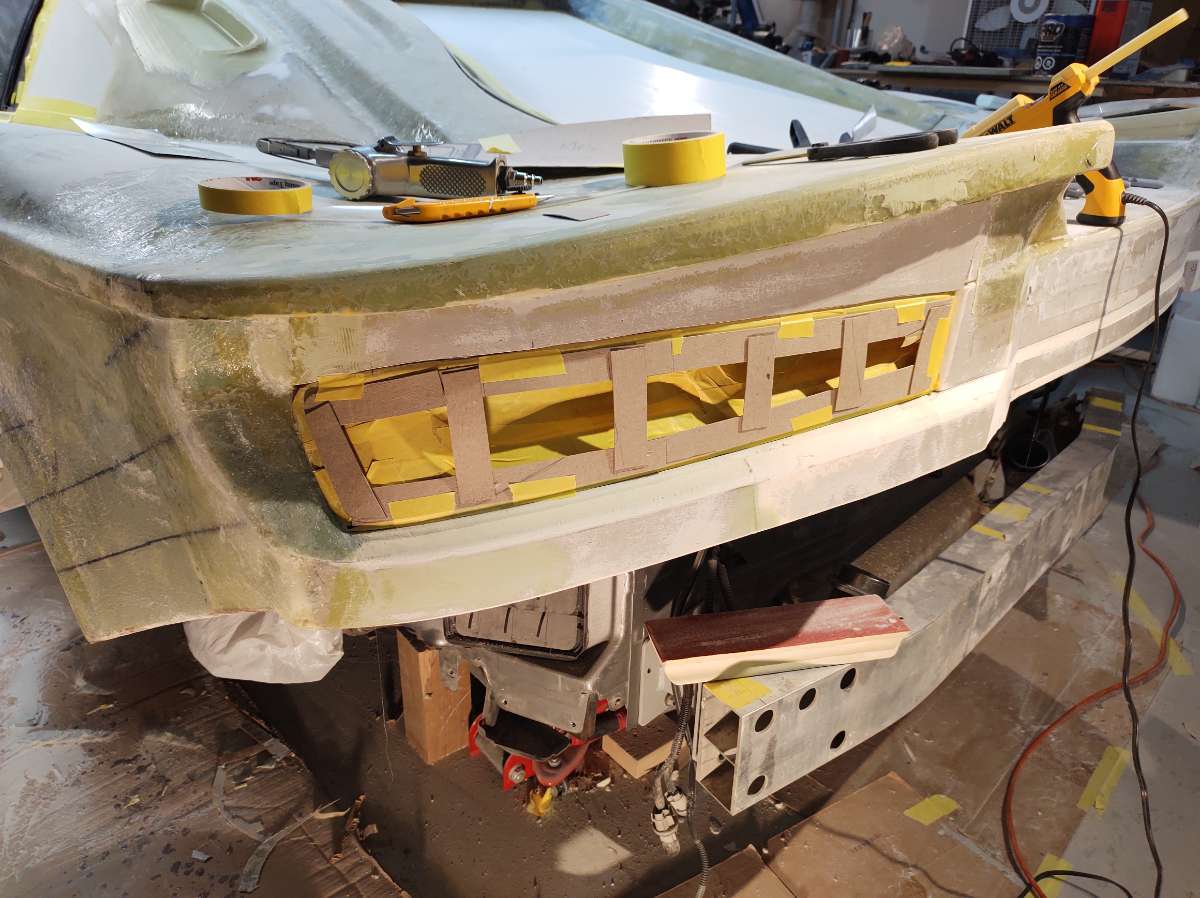
It was no fun at all to fiberglass inside the ducts
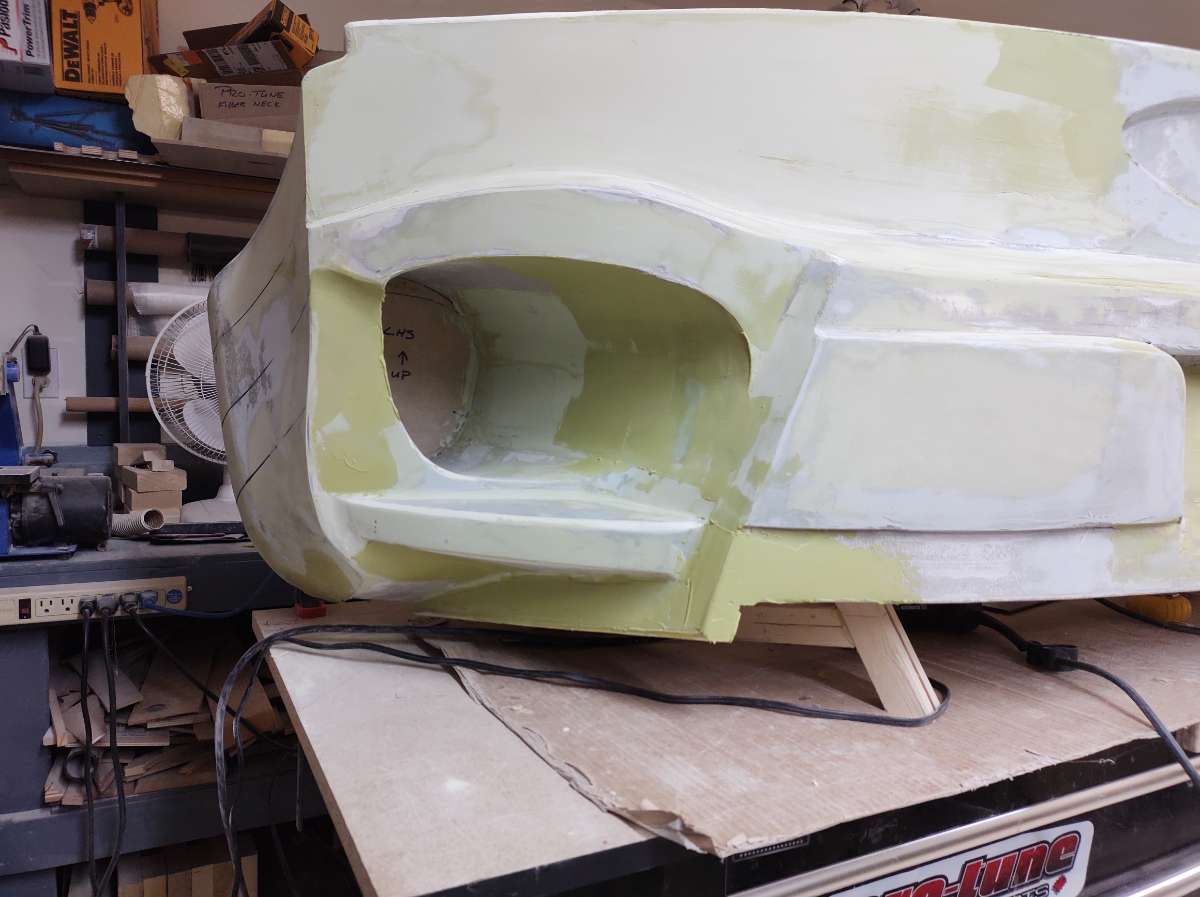
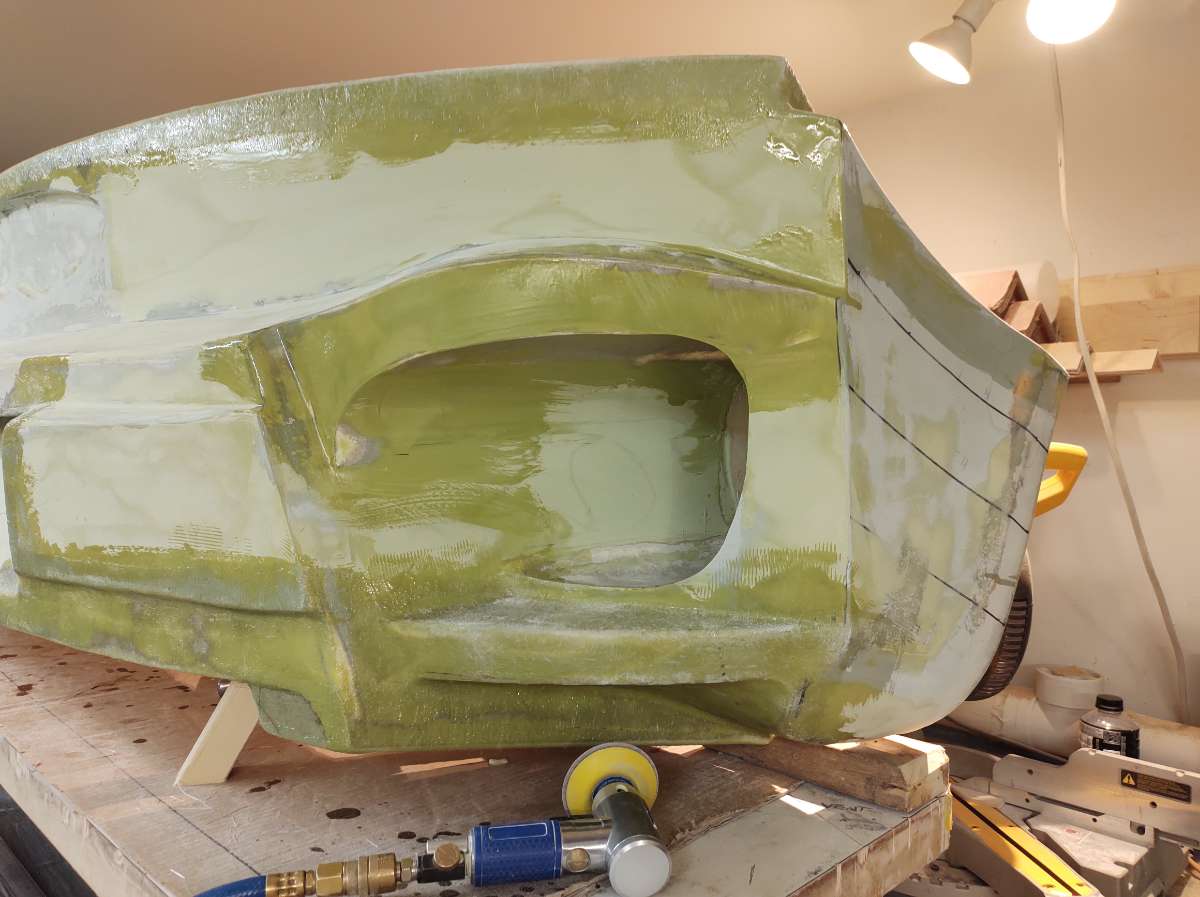
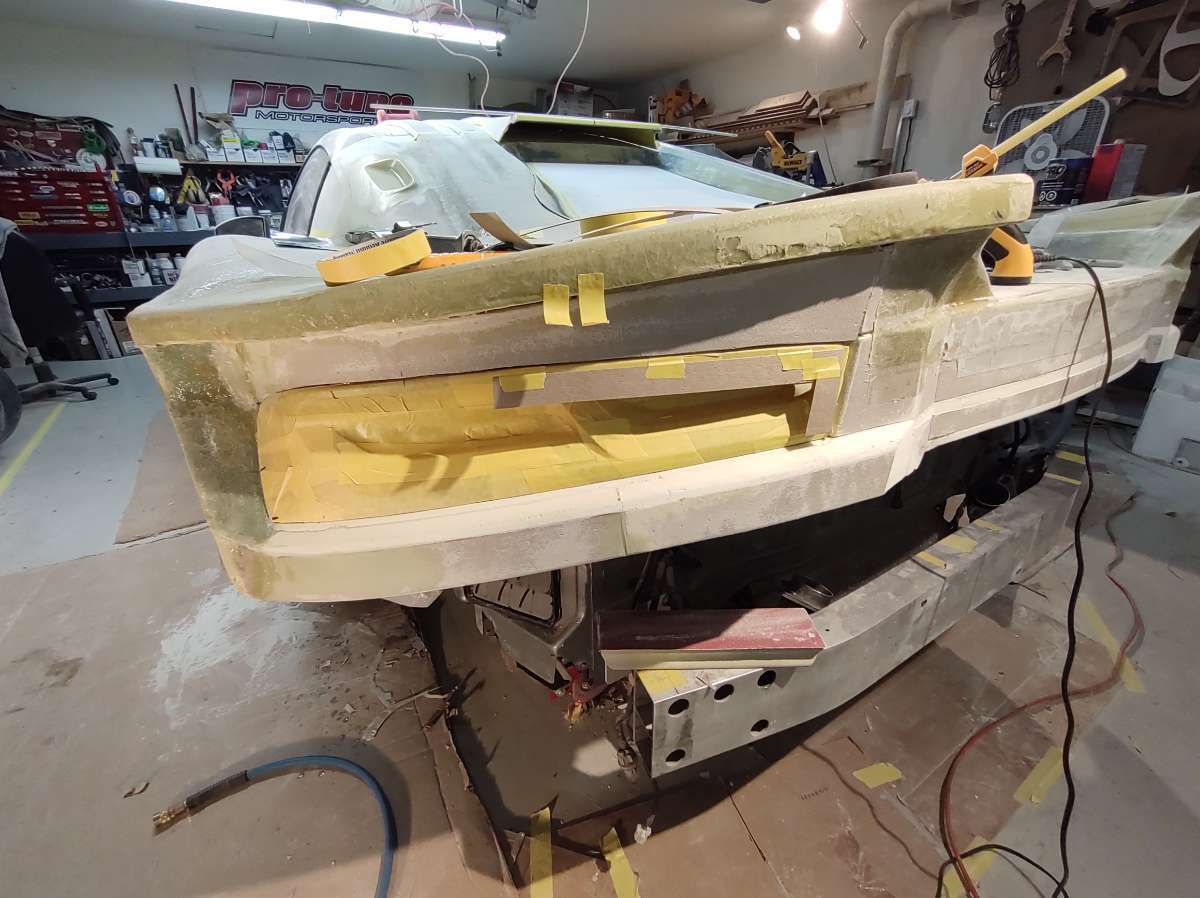
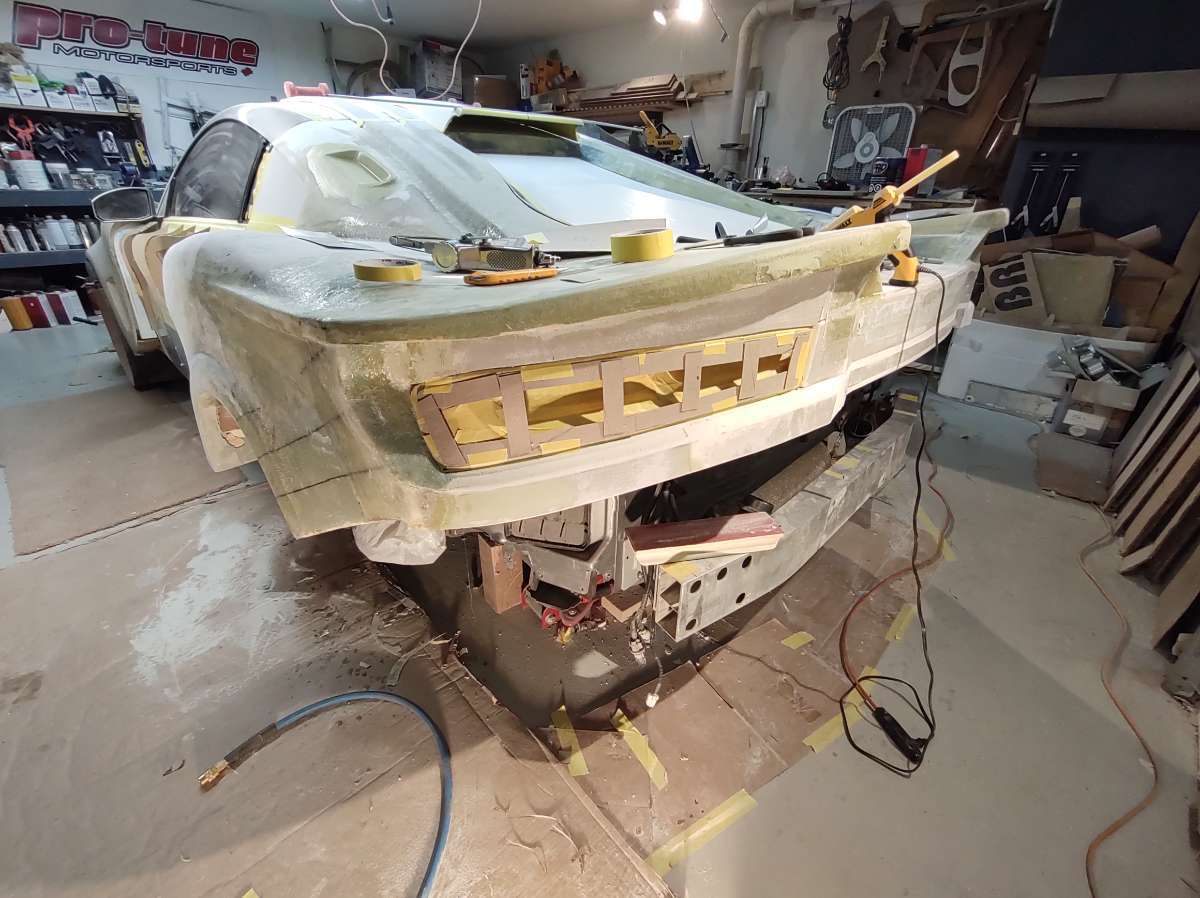
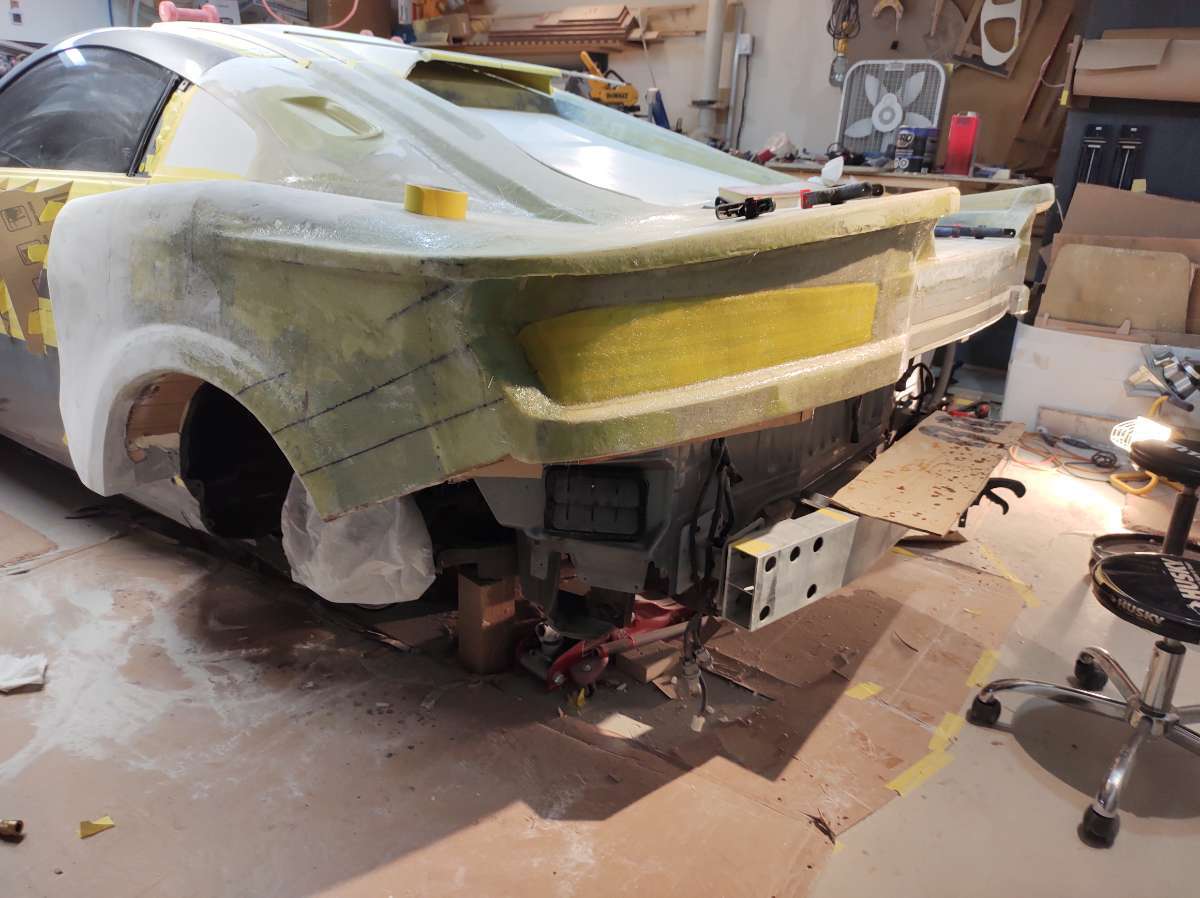
bumper cover starting to take shape
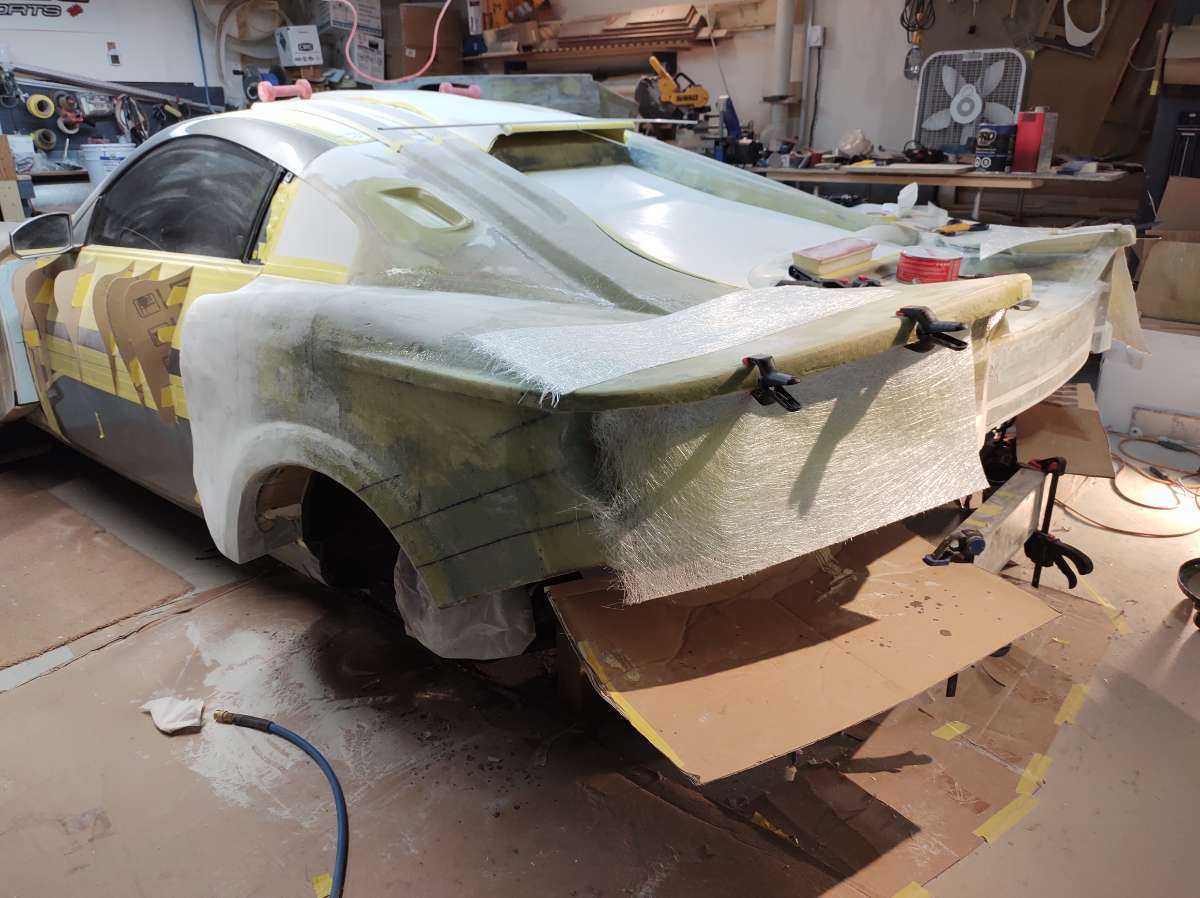
Getting ready for more glass
with this foam you have to glass over it before you apply any filler or when you try to sand it just tears it out in chunks .
Here you can see better the pieces i added to the bottom
upside down to apply filler and sand
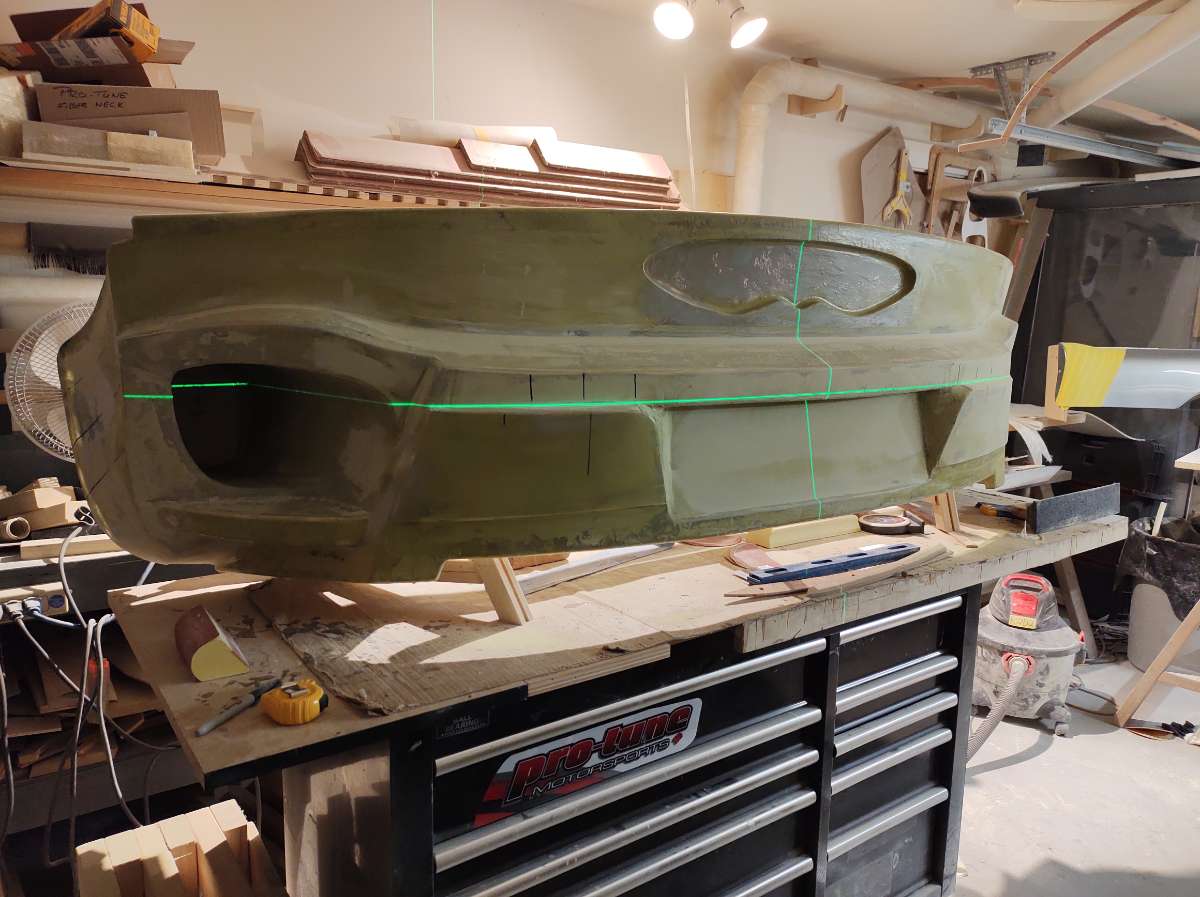
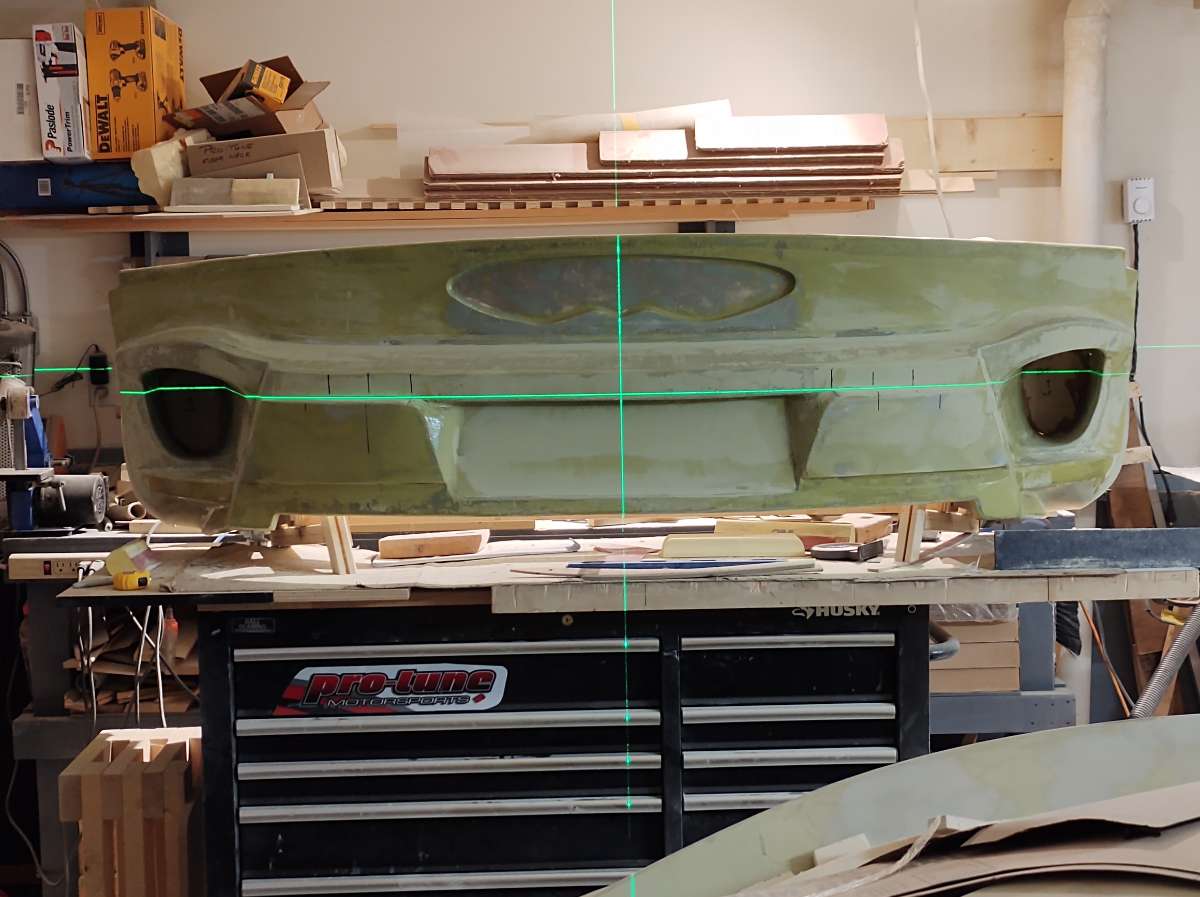
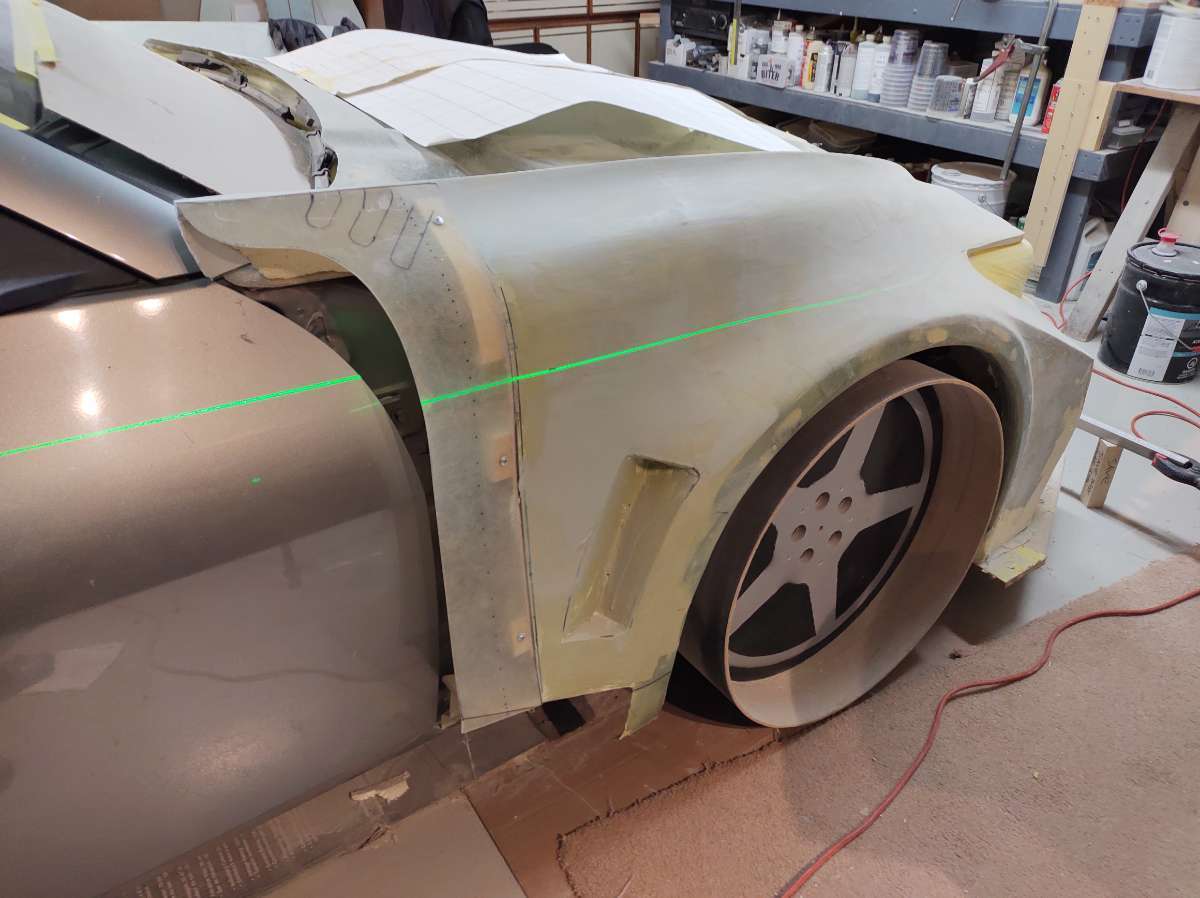
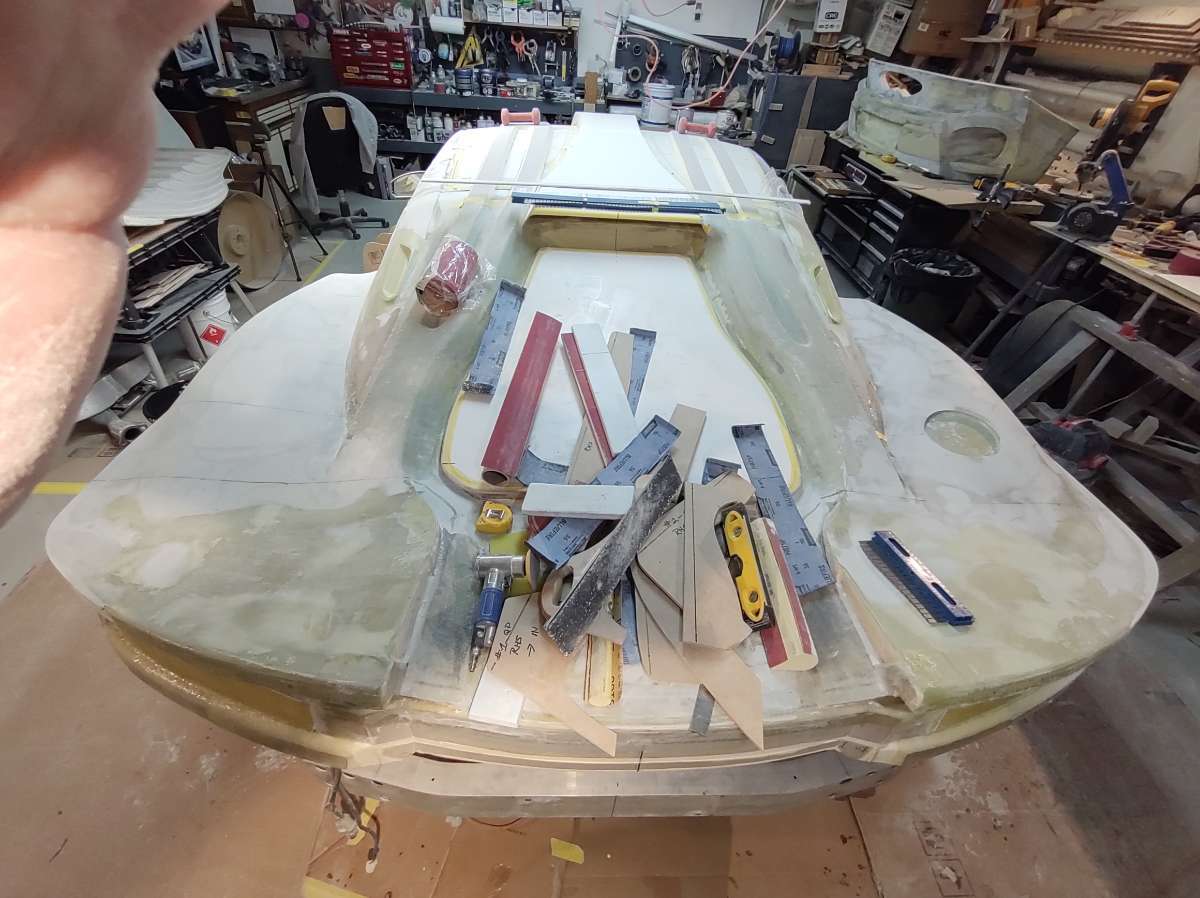
here checking to make sure everything is staying symmetrical , it not easy , so many compound curves
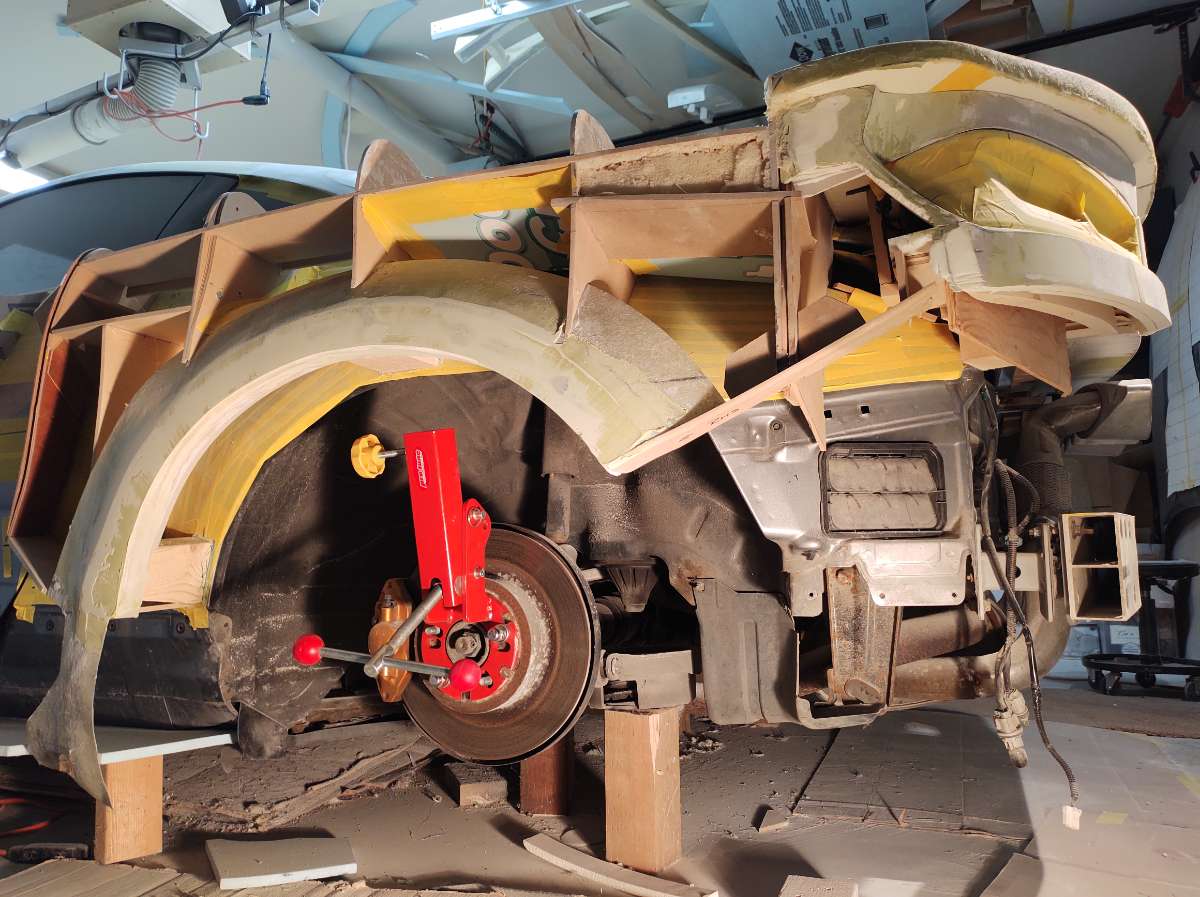
started filling in the fender inside lip with foam .
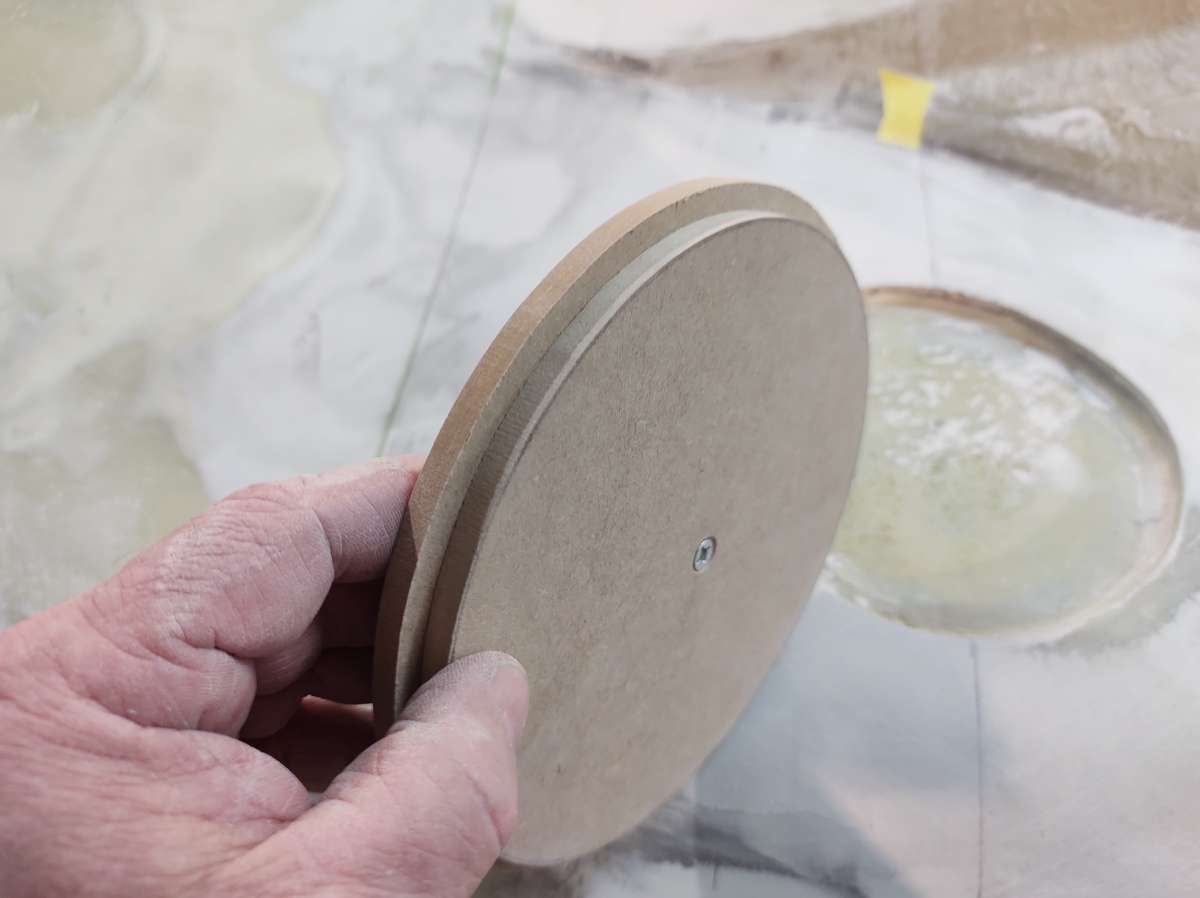
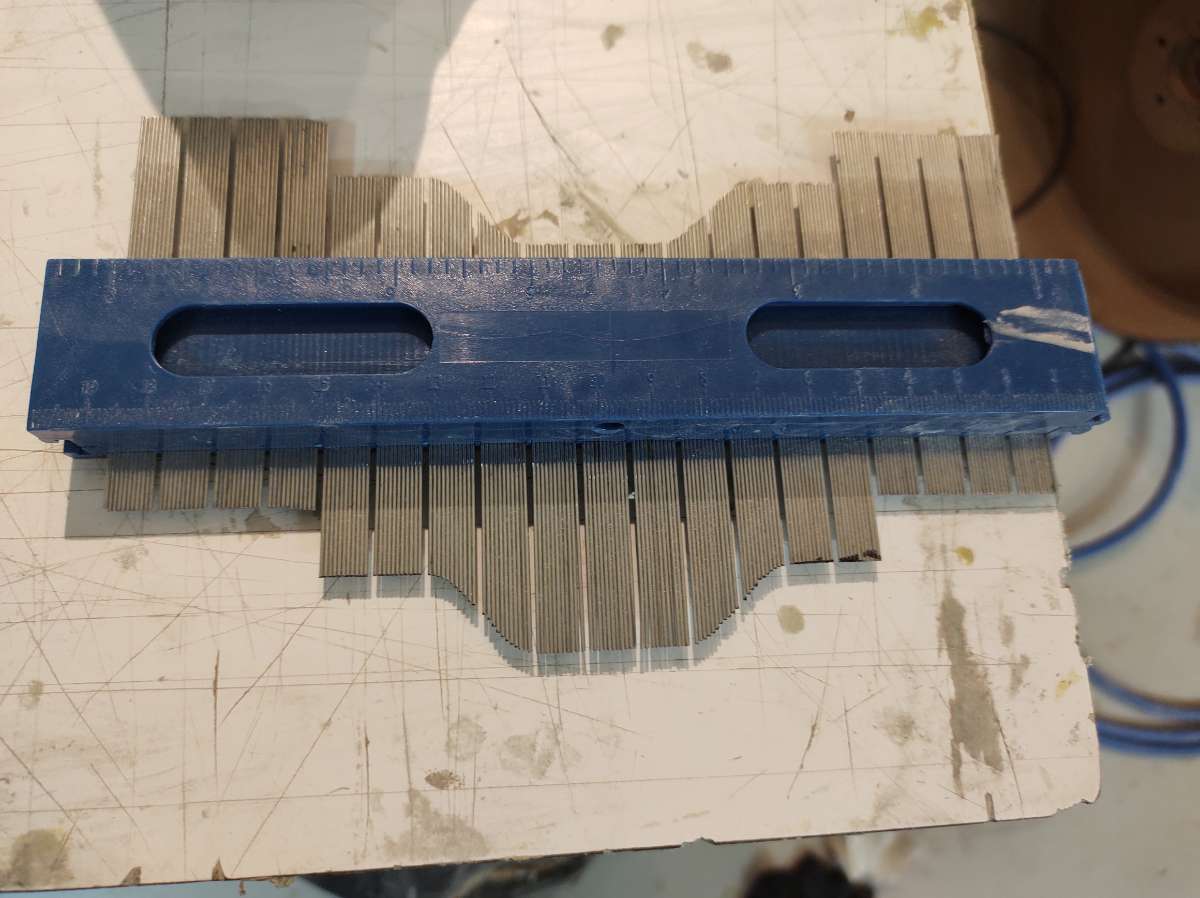
I modified my fender roller ( it didn't reach the edge by a long shot lol )
Using it to check and ensure that both sides are the same
More quality control , this is an unbelievable amount of work , I am going as fast as i can , it's just me and I have to have this finished by late spring .
I need to get it done but a also don't want a pile of crap after all the effort that's gone into it so far .
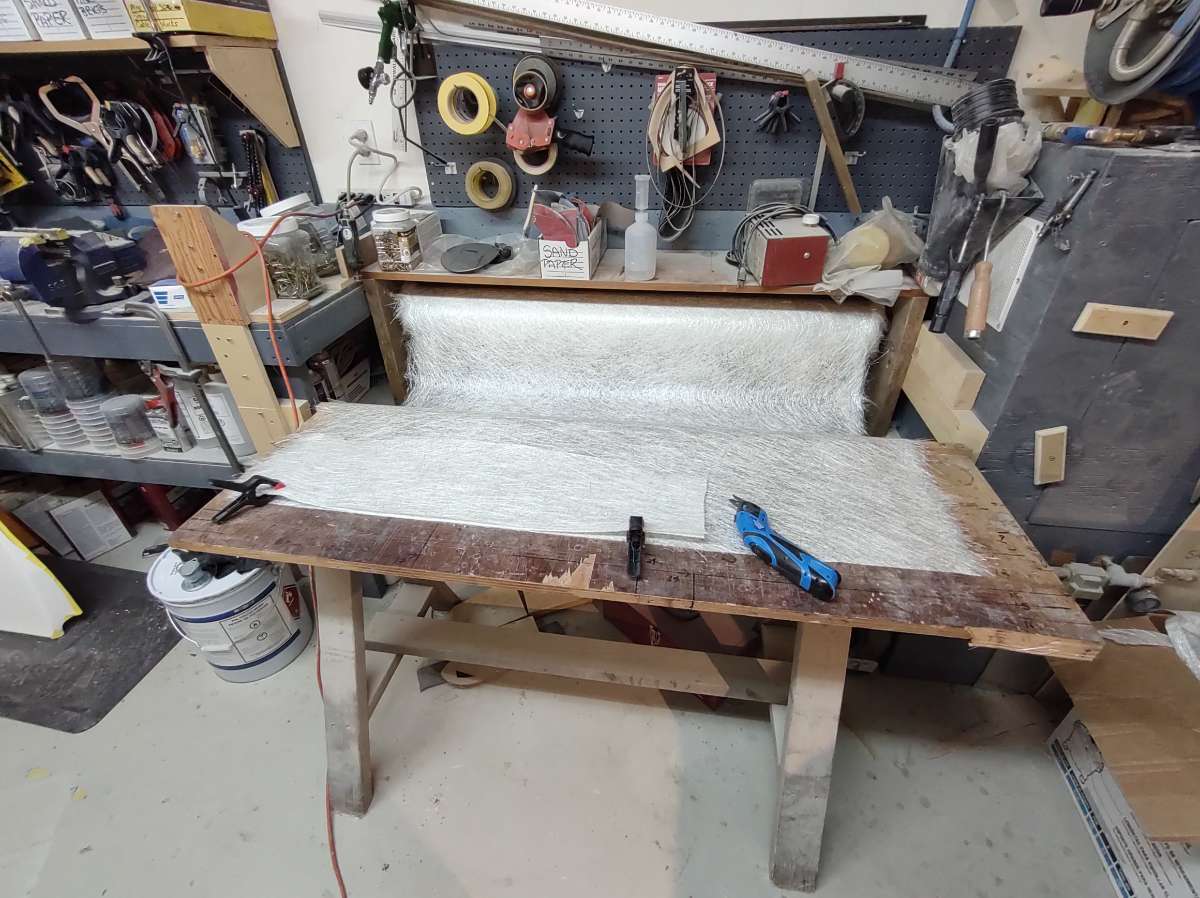
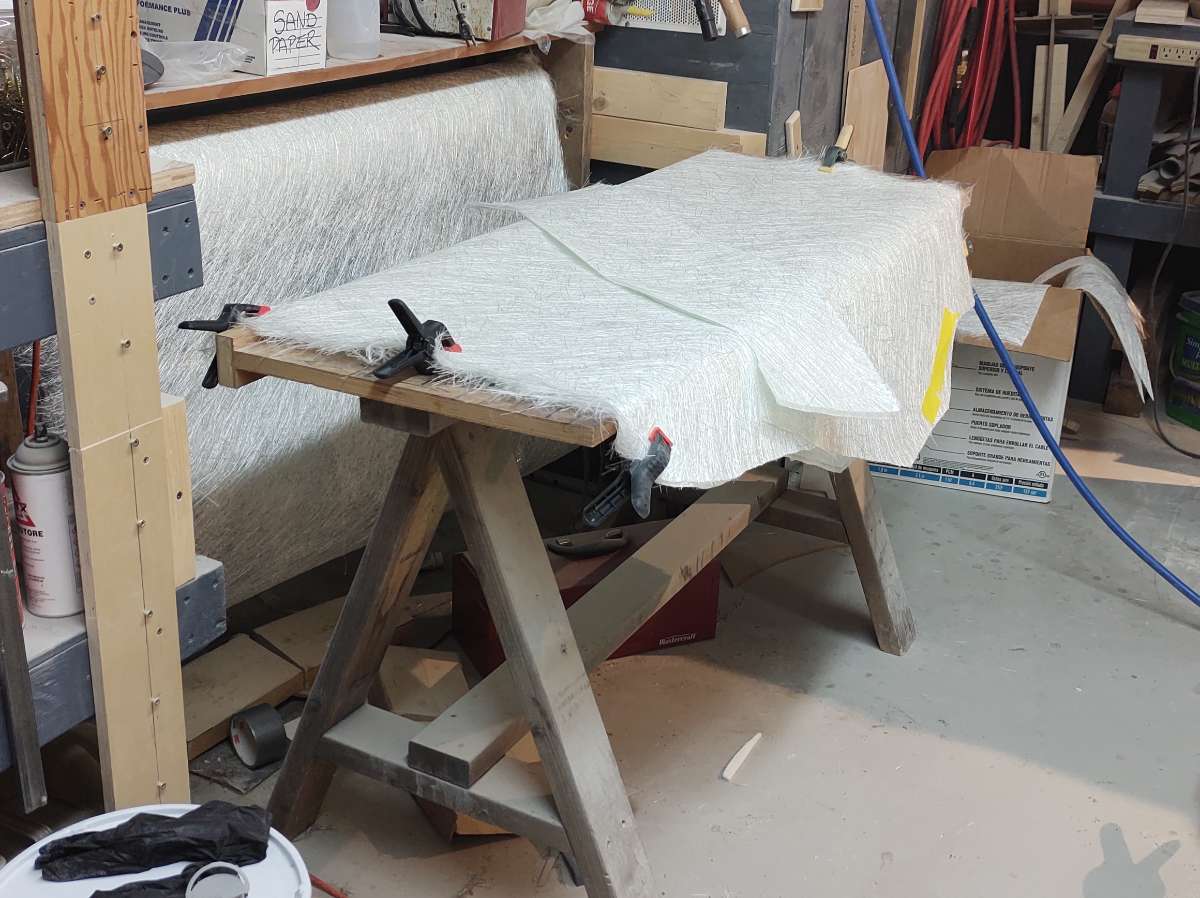
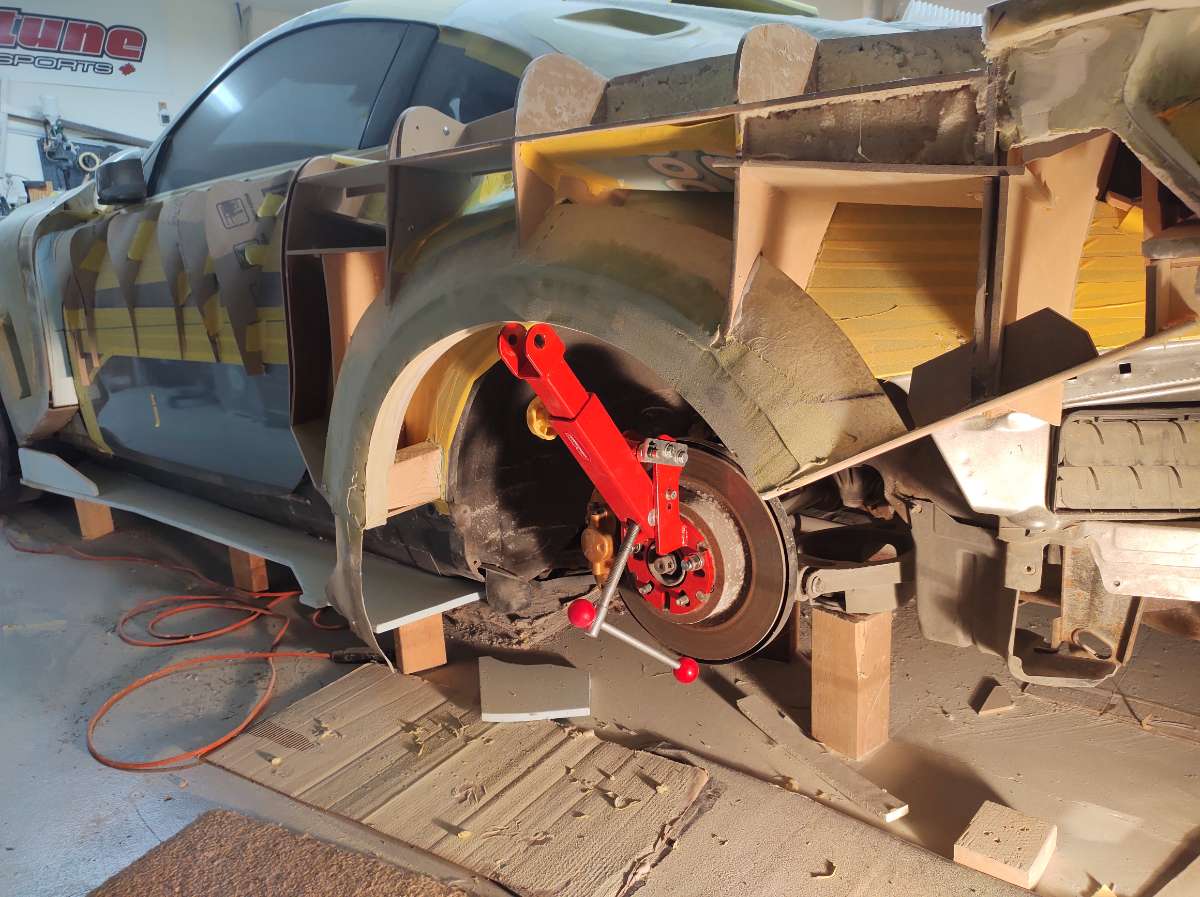
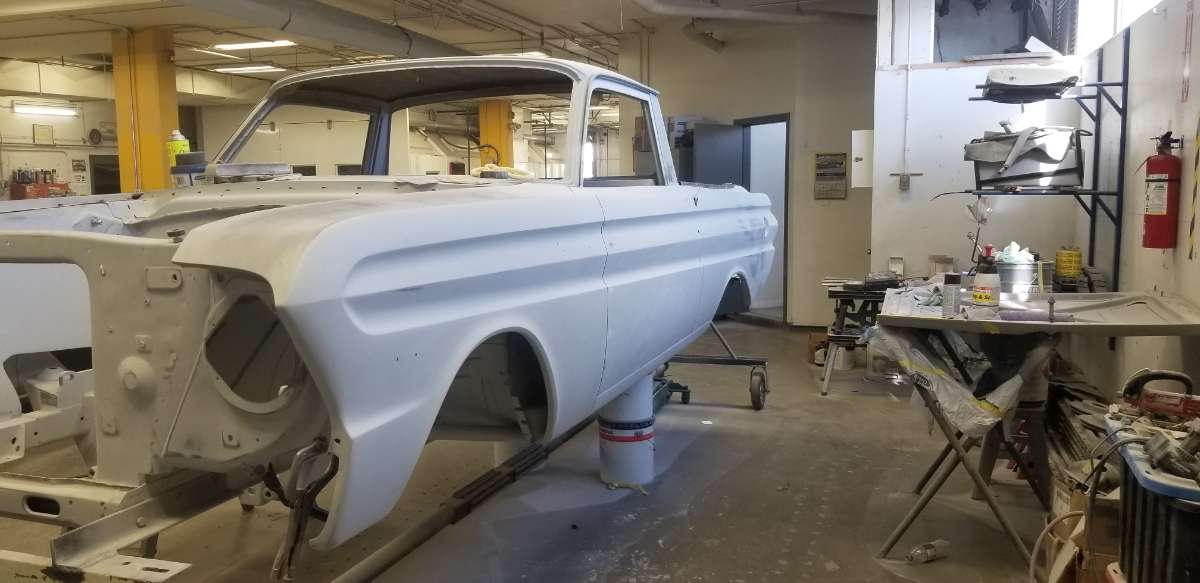
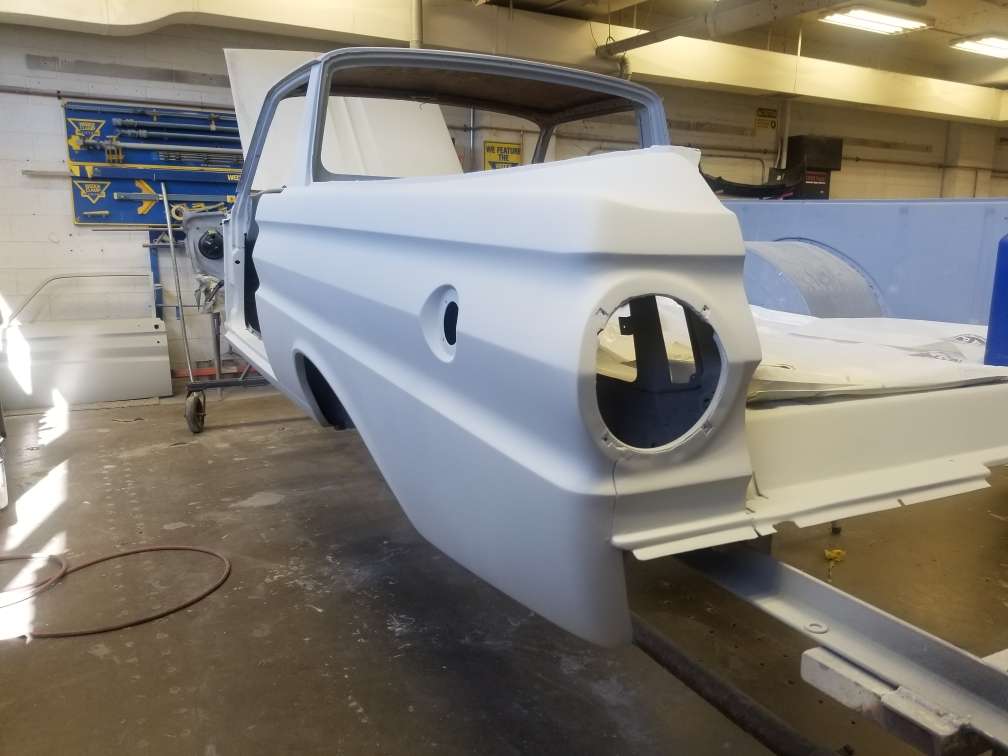
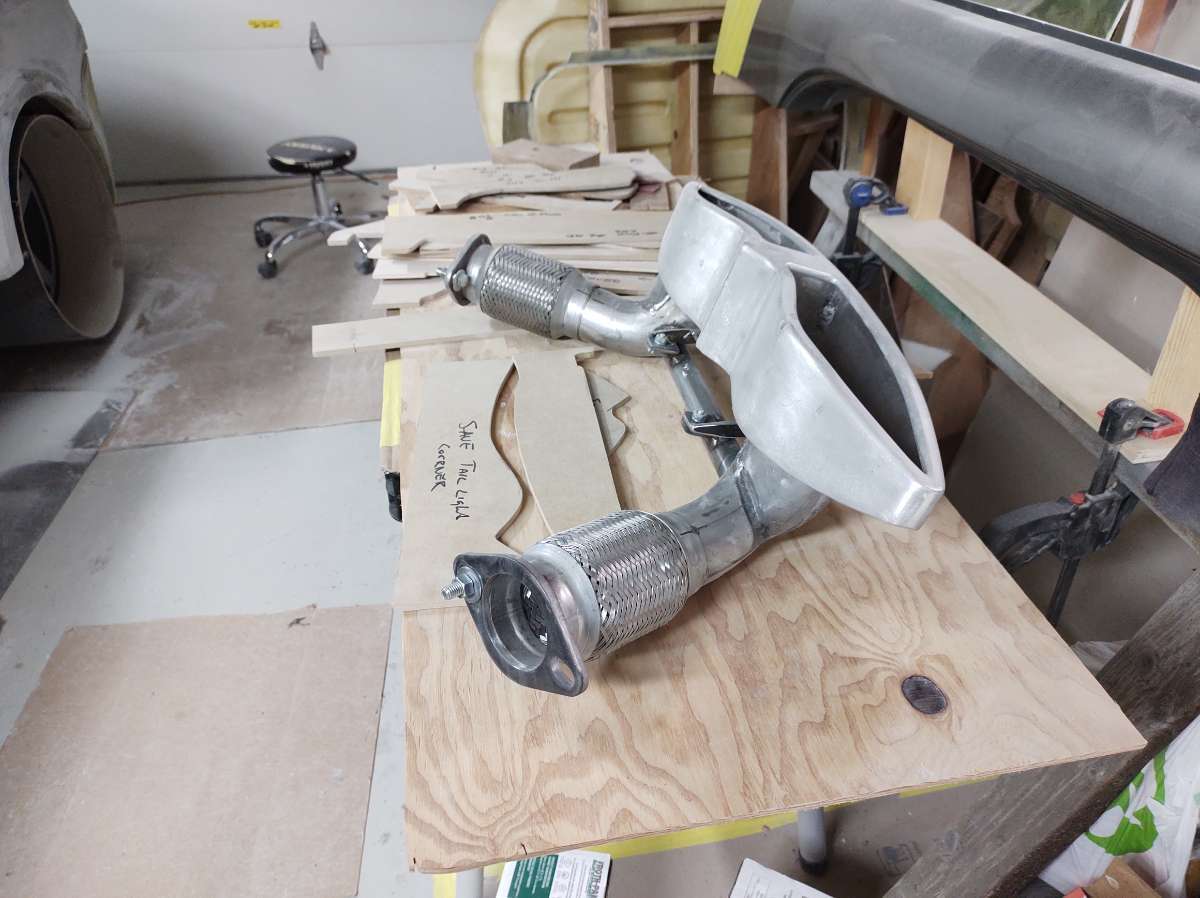
Also did a favor for my neighbor , he is building a 1964 Ford Ranchero , small block Ford , manual trans , EFI , Modern suspension , it's going to be very sweet and super straight .
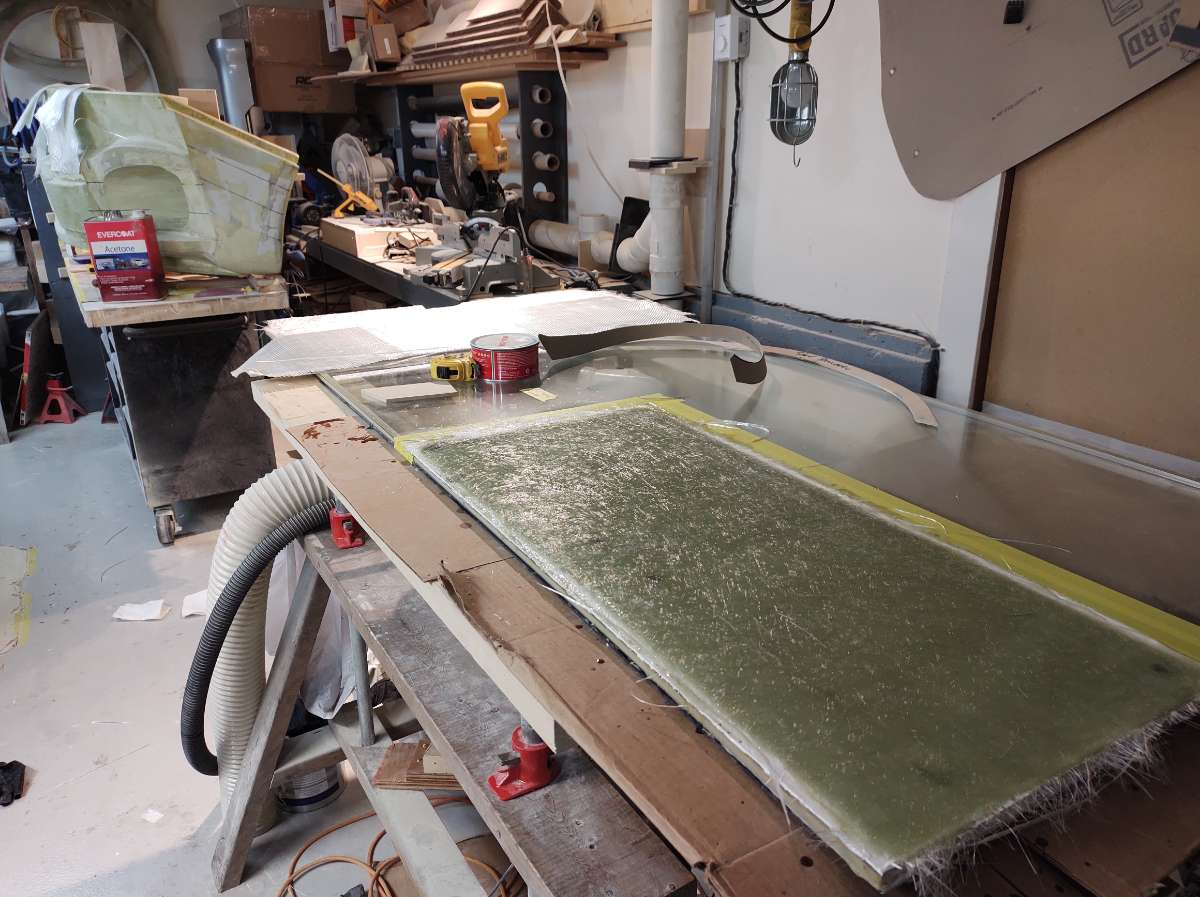
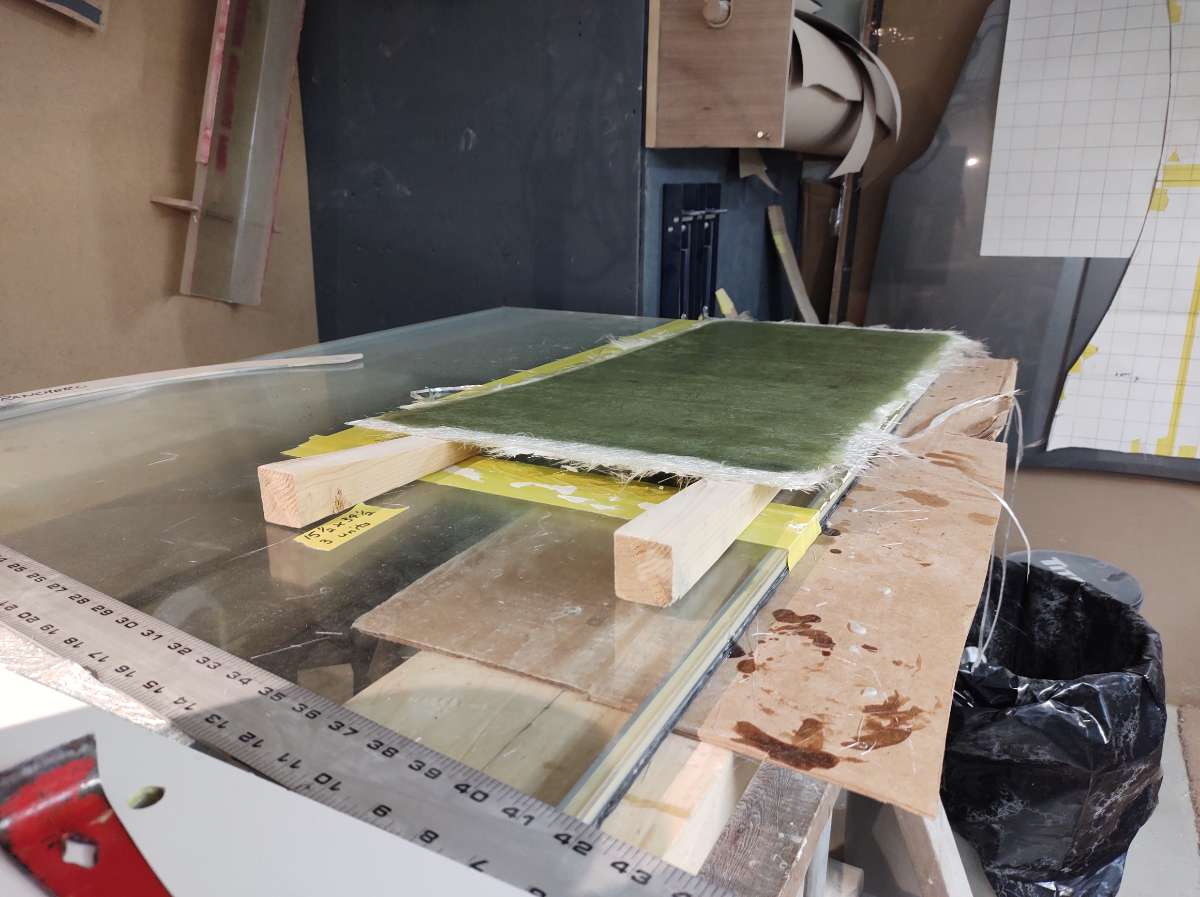
He asked me to make him a sheet of fiberglass to make some inner fender covers for inside the box , these will finish off the transition between the wheel tub and the box side .
Here you can see where the gap is in the box side and the wheel arch
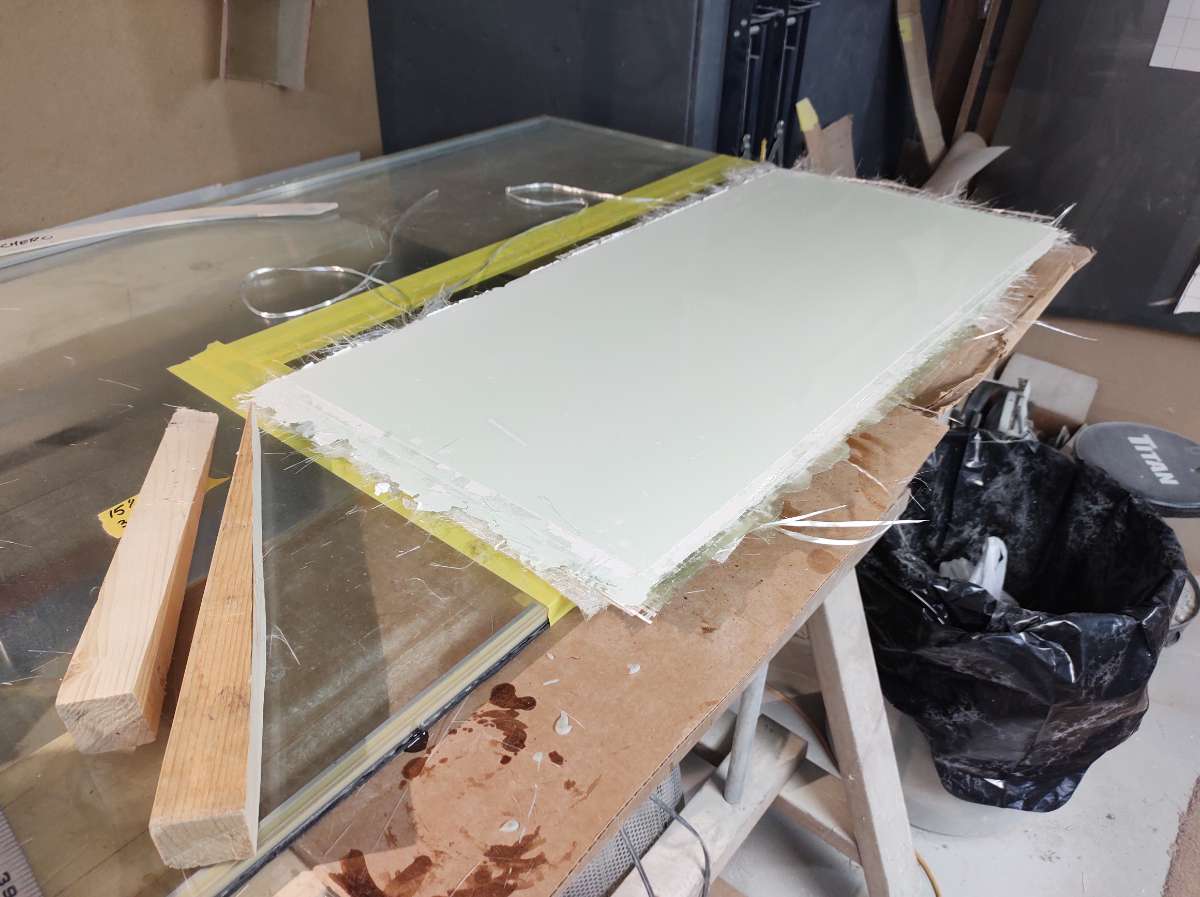
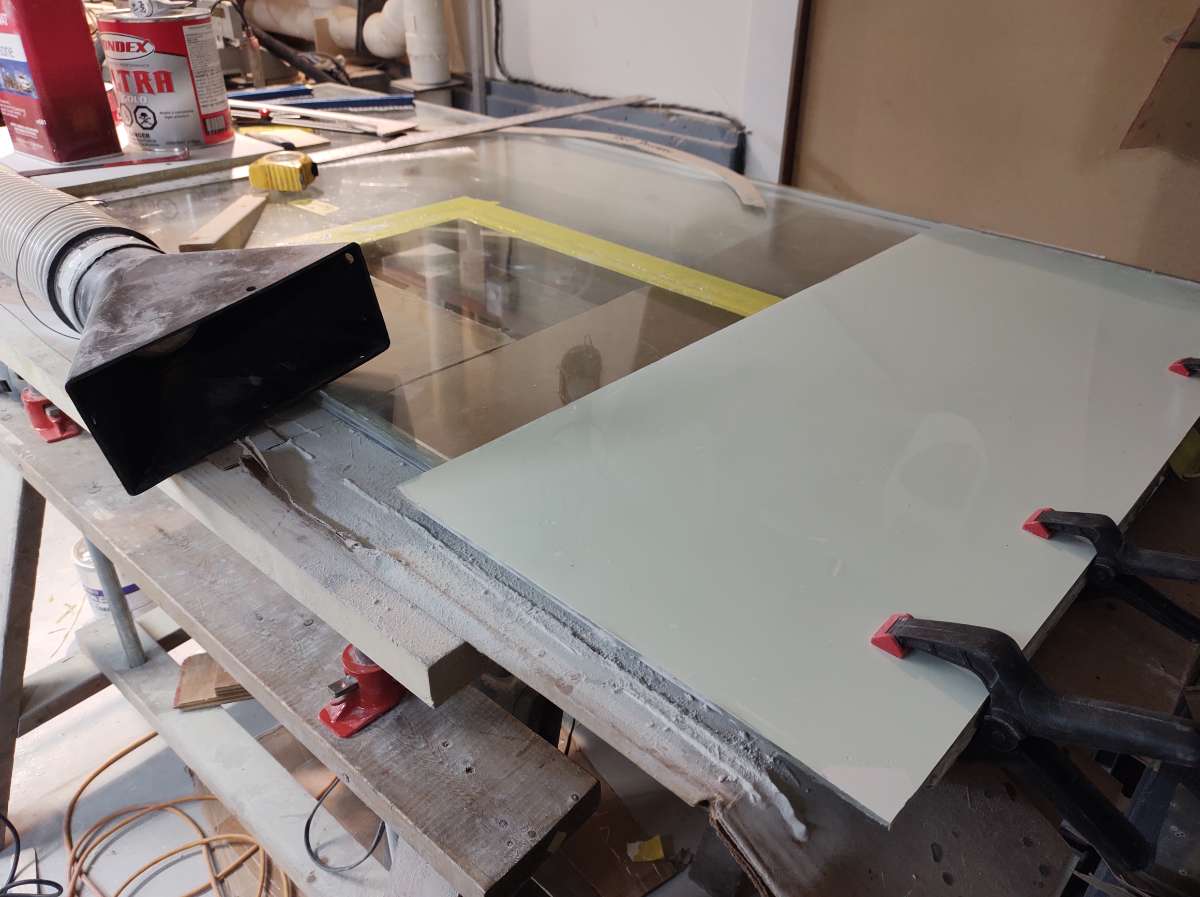
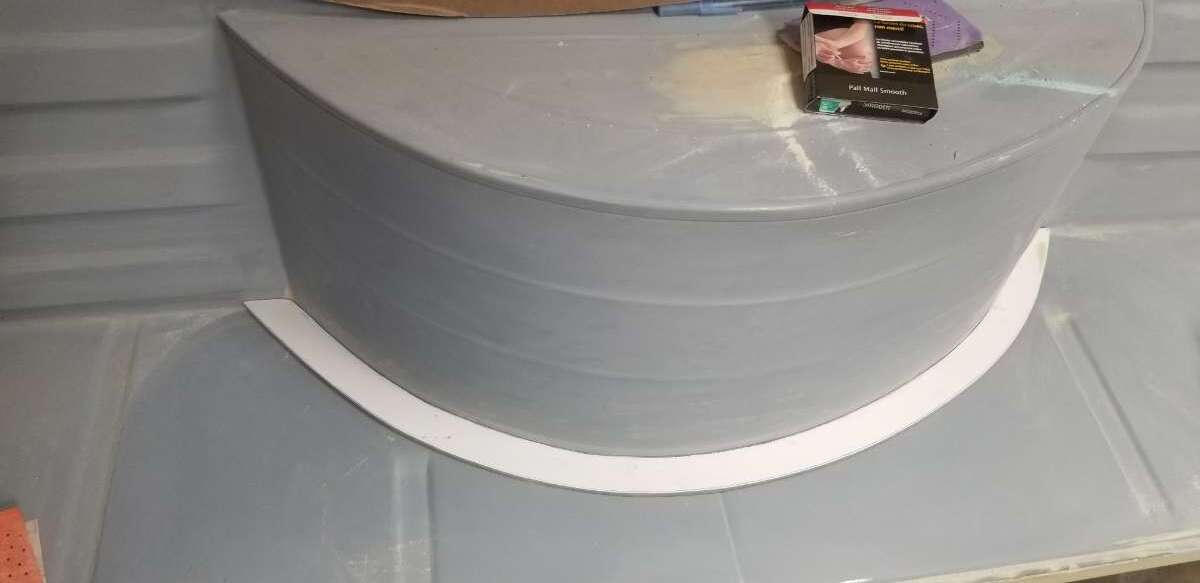
and this is the fiberglass part that will conceal the gap , it will look decent .
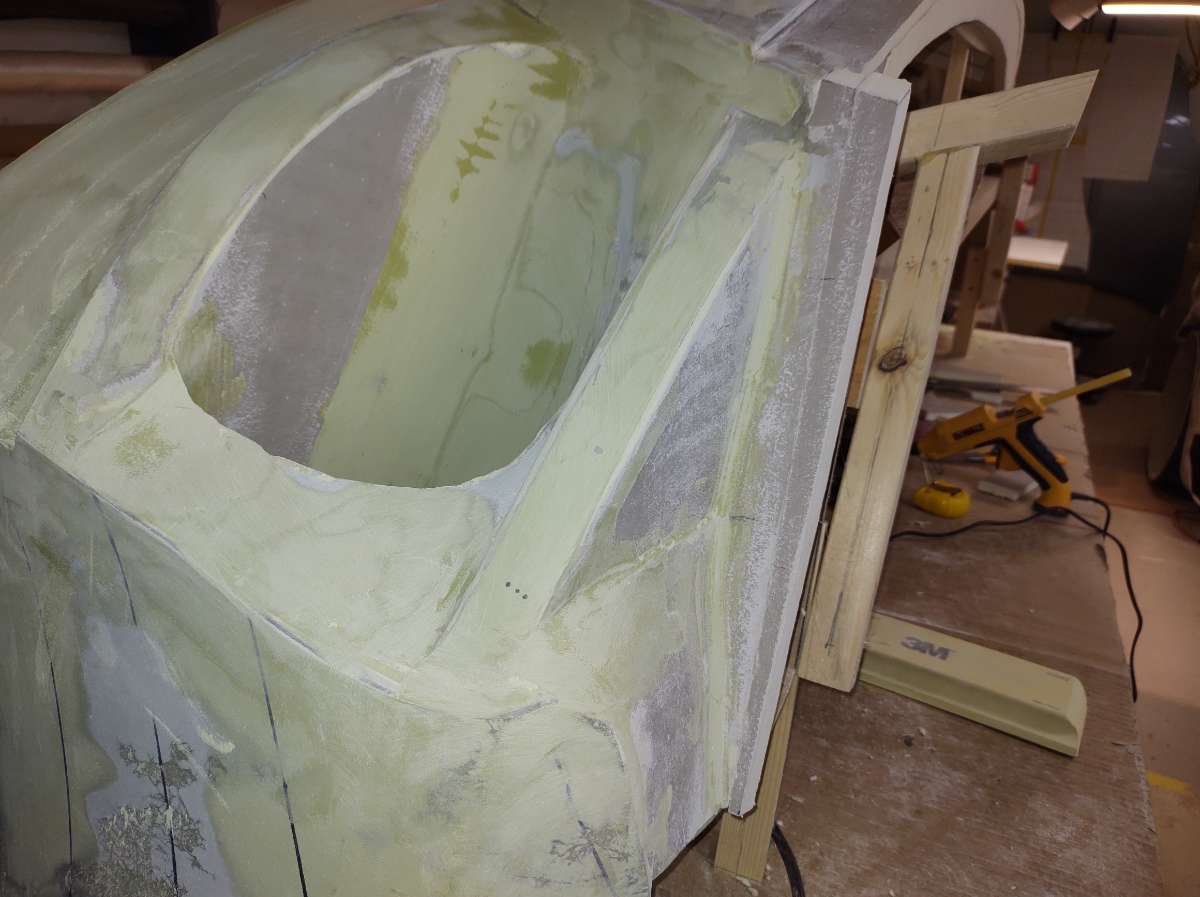
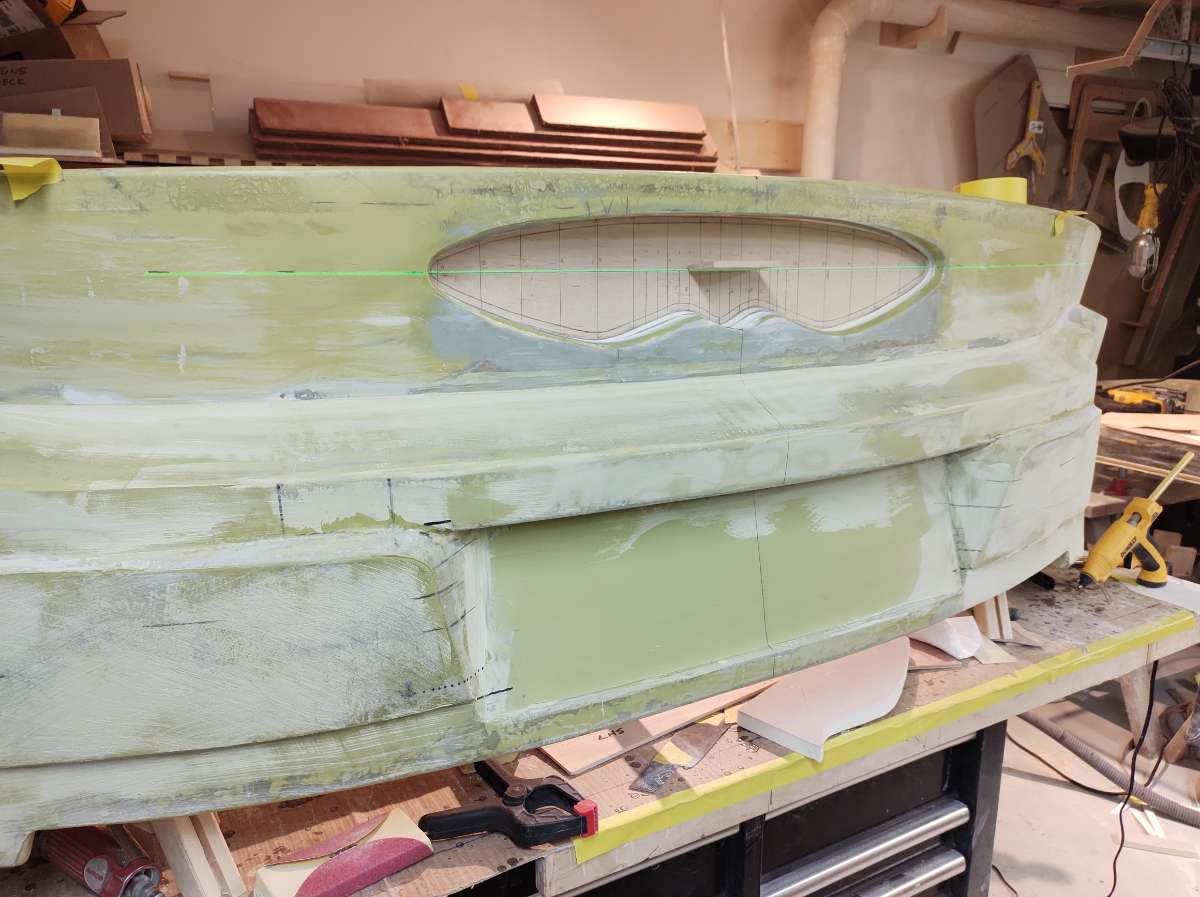
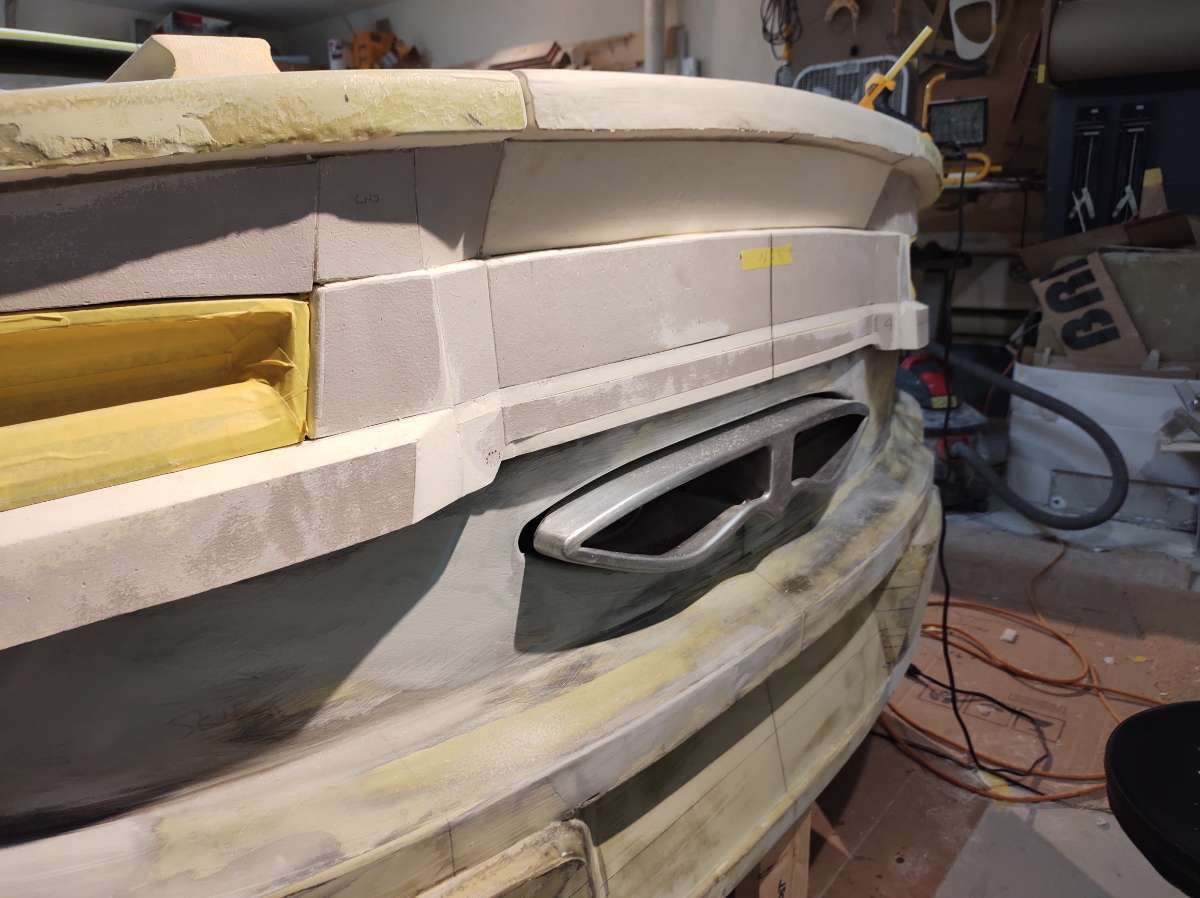
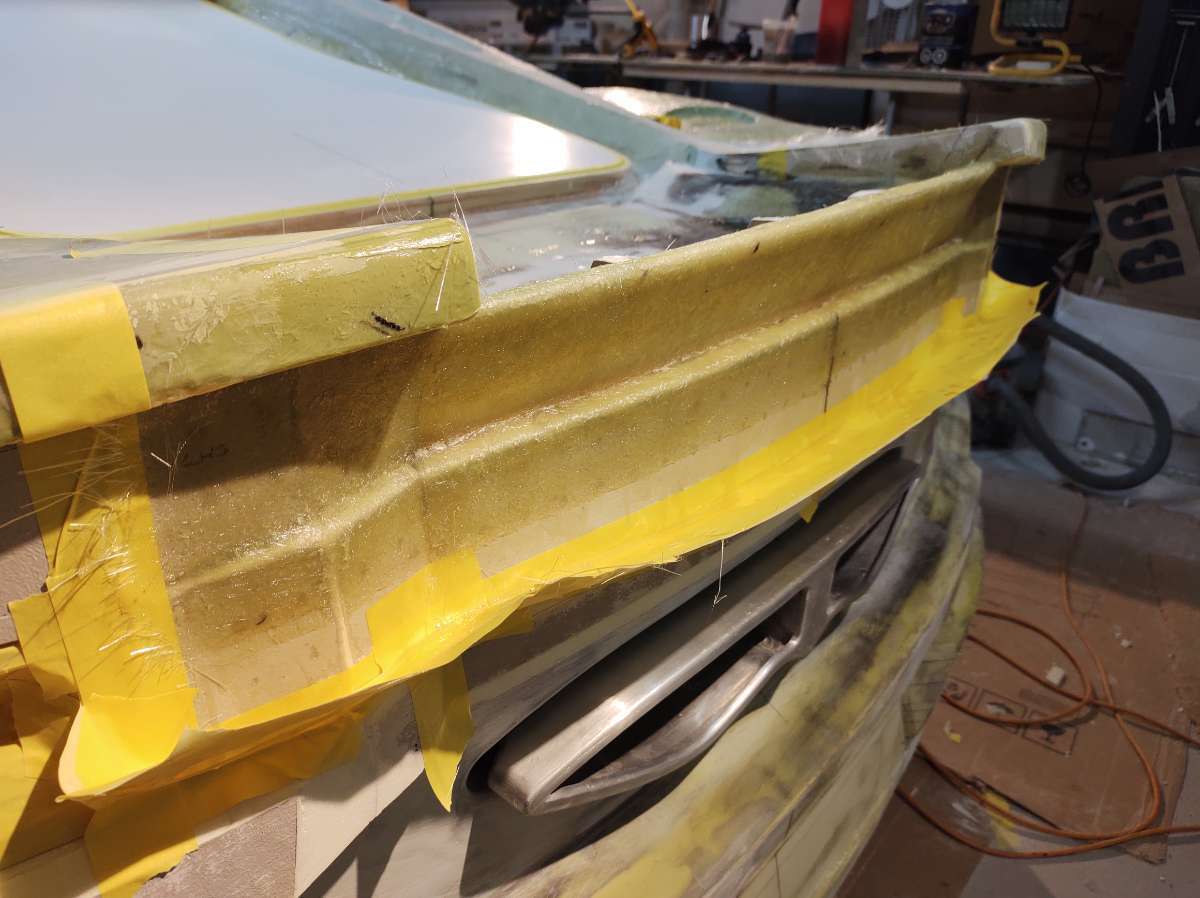
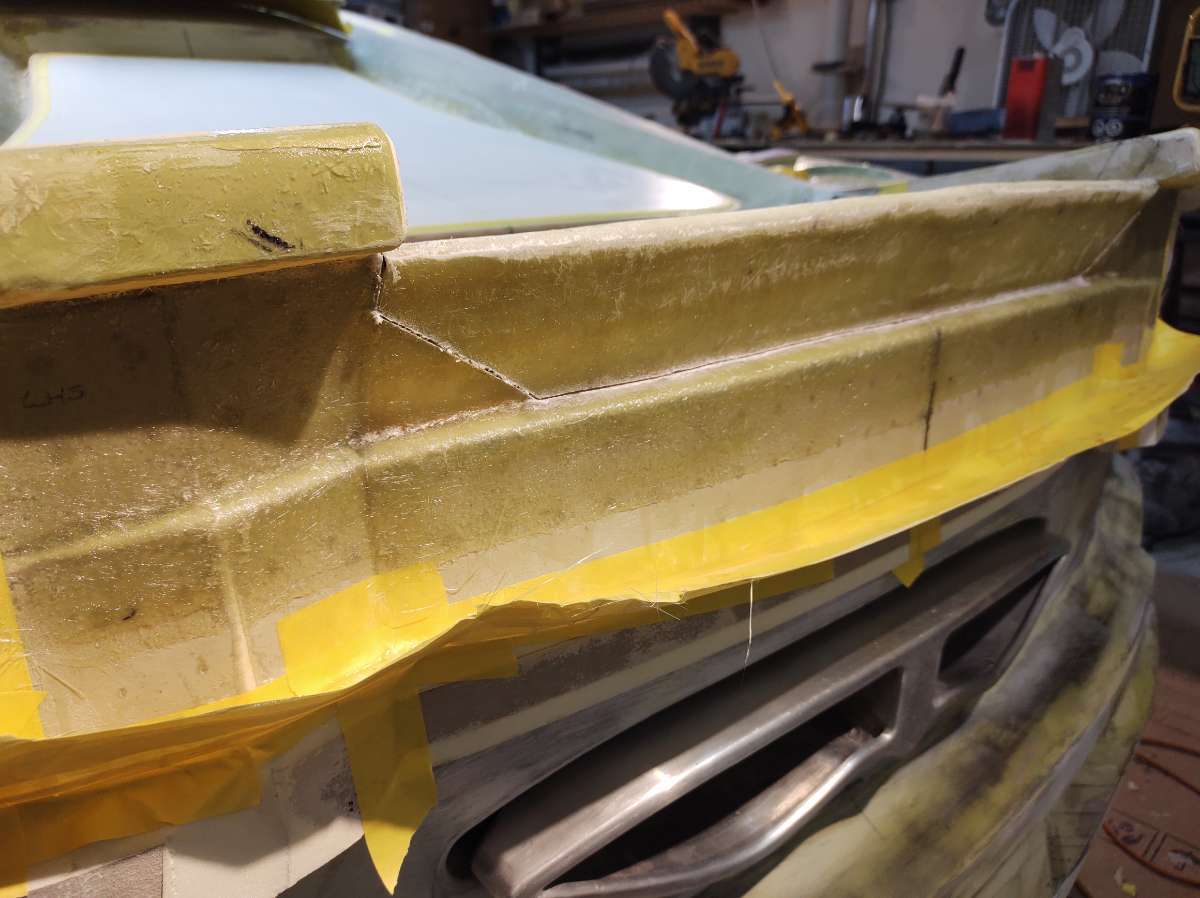
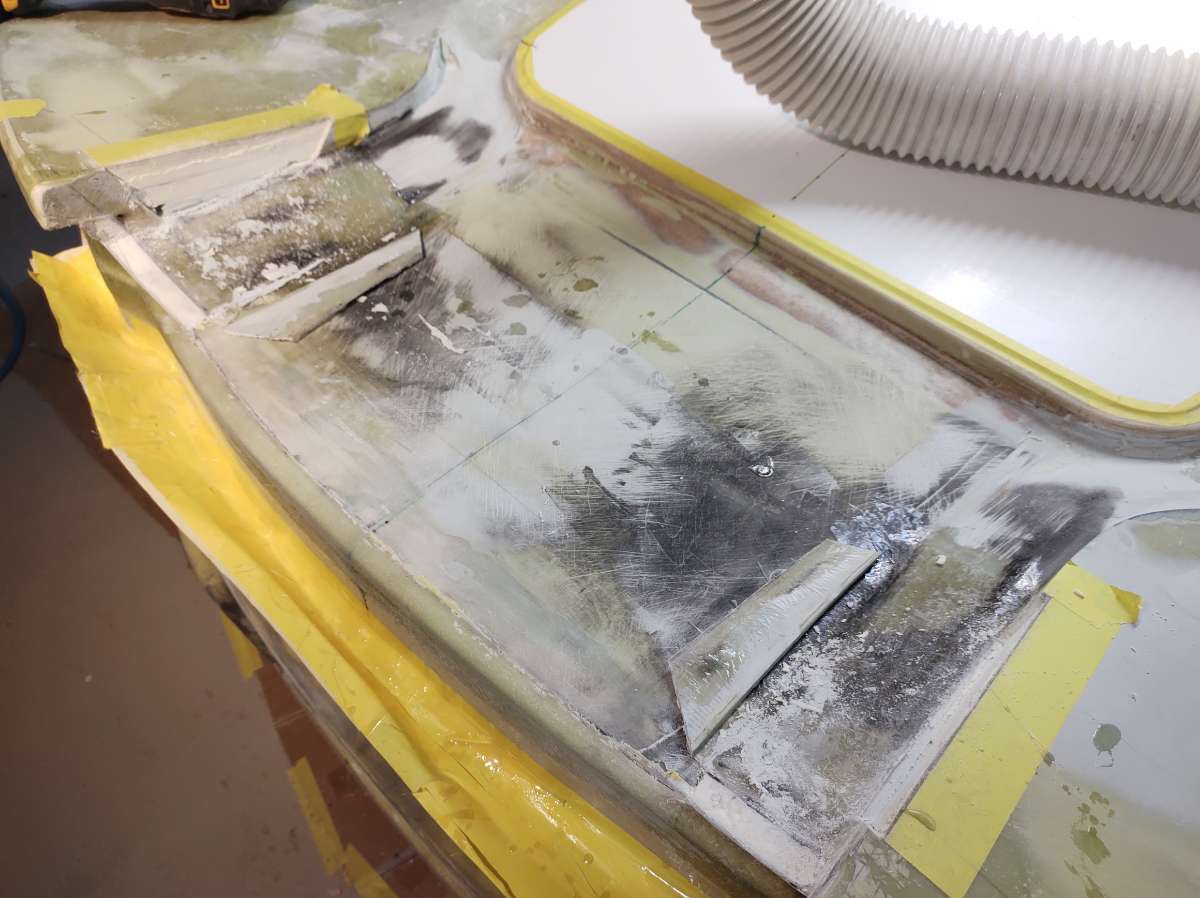
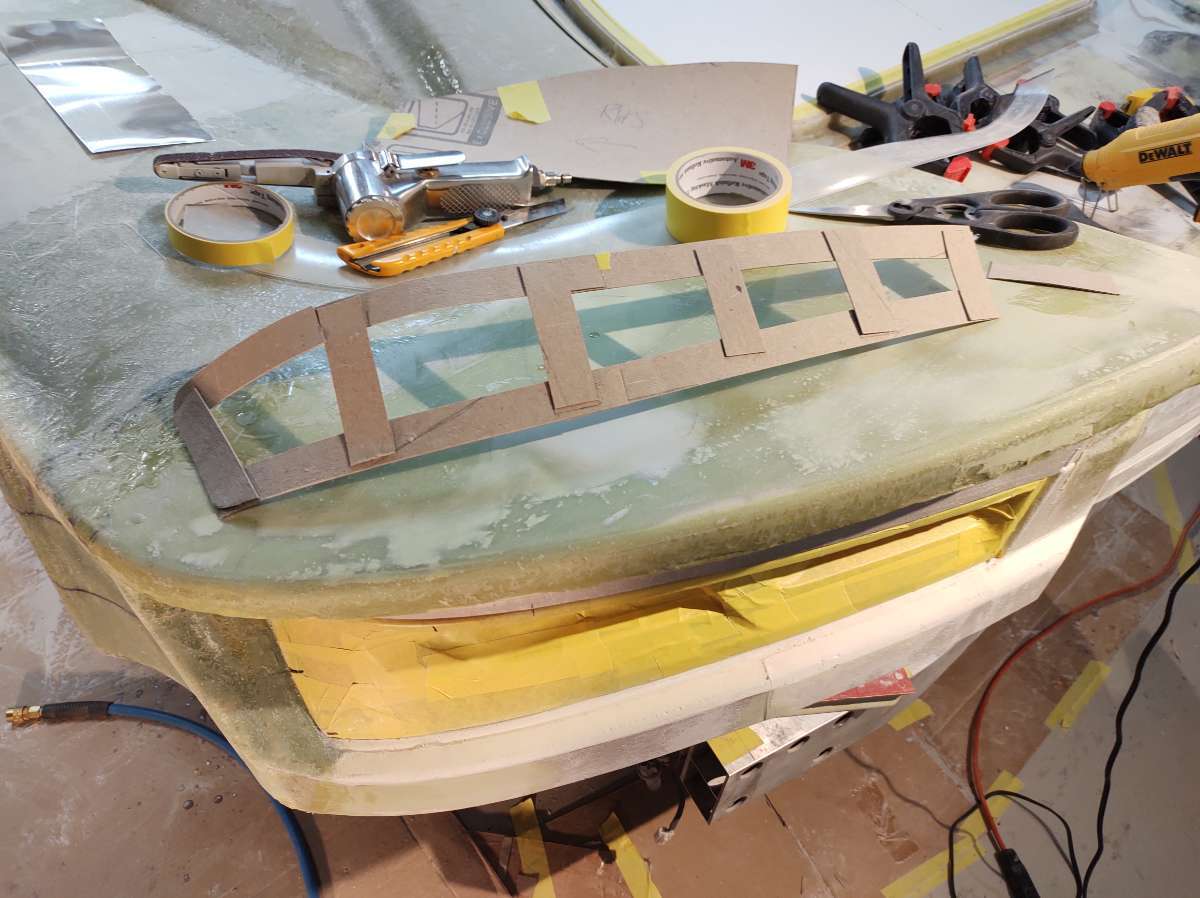
I decided to make the exhaust slot deeper , to give that area more strength and easier to chop the back off to make the opening . I made the mistake of putting filler on the foam edge without fiberglass first and the shape got away from me . so this will help me get it sorted out faster .
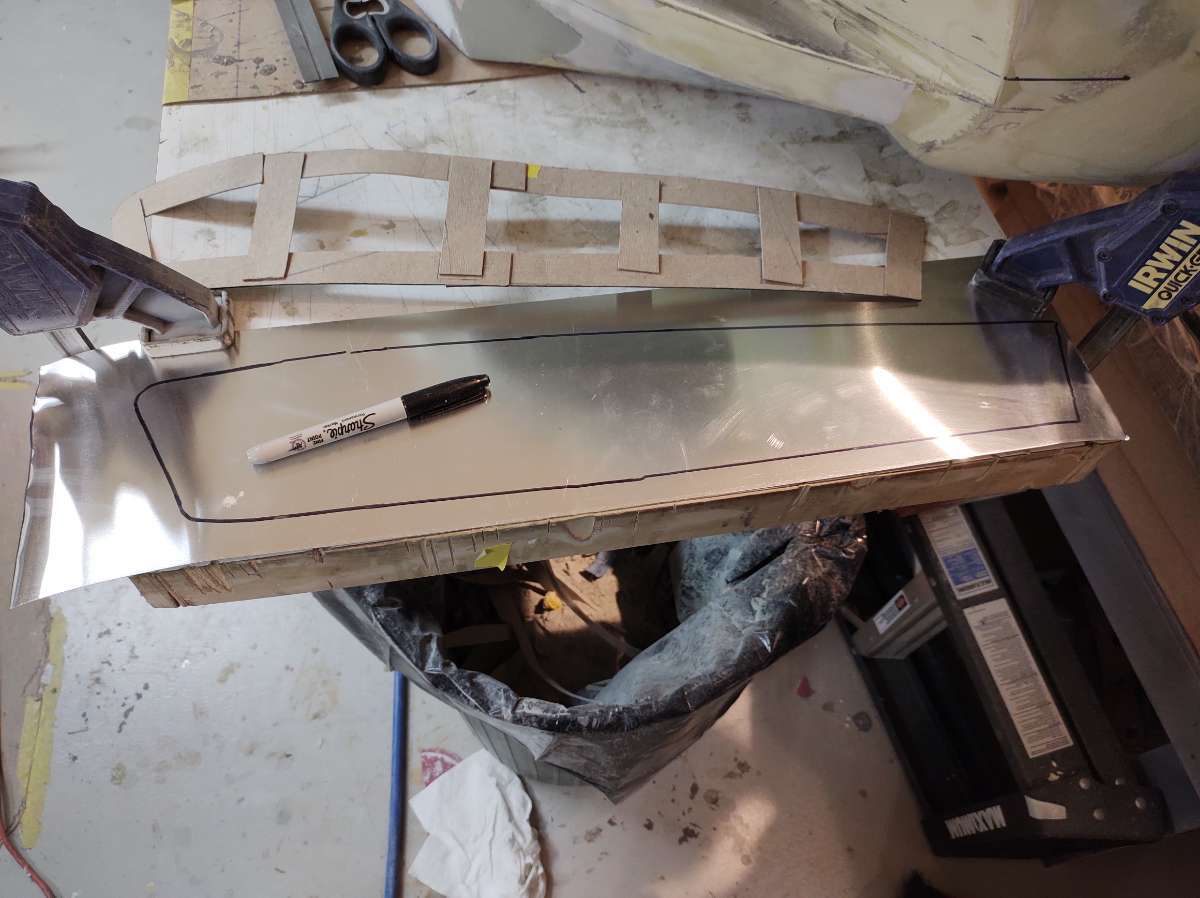
This is it cut out
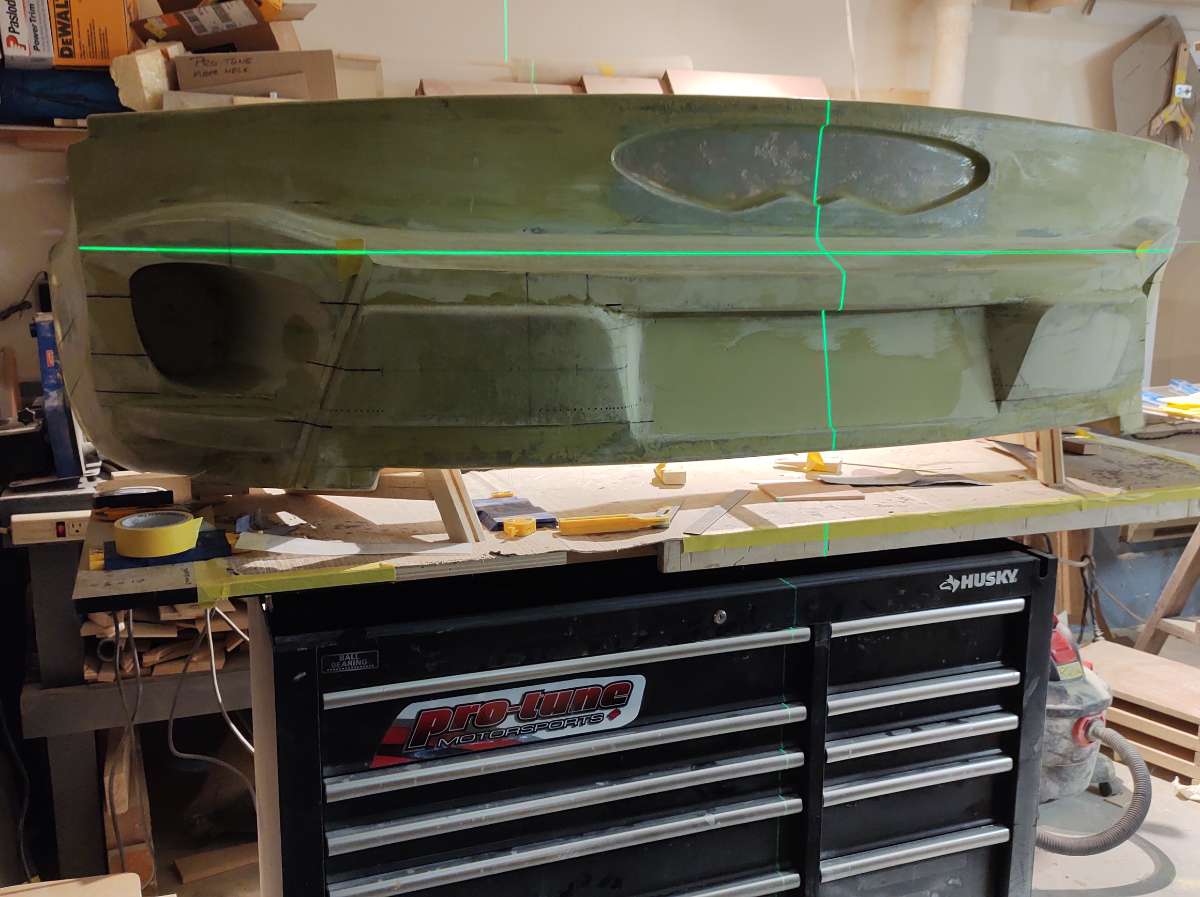
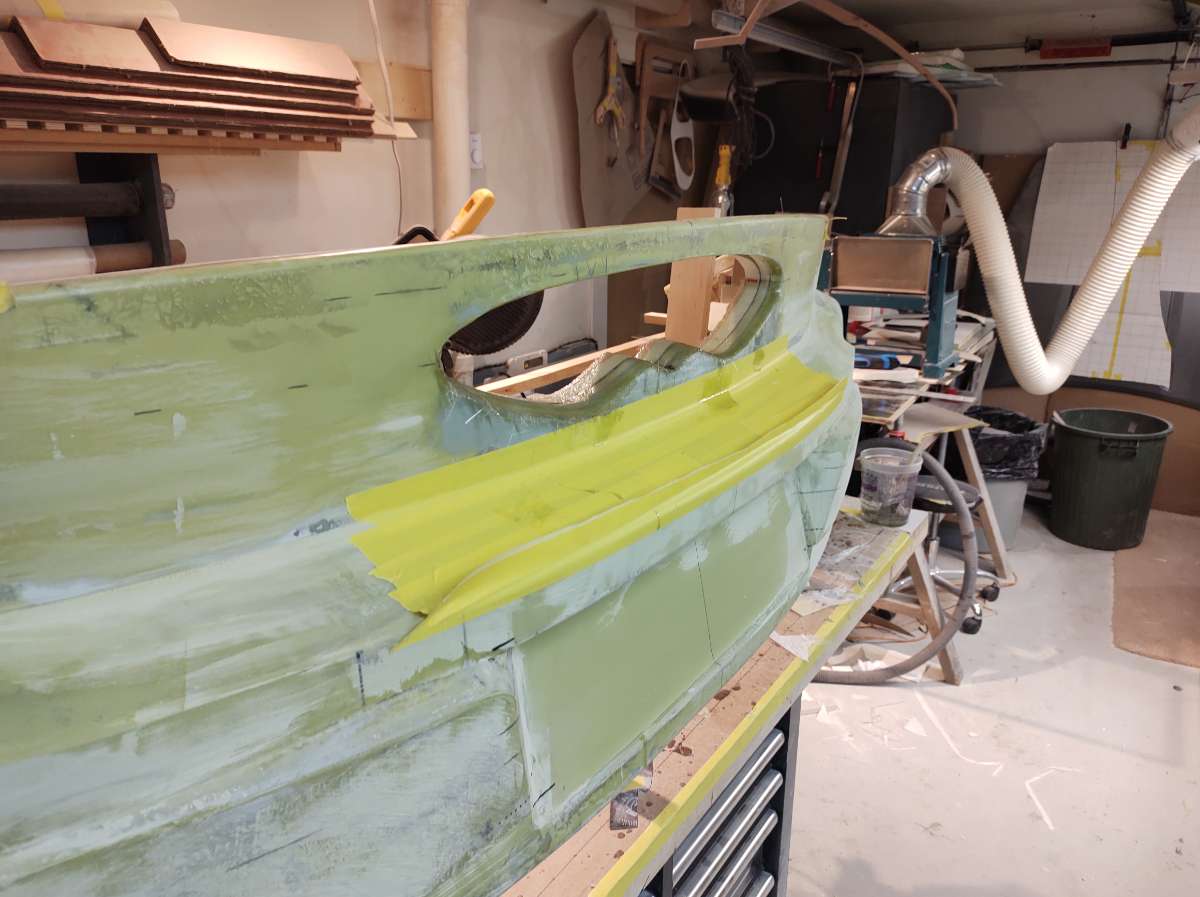
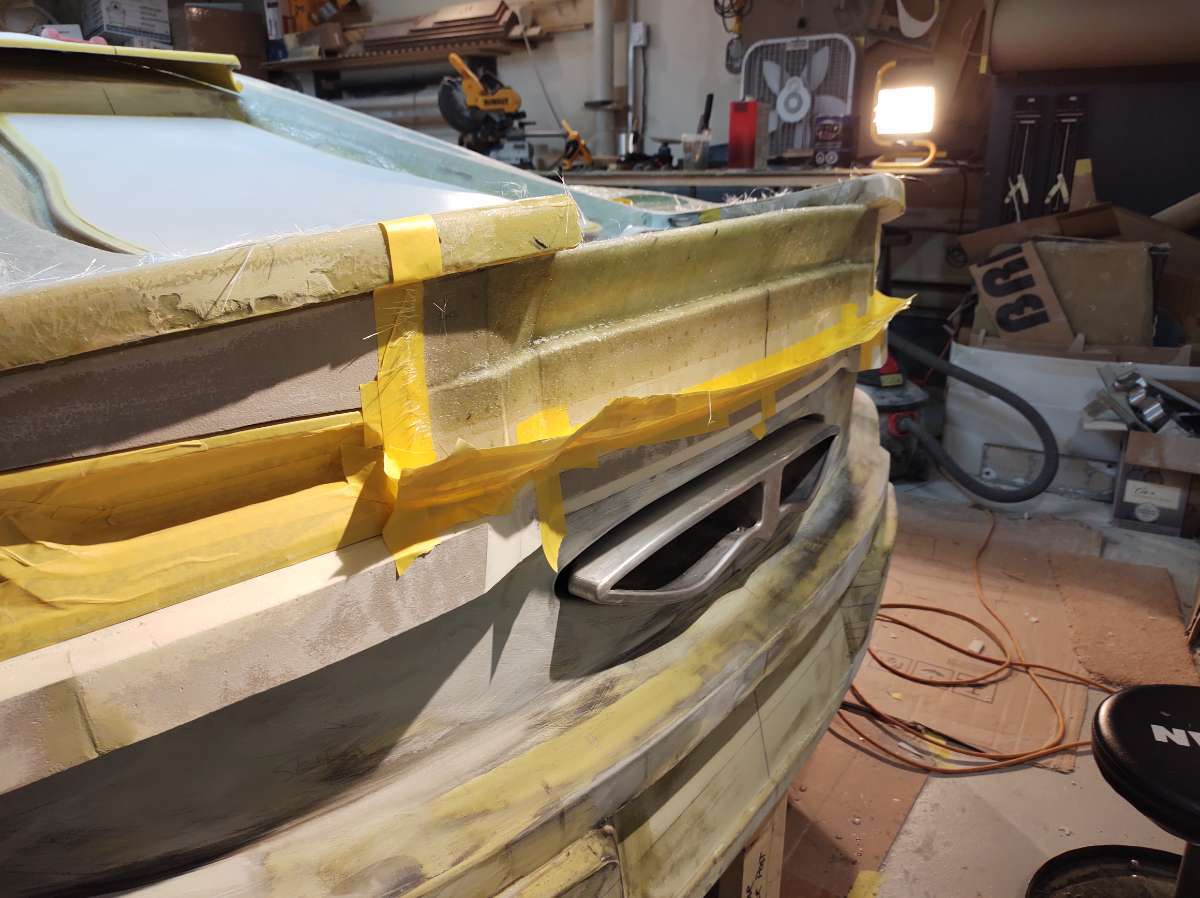
The new part to go in , by myself it's very difficult to be on both sides to line things up and glue etc , so I had to cut the part in half .
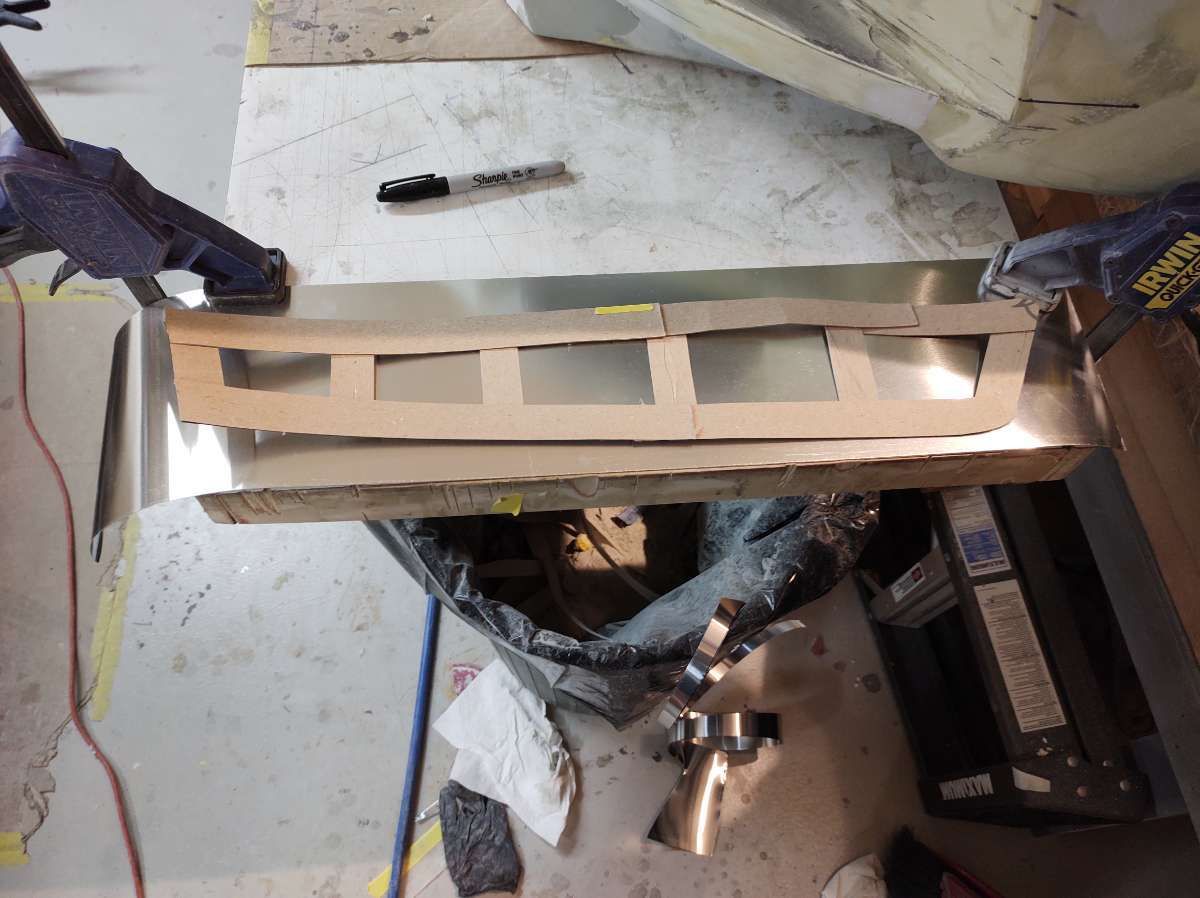
The little foam posts were to hold the gap open to glue it in place using the laser to insure it was right and checking with the template
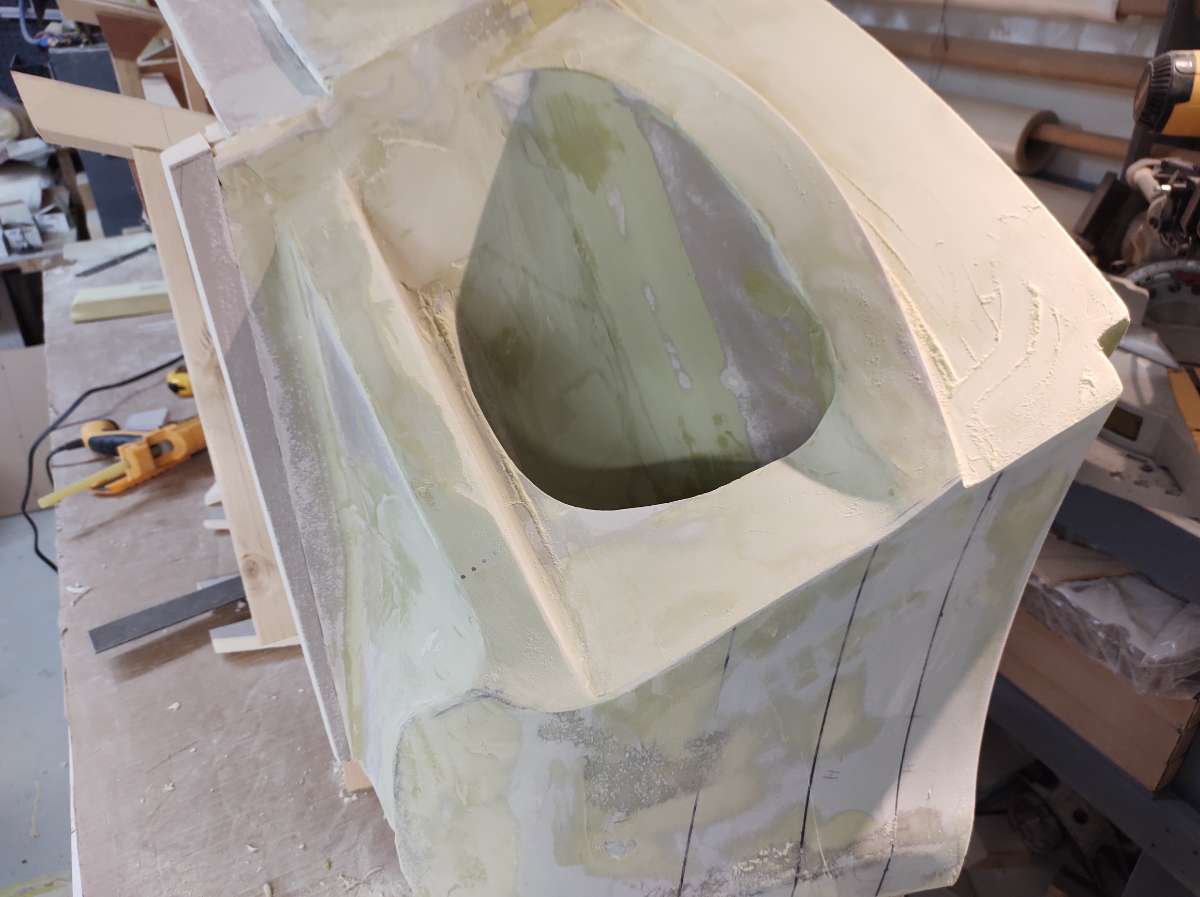
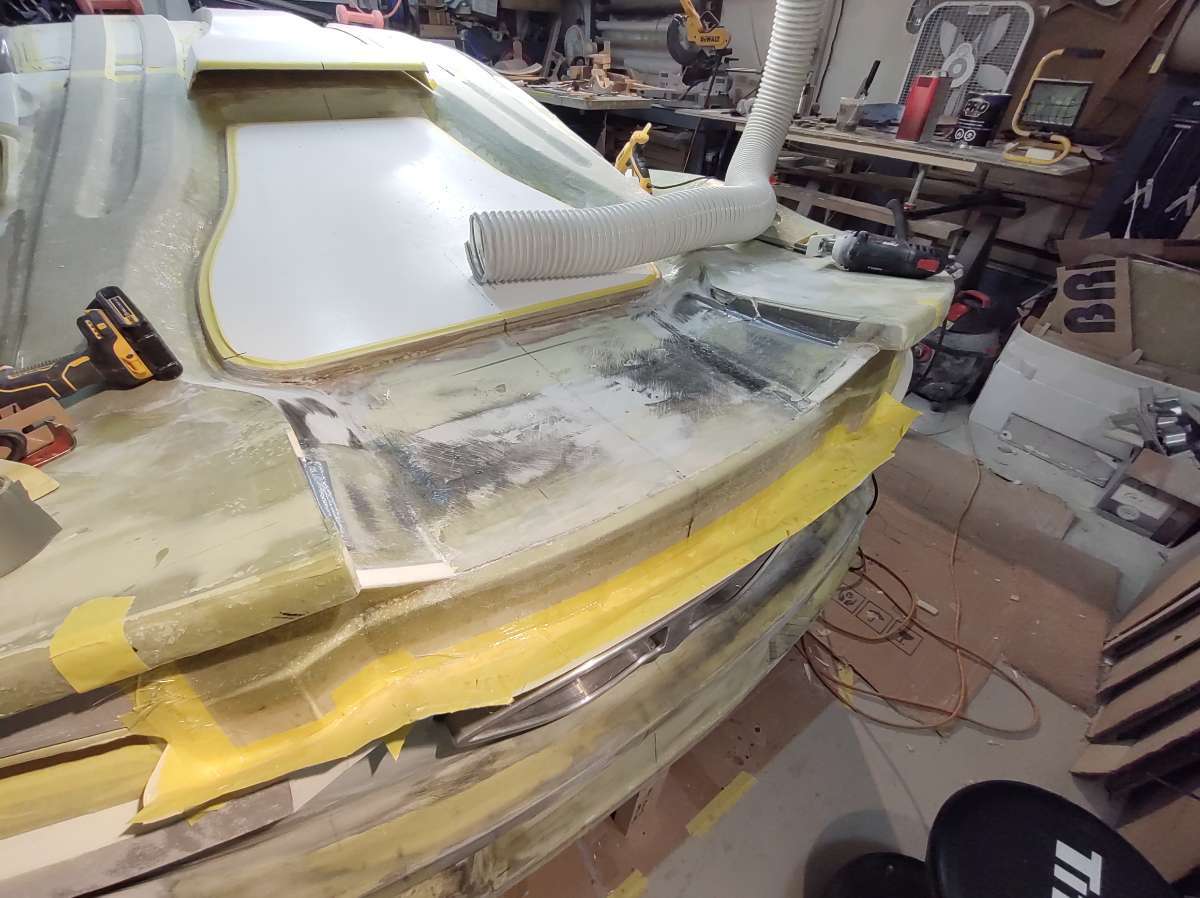
the first layer of glass , will flip it over to do the top today .
It will look better if you can't see the back edge past the exhaust tip .
Yes as Heel Til I Die mentioned it's really ambitious Hi everyone
It's time for an update !!!
As I said I am going full steam ahead , so not much time for anything else but the car . a couple of reasons , 1 I want it done and 2 I am losing the Shop in the forest , possibly as soon as the end of May or sooner .
So enough about that !!!!
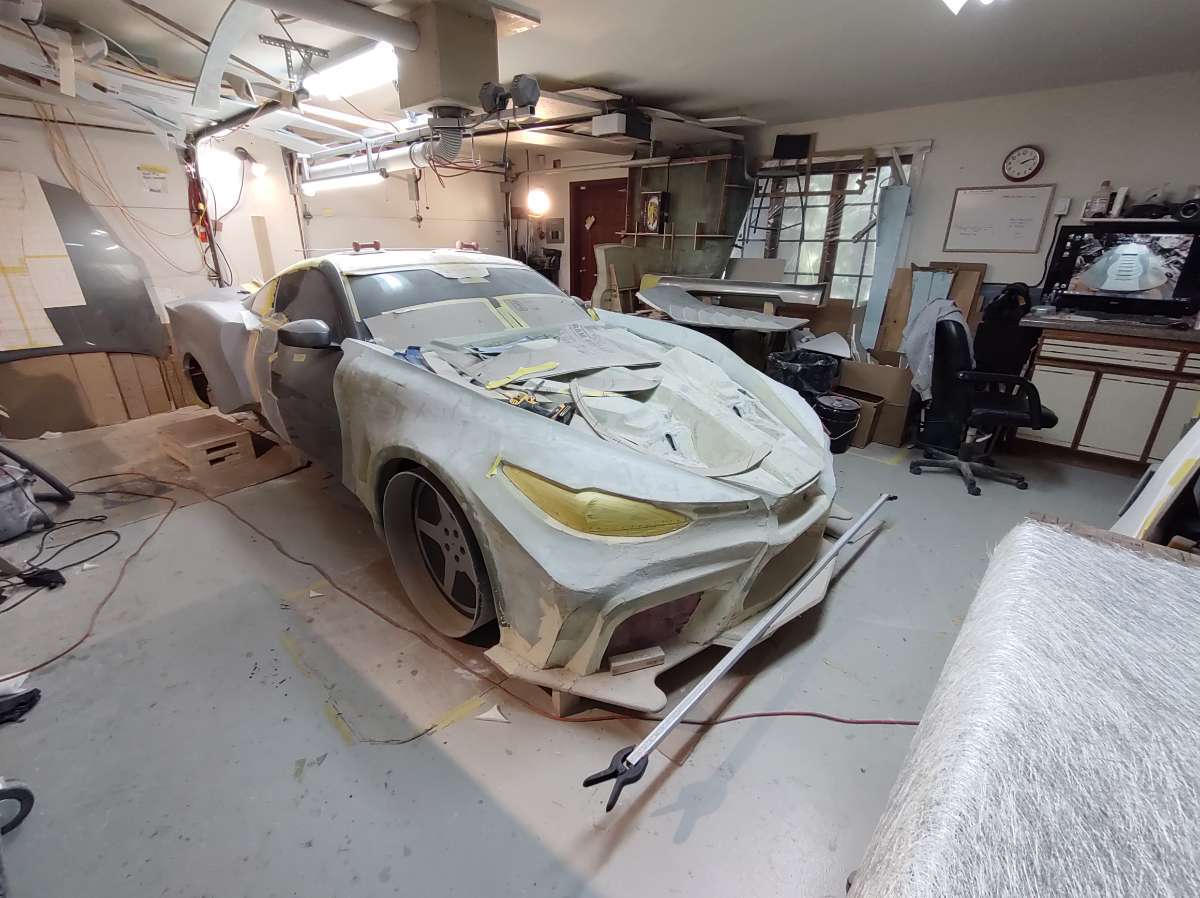
been busy .
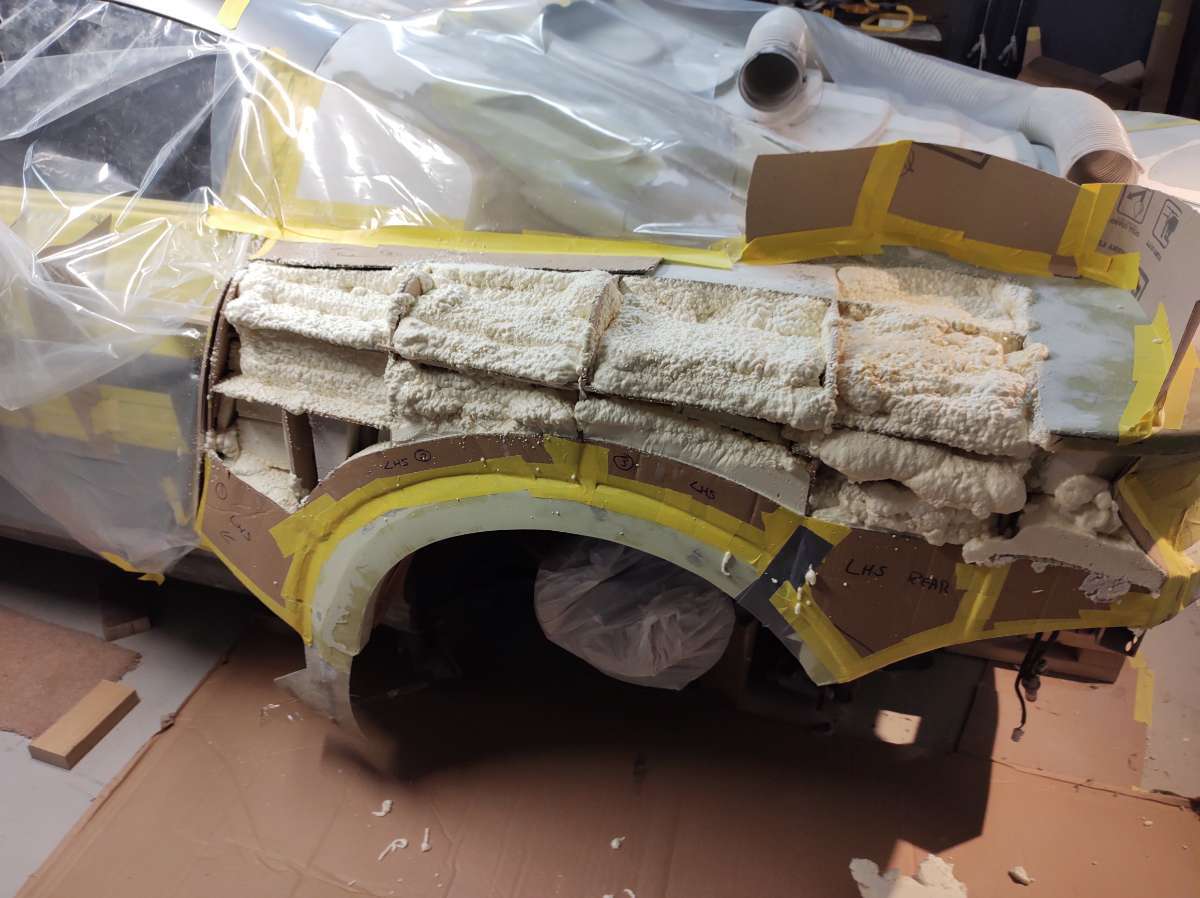
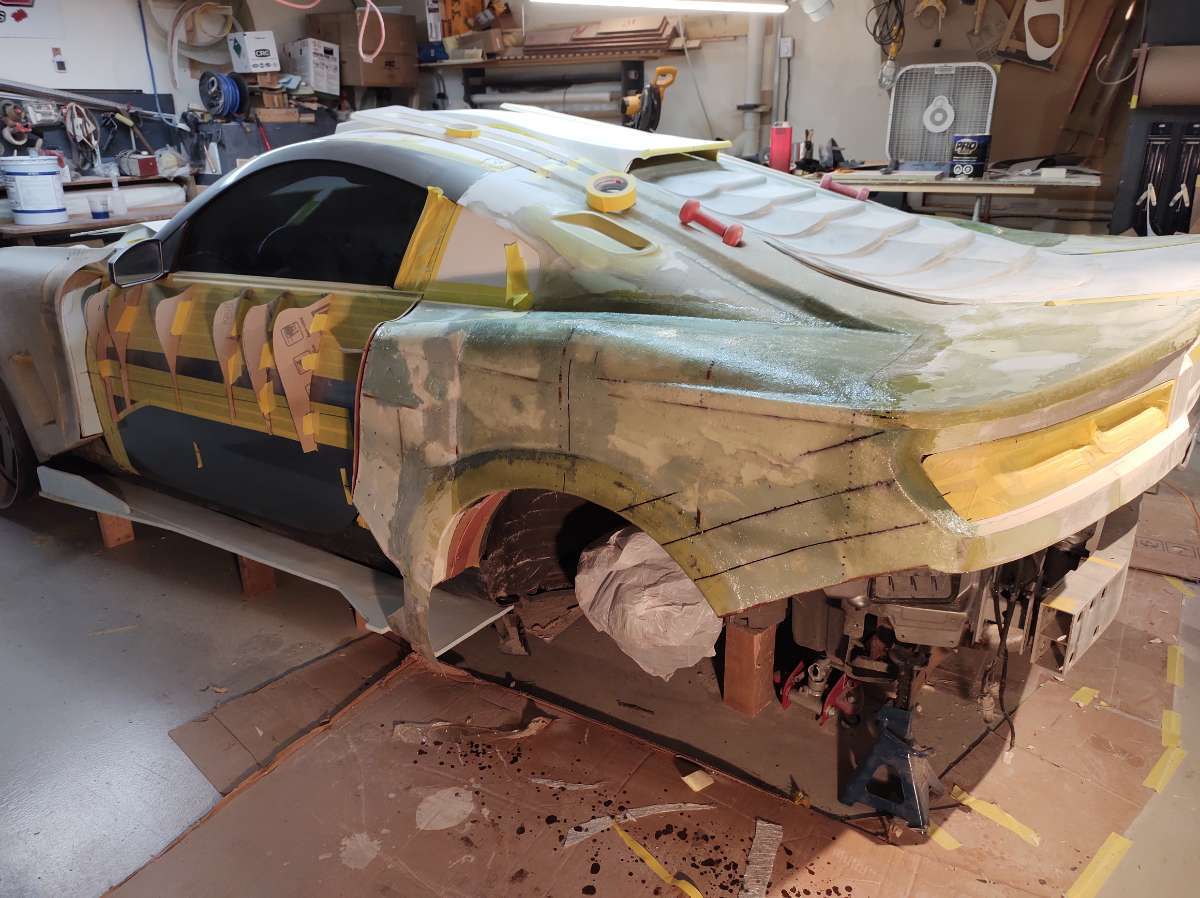
Getting the quarter panels ready for foam , had a hard time finding the 2 part spray foam and it's tripled in price ....
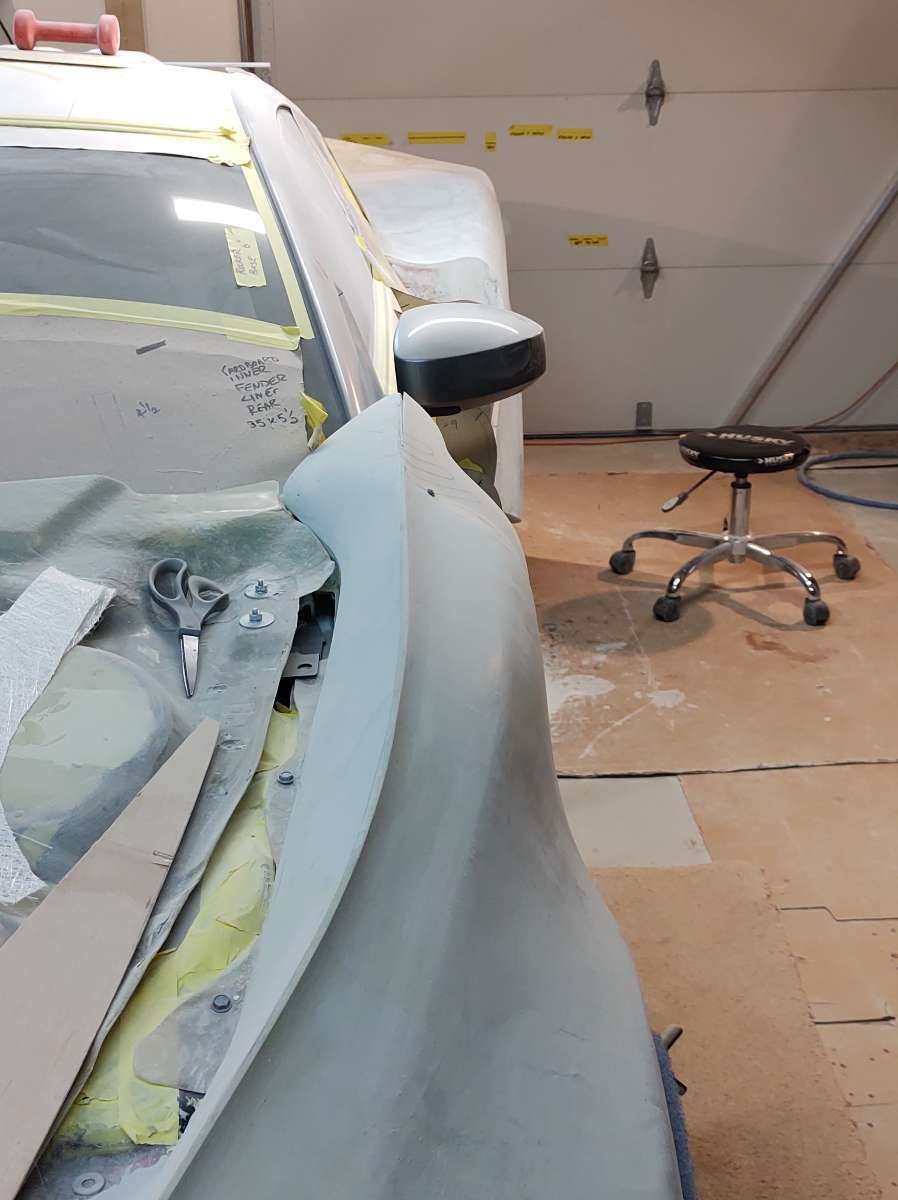
Made some protective trim for the opera window rubber so it doesn't get destroyed by sanding
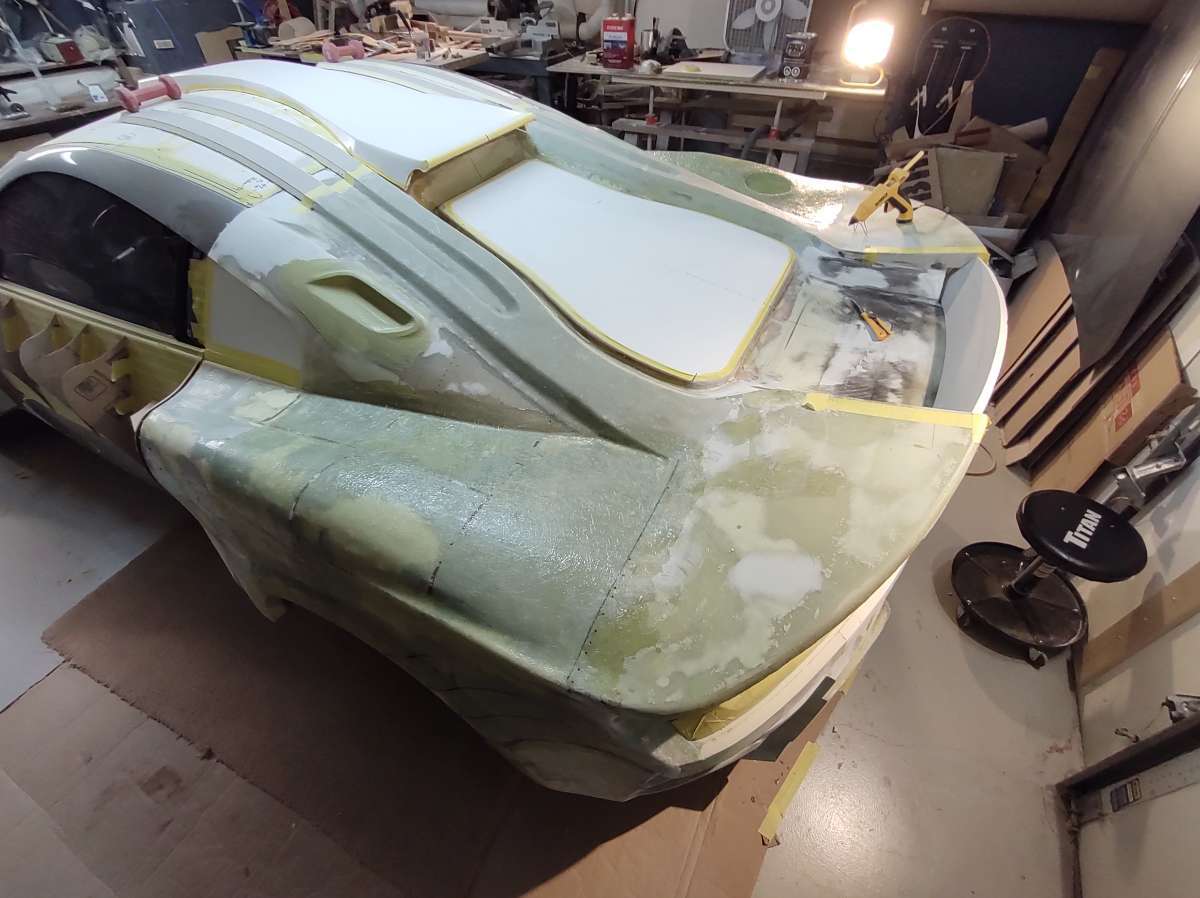
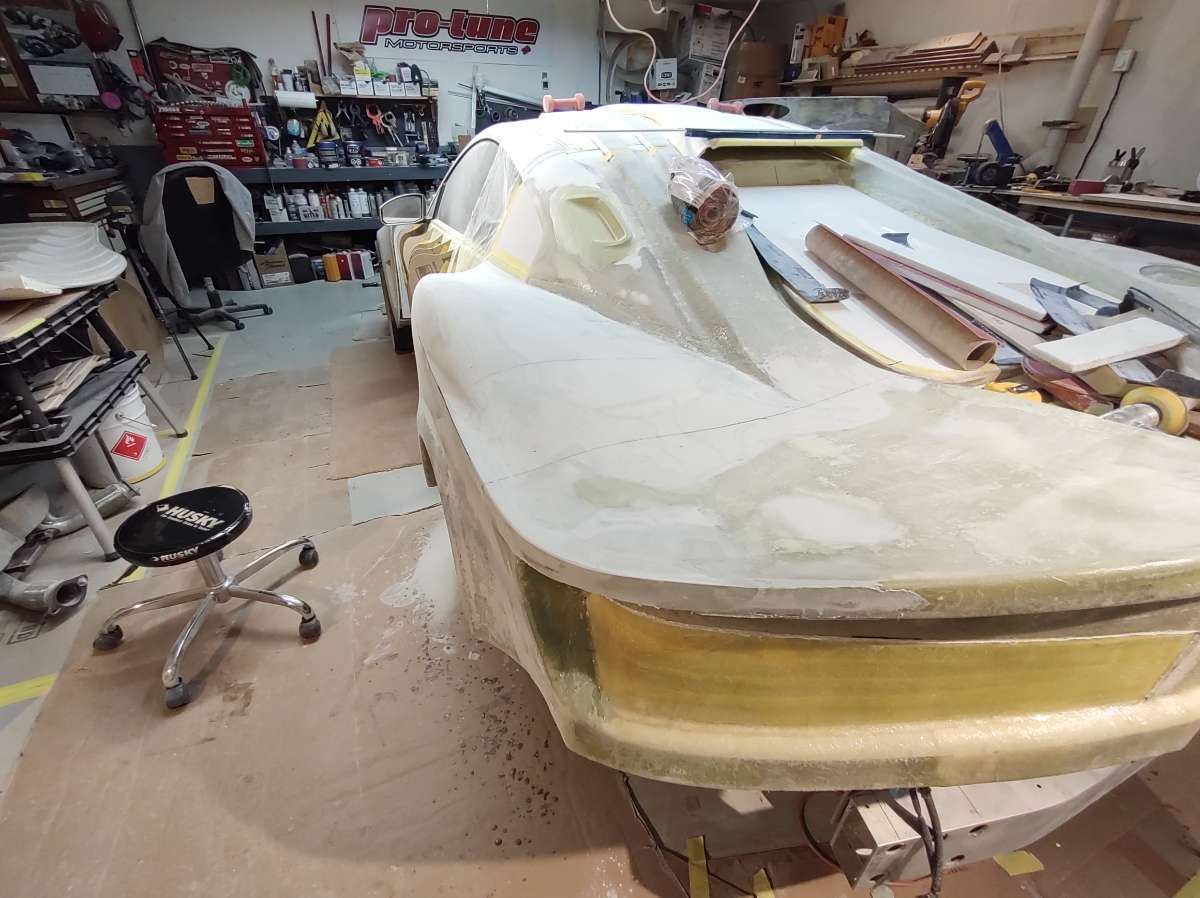
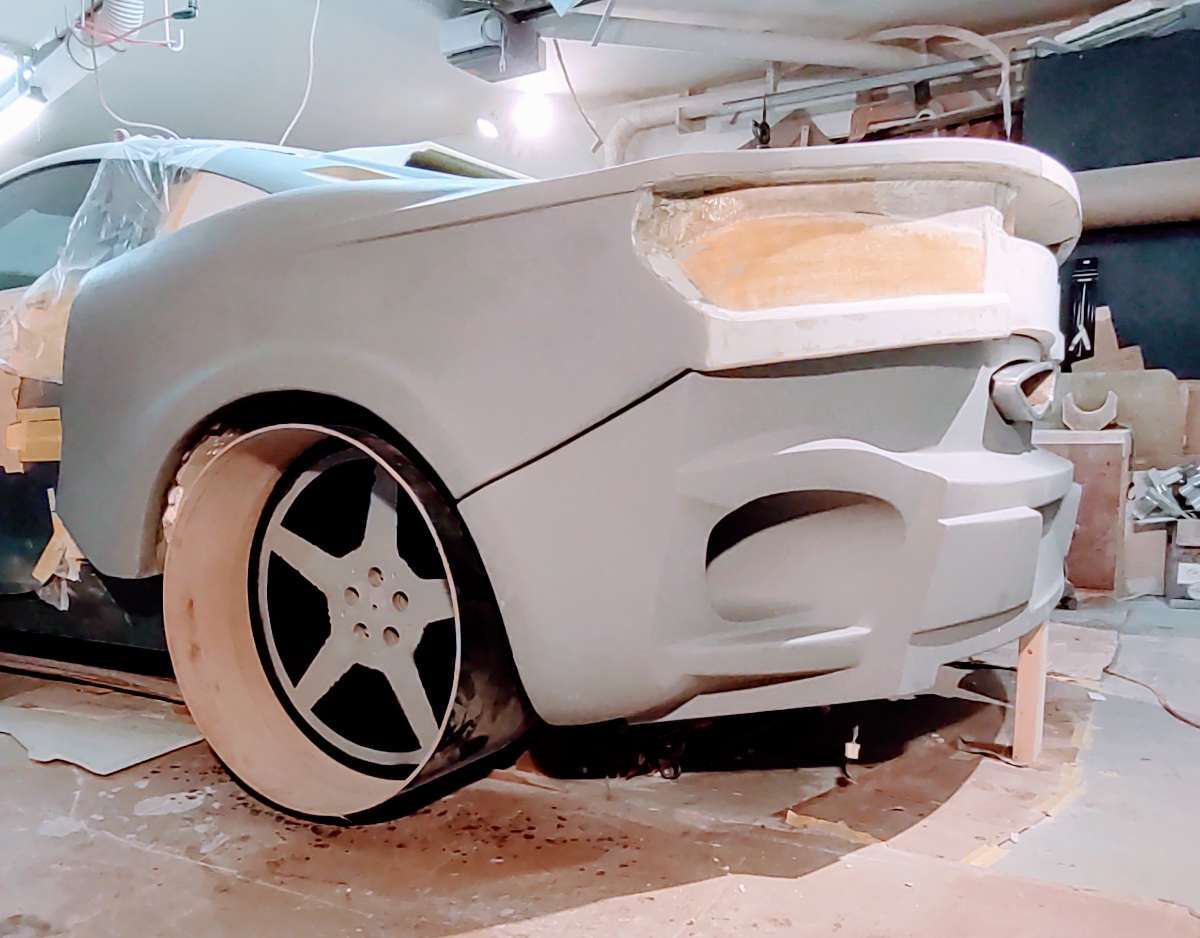
The line from the top of the head light ties into the feature line off the rear deck lid
As usual it's extremely difficult to get both sides the same ....
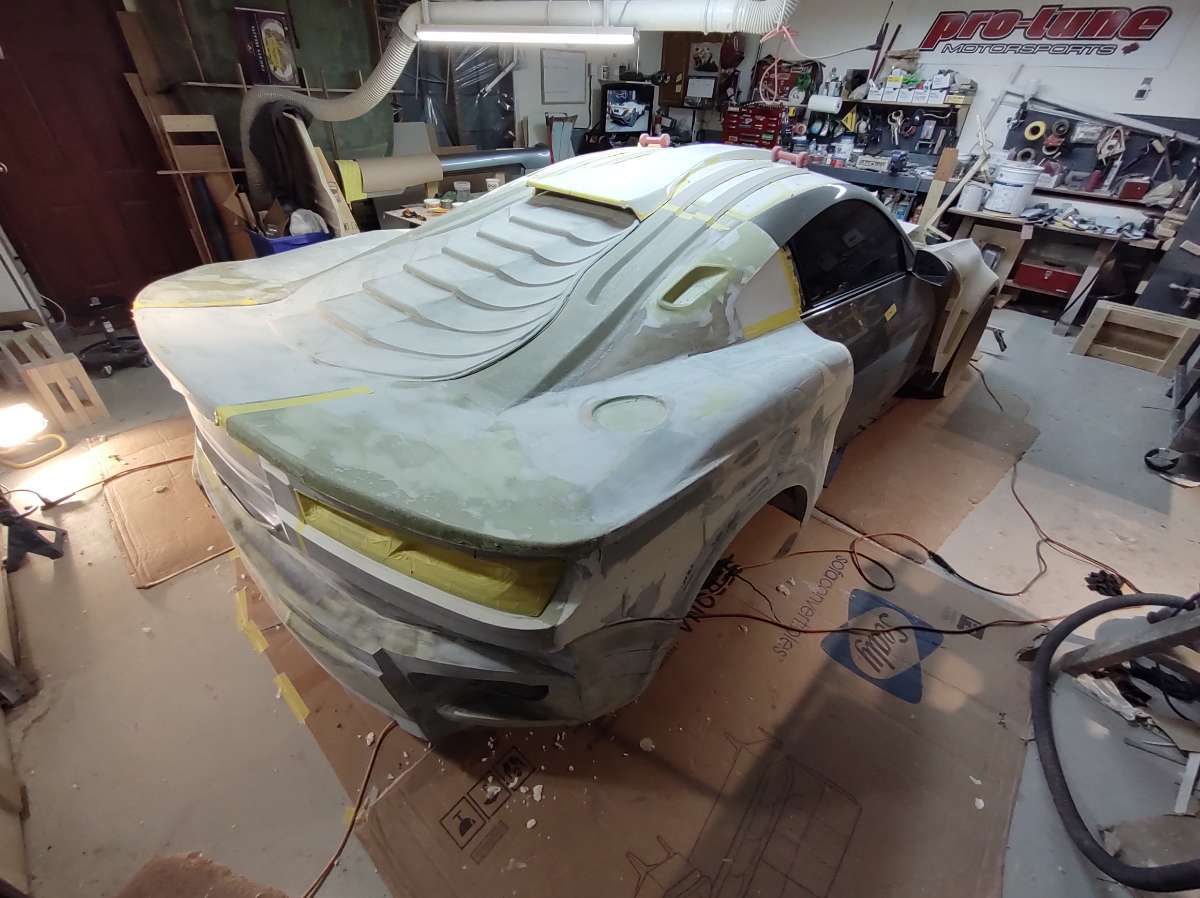
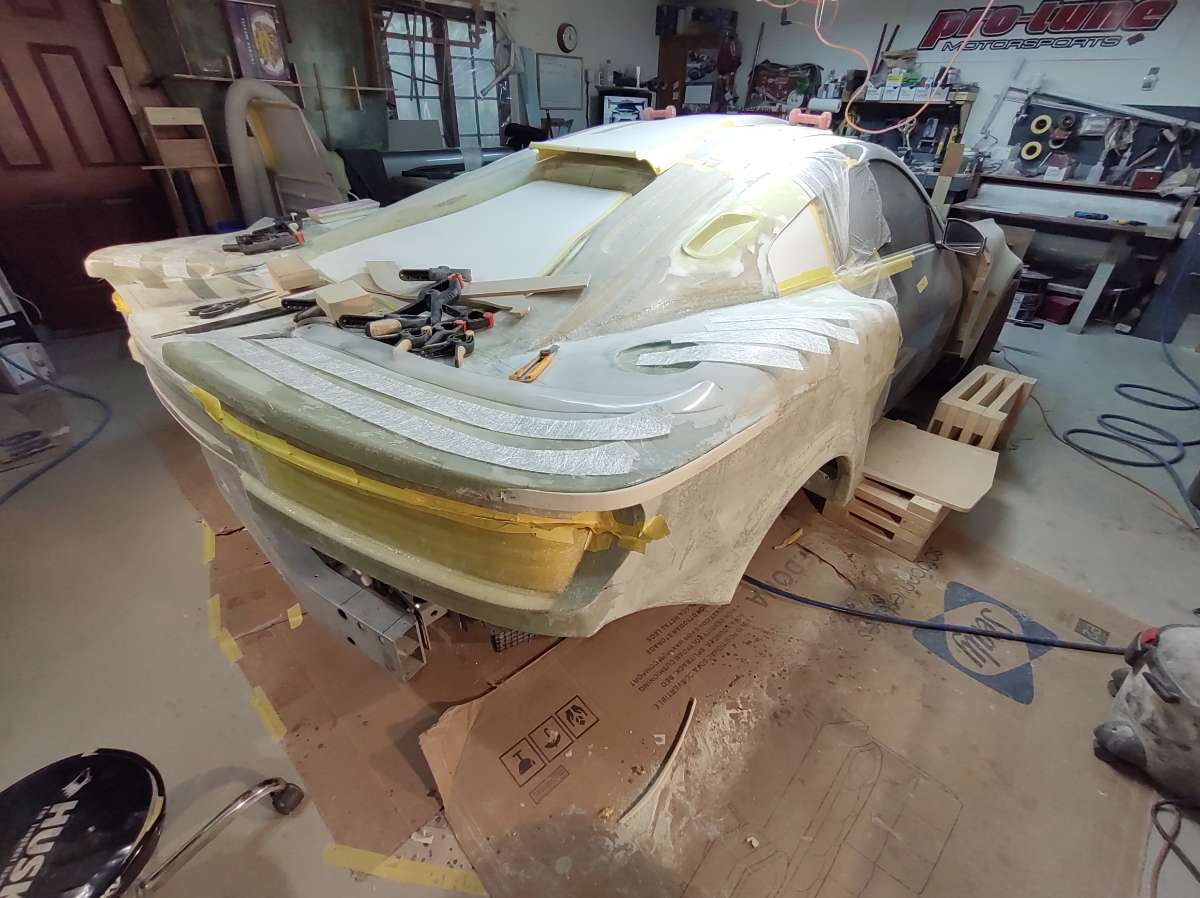
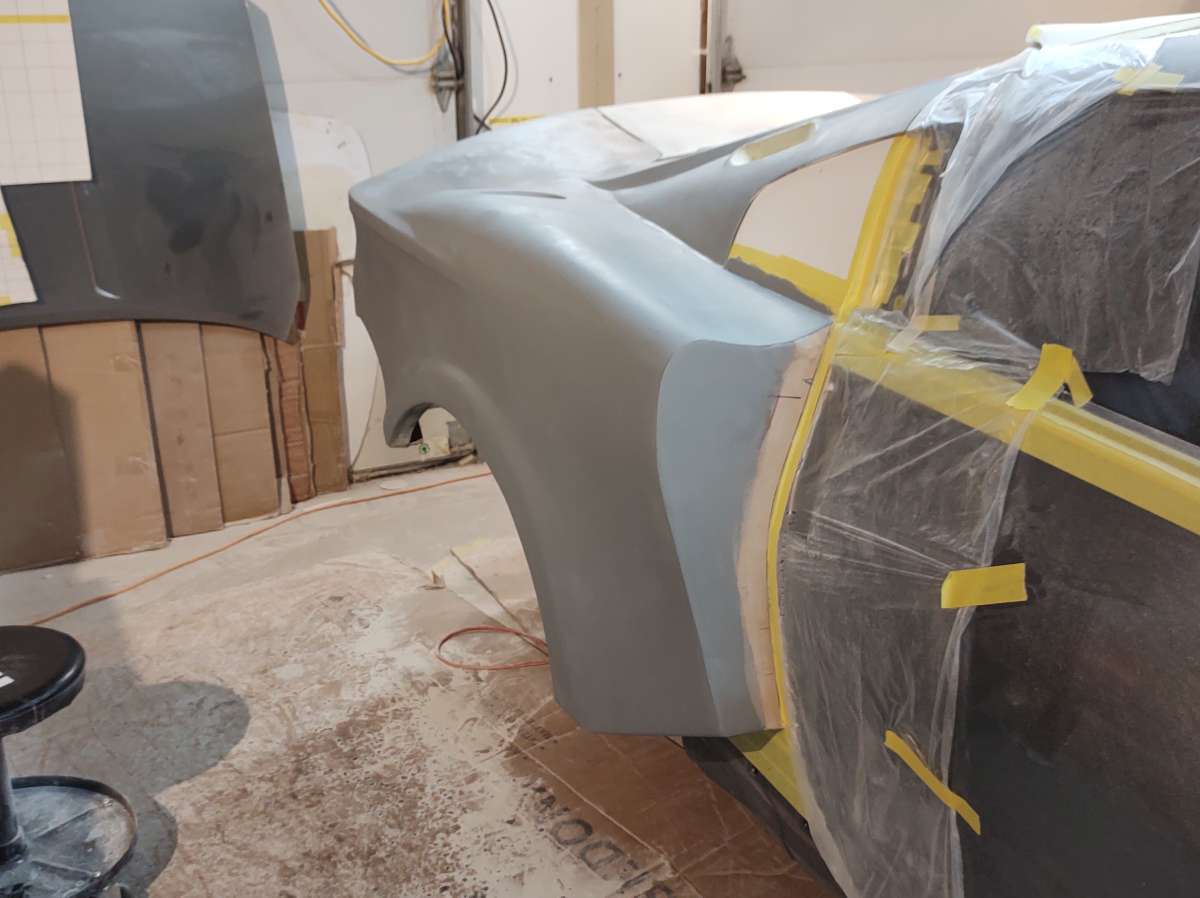
The bumper is almost ready for primer , the main goal at the moment is to get the rear deck , roof and quarters done and molded , also the front fenders and nose before the end of may as I am sure i will be moving out of that shop .
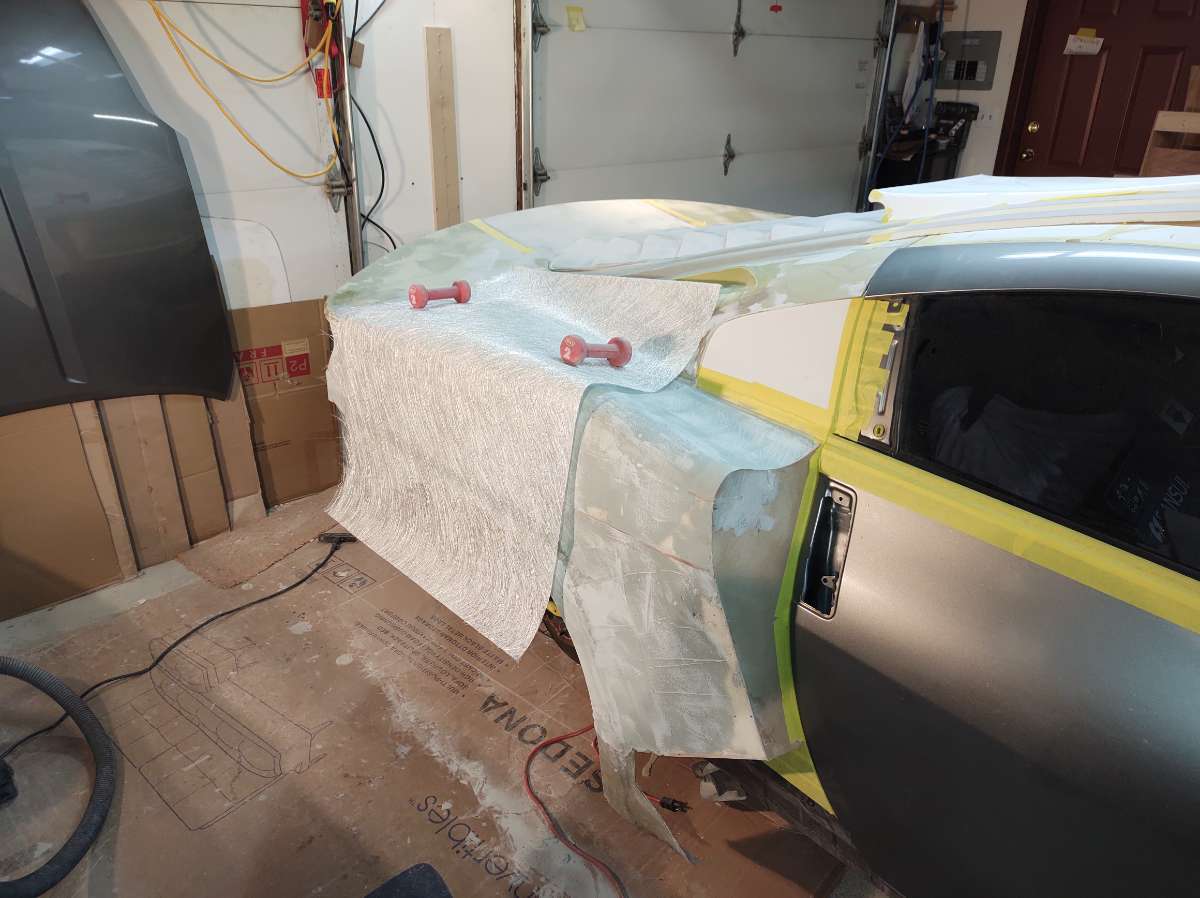
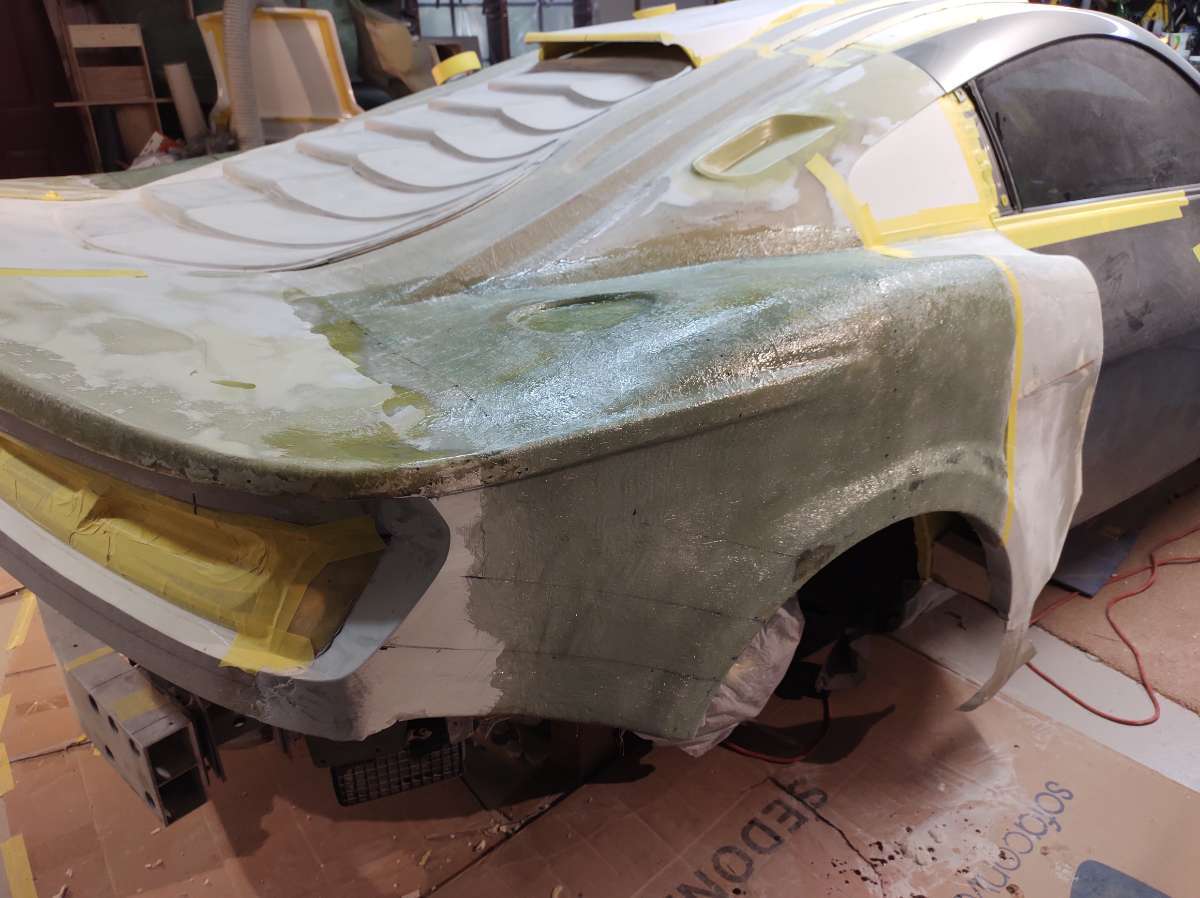
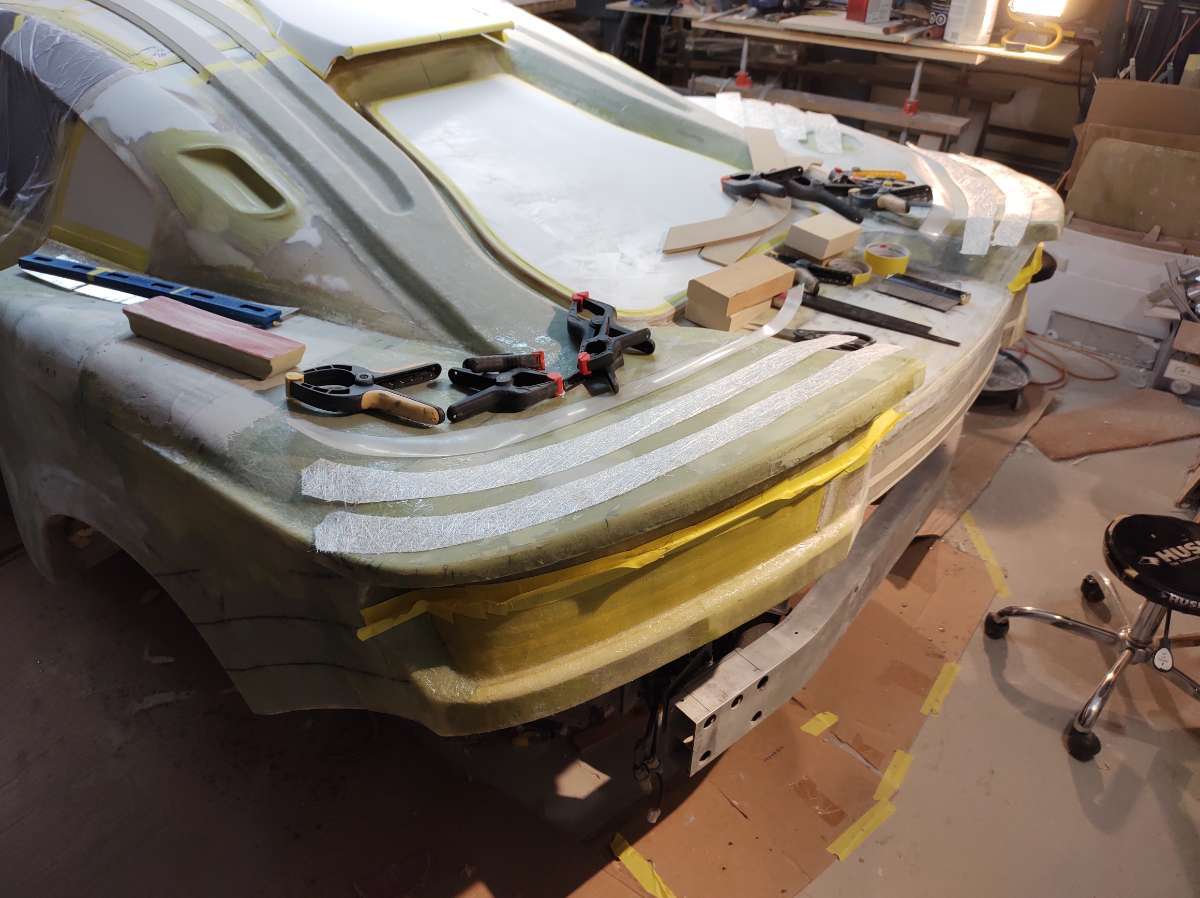
cutting layers of Mat to put on the quarters , this seals the foam and gives you a base for the filler so you don't sand through and mess things up . along with making it strong for taking a mold off of .
Two layers of mat fiberglass
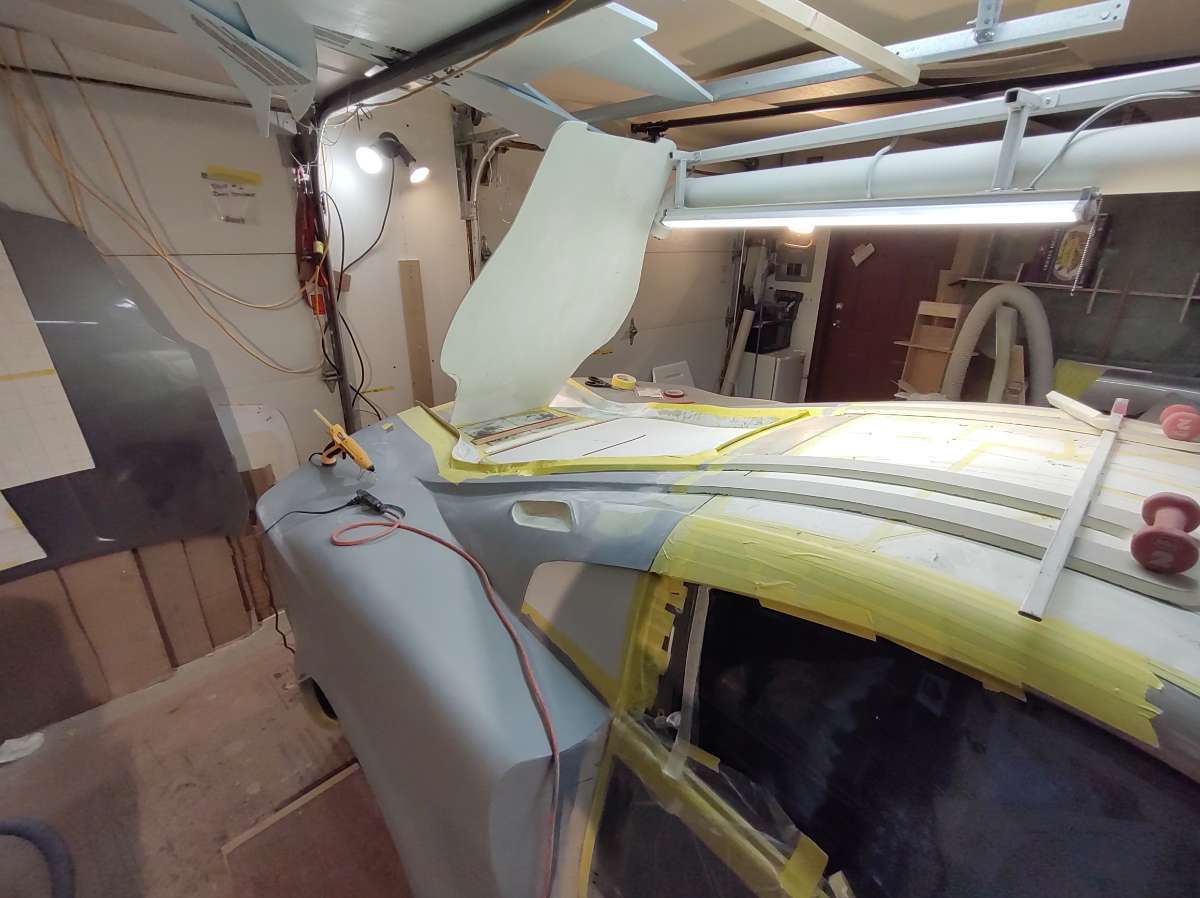
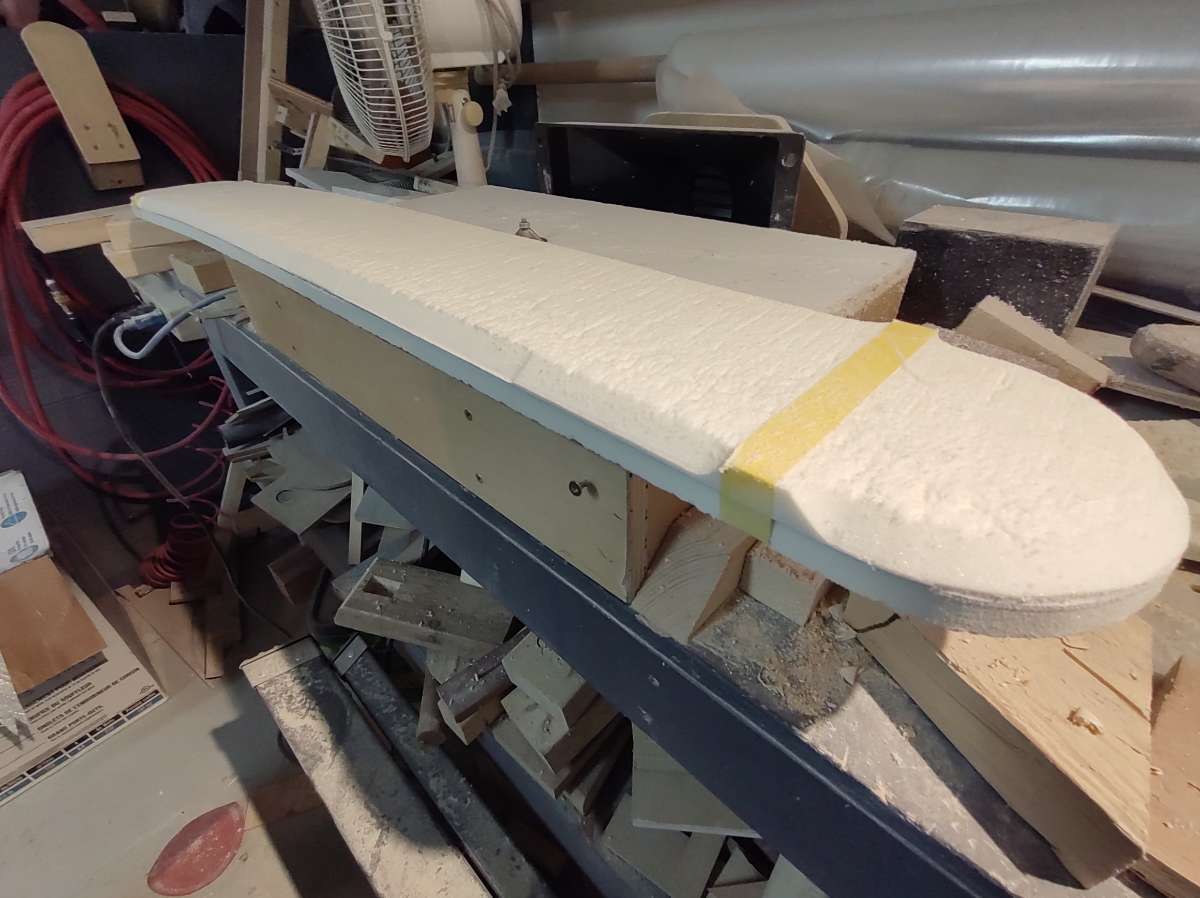
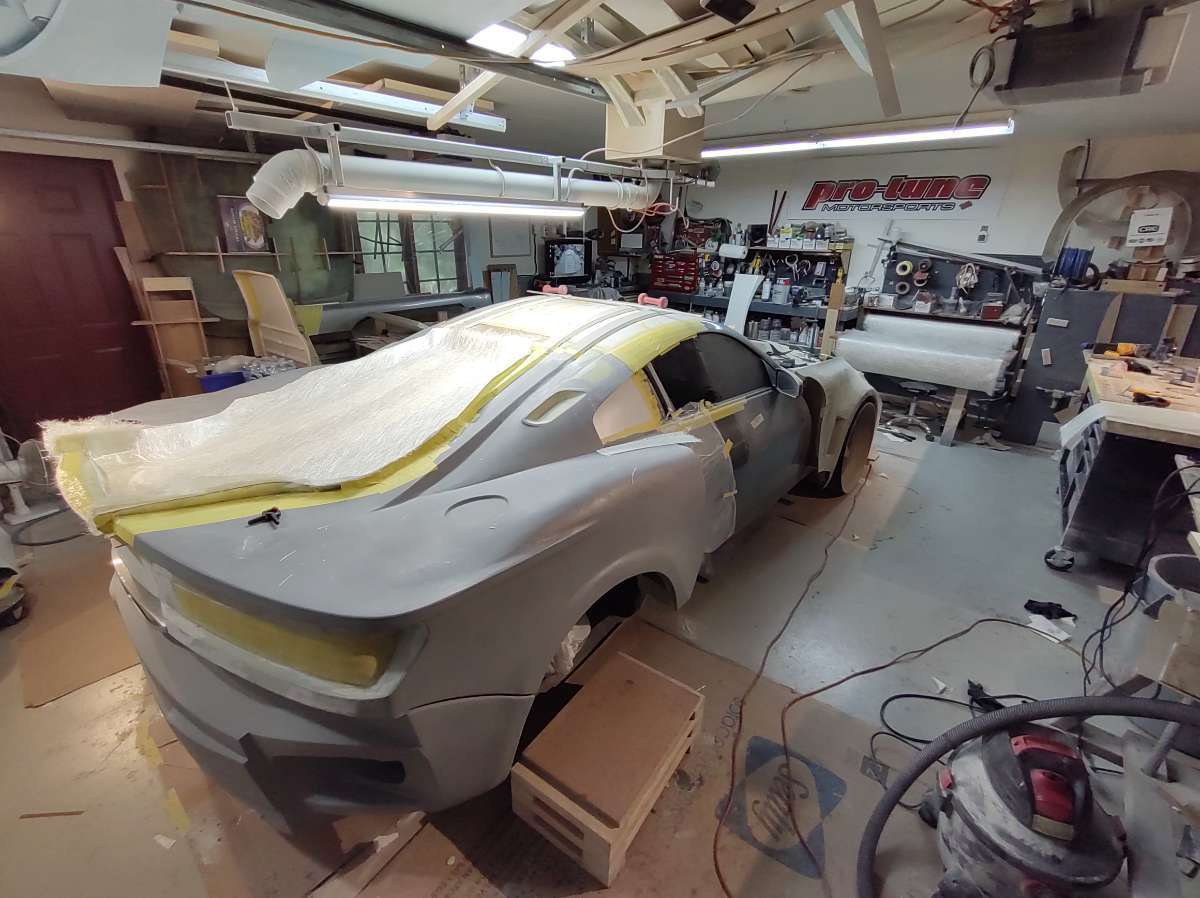
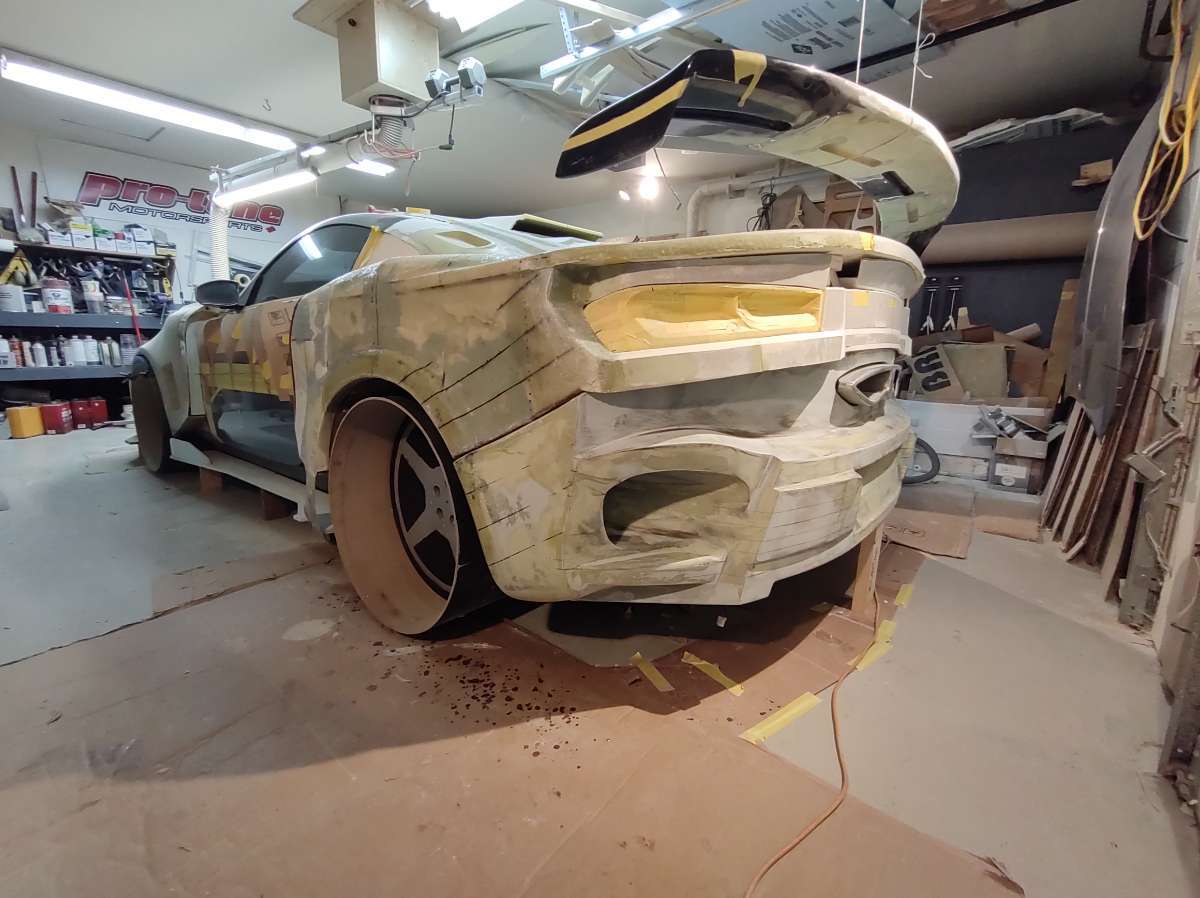
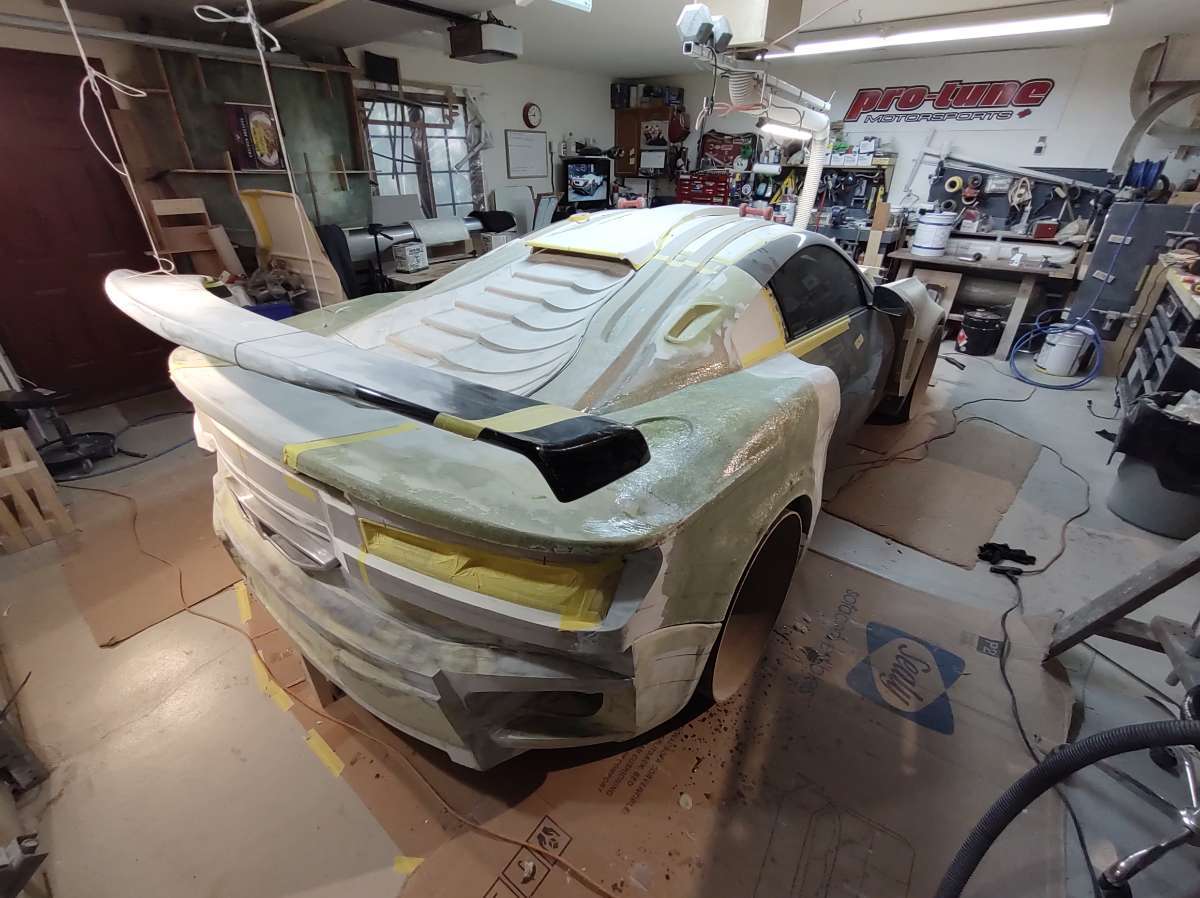
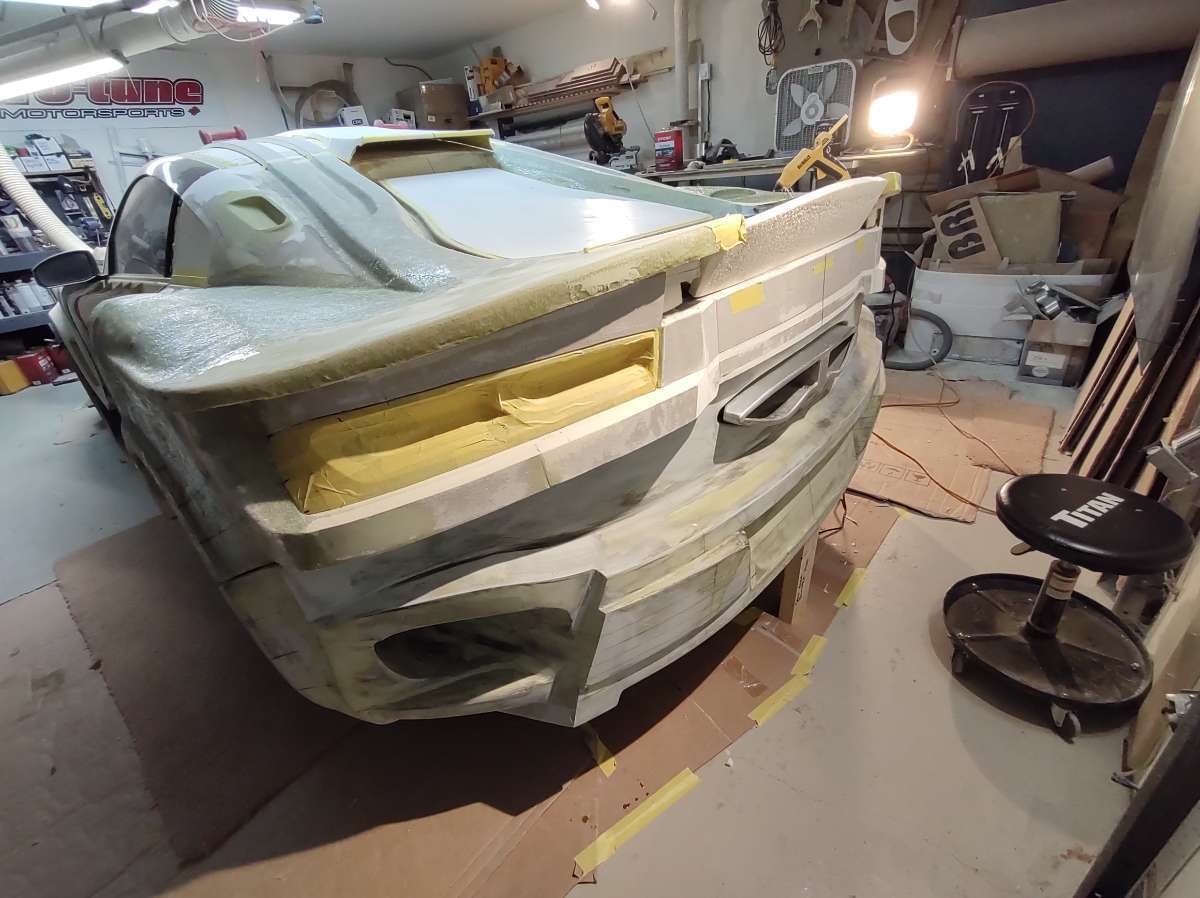
Hung the wing up for a look see
Still have to glass the front half of the quarters
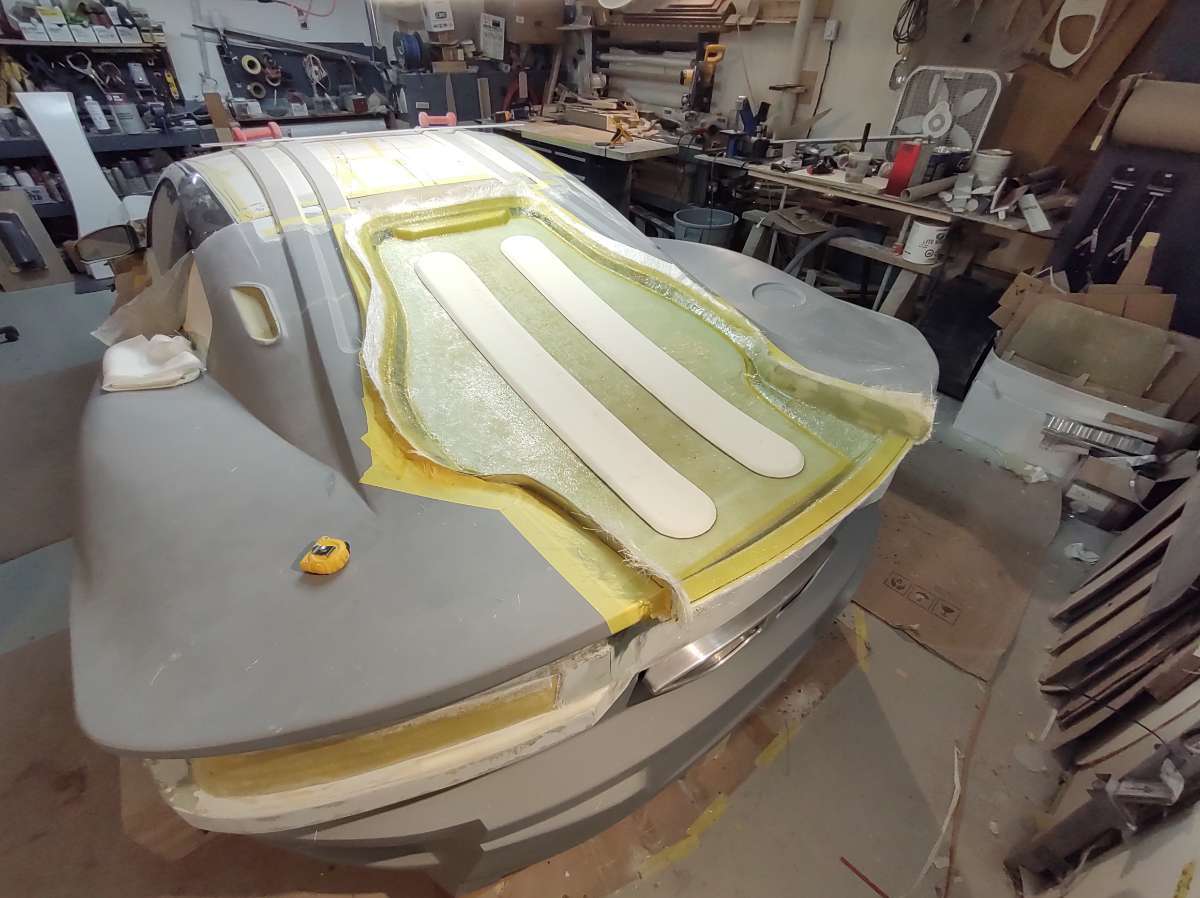
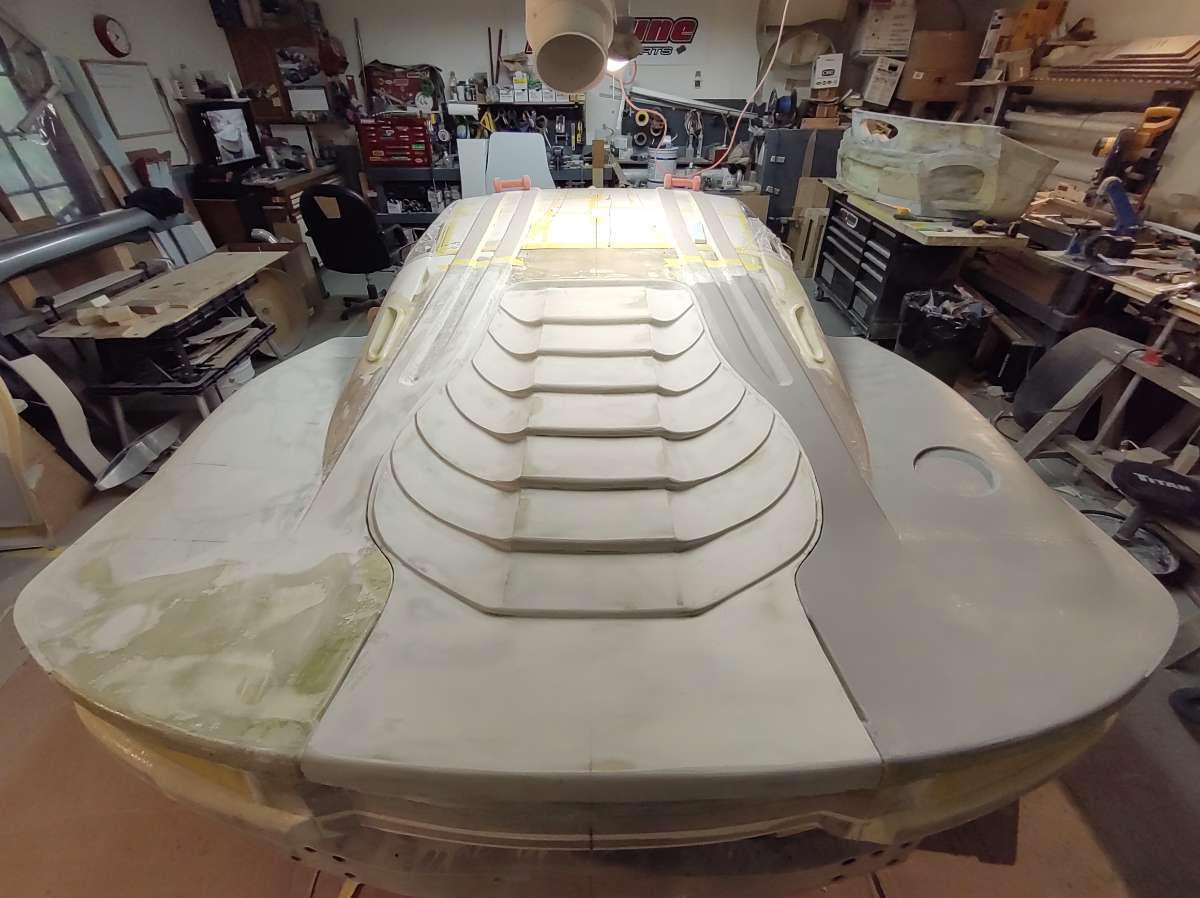
Glassing and bodywork on the rear quarters , some work on the back part of the trunk lid bottom , and some slots on the rear deck for the wing brackets to clear .......... yes have to think ahead all the time .
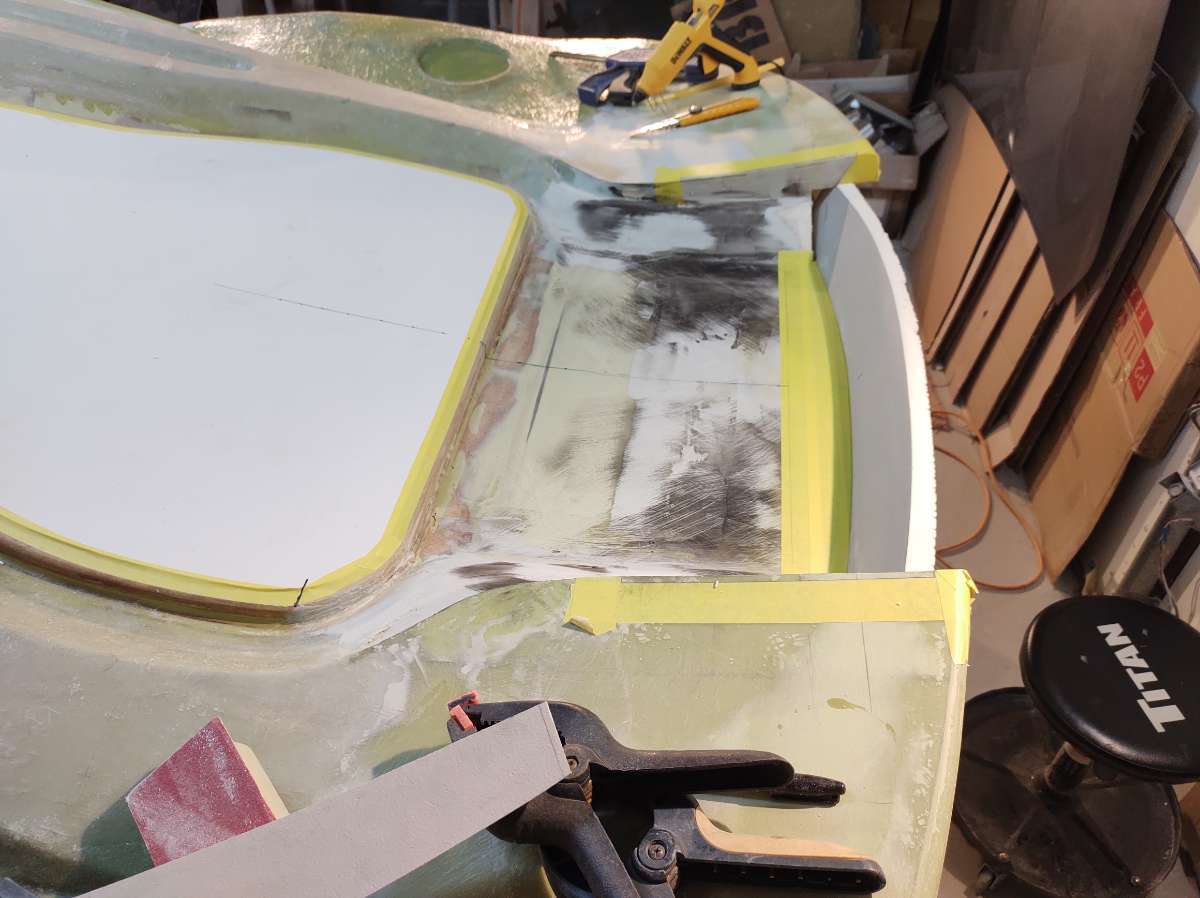
First thing is the back of the deck lid and the back bottom of the trunk lid
Shaping the piece to form the back of the trunk
Adding some gussets to keep it in place while glassing
filling in the gaps on ether side
cutting the trunk part out
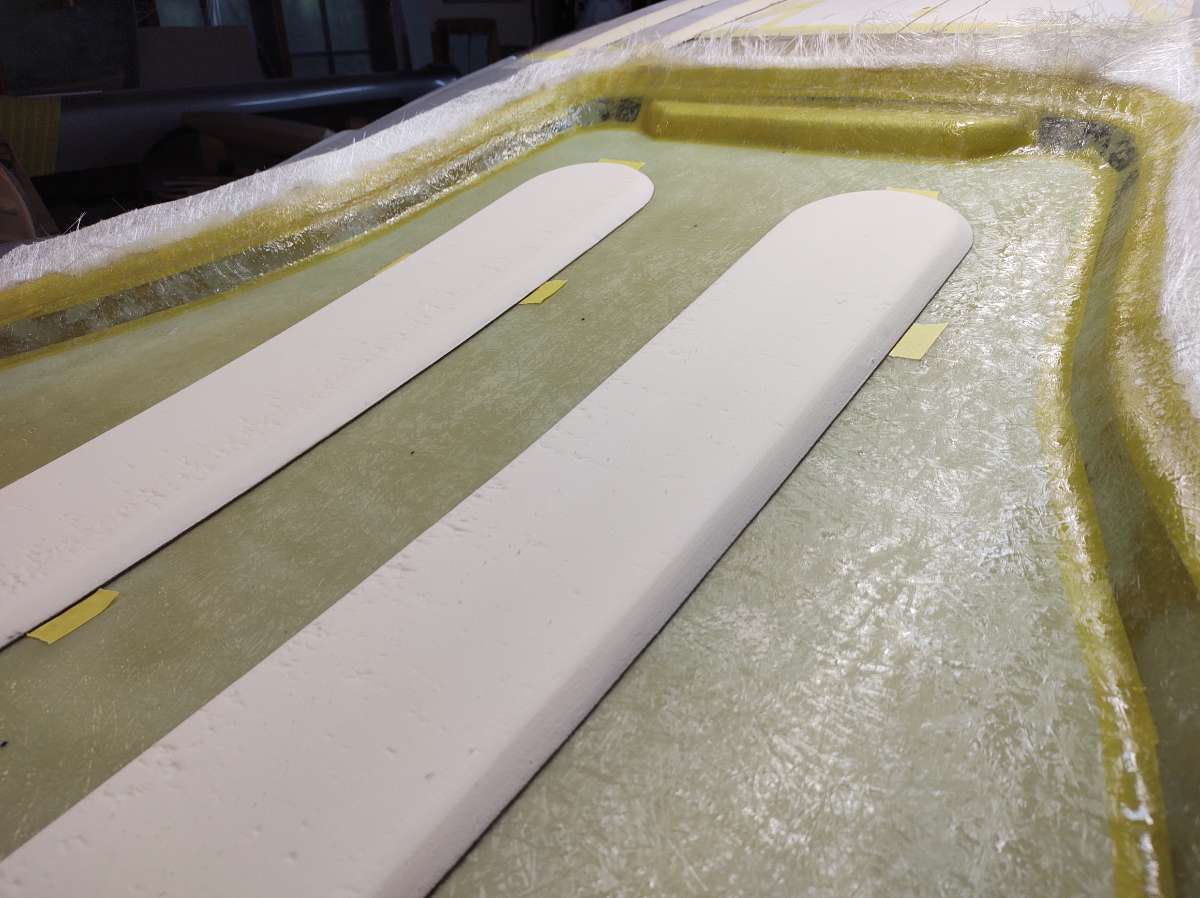
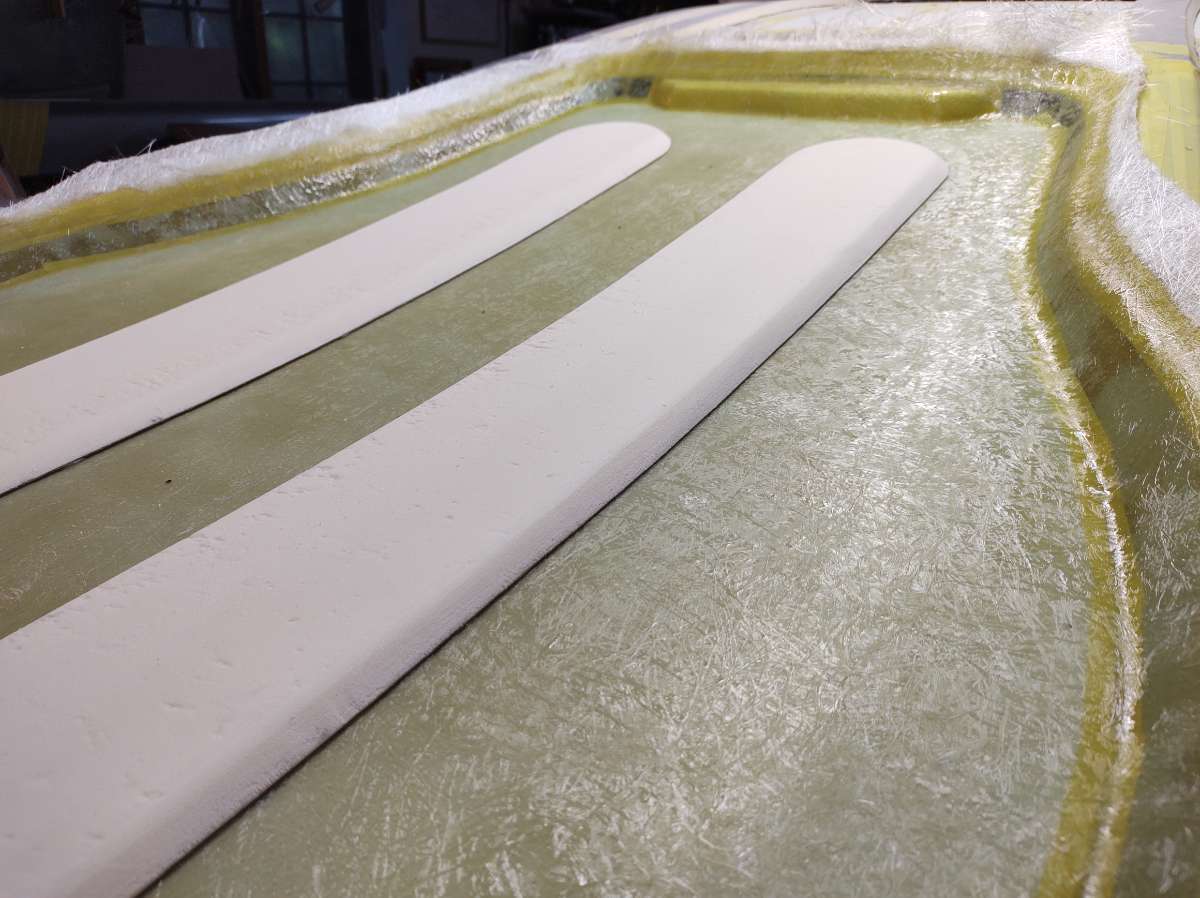
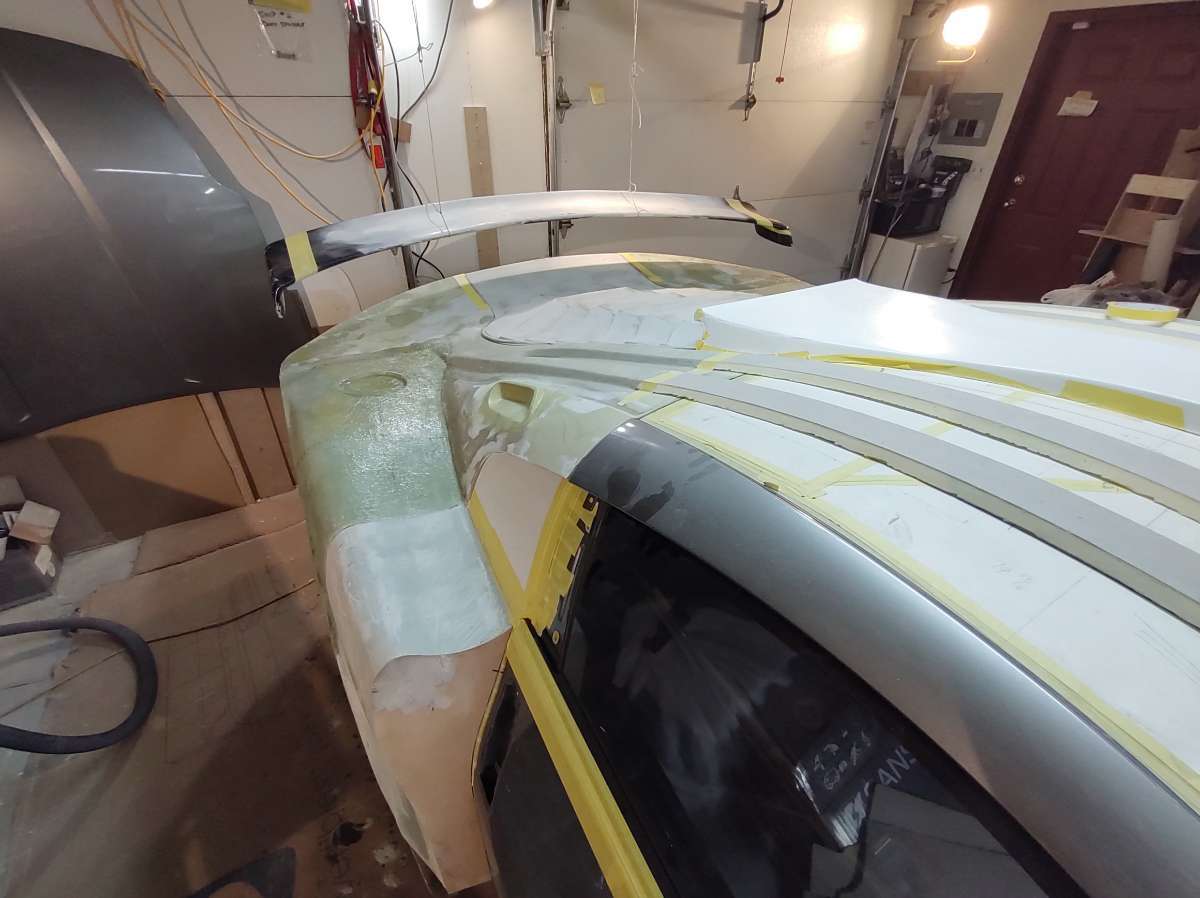
Next is to cut the slots in the deck lid for the wing brackets to clear
These slots will allow the win brackets that attach to the trunk lid sides to clear when the trunk is down , this also allows there to be options , no wing or winglets that go on the car and not on the trunk lid .
I hope your enjoying this , I am going as fast as I can , they say quality takes time ............well that's for sure .
I also want to thank all the fallowers for your support , the kind words really help stay motivated .
Next is more work on the quarters , really taking shape now .
so I just flip the the template to check the other side . that's why you see lines on the car .
Glassing the front sections of the quarters .
you have to glass over the foam for strength , and so I don't sand the filler too far , the foam sands like butter
More on the back of the beast .....
As you can imagine these tail lights would be hell to fiberglass over , so I made some quick covers for them .
Used some thin aluminum flashing .
Then taped them over to stop the resin from getting in and a couple of coats of wax .
So when I take all this apart it wont be stuck to the lights
More to come , out of time to post stuff . off to work on the car .
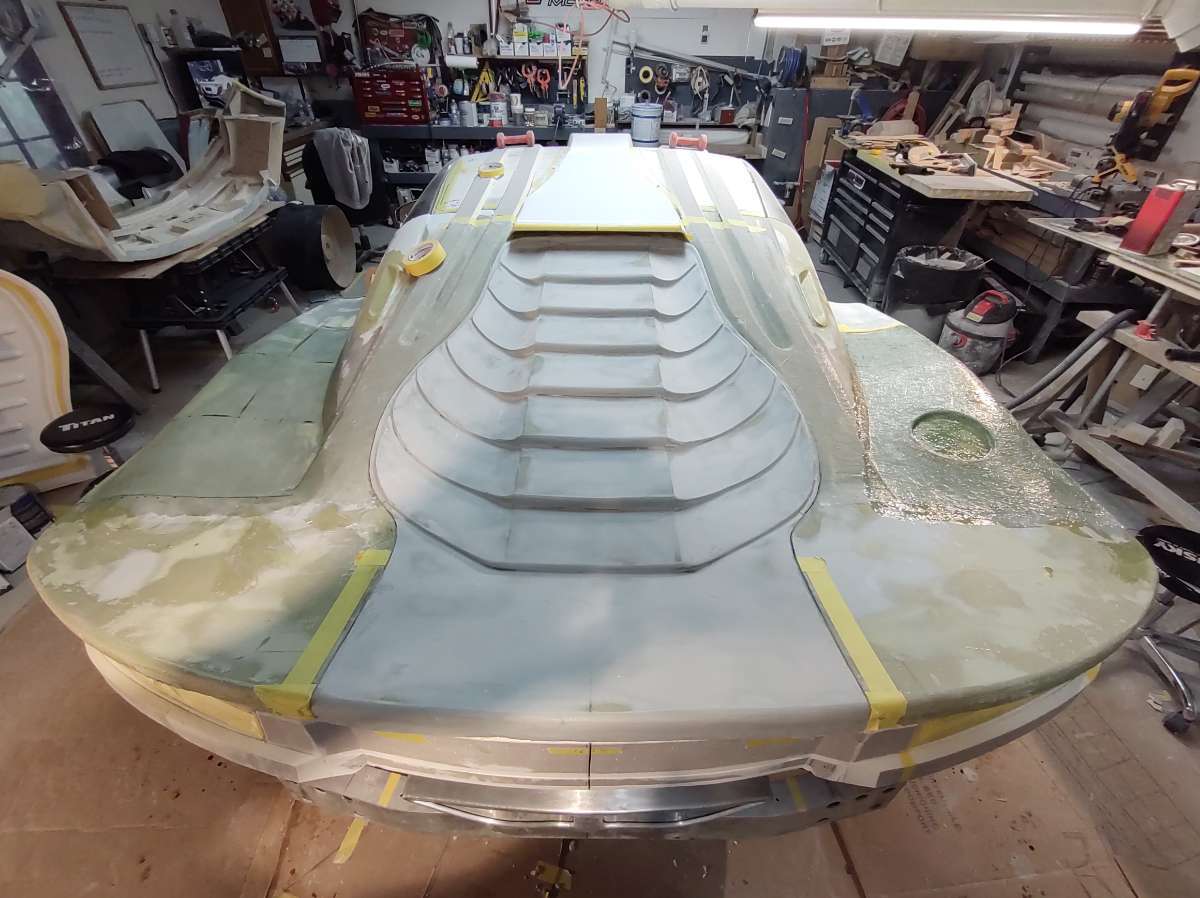
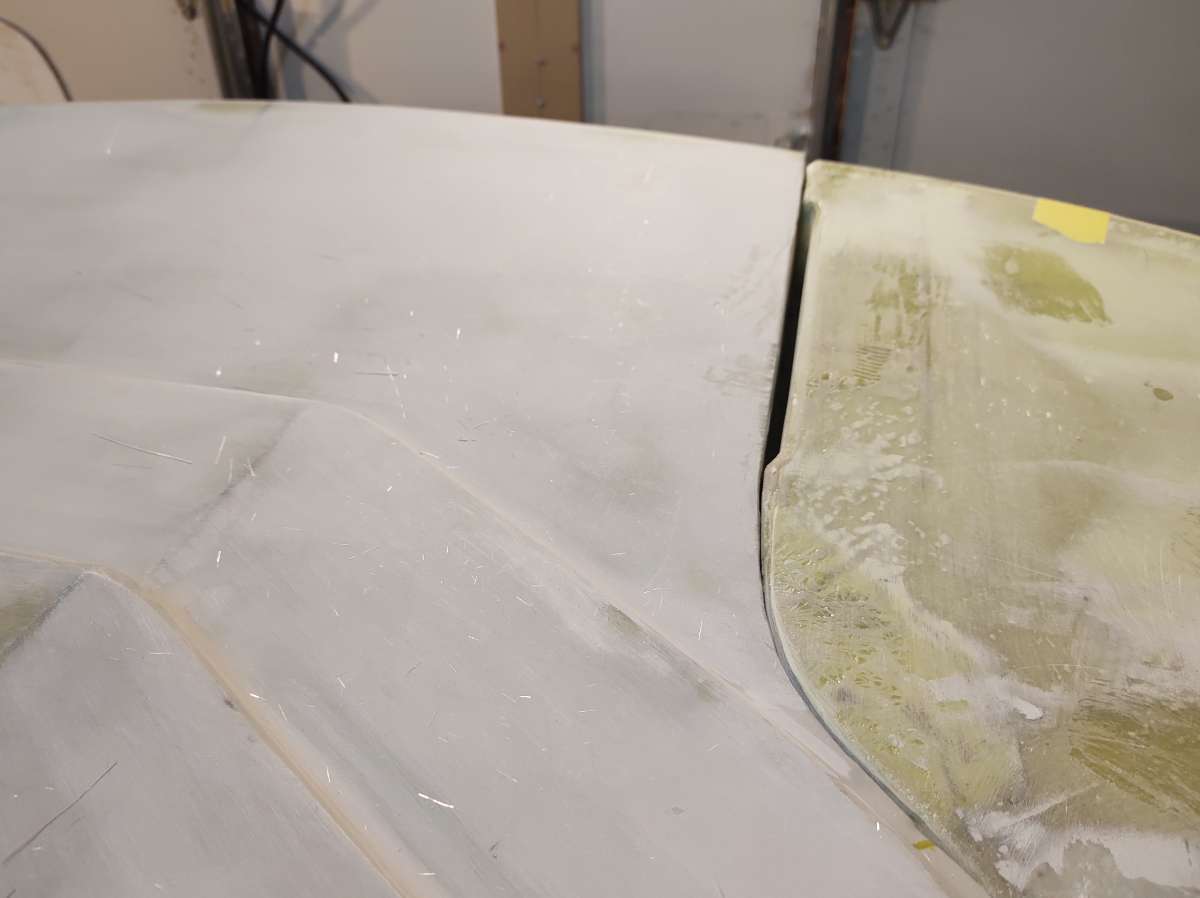
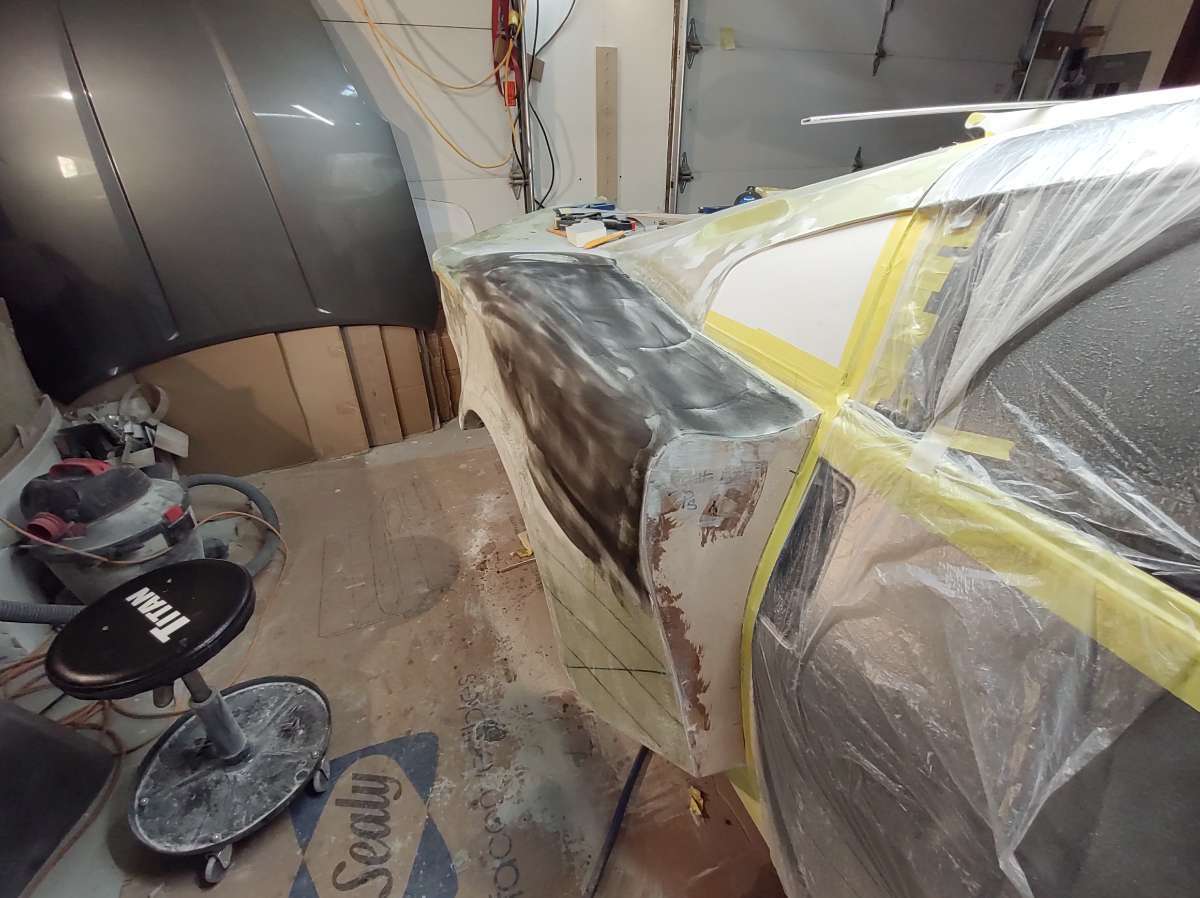
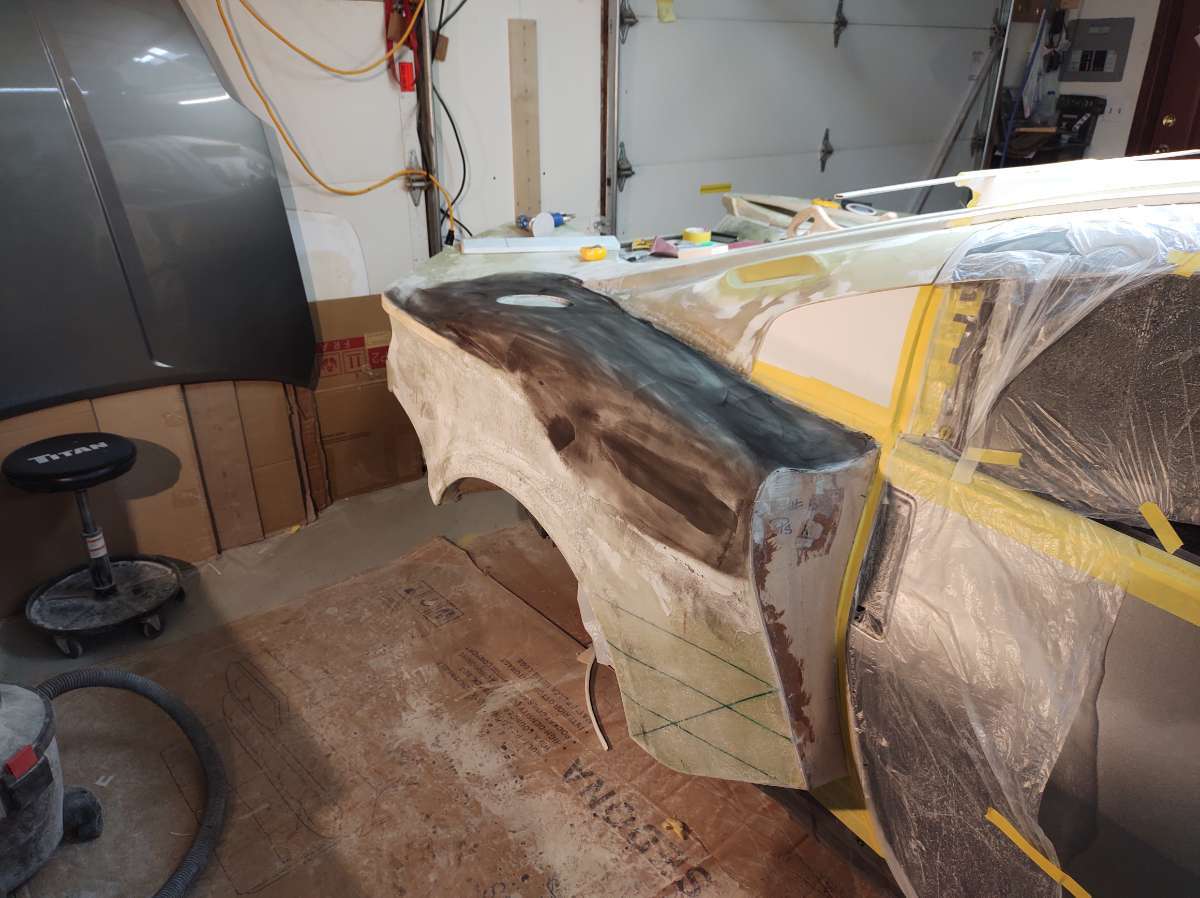
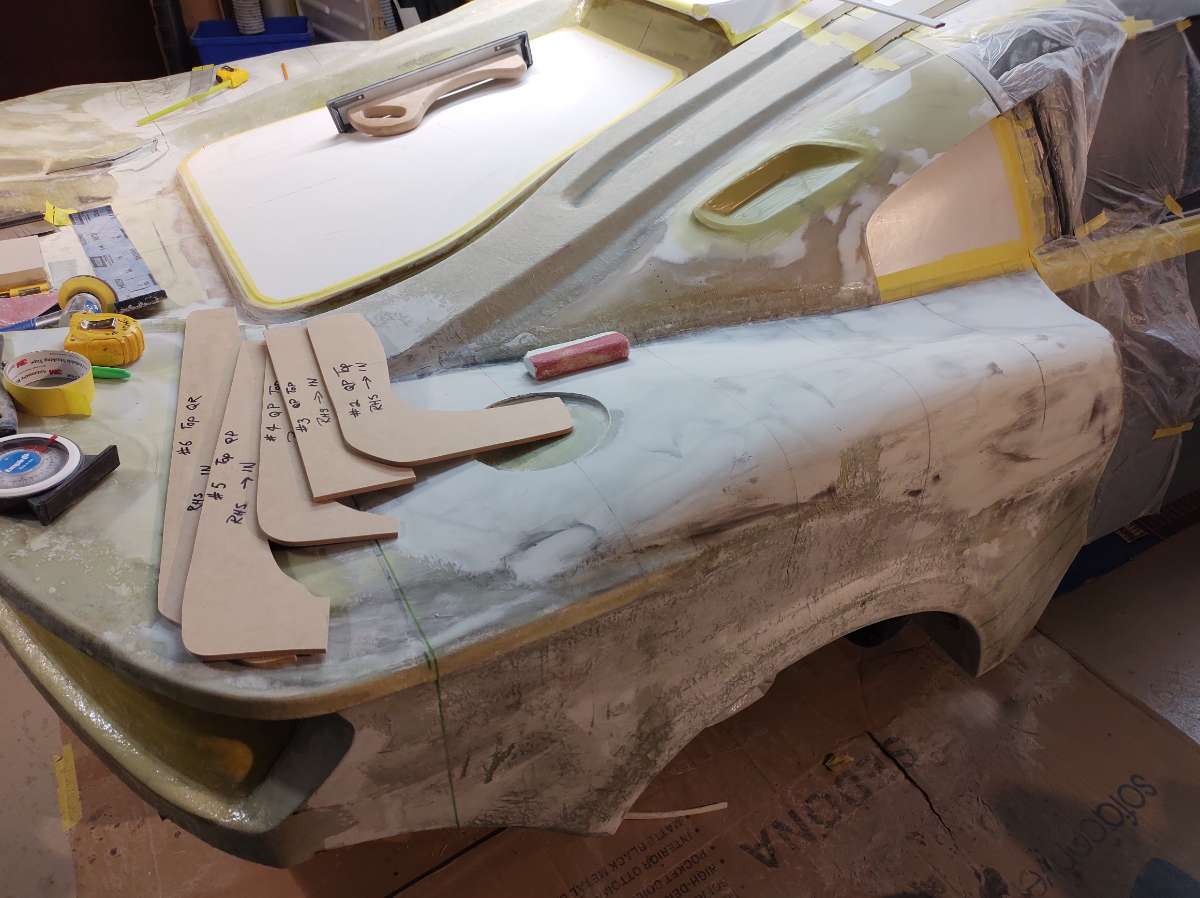
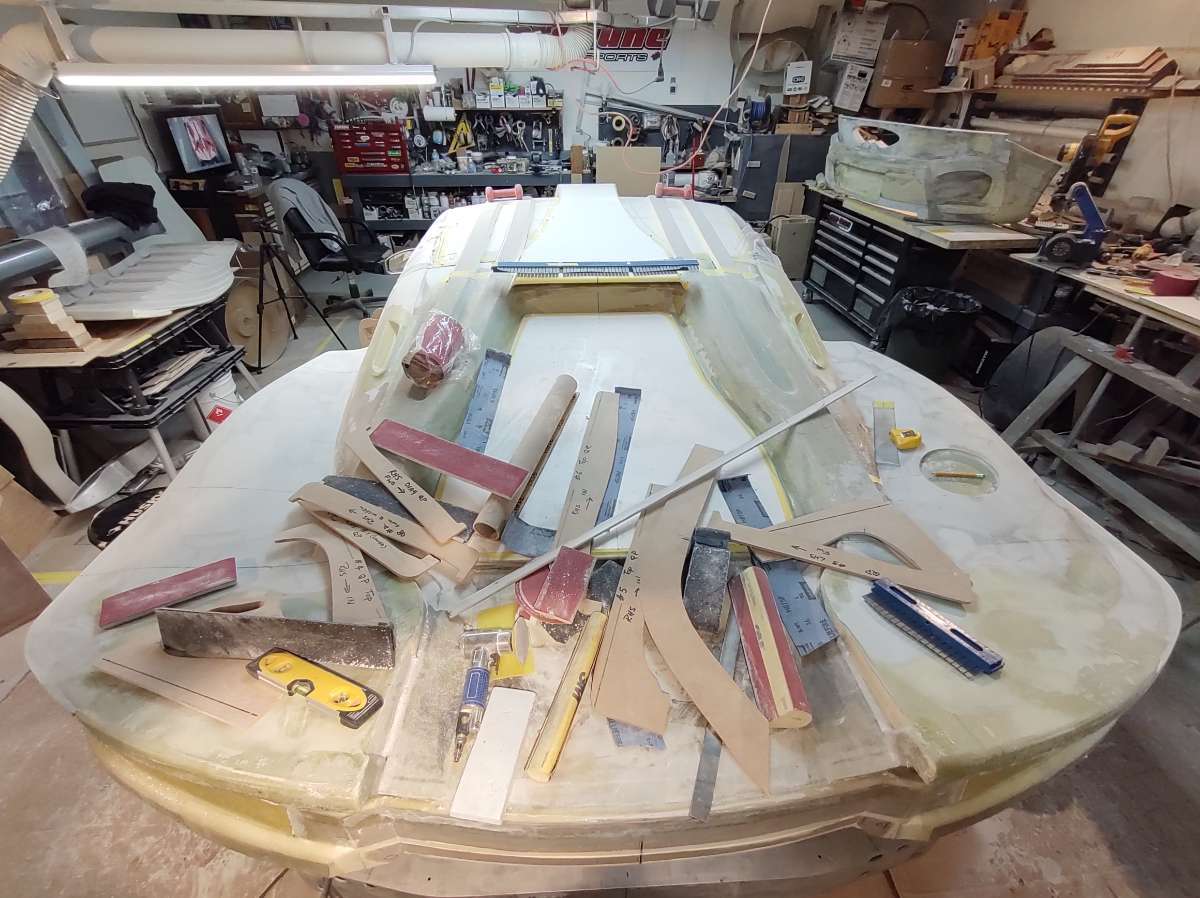
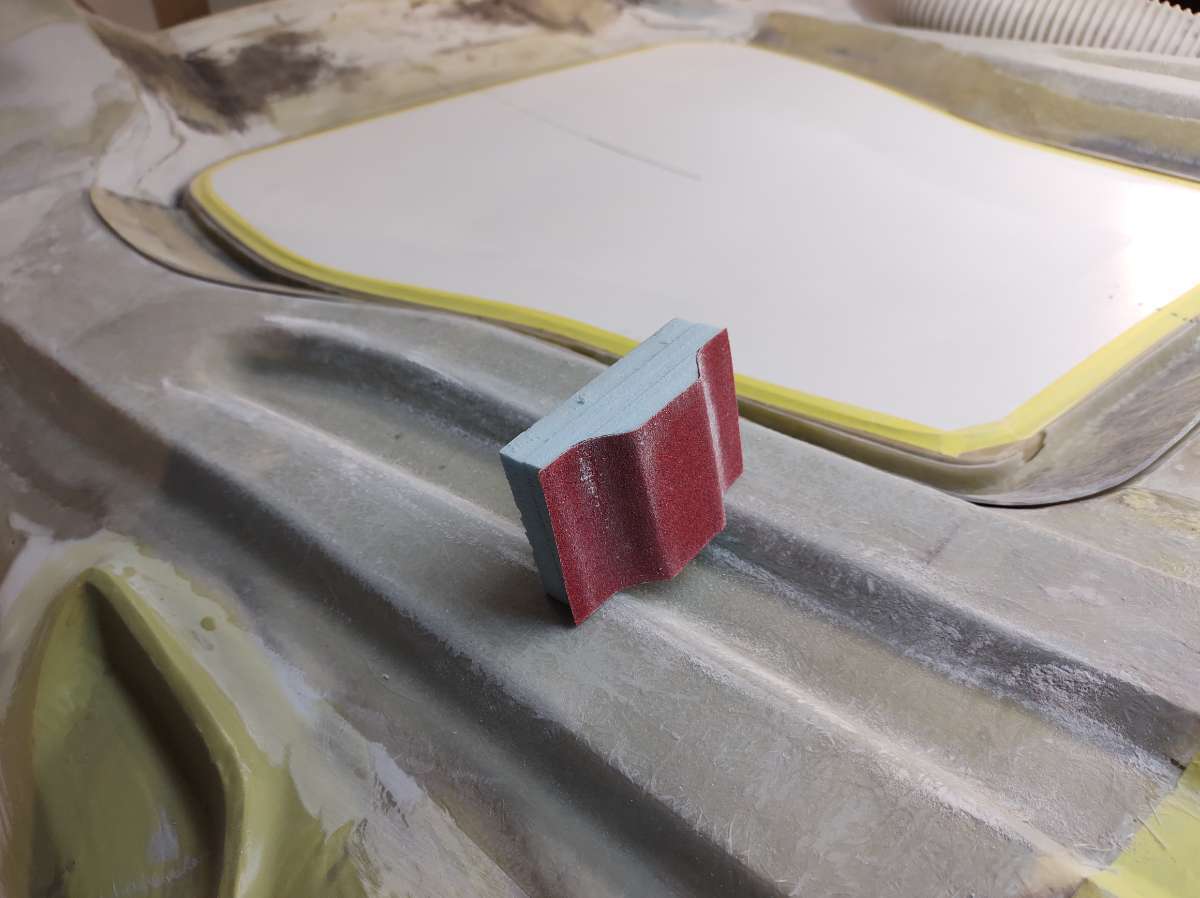
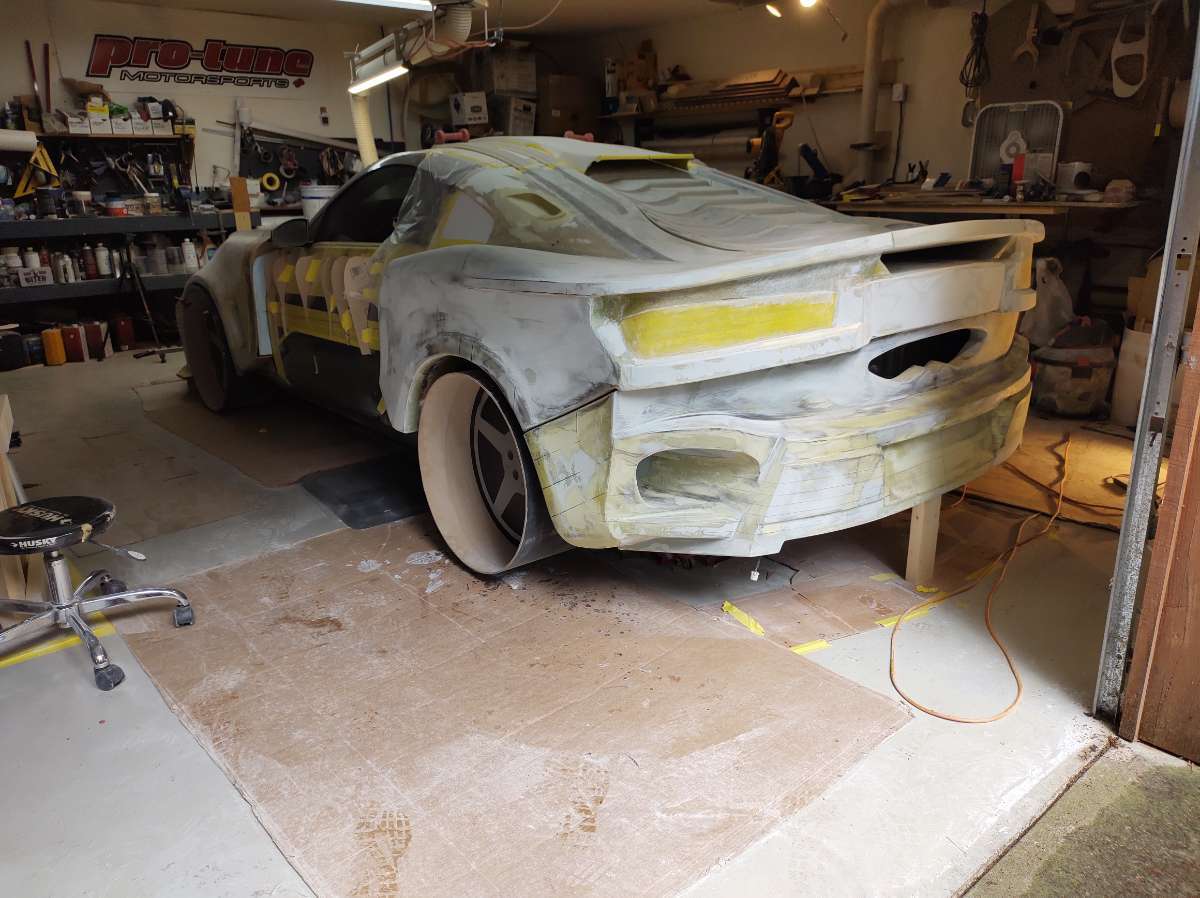
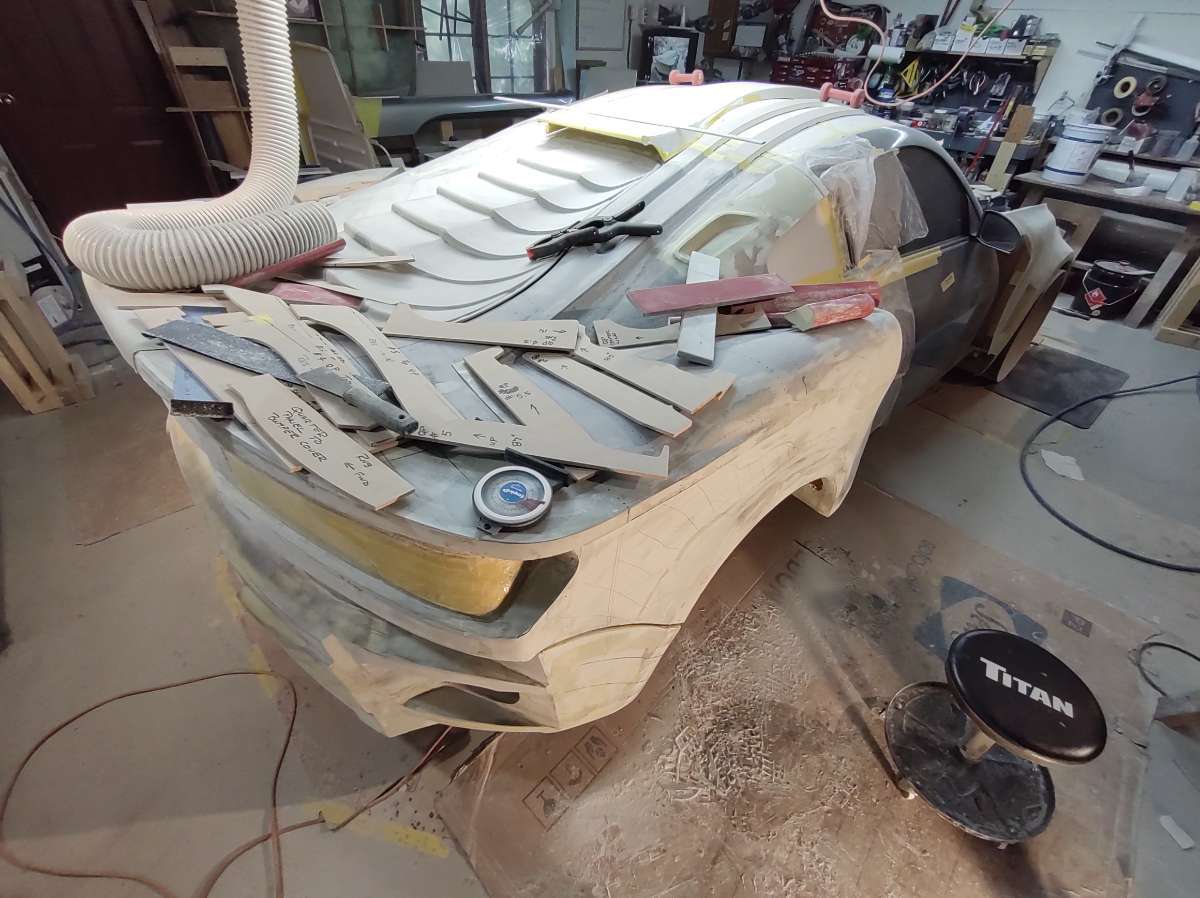
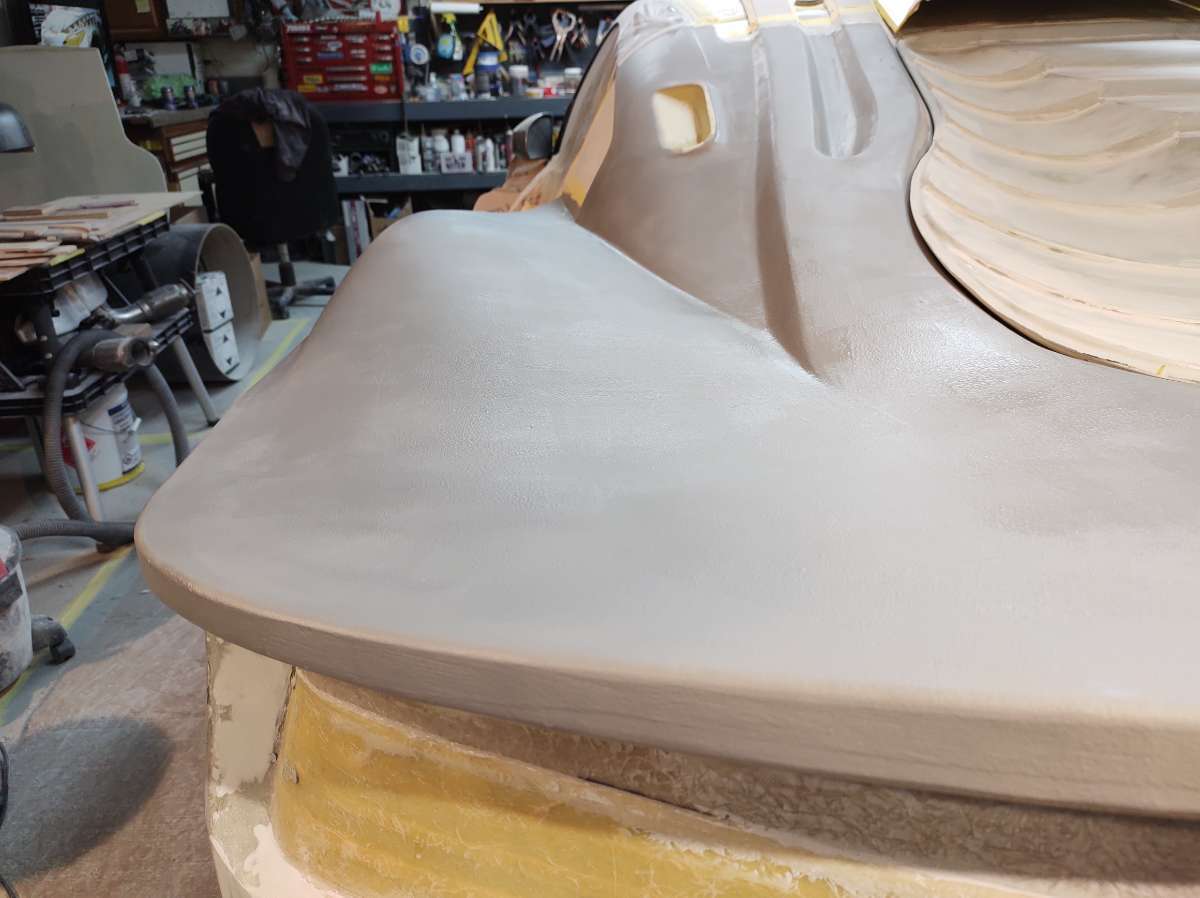
Hi everyone another update .This is called a guide coat , it's for sanding to show you where the low spots are or scratches , you can spray it on , which takes time to dry and some brands clog up the sand paper , I have started using this powder version , it's a graphite and works very well .
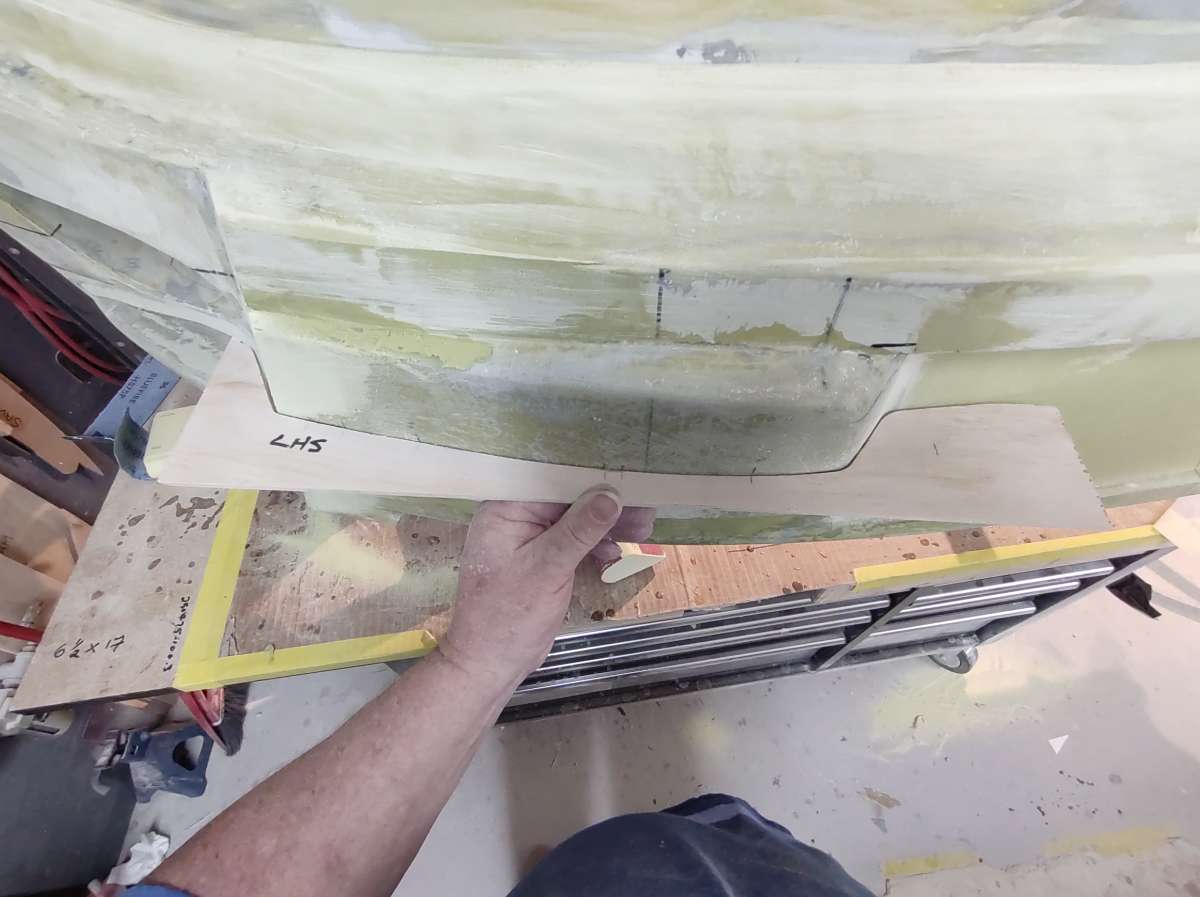
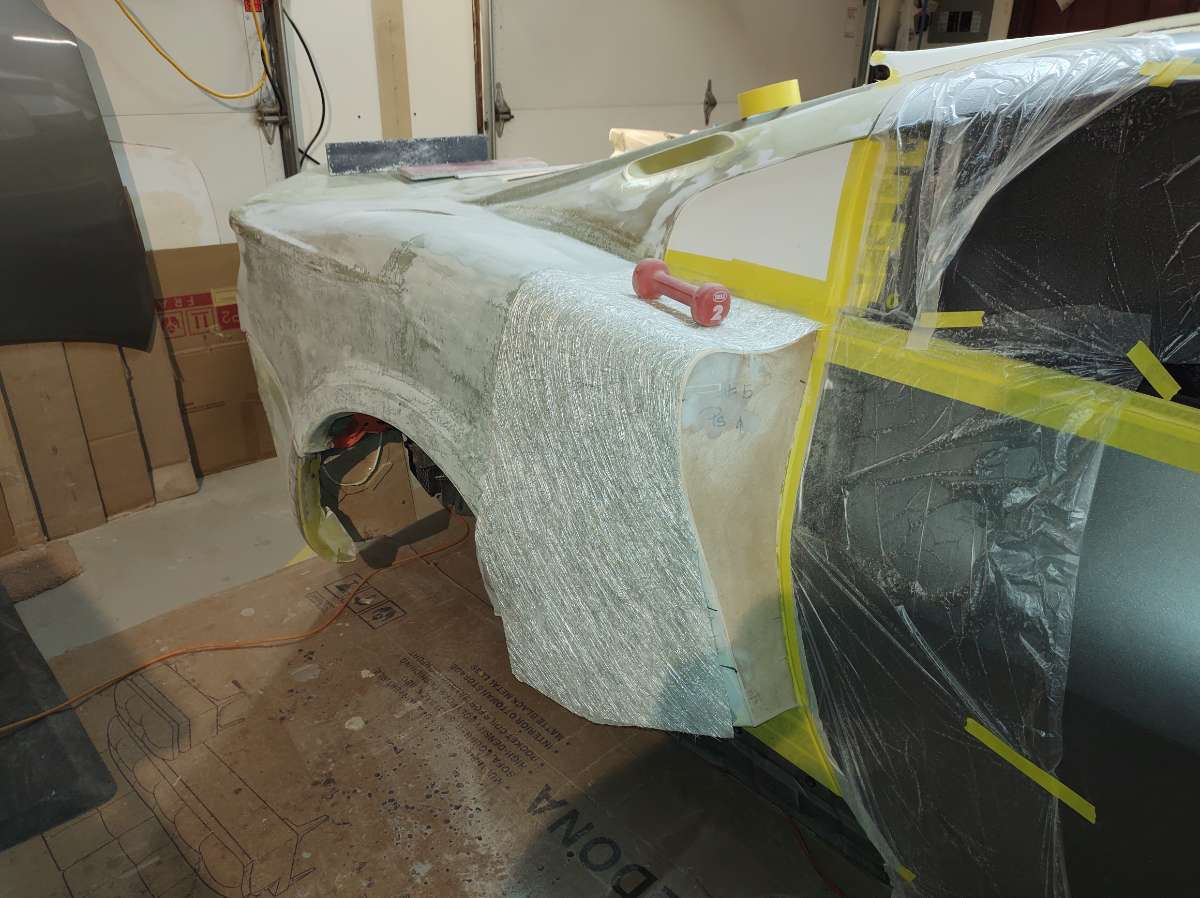
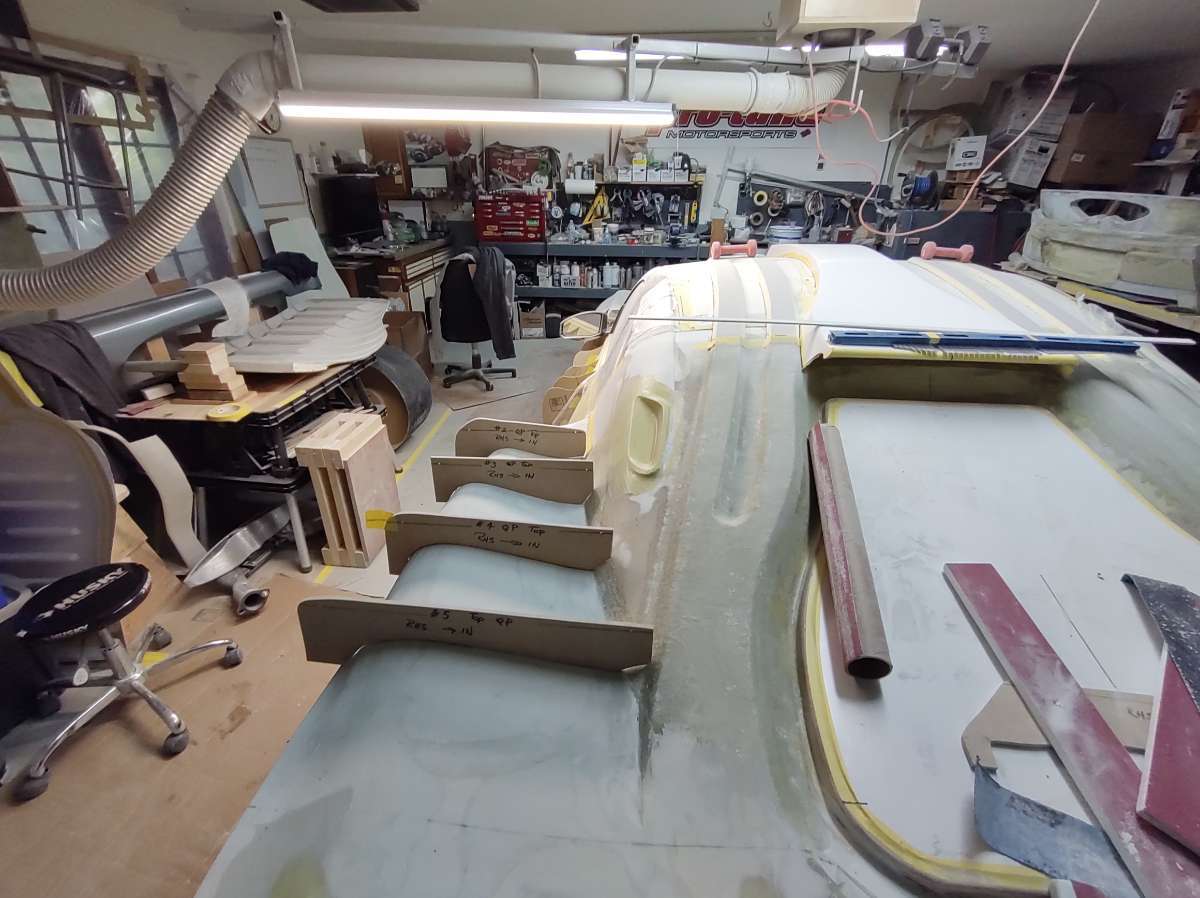
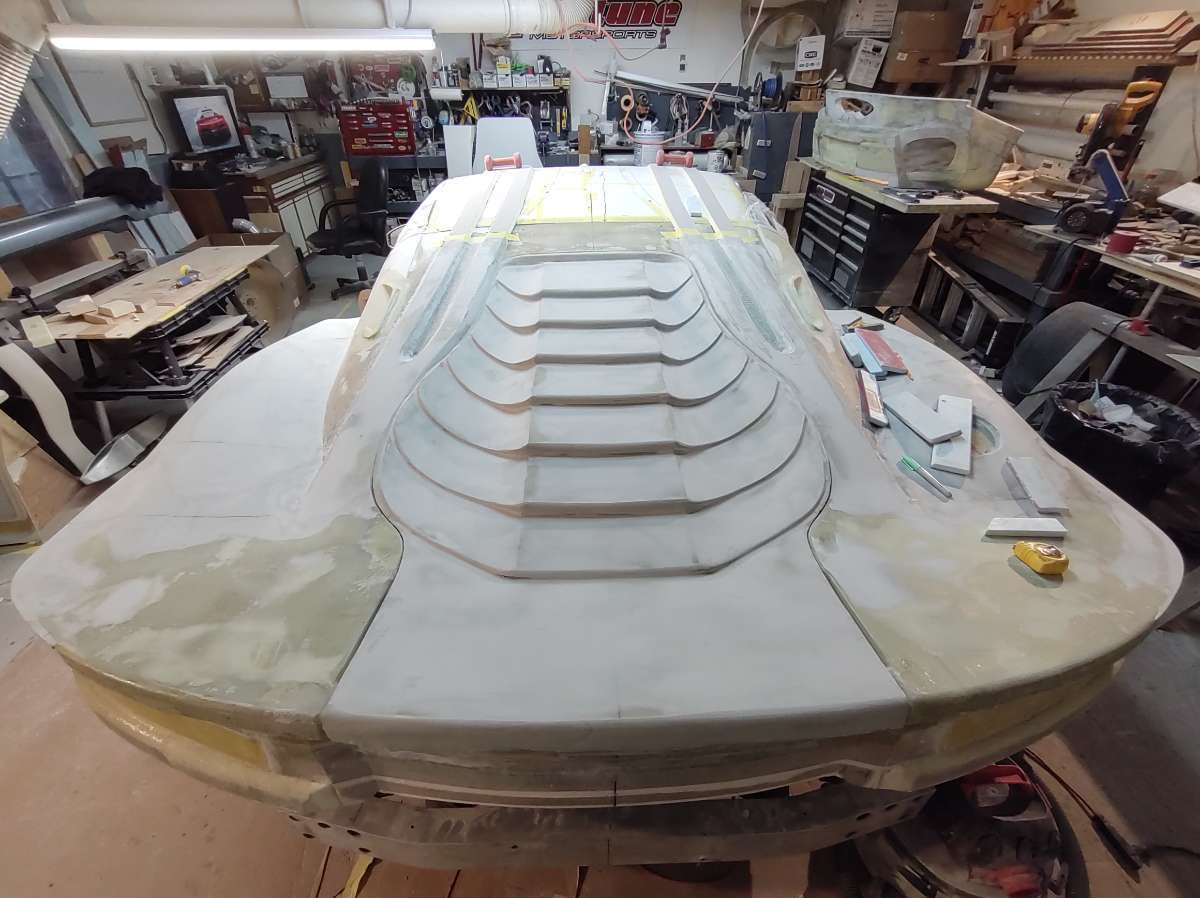
This is how I get both sides as close as I possible can to match up , after the wooden bucks on the car get filled with foam , they get roughed out with a long sanding board , this tends to make the foam flat between the bucks and you loose some of the curves .
So after the foam is close in shape it gets 2 layers of fiberglass mat for a base to add filler without damaging the foam.
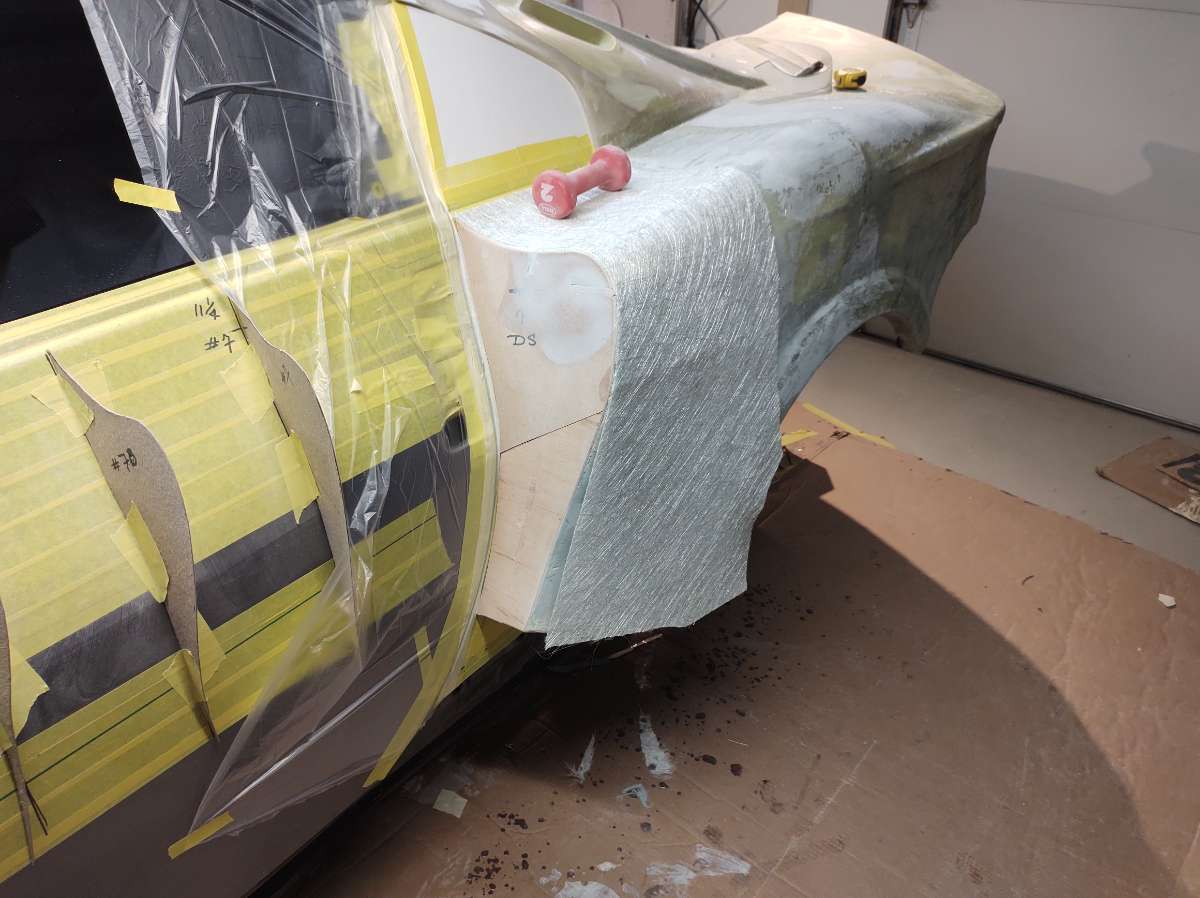
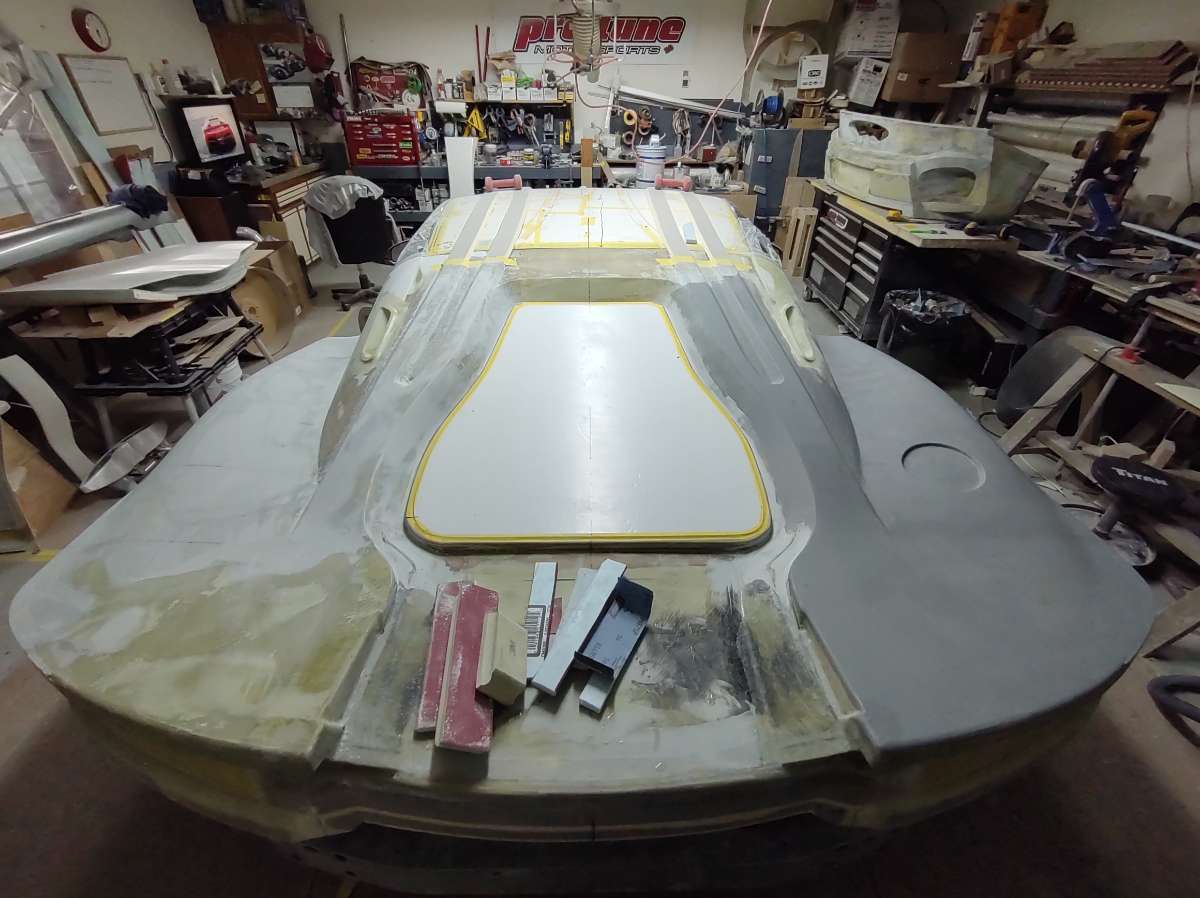
I did the passenger side firs for the final shaping because the filler cap for the gas is going to be the original from the Zed , so it has to fit properly .
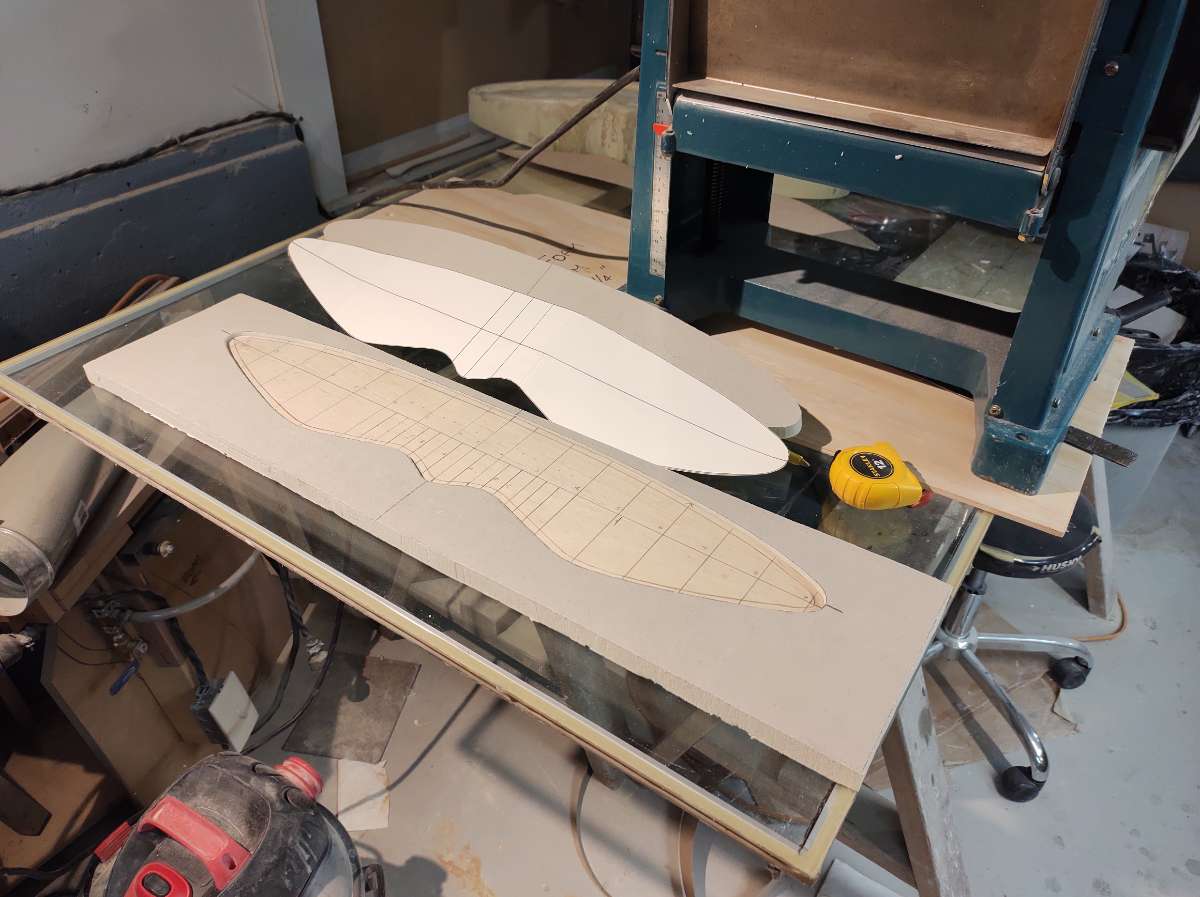
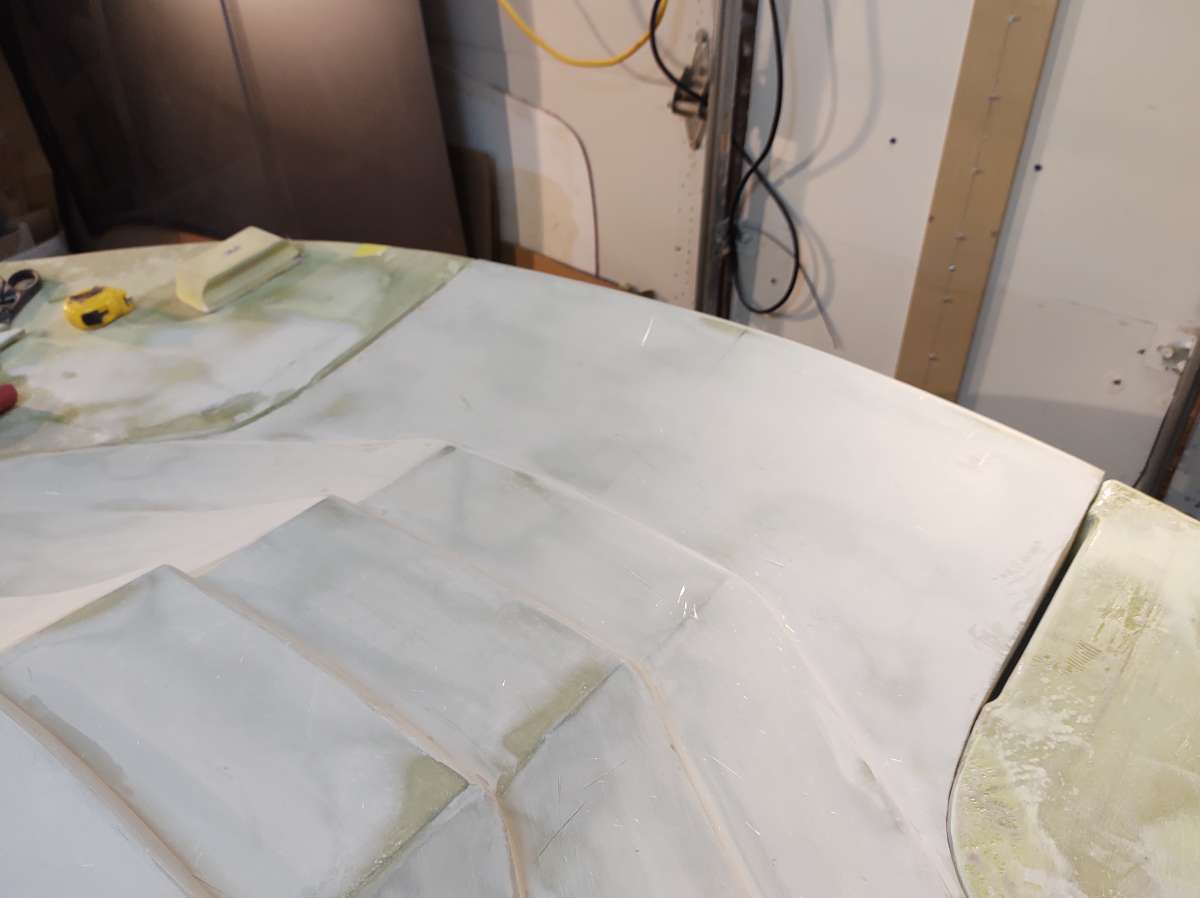
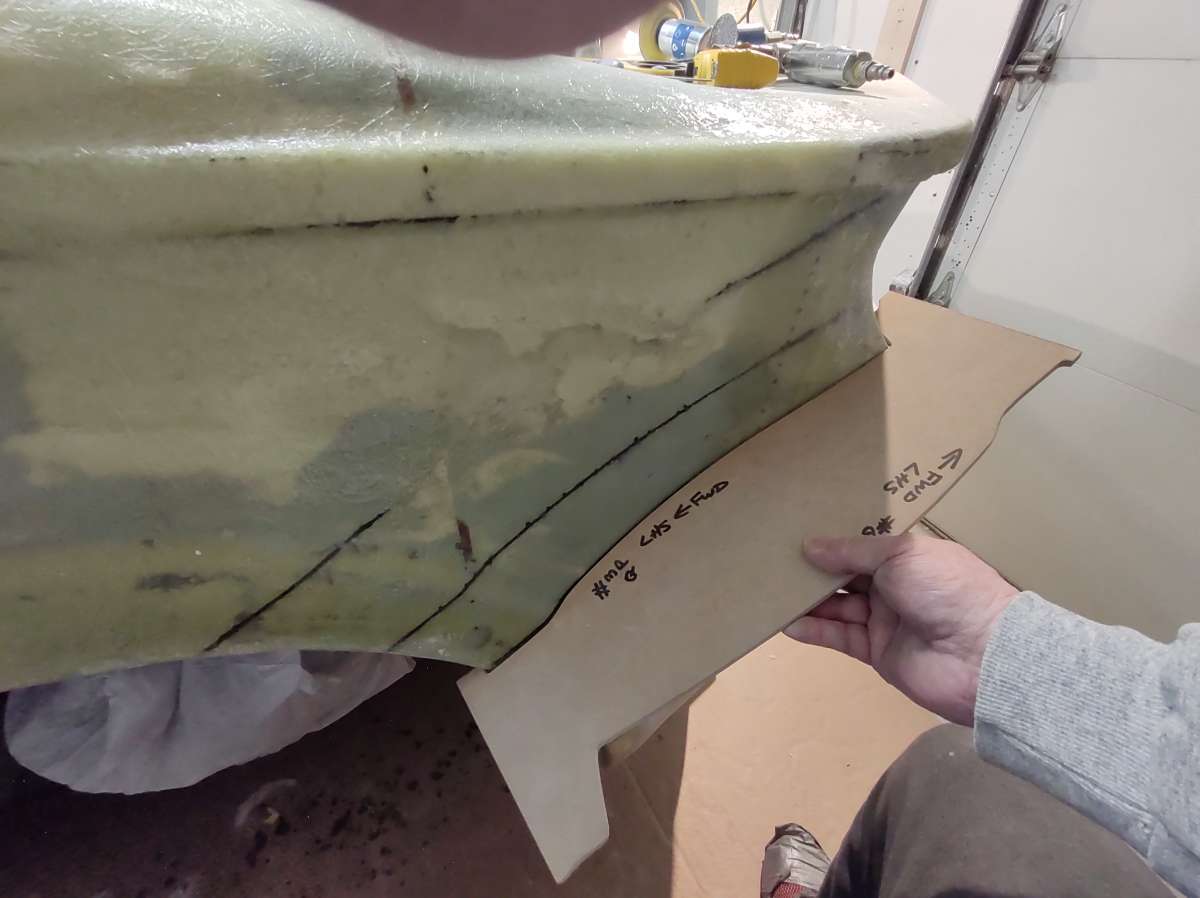
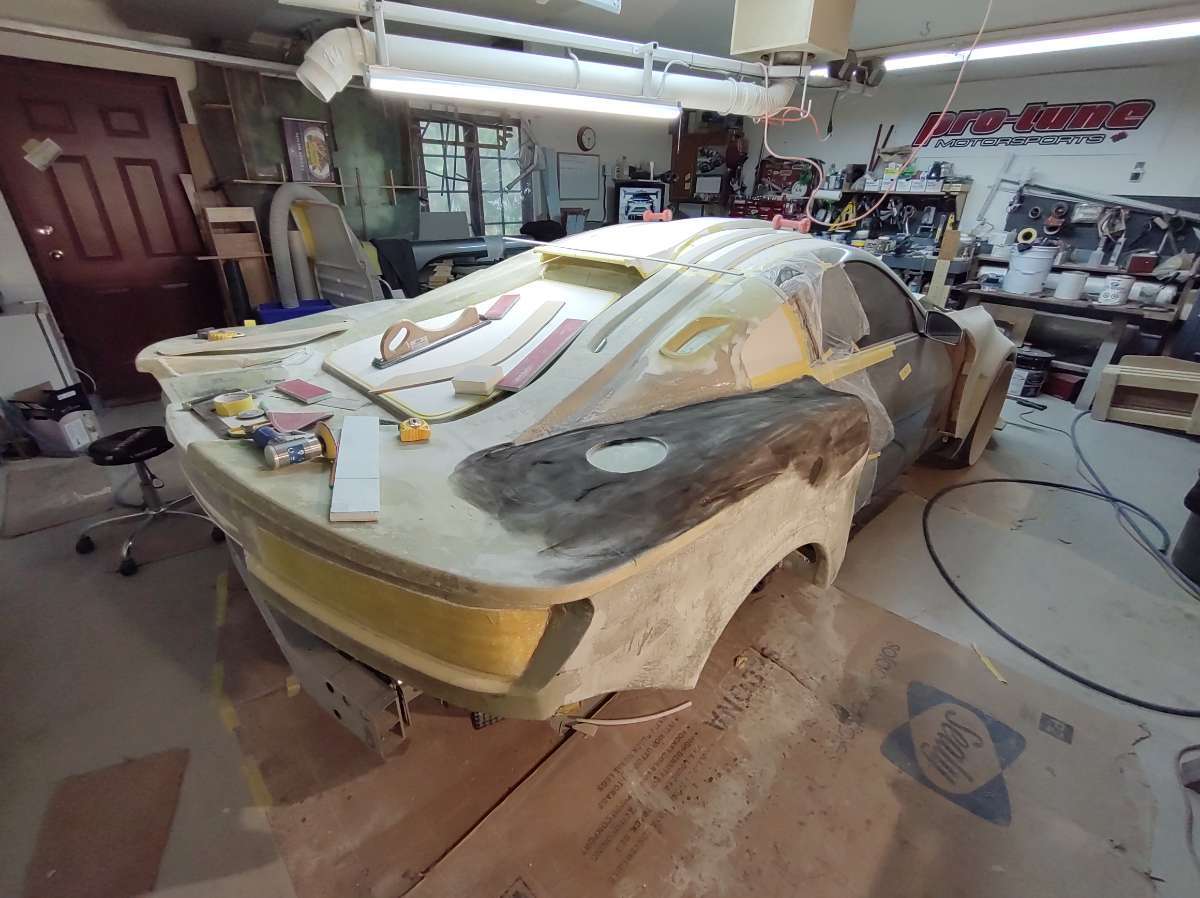
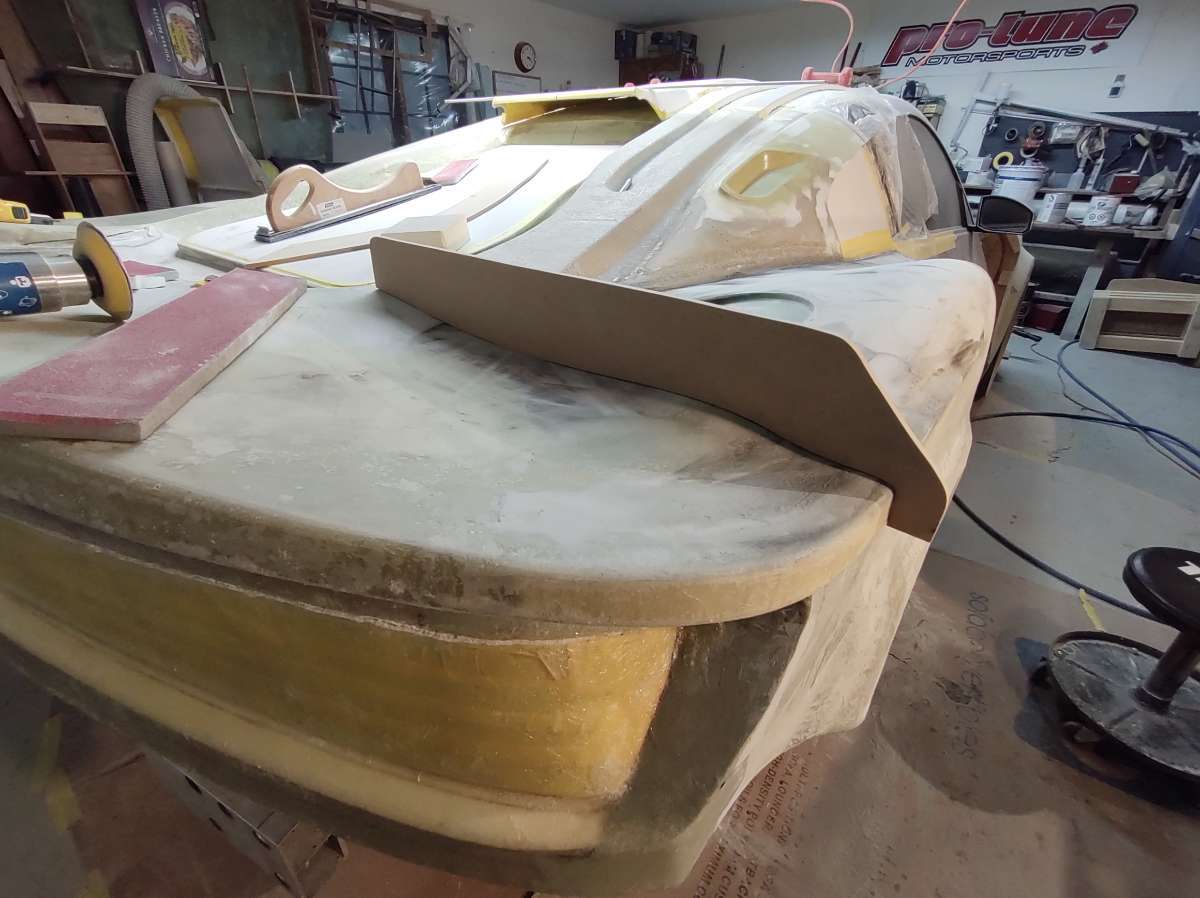
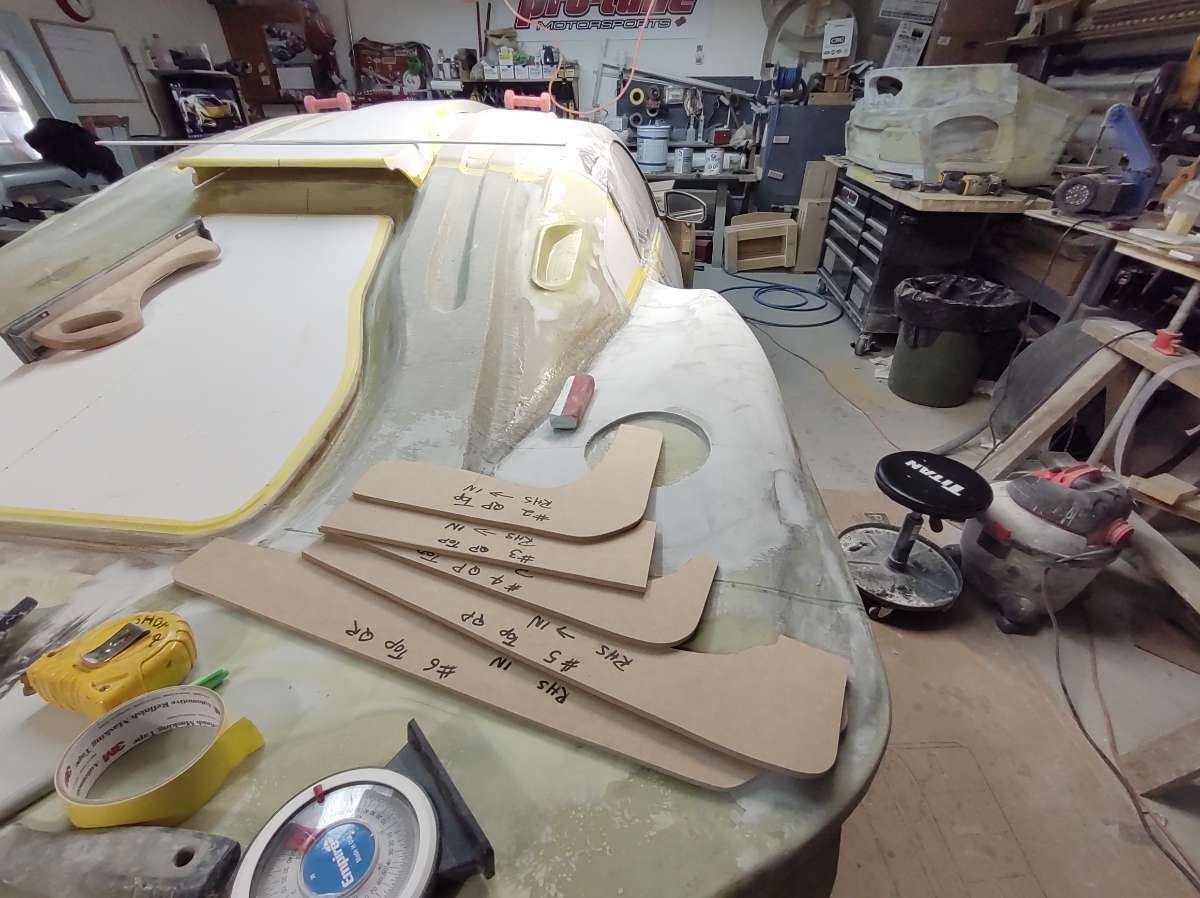
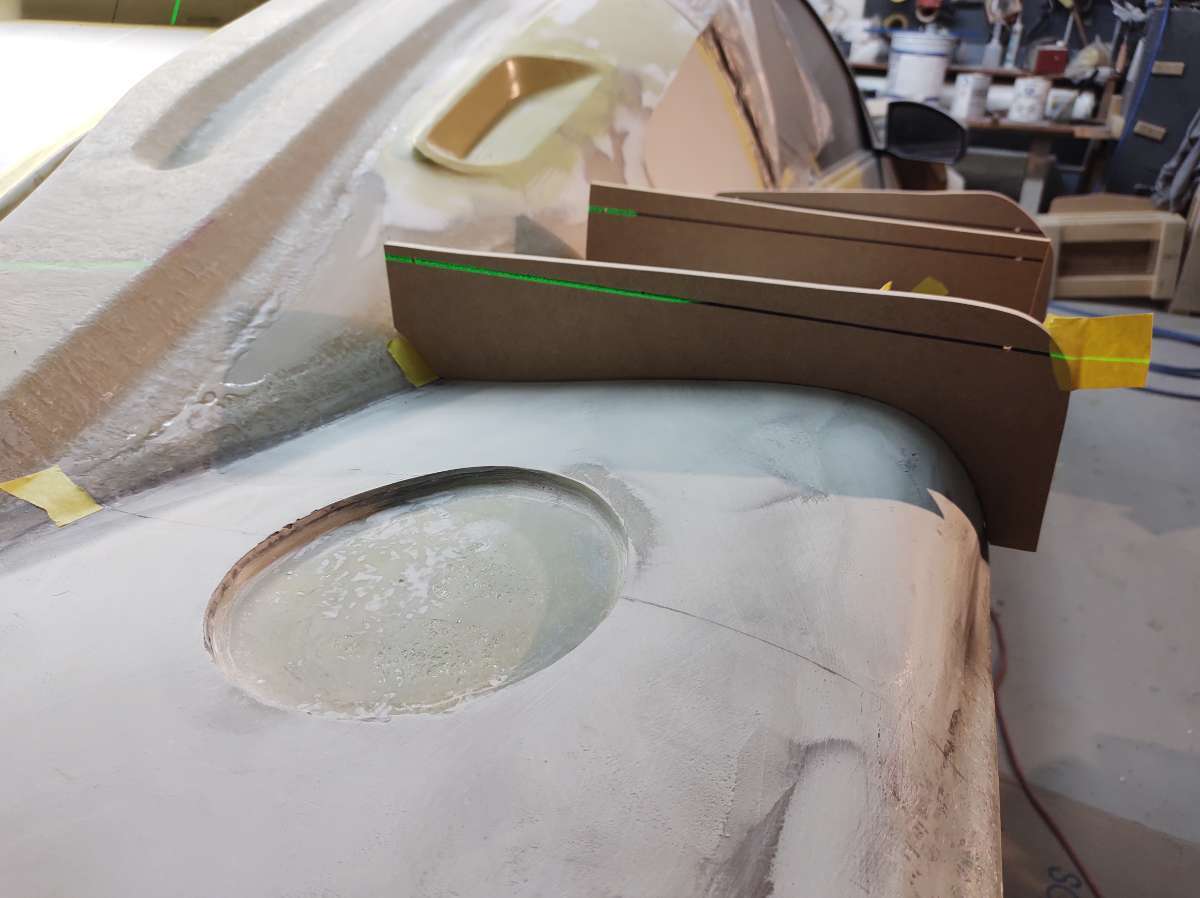
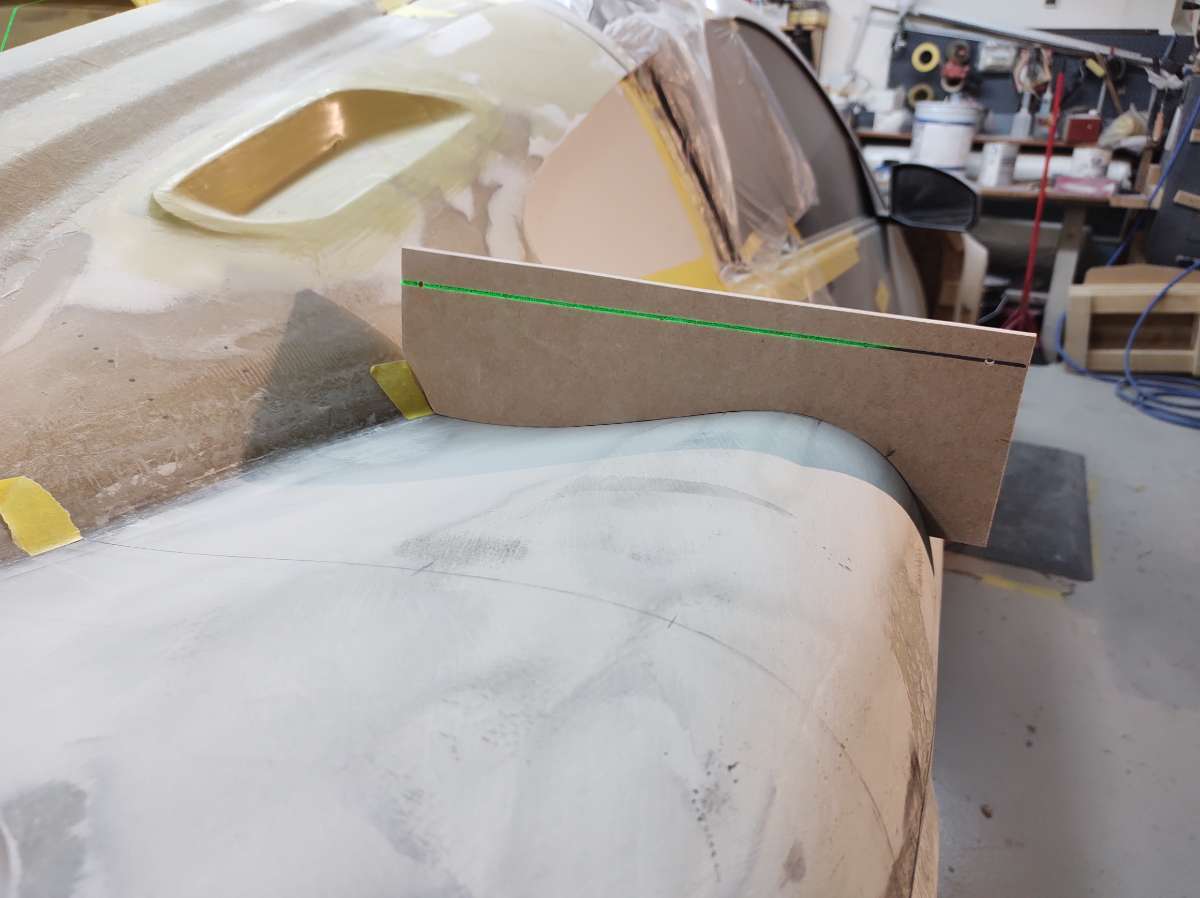
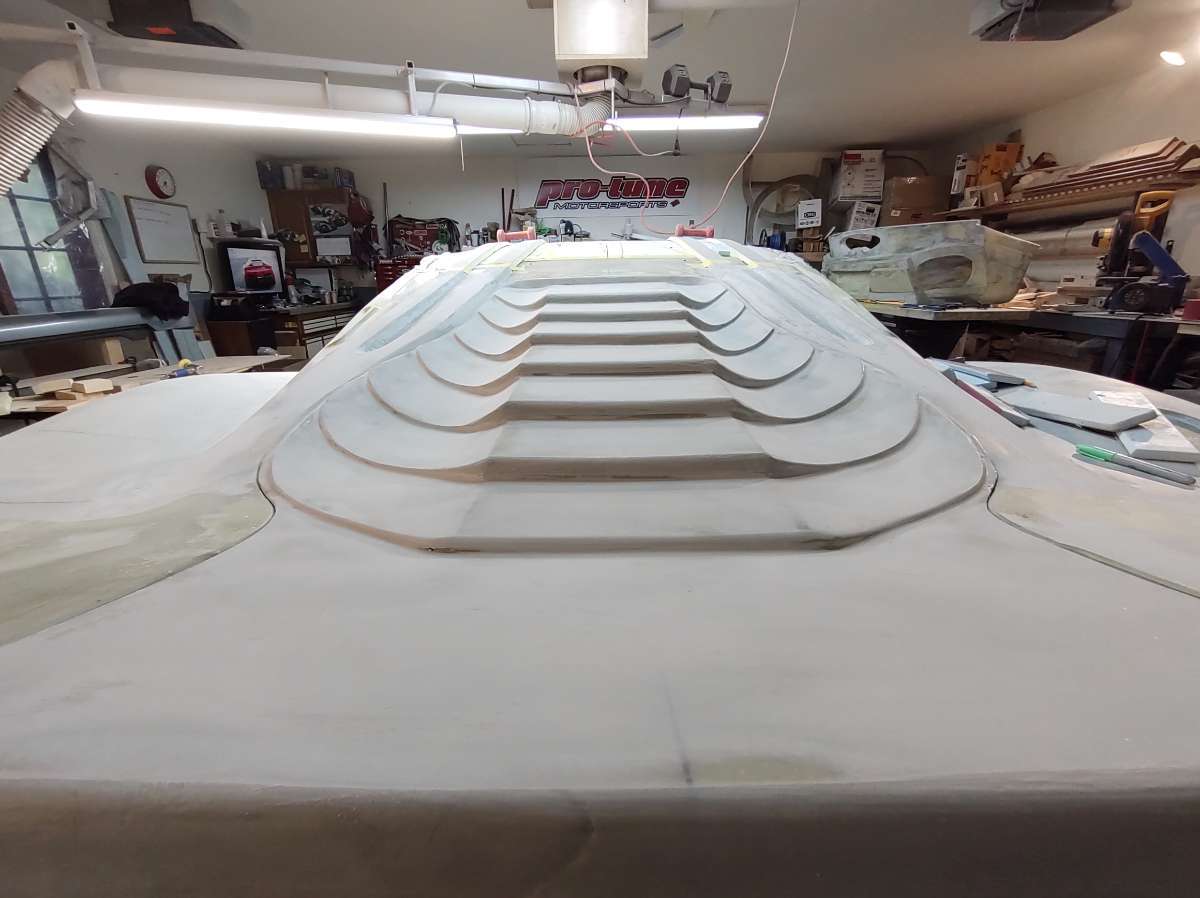
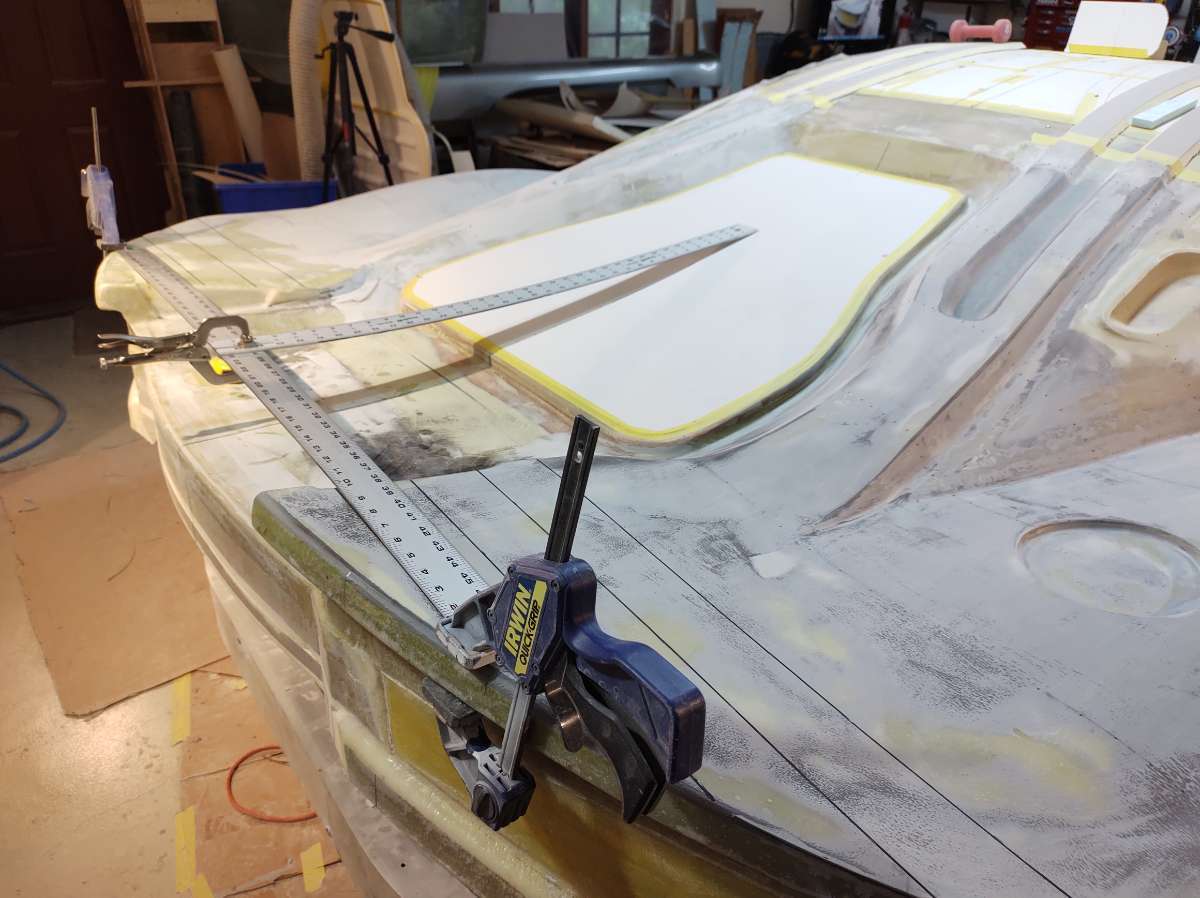
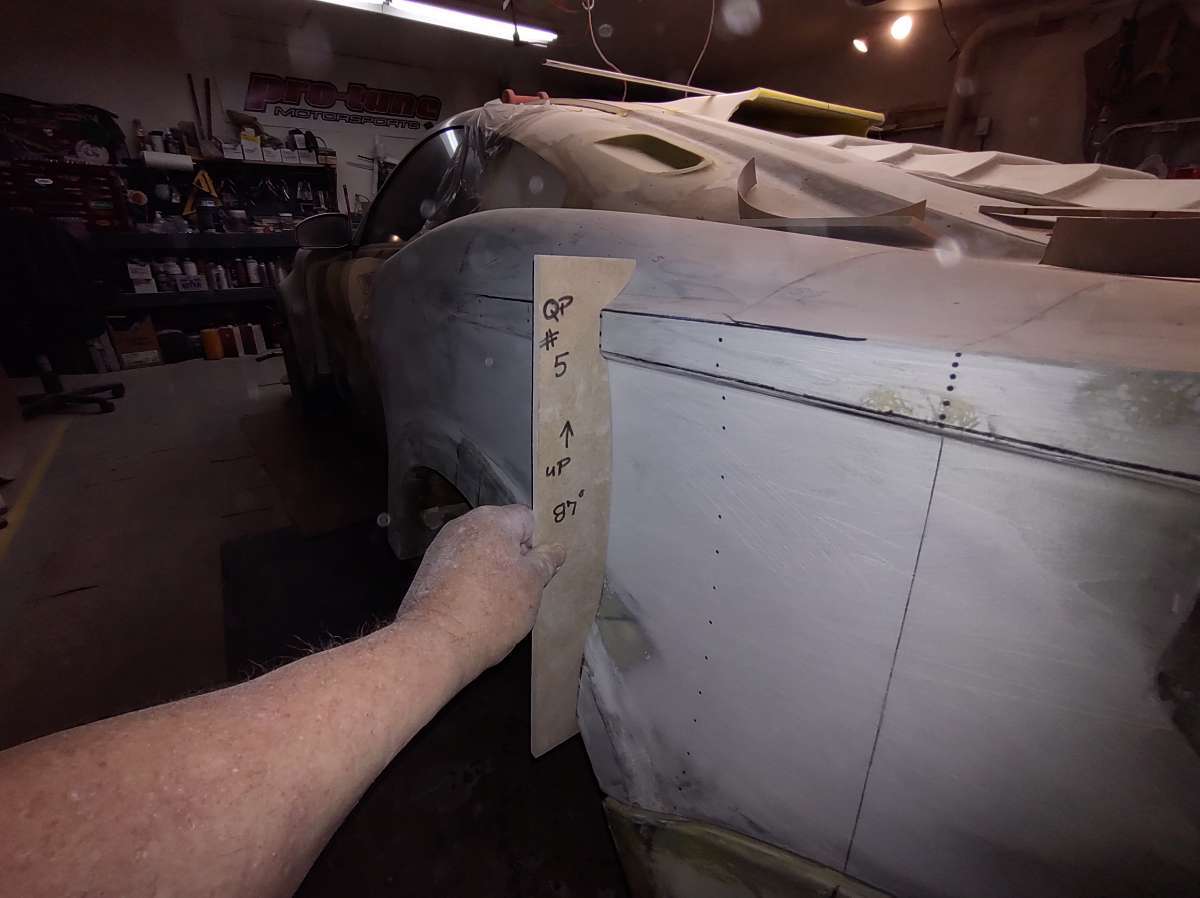
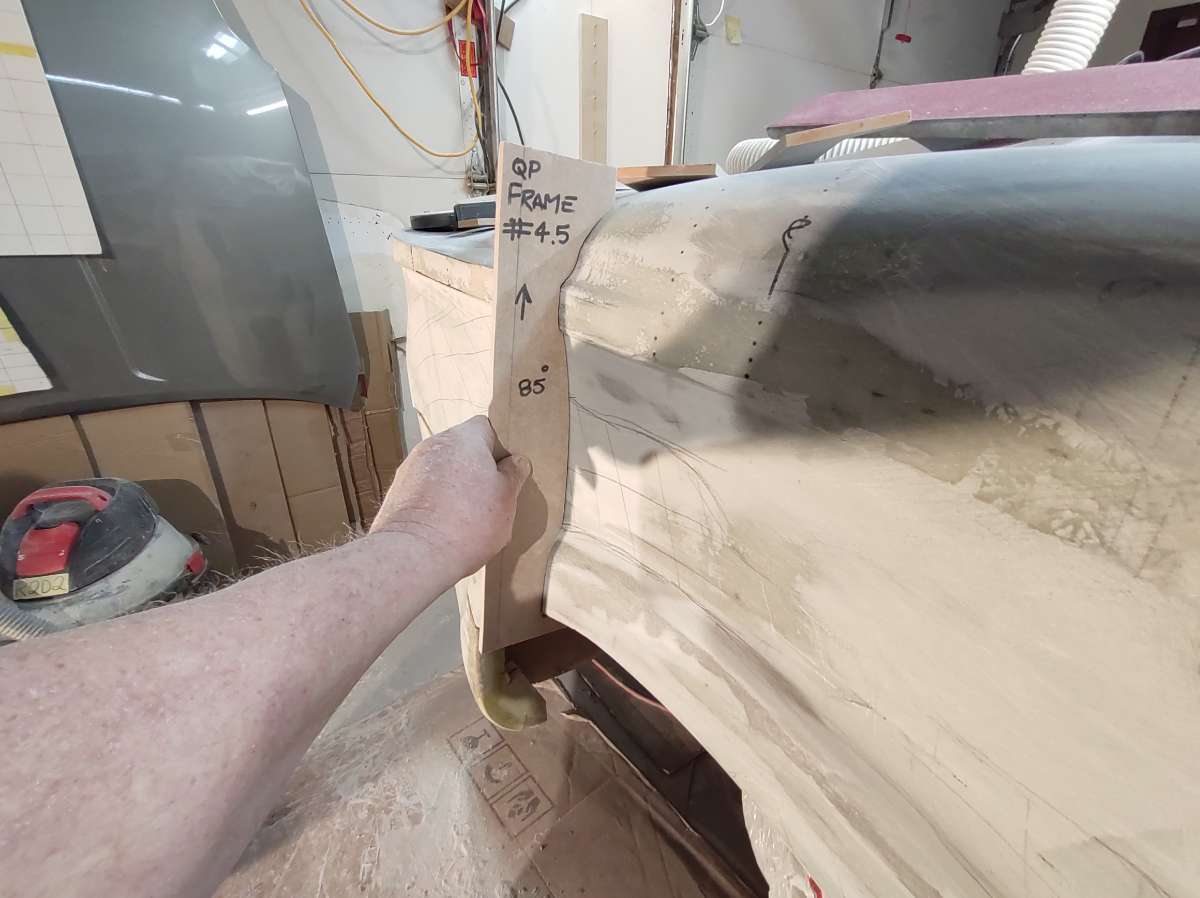
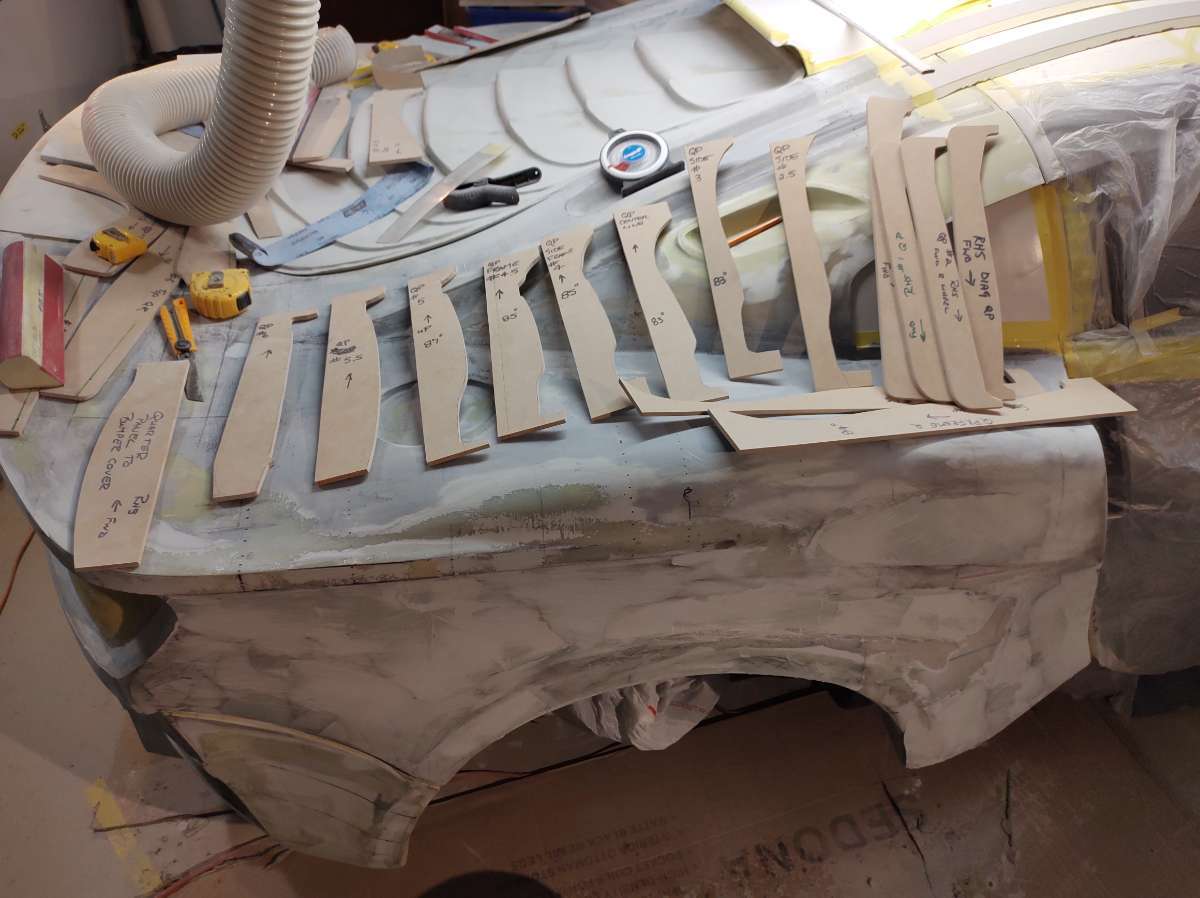
Next I lay out some lines on the car to keep a reference , then make templates to transfer the shap to the other side of the car using the laser to ensure the height .
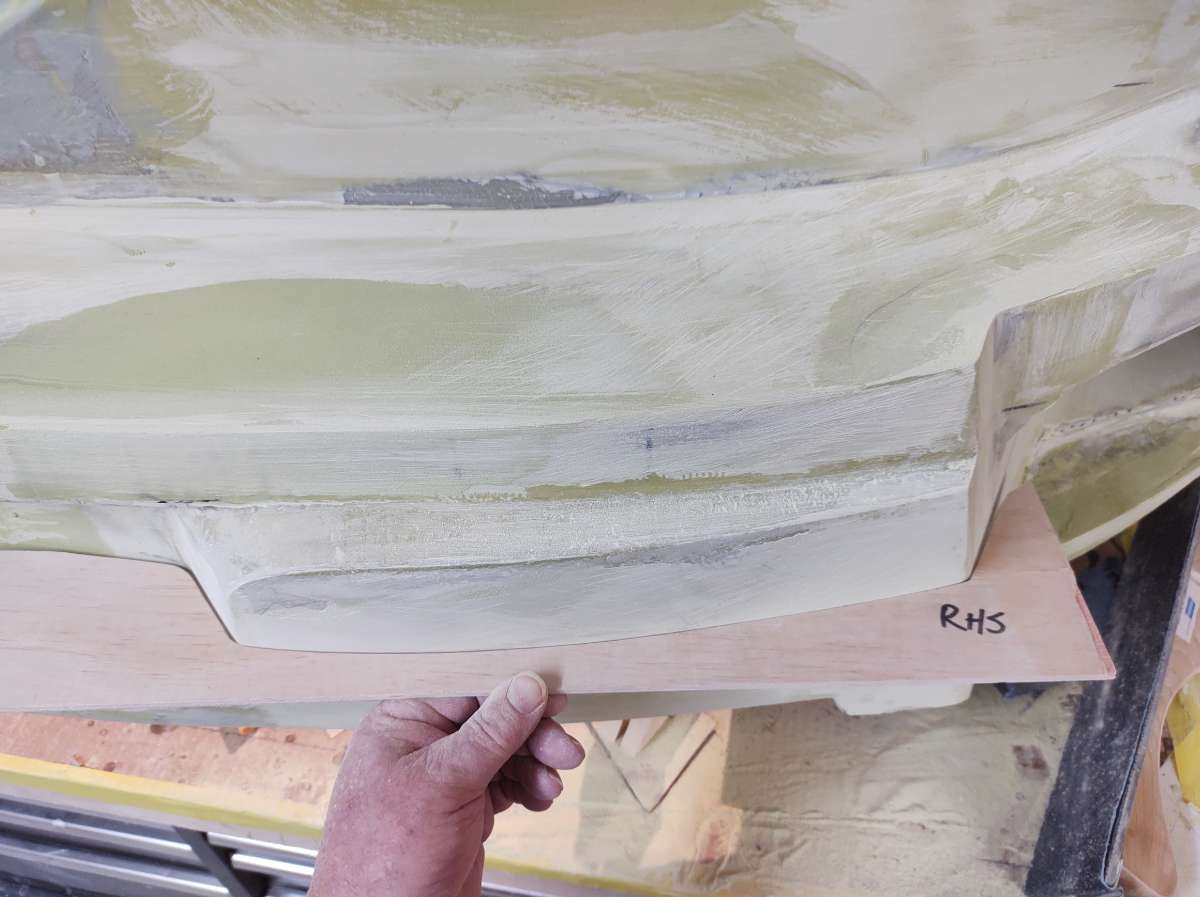
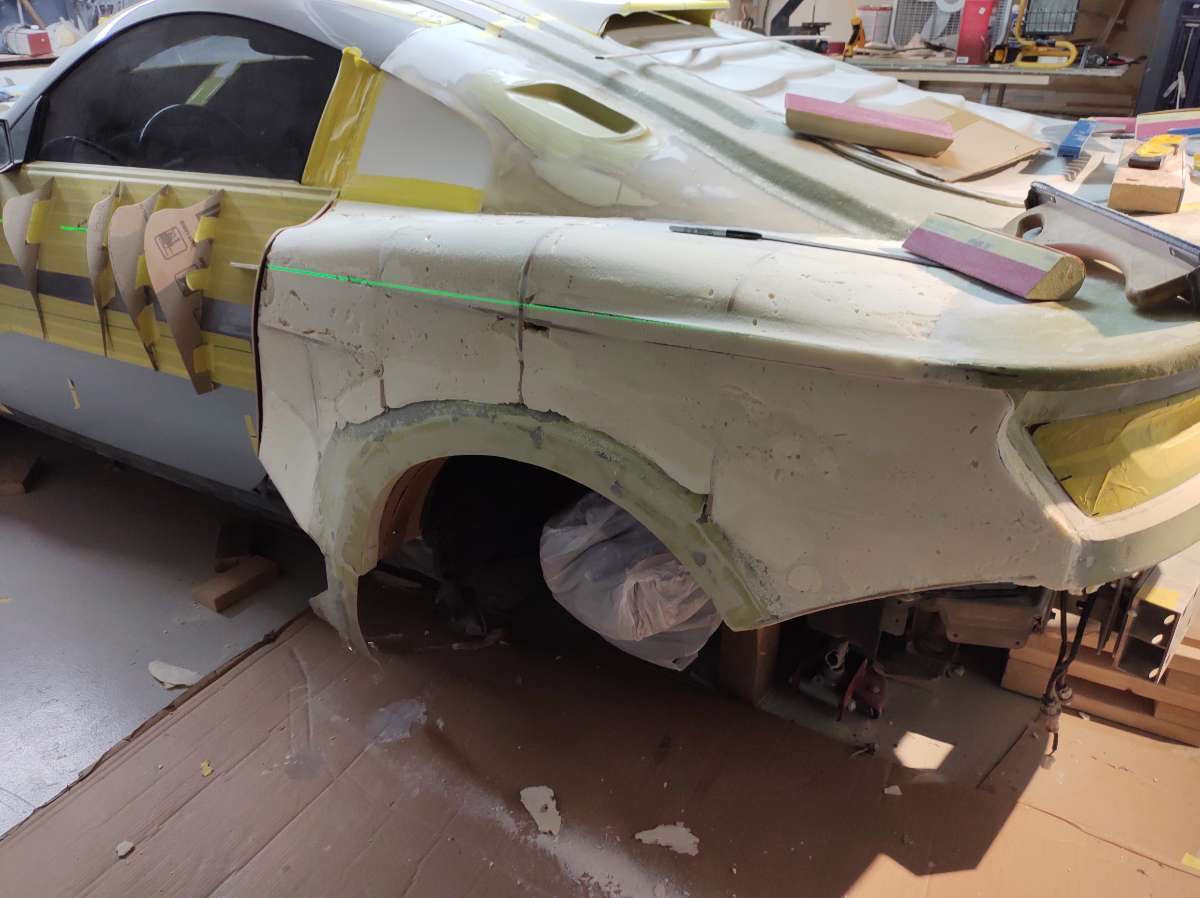
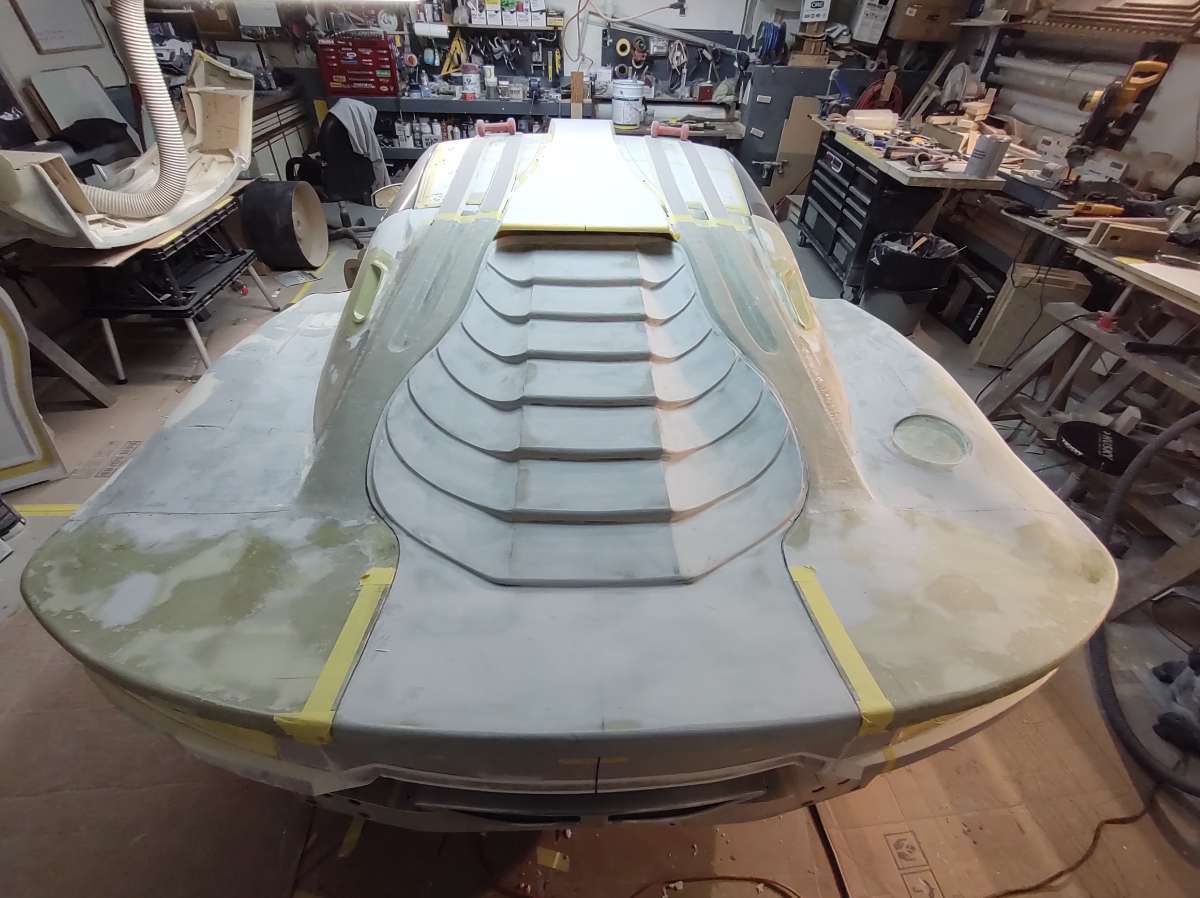
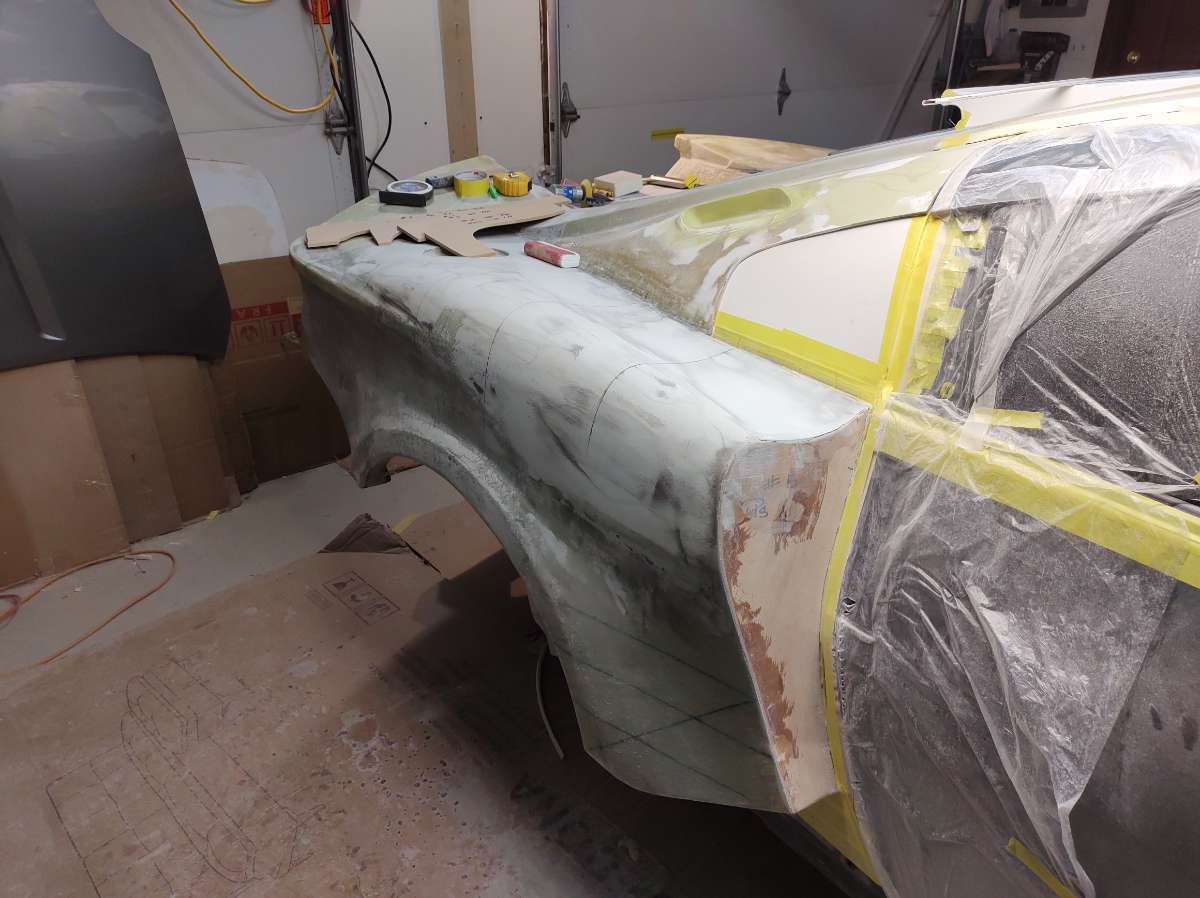
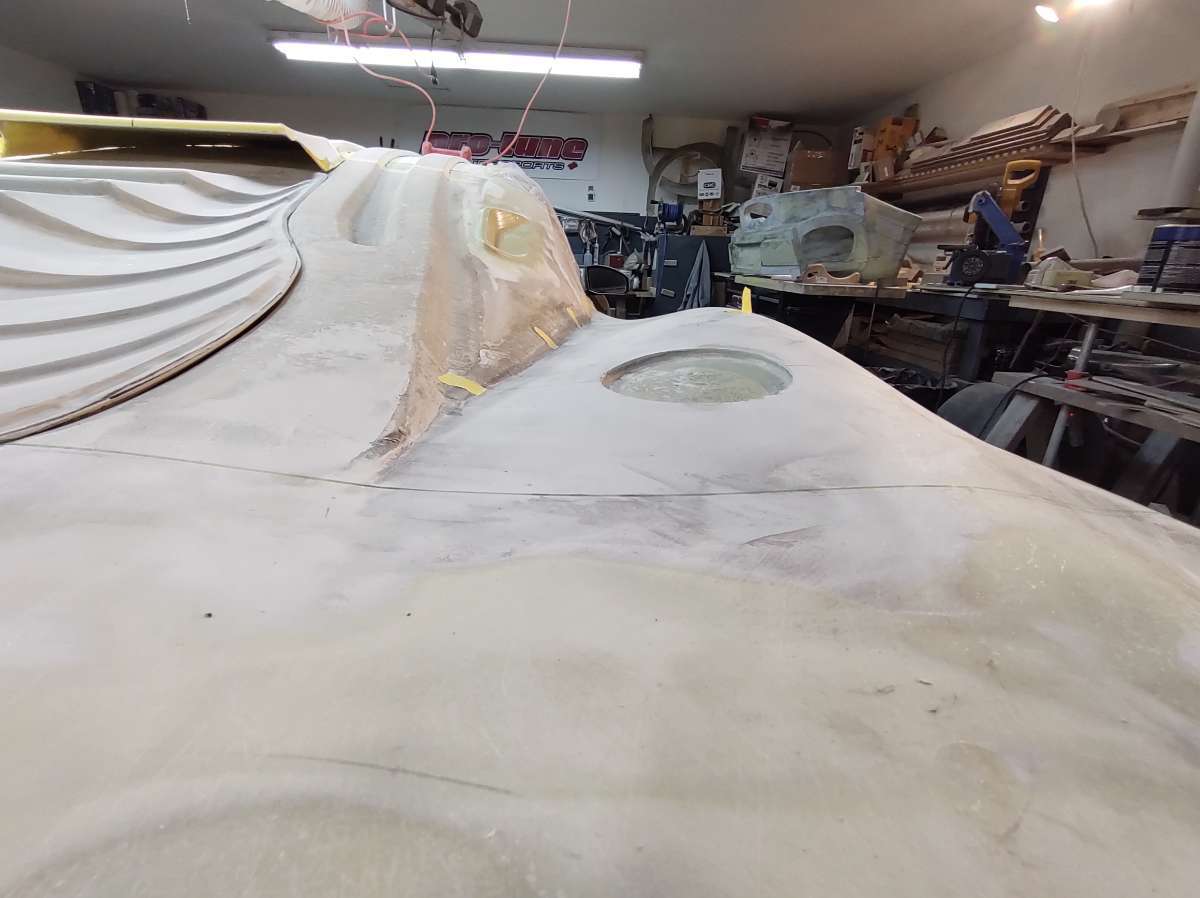
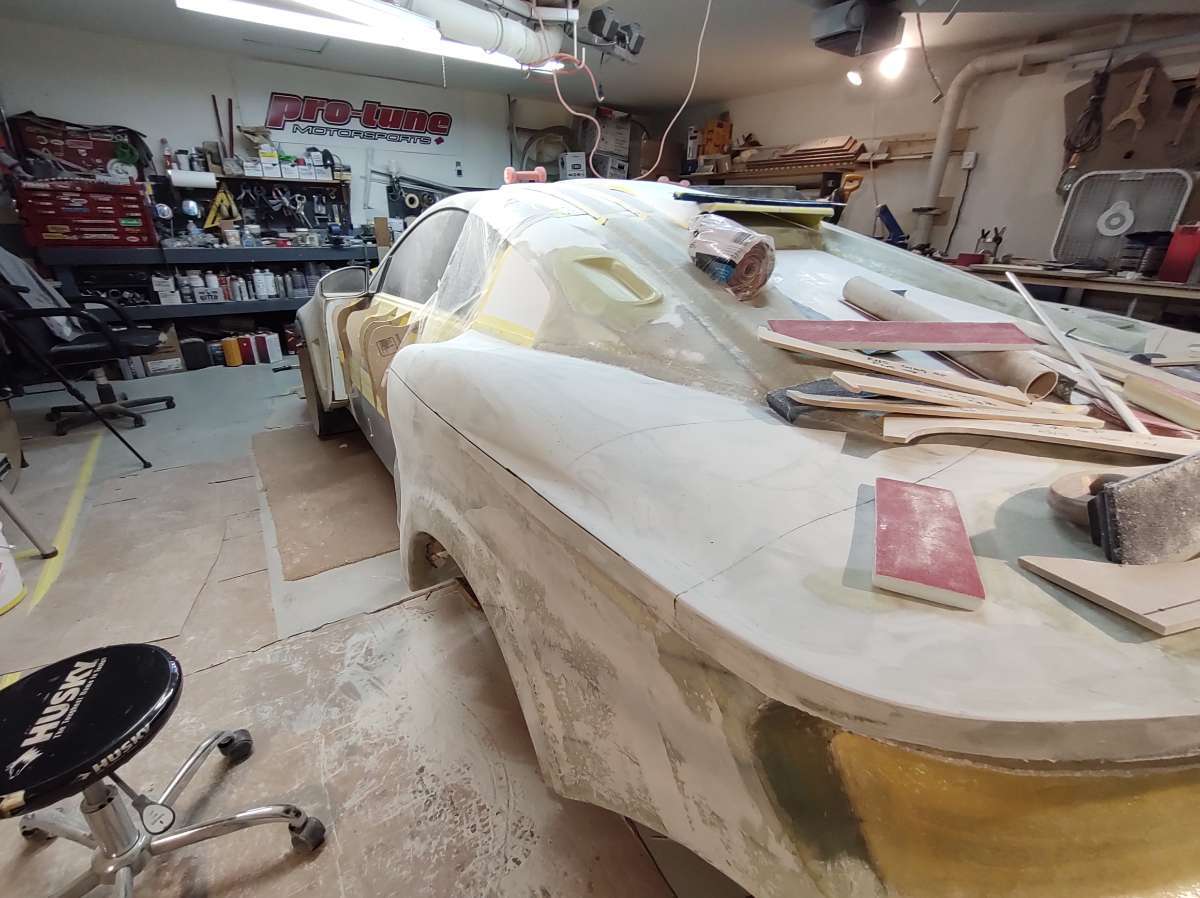
As you can see there is a ton of shape in these quarter panels
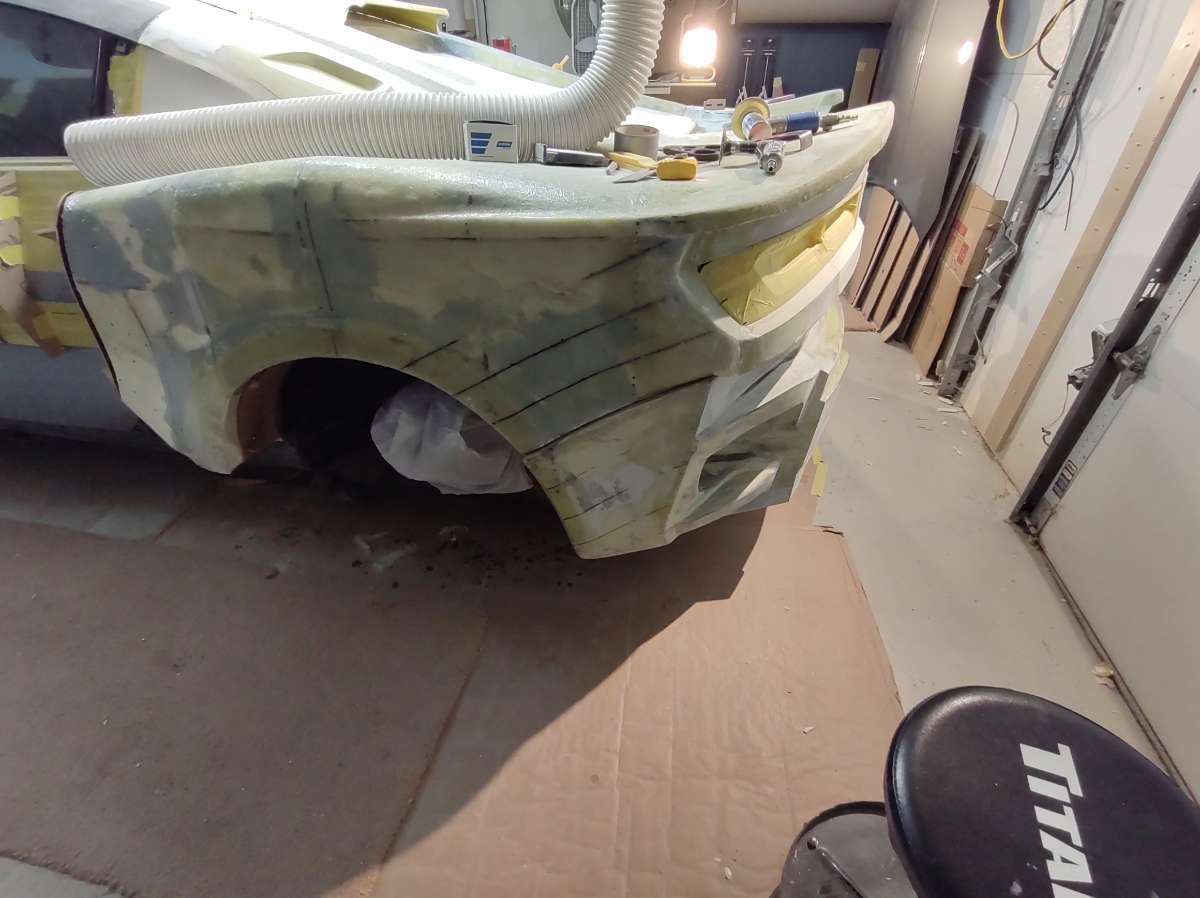
here on the drivers side you can see it's getting close !!!
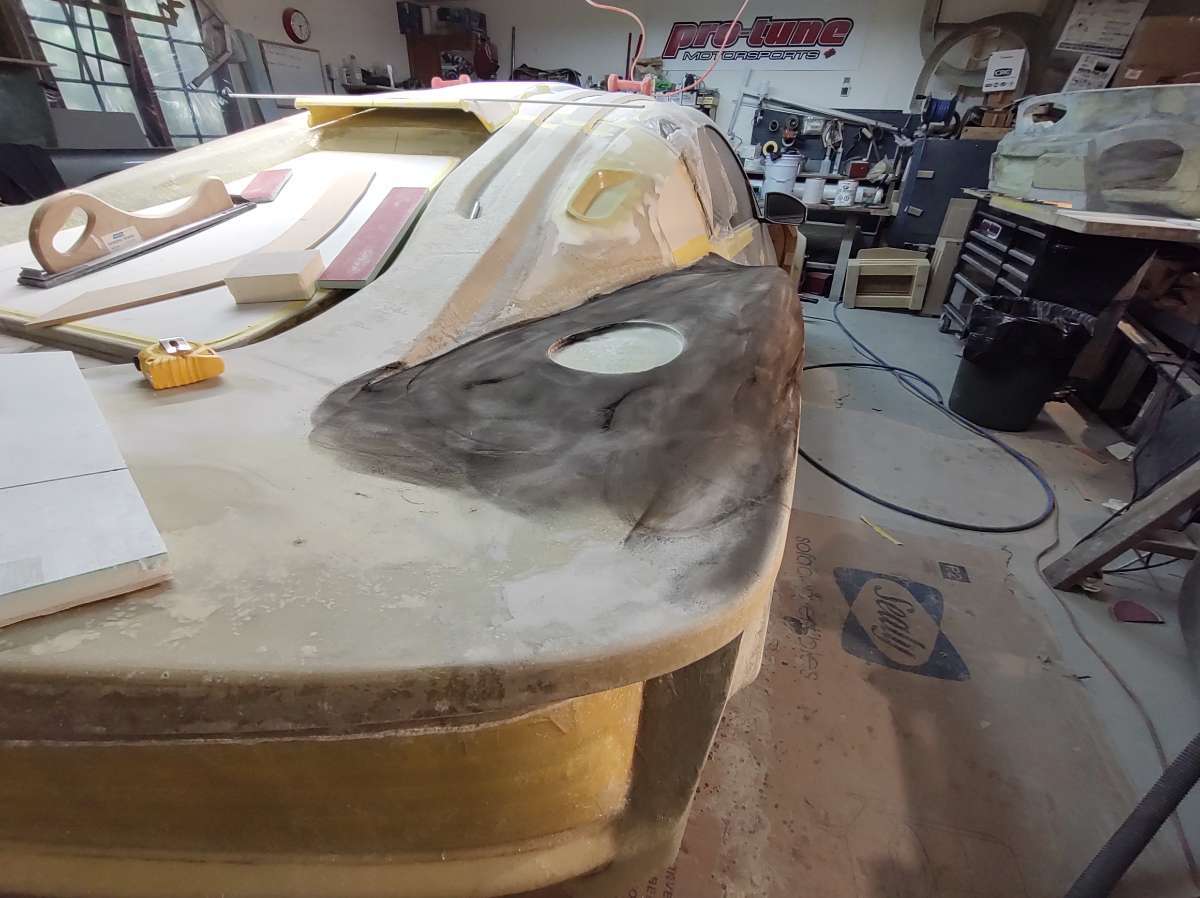
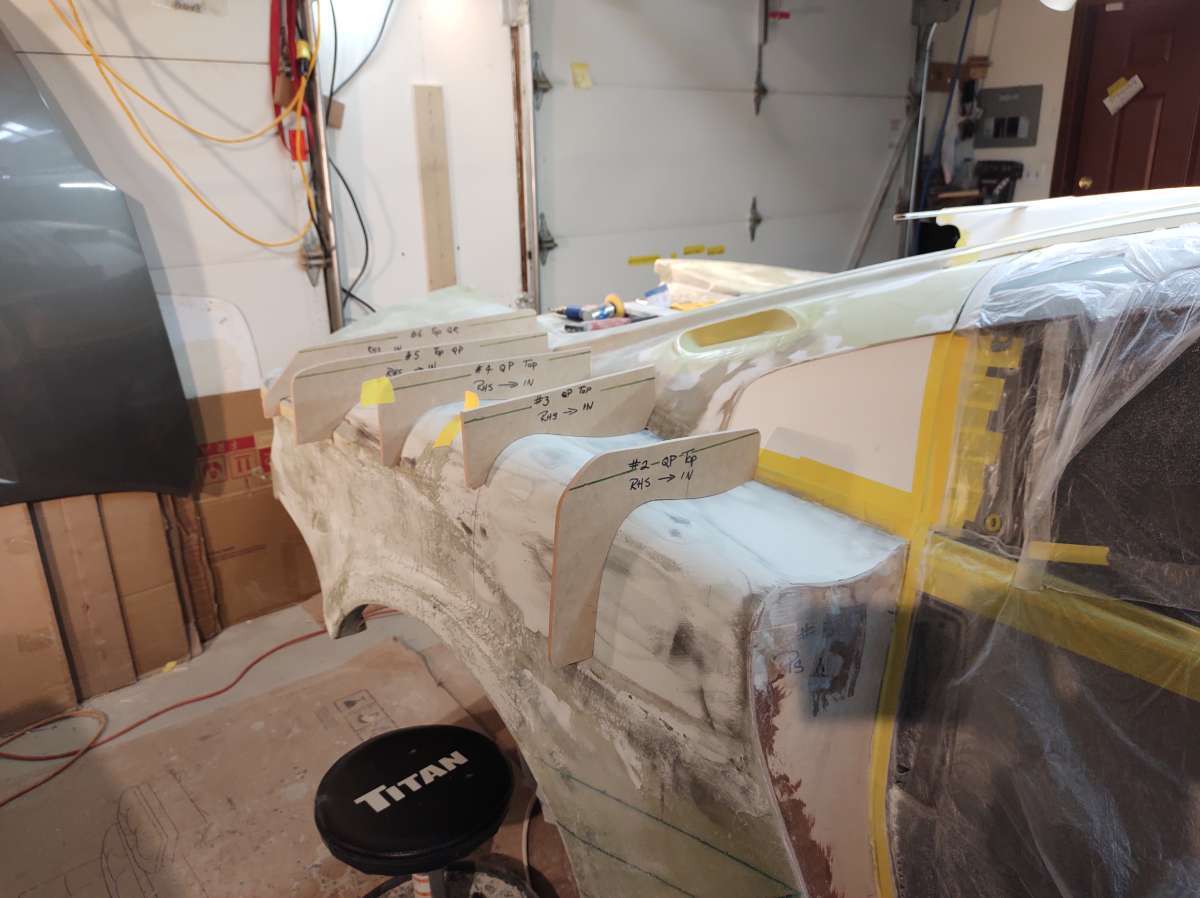
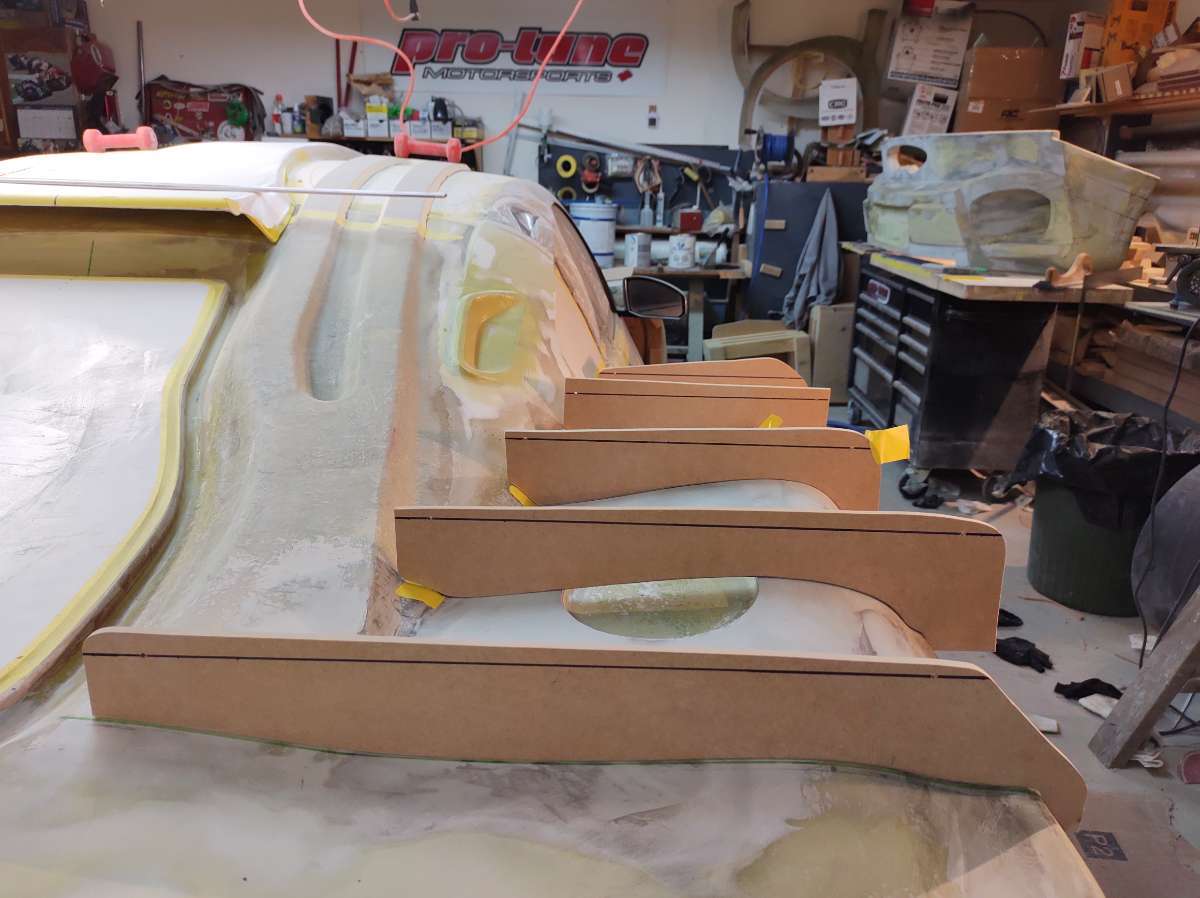
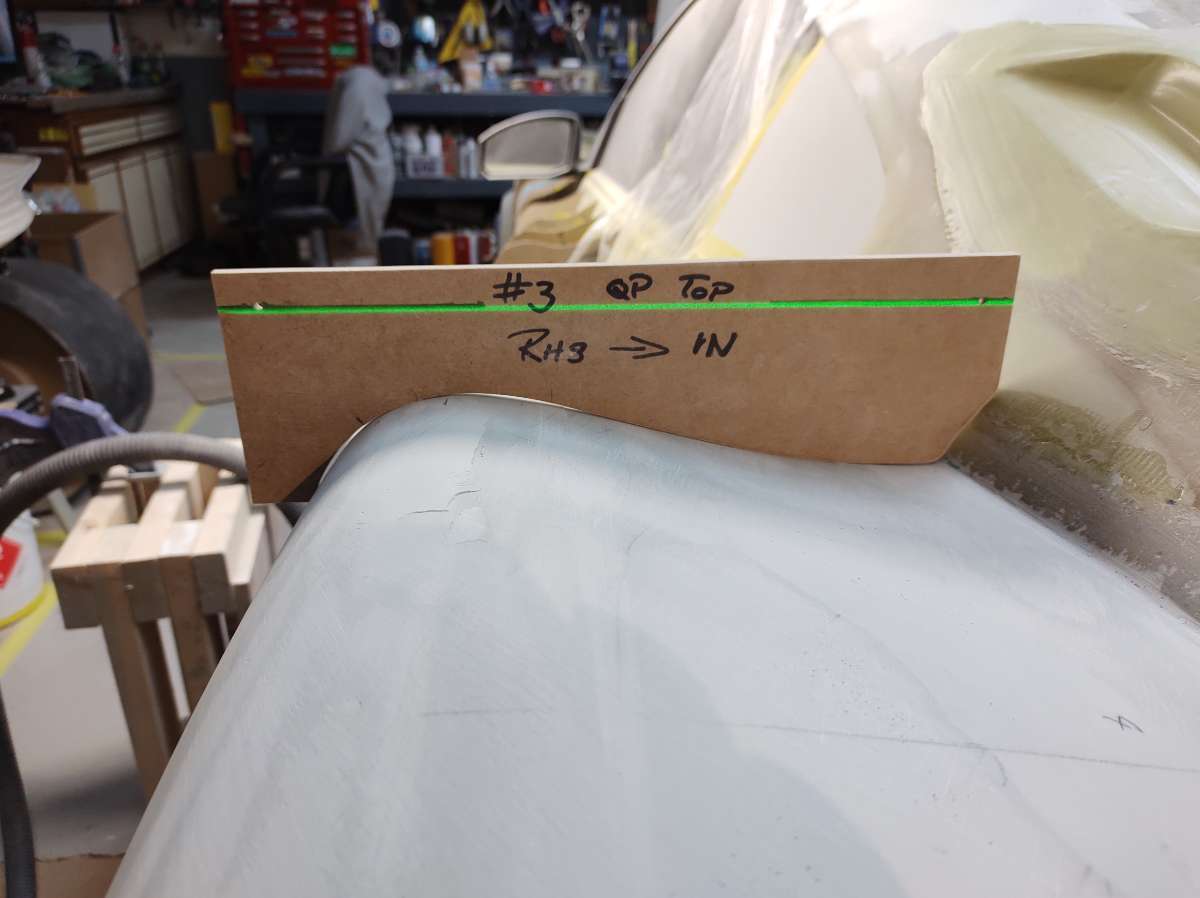
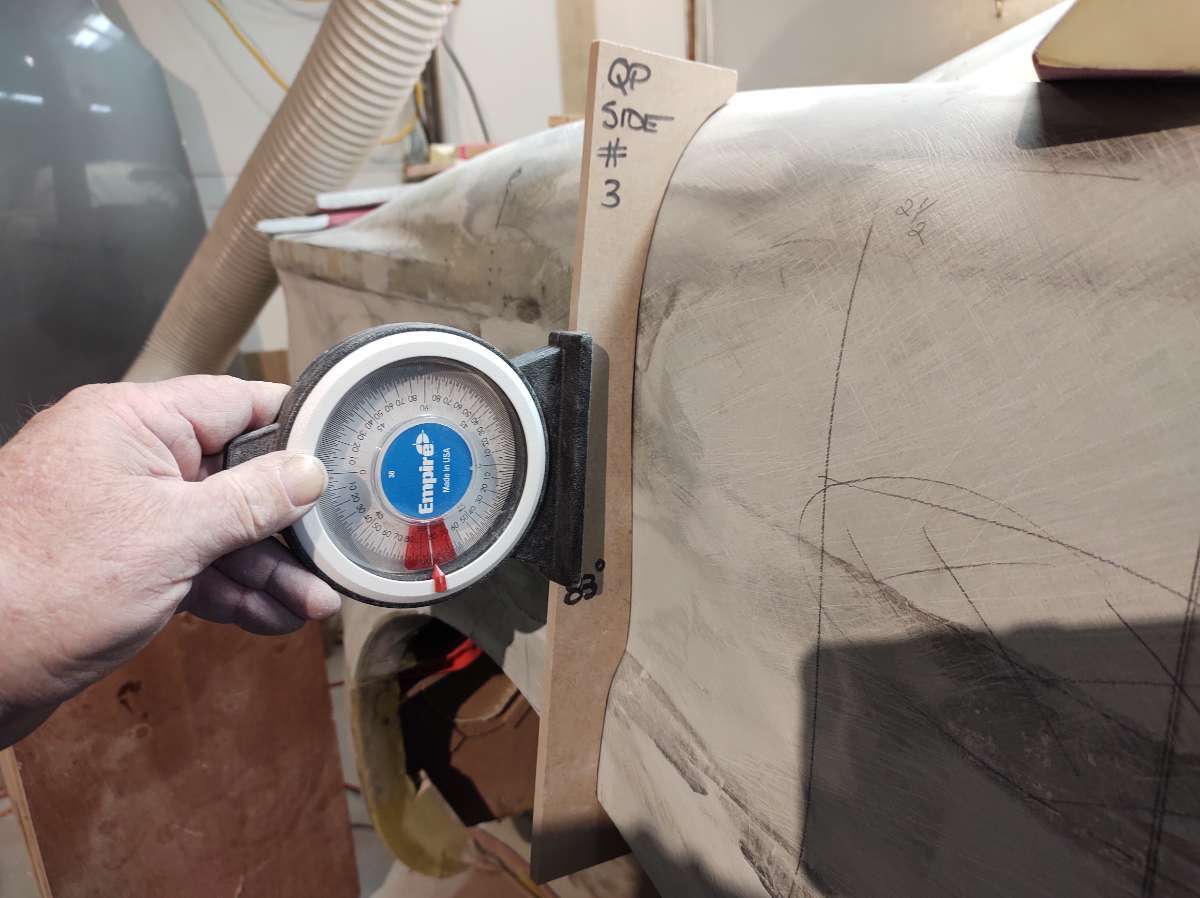
this is frame #3 passenger side
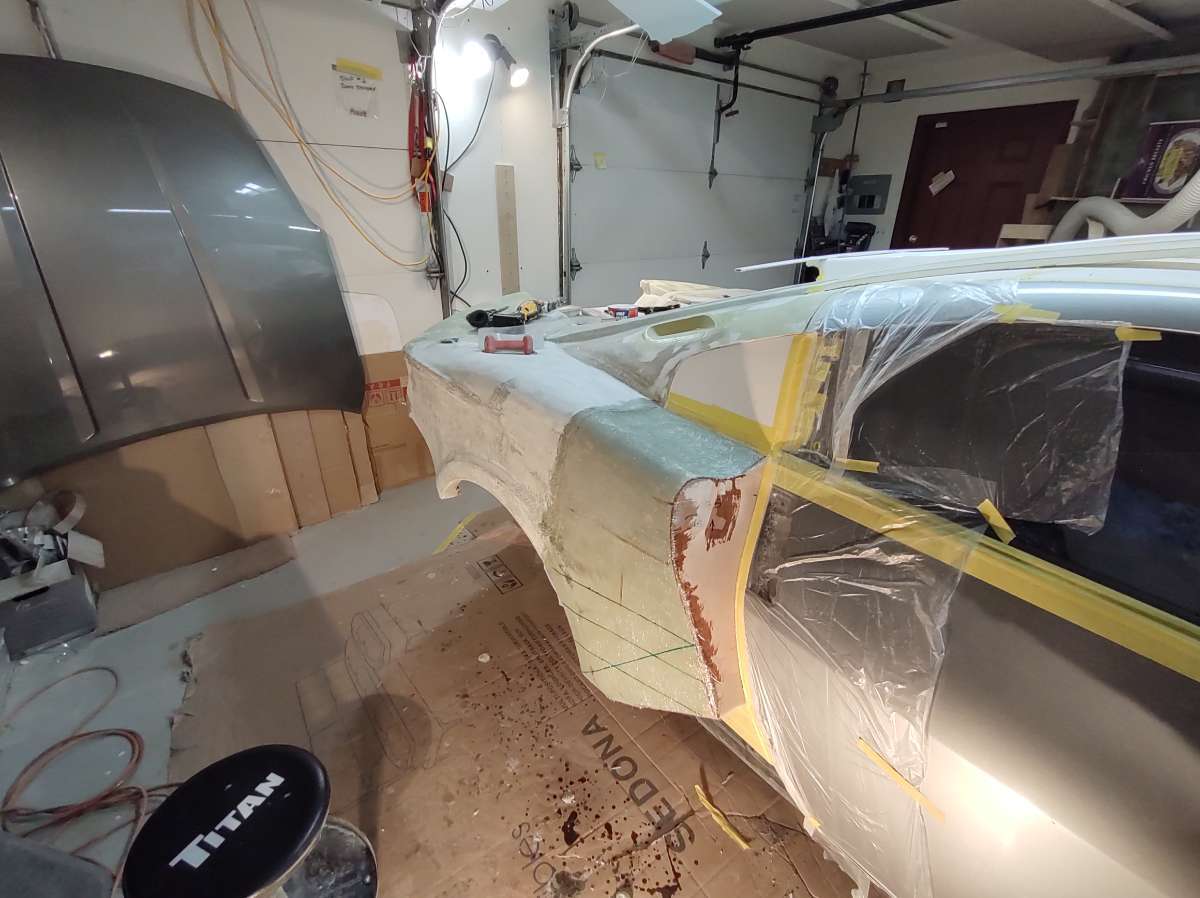
As you can see here the laser line on frame #3 drivers side , the outboard end of the template needs to go down a bit , so some more sanding .
Hi everyone as you know I am losing the fiberglass shop soon , not sure exactly when , I am going to ask for an extension to get the molds done on the big parts , like the whole back and front of the car before having to move it .
Ok enough of that depressing thought .
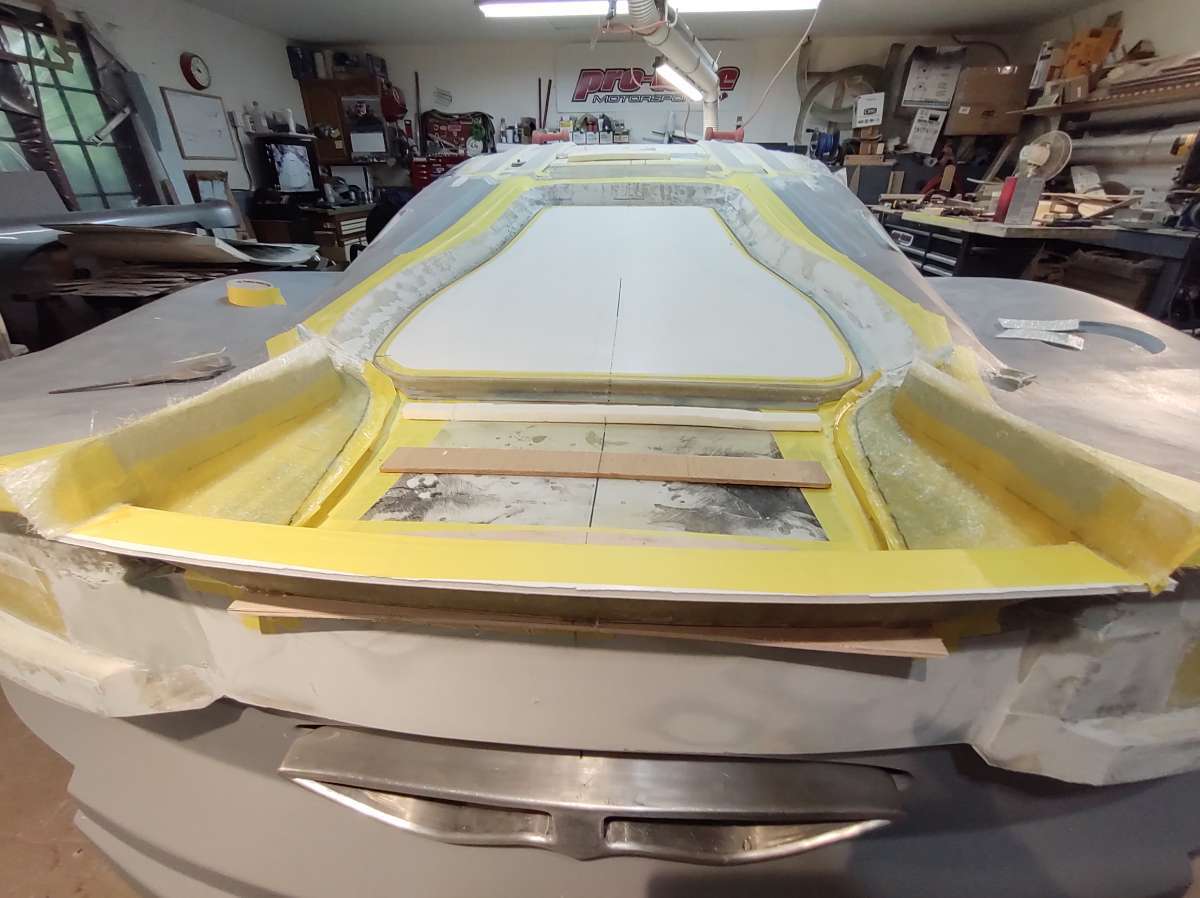
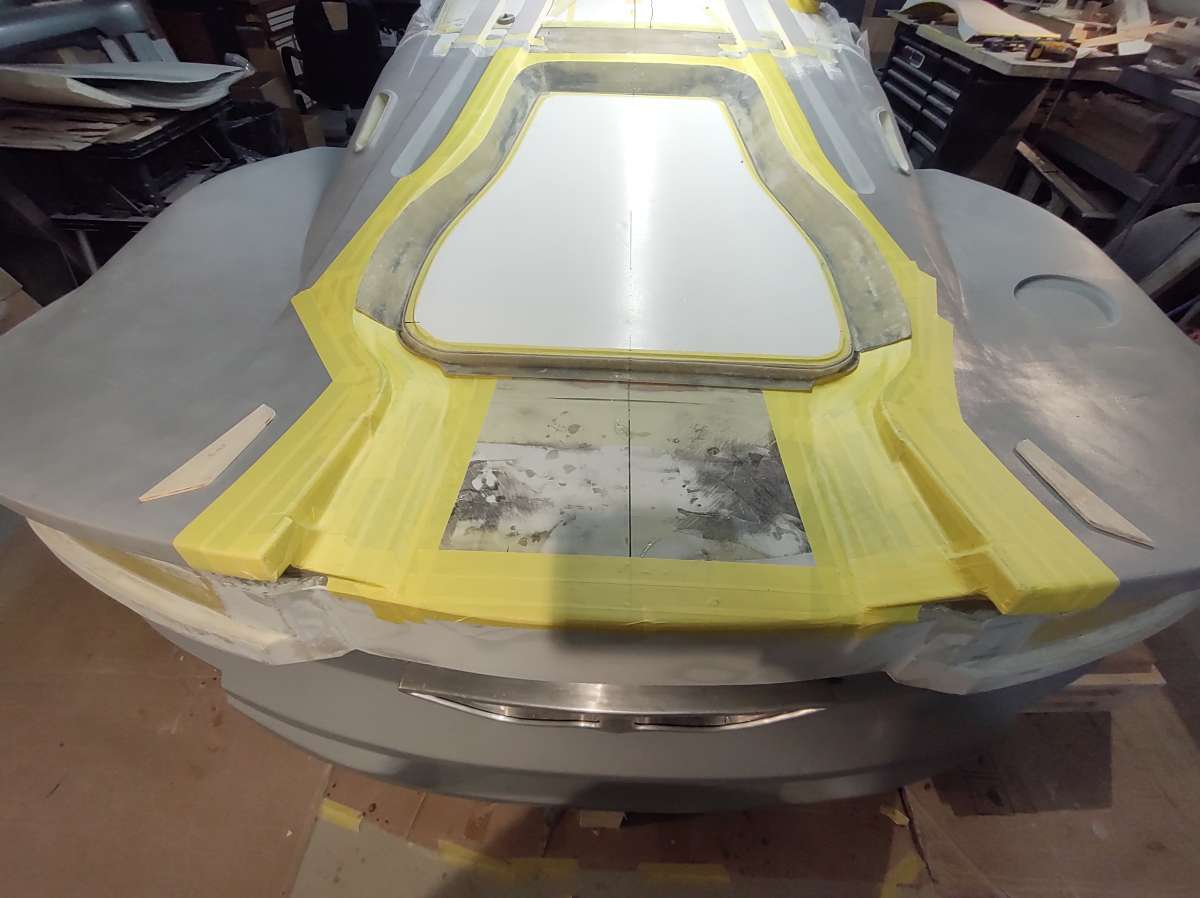
Alright a while back I had to change part of the trunk area , i thought it was too tight a curve and might be a problem or a weak spot in the trunk lid , it's a bit confusing even for me lol so I will try to explain as it goes along .
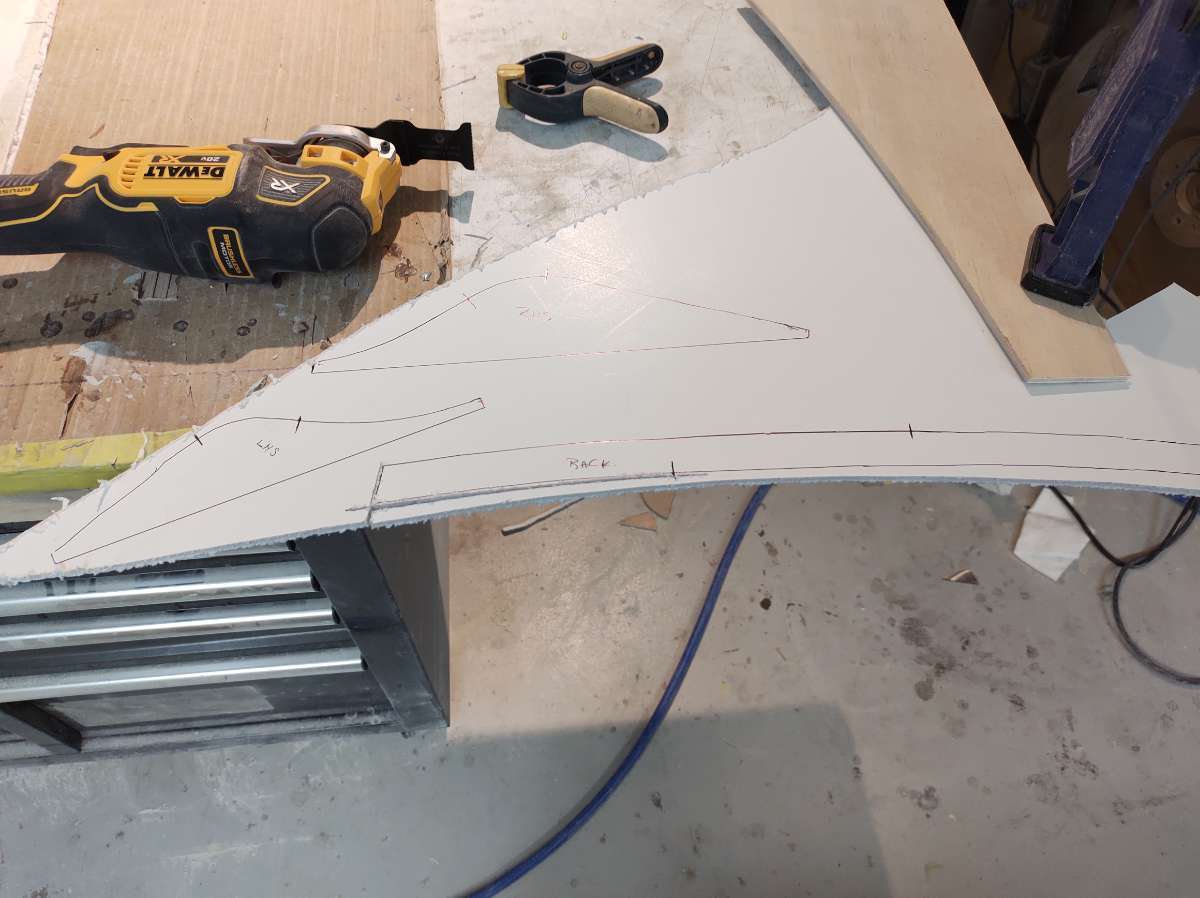
So now I have to remake the part that goes to the back of the car ,from where I cut it off .
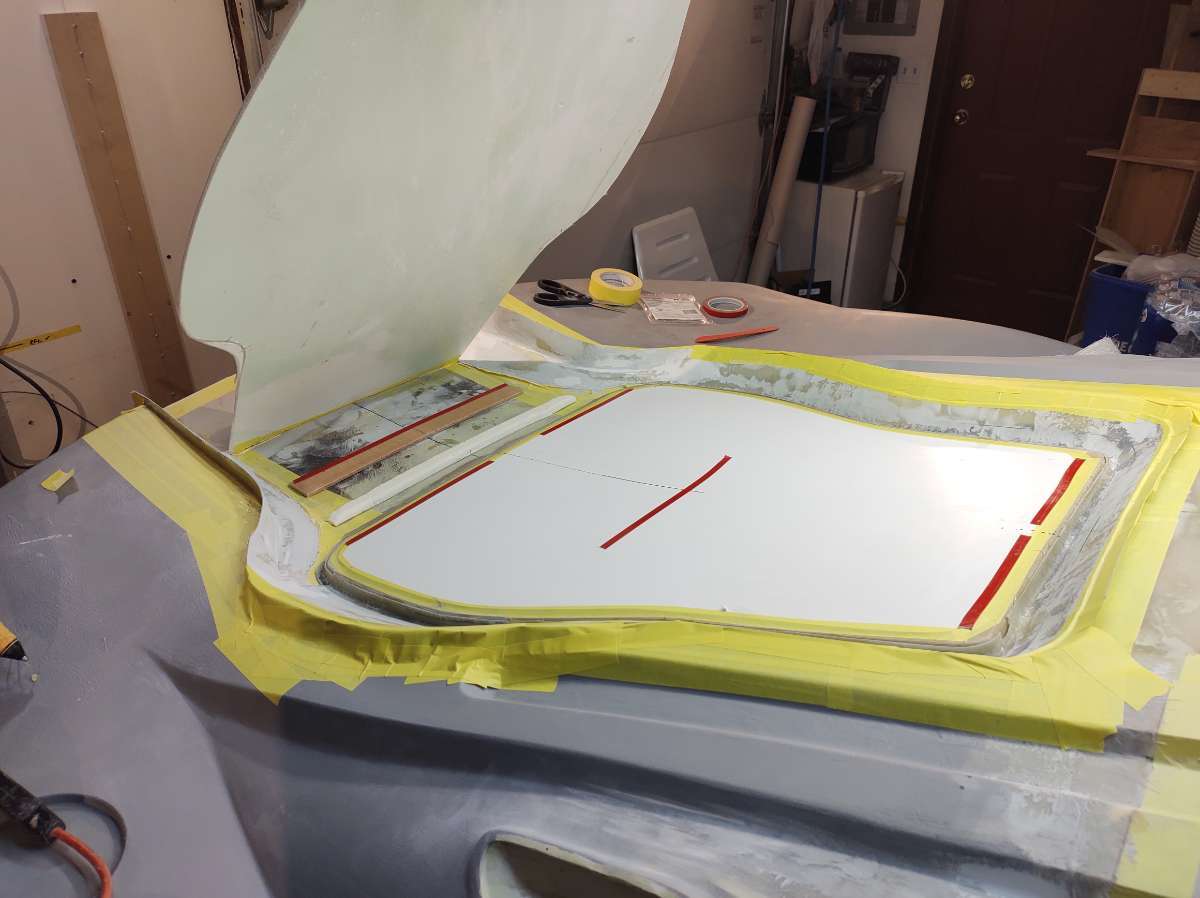
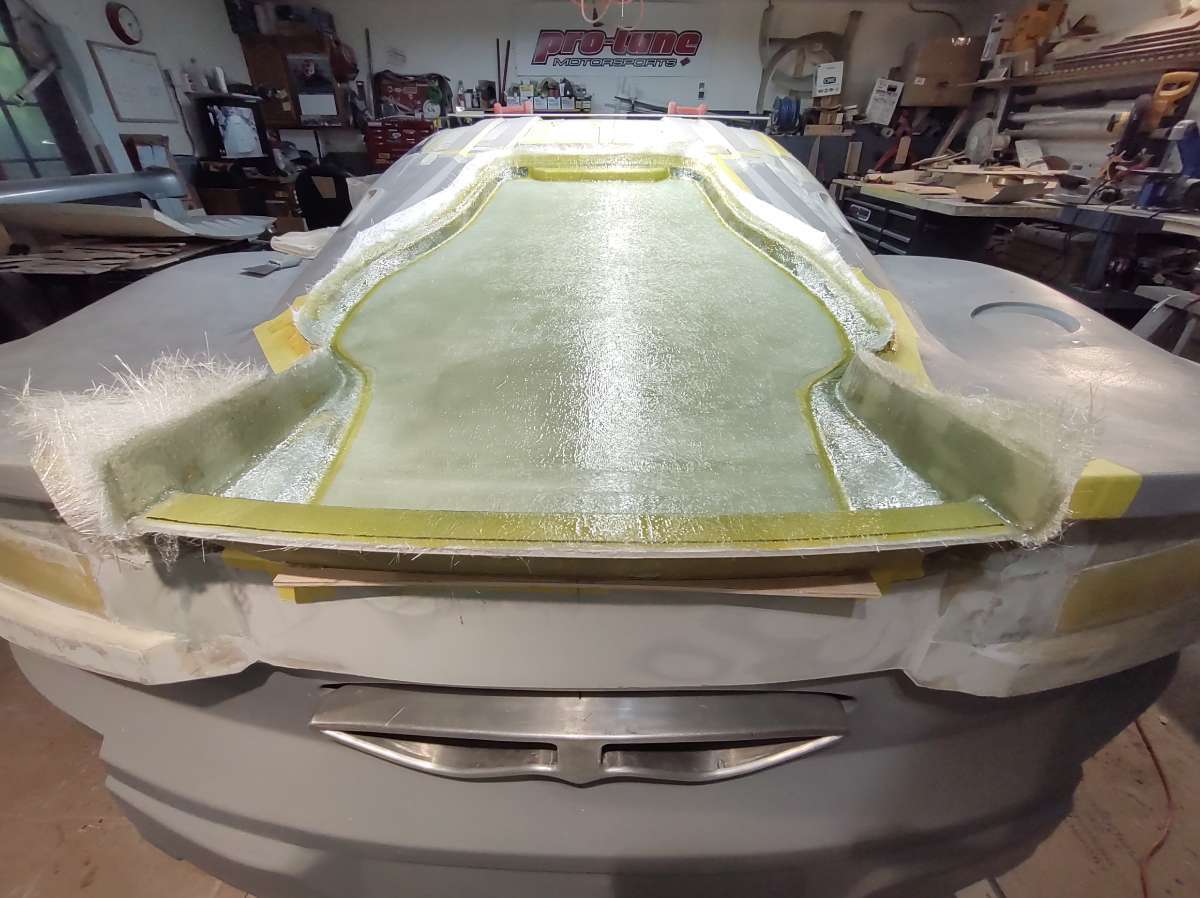
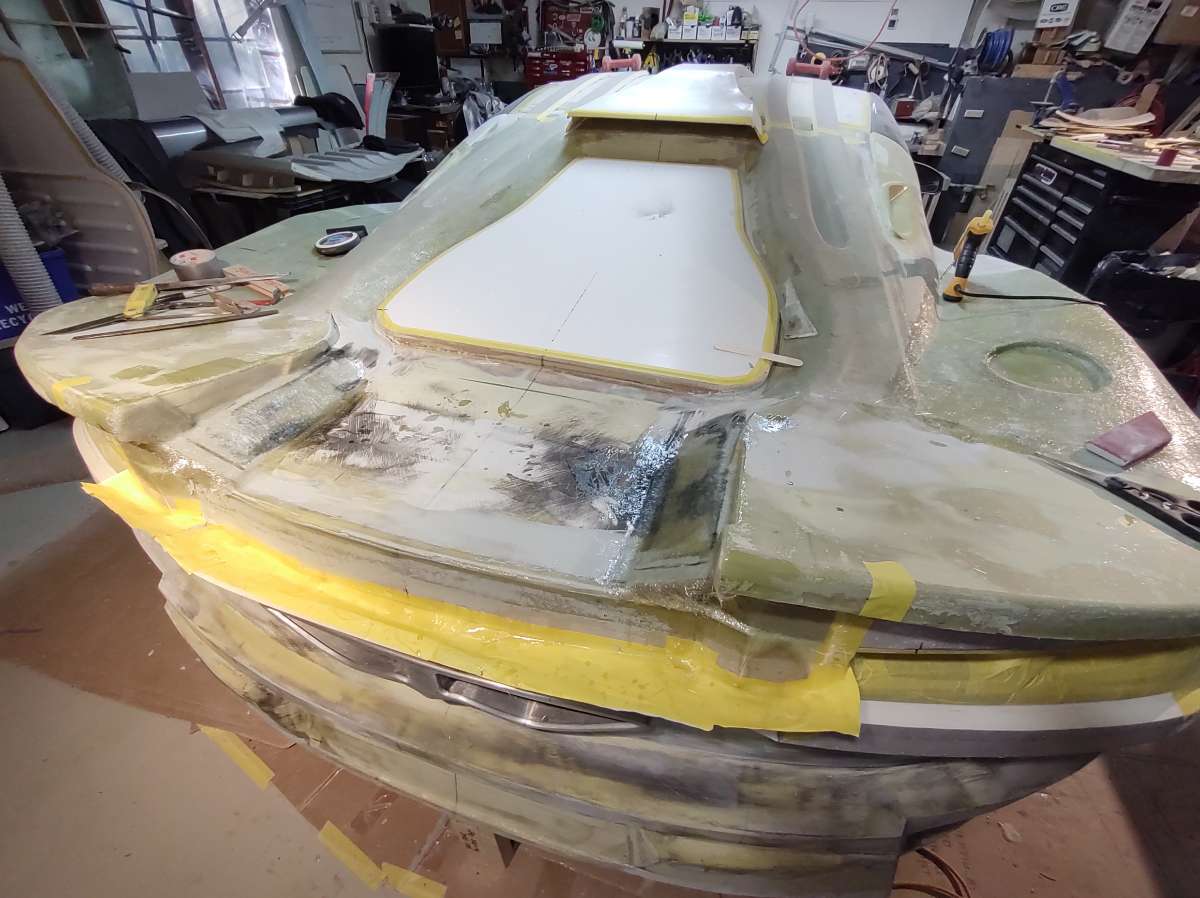
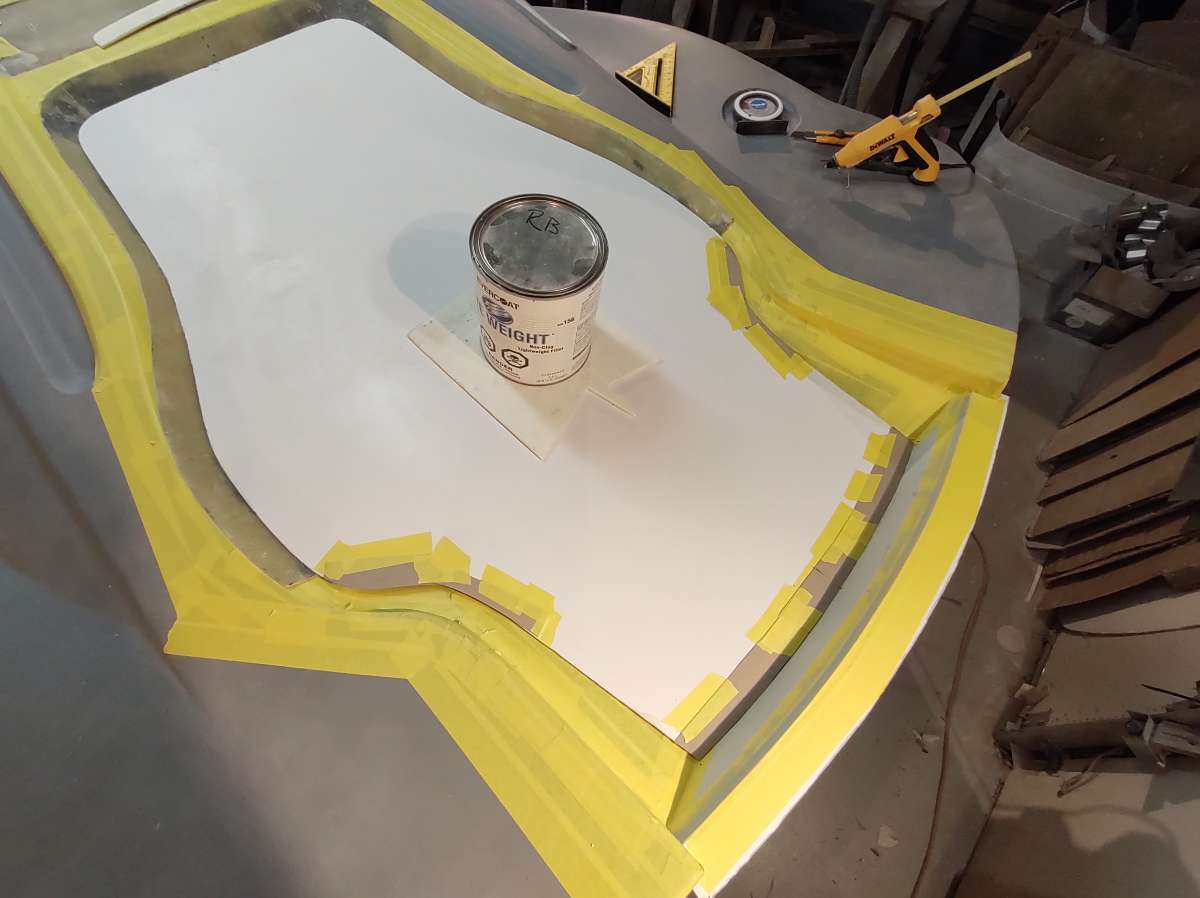
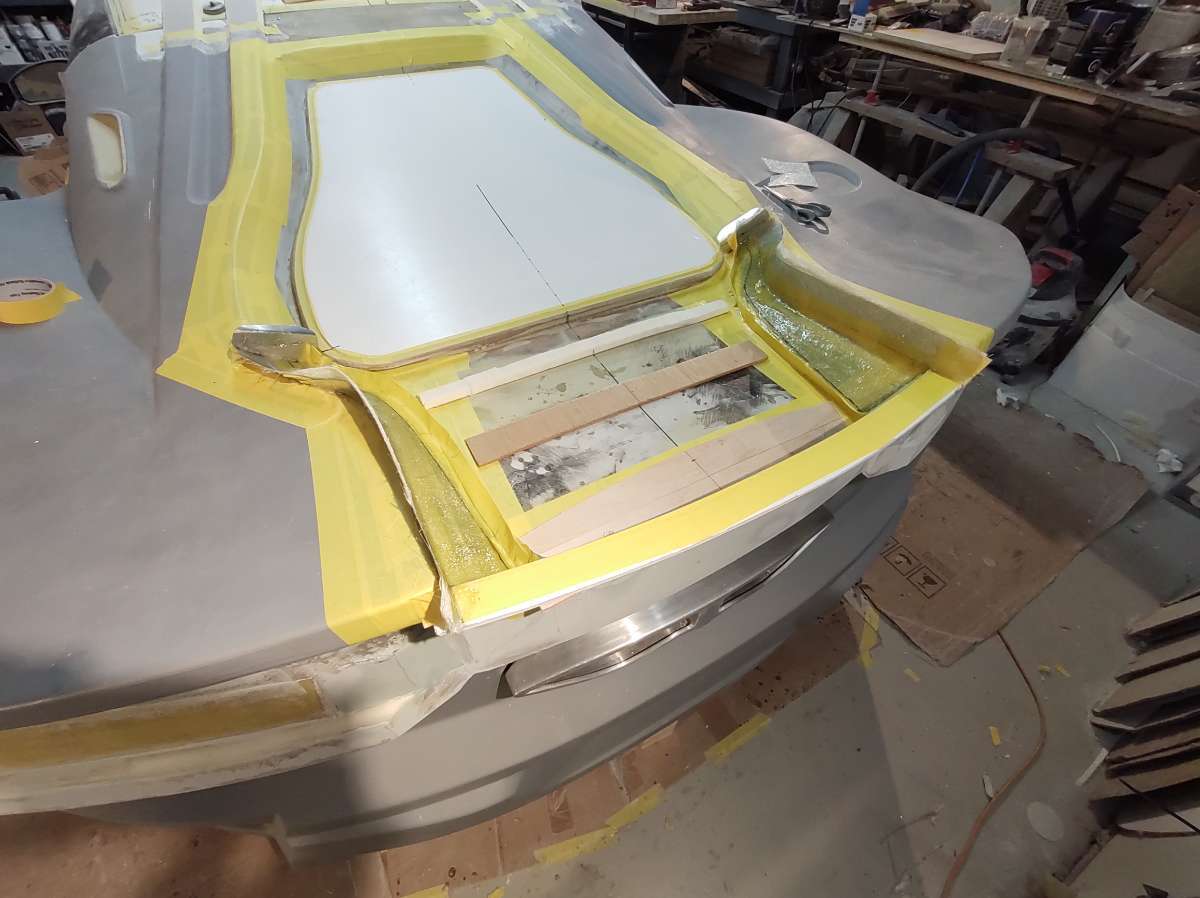
This is this going to be the new plug for the new bottom of the trunk lid
( I have to temporarily fill in the slots for the wing )
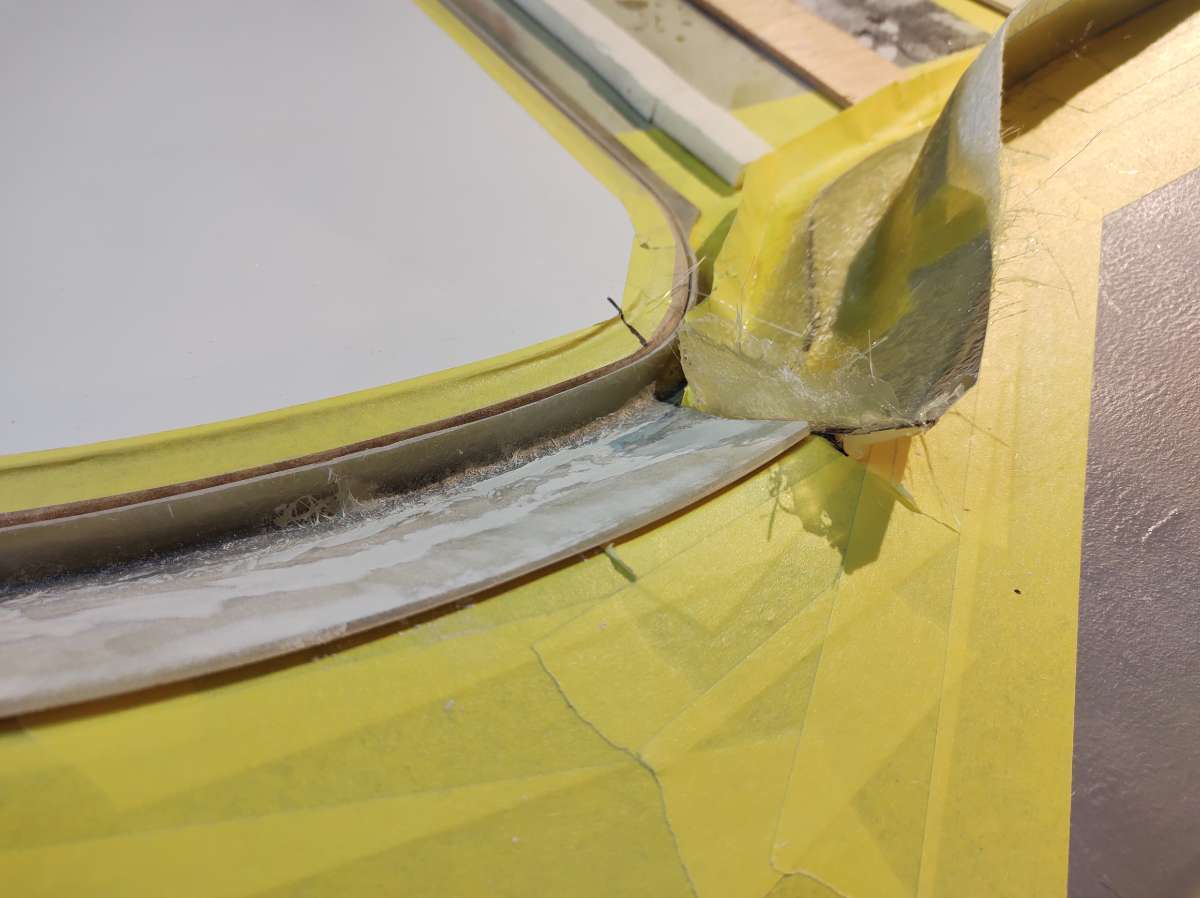
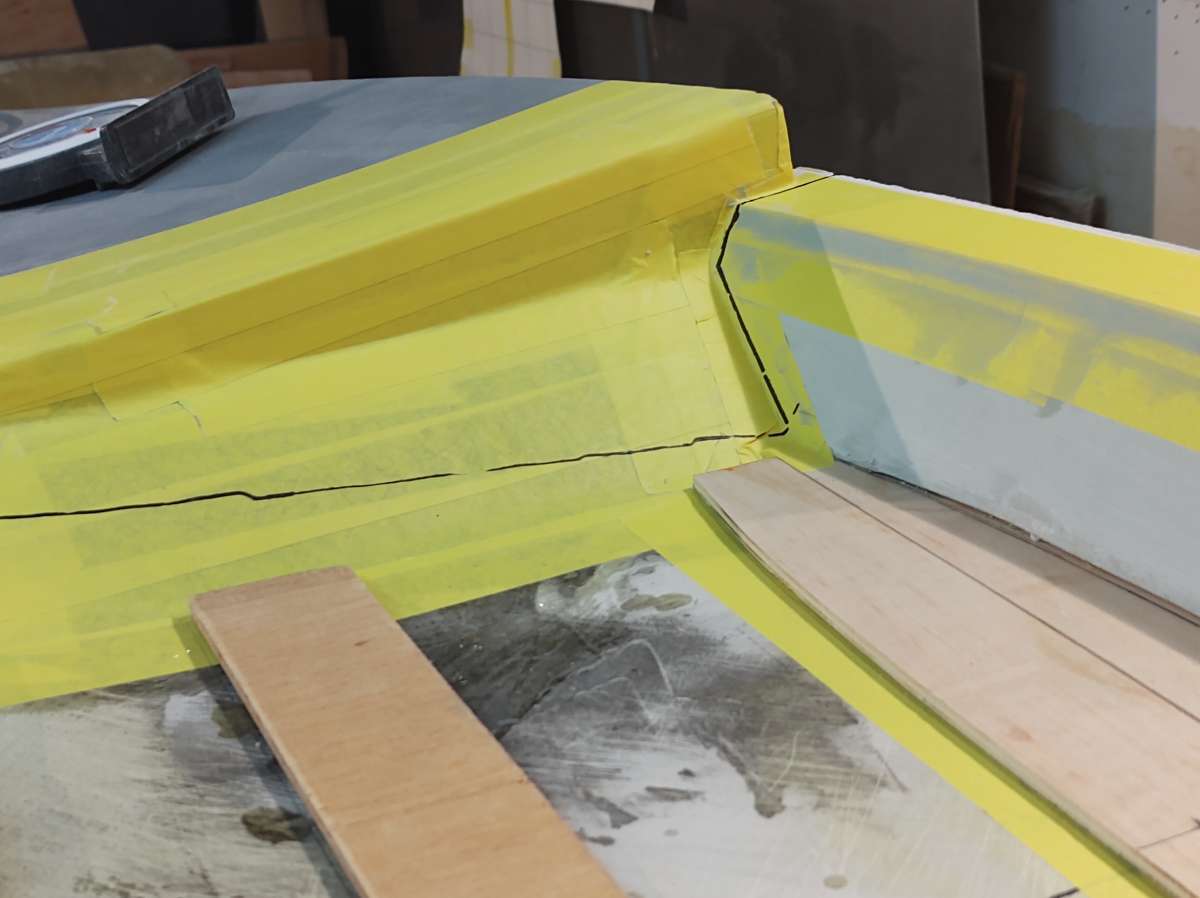
Ok you see the part on top of the yellow tape around the trunk opening , well that from the original one I made .
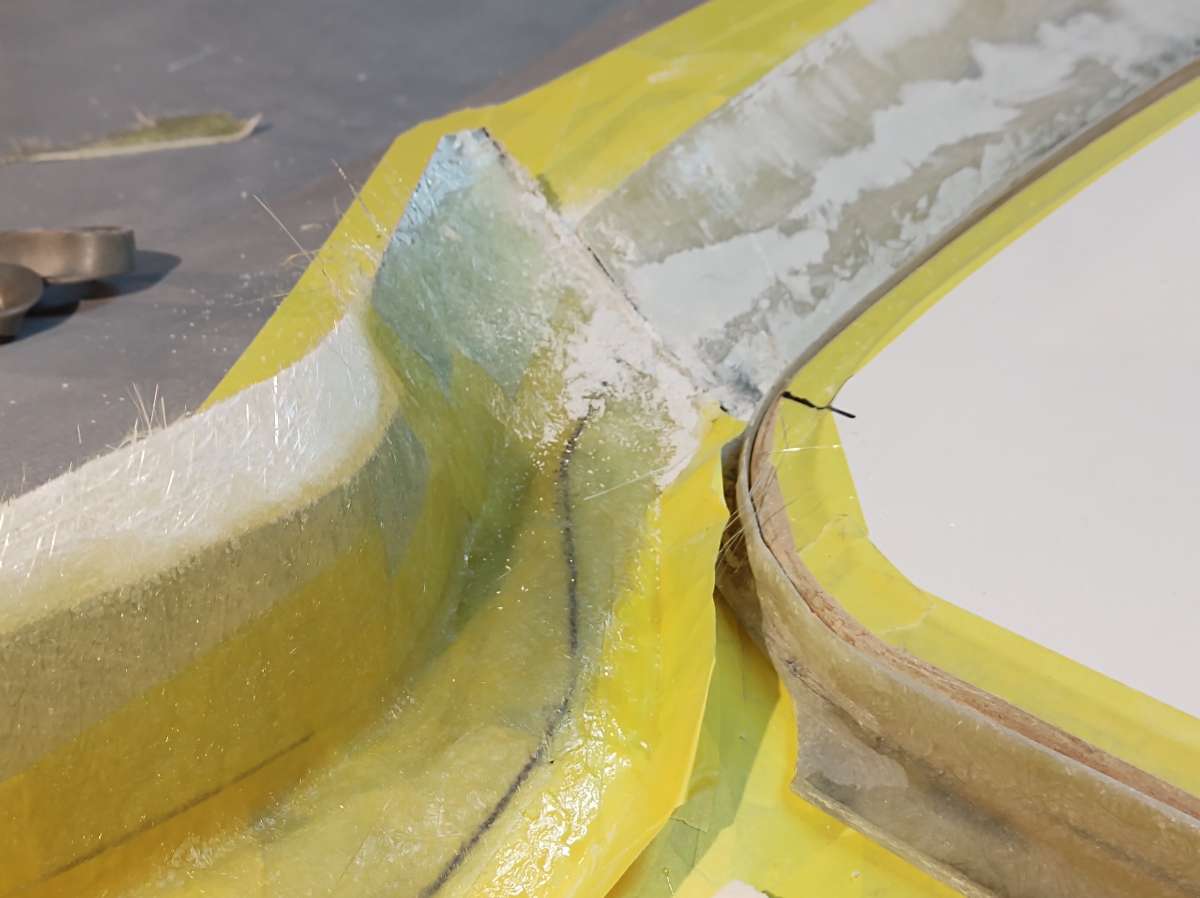
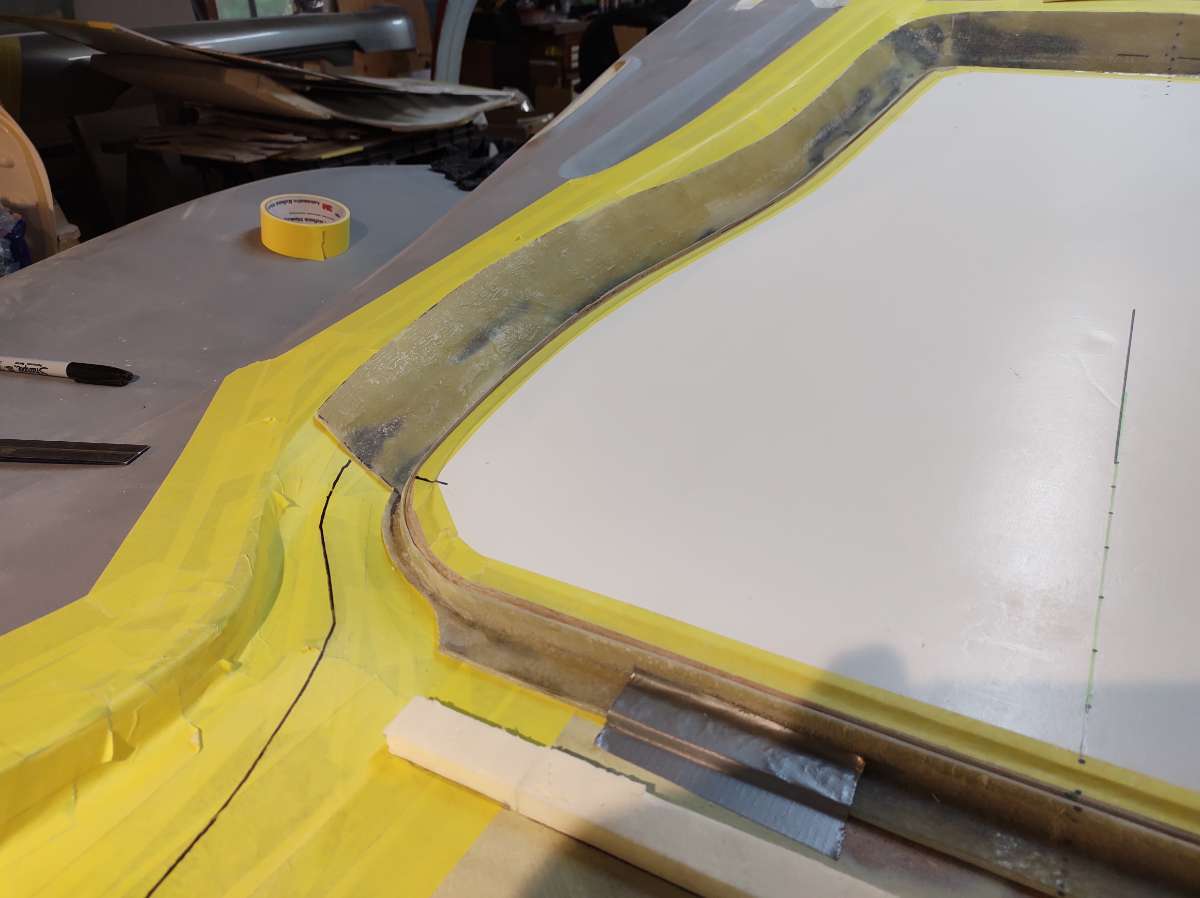
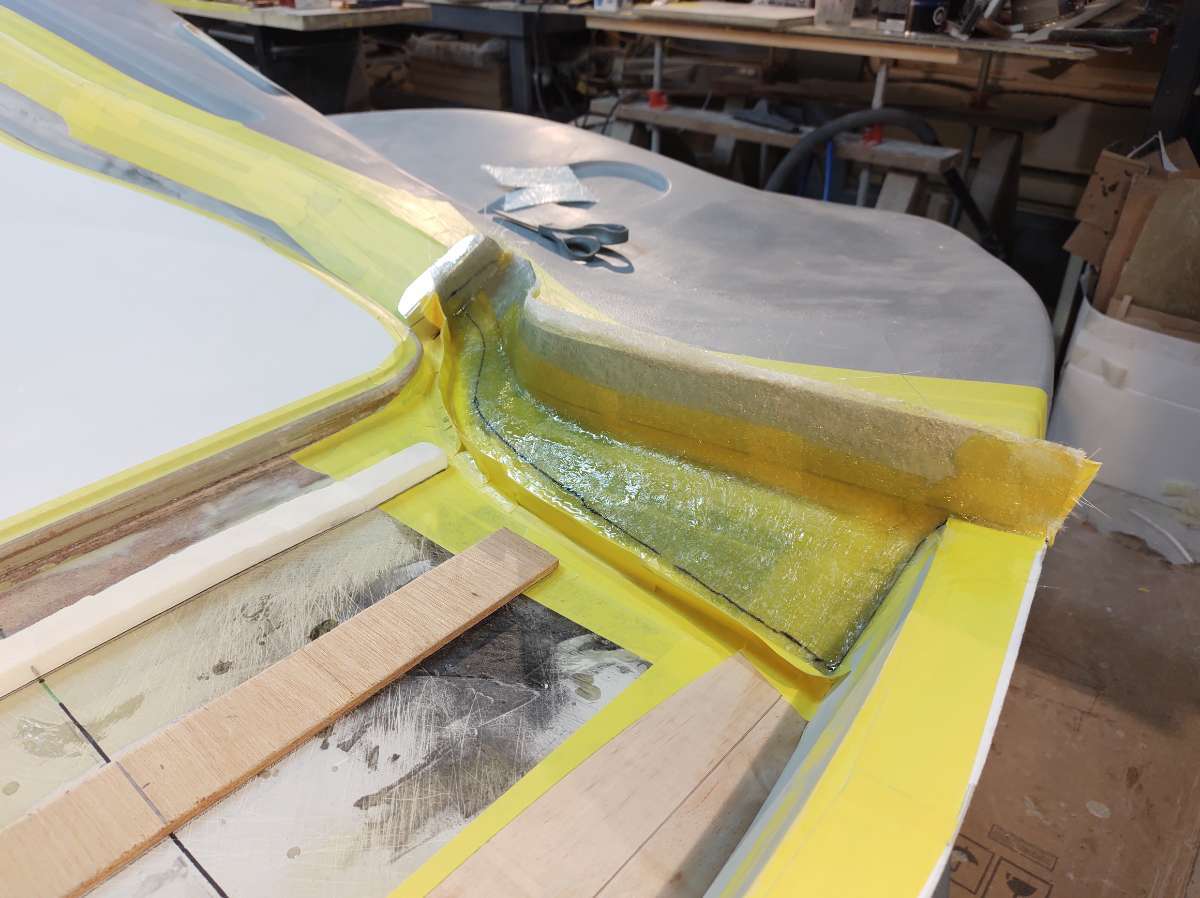
But where it turns at the bottom it was too tight and I didn't like it , it got too thin in this area and I was afraid it would break .
So I made the turns softer right where you see it cut off .
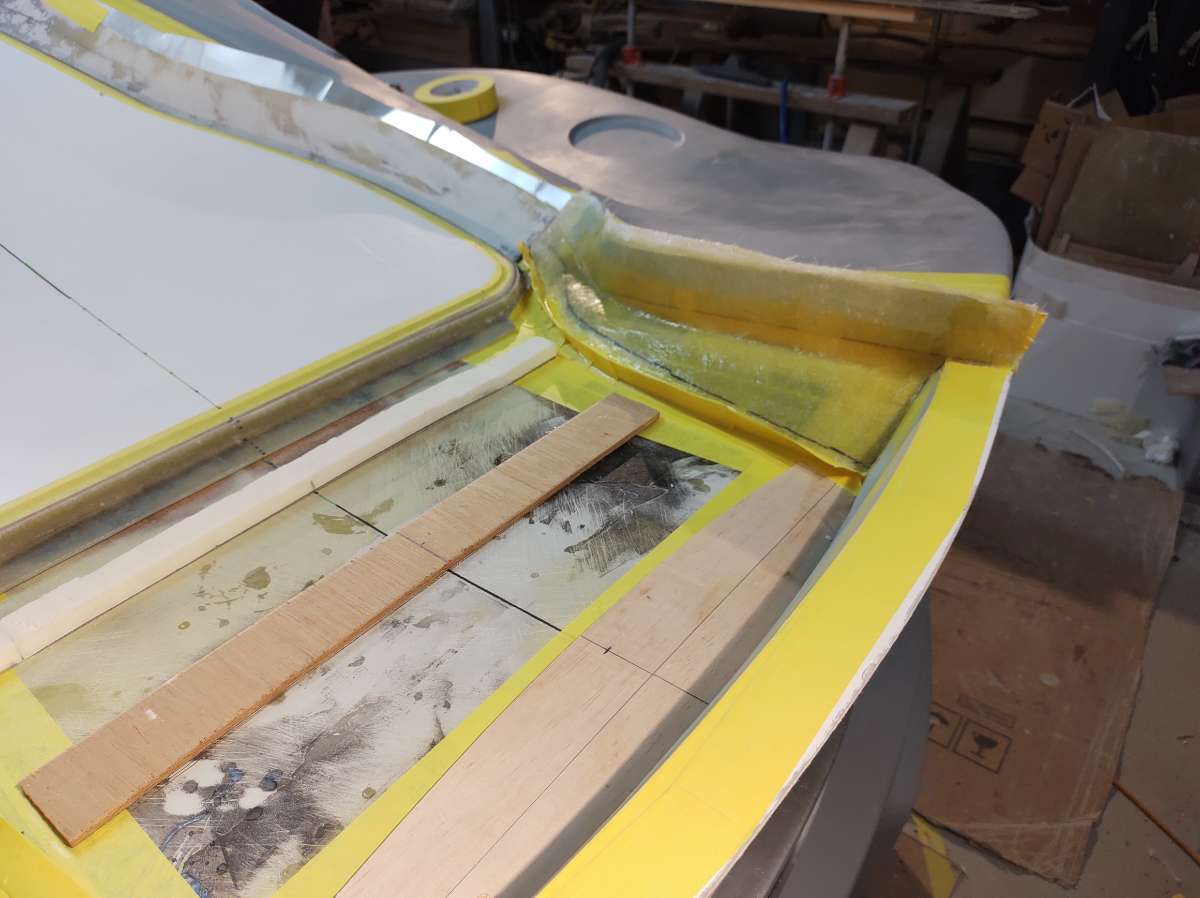
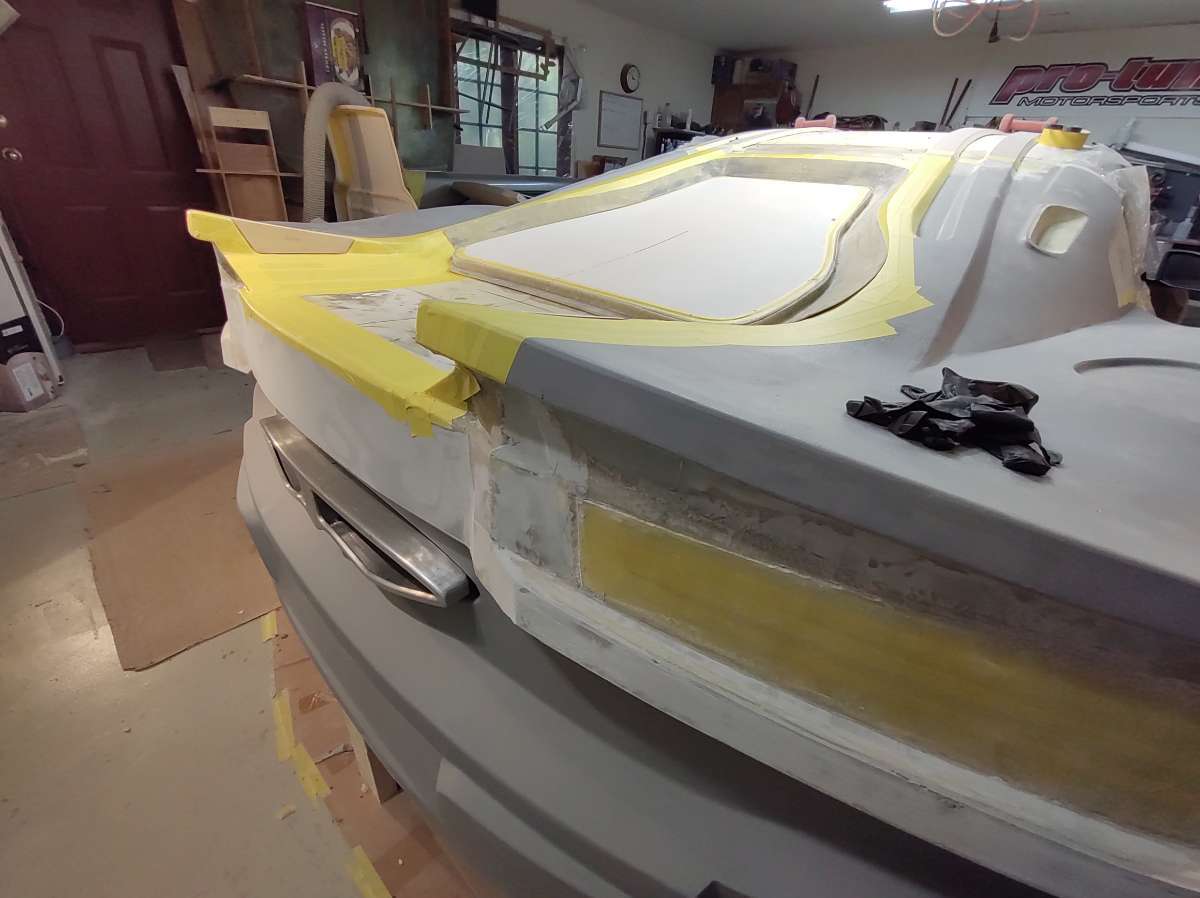
I glued in a piece of wood and just taped over it
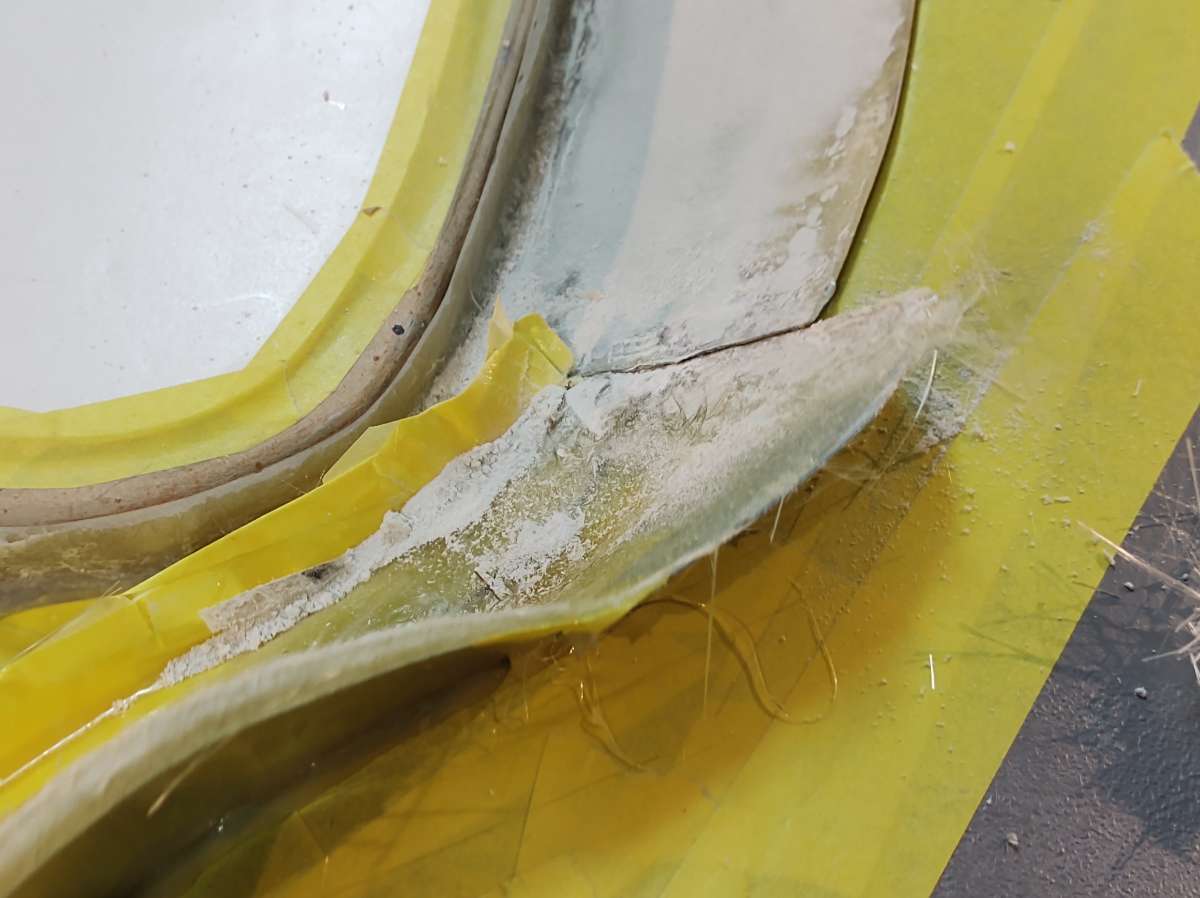
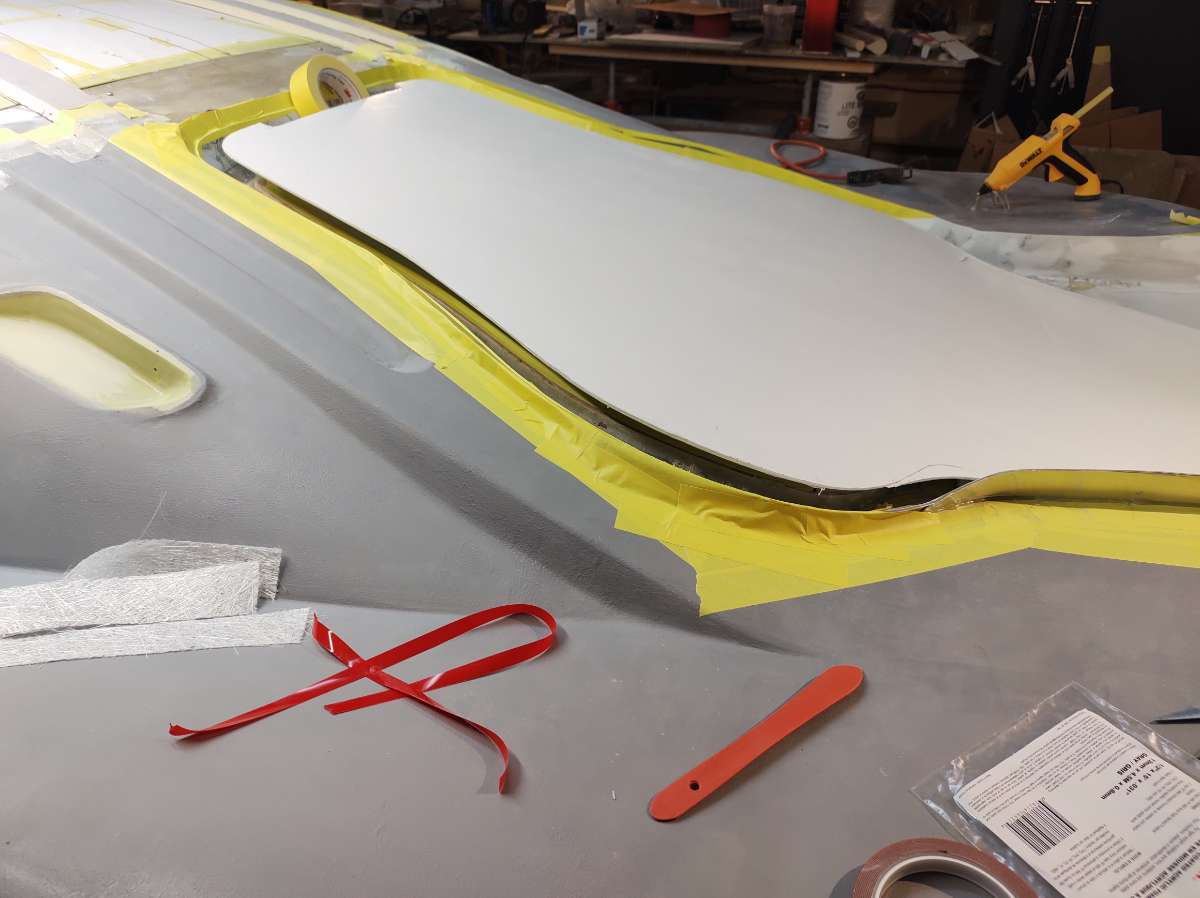
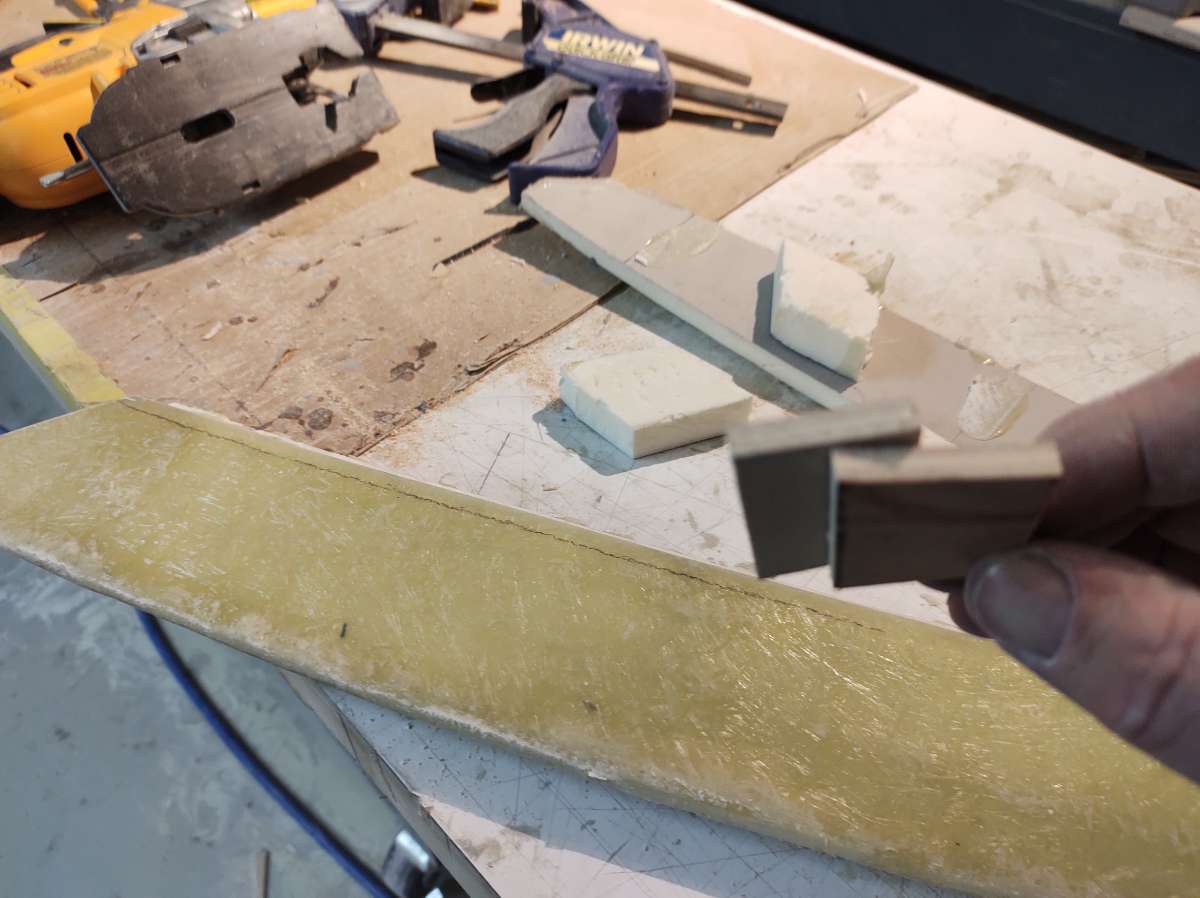
next is to simulate the back outside edge of the trunk lid with the piece I made earlier for this reason .
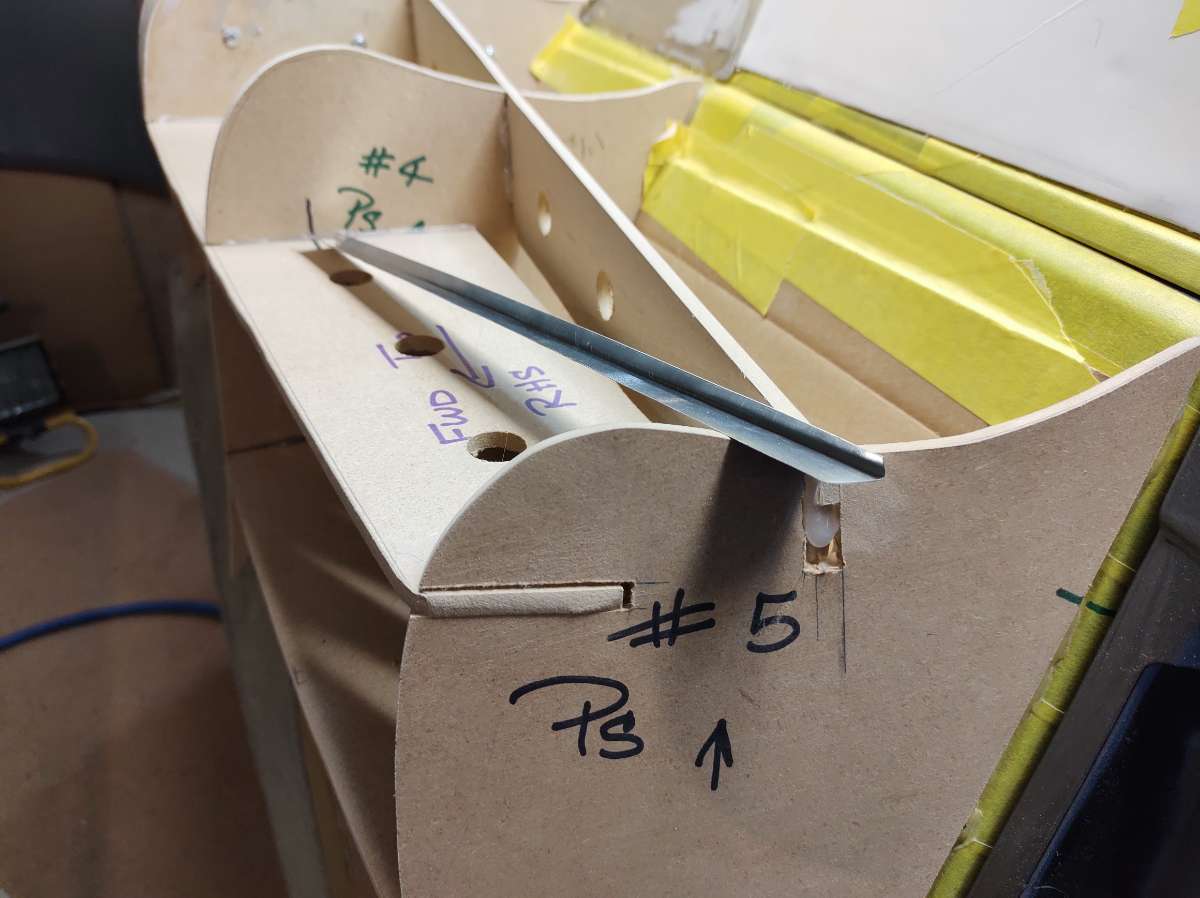
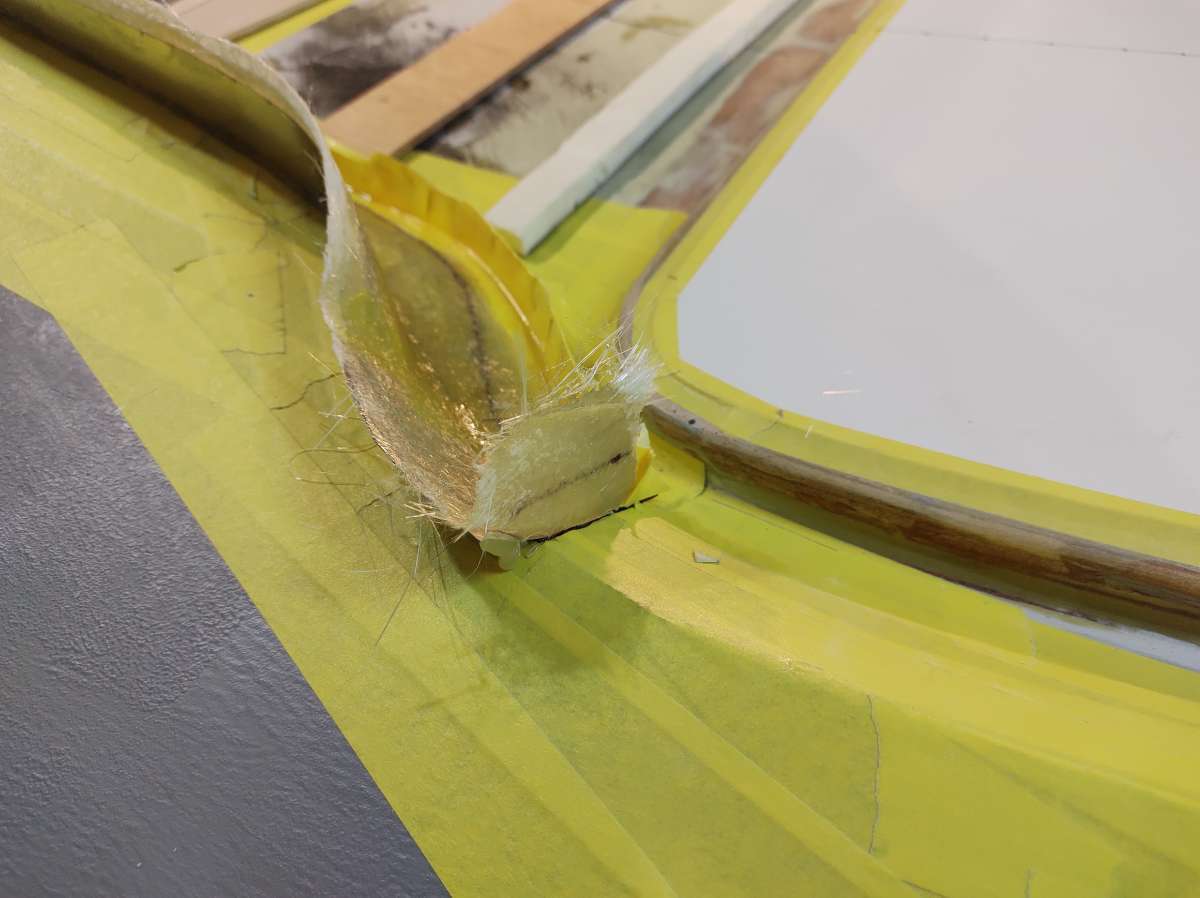
Here I glued 2 pieces of 3/16 ths together to mark the edge ( couldn't use a square because it's on an angle )
This get cut off , as it represents the gap for the bottom of the lid to make clearance
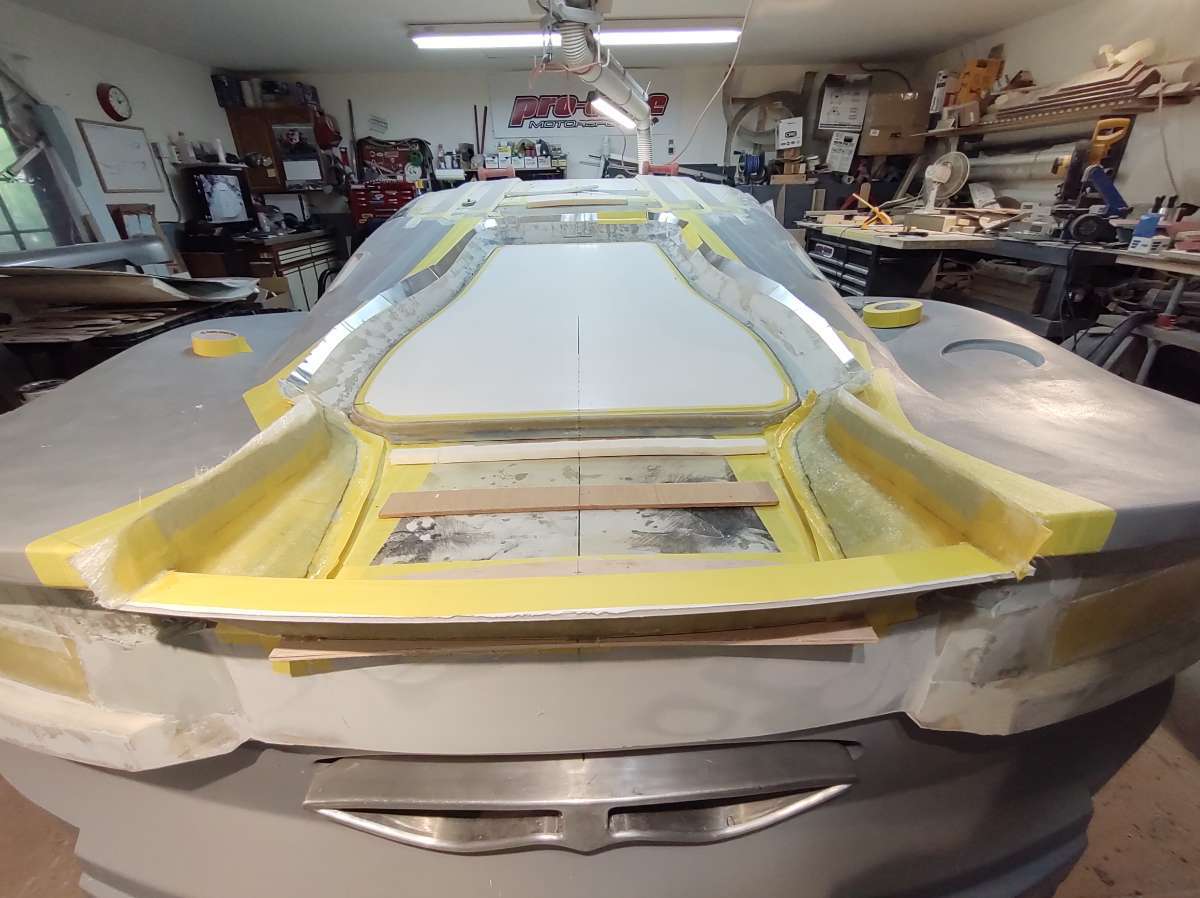
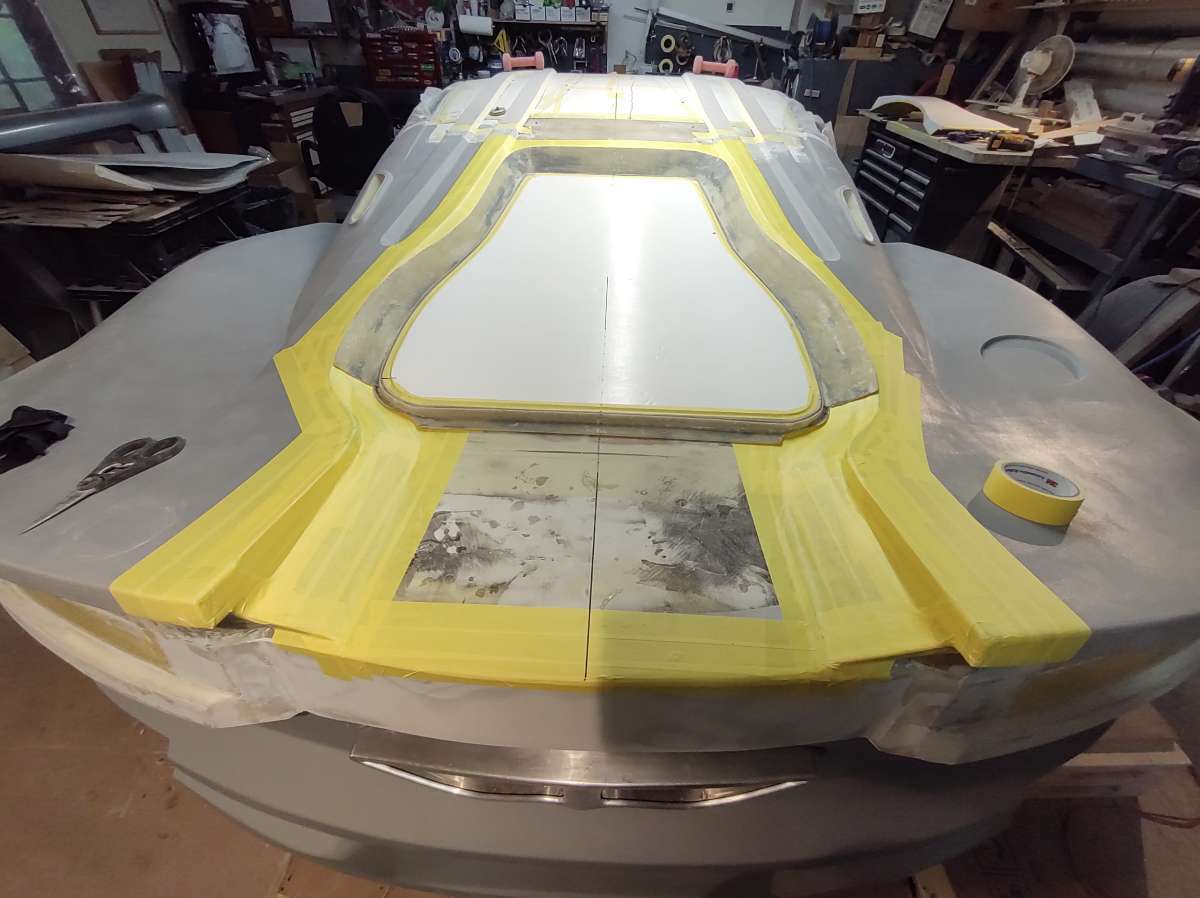
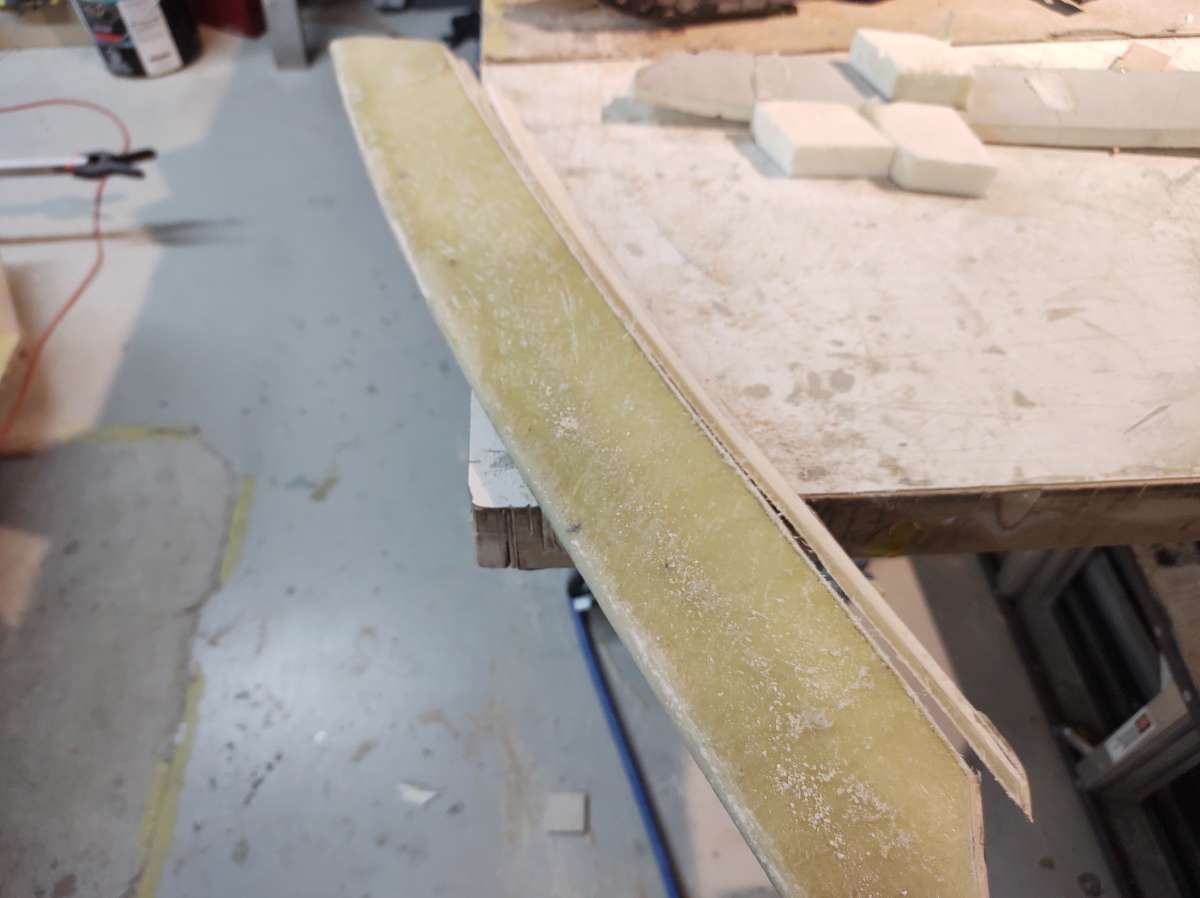
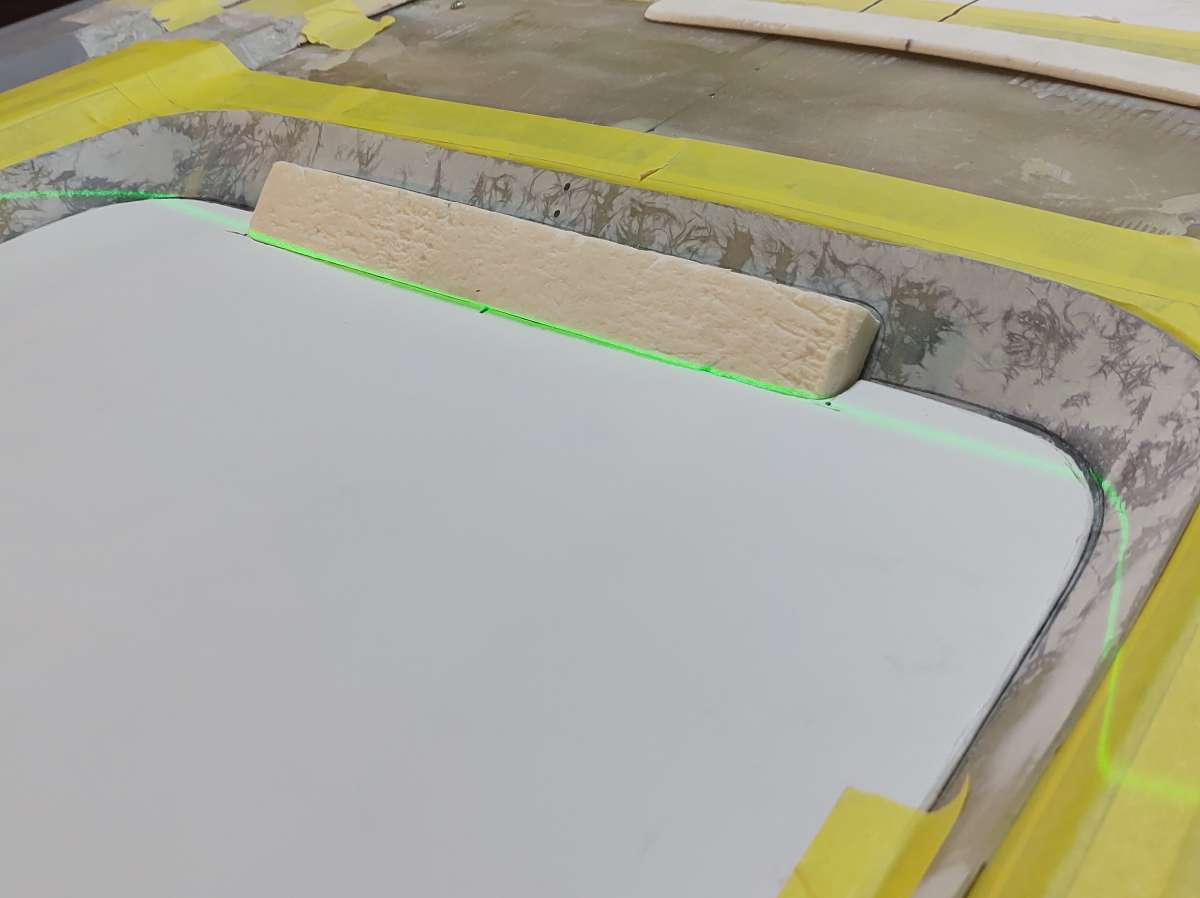
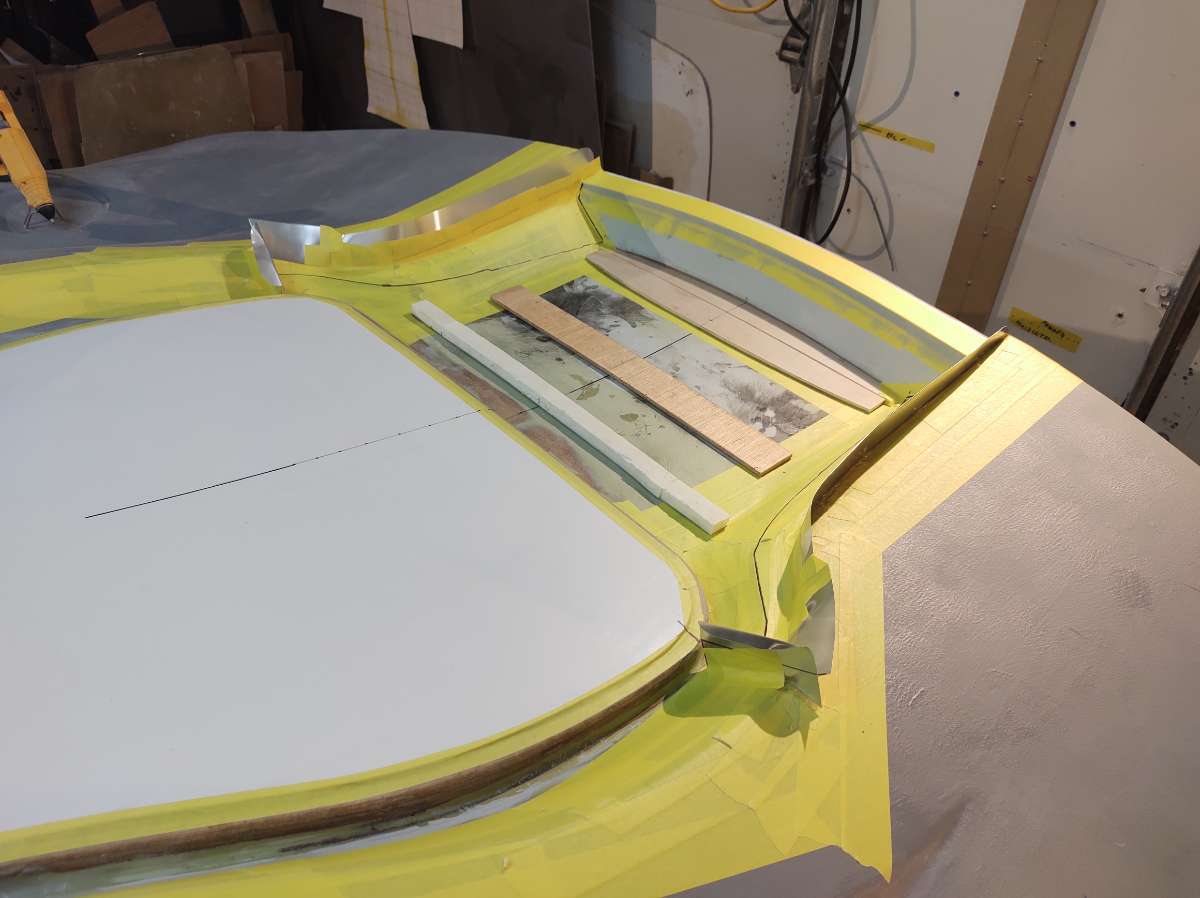
next is the foam core to make the bottom , now this was cut for the previous version , so it will need to be modified
these are spacers to support the foam core underneath , and will give clearance for the rain water escape , they get glued down temporarily
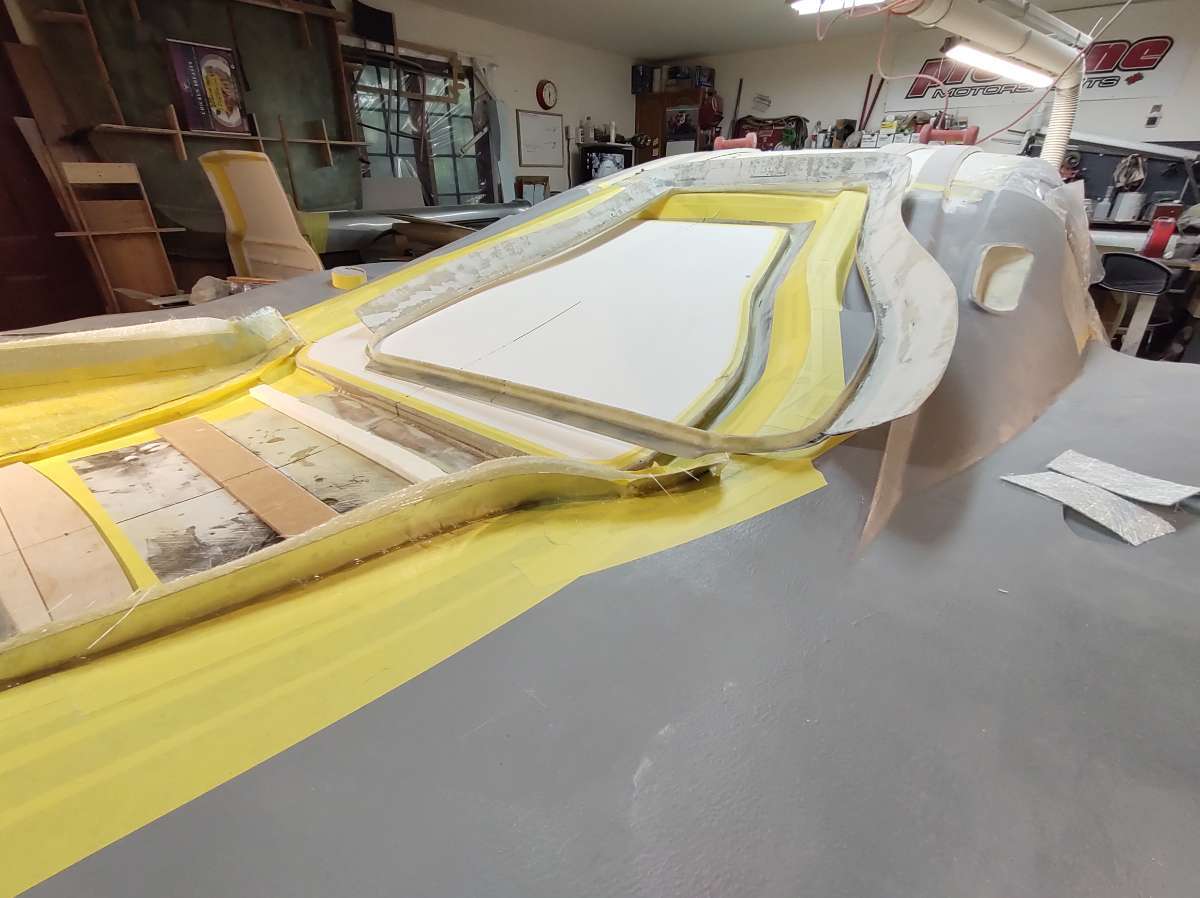
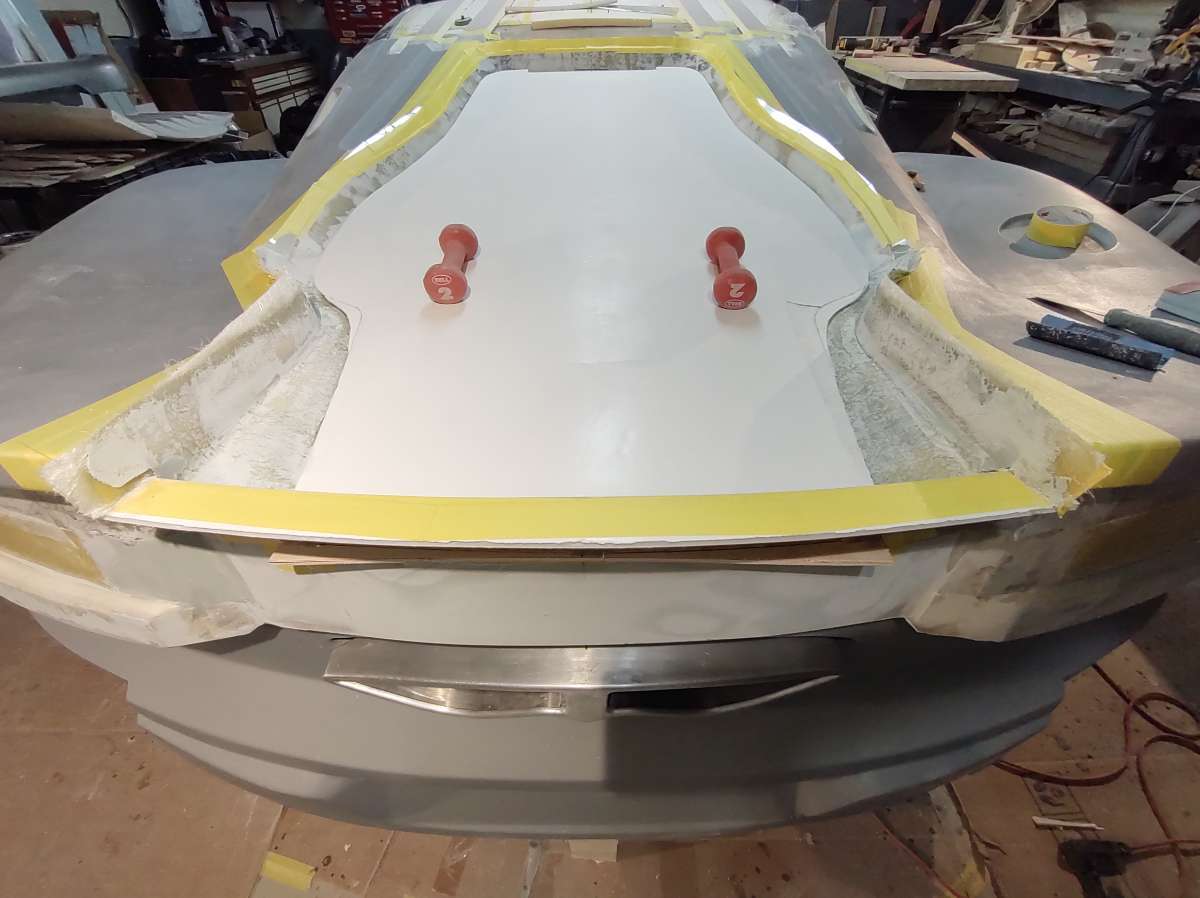
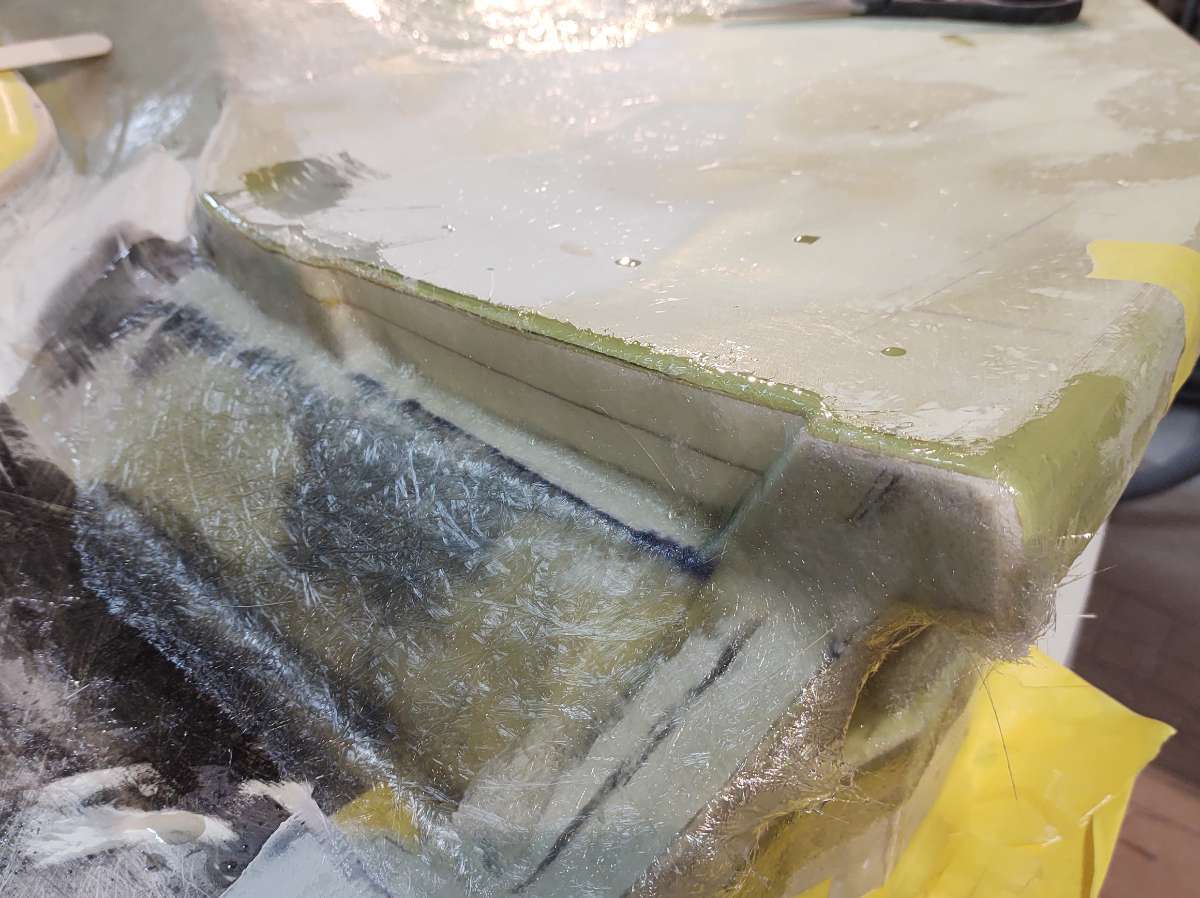
Hear you see the back piece is set back so the inside face will become the finished face , I know confusing ....
next is gluing a piece of foam core to the top of the back edge to make the bottom flange to bond to the bottom of the top part of the lid .
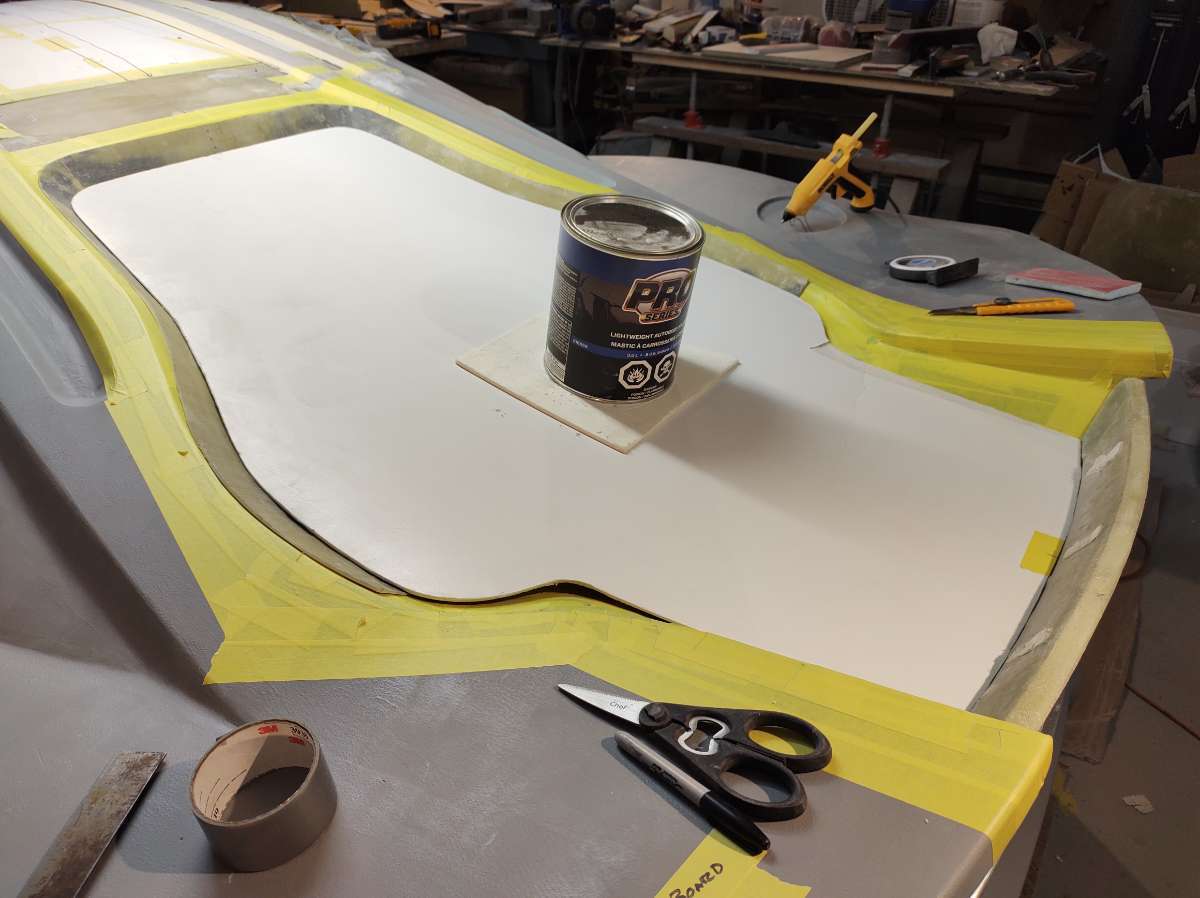
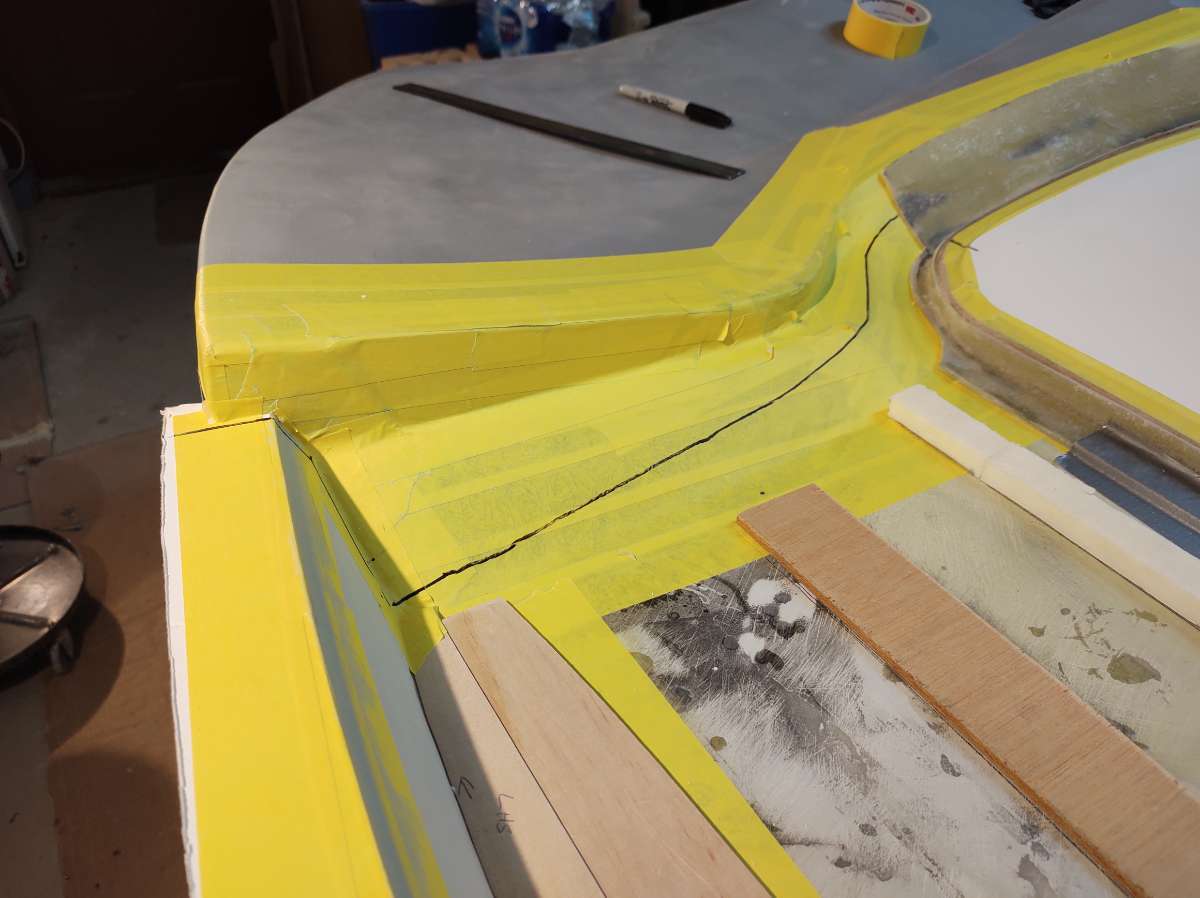
it gets taped to seal the edge of foam core , and you can see I am making some patterns to add foam core to the large base cover where I changed the corners .
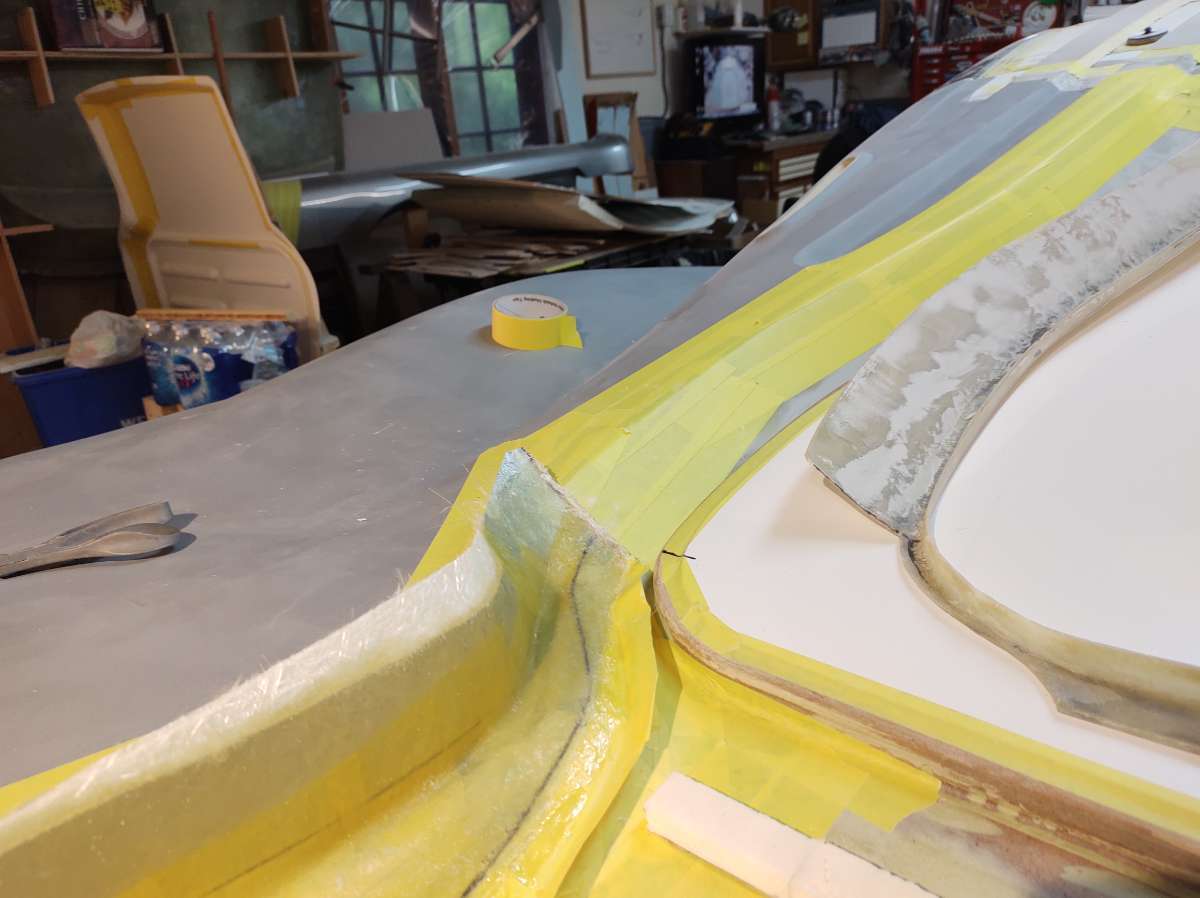
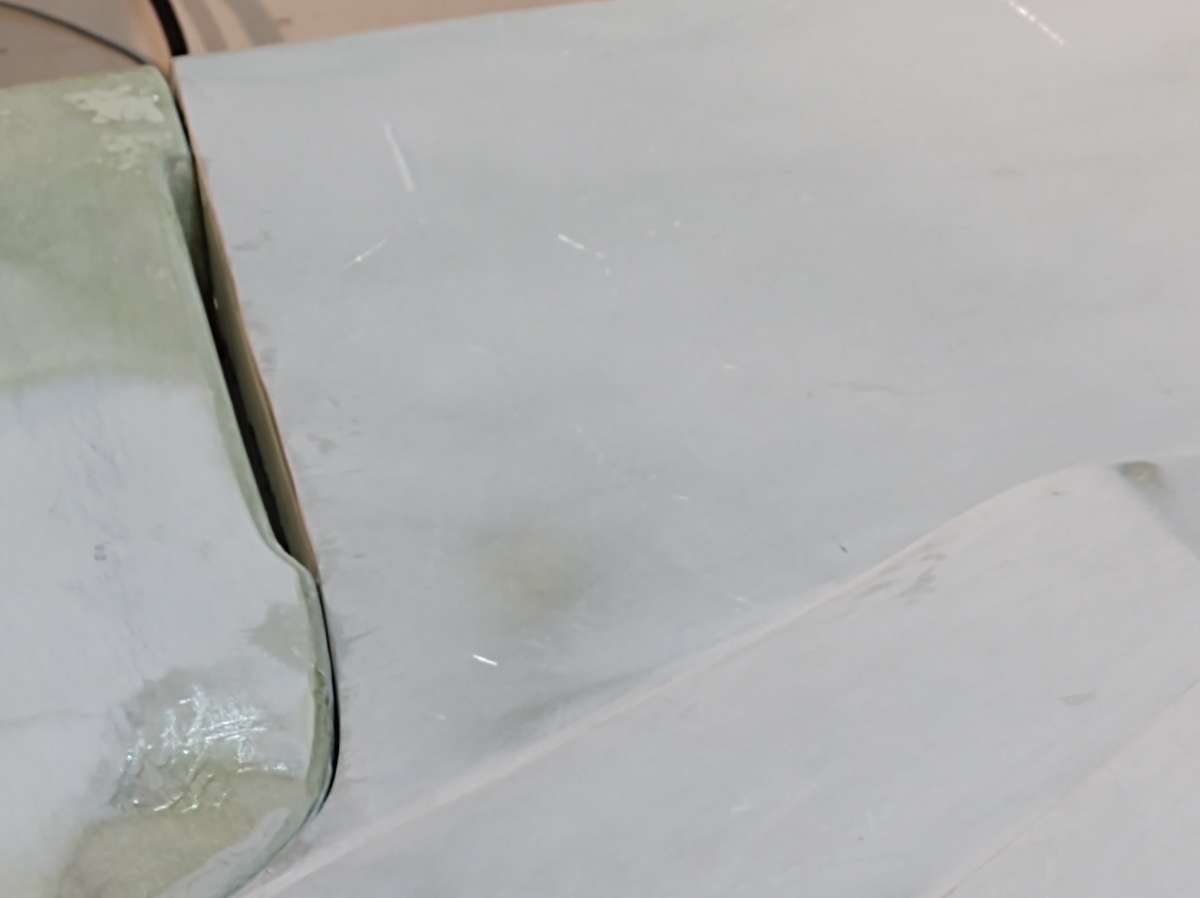
the black line represents the edge of the base cover , so I need to fiberglass this area to match the top part around the opening .
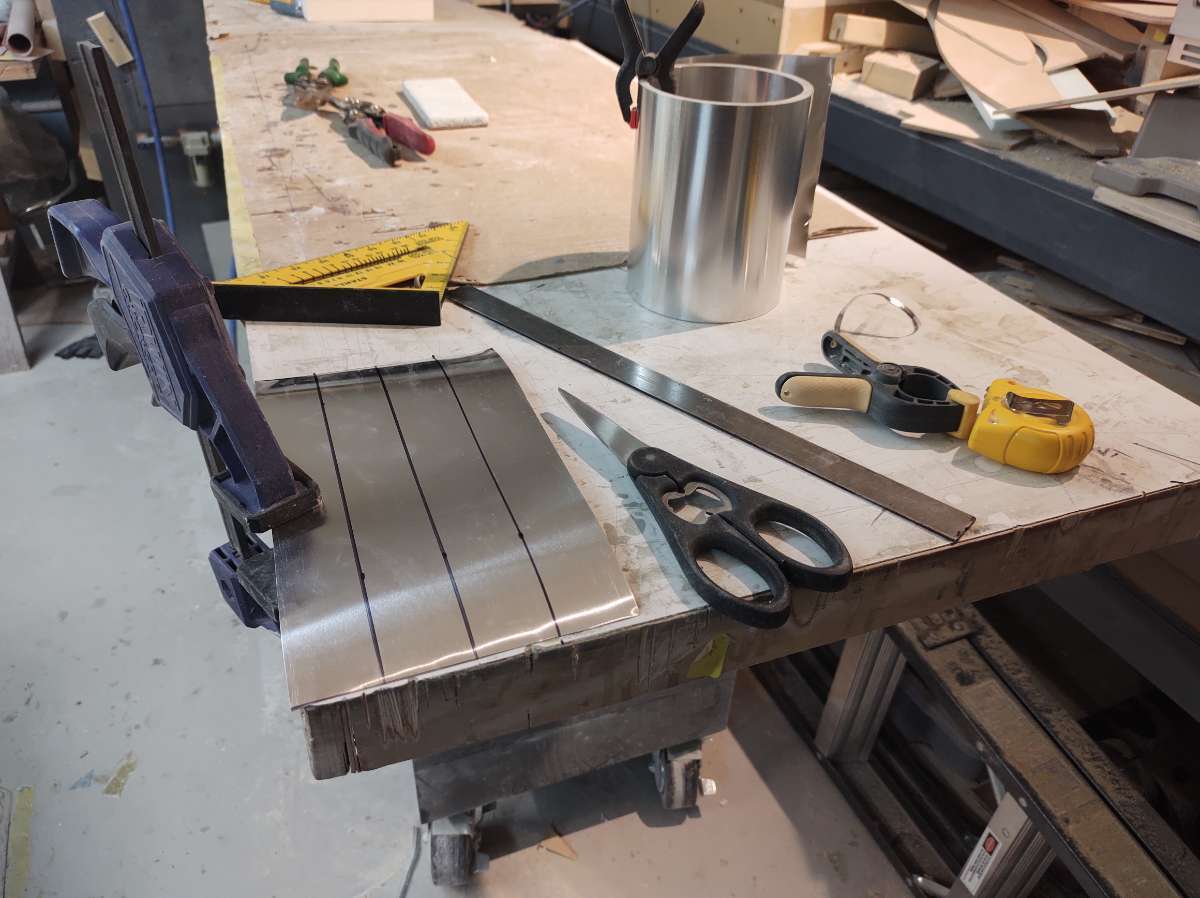
Here I am adding some thin aluminum flashing to the upper part to run the fiberglass on , this will allow extra space for an even thickness later when making the part .
( I know I don't have a pic crazy ) you will see when its back on the car .
the bottom side
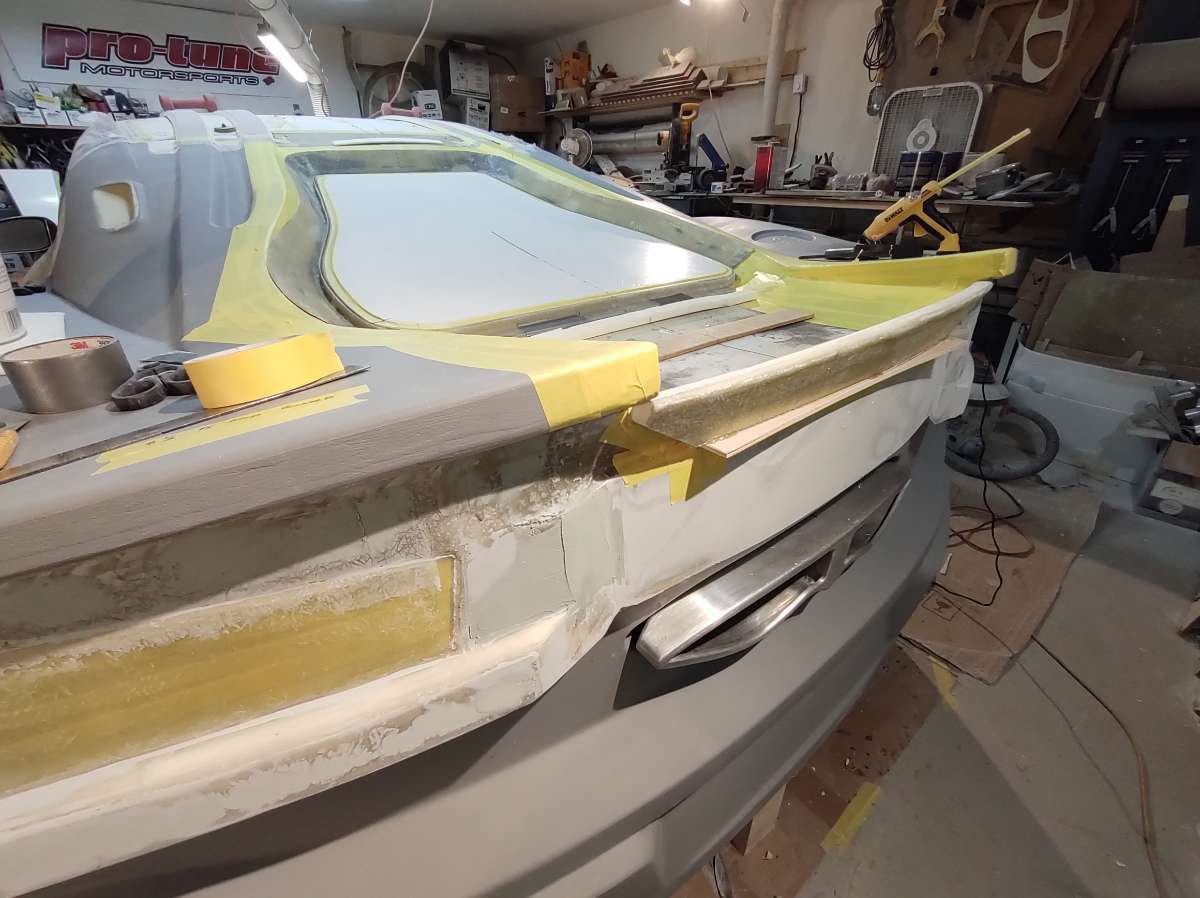
this line shows me how thick the fiberglass needs to be to form the proper gap
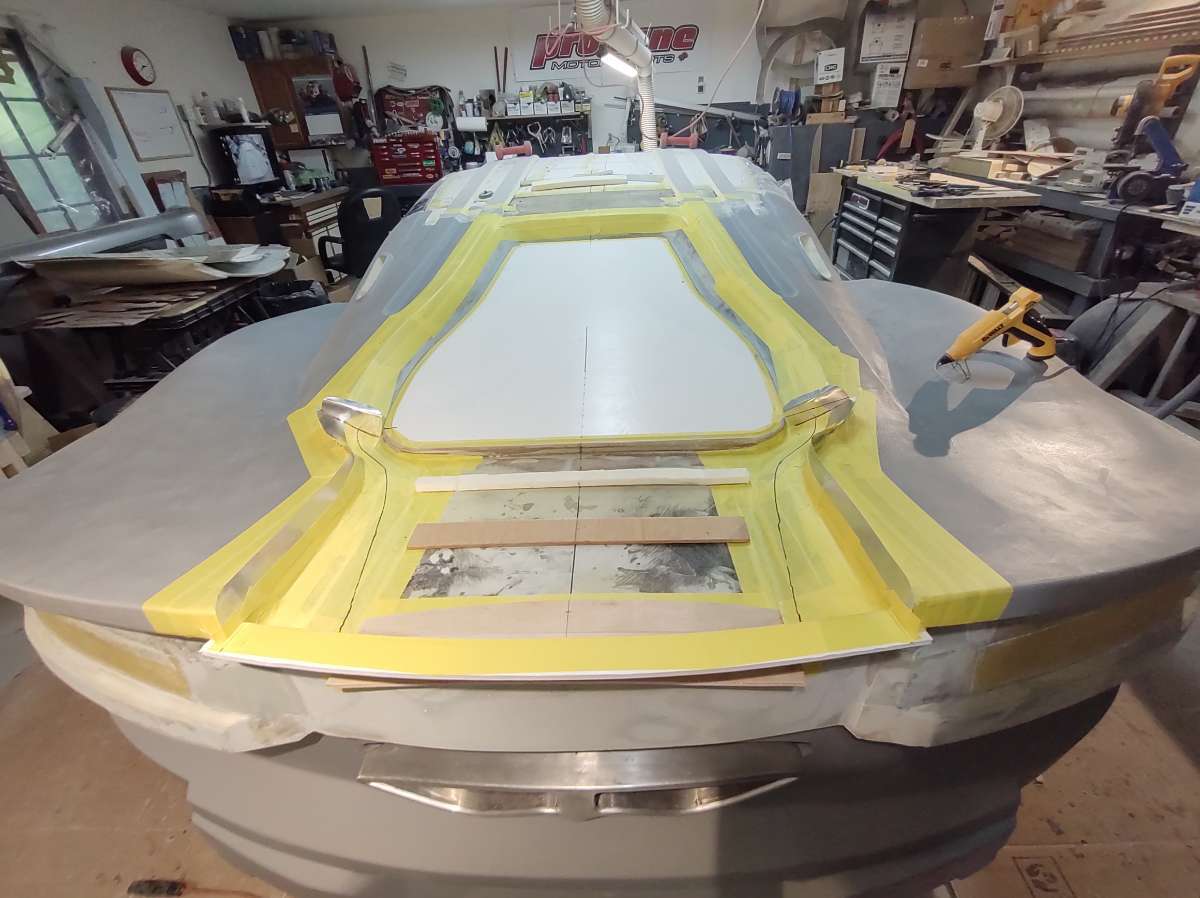
checking to make sure it level and figuring out a pocket for the Hinge to go in .
flashing to make the form extensions for the back sides
they have little dams where the new piece needs to terminate
these will get waxed so it will release after .
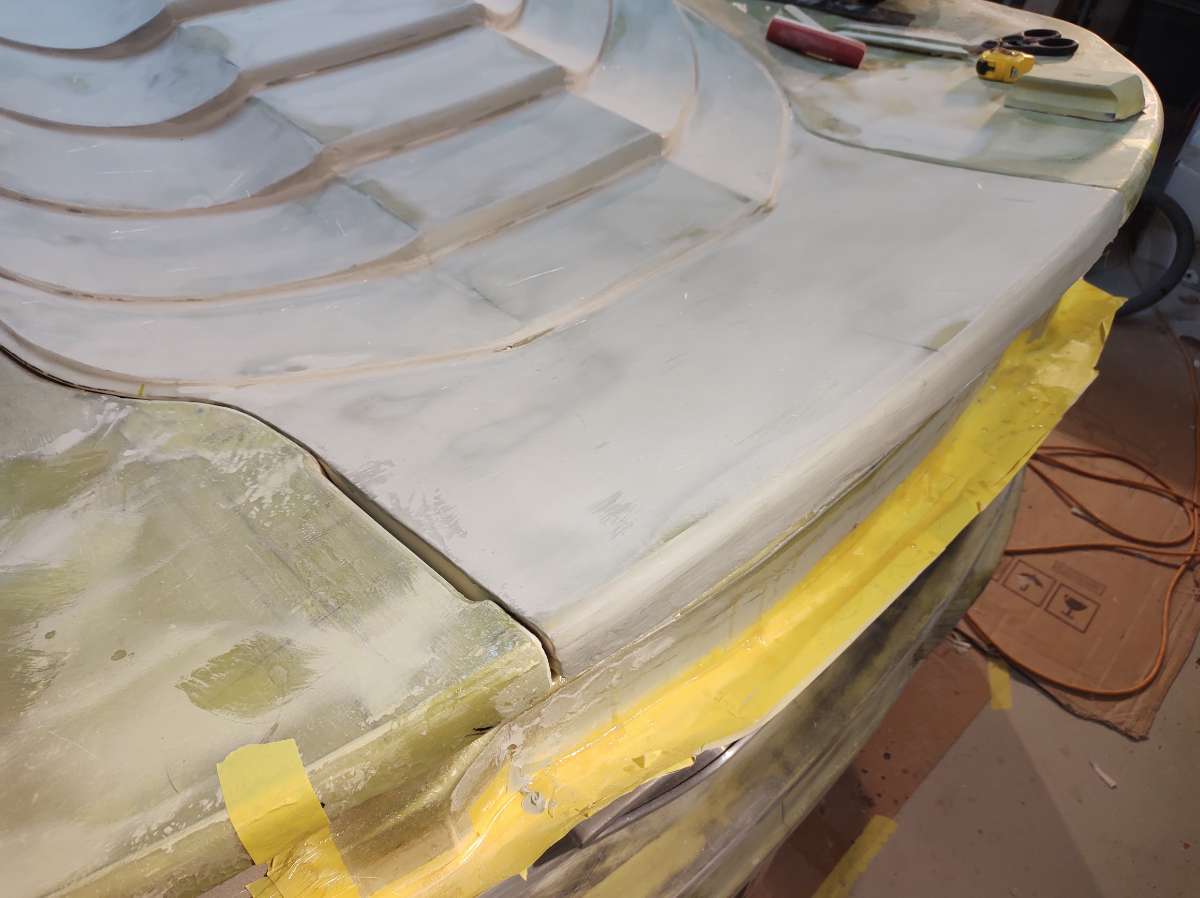
a few layers of glass
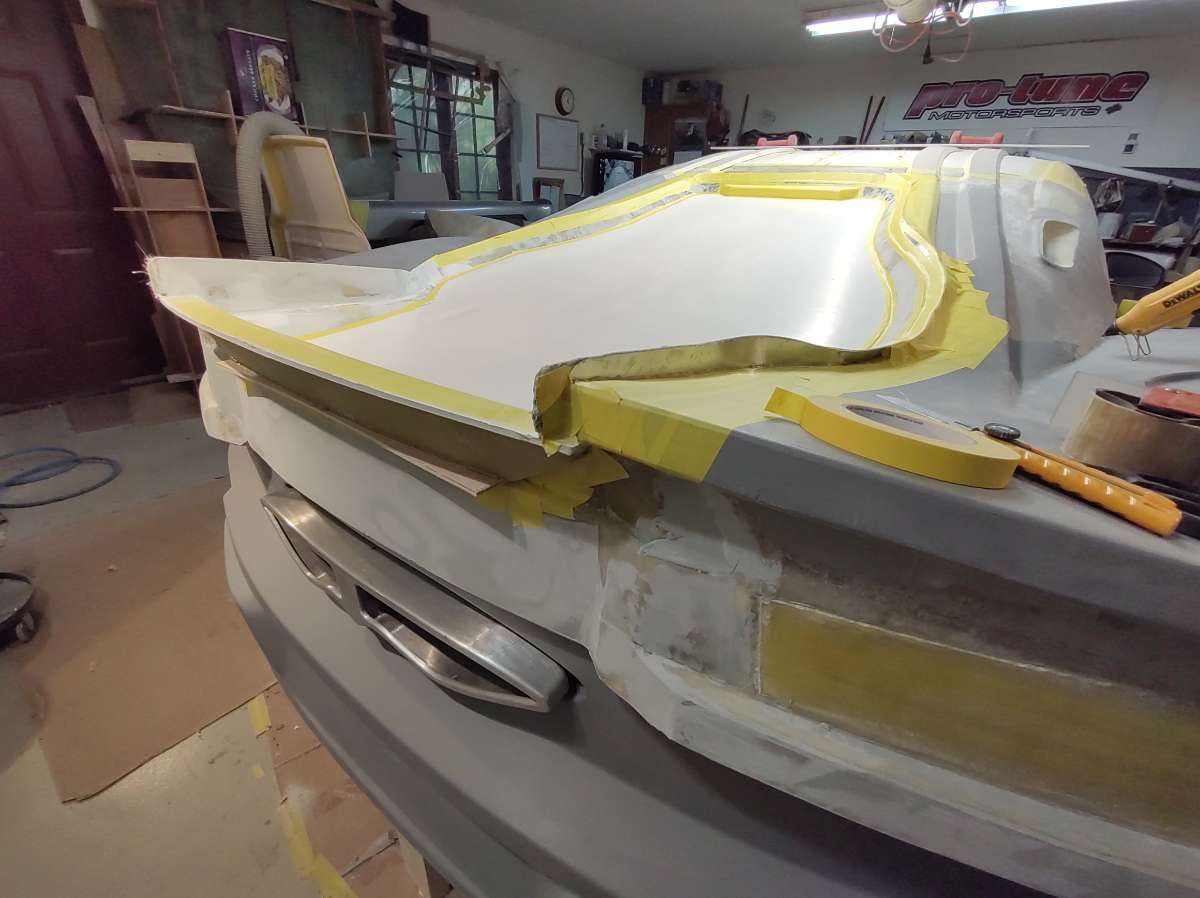
here i remove the end dam and the turned up part will get trimmed off to match the top
trimmed
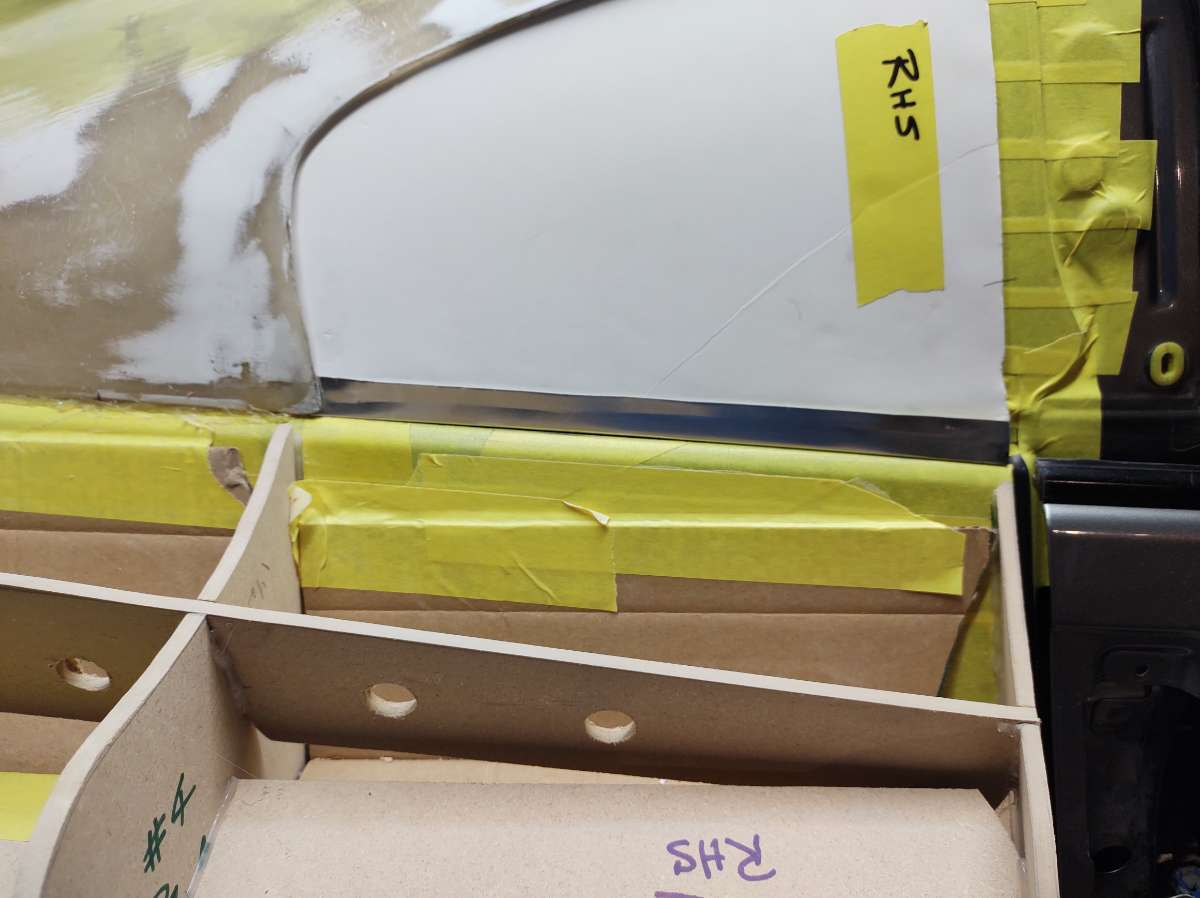
and the RHS
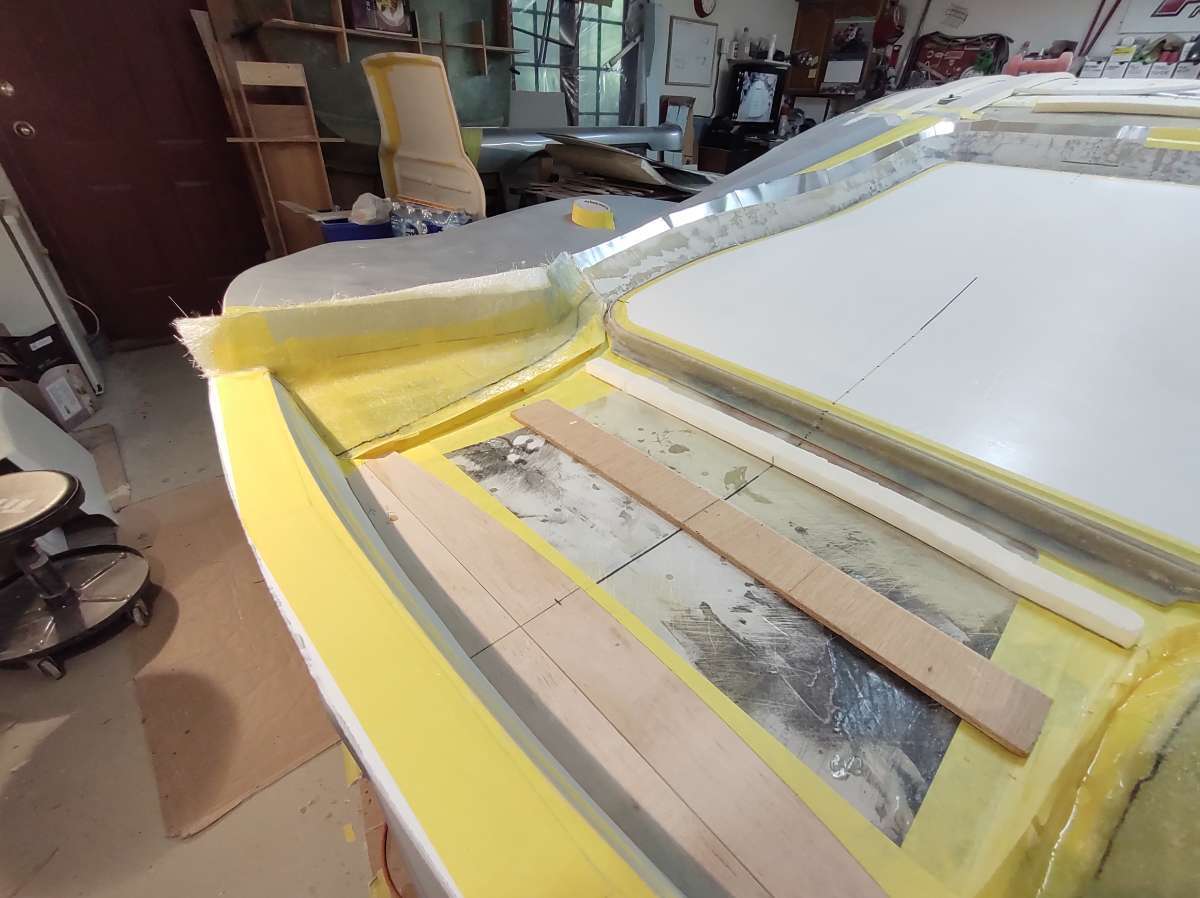
test fitting the foam core base before adding to corners that nee to be altered
here you see the flashing on the upper part , which now get temp glued to hold for glassing .
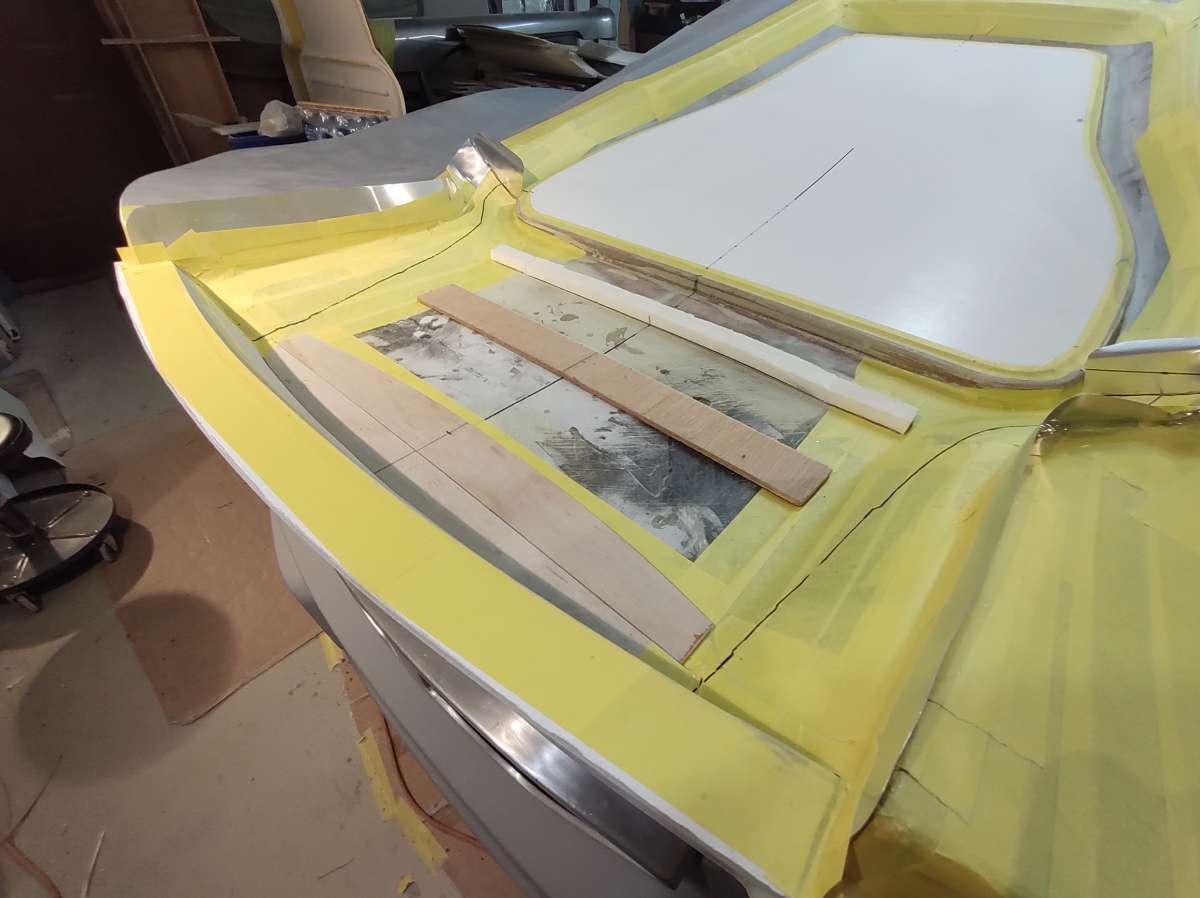
making the addons for the foam core
testing the addons
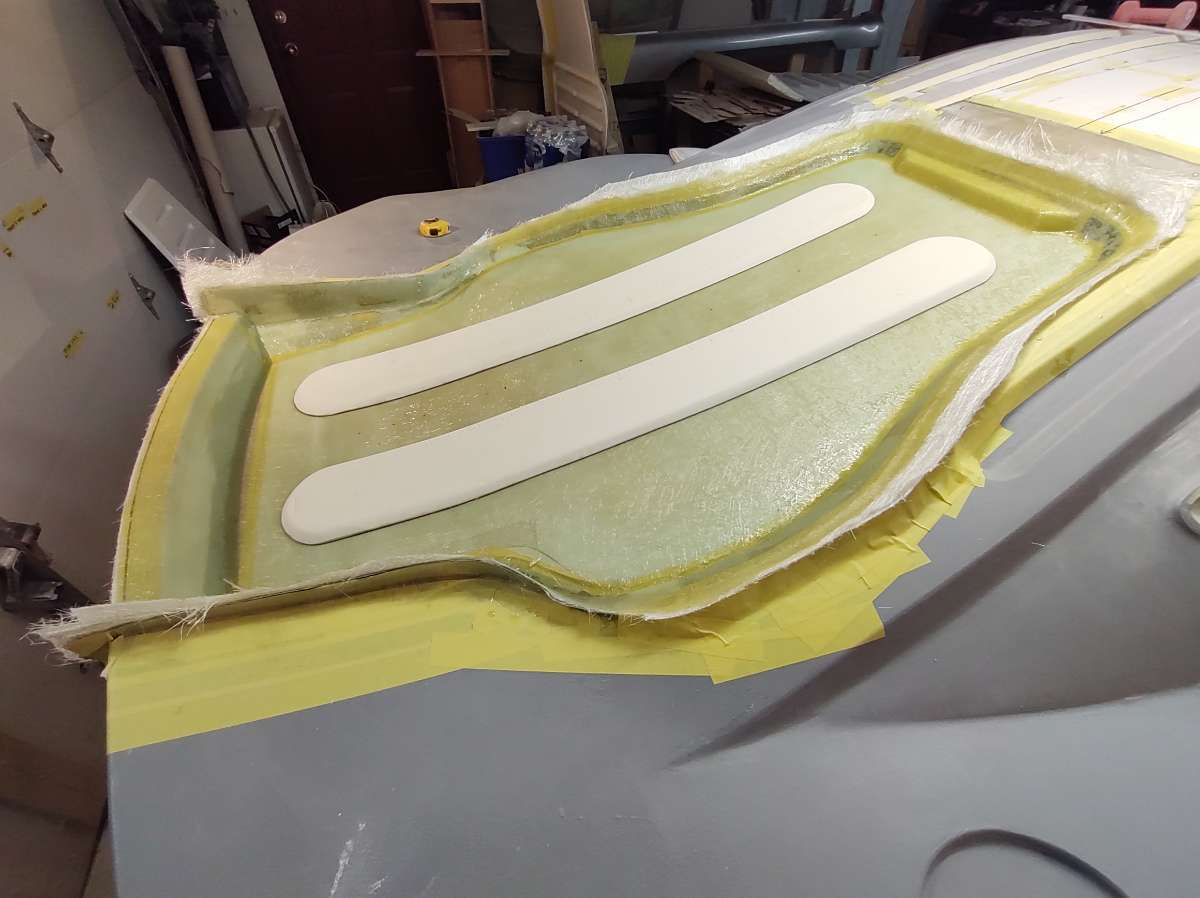
it's good so the base gets held down temporarily with 2 sided tape ,can't fasten from the top , no access after it glassed to remove it from the car
when it\s lined up and ready just press down evenly only one shot at it !!!
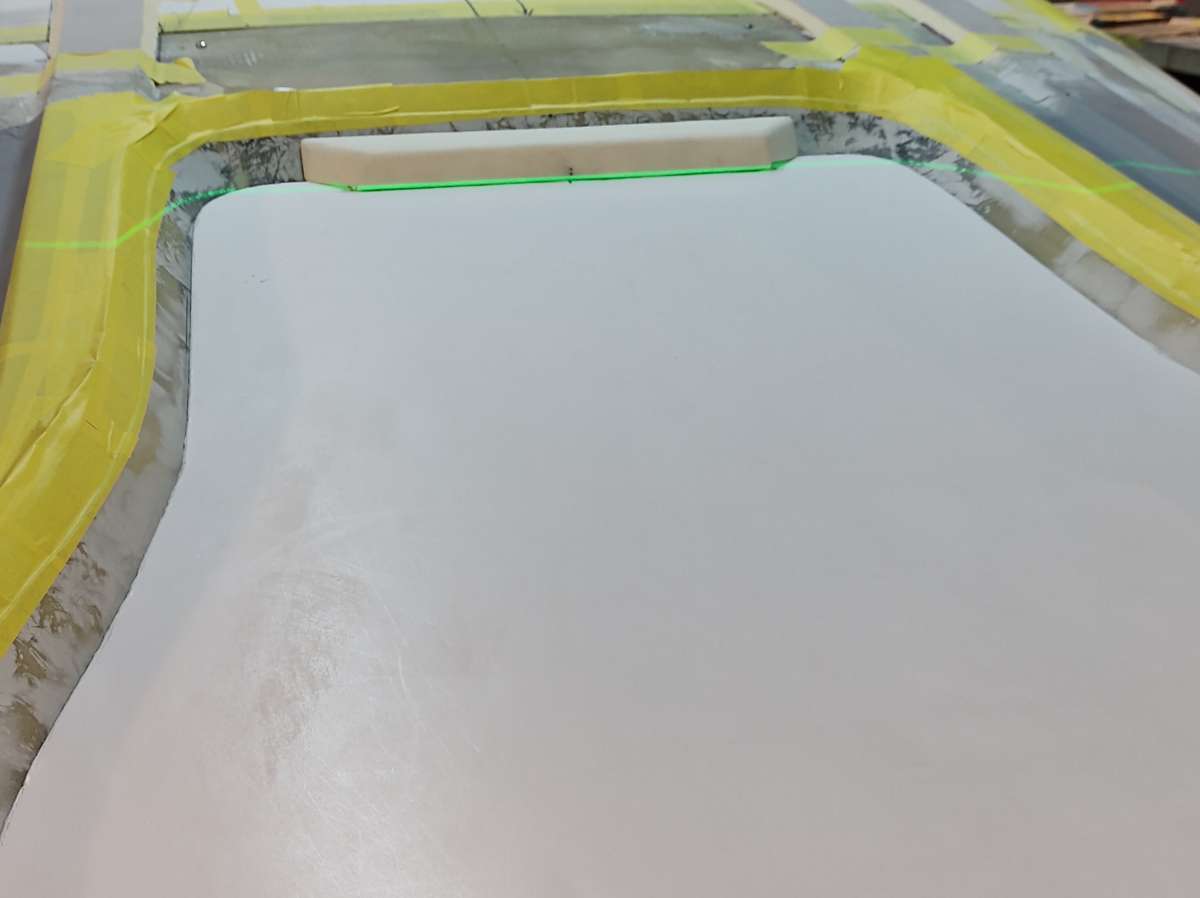
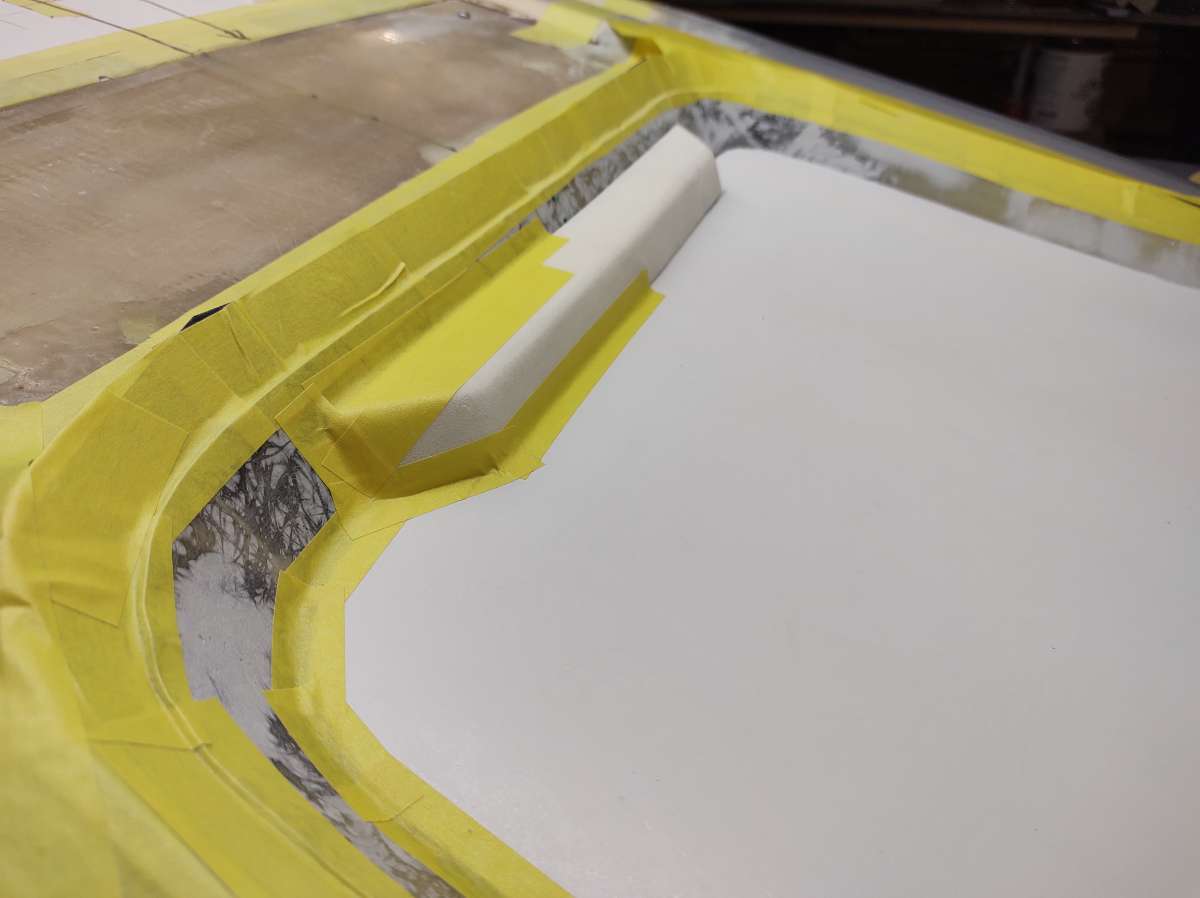
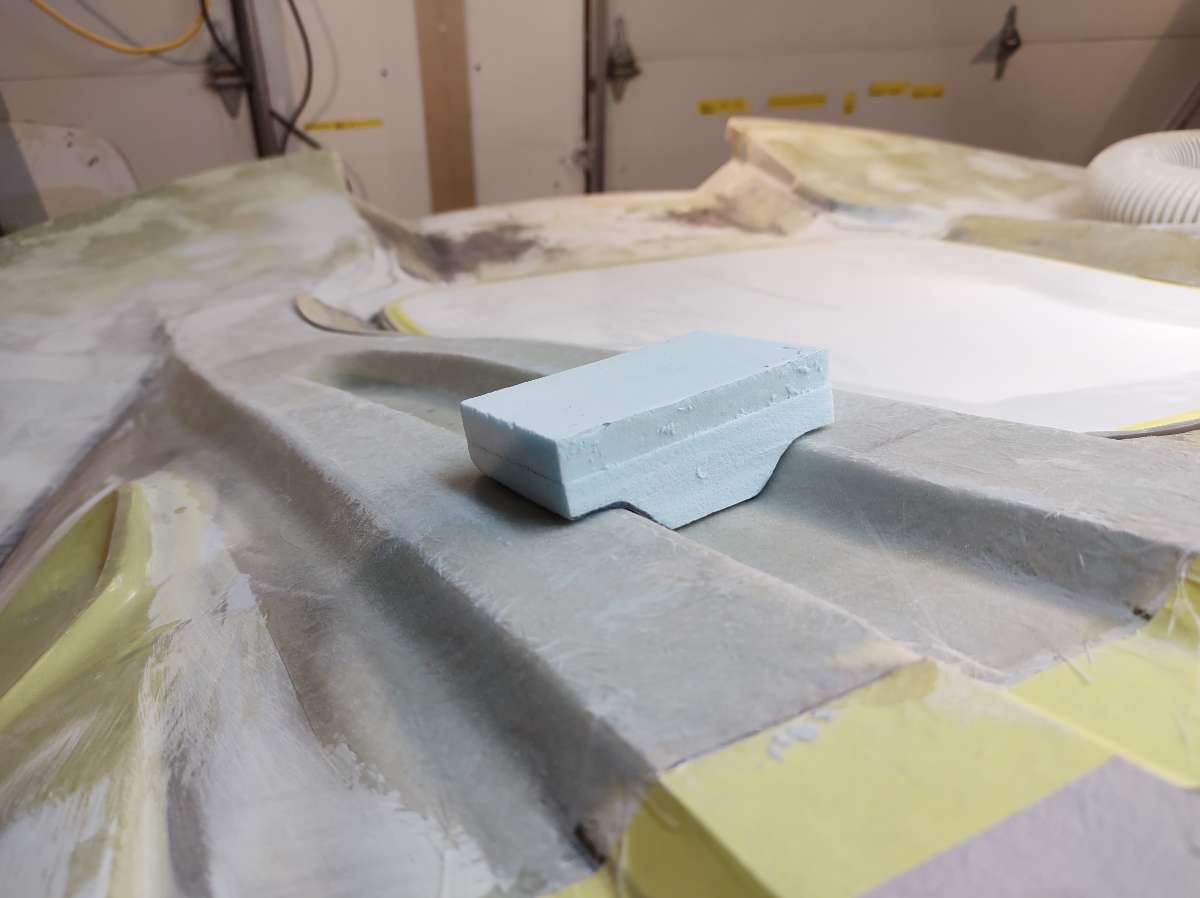
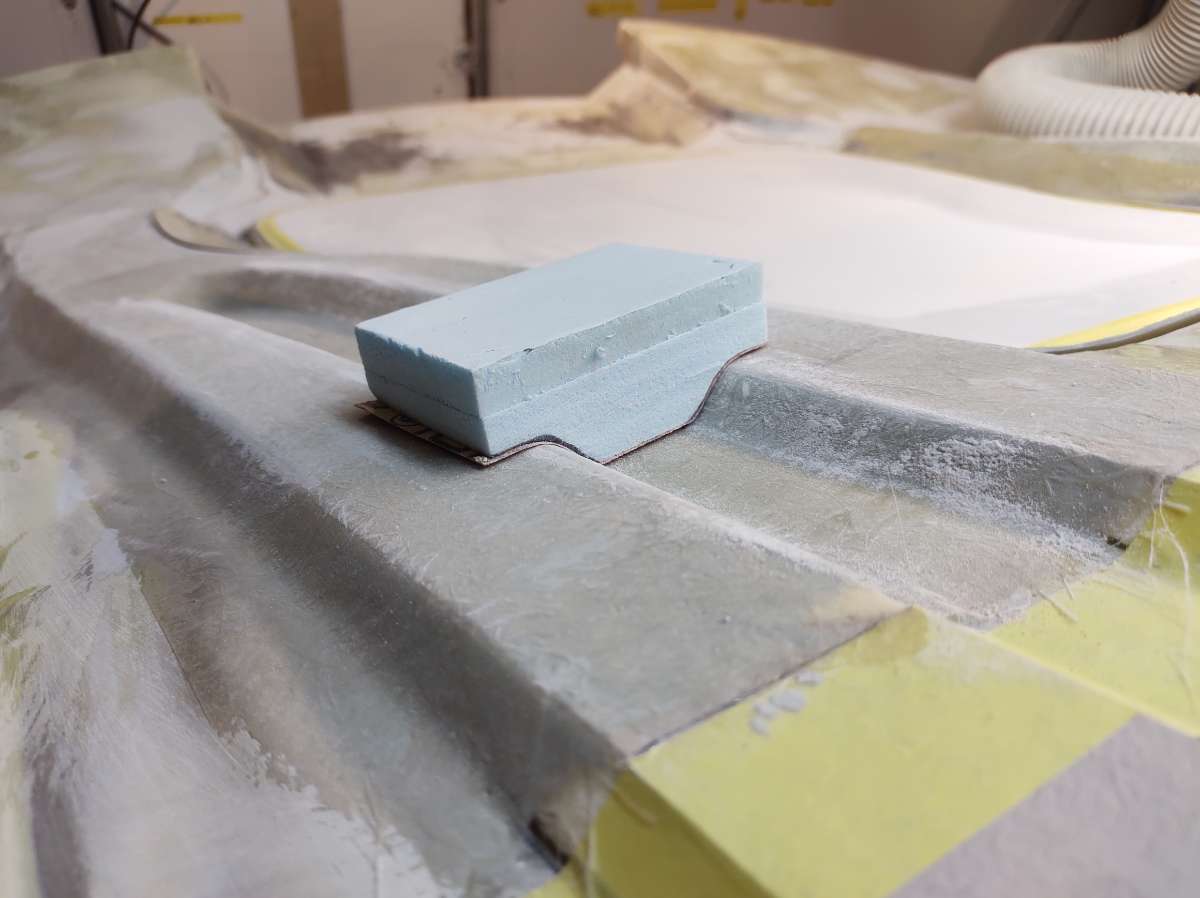
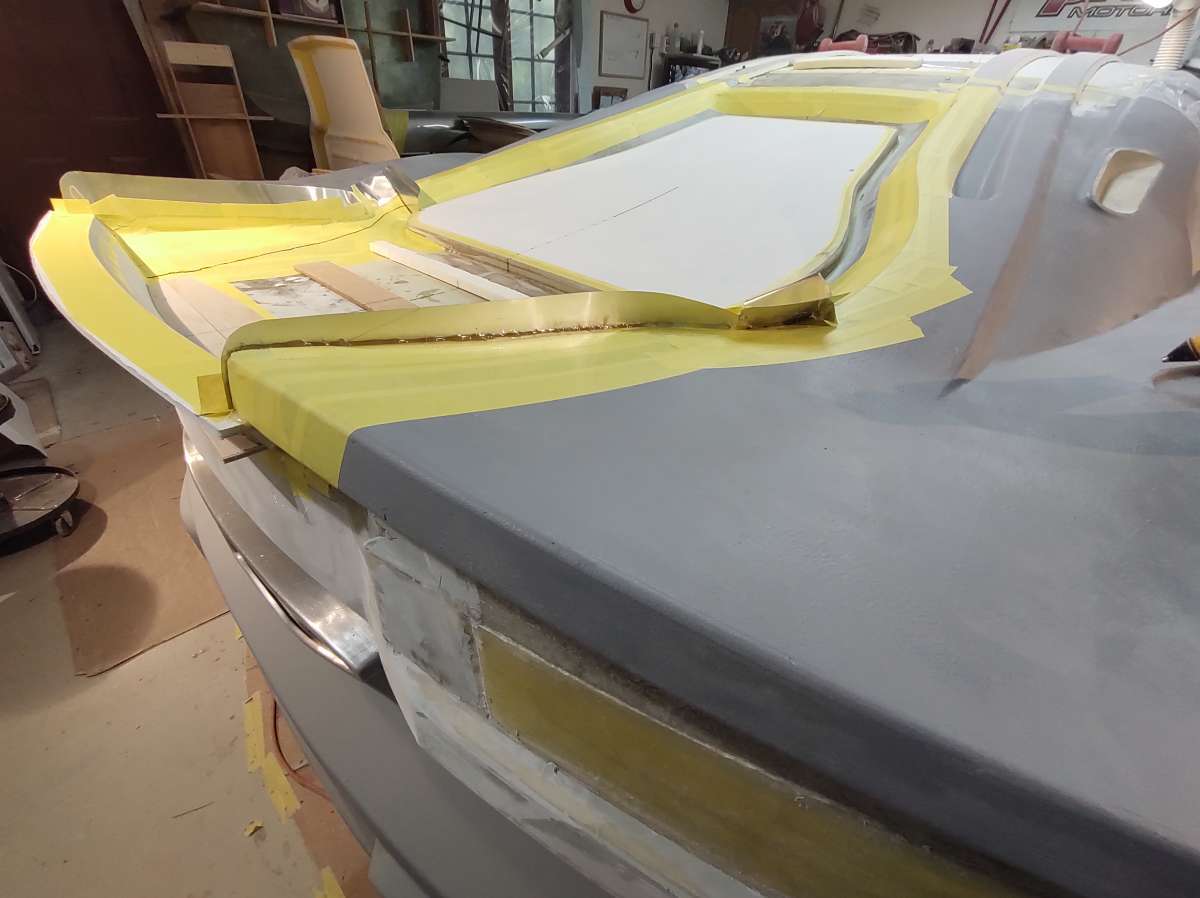
next is to add the foam block which will be the pocket for the hinge
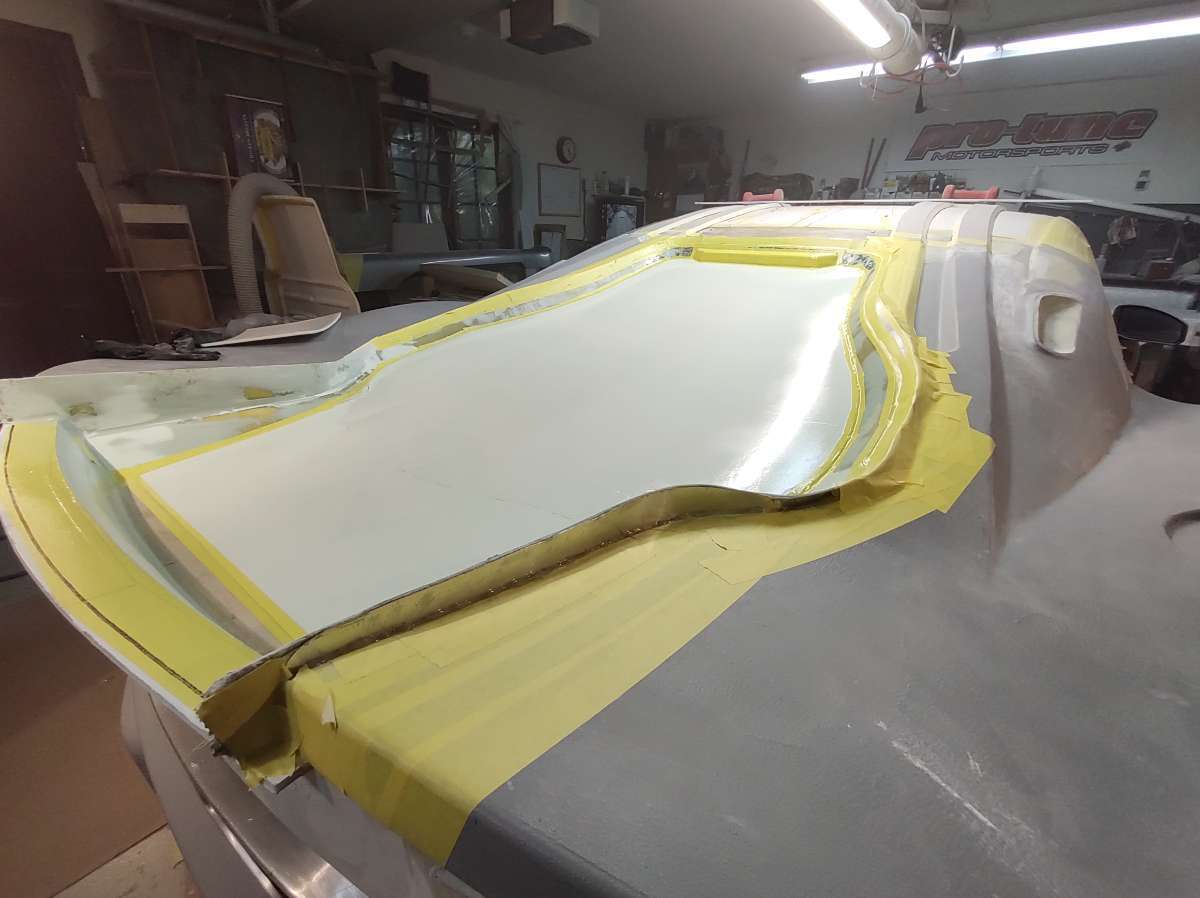
I am kind of cheating here , normally you would glass over this and bodywork it etc before glassing , but I am under the gun to get everything glassed now that can't be done off the car , because of the move and it will be easier to bodywork from the other side and off the car . so I am just taping the foam and the edge seams , kind of an experiment , hope it works !!!! what could go wrong lol
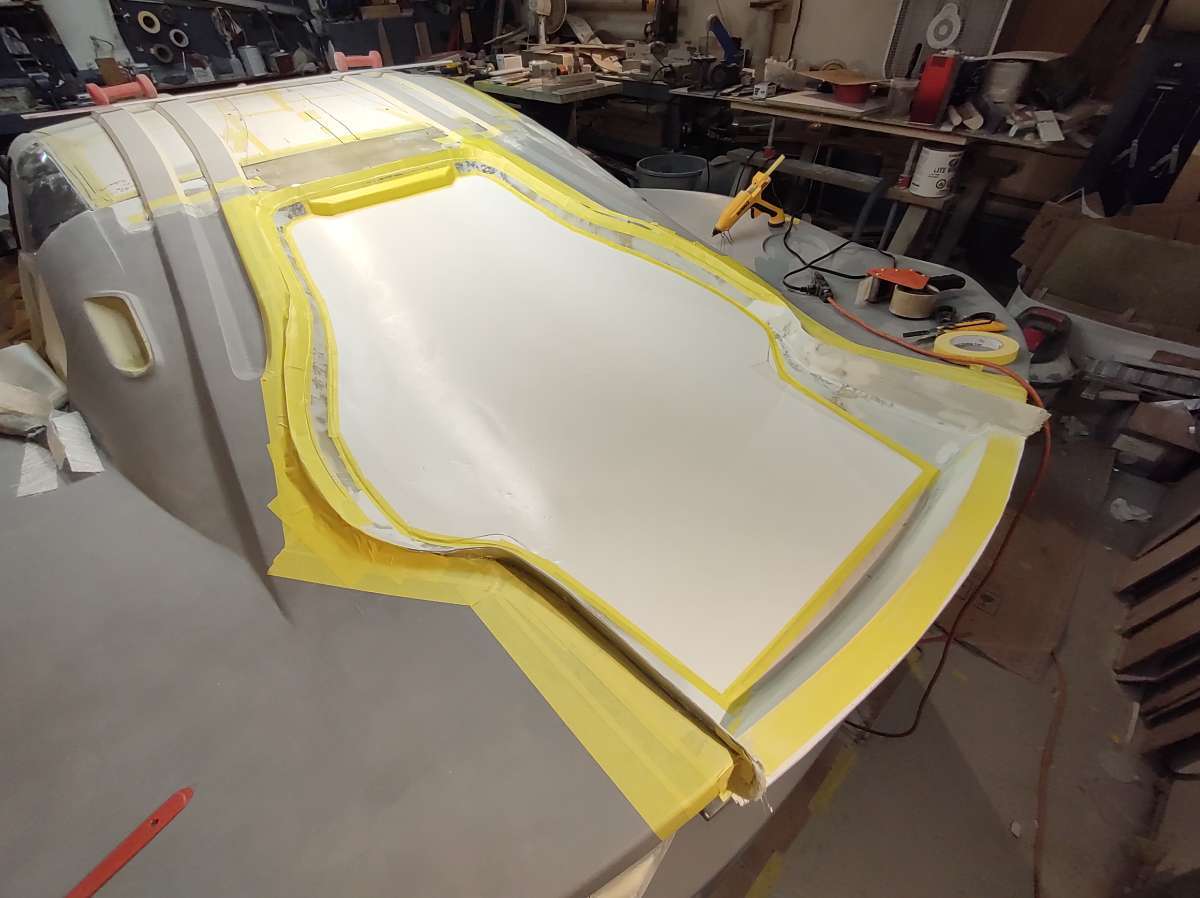
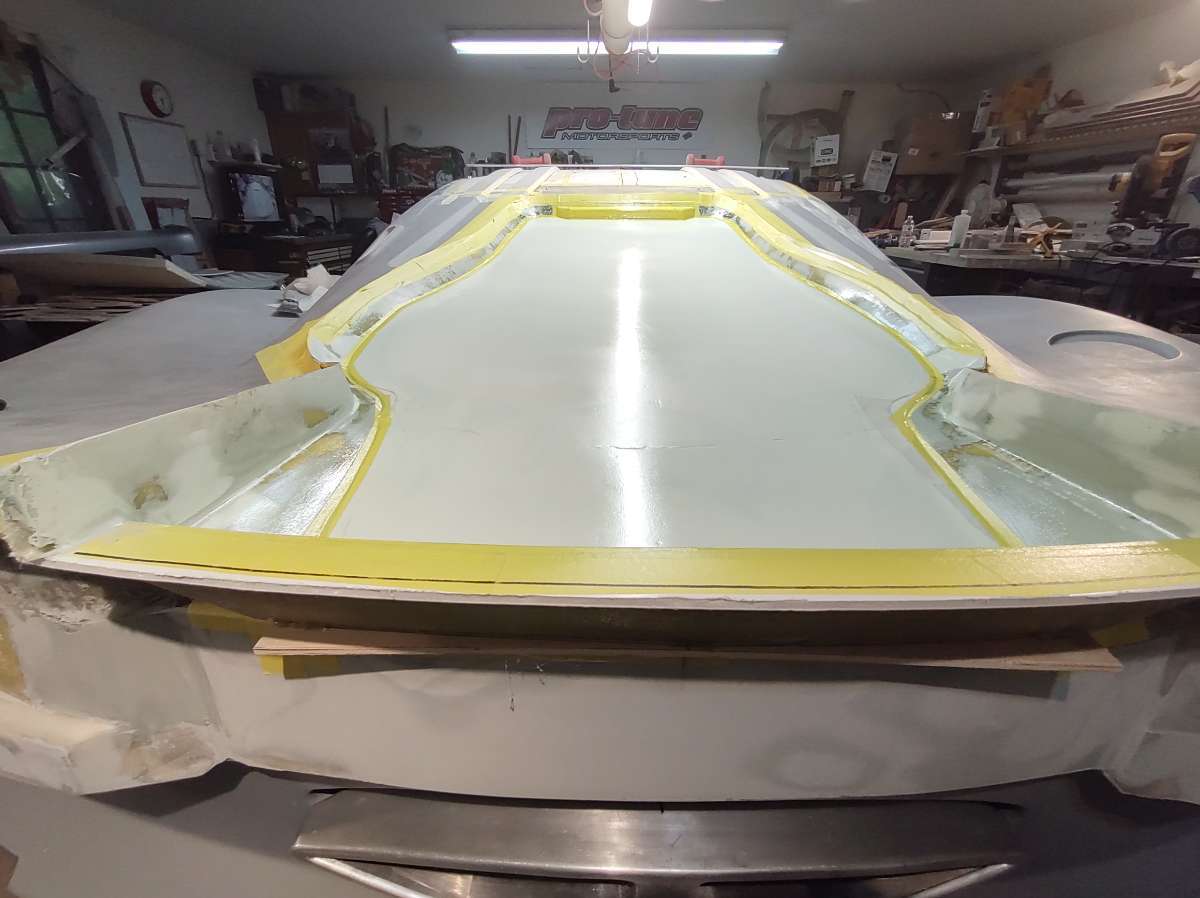
next is a few coats of wax and spray with PVA mold release
cut all the material before getting sticky
a few coats of PVA
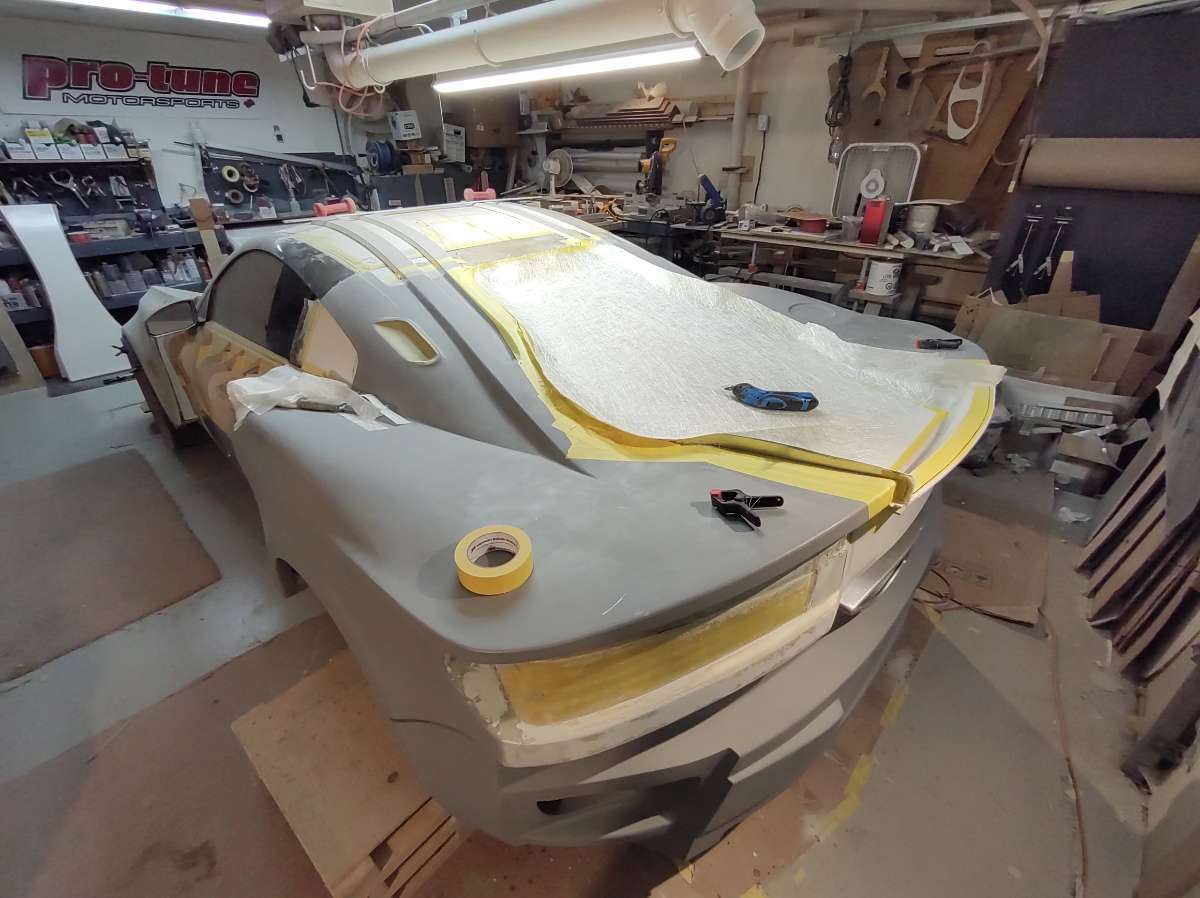
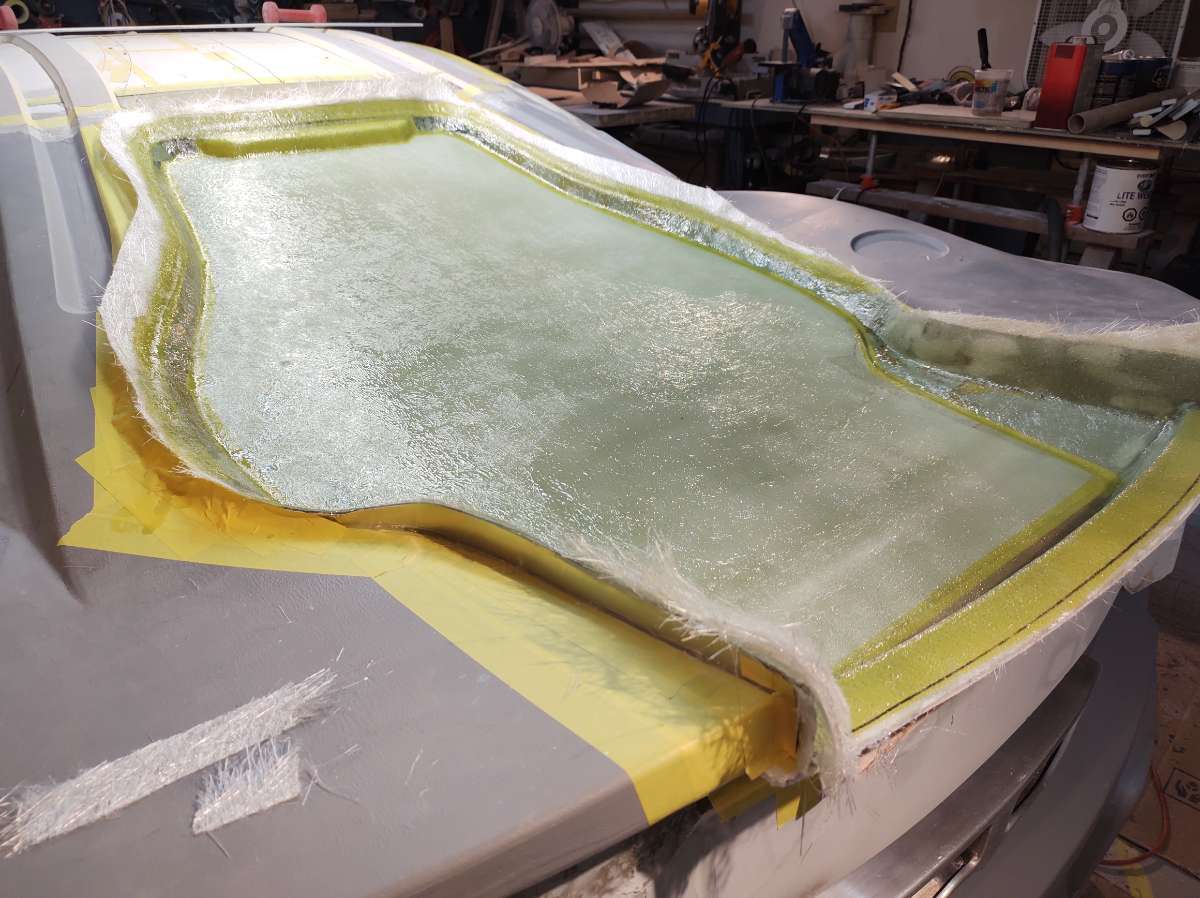
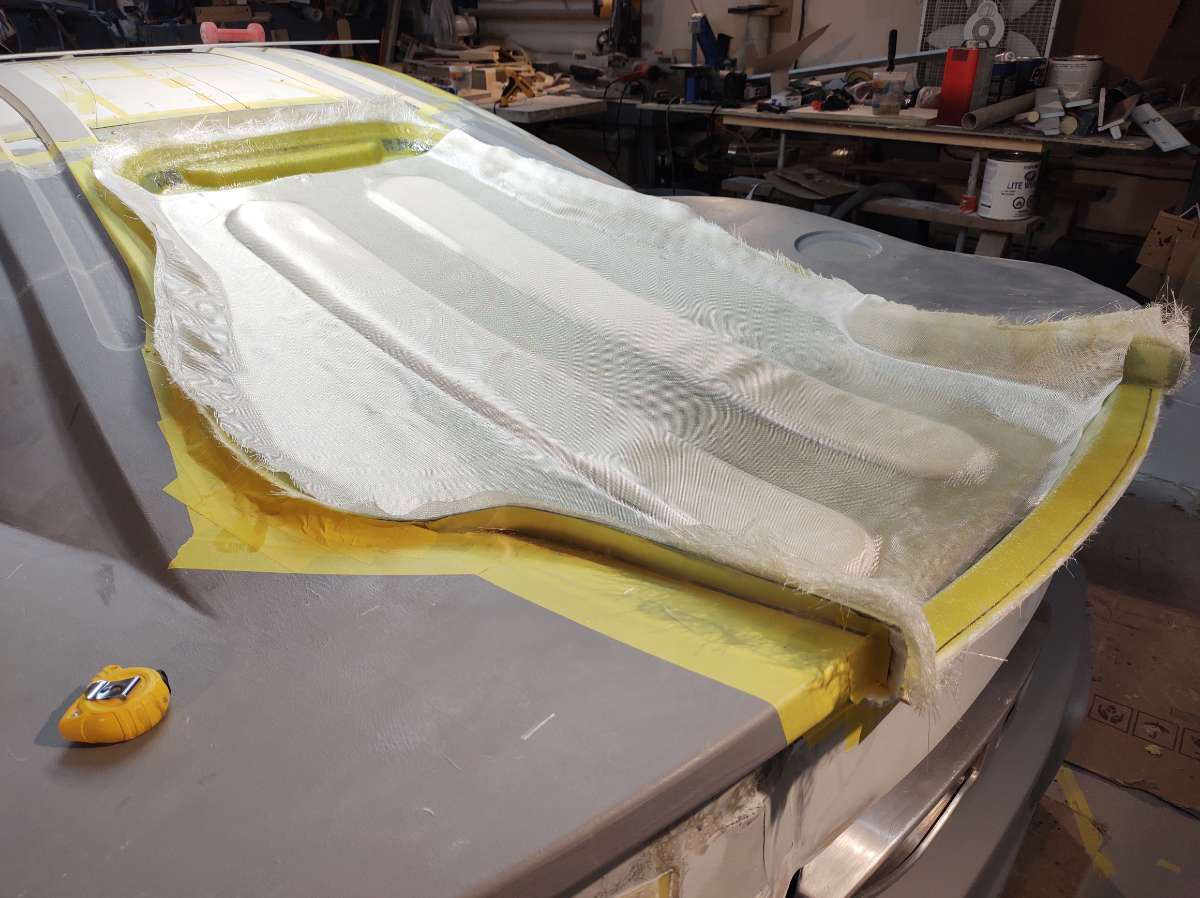
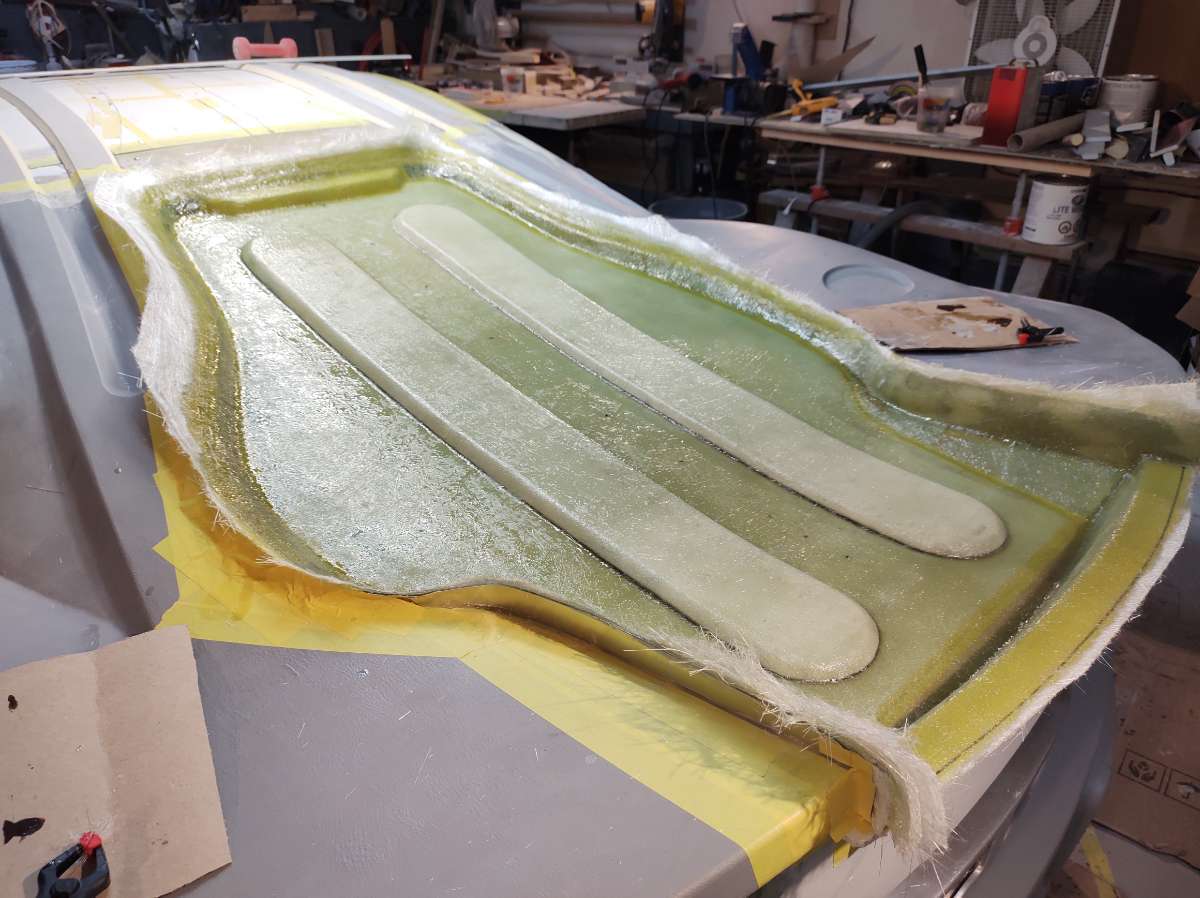
And we are ready for a few layers of glass
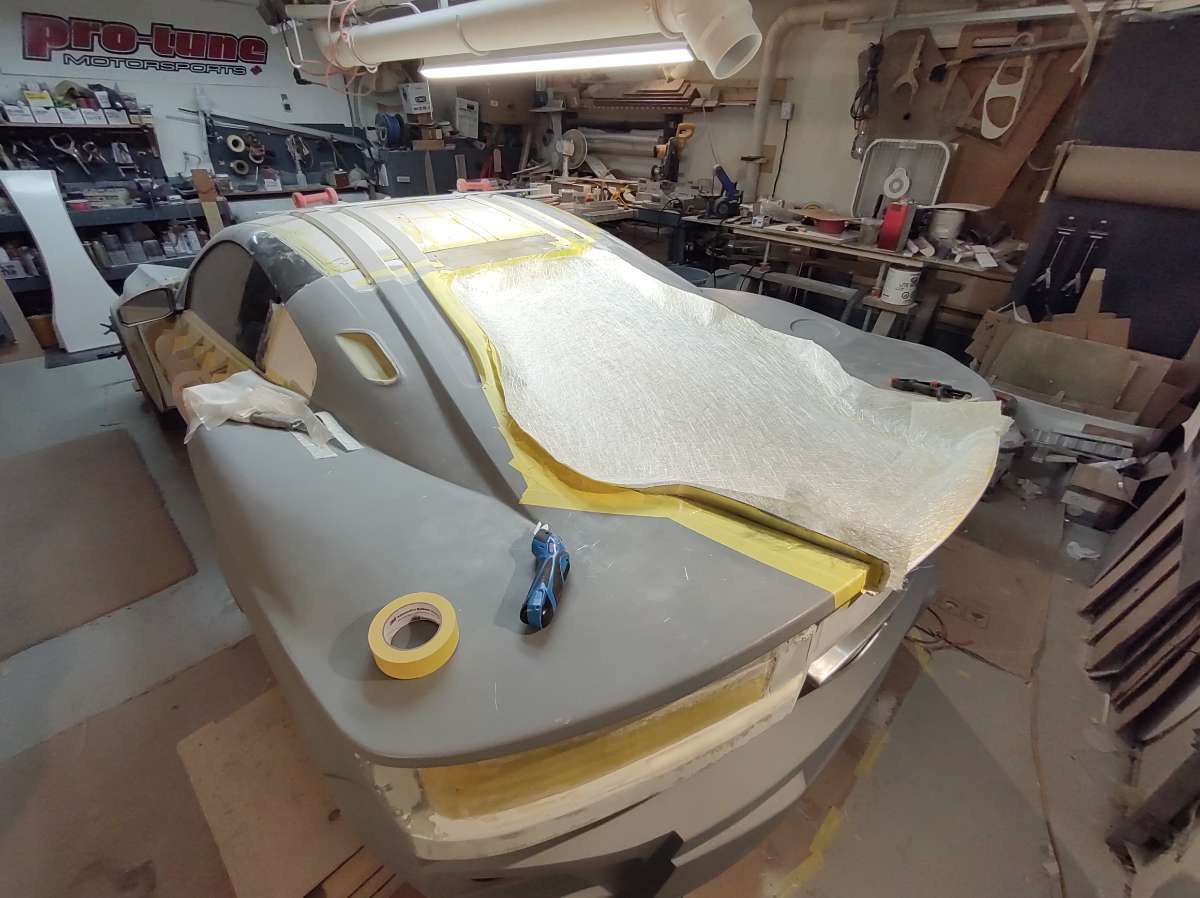
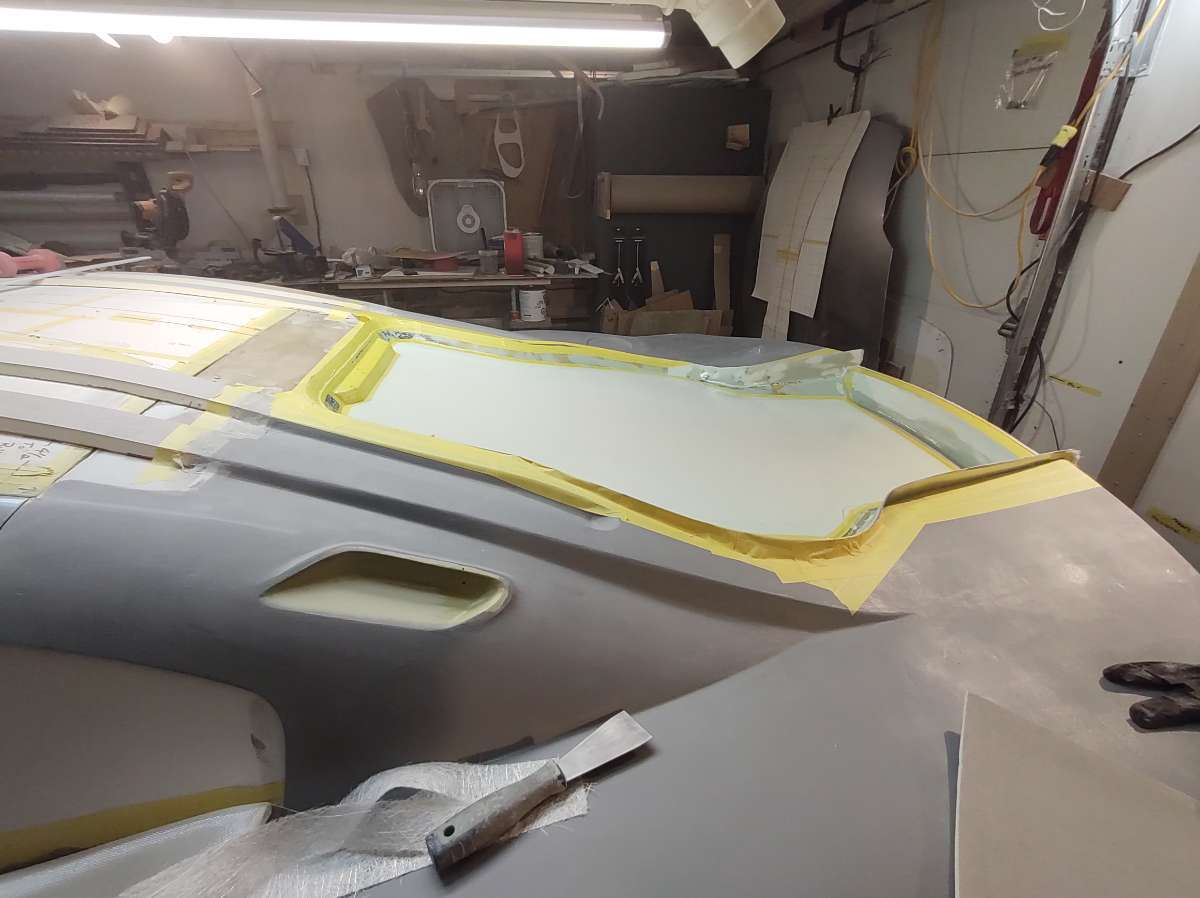
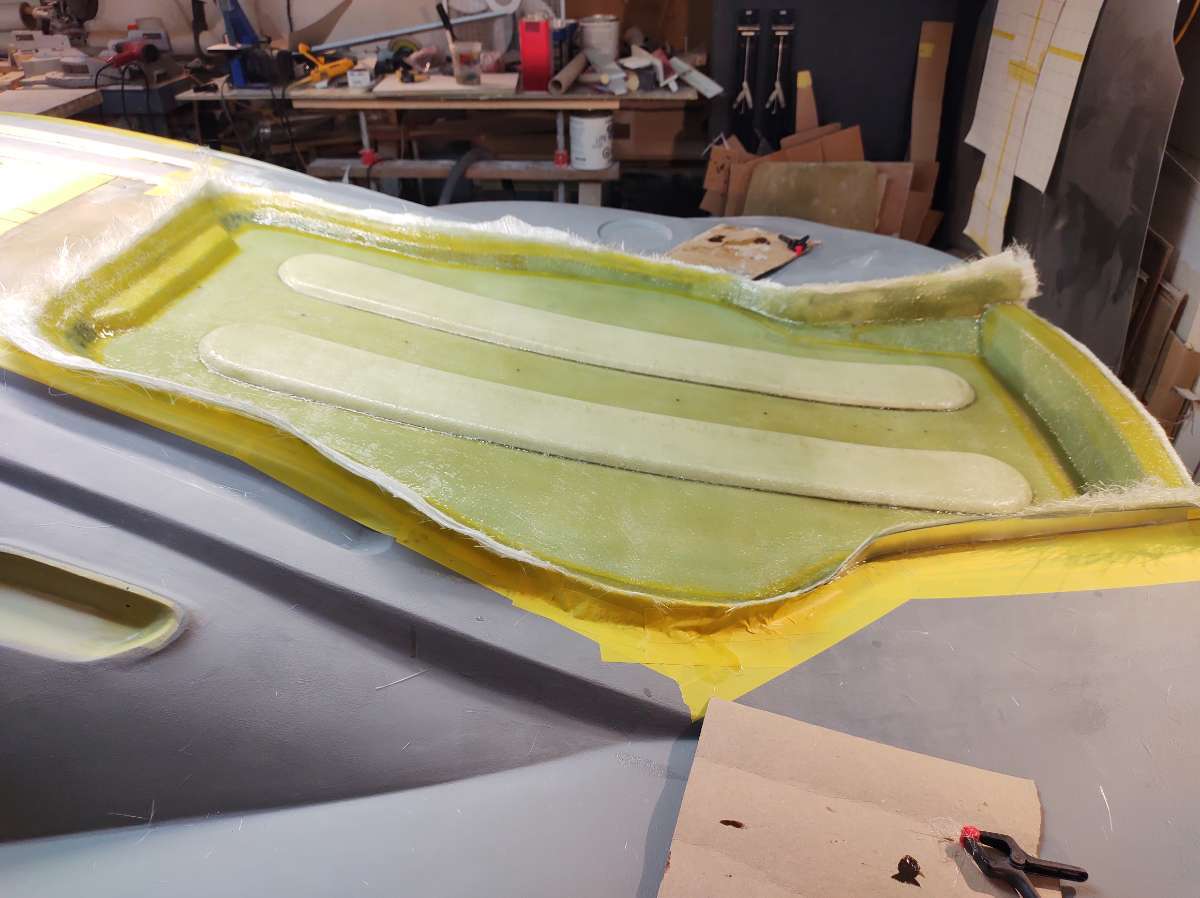
This is stage one of the glass
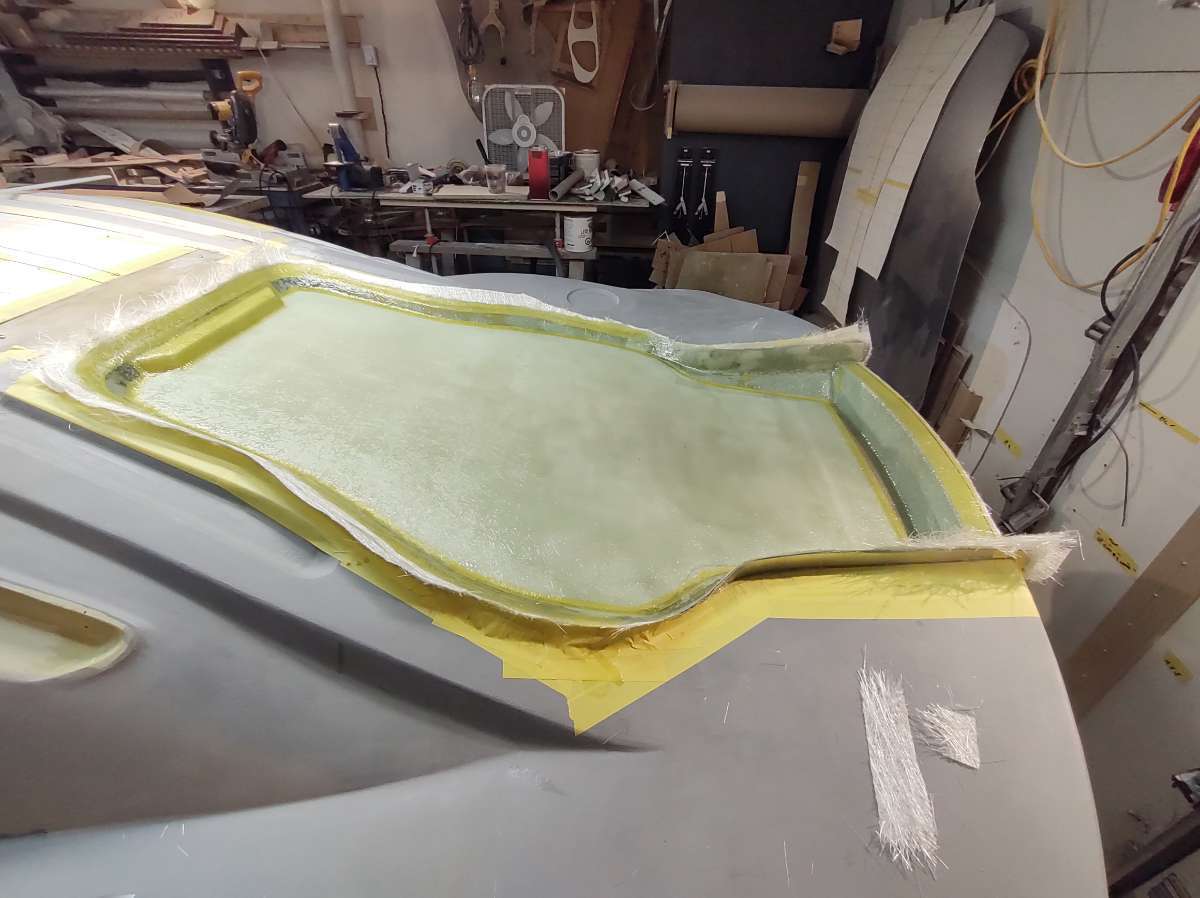
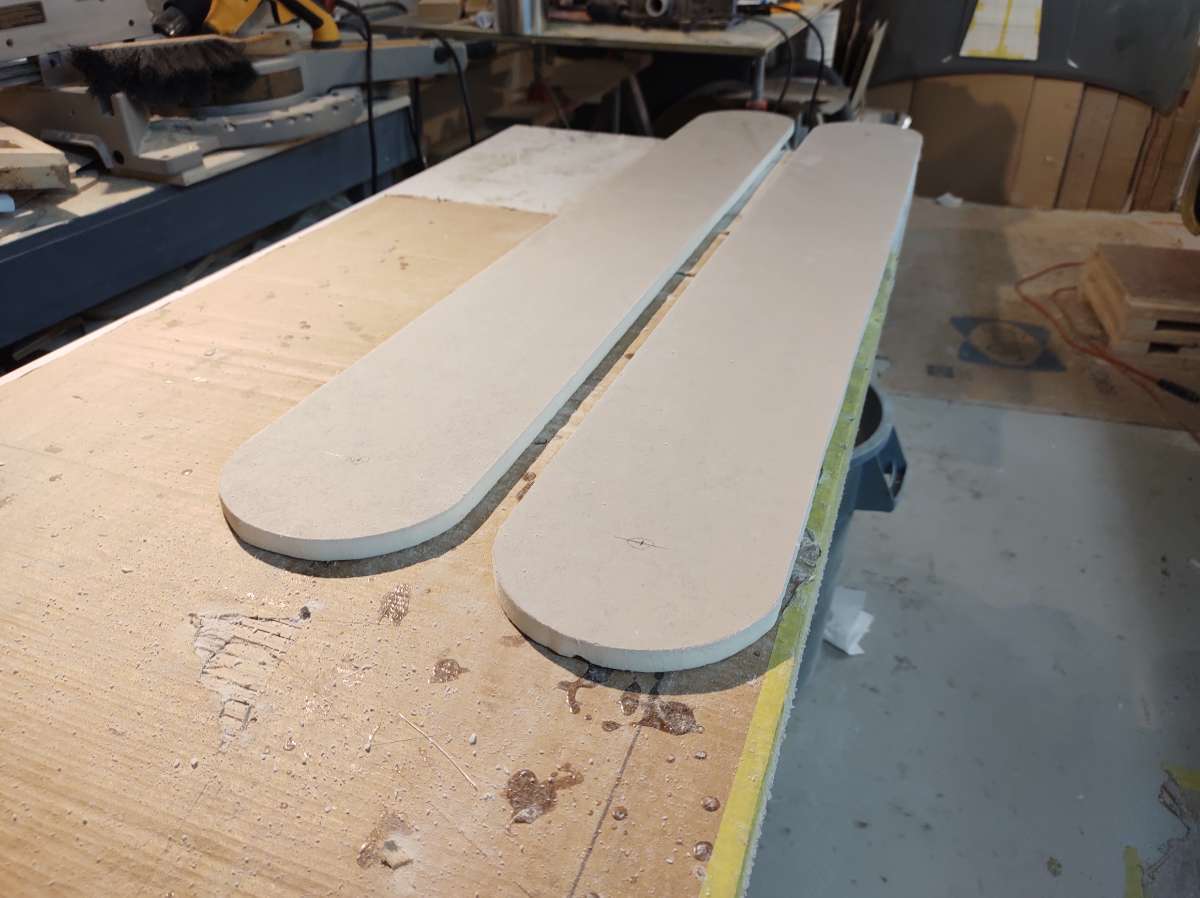
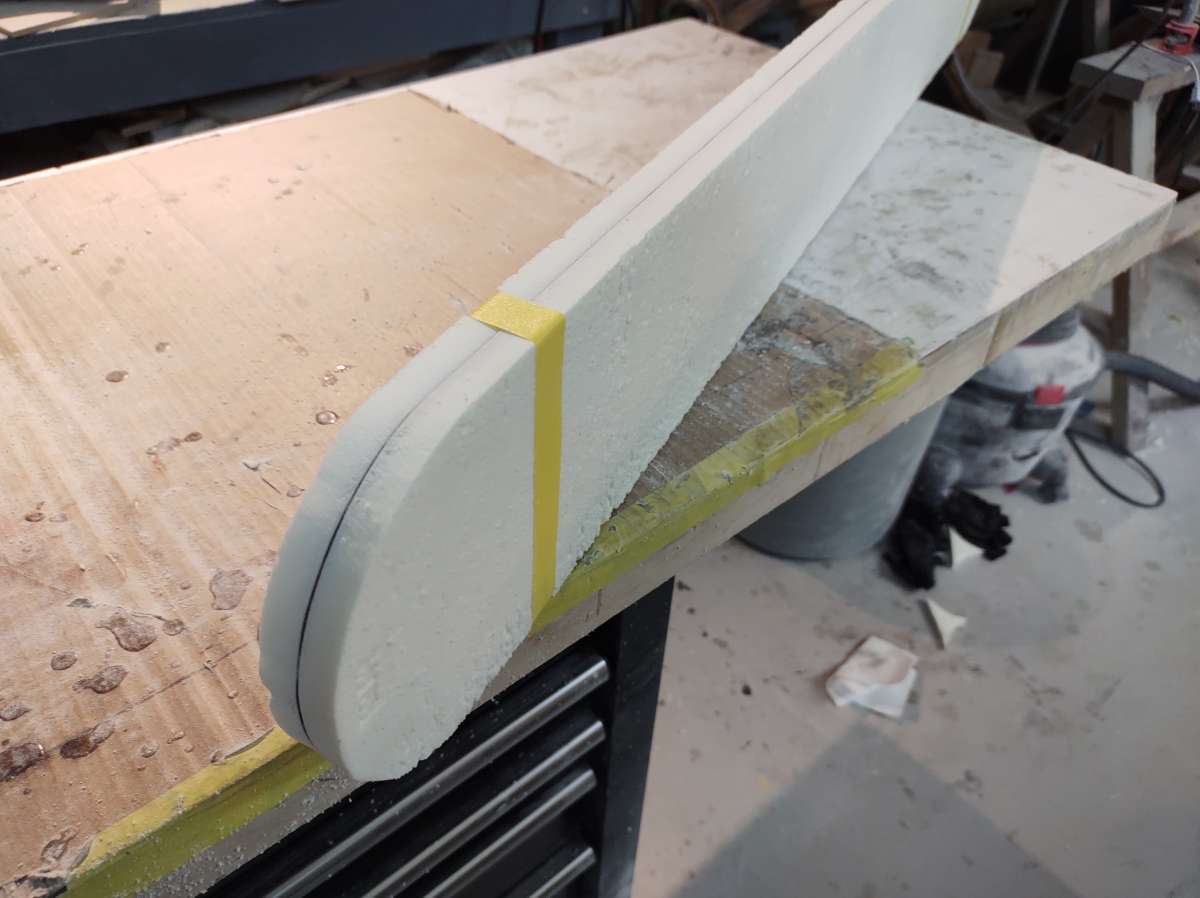
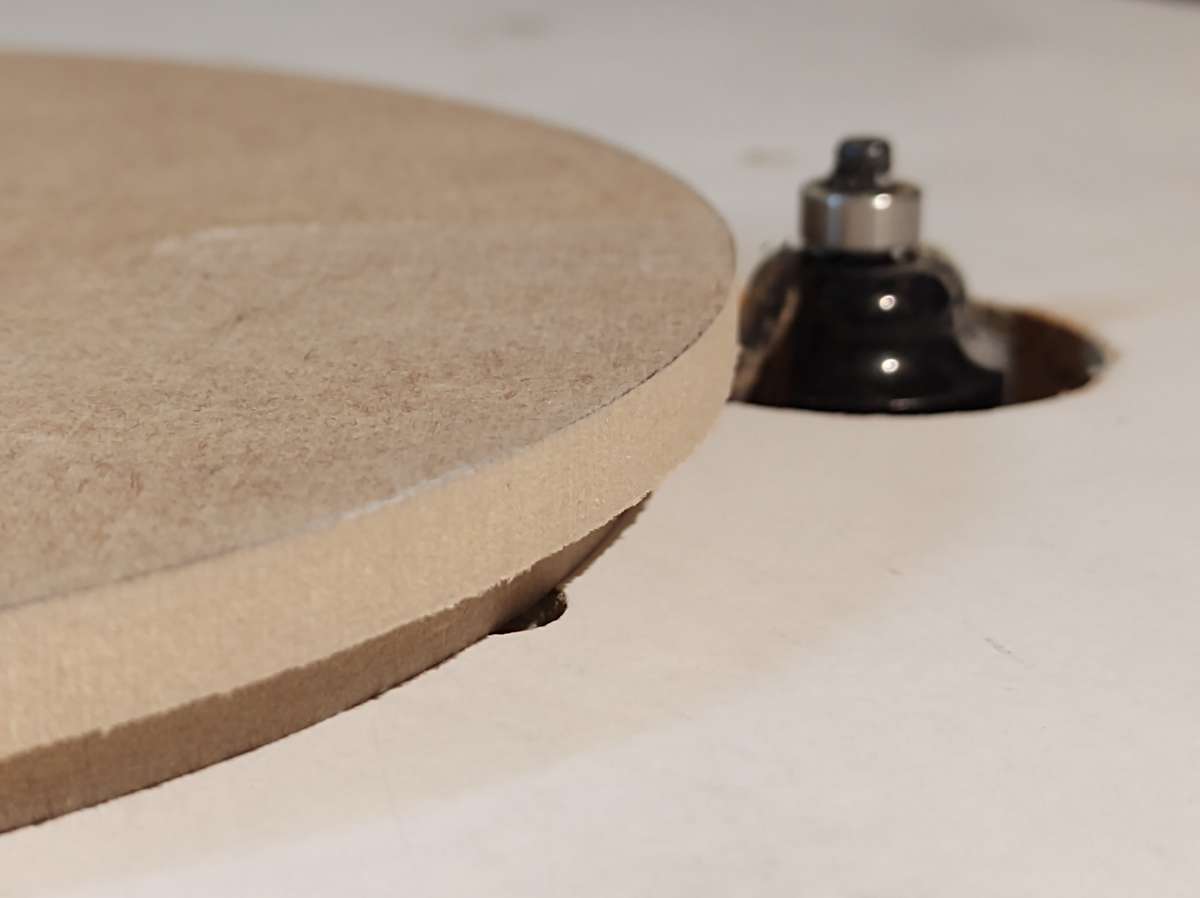
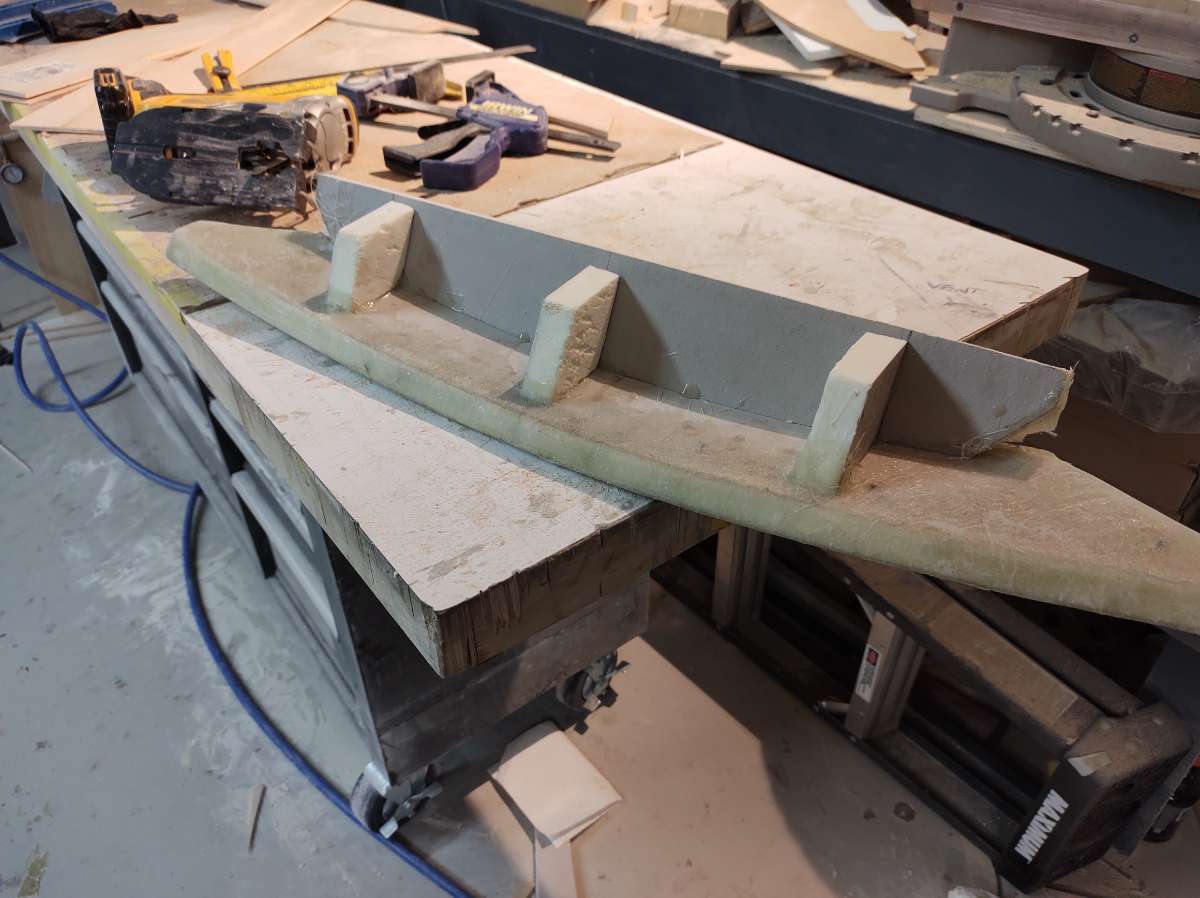
Ok looking good , on to stage two some stiffeners to keep the base in place and firm for body working the other side , going to make them out of foam with a 45 degree edge that's easy for the glass to go over
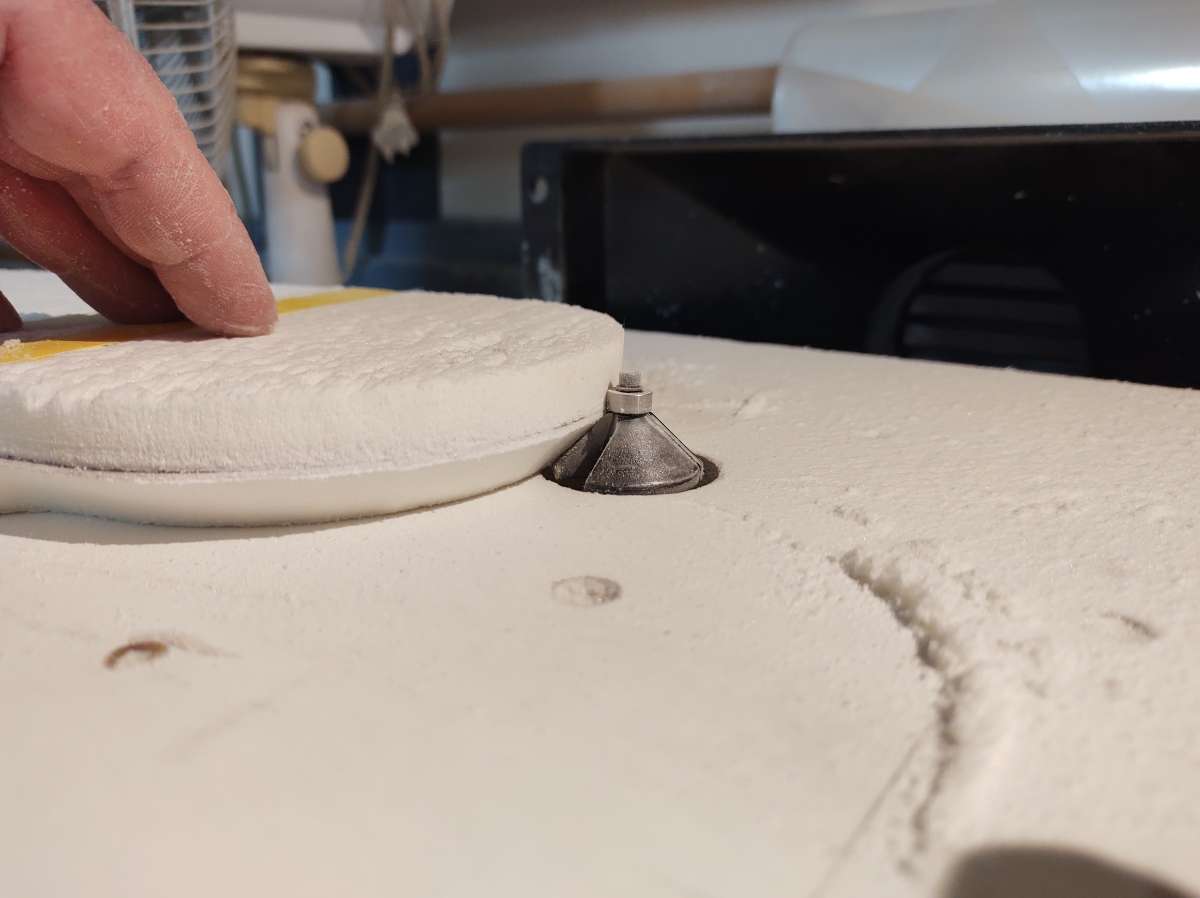
if I tape them back to back I can bevel them in the router table , the thin edge of fiber paper on the foam can run on the bearing , still tricky to do
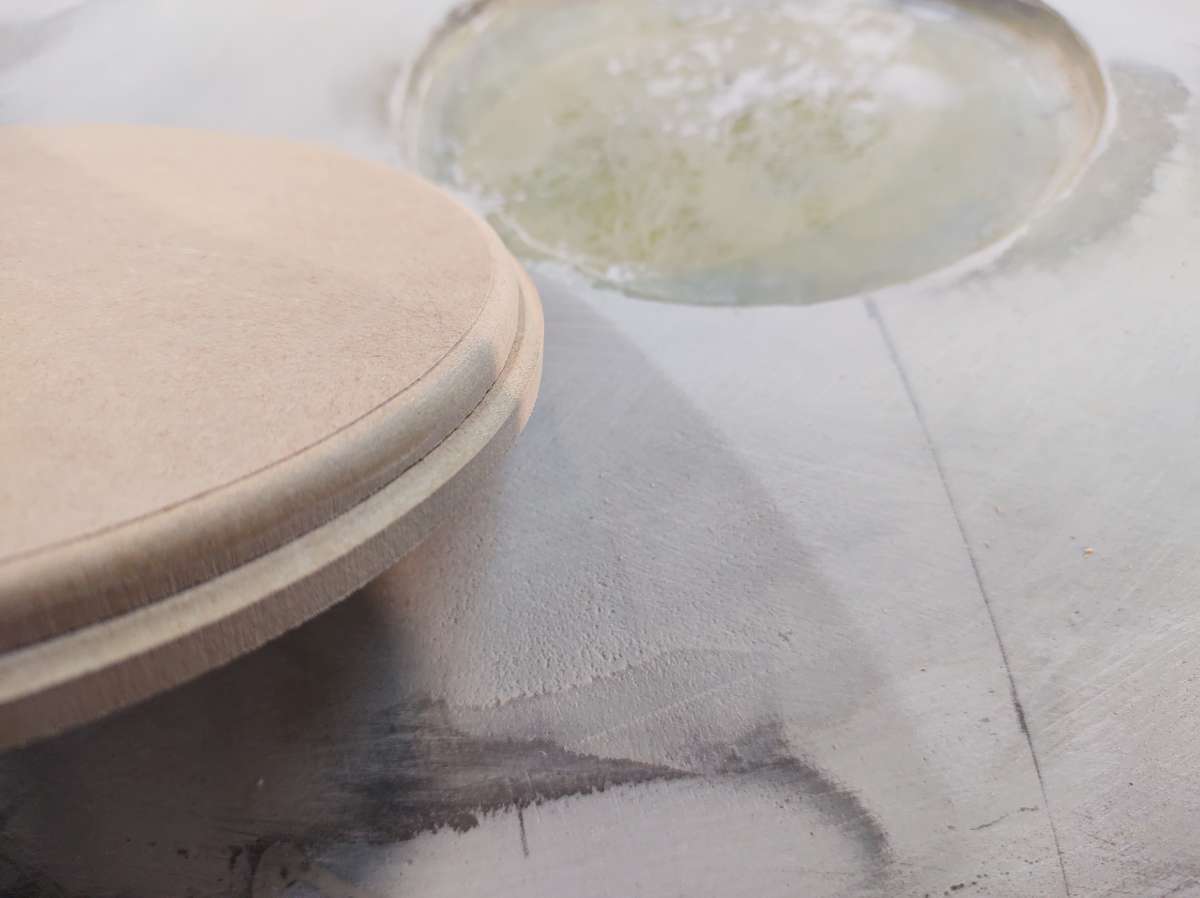
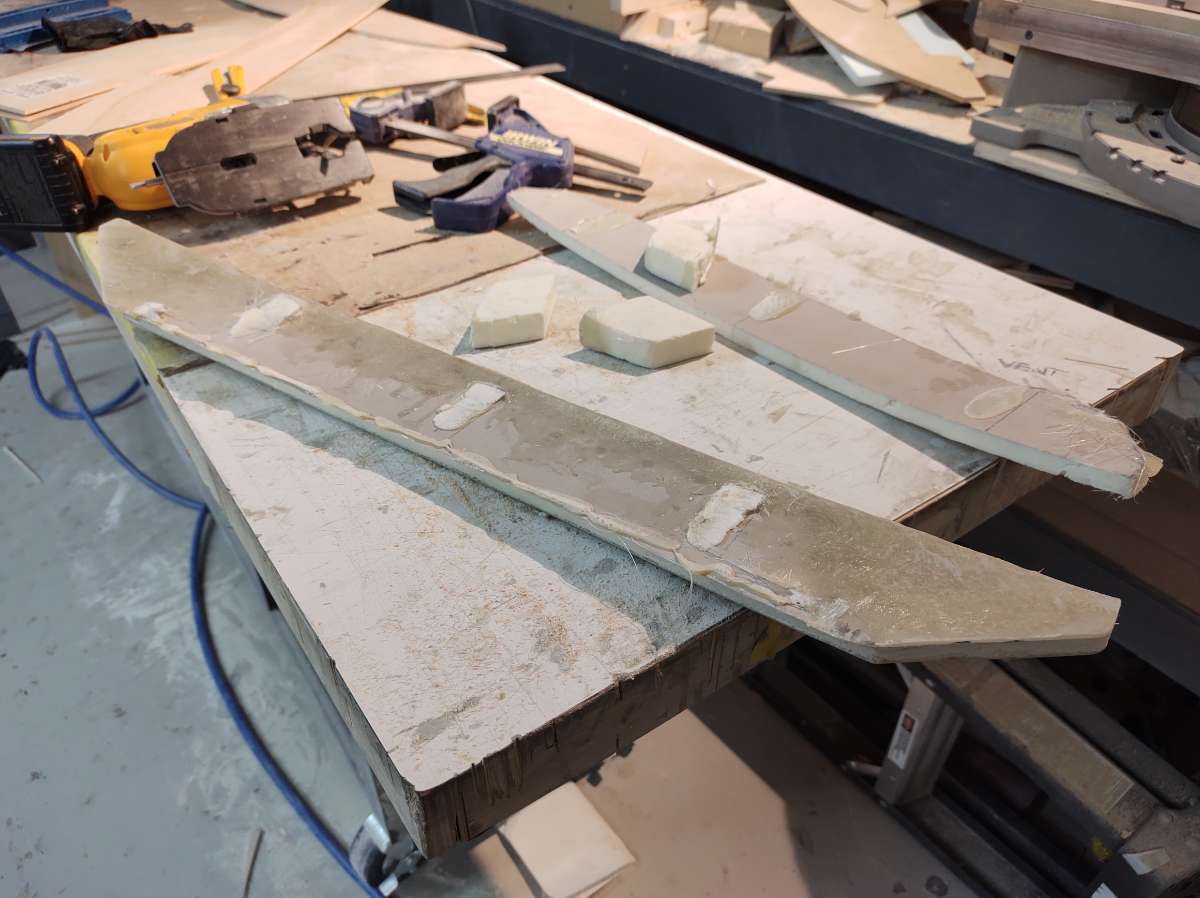
a quick sand and they are ready
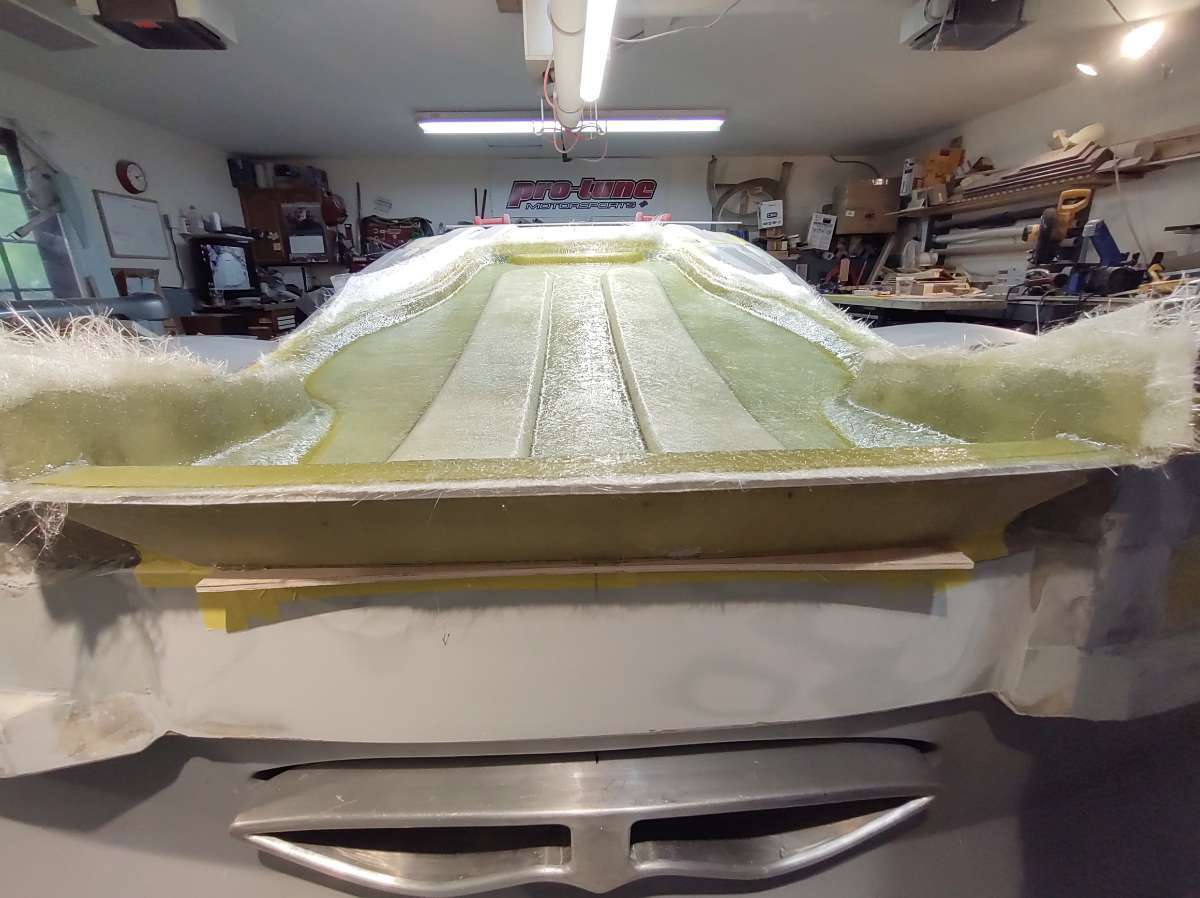
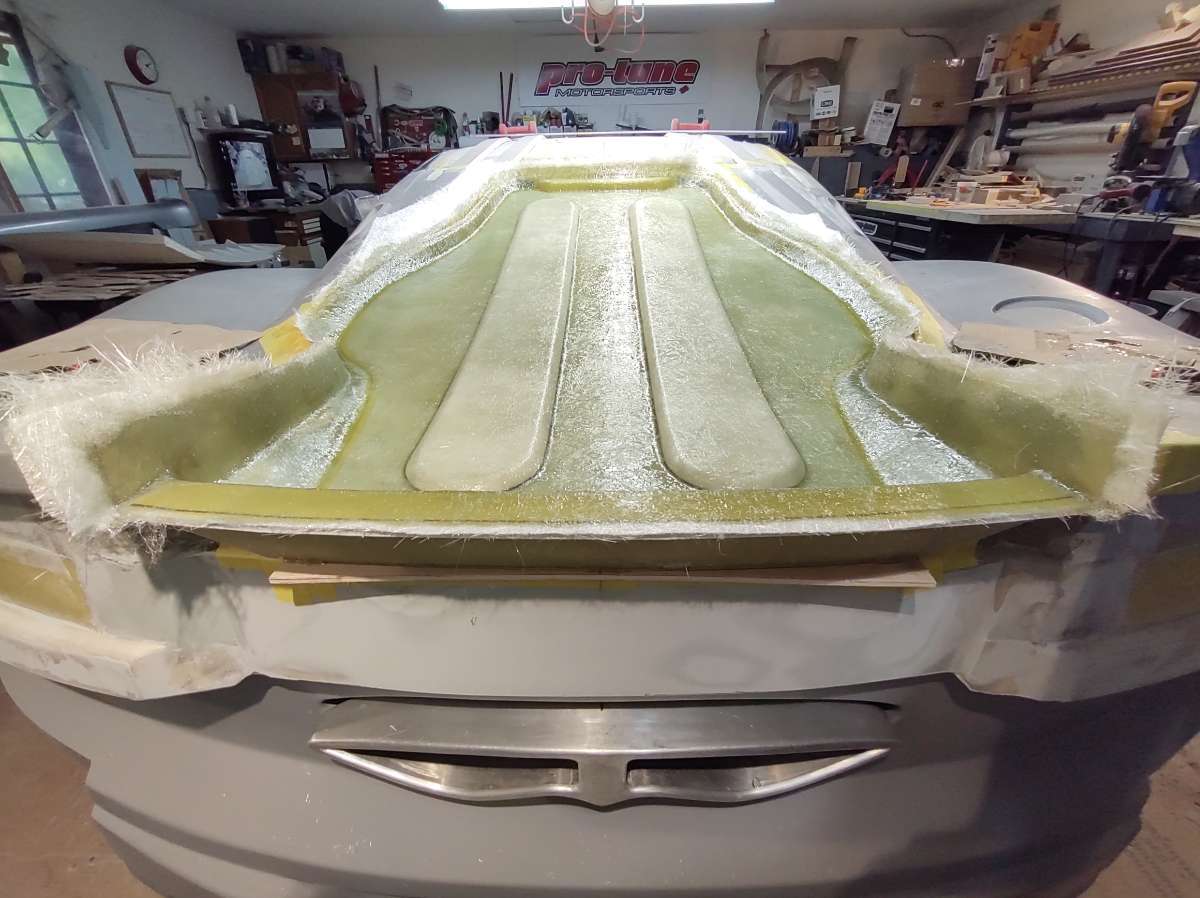
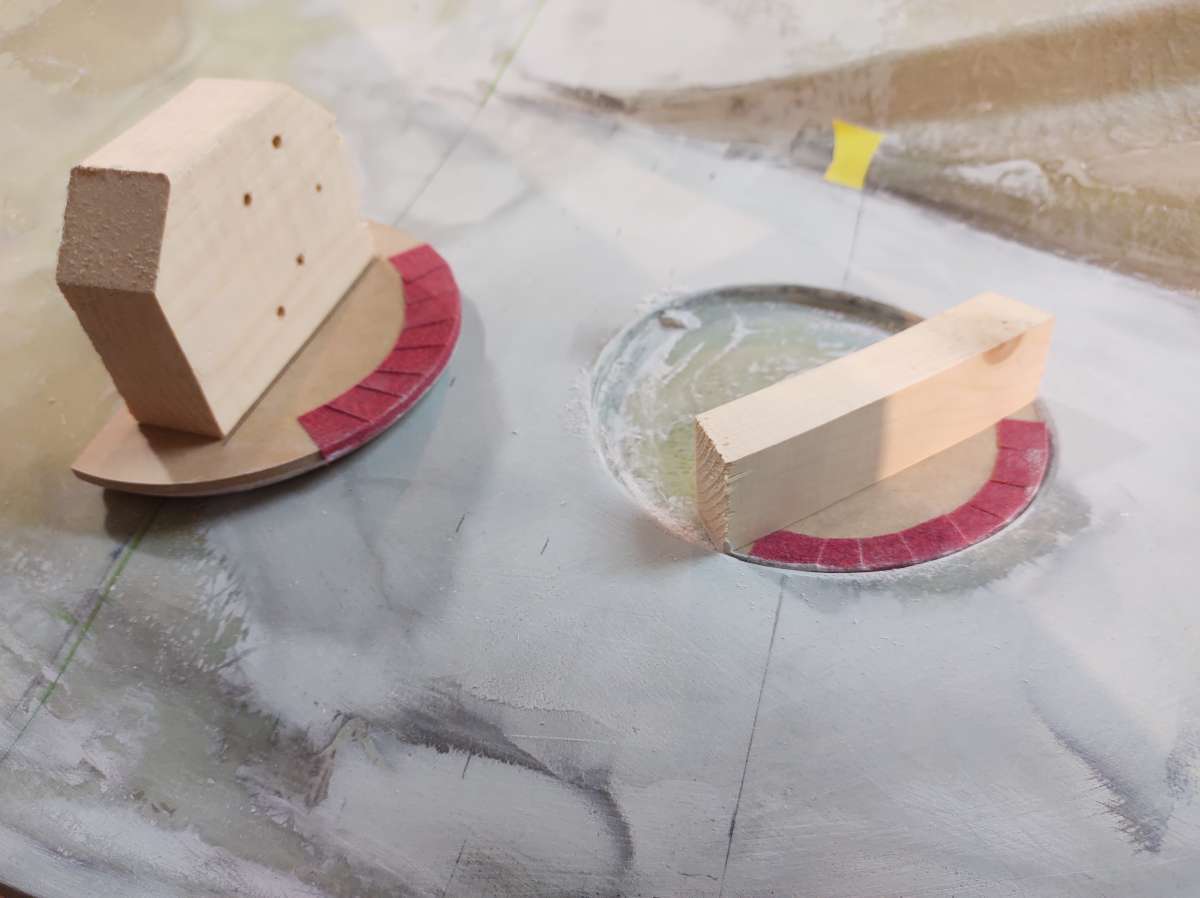
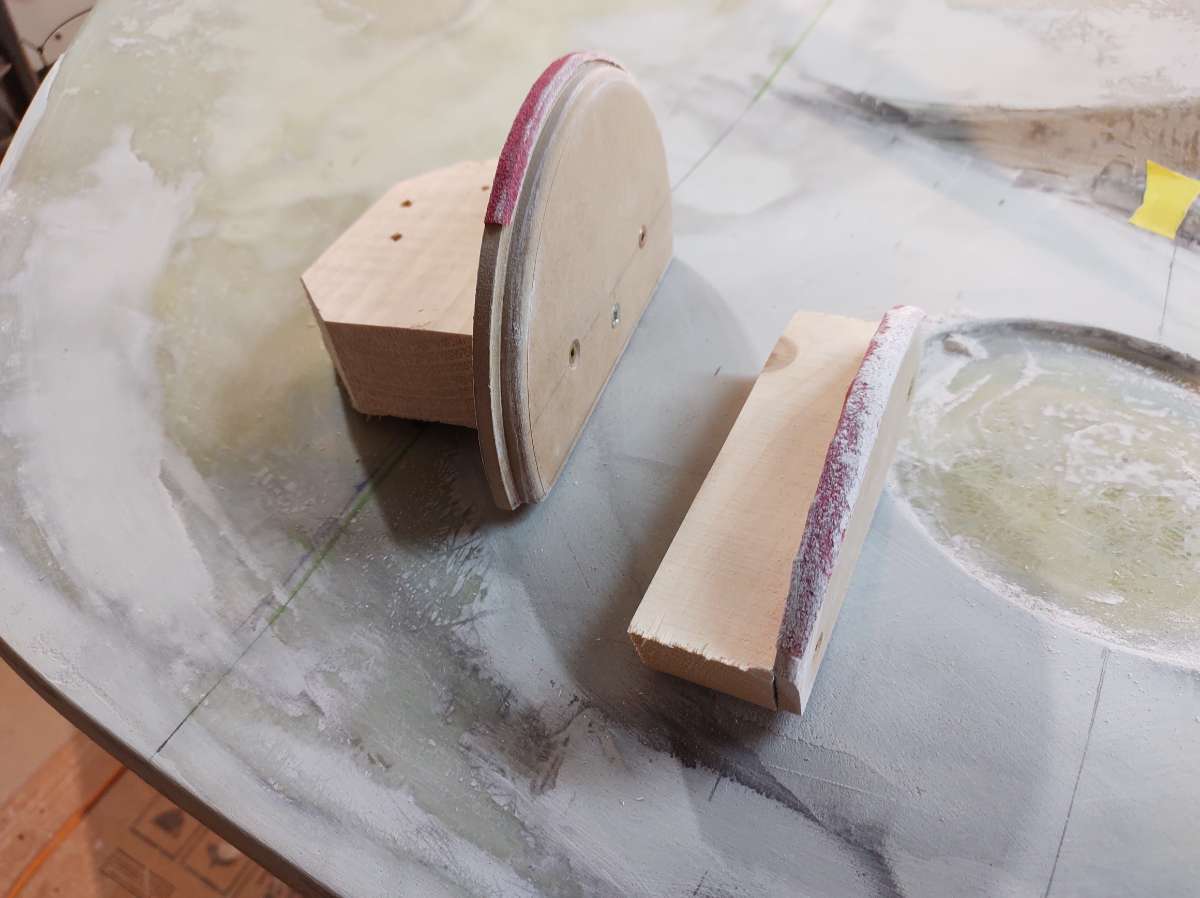
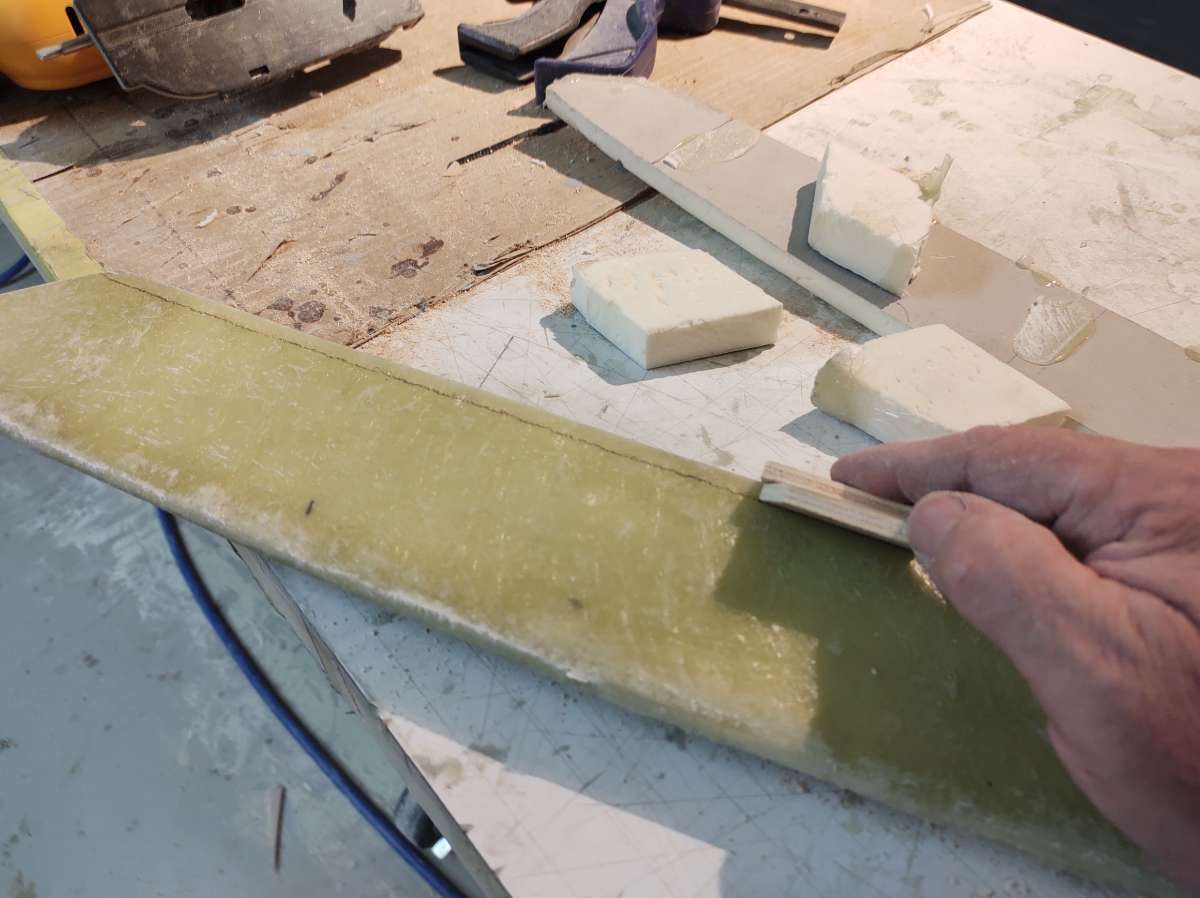
next is to lay them out and glue them down
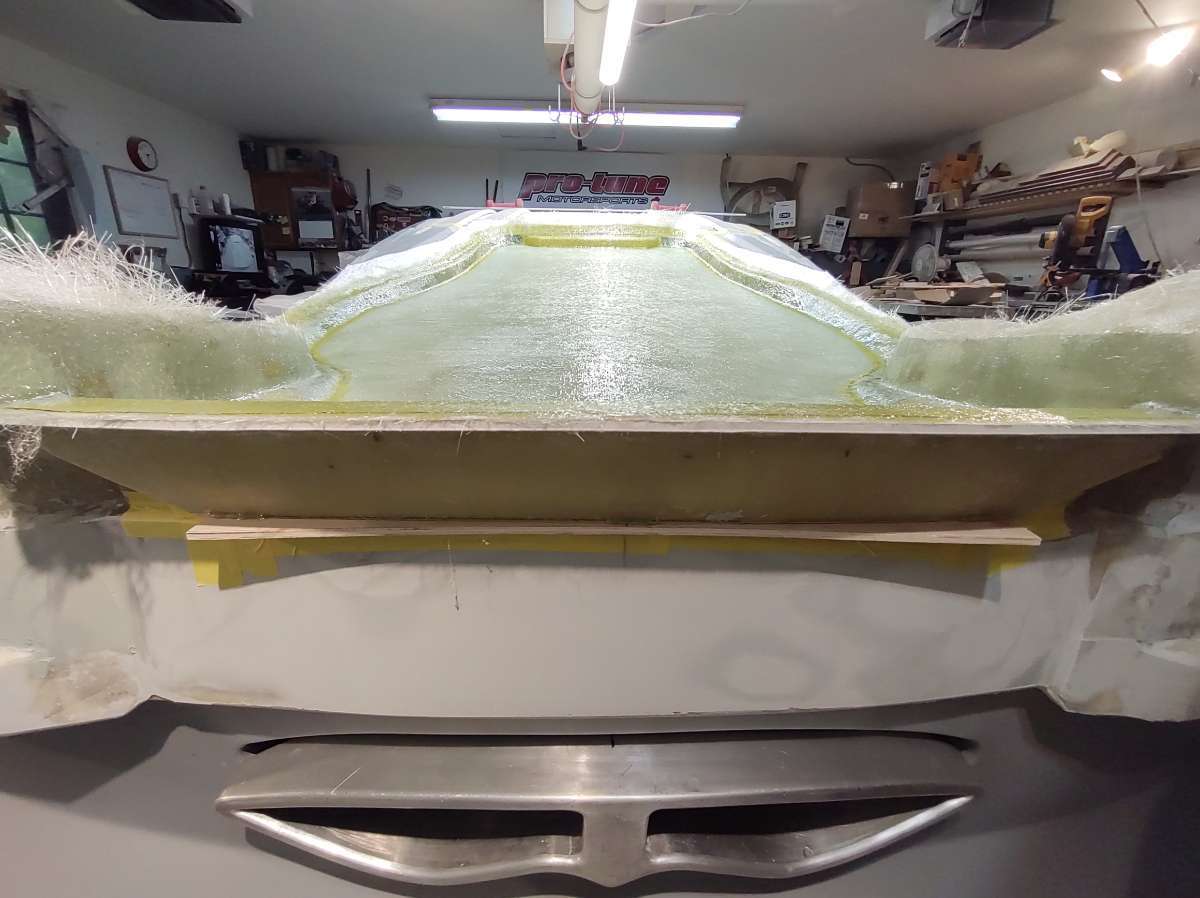
next is to prep some material and glass them
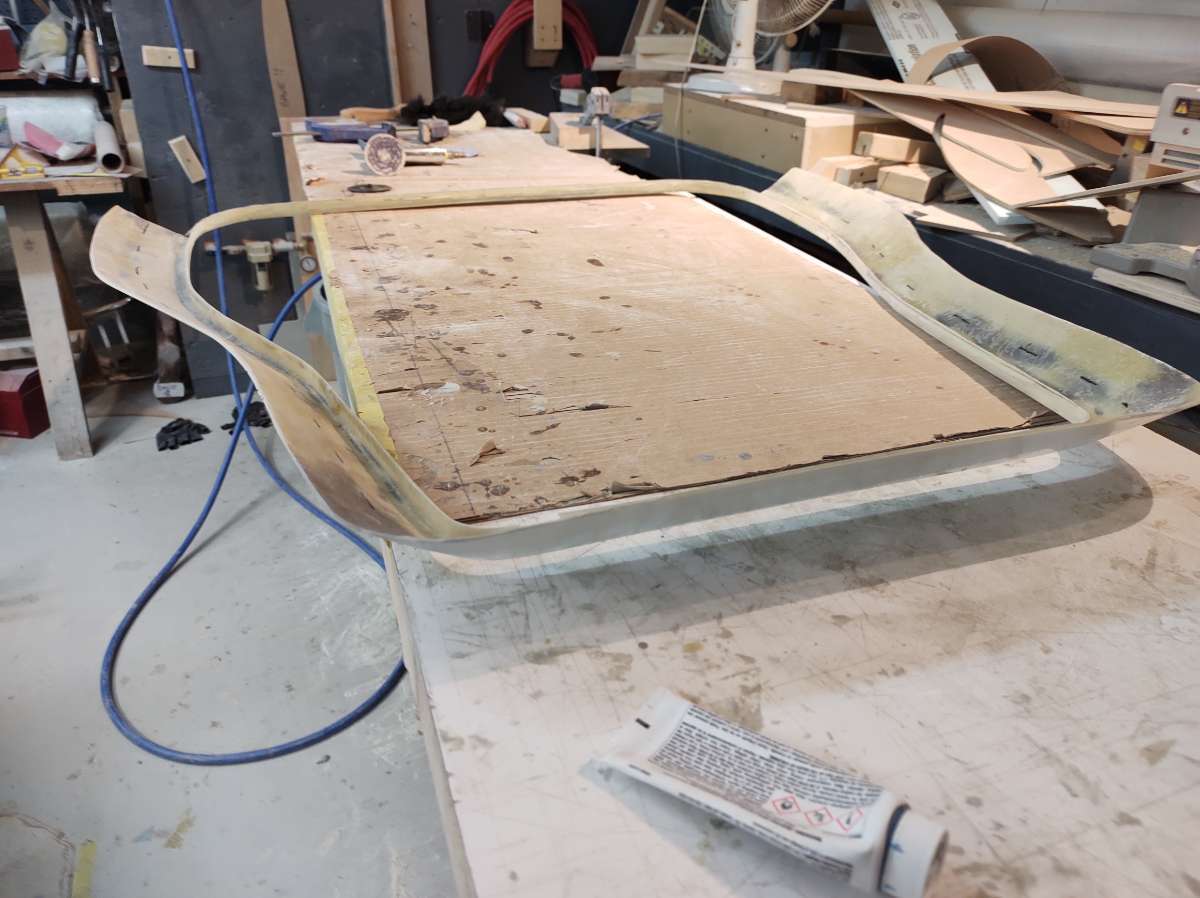
Well I am happy with how it turned out , I know its probably a little boring but its all part of it .
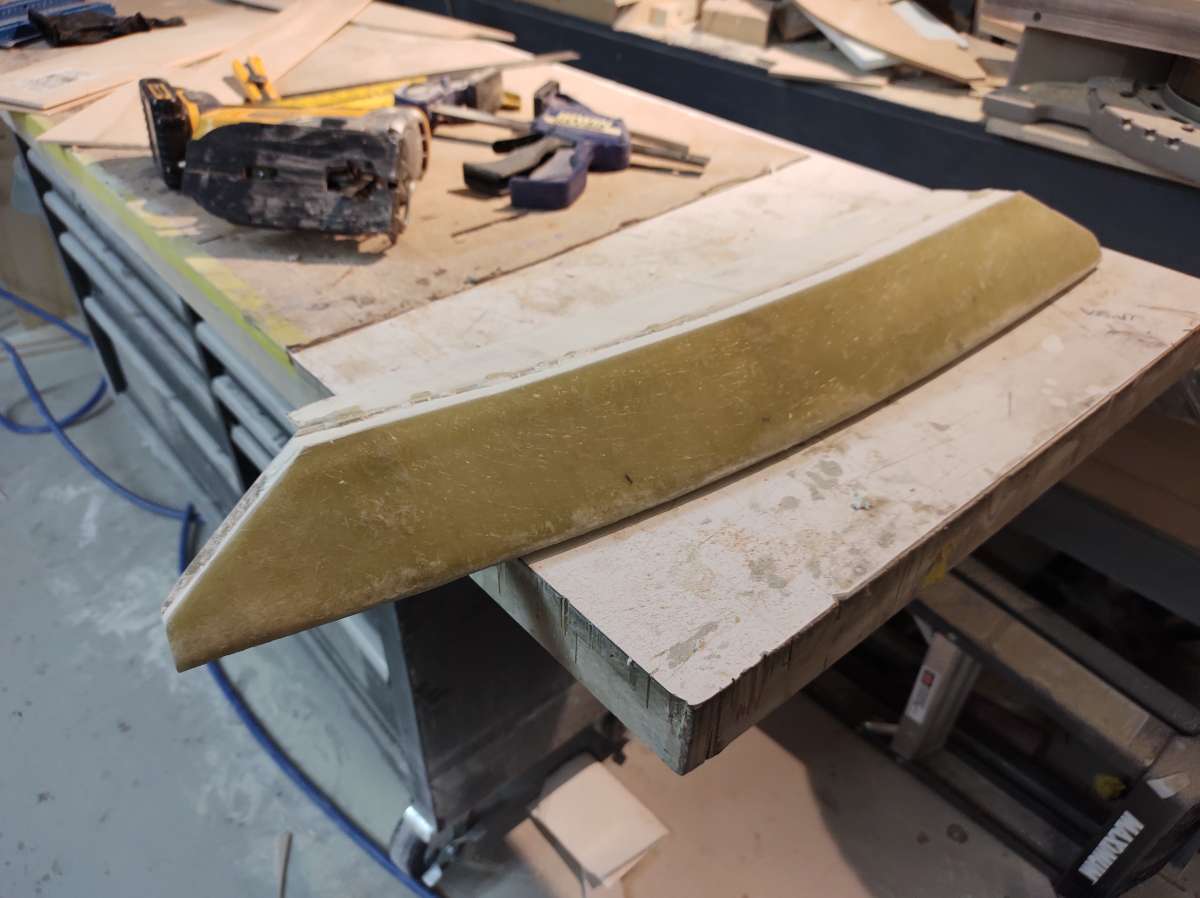
This morning I will pop it off the car and trim the edges
I would have loved to do a YouTube series on the build but I would have needed someone to shoot the vids and help produce it it takes about 3 hours a day , unfortunately I just don't have the time , maybe I will do one on installing the body on the car , let me know what you think .
It takes a lot of effort and time to post and share my build with you guys so if you have any feedback I would appreciate it , at the risk of sounding pissed off , there has been no comments from anyone for a long time .
Maybe I should not bother posting anymore .
Or maybe my build is in the wrong place on the site ? just saying some guy takes his Zed to a shop and has the exhaust tips changed and 200 people reply ..................
You're right, it's been really quiet recently after your latest updates. I honestly can't stop being amazed at how good of a job you are doing. I know you mention in a previous post coming to Ottawa with car eventually, I would love to see it in real life as I am just 2h away from there.
Continue your work and please keep posting, I am pretty sure i'm not be the only looking forward to your future post.
Keep up the good work, Phil! I hope you'll be able to finish before you lose the shop space, or at least get very close to it. It's nice to see some good progress! I am truly in awe of your glassing/fabricating skills.
You're right, it's been really quiet recently after your latest updates. I honestly can't stop being amazed at how good of a job you are doing. I know you mention in a previous post coming to Ottawa with car eventually, I would love to see it in real life as I am just 2h away from there.
Continue your work and please keep posting, I am pretty sure i'm not be the only looking forward to your future post.
Hi thanks for the reply and the kind words , I know there are some viewers that don't approve , but trust me I am a total Nissan guy , that's why my user name is Fast720 , a 720 is a Datsun / Nissan pickup truck .
this is the chassis I built for my 720 it has an 1986 300zx engine with an Xterra supercharger on it and it is fast !!
In the background is my shop truck a Nissan D21 with over 500 km on it
this is the 4 link with a watts link , I hand fabricated all the parts , and I narrowed ford 8.8 mustang posi diff ,this build is on Ratsun.net
i will post the link on my next post.
Thanks again for the support it really helps to keep motivated .
Keep up the good work, Phil! I hope you'll be able to finish before you lose the shop space, or at least get very close to it. It's nice to see some good progress! I am truly in awe of your glassing/fabricating skills.
Thanks for the reply , I know I wont be able to finish before I have to move , trying to get all the stuff that has to be done on the actual car before moving , I can do all the other parts off the car like the doors , hood and trunk ,splitters outside at my home shop.
Thanks again Phil
Looks amazing! Been wanting to do something like this with mine... convert to fiberglass body panels and make a hard/T/manual convertible top
Hi Vert
If this all works out I will buy a convertible and make a Falcata retractable !!!!
I only would have to modify the roof area , already have plans in my head for the whole thing !!!!
Hang in there
Thanks for the reply Phil

 01-08-2022, 02:33 PM


 the inside of the other side
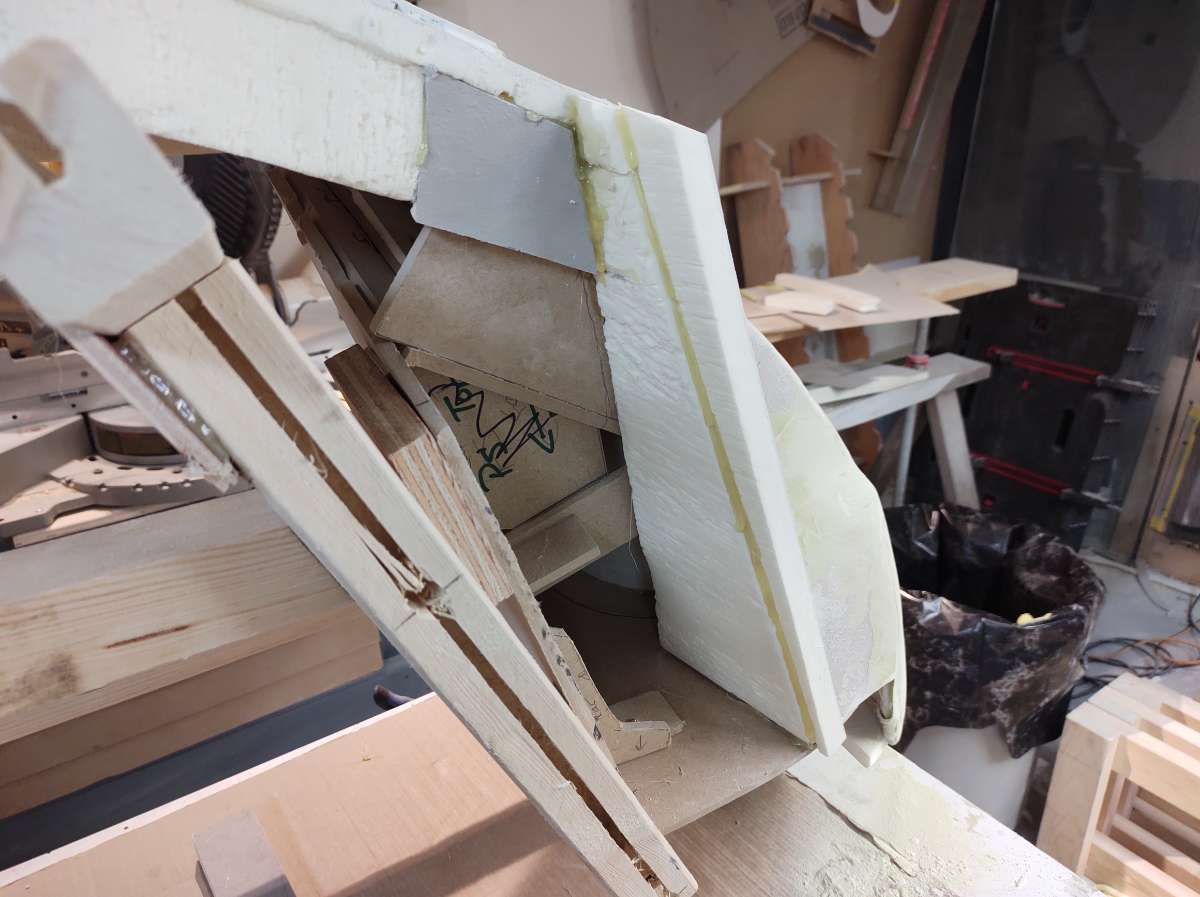

 The new part to go in , by myself it's very difficult to be on both sides to line things up and glue etc , so I had to cut the part in half .
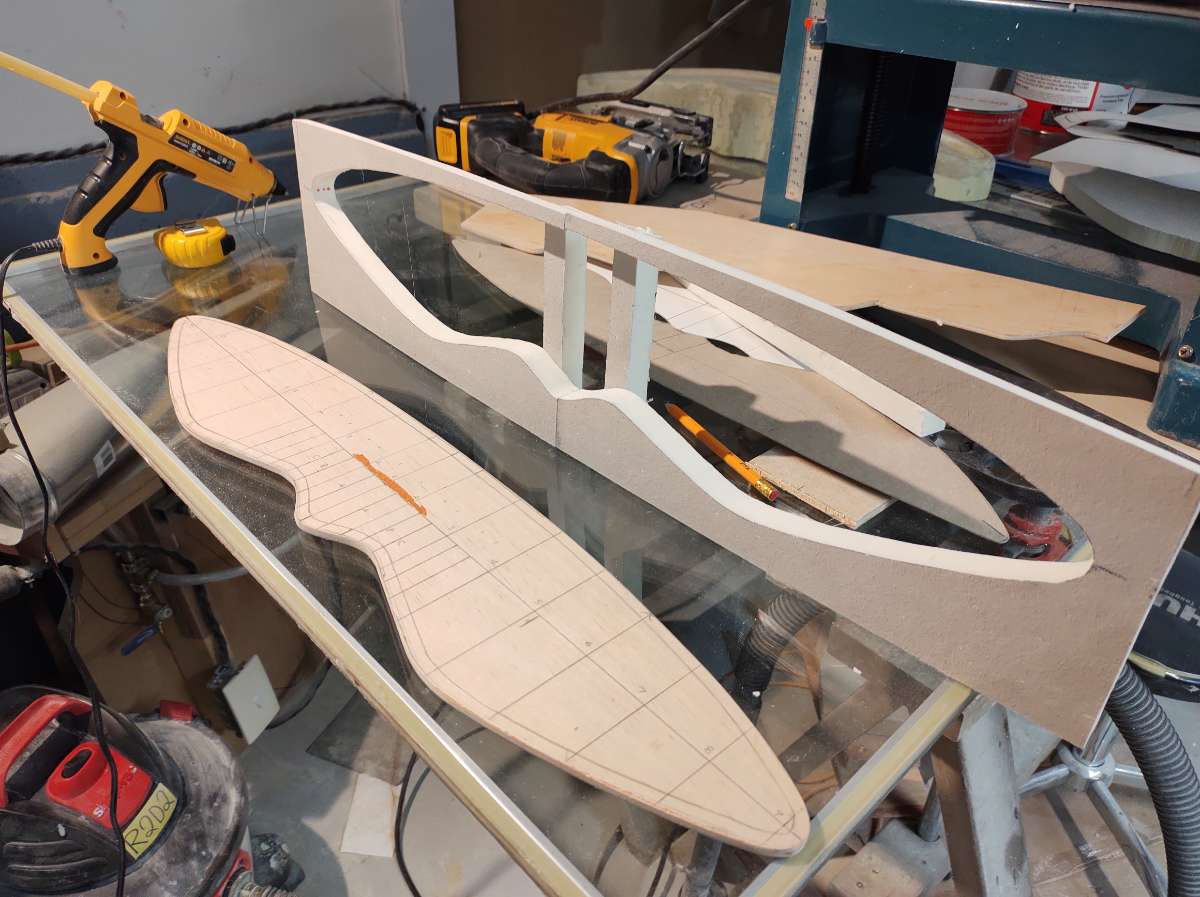


 These slots will allow the win brackets that attach to the trunk lid sides to clear when the trunk is down , this also allows there to be options , no wing or winglets that go on the car and not on the trunk lid .
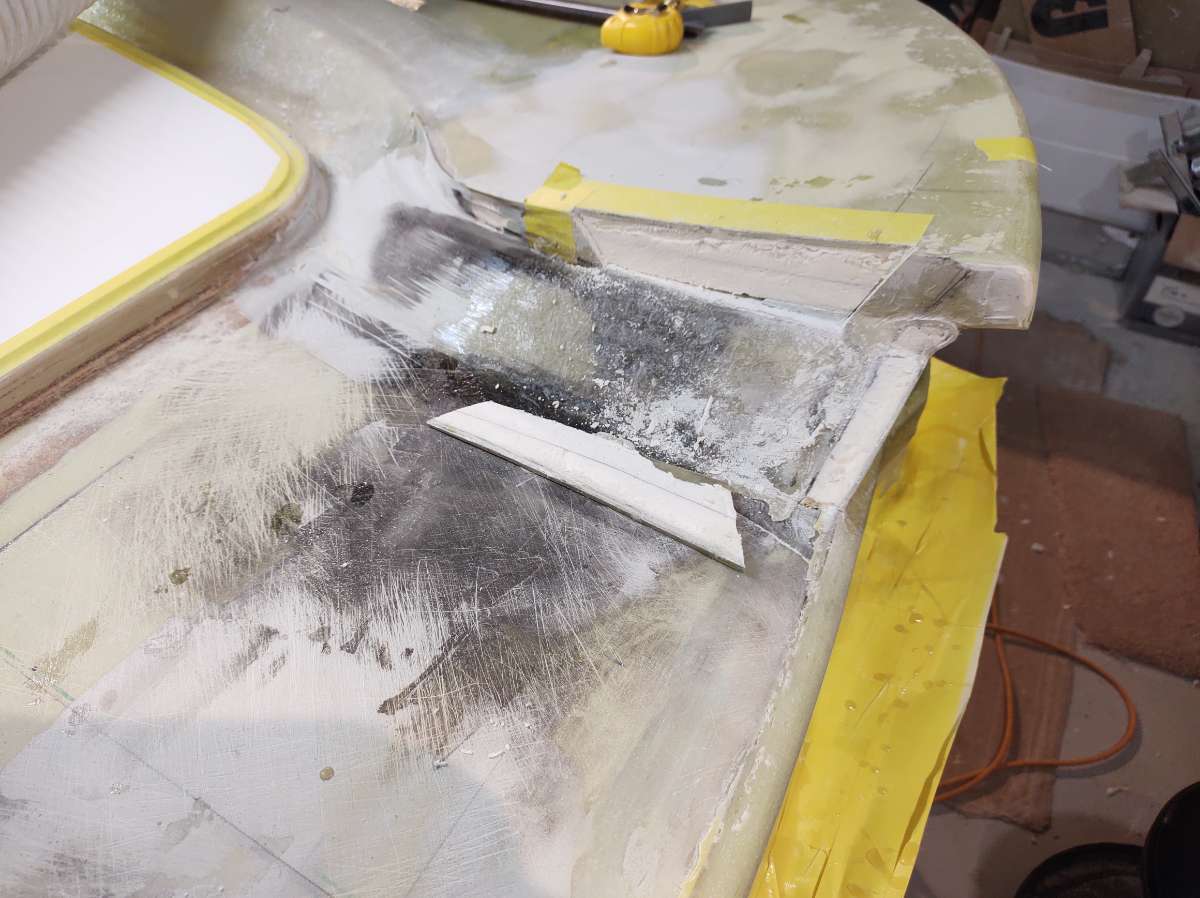
 I hope your enjoying this , I am going as fast as I can , they say quality takes time ............well that's for sure .
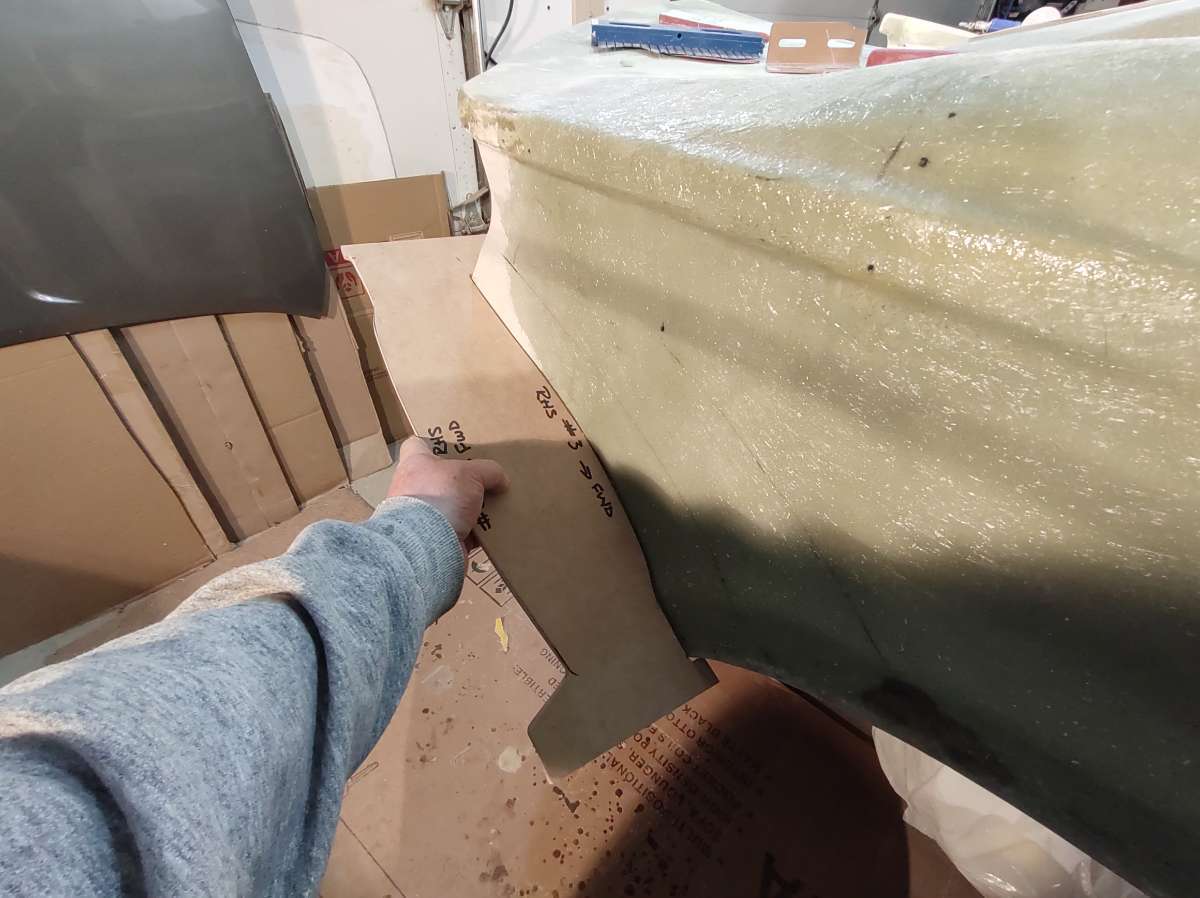


 It is a high build to take out imperfection's when block sanded
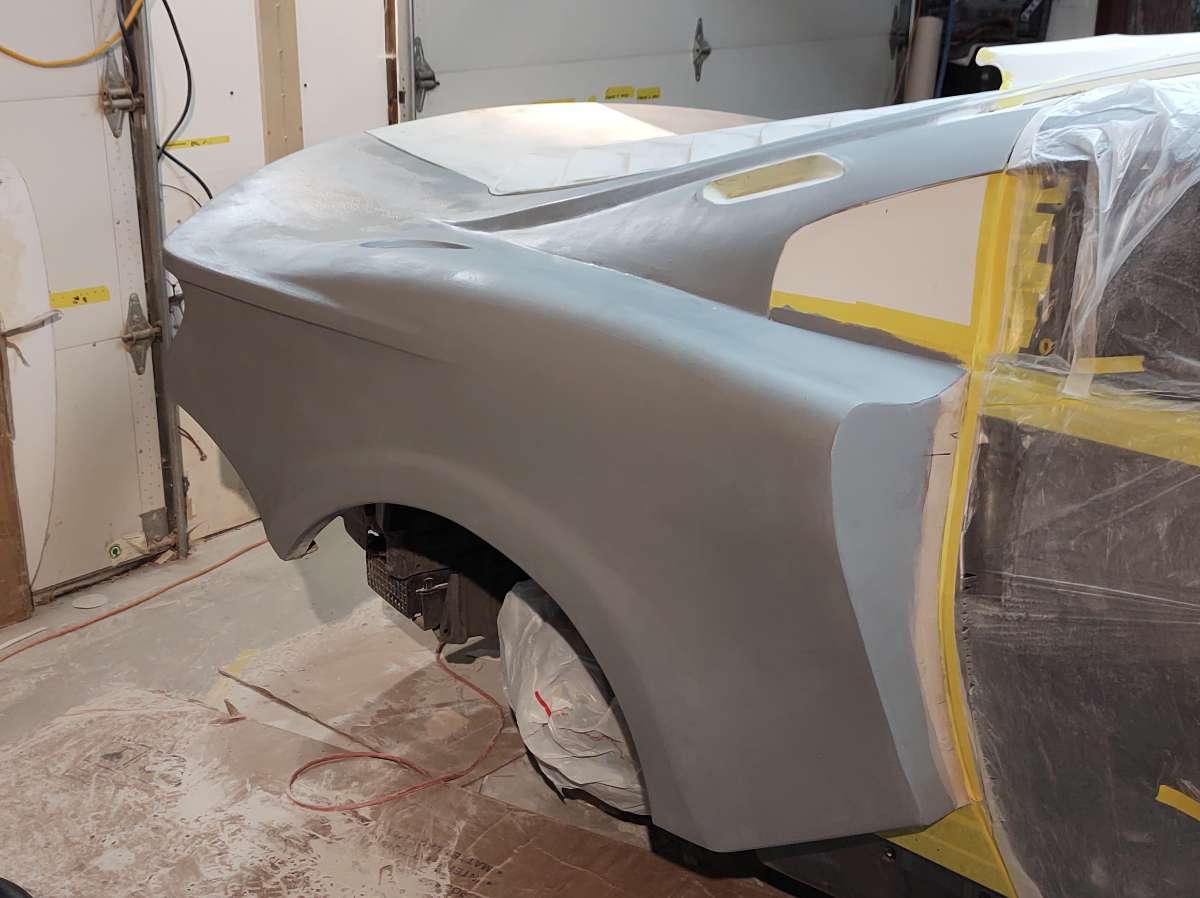


 here i remove the end dam and the turned up part will get trimmed off to match the top