
home made


Banned
Joined: Jun 2007
Posts: 1,342
Likes: 0
From: under the hood
Originally Posted by gothchick
Would you trust a plastic spacer under boost? Especially one made out of a walmart cutting board?

i ordered my plenum gasket today and im gunna use it as a templete when it comes in and see what i can make out of it. if anything ill just have a new gasket to put on if it doesnt work
Registered User
Joined: Jul 2007
Posts: 45
Likes: 0
From: Southern California
little bit of an update: you are going to need something 15" x 19" to make your spacer. The only cutting boards I could find that big have "drip channels" tha would screw up the spacer, so as far as something easy to obtain, it's not going to happen.
It's very easy to order plastic online, Nylon is going to run you about $50 for a sheet big enough to do it, LDPE and HDPE is about $30 and them you also got shipping.
My local West Marine was closed today, so I couldn't vouch for any marine board (And if they have something that big).
So out with the plastic and in with the wood. Did a little searching and Edelbrock feels confident enough to sell a carb spacer made out of wood, and carb's deal with fuel and air, so I've convinced myself that it will work.
Here's the main problem. Plywood is available in 1/4" 15/32" and 1/2" thicknesses, not 3/8" as I had hoped. I bought a 2' x 4' section of 1/2" birch plywood. I chose birch because it has a finer grain pattern. I'm not concerned with getting a good seal on the top and bottom (I'm going to use RTV blue, and wood is pourus, so it will be a really good seal, but I am concerned about air educting itself into the plenum through the layers on the sides of the spacer.
I plan to use JB-Quik to air-proof the outside and possibly inside (Haven't decited yet).
I didn't have enough time this weekend to finish the project, since I decited to grind down the lower plenum horns, so I won't have an update until next weekend.
Banned
Joined: Jun 2007
Posts: 1,342
Likes: 0
From: under the hood
Originally Posted by SoCal.VQ35DE
little bit of an update: you are going to need something 15" x 19" to make your spacer. The only cutting boards I could find that big have "drip channels" tha would screw up the spacer, so as far as something easy to obtain, it's not going to happen.
It's very easy to order plastic online, Nylon is going to run you about $50 for a sheet big enough to do it, LDPE and HDPE is about $30 and them you also got shipping.
My local West Marine was closed today, so I couldn't vouch for any marine board (And if they have something that big).
So out with the plastic and in with the wood. Did a little searching and Edelbrock feels confident enough to sell a carb spacer made out of wood, and carb's deal with fuel and air, so I've convinced myself that it will work.
Here's the main problem. Plywood is available in 1/4" 15/32" and 1/2" thicknesses, not 3/8" as I had hoped. I bought a 2' x 4' section of 1/2" birch plywood. I chose birch because it has a finer grain pattern. I'm not concerned with getting a good seal on the top and bottom (I'm going to use RTV blue, and wood is pourus, so it will be a really good seal, but I am concerned about air educting itself into the plenum through the layers on the sides of the spacer.
I plan to use JB-Quik to air-proof the outside and possibly inside (Haven't decited yet).
I didn't have enough time this weekend to finish the project, since I decited to grind down the lower plenum horns, so I won't have an update until next weekend.
It's very easy to order plastic online, Nylon is going to run you about $50 for a sheet big enough to do it, LDPE and HDPE is about $30 and them you also got shipping.
My local West Marine was closed today, so I couldn't vouch for any marine board (And if they have something that big).
So out with the plastic and in with the wood. Did a little searching and Edelbrock feels confident enough to sell a carb spacer made out of wood, and carb's deal with fuel and air, so I've convinced myself that it will work.
Here's the main problem. Plywood is available in 1/4" 15/32" and 1/2" thicknesses, not 3/8" as I had hoped. I bought a 2' x 4' section of 1/2" birch plywood. I chose birch because it has a finer grain pattern. I'm not concerned with getting a good seal on the top and bottom (I'm going to use RTV blue, and wood is pourus, so it will be a really good seal, but I am concerned about air educting itself into the plenum through the layers on the sides of the spacer.
I plan to use JB-Quik to air-proof the outside and possibly inside (Haven't decited yet).
I didn't have enough time this weekend to finish the project, since I decited to grind down the lower plenum horns, so I won't have an update until next weekend.
Last edited by go-fast; Jan 13, 2008 at 09:26 PM.

Registered User
Joined: Jul 2007
Posts: 45
Likes: 0
From: Southern California
I actually found a cheap source of 3/8" plywood.
http://www.rockler.com/product.cfm?page=846
so $7.99 + shipping (Odd, never though I would ship wood?)
They are local (enough) for me to get here in SoCal, so I will pick one up locally. My wife called and is going to pick up a 24" x 60" (They were out of the 24" x 30") so I might have enough wood to make a second in case someone is interested after I do mine.
I already got some new grade-8 m6 bolts, so they are ready as well. I've got MLK jr. Day off this weekend, so I'll have my success or failure report for the subscribers
If you were interested in the el-cheapo porting I did to the lower spacer, I have pics and stuff here.
Last edited by SoCal.VQ35DE; Jan 14, 2008 at 05:00 PM.


Banned
Joined: Jun 2007
Posts: 1,342
Likes: 0
From: under the hood
Originally Posted by Jeff92se
Instead of trying to find a pc of plastic that large, make two "C"s and glue them together. The sheet would only have to be 1/2 as big
Registered User
Joined: Jul 2007
Posts: 45
Likes: 0
From: Southern California
Yeah I thought about that, but inexpensive plastics (polyethelene) are an "oily" plastic and don't respond well to resins and so on...
Nylon may work, but for simplicity's sake, I decided to take another route.
I was thinking if I did go with the two piece design, I would slot the ends so they fit like a dovetail joint (Think of Gapless piston rings)
[Edit: I've never plastic welded, so that's out of my (fairly limited) skills Sounds cool though ]
Nylon may work, but for simplicity's sake, I decided to take another route.
I was thinking if I did go with the two piece design, I would slot the ends so they fit like a dovetail joint (Think of Gapless piston rings)
[Edit: I've never plastic welded, so that's out of my (fairly limited) skills
Sounds cool though ]
Last edited by SoCal.VQ35DE; Jan 15, 2008 at 05:38 PM. Reason: added the plastic welding part
Registered User
Joined: Jul 2007
Posts: 45
Likes: 0
From: Southern California
Well not done, but got some progress.
My observations first, then pics at the end
1. Because of the way the bolt fits right by the throttle body, it is nearly impossible to use the top plenum to trace the outside for a template.
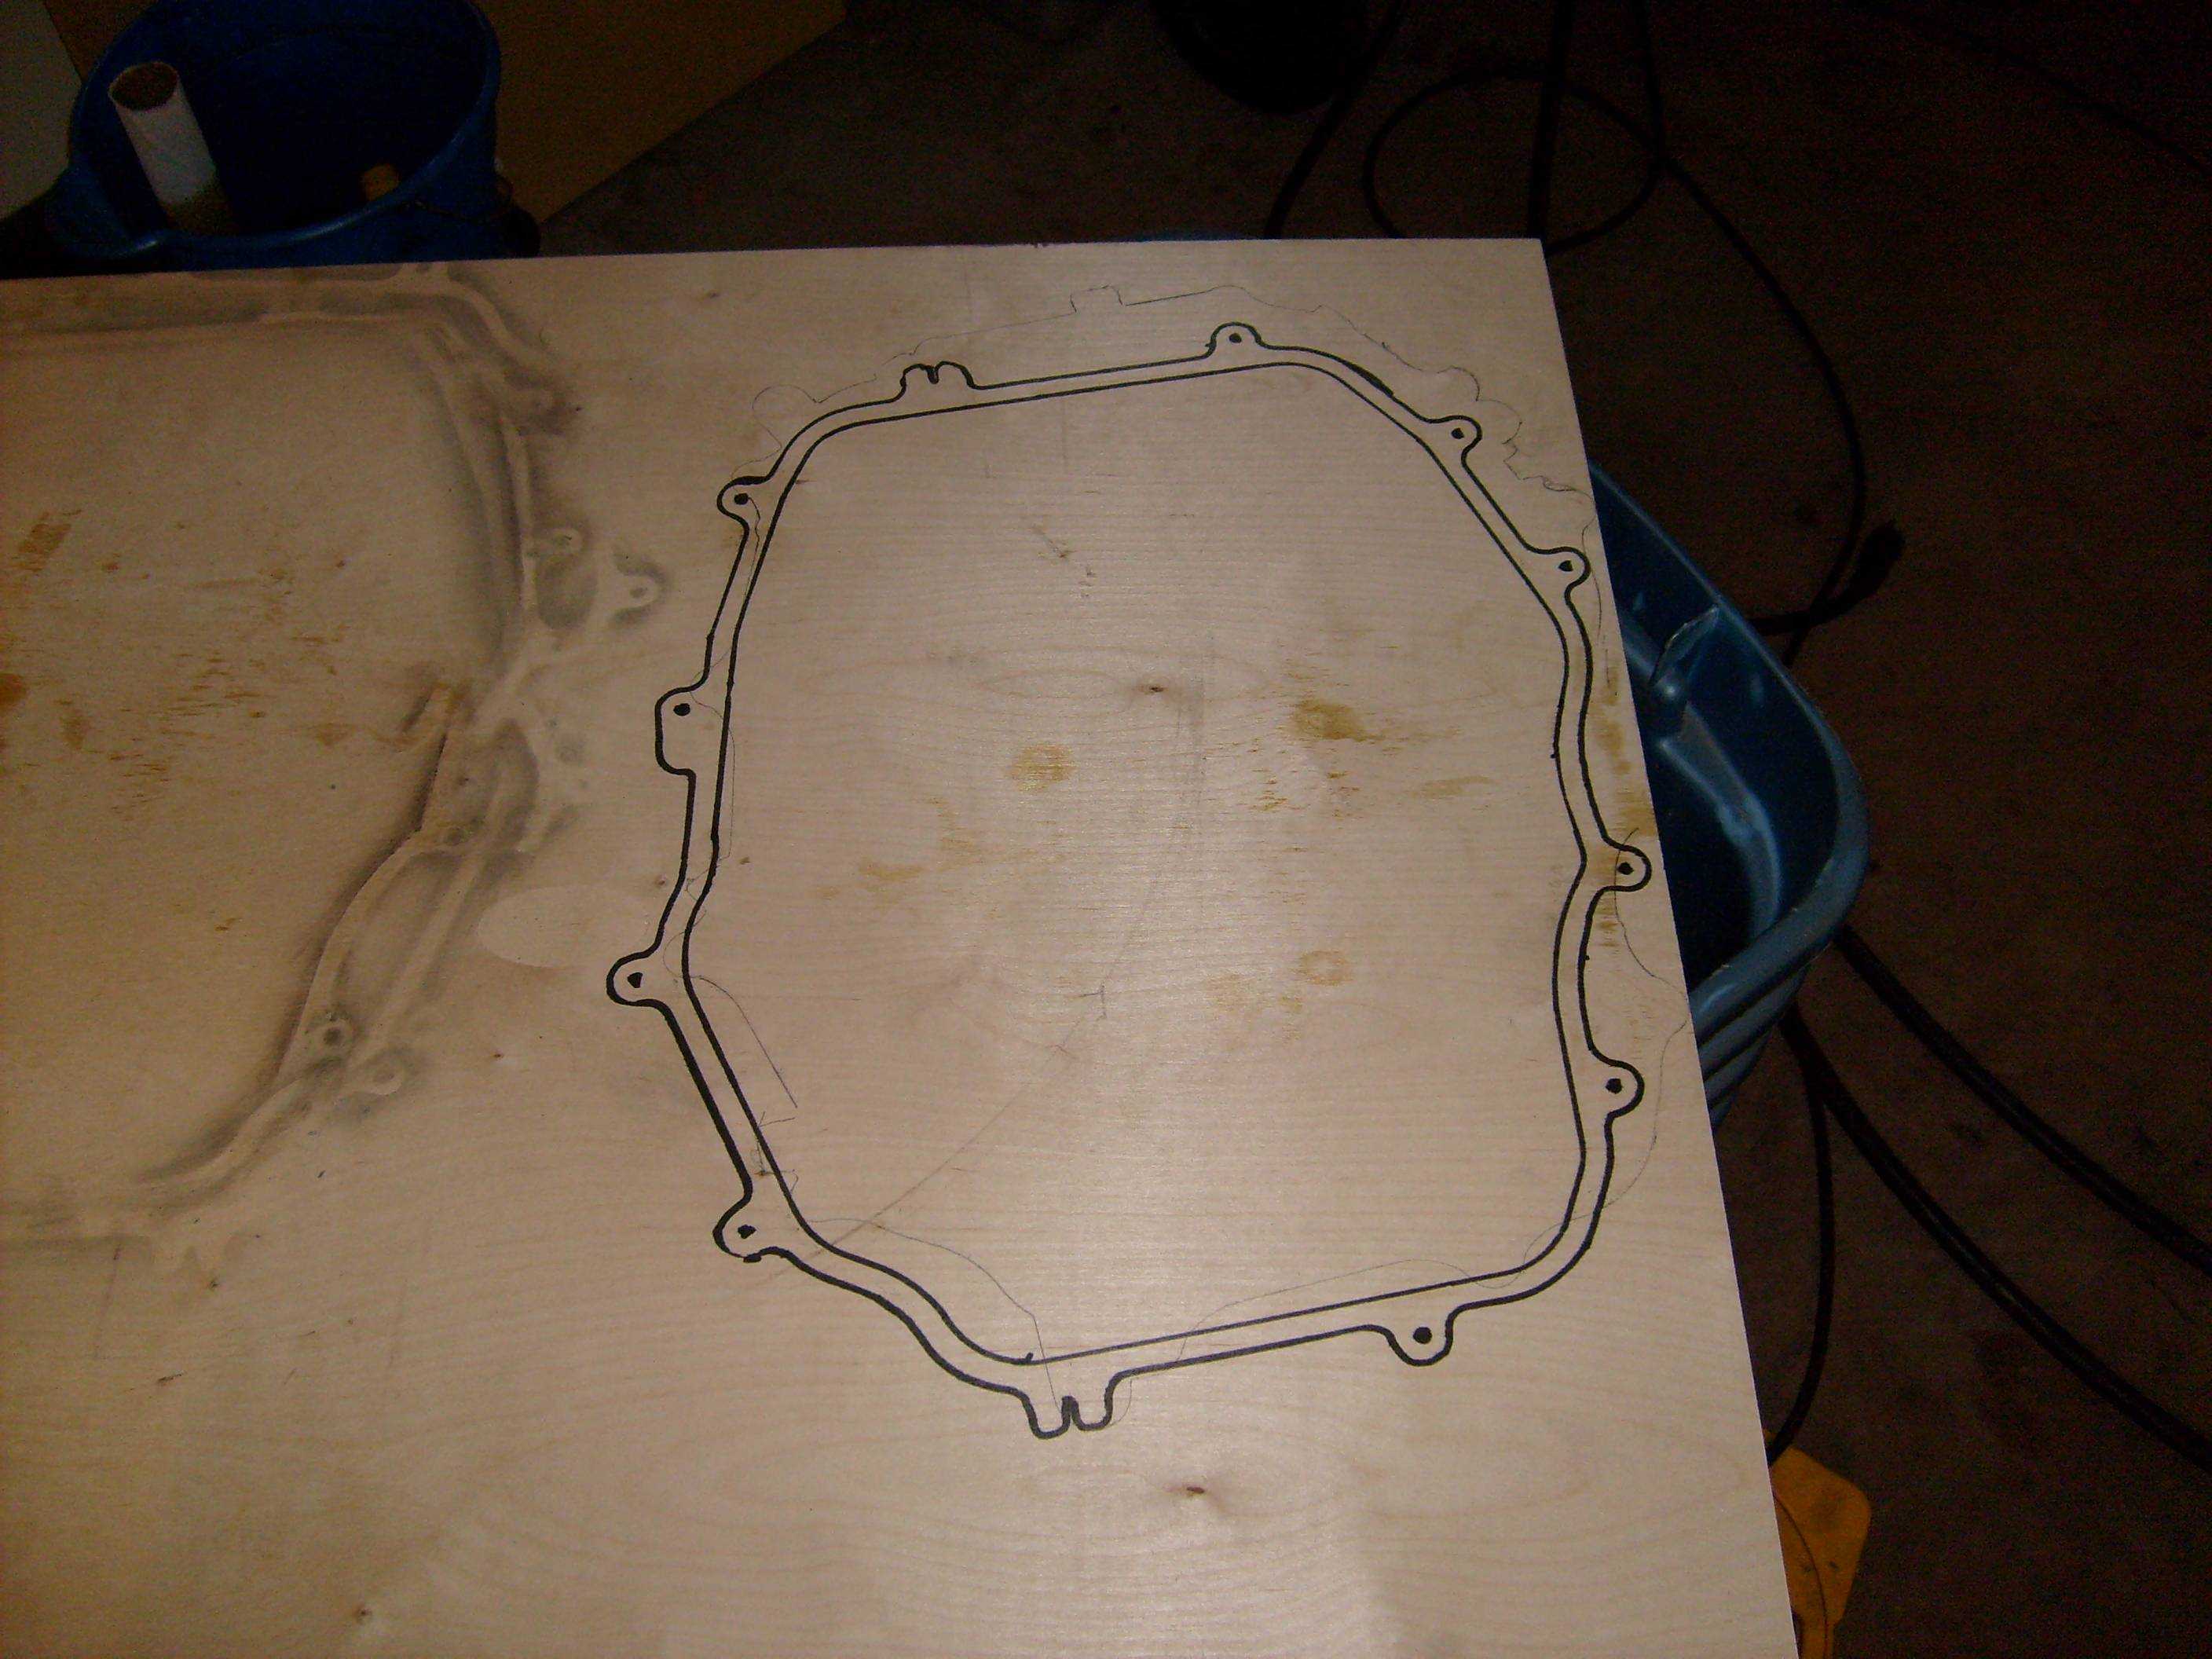
2. Because of this, I used the gasket. Problem with this is you obviously want the spacer larger than the gasket. The inside of the gasket surface is a good guide (Although the gasket veers upward towards the throttle body, yet the inside of the top plenum has a less dramatic curve (Hard to say in words).
3. I had this great idea for the gasket. I would spray paint it against the wood, then I wouldn;t have to worry aboit it moving when tracing it. Take it from me, this doesn't work because the gasket sitting on the wood will allow the paint to "weep" giving you a lousy image. Worse, you get to spend half an hour wiping the paint off the gasket. (I thought the paint wouldn't have dried so quick, especially because there was some oil residue on the gasket)
4. Permenent marker worked good for tracing. Keep in mind though that for the outside, it is very difficult to get a good intricate cut with a jigsaw. Using a rotozip or a router would have worked much better (And probably generated less freyed ends -- more about that later). So to make your life easier, after you traced the gasket, compare it to the lower and upper plenum and get out a yardstick and remove as much of the curves as possible. Yeah it will stick out a little between the plenum halfs, but I don't care and as mentioned before, it makes it stronger.
5. I cut the inside first, then the outside. Then with a 120-grit drum sander bit on my dremel (in the router attachment) I cleaned up the jagged cuts and made it more smooth. I don't want to drill holes until I can sandwich the plenum halfs around it, since I want to use the plenum as a guide for the drill bits.
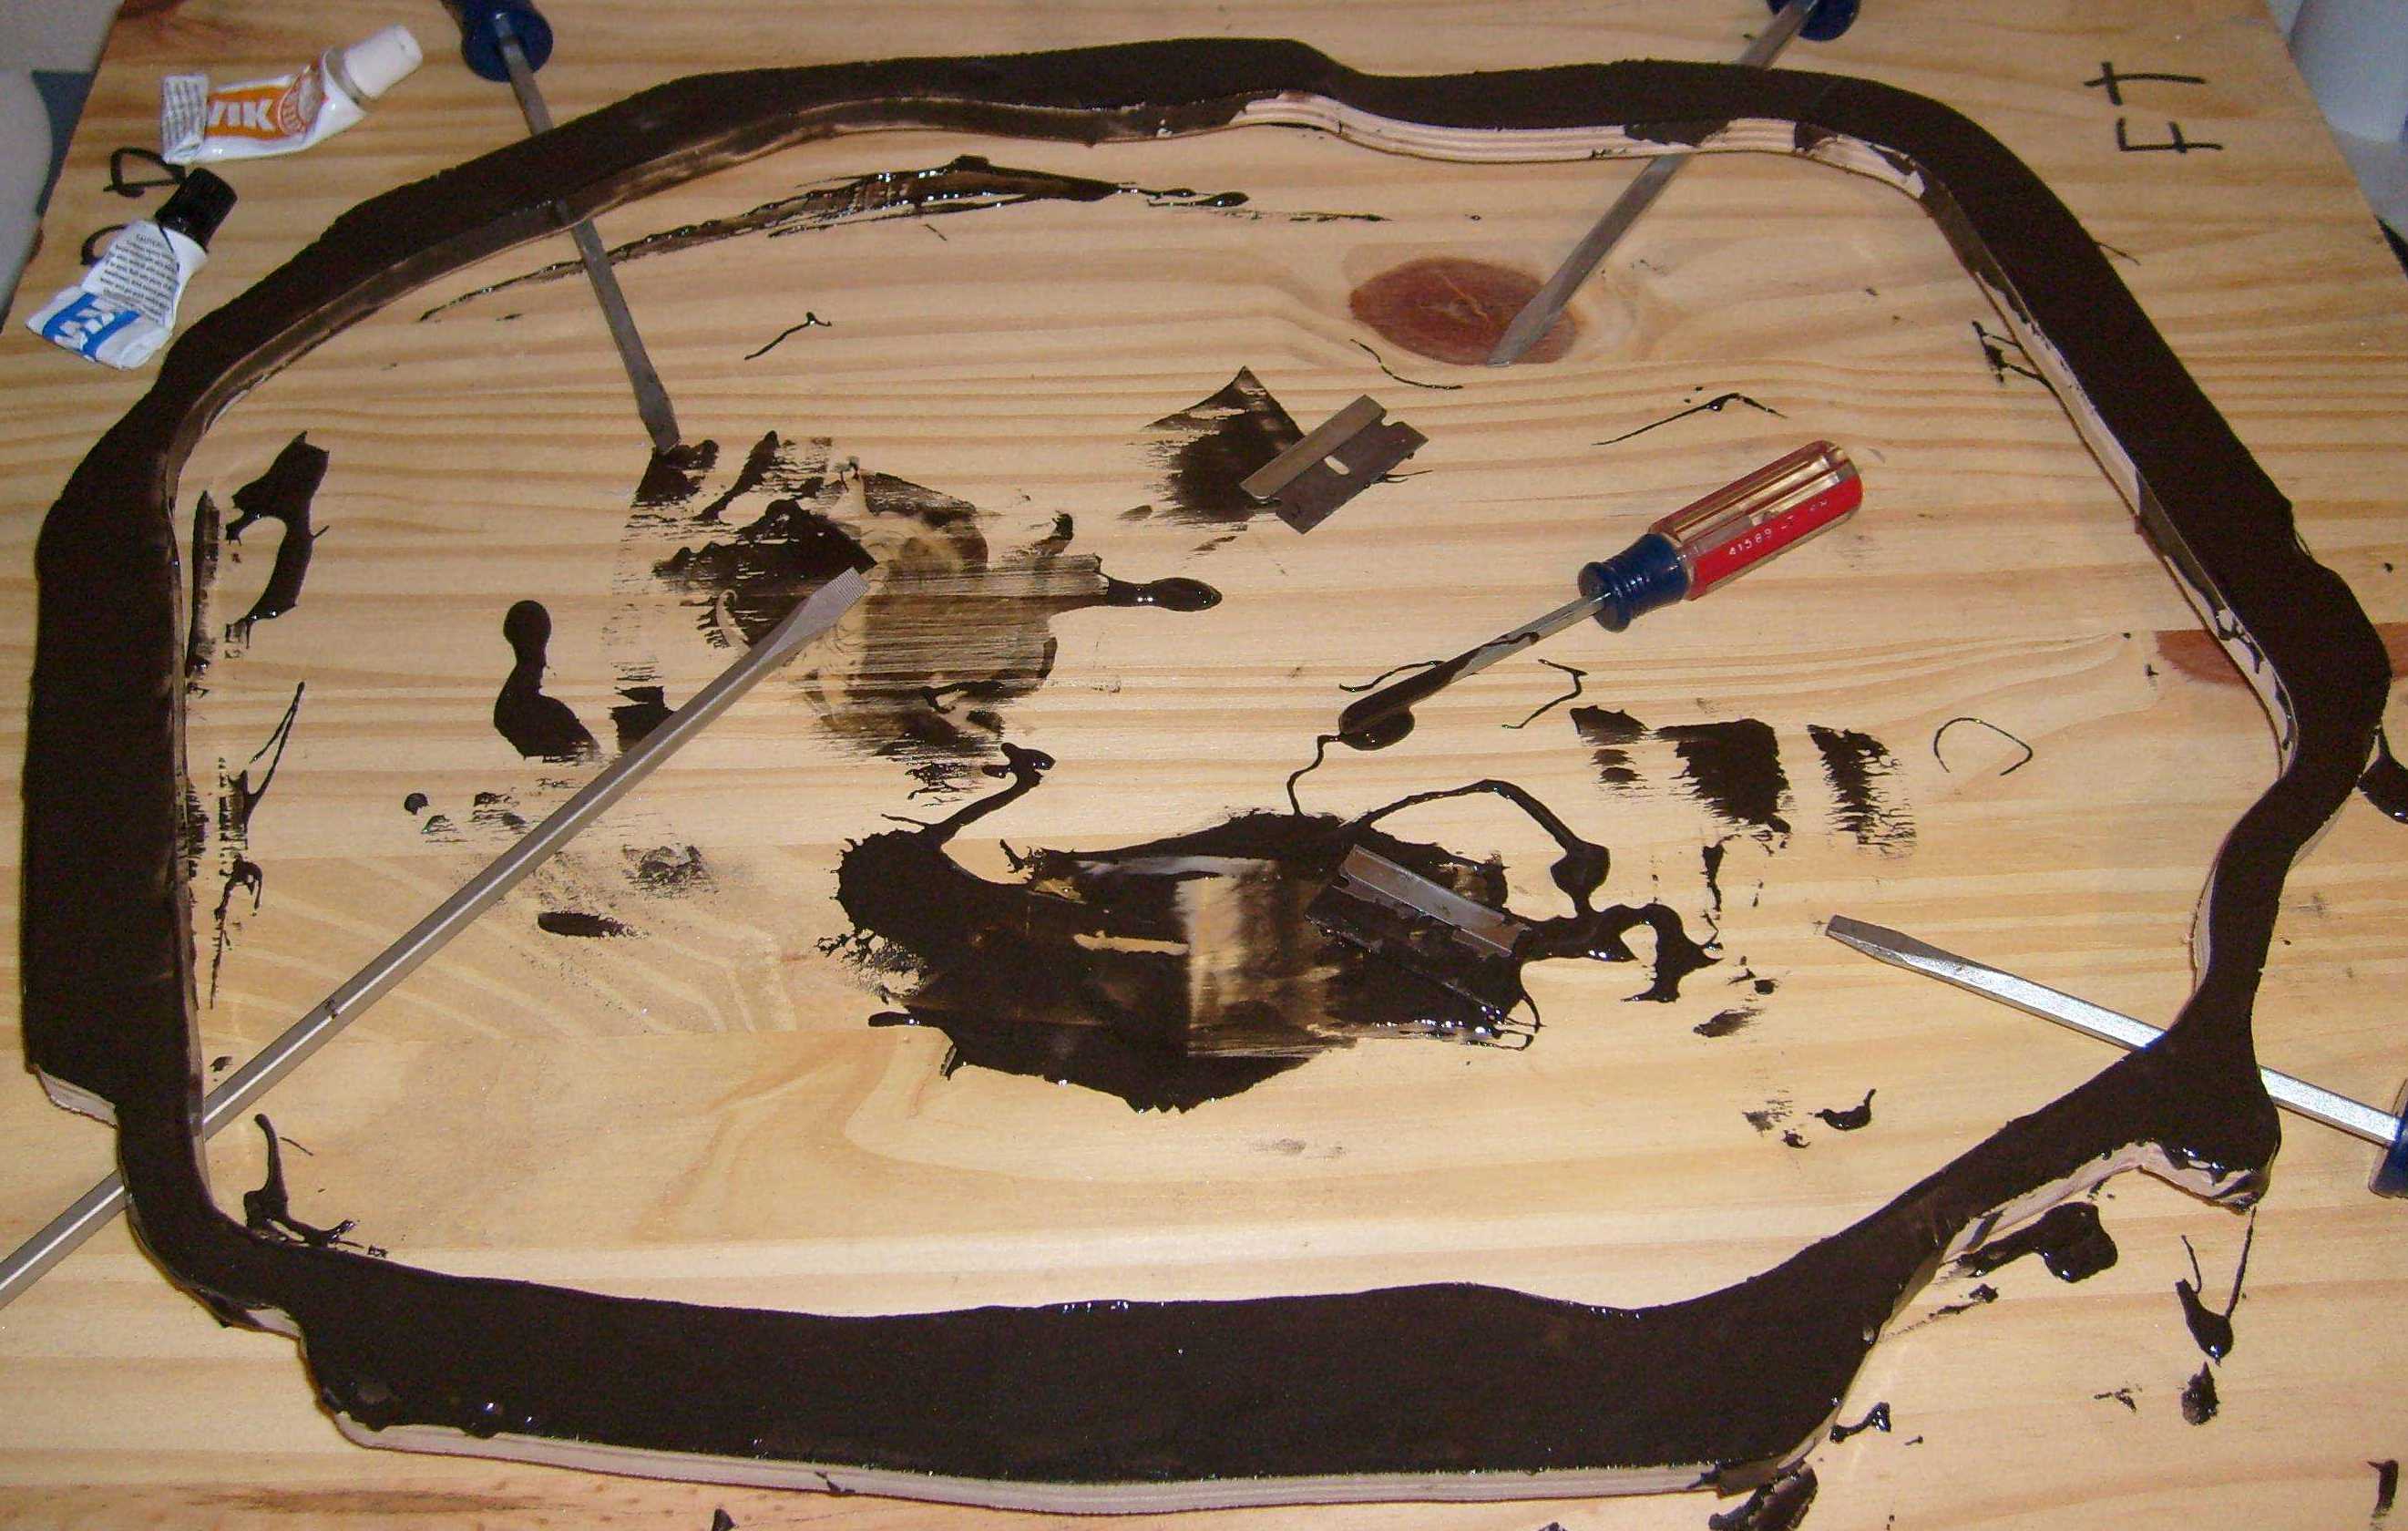
6. The inherit problem with using a jigsaw, is that even though I used a fine 10 tpi bit (For wood), it still roughed up the top surface, so it probably wouldn't seal very well. Because of that, I did something I didn't plan on doing, which was spreading a thin layer of jb-weld on the top surface. I plan to sand this smooth tomorrow. Basically sanding it all off until I get to the wood, leaving only the valleys still full of the resin.
So that's where I got tonight. Stay tuned for more tomorrow.
Tracing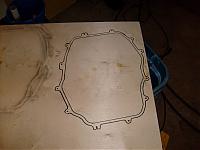
Center cut out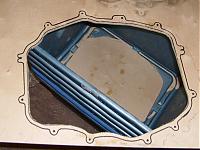
Sitting on Lower Plenum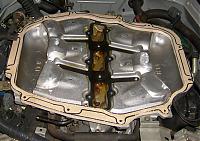
Resin Drying for Tonight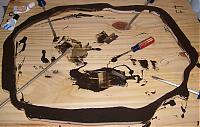
My observations first, then pics at the end
1. Because of the way the bolt fits right by the throttle body, it is nearly impossible to use the top plenum to trace the outside for a template.
2. Because of this, I used the gasket. Problem with this is you obviously want the spacer larger than the gasket. The inside of the gasket surface is a good guide (Although the gasket veers upward towards the throttle body, yet the inside of the top plenum has a less dramatic curve (Hard to say in words).
3. I had this great idea for the gasket. I would spray paint it against the wood, then I wouldn;t have to worry aboit it moving when tracing it. Take it from me, this doesn't work because the gasket sitting on the wood will allow the paint to "weep" giving you a lousy image. Worse, you get to spend half an hour wiping the paint off the gasket. (I thought the paint wouldn't have dried so quick, especially because there was some oil residue on the gasket)
4. Permenent marker worked good for tracing. Keep in mind though that for the outside, it is very difficult to get a good intricate cut with a jigsaw. Using a rotozip or a router would have worked much better (And probably generated less freyed ends -- more about that later). So to make your life easier, after you traced the gasket, compare it to the lower and upper plenum and get out a yardstick and remove as much of the curves as possible. Yeah it will stick out a little between the plenum halfs, but I don't care and as mentioned before, it makes it stronger.
5. I cut the inside first, then the outside. Then with a 120-grit drum sander bit on my dremel (in the router attachment) I cleaned up the jagged cuts and made it more smooth. I don't want to drill holes until I can sandwich the plenum halfs around it, since I want to use the plenum as a guide for the drill bits.
6. The inherit problem with using a jigsaw, is that even though I used a fine 10 tpi bit (For wood), it still roughed up the top surface, so it probably wouldn't seal very well. Because of that, I did something I didn't plan on doing, which was spreading a thin layer of jb-weld on the top surface. I plan to sand this smooth tomorrow. Basically sanding it all off until I get to the wood, leaving only the valleys still full of the resin.
So that's where I got tonight. Stay tuned for more tomorrow.
Tracing
Center cut out

Sitting on Lower Plenum

Resin Drying for Tonight
Banned
Joined: Jun 2007
Posts: 1,342
Likes: 0
From: under the hood
looks good,to level surface spray thin coat of adhesive on a piece of glass then apply some 220 grit sandpaper.you can then keep the mating surface from becoming wavy by moving the plenum back and forth in a criss-cross pattern.this is why plastic is superior,saves fab time making it worth the extra couple of bucks....you might also want to try using high build primer to fill the splinters,easier to apply and easier to sand.(i guess next time)
Registered User
Joined: Jul 2007
Posts: 45
Likes: 0
From: Southern California
24 hours later and a few tylenol lol...
Ok, so the jbweld idea...scrap that. trying to sand it smooth was horrible, it got too hot too quick and ended up a big mess. So luckily I made sure I had enough wood for a second one. Wanted to try a few things different this time, in particular, making less dramatic curves and more overlap.
So I don't have a roto-zip. but I do have a dremel, a router attachment, and a roto-zip bit... Skip that idea. Unless you like burning through wood. Thankfully I tested on some scrap. So back to the jigsaw. For the heck of it, I grabbed a fine tpi metal bit and tried it out. Tom my delight, as long as I let it do the work instead of pushing it, I was rewarded with much less splintering.
So between the metal 24tpi (I think) bit, and the less dramitic outline, I made another one. I sanded the top quickly with 220 grit sandpaper and a random/orbital sheet sander. I also used the routerdremel and a 120 grit drum bit to smooth out the sides.
Next, I set the upper plenum on top, grabbed a 1/4" bit and drilled the first hole. I put a bolt in that hole to hold it, then drilled one on the opposite side, then put the bolt in there, and finished drilling the other holes.
I dry fitted on the car and the holes didn't line up. Confused and slightly bitter, I put the spacer back on the plenum, lined the holes up and with a very small pencil (I broke it so it was about 1" long) I traced the outline of the inside of the plenum, and broke out the jigsaw again. After quite a few adjustments I got everything right.
Next problem: the 6 holes in the middle of the plenum. So my first plan was to use a nylon spacer, but I couldn't find one 3/8 of an inch long. So I got 1/2" and tried to cut it down with a razor blade (nope) tried grinding down with a dremel (nope). So I settled on stacking some washers. I put everything together and then got scared about 36 potential valve-breaking washers that may or may not be secured by a bolt I couldn't see, so I ripped everything out and cleaned off the RTV sealant.
So I found that a 5/8" socket fits in the outer holes, so I traced it, drilled some holes and the middle and *tried* to cut it out with a jigsaw. (Nope). So I then realized that cutting straight lines was easier than curved ones, I made square spacers.
So this evening, the square spacers are sitting on the lower plenum with a thin coat of RTV drying so that tomorrow I can finish it up after work.
Here's my biggest "gift" to the masses...Before I put the spacer on, I taped four sheets of 8.5 x 11 paper together, and traced the finished spacer on it. I then put some markings on it, and some 1" measurements in x and y coordinates, along with 3 measurements to double-check.
Why do this?
I'm going to scan the 4 pages and push them up so if you want, you can tape them together and use it as a template if you decide to embark on this journey. Realistically, having someone that already has a spacer would be better, but technically that would be patent infringement (worst case) or best case, morally wrong. But because this is my design, I can do whatever I want with it, which is to share to all (I'm a big fan of open-source software)
The scans will be big, I know that it won't fit based on the attachment sizes here. If anyone is willing to host the scans, please let me know and I can email/ftp/sftp them to you. I probably won't get around to scanning them until next weekend, but I'm guessing no more than 100MB unzipped.

Thread
Thread Starter
Forum
Replies
Last Post
Colombo
Forced Induction
35
Nov 9, 2020 10:27 AM