
How to replace weather seal between mirror and sail panel


Thread Starter
Registered User
Joined: Sep 2012
Posts: 245
Likes: 1
From: Tampa, FL
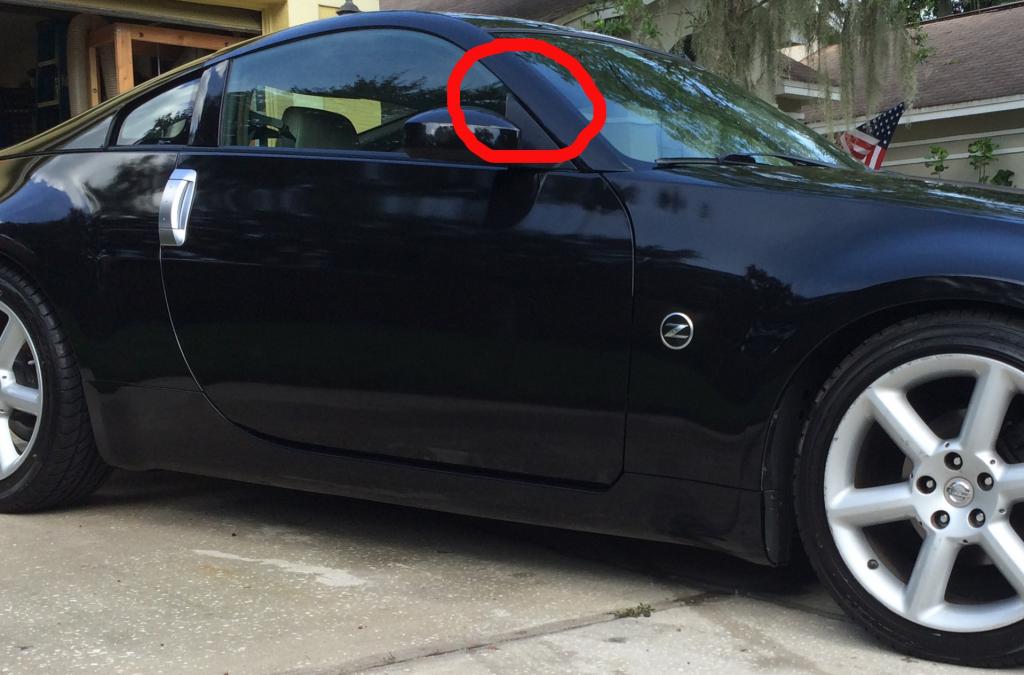
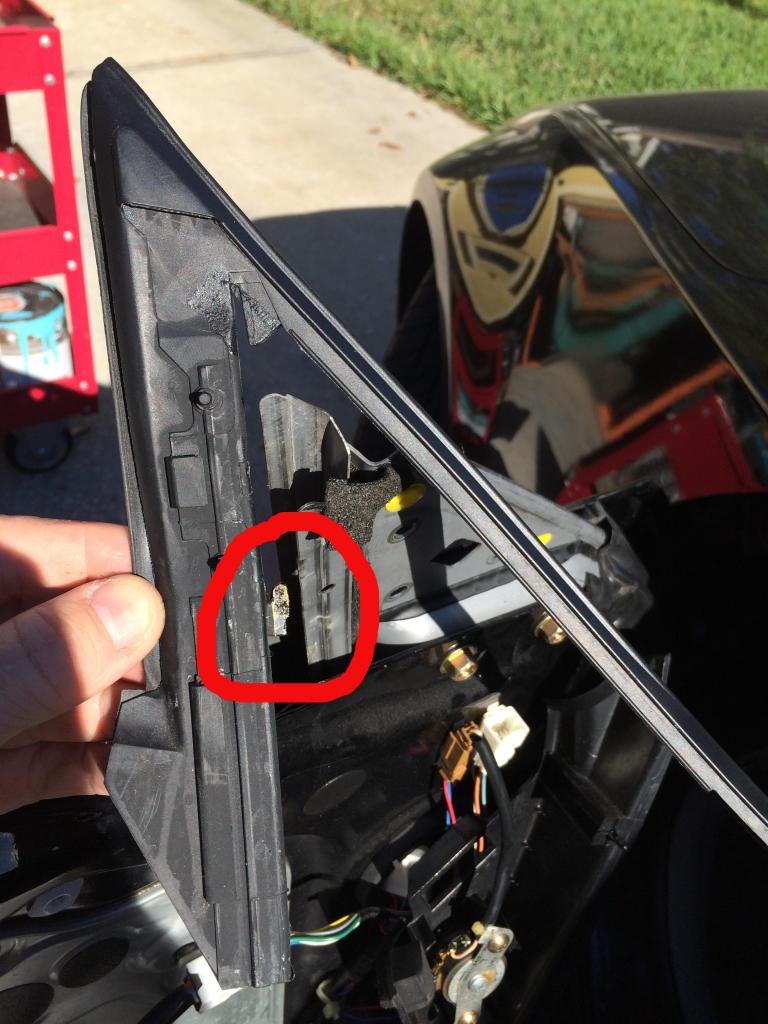
I wasn't able to find one, so here's a how-to on replacing the seals around the �sail panel� area of the door windows. You may have noticed water leaking in, or perhaps increased wind noise near the area circled in red:
A closer inspection of those seals may reveal that they are dried and cracked, and need to be replaced. Here's the parts:
Driver's side............80833-CD000
Passenger side.........80832-CD000
Available from your favorite Nissan parts store or site. I paid about $24.00 each.
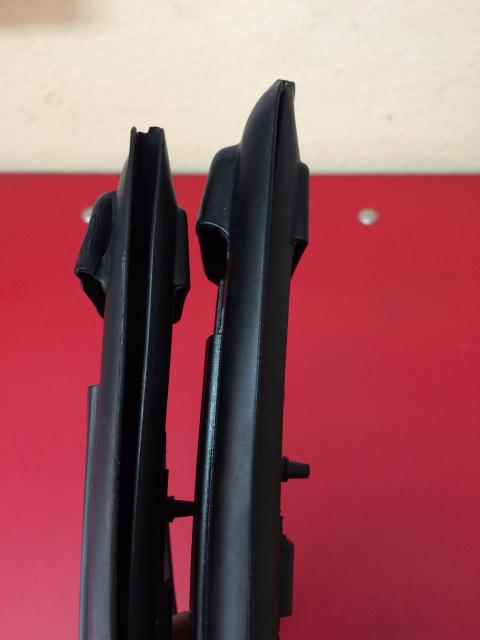
Old cracked seal:

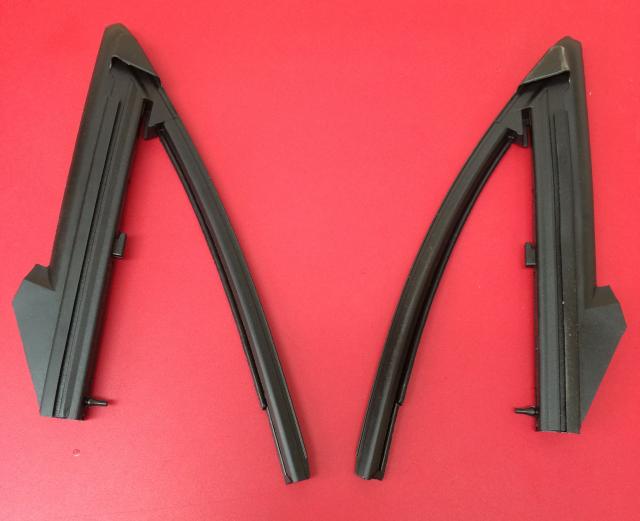
New one side-by-side with the old one:
Start by removing the door panel:
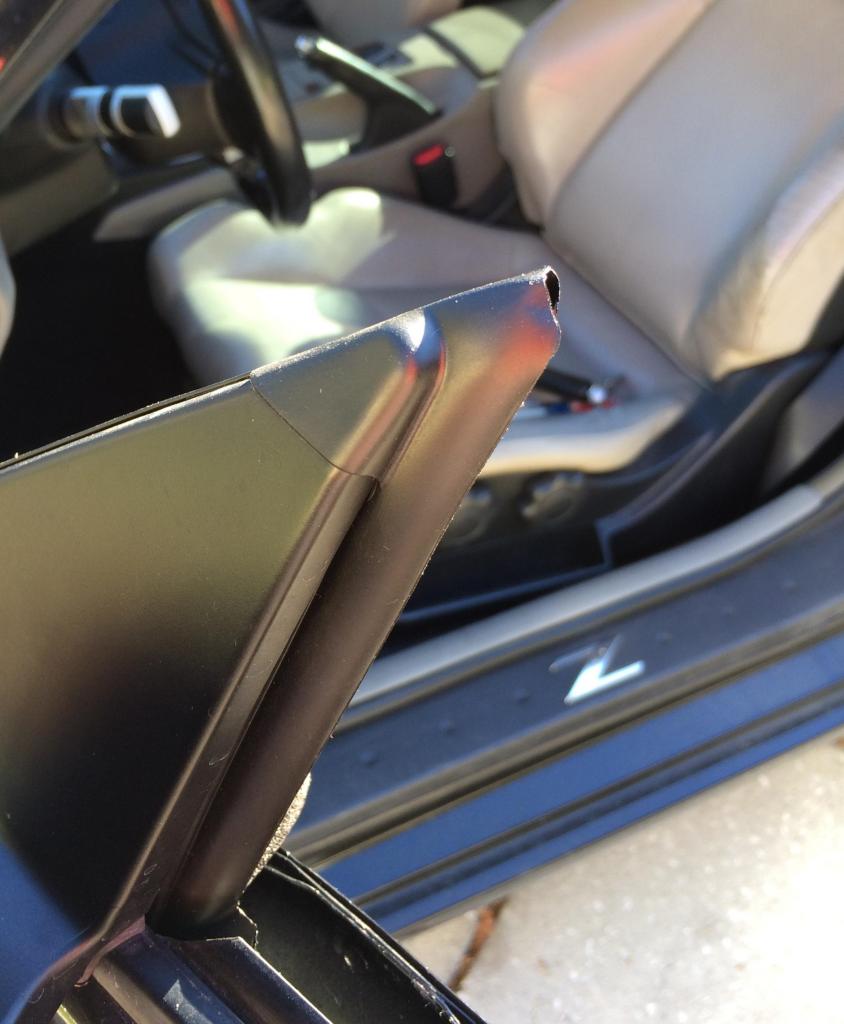
Then the sail panel:
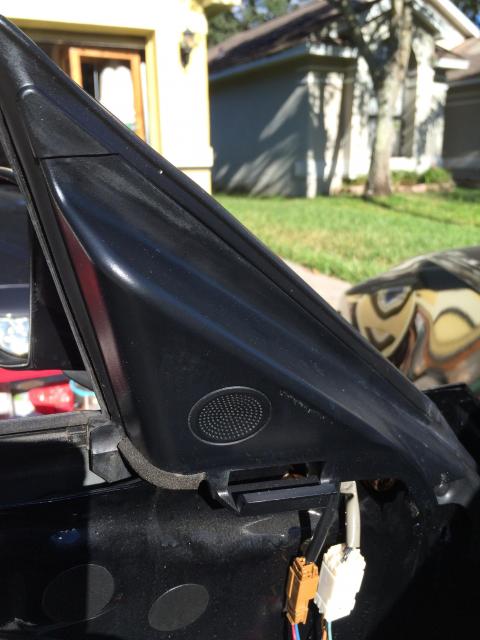
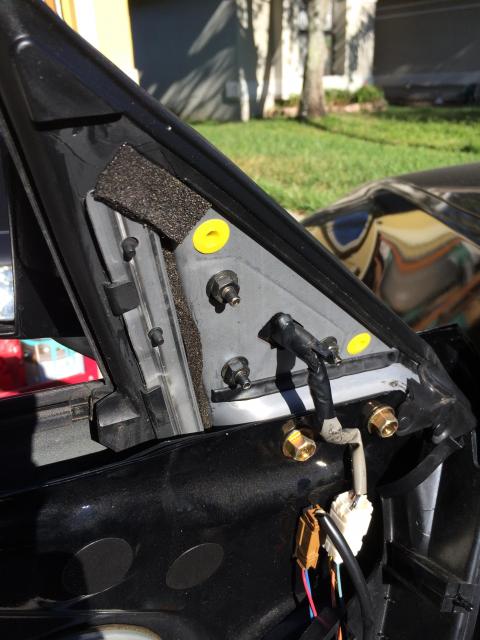
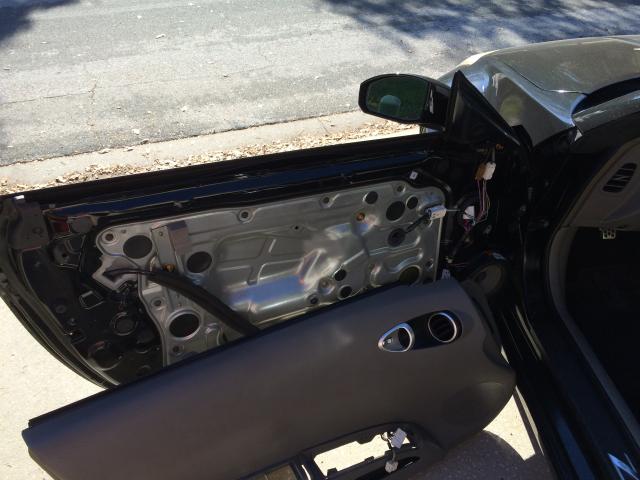
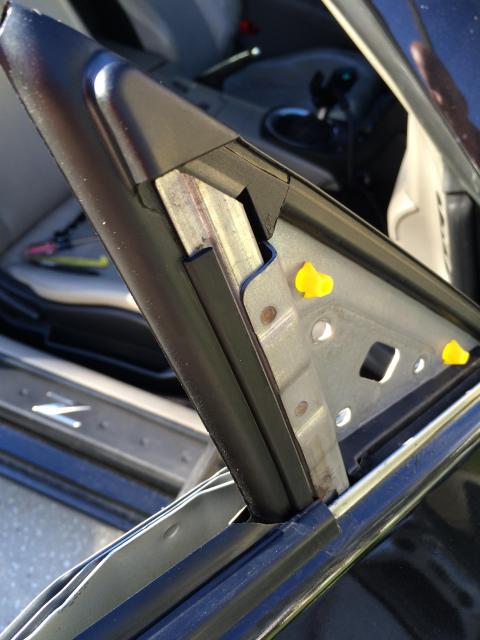
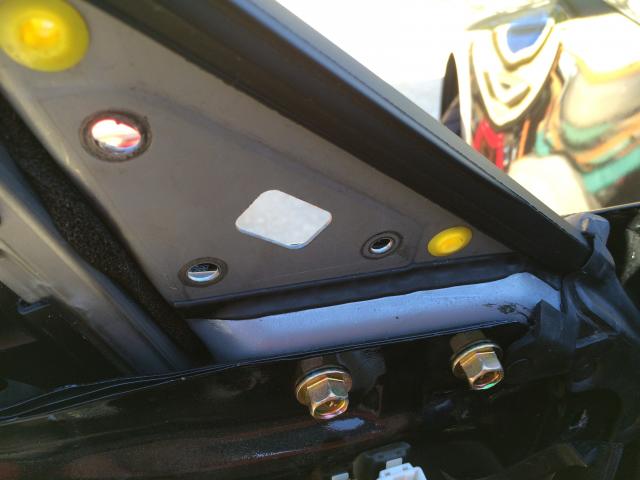
Undo the three nuts holding the mirror on, unplug the electrical connector, and set the mirror aside:
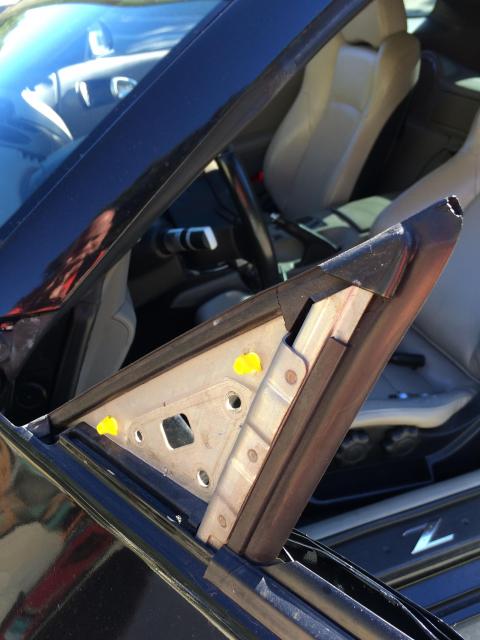
The old seal can be lifted out:
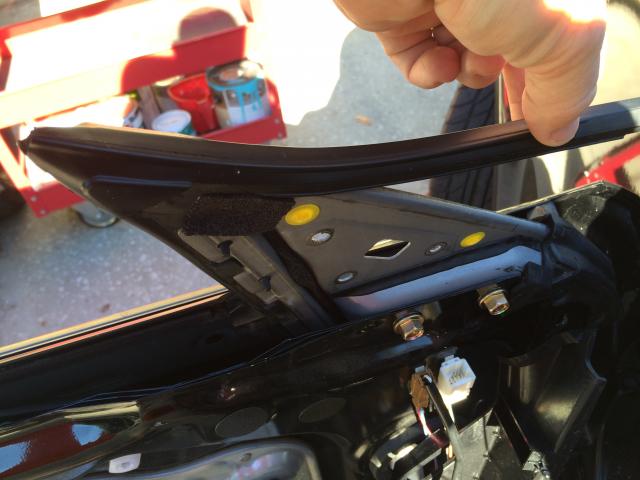
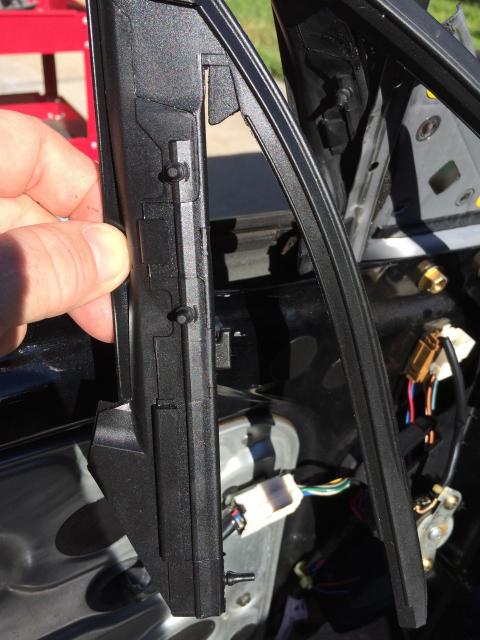
As you remove the seal, pay attention to how the little tabs lay on the frame, and how this notched tab circled in red ends up being inserted into the channel and then lifted up to secure it:
Here's the new one.....observe the previously described notched tab:
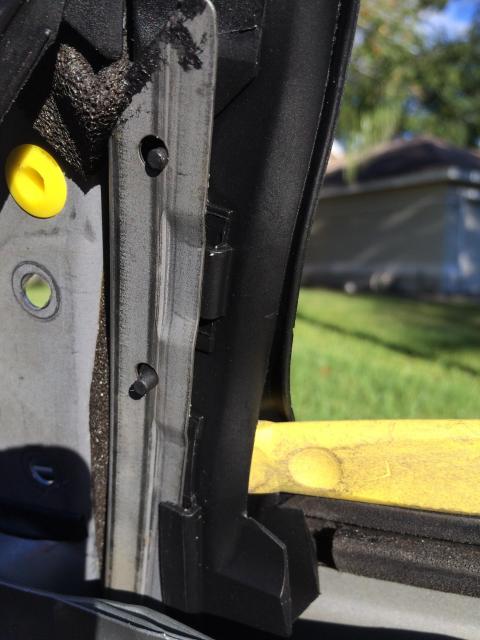
Fit the new seal over the frame. The first step is to get that notched tab to insert and then lock upwards, while fitting the two rubber **** through the frame holes......while making sure the two flat tabs on the inside and the one long flat tab on the outside mate against the frame. You can do this any number of ways. I used a plastic pry bar to push on the inside of the channel while I lifted it up. Gently use pliers to pull the rubber **** through til they click. Here's some photos of that from the driver and passenger sides:


The frustrating part will be the outside flat tab. It will want to go on like this:
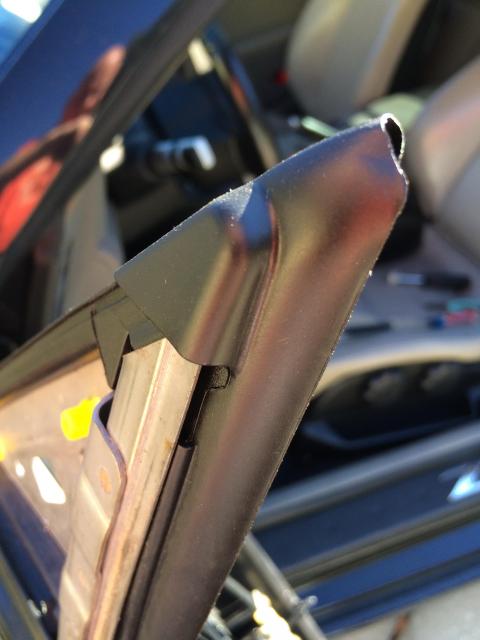
But it has to go on like this:
I used a small screwdriver to slightly open the space between the frame and the door skin while I fished it down and onto the rail.....all while not undoing the parts on the other side which I already had in place:

The upper part of the seal fits easily down the top side of the frame:
All done, reinstall the mirror, sail panel, and door panel:

A closer inspection of those seals may reveal that they are dried and cracked, and need to be replaced. Here's the parts:
Driver's side............80833-CD000
Passenger side.........80832-CD000
Available from your favorite Nissan parts store or site. I paid about $24.00 each.

Old cracked seal:

New one side-by-side with the old one:

Start by removing the door panel:

Then the sail panel:


Undo the three nuts holding the mirror on, unplug the electrical connector, and set the mirror aside:

The old seal can be lifted out:

As you remove the seal, pay attention to how the little tabs lay on the frame, and how this notched tab circled in red ends up being inserted into the channel and then lifted up to secure it:

Here's the new one.....observe the previously described notched tab:

Fit the new seal over the frame. The first step is to get that notched tab to insert and then lock upwards, while fitting the two rubber **** through the frame holes......while making sure the two flat tabs on the inside and the one long flat tab on the outside mate against the frame. You can do this any number of ways. I used a plastic pry bar to push on the inside of the channel while I lifted it up. Gently use pliers to pull the rubber **** through til they click. Here's some photos of that from the driver and passenger sides:


The frustrating part will be the outside flat tab. It will want to go on like this:

But it has to go on like this:

I used a small screwdriver to slightly open the space between the frame and the door skin while I fished it down and onto the rail.....all while not undoing the parts on the other side which I already had in place:

The upper part of the seal fits easily down the top side of the frame:

All done, reinstall the mirror, sail panel, and door panel:


New Member
Joined: Feb 2009
Posts: 2,821
Likes: 512
From: Seattle, WA
Great write up! Thanks for taking the time to put it together. I had to replace those seals at about 15,000 miles (2.5 years). One of the things I noticed was that the bolts holding the mirror to the door frame had come loose on both sides and the mirrors were rattling like crazy every time I'd hit a patch of rough road. That, plus water got in every time it rained hard. New seals and a daub of blue Lock-Tite on the mirror bolts took care of that problem and I haven't had any issues with the seals or the mirrors rattling since. Thanks again!

Registered User
Joined: Feb 2003
Posts: 841
Likes: 9
From: indiana
What a pain! At least the pats are cheap. Of course I can take the door panel off in my mind after several window motors. 
Nice write up. I suspect now that mine are doing the same thing and need to take a closer look. I suspected mine were leaking above that point along the top frame but if this is common it is probably from the sail like yours. Thanks for pushing me to no longer neglect this. I don't really want water leaking through the sails if that is where mine is leaking.
Thanks for the excellent pics!

Registered User
Joined: Feb 2003
Posts: 841
Likes: 9
From: indiana
jtbinvalrico -
Did you purchase yours online? If so I'd appreciate if you could PM me a quick link to the product page if you have it handy.
I already checked with my favorite online vendor and they claim to only have the whole tweeter pod available which includes the weatherstripping. $81 per side.
If I google the part numbers I only get a few hits and so far the exploded views are not showing the gasket at all.
I'd like to get these ASAP and don't want to leave work early to go to a local dealer to make sure I see the diagram unless I have to this week. Plus they could tell me the same thing = wasted trip.
If you could save me a step that would be awesome!
Thread Starter
Registered User
Joined: Sep 2012
Posts: 245
Likes: 1
From: Tampa, FL
Here you go....this is a site vendor so I think I can post these links:
https://conceptzperformance.com/sear...ch=80833-cd000
https://conceptzperformance.com/sear...ch=80832-cd000
Remember that this part is different from the triangle-shaped rubber gasket that sits between the mirror body and the triangular metal door frame. Looking at the parts diagrams, that gasket doesn't appear to be sold individually, and I'd assume it's included with the purchase of either a new mirror assembly or the sail/tweeter panel.
Trending Topics
Registered User
Joined: Feb 2003
Posts: 841
Likes: 9
From: indiana
Thanks!
Ordered them immediately. Don't know how I would have explained those to the parts counter people or if they could find them. Especially since you can get them confused with some other internal seals you seem to be describing. It will all be clear when I get the parts in my hand and the car apart. Sometimes even excellent pictures only get you 95% understanding of a repair. Looks like an easy one though. thanks for including all of the tips and advice.
You saved me a lot of hassle on top of a busy week by adding on the link. Thanks again...


New Member
Joined: May 2026
Posts: 2
Likes: 0
I wasn't able to find one, so here's a how-to on replacing the seals around the �sail panel� area of the door windows. You may have noticed water leaking in, or perhaps increased wind noise near the area circled in red:
Attachment 398764
A closer inspection of those seals may reveal that they are dried and cracked, and need to be replaced. Here's the parts:
Driver's side............80833-CD000
Passenger side.........80832-CD000
Available from your favorite Nissan parts store or site. I paid about $24.00 each.
Attachment 398765
Old cracked seal:
Attachment 398766
New one side-by-side with the old one:
Attachment 398767
Start by removing the door panel:
Attachment 398768
Then the sail panel:
Attachment 398769
Attachment 398770
Undo the three nuts holding the mirror on, unplug the electrical connector, and set the mirror aside:
Attachment 398771
The old seal can be lifted out:
Attachment 398772
As you remove the seal, pay attention to how the little tabs lay on the frame, and how this notched tab circled in red ends up being inserted into the channel and then lifted up to secure it:
Attachment 398773
Here's the new one.....observe the previously described notched tab:
Attachment 398774
Fit the new seal over the frame. The first step is to get that notched tab to insert and then lock upwards, while fitting the two rubber **** through the frame holes......while making sure the two flat tabs on the inside and the one long flat tab on the outside mate against the frame. You can do this any number of ways. I used a plastic pry bar to push on the inside of the channel while I lifted it up. Gently use pliers to pull the rubber **** through til they click. Here's some photos of that from the driver and passenger sides:
Attachment 398775
Attachment 398776
Attachment 398777
The frustrating part will be the outside flat tab. It will want to go on like this:
Attachment 398778
But it has to go on like this:
Attachment 398779
I used a small screwdriver to slightly open the space between the frame and the door skin while I fished it down and onto the rail.....all while not undoing the parts on the other side which I already had in place:
Attachment 398780
The upper part of the seal fits easily down the top side of the frame:
Attachment 398781
All done, reinstall the mirror, sail panel, and door panel:
Attachment 398782


This post is very old and I doubt any of the previous users will respond. Having recently done this job, here's my recommendation...
Your best bet is to remove the entire frame piece. It's held in the door with an extra few bolts and a nut. I think you can do this without removing the window glass, but I wouldn't risk it. When I tackled the passenger side, I removed the window glass for safety reasons (as I didn't want to scratch it during the re-install process).
The rubber studs/tabs that lock the seal onto the frame fight you like crazy when trying to install the new seal (removal of old is easy!). I had the same issue, you simply cannot get a pair of good strong pliers into those small spaces without breaking or scratching something. To make sure the seal is properly secure/aligned/flush you really need to remove the frame piece from the door. There's a lock nut holding it to the lower section of the door skin and two bolts securing it to the upper section. Remove those and gently maneuver the piece out of the door. That lower channel section with the stud is the reason I removed the door glass.
Once it's out of the door, you have all the working space required to properly install the new seal. EVEN THEN, it was a total PITA to do it right. The door is already mostly taken apart by this point, so removing the window glass only adds a few more minutes to the job. Not a big deal.
Good Luck!
-Icer
Last edited by icer5160; Yesterday at 06:25 PM.
New Member
Joined: May 2026
Posts: 2
Likes: 0
This post is very old and I doubt any of the previous users will respond. Having recently done this job, here's my recommendation...
Your best bet is to remove the entire frame piece. It's held in the door with an extra few bolts and a nut. I think you can do this without removing the window glass, but I wouldn't risk it. When I tackled the passenger side, I removed the window glass for safety reasons (as I didn't want to scratch it during the re-install process).
The rubber studs/tabs that lock the seal onto the frame fight you like crazy when trying to install the new seal (removal of old is easy!). I had the same issue, you simply cannot get a pair of good strong pliers into those small spaces without breaking or scratching something. To make sure the seal is properly secure/aligned/flush you really need to remove the frame piece from the door. There's a lock nut holding it to the lower section of the door skin and two bolts securing it to the upper section. Remove those and gently maneuver the piece out of the door. That lower channel section with the stud is the reason I removed the door glass.
Once it's out of the door, you have all the working space required to properly install the new seal. EVEN THEN, it was a total PITA to do it right. The door is already mostly taken apart by this point, so removing the window glass only adds a few more minutes to the job. Not a big deal.
Good Luck!
-Icer
Your best bet is to remove the entire frame piece. It's held in the door with an extra few bolts and a nut. I think you can do this without removing the window glass, but I wouldn't risk it. When I tackled the passenger side, I removed the window glass for safety reasons (as I didn't want to scratch it during the re-install process).
The rubber studs/tabs that lock the seal onto the frame fight you like crazy when trying to install the new seal (removal of old is easy!). I had the same issue, you simply cannot get a pair of good strong pliers into those small spaces without breaking or scratching something. To make sure the seal is properly secure/aligned/flush you really need to remove the frame piece from the door. There's a lock nut holding it to the lower section of the door skin and two bolts securing it to the upper section. Remove those and gently maneuver the piece out of the door. That lower channel section with the stud is the reason I removed the door glass.
Once it's out of the door, you have all the working space required to properly install the new seal. EVEN THEN, it was a total PITA to do it right. The door is already mostly taken apart by this point, so removing the window glass only adds a few more minutes to the job. Not a big deal.
Good Luck!
-Icer
Thank you so much for responding to a very old post. Literally, in searching the internet and Youtube, this is the only guide I can find, so I'm definitely lucky you were still paying attention. I bought 12" tweezers which, if they work, makes this thing a little less of a PITA to replace. Will report back, thanks again.

Thread
Thread Starter
Forum
Replies
Last Post
Mr. Nibiru
Exterior & Interior
5
Apr 5, 2012 05:39 AM
R@lph'$ 350z
Exterior & Interior
2
Sep 8, 2009 05:01 PM