
MVP Motorsports Berk HFC Install with Dyno and Video!!! 2008 350Z


To start things off here is the list of all the tools required for removal and reinstallation of the Berk High Flow Cats on the 2008 350z:
3/8 inch Drive Impact
3/8 inch Breaker Bar
3/8 inch Ratchet
3/8 14mm Swivel Socket
3ft of extension
14mm Long Socket
14mm Short Socket
7/8 Wrench
16mm Wrench
Prybar
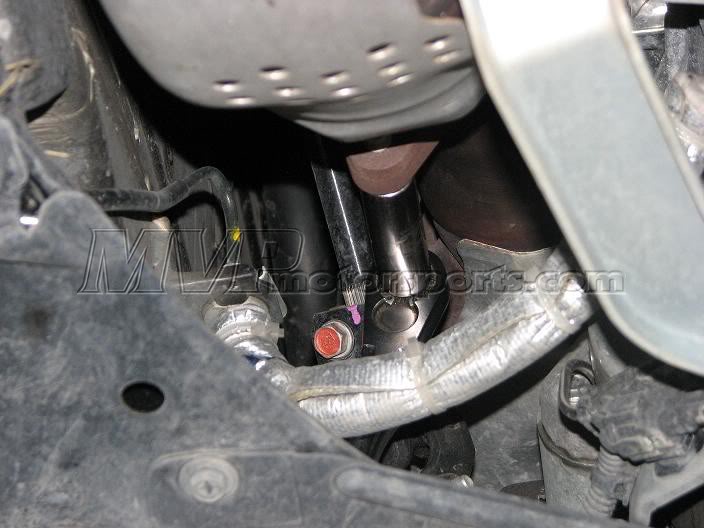
Prior to lifting the vehicle up we recommend you remove the top two bolts as to access these you will need to go through the engine bay.
For this you will need the 3 ft of extension as well as your breaker bar if the nut cannot be removed with the 3/8 impact. The driver side is where your short 14mm will come in as you have your steering shaft directly in the way of the nut, the passenger side is a straight shot and very easily reached.
DRIVER SIDE:


PASSENGER SIDE


Next you will need to lift the vehicle up. Make sure to use jack stands if you do not have access to a lift for your personal safety.
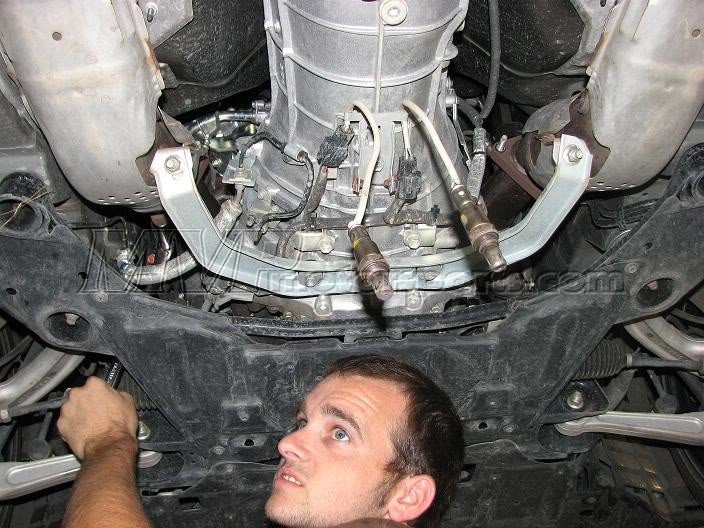
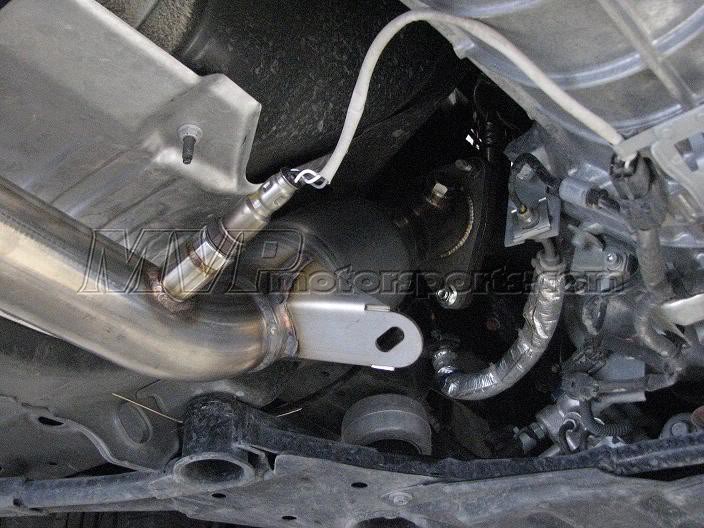
Remove your 02 sensors 1st so you do not have to worry about damaging them. For this you will need your 7/8 wrench.
Once you get the sensors out of your way start on the rear of the cats and work your way forward. All of the hardware holding your cats on are 14mm.
MAKE SURE TO NOT DAMAGE YOUR CAT TO CATBACK METAL 2 BOLT GASKETS, YOU WILL REUSE THEM.

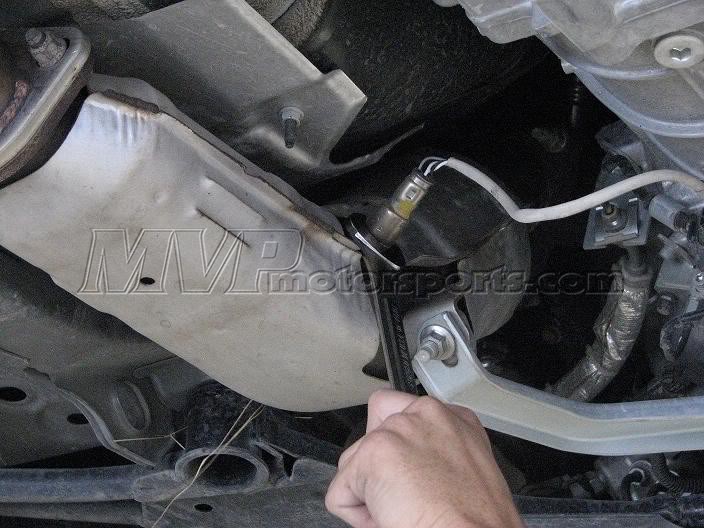
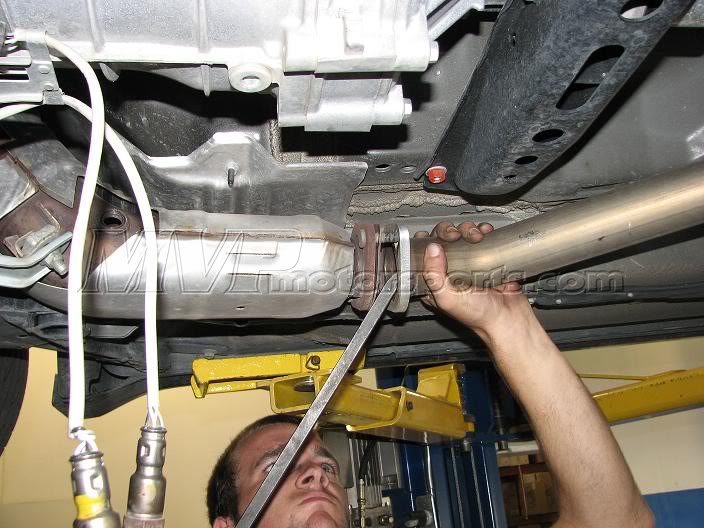
After you have removed all hardware from your cat to catback,move on to the top bolts. Here you will need your 3/8 inch Ratchet and 14mm long socket. These bolts are fairly simple to access. Here are some photos on how to access them.
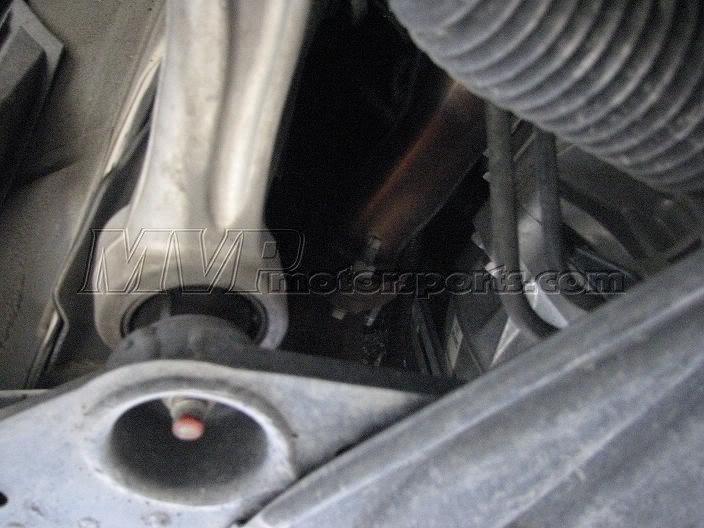
To get to the forward facing bolt it is best to go between the subframe and control arms. Here are a few pics so you can see how we did it.
The last bolt near the transmission is very easy to get to compared to the other two.

Next you will need a pry bar as your OEM cat has studs. Pry between the cat and catback to separate the two. You will repeat this process for both sides.
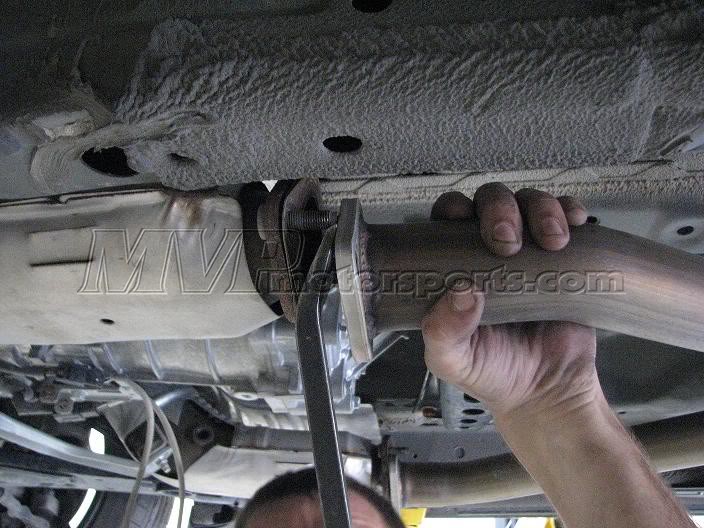
The last part to be removed will be the exhaust brace connected to your transmission. This is held on by 2 14mm bolts and 2 14mm nuts(on cats).

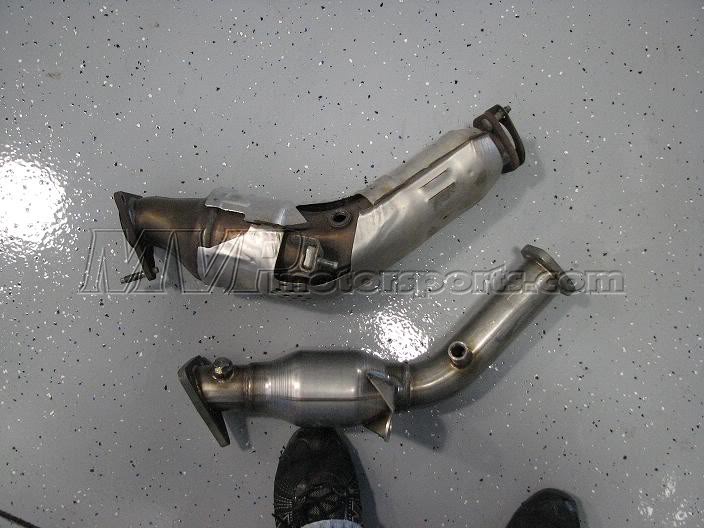
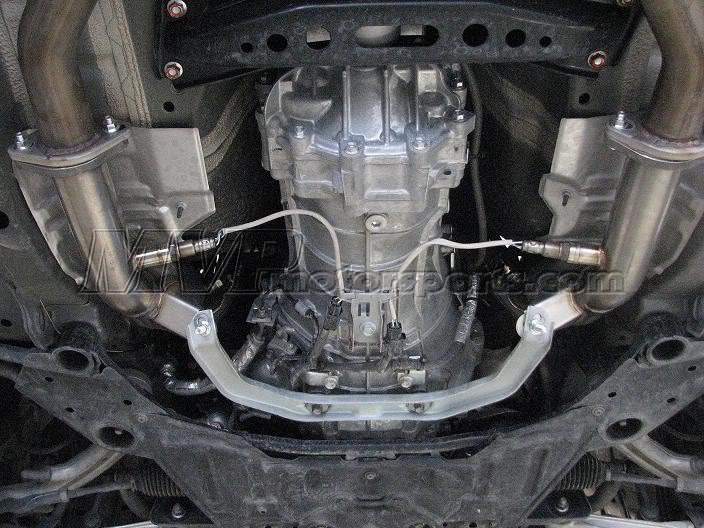
Now that you have your OEM cats off it is time to bolt up your new Berk Technologies High Flow Cats!!
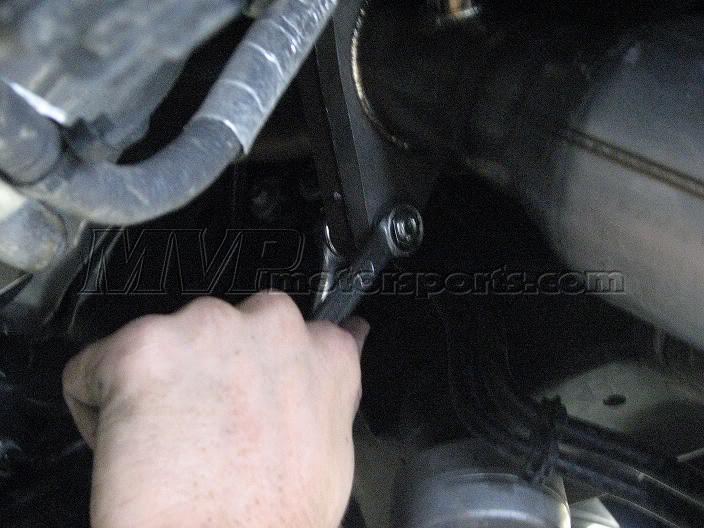
To start things off get your new gasket provided by Berk and put it on the stud coming of you factory exhaust manifold. Slide the Berk cat into place and hand tighten with the 14mm nut provided in your kit. Next get one of the 16mm bolt/14mm nut combos out of your kit and install in the other 2 bolt hole locations. For your top bolt hole make the nut face forward as you must tighten that one from the engine bay. Hand tighten all nuts to ensure they do not come lose while tightening other nuts. You will need your 3/8 impact, short extension, and 14mm swivel socket to torque the nuts down.

Next reinstall your O2 sensors using your 7/8 wrench. Make sure to completely unclip your O2 sensors from the harnesses so you do not bind them during install.
Now get your exhaust brace and mount into place using the factory bolts on the transmission and the two long bolts provided with your kit and 2 14mm nuts.
Get 4 of the regular 16mm bolts and 4 of the 14mm nuts out of your kit so you can mate the Berk HFC�s to your catback. Make sure you use your OEM multilayer metal exhaust gasket to ensure no leaks!
This is what you should have once finished
Now go enjoy you new crisp exhaust note and added horsepower!!!
MVP Technician rated the removal of the cats a 6 out of 10 in difficulty and the installation of the Berk HFC�s a 2 out of 10.
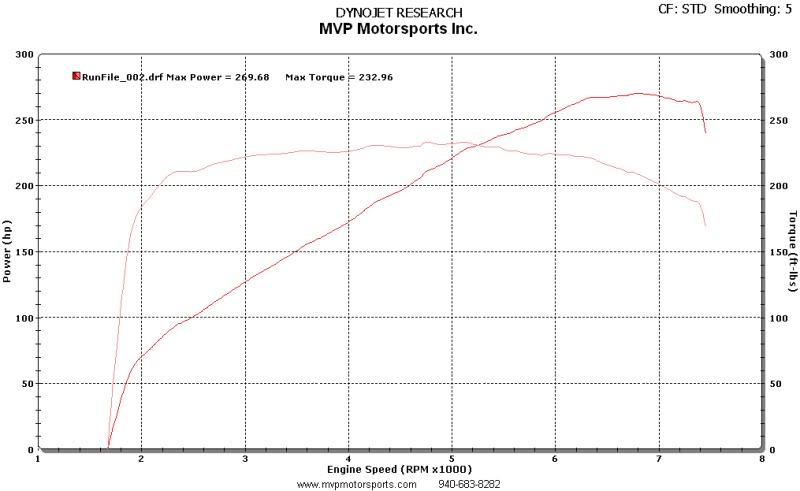
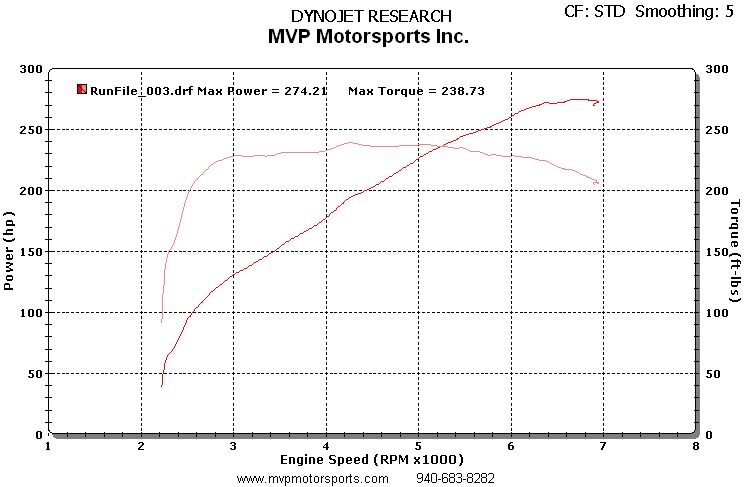
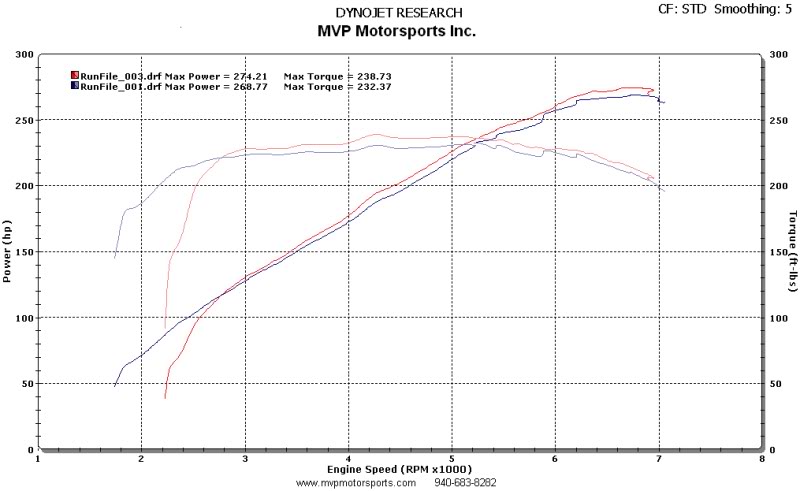
Here are some dyno sheets before and after the cats. Please note that the vehicle already had a Bassani catback exhaust system hence only a 5hp gain to the wheels.
Before:
After:
If you have any questions don�t hesitate to pm or call me here at the shop.
Videos coming soon!!
Regards,
Robert

Here are both runs on top of each other so you can get a better idea of the gains! Sorry for the after run being done at 2200, I did the 1st run while my tech did the last run. He is used to dynoing Supras ") .
.
Regards,
Robert
.Regards,
Robert


Trending Topics
Before Video:
http://www.vimeo.com/6090436
After (Accelerating)
http://www.vimeo.com/6269122
After Video:
http://www.vimeo.com/6270311
Regards,
Robert
http://www.vimeo.com/6090436
After (Accelerating)
http://www.vimeo.com/6269122
After Video:
http://www.vimeo.com/6270311
Regards,
Robert
Last edited by Chops@MVP; Aug 25, 2009 at 02:29 PM.


Registered User
Joined: Aug 2011
Posts: 68
Likes: 0
From: New jersey
Somebody! Help i just got berks hfc's today at my house, my current setup in my 2008 350z hr is skunk2 true dual exhaust and fujitgo dual intakes, i have not yet install the hfcs..... If i install my hfcs will i get a CEL? Or do i need a tune? If so what kind of tune ? Please PM me and tell me any info that would be helpful. I currently do not have a cel on exhaust and intakes... I do not want a cel, soo any help would be very thankful of you's! PM any info thank you! Also how much wherl power should i make on dynojet?

Thread
Thread Starter
Forum
Replies
Last Post
m_0g
Audio, Video & Electronics (DIY)
12
Jun 3, 2021 10:05 AM