
lifekenophobic's progress thread.


Thread Starter
New Member


Joined: Nov 2009
Posts: 238
Likes: 57
From: Florida
I originally had a post setup in the New Owners area, but realized that wouldn't really apply, since I won't be a "new owner" forever! 
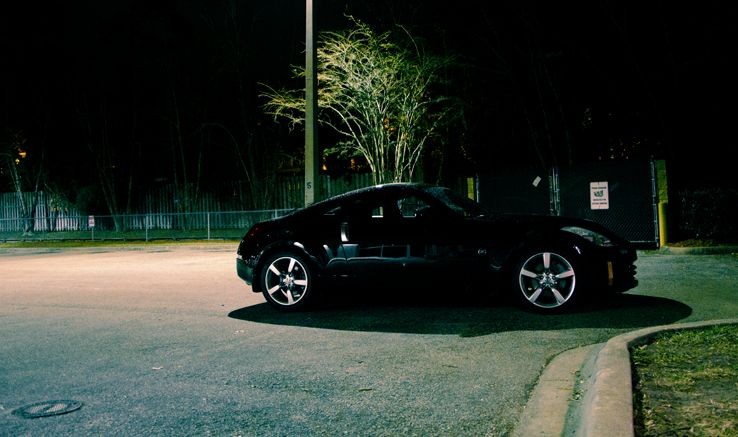
I decided to post the progress/build of my car here instead. I have some great plans for down the road, but want to make sure I handle them tastefully and intelligently. I've changed some basic things to begin with:
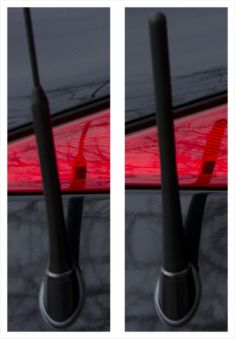
One of the first things I ran out to do was get a shorter antenna. I went with the RDX antenna for three reasons. One, it looks the best (in my opinion) of the most popular options (S2000, Avenger, etc). Two, it maintains a great level of reception. And three, the price was right - $11 from the Acura dealership.
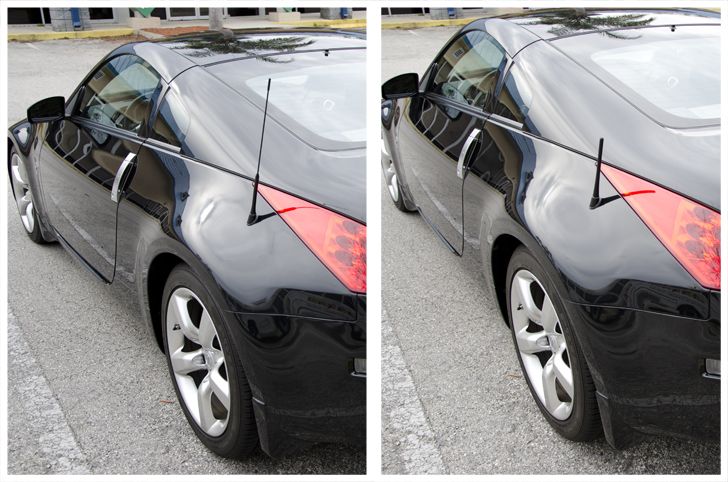
Here's a closer picture of the base, to show how flush it sits.
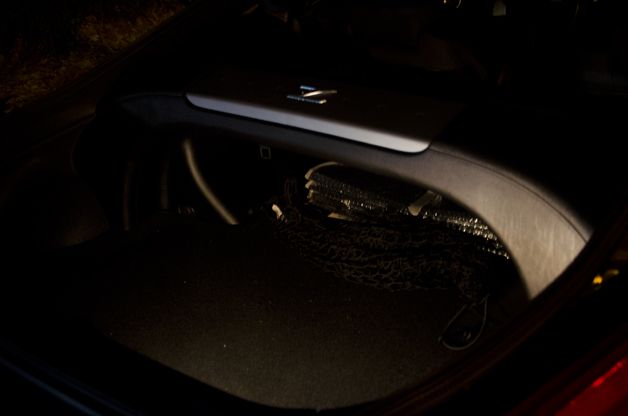
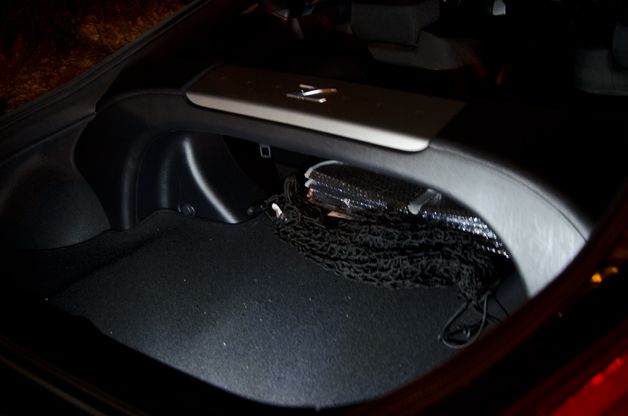
Next was converting some lighting to LED. Here are a couple before and afters of Diode Dynamics' Stage 2 cargo light LEDs.
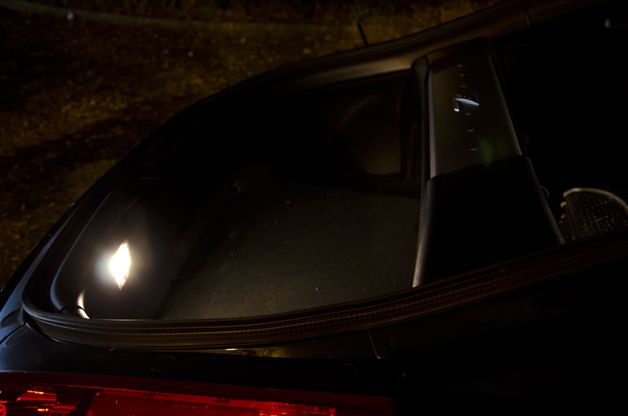
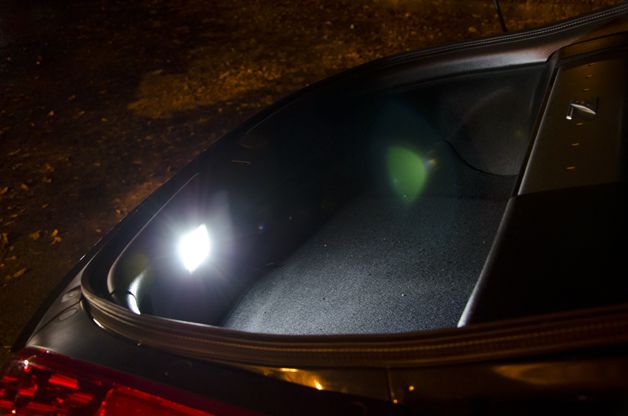
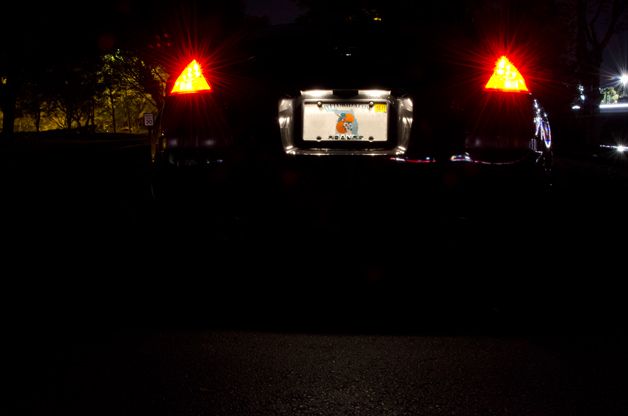
I also went with Diode Dynamics Stage 2 license plate LEDs. Here are the before and afters:
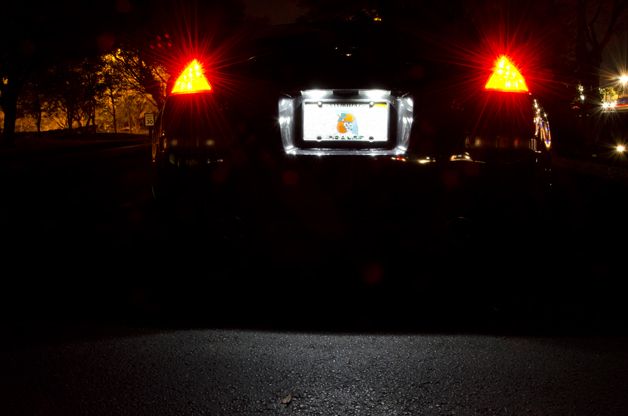
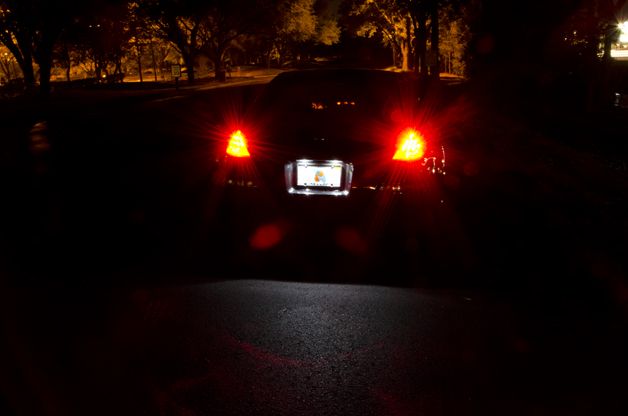
And just a night shot that came out kinda nice.
I'm excited to watch this thread grow, and see where I go with the car. I've already learned a lot from the forums, so. Thank you to all who have posted good, useful info. I look forward to becoming part of the community.
I decided to post the progress/build of my car here instead. I have some great plans for down the road, but want to make sure I handle them tastefully and intelligently. I've changed some basic things to begin with:
One of the first things I ran out to do was get a shorter antenna. I went with the RDX antenna for three reasons. One, it looks the best (in my opinion) of the most popular options (S2000, Avenger, etc). Two, it maintains a great level of reception. And three, the price was right - $11 from the Acura dealership.
Here's a closer picture of the base, to show how flush it sits.
Next was converting some lighting to LED. Here are a couple before and afters of Diode Dynamics' Stage 2 cargo light LEDs.
I also went with Diode Dynamics Stage 2 license plate LEDs. Here are the before and afters:
And just a night shot that came out kinda nice.
I'm excited to watch this thread grow, and see where I go with the car. I've already learned a lot from the forums, so. Thank you to all who have posted good, useful info. I look forward to becoming part of the community.


Thread Starter
New Member
Joined: Nov 2009
Posts: 238
Likes: 57
From: Florida
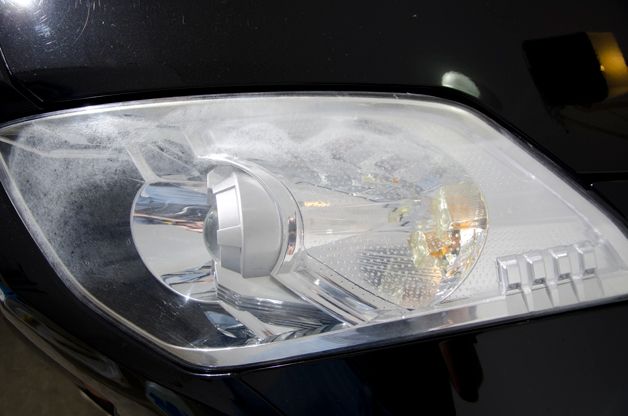
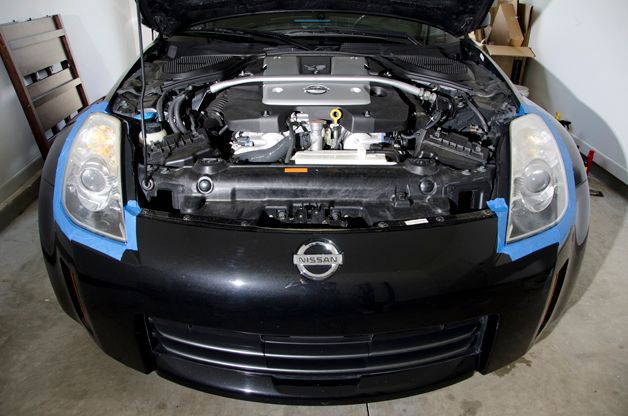
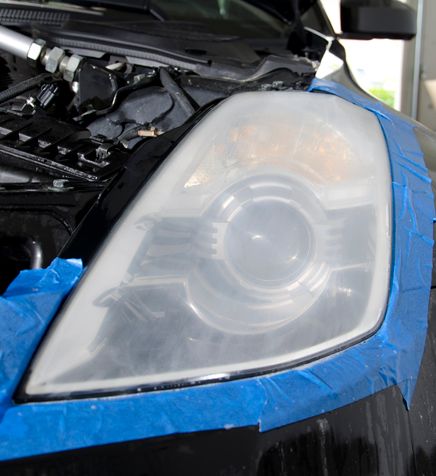
I'm still saving for my first bigger mod (exhaust?), so figured I could at least make some improvements in the meantime. My headlights weren't all that horrible to begin with, but they needed a good restore anyway.
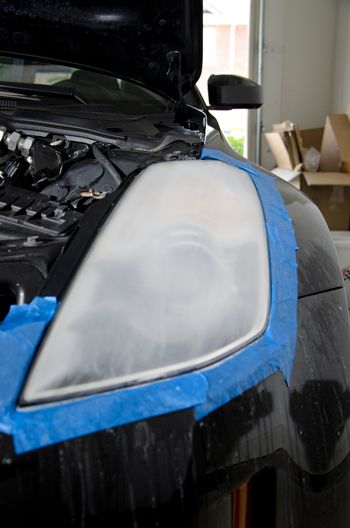
This is what I started with. You can see a bit of the OEM protection flaking off and not looking so good.
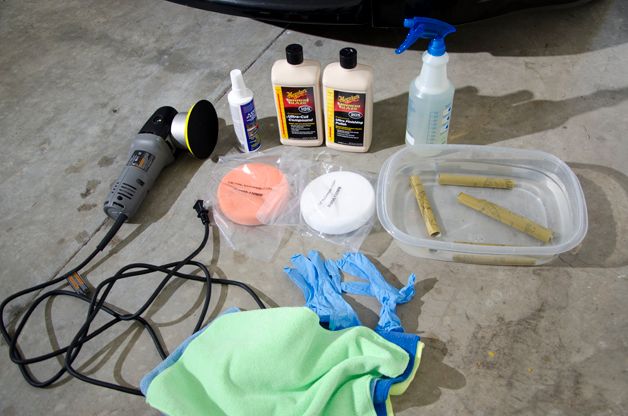
Here are the materials I used:
-Porter Cable 7424XP DA polisher
-Orange and white Lake Country pads
-Spray bottle with water and car soap
-1000, 2000, and 3000 grit sandpaper
-Meguiars M105 and M205 compound and polish
-Aerospace 303 sealant
-A few microfiber towels
Taped up and ready for correction.
Yikes. Sanding with 1000 grit looks pretty scary for a $400+ headlight.
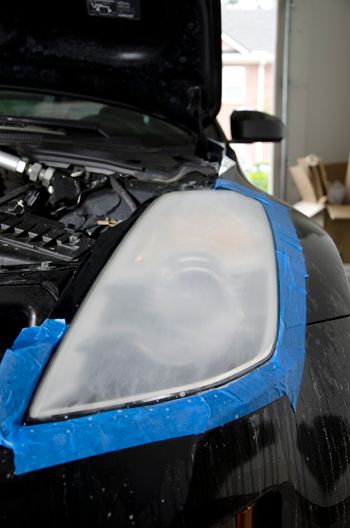
After 2000 grit, it starts to clear up a bit.
After 3000 grit, you can start to at least see the headlight again.
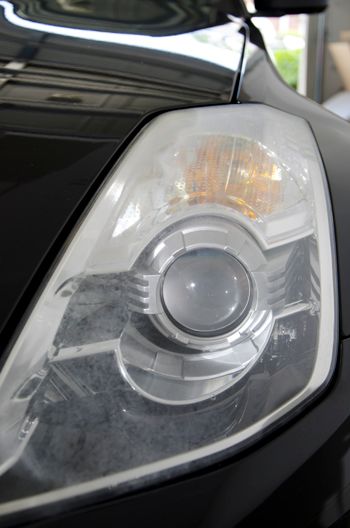
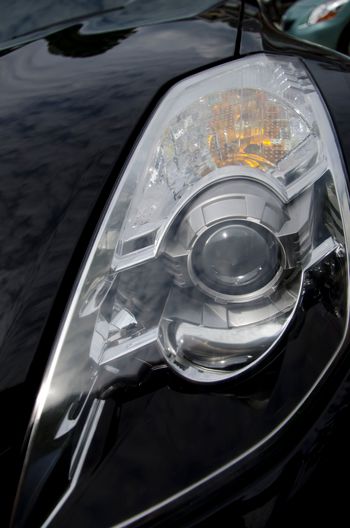
Final results after polishing and sealing. I'm pretty happy with the results, but will need to hit them again when I detail the whole car. This was my first time using the Porter Cable, so I think I did alright.
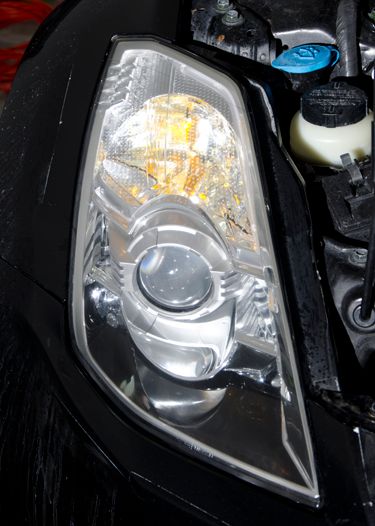
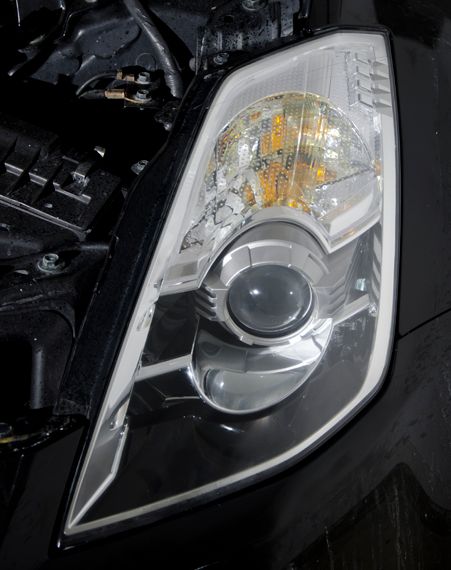
In the sun for a final check of my work.
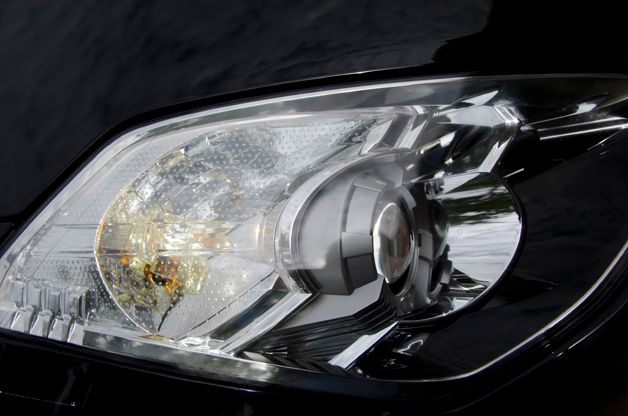
This is what I started with. You can see a bit of the OEM protection flaking off and not looking so good.


Here are the materials I used:
-Porter Cable 7424XP DA polisher
-Orange and white Lake Country pads
-Spray bottle with water and car soap
-1000, 2000, and 3000 grit sandpaper
-Meguiars M105 and M205 compound and polish
-Aerospace 303 sealant
-A few microfiber towels

Taped up and ready for correction.

Yikes. Sanding with 1000 grit looks pretty scary for a $400+ headlight.

After 2000 grit, it starts to clear up a bit.

After 3000 grit, you can start to at least see the headlight again.

Final results after polishing and sealing. I'm pretty happy with the results, but will need to hit them again when I detail the whole car. This was my first time using the Porter Cable, so I think I did alright.


In the sun for a final check of my work.


Trending Topics


Thread Starter
New Member
Joined: Nov 2009
Posts: 238
Likes: 57
From: Florida
Thanks guys. Between work, traveling, and moving into a new place, time and funds have been pretty tight. I don't want to rush my actual mods anyway, so some general maintenance is tying me over for now. (Yes, my wallet is indeed thanking me).
I do have some pretty nice plans, but want to make sure I can save up for quality parts. The good news is, I just got a promotion today! So hopefully that will help with things down the road. Stay tuned.
I do have some pretty nice plans, but want to make sure I can save up for quality parts. The good news is, I just got a promotion today! So hopefully that will help with things down the road. Stay tuned.

Nice work!
Might want to check this thread out for a good way to restore the UV coating to the lenses:
https://my350z.com/forum/body-interi...v-coating.html
Might want to check this thread out for a good way to restore the UV coating to the lenses:
https://my350z.com/forum/body-interi...v-coating.html
Thread Starter
New Member
Joined: Nov 2009
Posts: 238
Likes: 57
From: Florida
Nice work!
Might want to check this thread out for a good way to restore the UV coating to the lenses:
https://my350z.com/forum/body-interi...v-coating.html
Might want to check this thread out for a good way to restore the UV coating to the lenses:
https://my350z.com/forum/body-interi...v-coating.html


Thread Starter
New Member
Joined: Nov 2009
Posts: 238
Likes: 57
From: Florida
Nothing major, but I got around to painting my side markers. I was debating the JDM clears, but I think just blacking them out looks better on MB.
First coat of gloss black Krylon Fusion.
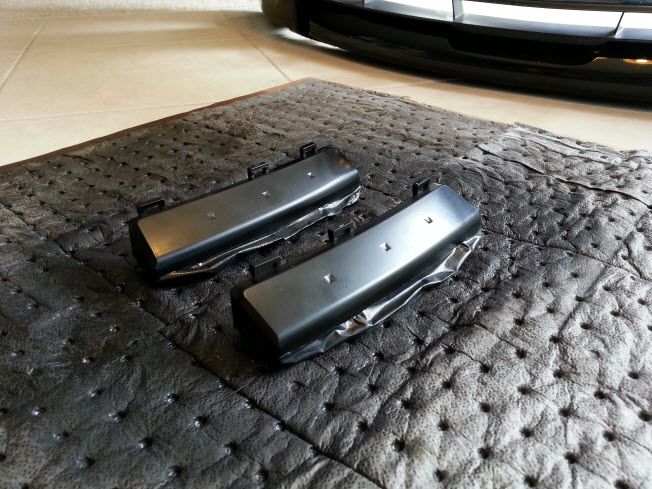
Second coat, finally looking a bit more shiny.
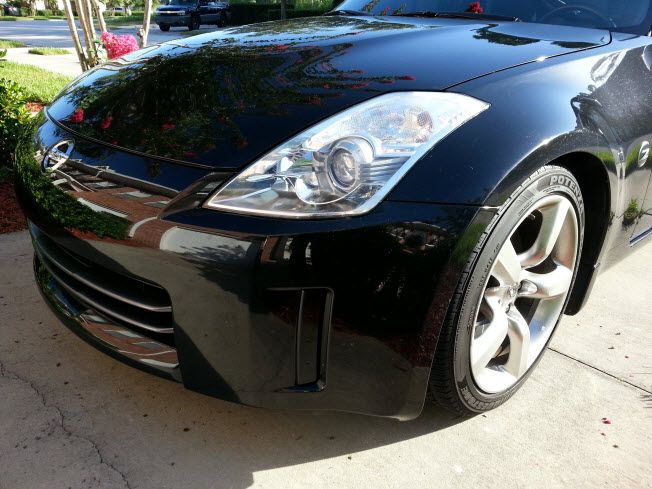
Re-installed, and back outside. I'm pretty happy with it, and it really cleaned up the front end not having the orange there. (Excuse my dirty paint. It's been raining like crazy.)
Headlights are next. I just need to find the courage to stick them in the oven.
First coat of gloss black Krylon Fusion.
Second coat, finally looking a bit more shiny.
Re-installed, and back outside. I'm pretty happy with it, and it really cleaned up the front end not having the orange there. (Excuse my dirty paint. It's been raining like crazy.)
Headlights are next. I just need to find the courage to stick them in the oven.


Registered User
Joined: Sep 2012
Posts: 1,490
Likes: 24
From: planet earth
They look good, I must admit when I first stated to read the thread I thought 'oh oh this could end up being a bit of a mistake', but now you've fitted them I think they really do look good and like you say they tidy up the front end. Good job OP.
