
VO's Sub Enclosure Makeover Fr3ad In Progress..FI Q series 12" sub..RF power....

Thread Starter
Administrator
iTrader: (25)
Joined: Jun 2005
Posts: 58,609
Likes: 2,747
From: Down Under & Dirty
I took 4 hours off of work yesterday so I could tackle this project. It went extremely smooth. A total of 6 hours was put into it last night. 6 hours may seem like a long time to some, but I'm a perfectionist when it comes to my work.  I also took a lunch break too. I hope you guys enjoy the pictures....
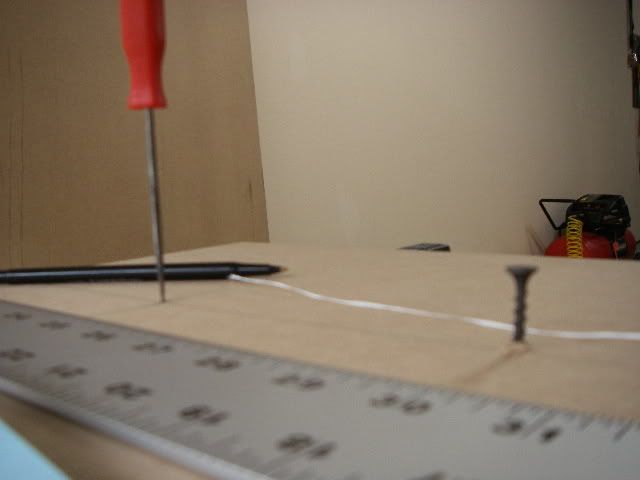
First I had to get the sub cut out. It took alittle bit of creativity here. I tried the dental floss attached to a pen method, but failed. The dental floss wouldn't swivel on the center screw properly and it kept stretching also.
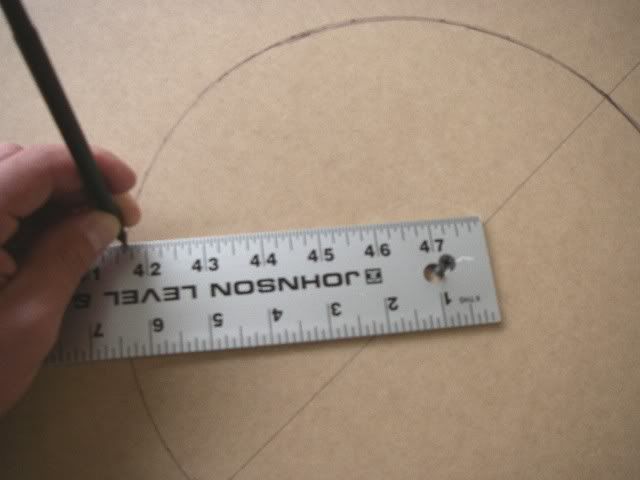
I found a better method by using a straight edge. The ruler had a hole on one end. I simple placed it through the center screw, then held a pen firmly at my mark while guiding the ruler in a circle. It made a perfect sub cut out hole...
Fail
Suceed
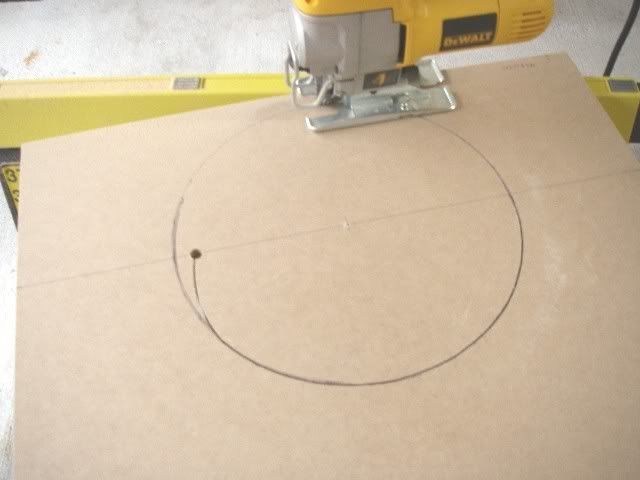
Carefully cutting out the cut out with a jigsaw
I also took a lunch break too. I hope you guys enjoy the pictures....First I had to get the sub cut out. It took alittle bit of creativity here. I tried the dental floss attached to a pen method, but failed. The dental floss wouldn't swivel on the center screw properly and it kept stretching also.
I found a better method by using a straight edge. The ruler had a hole on one end. I simple placed it through the center screw, then held a pen firmly at my mark while guiding the ruler in a circle. It made a perfect sub cut out hole...
Fail
Suceed
Carefully cutting out the cut out with a jigsaw
Last edited by VO...; Jan 16, 2008 at 07:32 AM.
Thread Starter
Administrator
iTrader: (25)
Joined: Jun 2005
Posts: 58,609
Likes: 2,747
From: Down Under & Dirty
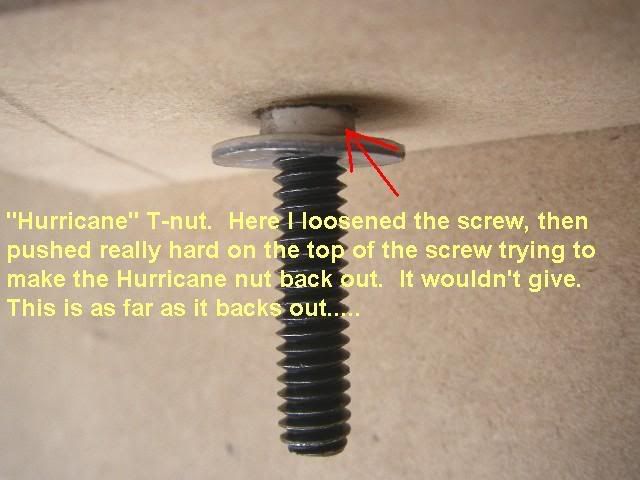
There are 3 different types of T-nuts available from Partsexpress.com . I've always used the traditional 4 prong T-nut. I've had a couple of them dislodge and cause havoc trying to get the bolt out. This time around I tried a new designed offered. It's called the "Hurricane" T-nut. It has no spikes on it, only these tiny fins on the outter edge of them. I was quite skeptical, but the website assures you to not be decieved. Before deciding to use these, I did a trial run on some scrap wood. They're easy to install. Use a 5/16" drill bit, then tap the Hurrican nuts in with a light hammer.
I tightened the bolt with as much hand strength as I could muster. The amount of torque these things can handle is unbelievable. They are solid as a rock! I then tried to dislodge them by loosening the bolt up about 1/2", then pushing real hard on the bolt. The hurricane nut backs out about 1/4 of it's overall length, then stops dead in it's tracks. It has a spongey feeling like it's spring loaded. You can push on the bolt and watch the hurricane nut back out, but it's like it is on a rubber band and retracts back into the hole. I have no other better explaination...
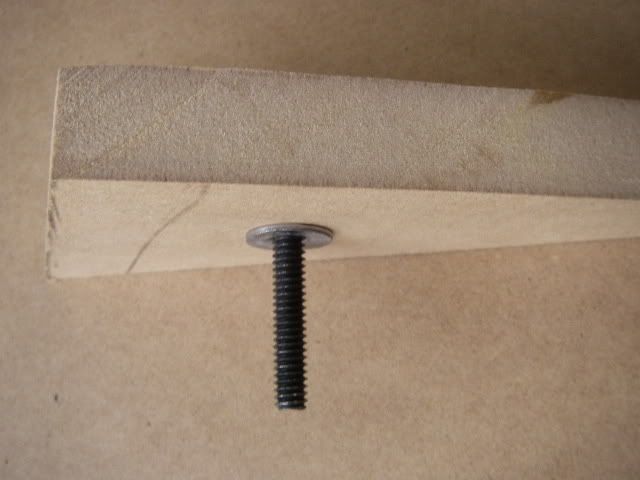
I tightened the bolt with as much hand strength as I could muster. The amount of torque these things can handle is unbelievable. They are solid as a rock! I then tried to dislodge them by loosening the bolt up about 1/2", then pushing real hard on the bolt. The hurricane nut backs out about 1/4 of it's overall length, then stops dead in it's tracks. It has a spongey feeling like it's spring loaded. You can push on the bolt and watch the hurricane nut back out, but it's like it is on a rubber band and retracts back into the hole. I have no other better explaination...
Thread Starter
Administrator
iTrader: (25)
Joined: Jun 2005
Posts: 58,609
Likes: 2,747
From: Down Under & Dirty
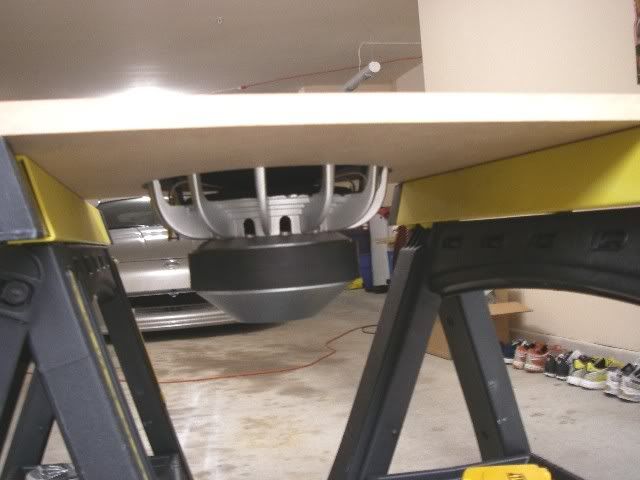
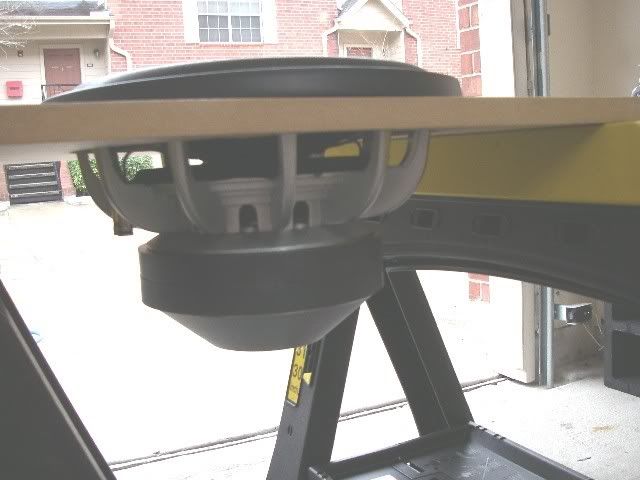
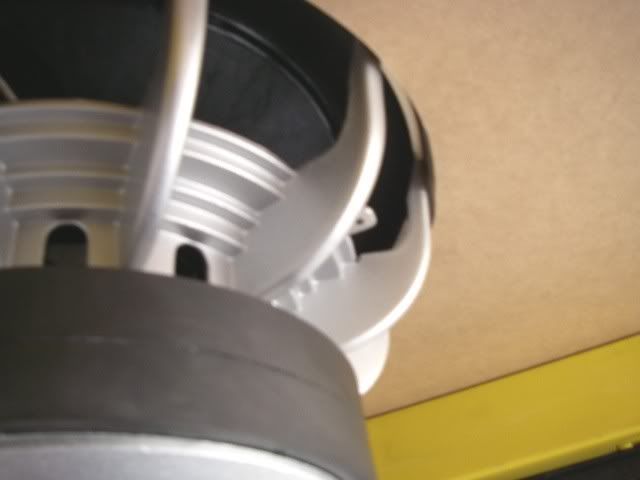
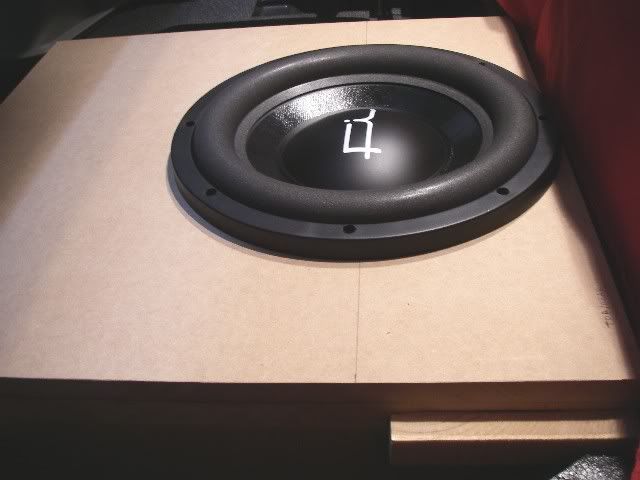
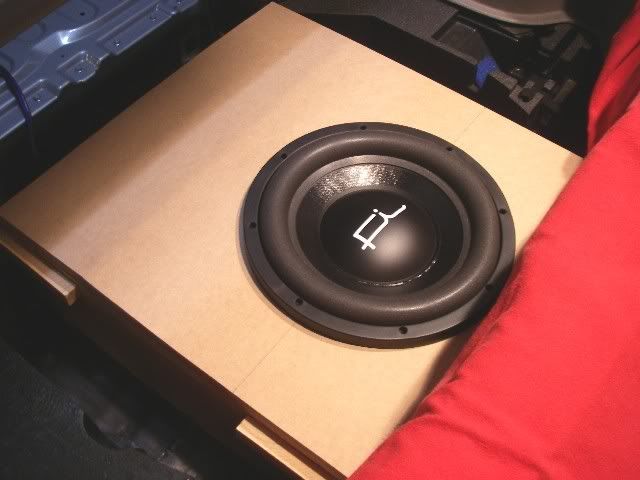
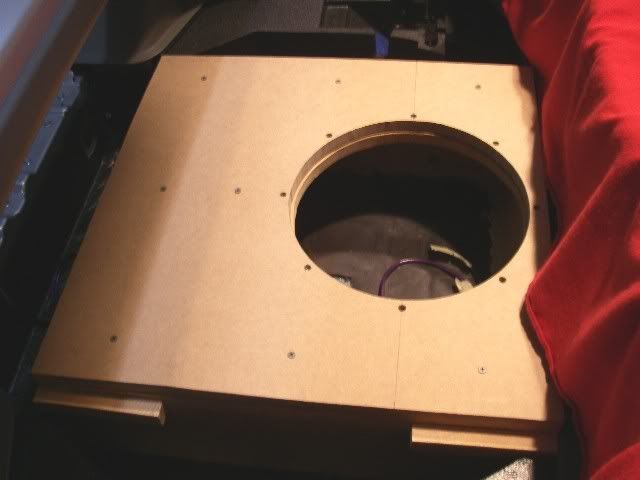
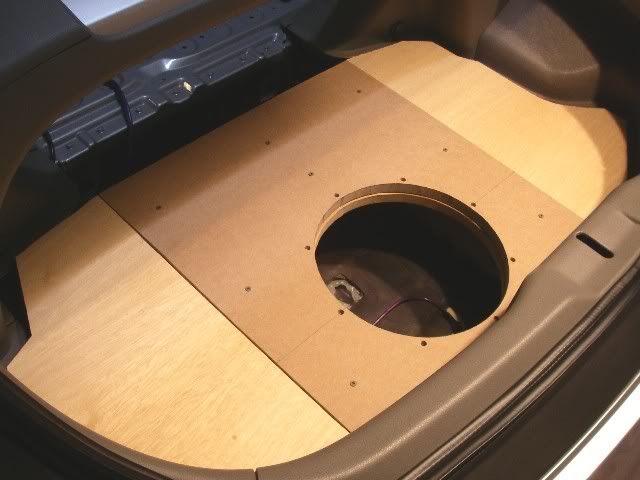
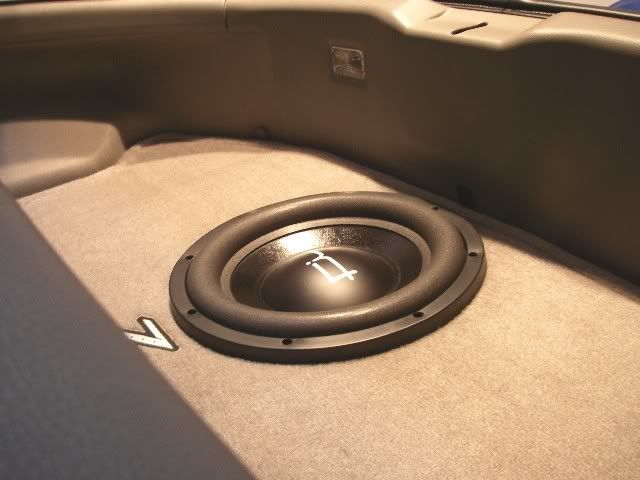
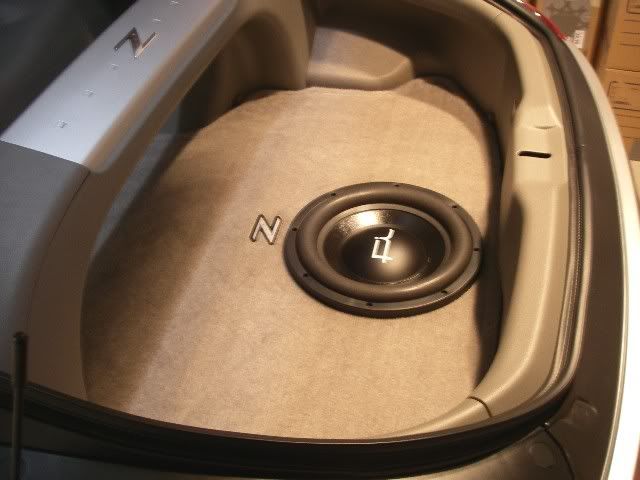
After the hole was cut, I did a quick test fit to make sure the sub didn't hit anything. Everything fit fine. I now have an enclosure depth of 8"....
Last edited by VO...; Jan 16, 2008 at 07:16 AM.


Thread Starter
Administrator
iTrader: (25)
Joined: Jun 2005
Posts: 58,609
Likes: 2,747
From: Down Under & Dirty
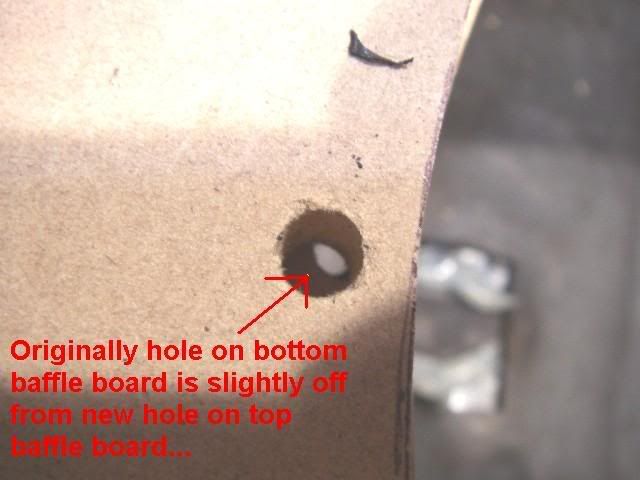
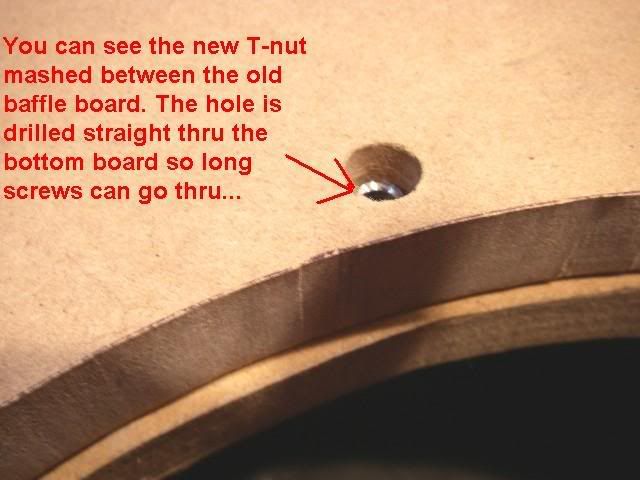
Next came the mounting bolt hole drilling. I knew I was going to have a problem here, due to the previous drilled holes on the original baffle board. I went ahead and drilled my new holes on the new baffle board, then placed the new board on top of the old one to see how the holes matched up. As you can see, there was going to be a problem getting a clean 5/16" hole on the bottom baffle board in order to fit a T-nut in there properly...
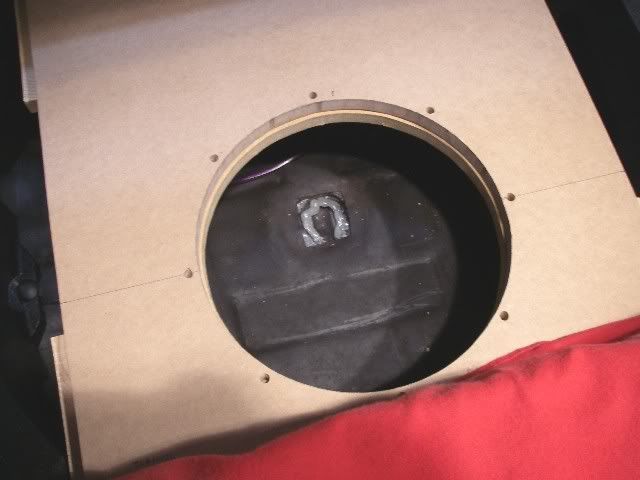
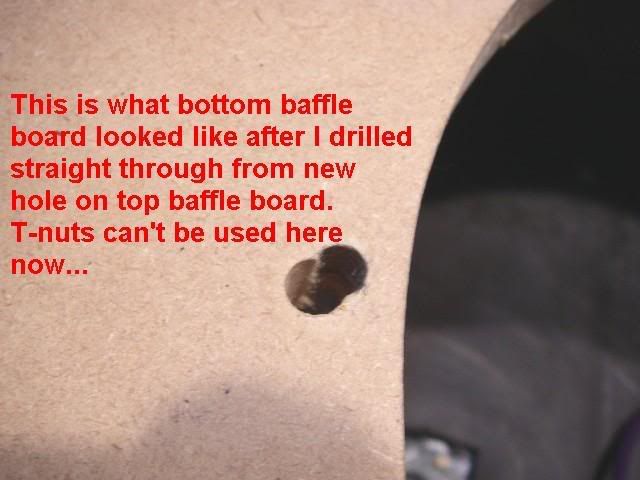
After the top holes were drilled, I placed the new baffle on top and drilled straight through. As you can see some of the holes overlapped eachother on the bottom baffle..
After the top holes were drilled, I placed the new baffle on top and drilled straight through. As you can see some of the holes overlapped eachother on the bottom baffle..
Thread Starter
Administrator
iTrader: (25)
Joined: Jun 2005
Posts: 58,609
Likes: 2,747
From: Down Under & Dirty
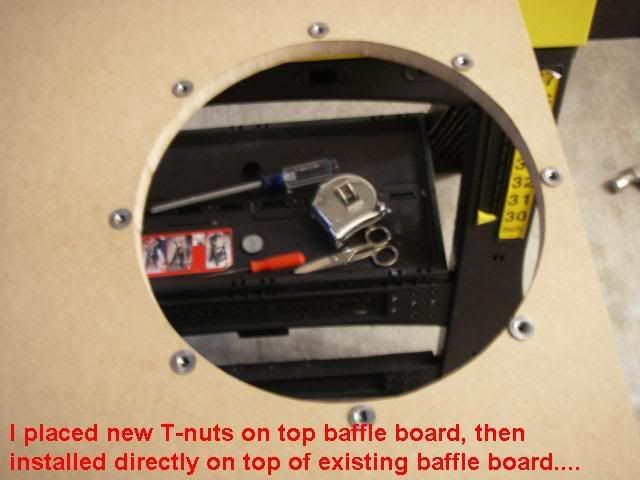
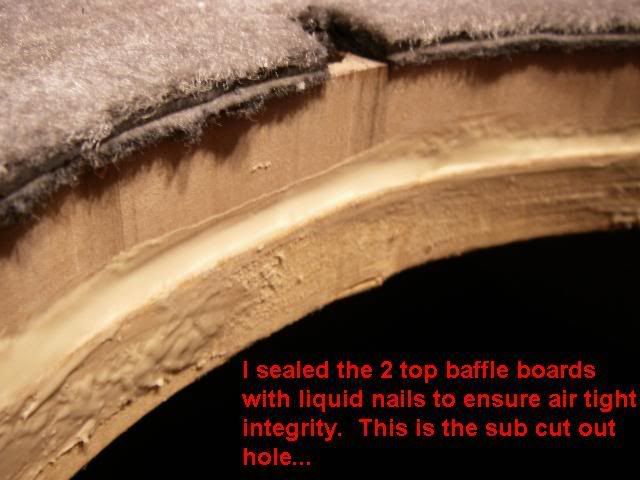
I had to ressolve the mounting bolt hole issue, so I brain stormed for a few minutes and decided to place the T-nuts on the top baffle board. This is permanent and means the T-nuts will never be removable unless the top of the box is destroyed. I really had no other choice....
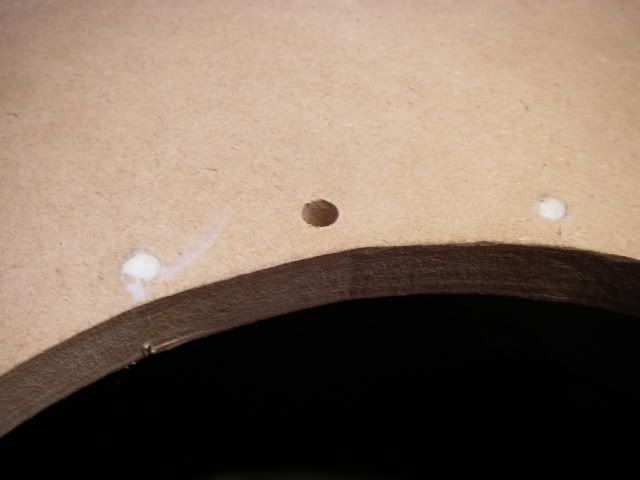
Hurricane T-nuts pre-installed on new baffle board.
Sealed up old holes on bottom baffle.
Coating of liquid nails laid out prior to installing new baffle board.
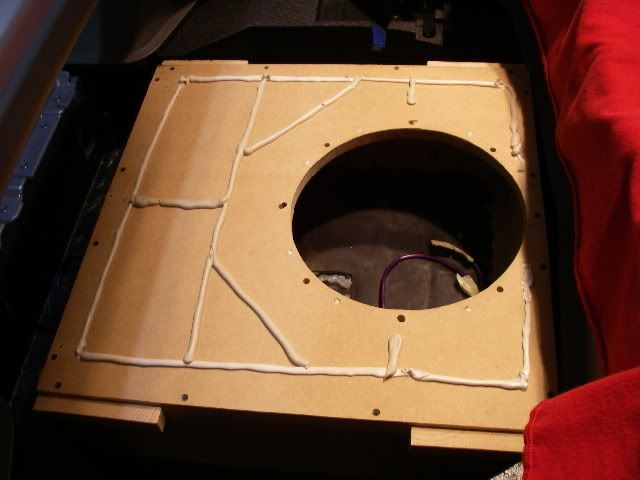
New baffle board mounted and screwed down with 1 1/2" wood screws.
Close up of T-nut sandwiched inbetween old and new board.
Hurricane T-nuts pre-installed on new baffle board.
Sealed up old holes on bottom baffle.
Coating of liquid nails laid out prior to installing new baffle board.
New baffle board mounted and screwed down with 1 1/2" wood screws.
Close up of T-nut sandwiched inbetween old and new board.
Last edited by VO...; Jan 16, 2008 at 07:35 AM.

Originally Posted by StreetOC192
set the bass and treble and mid tone to "0", turn off loudness, turn off any sound enhancement features, set any equalizer settings to "0".
Thread Starter
Administrator
iTrader: (25)
Joined: Jun 2005
Posts: 58,609
Likes: 2,747
From: Down Under & Dirty
Originally Posted by SuperBlack350z
Good job! How does it sound?

I'm gonna try and tune it tonight. It was raining nasty last night and I was tired.
Thread Starter
Administrator
iTrader: (25)
Joined: Jun 2005
Posts: 58,609
Likes: 2,747
From: Down Under & Dirty
Originally Posted by DustinZ33
After tuning your system with this procedure, do you adjust the bass, treble, and mid tone on the HU any? or Do you just leave the HU settings at 0?
Originally Posted by DustinZ33
After tuning your system with this procedure, do you adjust the bass, treble, and mid tone on the HU any? or Do you just leave the HU settings at 0?
Thread Starter
Administrator
iTrader: (25)
Joined: Jun 2005
Posts: 58,609
Likes: 2,747
From: Down Under & Dirty
It's a sad day in the audio world.
Last night I took the Z to an empty Home Depot parking lot to perform the tuning. Here's how it went.
I disconnected all RCA's going to my amps. Turned up volume as high as it would go(+60), then turned it down to 3/4's volume(+45). All enhanced features turned off and Bass/Mid/High settings zero'd out.
I tuned my mid's/high's amp first, since it recieves all 4 chns from my HU, then passes 2 passive chns to my sub amp. Tuned the front highs, then rears.
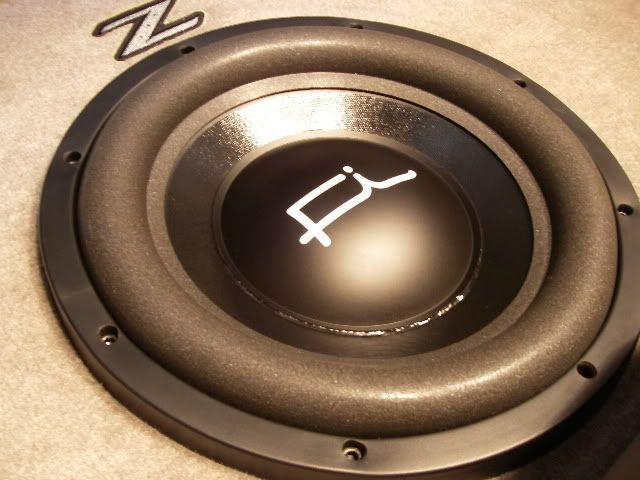
I tuned the sub last, making sure to use the same song over and over. My sub amp settings are set @ cut off frequency 55hz and the filter is set to LP only. The FI Q sub ended up only being able to take roughly the same amount of power the Fosgate T1 sub did, meaning the gain stayed in almost the same position(65% turned up). Anything higher and it started distorting.
The sub hits, but not as hard as my T1 did. It is a flat bass probably good for rock, but not rap. When playing DJ Magic Mike's "Feel the Bass", the FI sub was unable to effectively reproduce any of the lower range Hz notes. I watched and listened to the sub while it played various bass notes. If I could explain it best, I would say the sub would start to play a low note(20-30hz range) then back off mid way through the excursion. I could see the sub actually start excursion, then back off before the entire bass note was played. This gave it a non-responsive flat sound. Even when playing a full length song with higher bass frequencies, the sub appeared to not reproduce accurate bass notes after playing for a few minutes. Perhaps that was my imagination. I'm calling it like I see it.
Overall, I was more satisfied with the Fosgate T1's ability to reproduce lower bass notes. You could feel the T1's bass notes rumble your insides and make your clothing move standing outside the door. The FI Q is just not cutting it.
If there is something I missed or any suggestions to making the FI Q sub sound better I'm open to suggestions....
Last night I took the Z to an empty Home Depot parking lot to perform the tuning. Here's how it went.
I disconnected all RCA's going to my amps. Turned up volume as high as it would go(+60), then turned it down to 3/4's volume(+45). All enhanced features turned off and Bass/Mid/High settings zero'd out.
I tuned my mid's/high's amp first, since it recieves all 4 chns from my HU, then passes 2 passive chns to my sub amp. Tuned the front highs, then rears.
I tuned the sub last, making sure to use the same song over and over. My sub amp settings are set @ cut off frequency 55hz and the filter is set to LP only. The FI Q sub ended up only being able to take roughly the same amount of power the Fosgate T1 sub did, meaning the gain stayed in almost the same position(65% turned up). Anything higher and it started distorting.
The sub hits, but not as hard as my T1 did. It is a flat bass probably good for rock, but not rap. When playing DJ Magic Mike's "Feel the Bass", the FI sub was unable to effectively reproduce any of the lower range Hz notes. I watched and listened to the sub while it played various bass notes. If I could explain it best, I would say the sub would start to play a low note(20-30hz range) then back off mid way through the excursion. I could see the sub actually start excursion, then back off before the entire bass note was played. This gave it a non-responsive flat sound. Even when playing a full length song with higher bass frequencies, the sub appeared to not reproduce accurate bass notes after playing for a few minutes. Perhaps that was my imagination.
I'm calling it like I see it.Overall, I was more satisfied with the Fosgate T1's ability to reproduce lower bass notes. You could feel the T1's bass notes rumble your insides and make your clothing move standing outside the door. The FI Q is just not cutting it.
If there is something I missed or any suggestions to making the FI Q sub sound better I'm open to suggestions....
There's gotta be a reason. That just doesn't sound right. It actually sounds as if it's clipping (not finishing th full excursion).
Normally when tuning the gains, you would use a test tone cd, but a music cd could work also so long as you KNOW the ins and outs of the song used (sounds like you do).
What is this sub crossed over at? Did you try reversing phase? Does the amp have a subsonic filter?
Normally when tuning the gains, you would use a test tone cd, but a music cd could work also so long as you KNOW the ins and outs of the song used (sounds like you do).
What is this sub crossed over at? Did you try reversing phase? Does the amp have a subsonic filter?