
sintaxeror's build log - tons of PICS/No 56k!


Thread Starter
Registered User
iTrader: (3)
Joined: Jun 2005
Posts: 670
Likes: 0
From: St. Petersburg, FL
Originally Posted by geomark
I can't keep up!! What is that going to be used for? What the 18 pack is holding down.

That is my amp rack. You can see some earlier planning stages of it at the end of the previous update.
Thread Starter
Registered User
iTrader: (3)
Joined: Jun 2005
Posts: 670
Likes: 0
From: St. Petersburg, FL
Originally Posted by dkmesa350z
photo loggin the whole process must be a huge pain in the ***. Everytime I try to do that, I end up with only a few pictures at the end of the install lol.
Keep up the perfectionism
Keep up the perfectionism

looks great Jay. I have done a few installs in cars over the years but nothing this nice. I have always wanted to try working with fiberglass so maybe this will get me moving. subscribing for updates.
thanks for the motivation.
Mike
thanks for the motivation.
Mike
Thread Starter
Registered User
iTrader: (3)
Joined: Jun 2005
Posts: 670
Likes: 0
From: St. Petersburg, FL
UPDATE 3/11/08 Evening
Finished up the amp rack, I think that's all you'll get out of me today as I am too tired to tackle much more. The goal for the rest of this week is to run the rest of the amp wires, install the amps, and put the interior back in the car..
If I can get all that done, I can focus the weekend on running wires into the doors and installing the new components. After that it will be all sub box time.
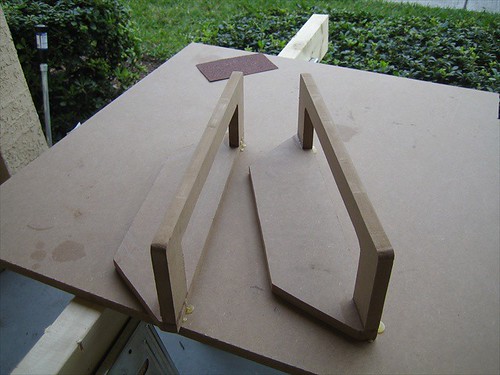
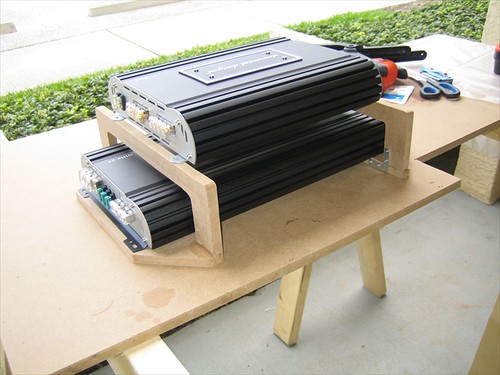
Here's the rack pieces after the glue has dried...
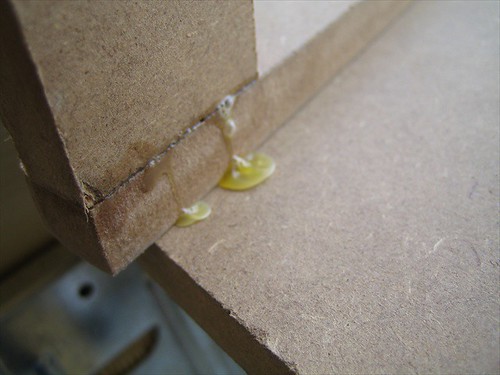
The pools of excess glue dried up like this...
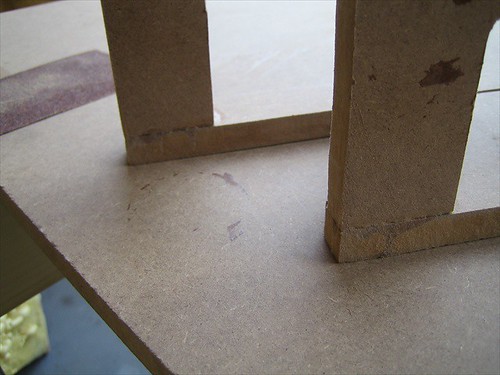
I cut those off with a utility knife and sanded the edges smooth..
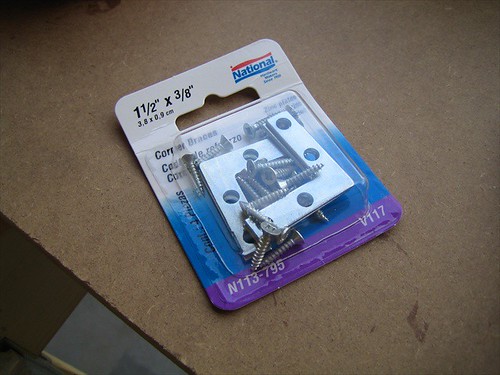
Got these from walmart for like a buck fiddy.
Here's one installed..
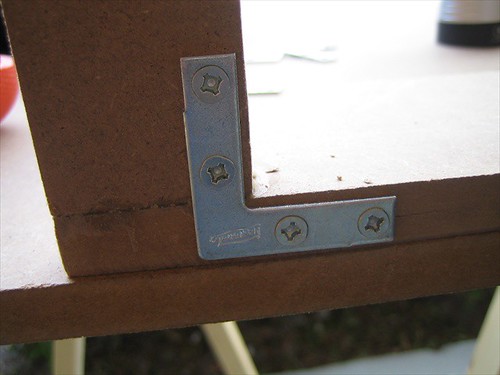
Screws were just a liiiiiiittle too long..you can see they've poked through.
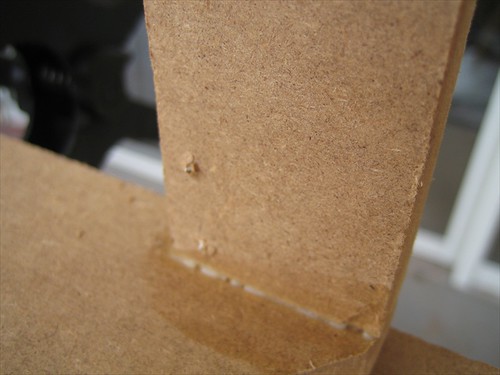
Went ahead and installed the rest of them anyways...
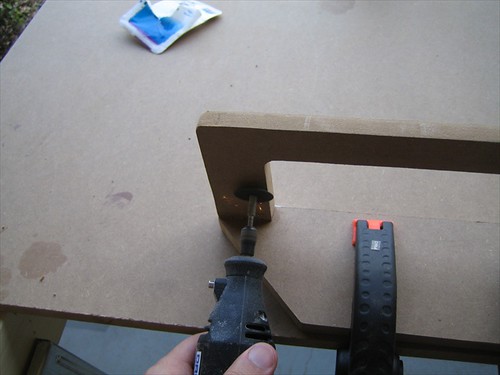
Heres an action shot of me cutting/grinding the screw tips.. This was hard to do while controlling the dremel. The things I do for you guys....
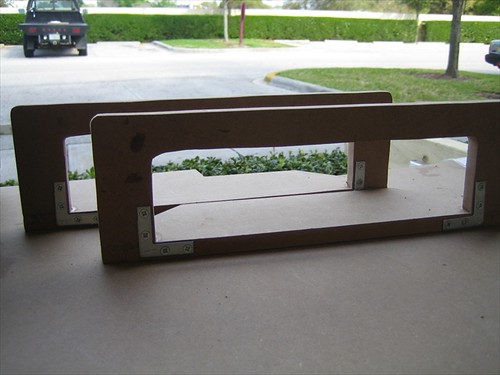
All trimmed up..

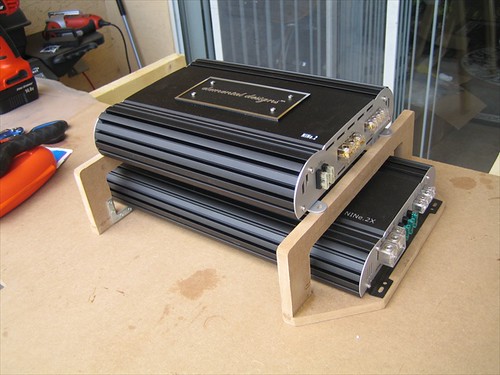
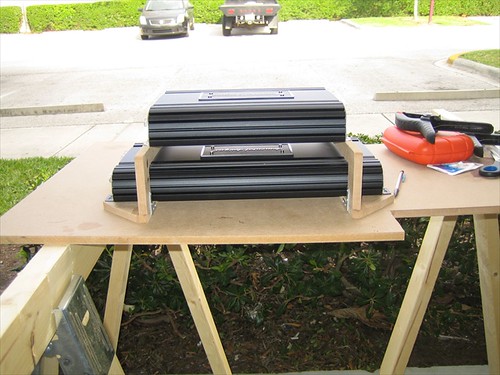
Amp rack all set up.. I marked the holes but I won't bother mounting everything until I get around to actually installing it.
Thats it for today! Let me know your thoughts as always!
Finished up the amp rack, I think that's all you'll get out of me today as I am too tired to tackle much more. The goal for the rest of this week is to run the rest of the amp wires, install the amps, and put the interior back in the car..
If I can get all that done, I can focus the weekend on running wires into the doors and installing the new components. After that it will be all sub box time.
Here's the rack pieces after the glue has dried...
The pools of excess glue dried up like this...
I cut those off with a utility knife and sanded the edges smooth..
Got these from walmart for like a buck fiddy.
Here's one installed..
Screws were just a liiiiiiittle too long..you can see they've poked through.
Went ahead and installed the rest of them anyways...
Heres an action shot of me cutting/grinding the screw tips.. This was hard to do while controlling the dremel. The things I do for you guys....
All trimmed up..
Amp rack all set up.. I marked the holes but I won't bother mounting everything until I get around to actually installing it.
Thats it for today! Let me know your thoughts as always!

Registered User
Joined: Oct 2007
Posts: 49
Likes: 0
From: PA
Amp rack looks nice and clean, are you planning on spray painting or carpeting it? Seeing all the detail you have been putting into every other part of the install i would assume so.
Keep up the good work
Keep up the good work
Thread Starter
Registered User
iTrader: (3)
Joined: Jun 2005
Posts: 670
Likes: 0
From: St. Petersburg, FL
amp rack will be sitting in the cubby so I'm not going to bother finishing it..then I would have to make the whole cubby look nice and I just dont have it in me =)

New Member


Joined: Dec 2006
Posts: 7,337
Likes: 204
From: Edina, Minnesota
Great thread. I�m watching and reading, as are a lot of other people.
I don�t know if this has come up or been asked previously on the thread, but could you weigh everything (components, mounts, racks, etc.) individually before the final installation so that there is an itemized weight list arriving at a grand total for a sophisticated CES installation?
I think that would be an interesting statistic.
--Spike
Thread Starter
Registered User
iTrader: (3)
Joined: Jun 2005
Posts: 670
Likes: 0
From: St. Petersburg, FL
Well I can do my best! I can weigh the rack, amps, sub, sub box, and components...
I won't be able to weigh the head unit or cables though, since they are already installed. Head unit probably not necessary since its not being added by itself, it replaces the stocker.
I almost don't want to weigh it so I don't realize how much I'm adding =/ I am guesstimating it will probably be 70ish pounds =/
New Member
Joined: Dec 2006
Posts: 7,337
Likes: 204
From: Edina, Minnesota
^^ You could use the manufacturer�s specs for the weight of individual components, so no need to bother weighting these. Wiring should be about 2 or 3% of the weight of the electronic components.
The unknown variable is the weight of the glassing and the stuff you build (racks, speaker enclosures, etc.).
It will be on the heavy side, but that�s how you get a good sounding CES. Light-weight is important to guys who track, but this is not a track car; so who cares if there is a minor loss of performance for a great sounding CES. Jeez� the car�s got like 300 hp, so adding 100 lbs. to a street car to get great sound is hardly any big deal. It would be interesting to see the �itemized list.�
--Spike


Looking fantastic. I like the amp rack you made.
I know you said you don't want to make the cubby look neat so you won't even bother with finishing off the amp rack, but just a little food for thought. I would spray at least 1 or 2 coats of rustolium or something to seal the wood. The car's interior can get humid and damp at times and that will compromise the integrity of the wood. Even just some flat black real quick - you could get two coats sprayed on in about an hour's time. With as much time and effort you are putting into this meticulous install, I would hate to see something happen down the road.
I know you said you don't want to make the cubby look neat so you won't even bother with finishing off the amp rack, but just a little food for thought. I would spray at least 1 or 2 coats of rustolium or something to seal the wood. The car's interior can get humid and damp at times and that will compromise the integrity of the wood. Even just some flat black real quick - you could get two coats sprayed on in about an hour's time. With as much time and effort you are putting into this meticulous install, I would hate to see something happen down the road.
Thread Starter
Registered User
iTrader: (3)
Joined: Jun 2005
Posts: 670
Likes: 0
From: St. Petersburg, FL
Originally Posted by StreetOC192
Looking fantastic. I like the amp rack you made.
I know you said you don't want to make the cubby look neat so you won't even bother with finishing off the amp rack, but just a little food for thought. I would spray at least 1 or 2 coats of rustolium or something to seal the wood. The car's interior can get humid and damp at times and that will compromise the integrity of the wood. Even just some flat black real quick - you could get two coats sprayed on in about an hour's time. With as much time and effort you are putting into this meticulous install, I would hate to see something happen down the road.
I know you said you don't want to make the cubby look neat so you won't even bother with finishing off the amp rack, but just a little food for thought. I would spray at least 1 or 2 coats of rustolium or something to seal the wood. The car's interior can get humid and damp at times and that will compromise the integrity of the wood. Even just some flat black real quick - you could get two coats sprayed on in about an hour's time. With as much time and effort you are putting into this meticulous install, I would hate to see something happen down the road.
THANKS Street...
edit: 3000+ views! look at me go!
Last edited by sintaxeror; Mar 12, 2008 at 05:01 AM.

Registered User
Joined: Aug 2006
Posts: 613
Likes: 0
From: Atlanta, GA
Jay,,,Man,,,everything looks incredible. Yes,,I would at least shoot the amp rack with some black,,,give it some type of finish look and seal the wood. Especially, after all the time and energy you have put into this. Looking forward to reading as you update. I am an Accountant, slammed this time of year,,,but I keep checking back here to ease my mind from the number crunching...Keep the photo's coming. GREAT JOB!
Thread Starter
Registered User
iTrader: (3)
Joined: Jun 2005
Posts: 670
Likes: 0
From: St. Petersburg, FL
UPDATE 3/12/08 Night
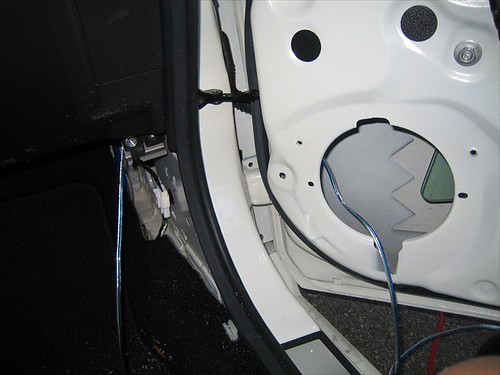
Well I wasn't feeling too well today but I decided I would try to route speaker wire to one of the doors..
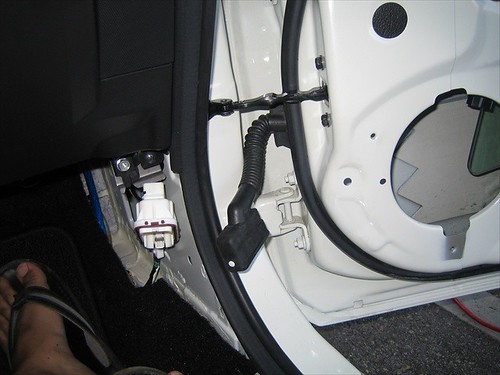
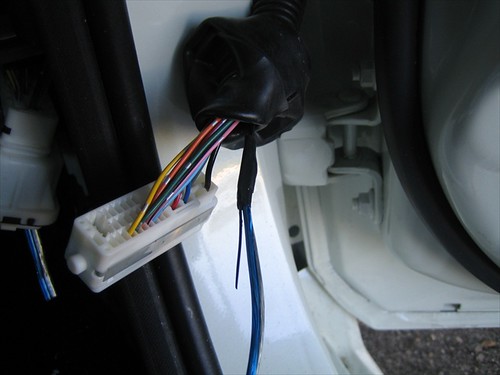
Thanks to the how-to on these forums... Here's the harness... lower the lever to loosen it.
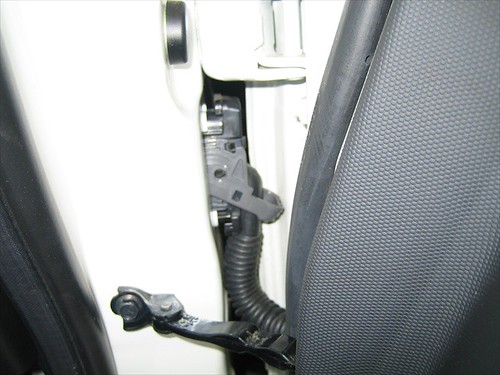
I wish all the connectors in this car used the lever method to lock into place.
With everyone on the how-to talking about how beatup their hands were after doing this, i decided to use tools for pretty much everything... and I couldn't fit one of my plastic upholstery pry thingies in there because the door panel was in the way.. So i took it off.
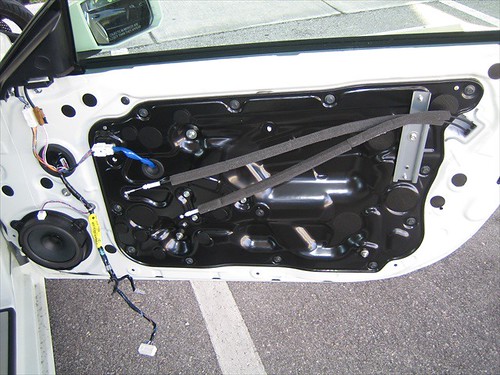
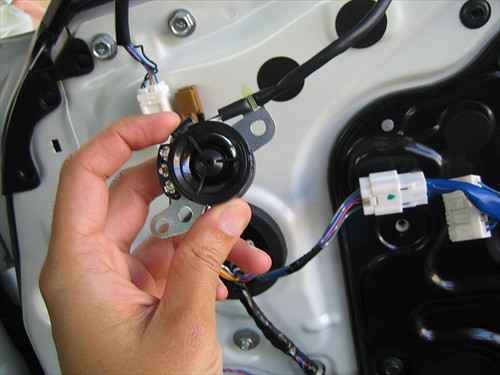
Then I sort of got side tracked and began wondering how the tweeter was mounted..
Then I started remembering my fears of my DLS MS6A set not fitting.. so i decided to have a look...
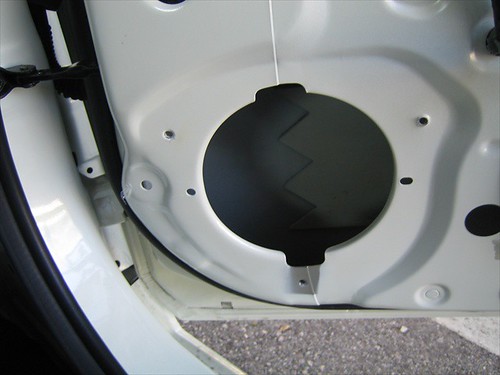
Looks fine... whats the big deal with fitting speakers in there? Oh wait...
Let me lower the window...
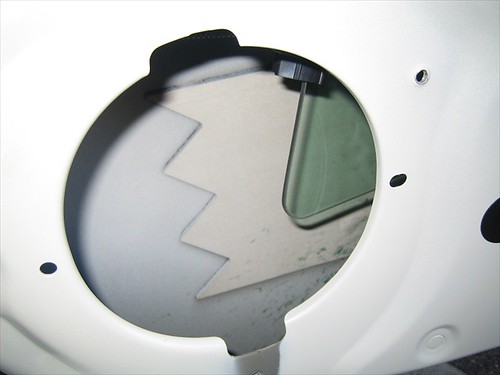
Damnit Nissan... you didn't really think that through did you. Of course the MS6A does NOT clear the window... I could see how you could do it with a spacer, if you were to offset the speaker all the way to the lower left part of the hole it would BARELY clear.. but I'm don't really have the precision tools necessary to build something that barely clears... I'll just play it safe and use a different set.
So this is when I took a "break" to call up Alex@eD (where I ordered my DLS speakers), and beg and plead for some help. They generously offered to exchange for a set of UP6's (with much smaller motors) for the difference in price+shipping.. So basically I made an $80ish mistake for not going with the UP6 to begin with. Thinking back on it I did have a thought that this would happen... I don't know why I didn't just spend the extra $100 at the time. Unfortunately this will also delay things more.. but hey, you can only control what you can control. the MS6A set will be in the mail tomorrow.
Back to the task at hand... getting wire into the doors.
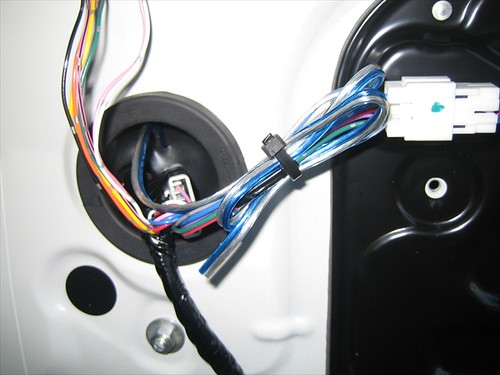
Here are both sides of the harness disconnected.. and also my foot in an old navy flip flop.
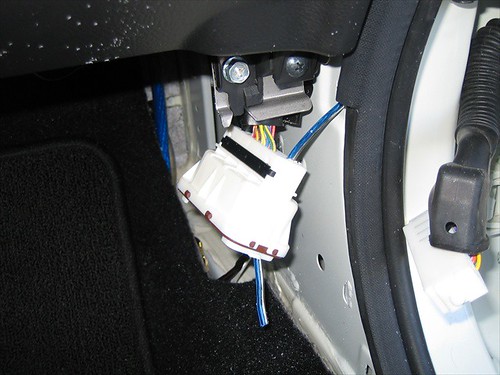
I tried using an exacto knife.. and I tired melting through with a crappy old spare soldering iron (tip from the how-to thread)... but nothing cuts into that connector like a good old dremel. I was EASILY able to remove some material cleanly, and with the right bit its pretty easy to control.. Here is a test fit with a bit of wire.
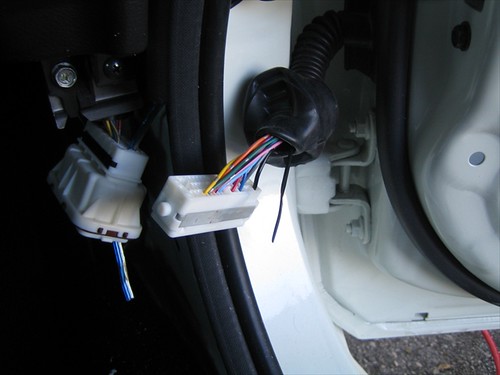
Same thing on the other side.. note all the plastic shavings caused by dremel.
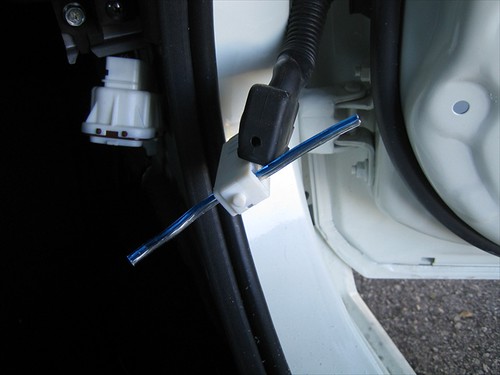
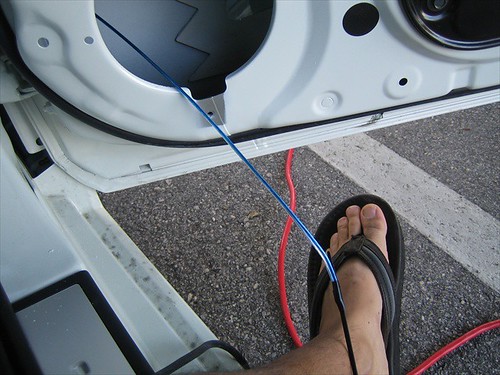
I was able to push a zip tie through the boot...
tape the wire to the zip tie...Also you can see the hole i bored with the dremel..
Pull through...and my foot again.
Then I realized that I forgot to thread through the other side and through the door jamb first.. so I pulled the wire out did just that.

Back to the zip tie and tape..
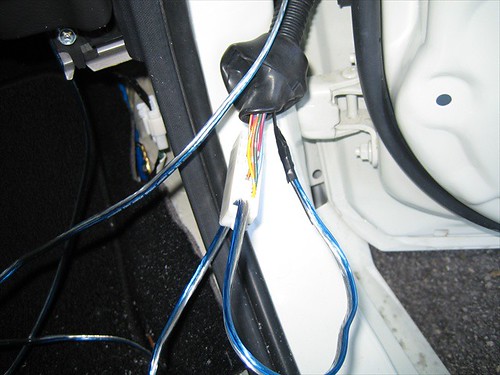
boot over the connector..
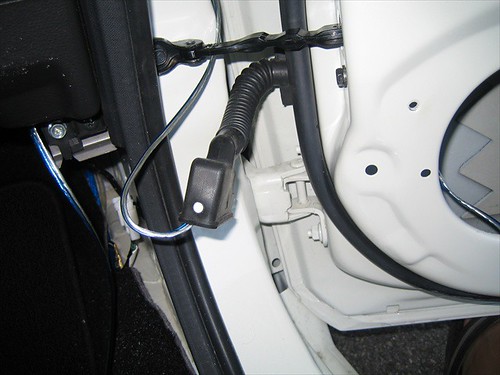
And reconnected back up, my hands are not beat up at all.. and supposedly the passenger side is the hard side. sweet!
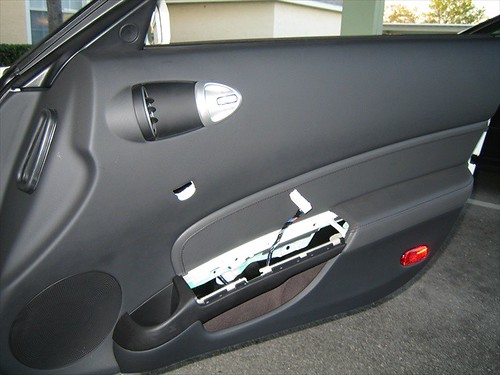
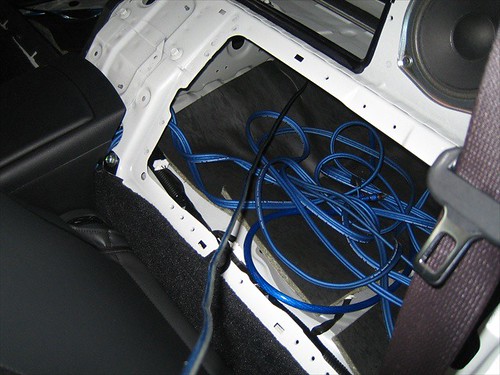
Since I clearly will not be installing my speakers today, I just fed the wire through the big grommet there and tied it up.
Door panel going back on..
Back on now..
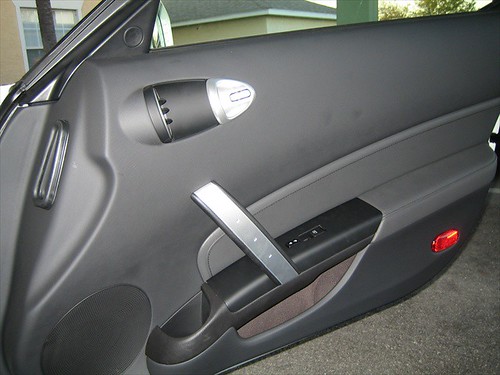
Gotta feed this back to the drivers side cubby now..
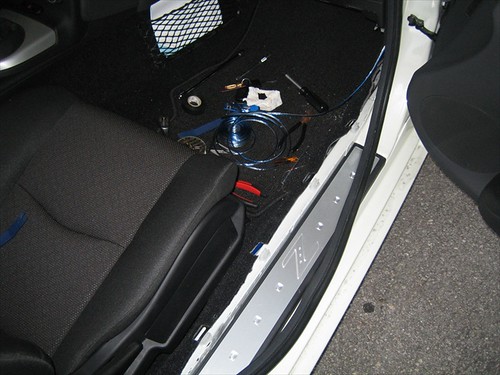
Went down the rail and under the passenger side cubby...
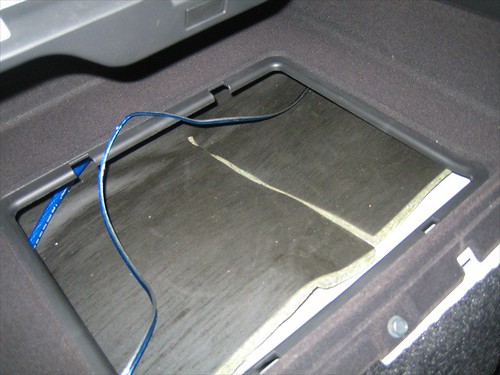
And fed into the drivers side cubby...
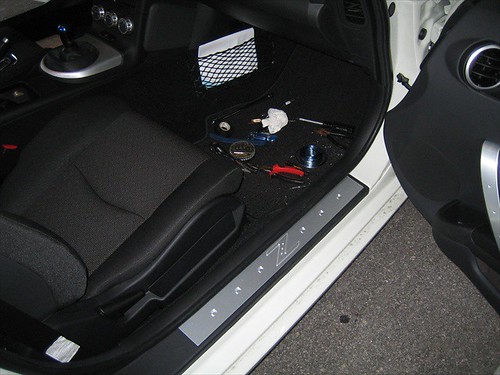
Kick panel and door sill back on... all finished with this side..
Well thats all for today.. hopefully I will feel better tomorrow and have time to do the other side... and maybe have a chance to paint my amp rack?
Also, my replacement sub is in the mail, estimated delivery time is Monday...
Well I wasn't feeling too well today but I decided I would try to route speaker wire to one of the doors..
Thanks to the how-to on these forums... Here's the harness... lower the lever to loosen it.
I wish all the connectors in this car used the lever method to lock into place.
With everyone on the how-to talking about how beatup their hands were after doing this, i decided to use tools for pretty much everything... and I couldn't fit one of my plastic upholstery pry thingies in there because the door panel was in the way.. So i took it off.
Then I sort of got side tracked and began wondering how the tweeter was mounted..
Then I started remembering my fears of my DLS MS6A set not fitting.. so i decided to have a look...
Looks fine... whats the big deal with fitting speakers in there? Oh wait...
Let me lower the window...
Damnit Nissan... you didn't really think that through did you. Of course the MS6A does NOT clear the window... I could see how you could do it with a spacer, if you were to offset the speaker all the way to the lower left part of the hole it would BARELY clear.. but I'm don't really have the precision tools necessary to build something that barely clears... I'll just play it safe and use a different set.
So this is when I took a "break" to call up Alex@eD (where I ordered my DLS speakers), and beg and plead for some help. They generously offered to exchange for a set of UP6's (with much smaller motors) for the difference in price+shipping.. So basically I made an $80ish mistake for not going with the UP6 to begin with. Thinking back on it I did have a thought that this would happen... I don't know why I didn't just spend the extra $100 at the time. Unfortunately this will also delay things more.. but hey, you can only control what you can control. the MS6A set will be in the mail tomorrow.
Back to the task at hand... getting wire into the doors.
Here are both sides of the harness disconnected.. and also my foot in an old navy flip flop.
I tried using an exacto knife.. and I tired melting through with a crappy old spare soldering iron (tip from the how-to thread)... but nothing cuts into that connector like a good old dremel. I was EASILY able to remove some material cleanly, and with the right bit its pretty easy to control.. Here is a test fit with a bit of wire.
Same thing on the other side.. note all the plastic shavings caused by dremel.
I was able to push a zip tie through the boot...
tape the wire to the zip tie...Also you can see the hole i bored with the dremel..
Pull through...and my foot again.
Then I realized that I forgot to thread through the other side and through the door jamb first.. so I pulled the wire out did just that.
Back to the zip tie and tape..
boot over the connector..
And reconnected back up, my hands are not beat up at all.. and supposedly the passenger side is the hard side. sweet!
Since I clearly will not be installing my speakers today, I just fed the wire through the big grommet there and tied it up.
Door panel going back on..
Back on now..
Gotta feed this back to the drivers side cubby now..
Went down the rail and under the passenger side cubby...
And fed into the drivers side cubby...
Kick panel and door sill back on... all finished with this side..
Well thats all for today.. hopefully I will feel better tomorrow and have time to do the other side... and maybe have a chance to paint my amp rack?
Also, my replacement sub is in the mail, estimated delivery time is Monday...

Originally Posted by geomark
Whoah, I just got a flashback watching you do the door wires. That was NOT fun!
My hatch button still does not work to release the hatch and I'm too lazy to take the driver's side harness apart to see what pin got bent over

Thread Starter
Registered User
iTrader: (3)
Joined: Jun 2005
Posts: 670
Likes: 0
From: St. Petersburg, FL
Honestly I'm not sure why you guys had so much trouble.. I really didn't have a hard time with it... maybe the drivers side will teach me a lesson today?

