
Part 2 of my custom install *PICS!*


Thread Starter
Registered User
iTrader: (4)
Joined: Jul 2004
Posts: 515
Likes: 0
From: Vancouver, BC
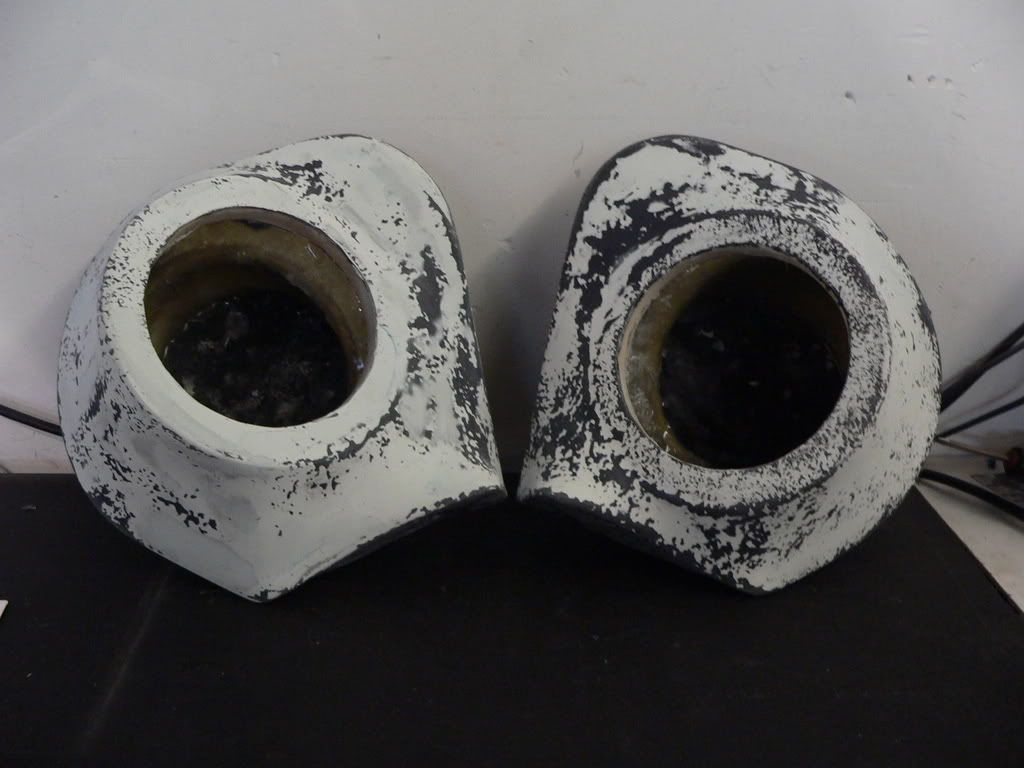
Well, I finally got down to building my custom door pods. These pods were designed to house a high end mid-bass driver made by Digital Designs. It is German made and the basket is similar to that of the older MB Quarts units. Its a great sounding driver!
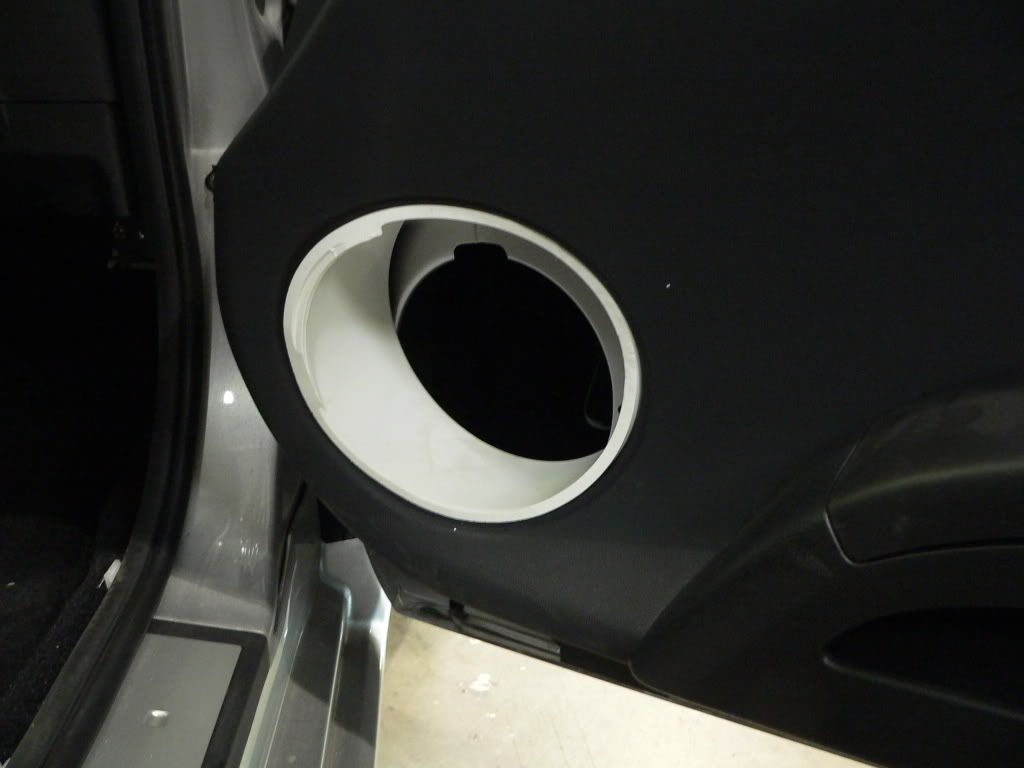
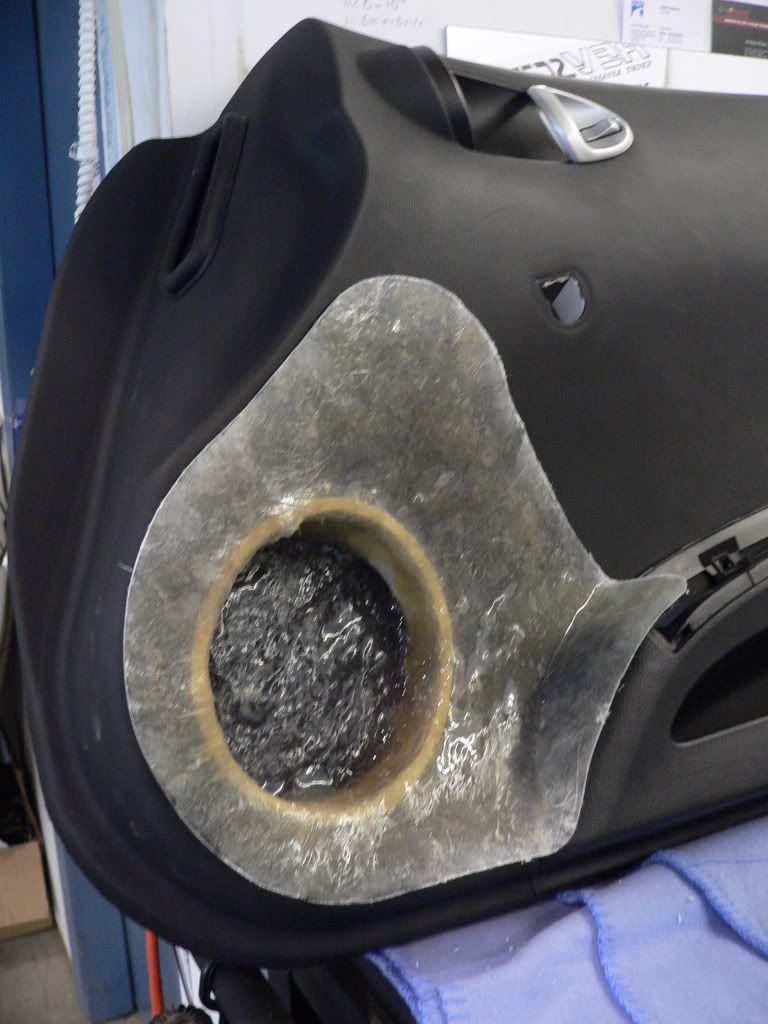
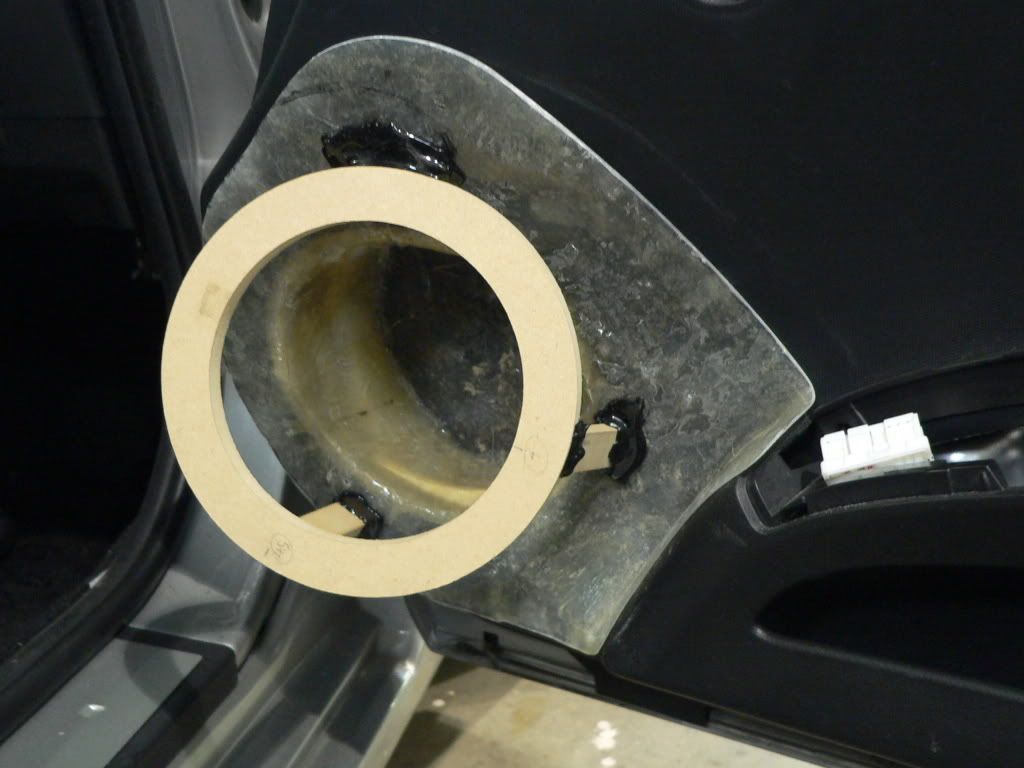
First of all I had to find the perfect 6" pipe to insert through the factory grille hole. I did not have to cut any of the grille or grille hole at all so I can put it back to stock at any time.
This 6" sewer pipe was cut to follow the contour of the door and lay flush against the metal door inard.
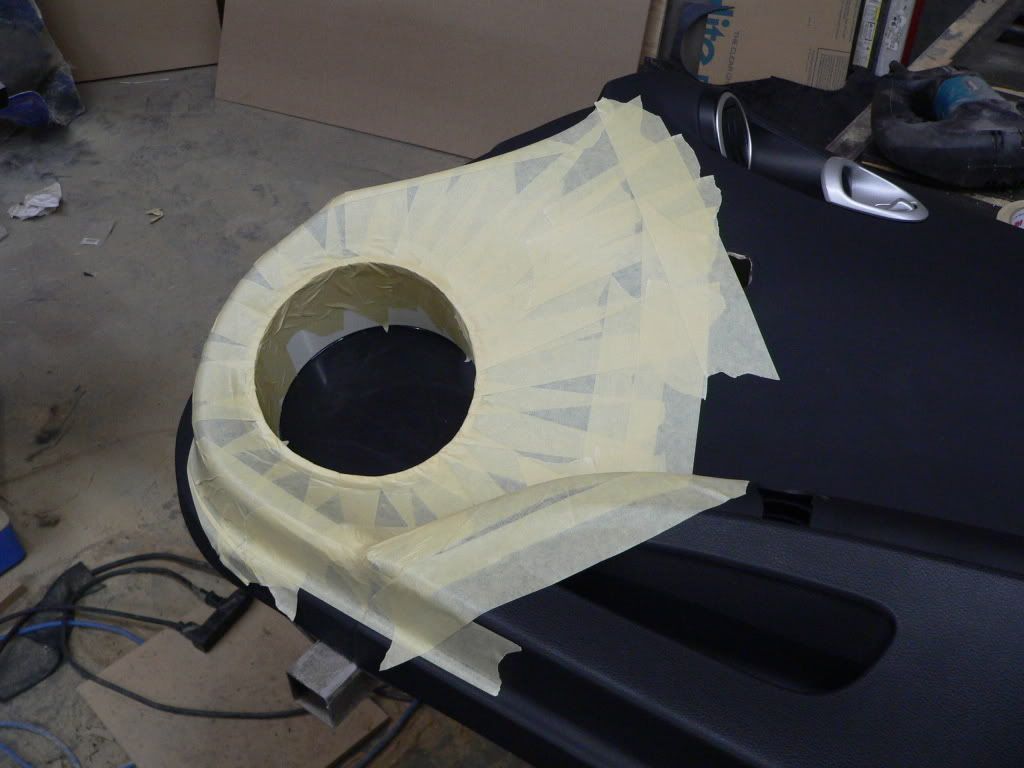
Time to tape this stuff up!
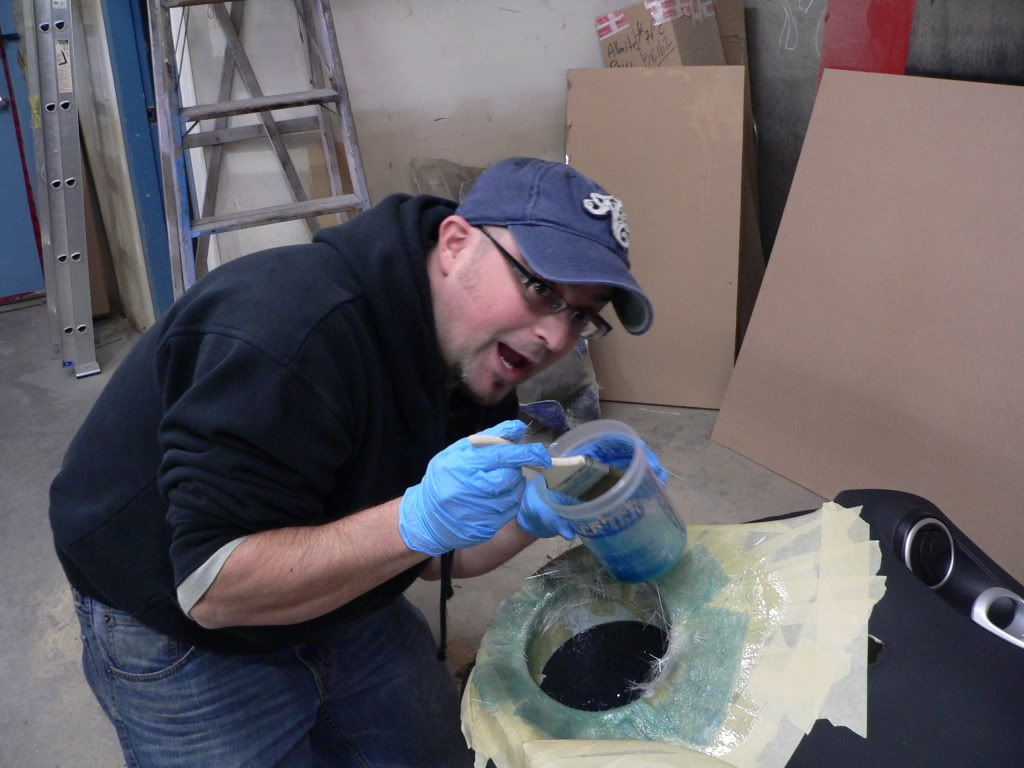
Fibreglassing the inside of my pod
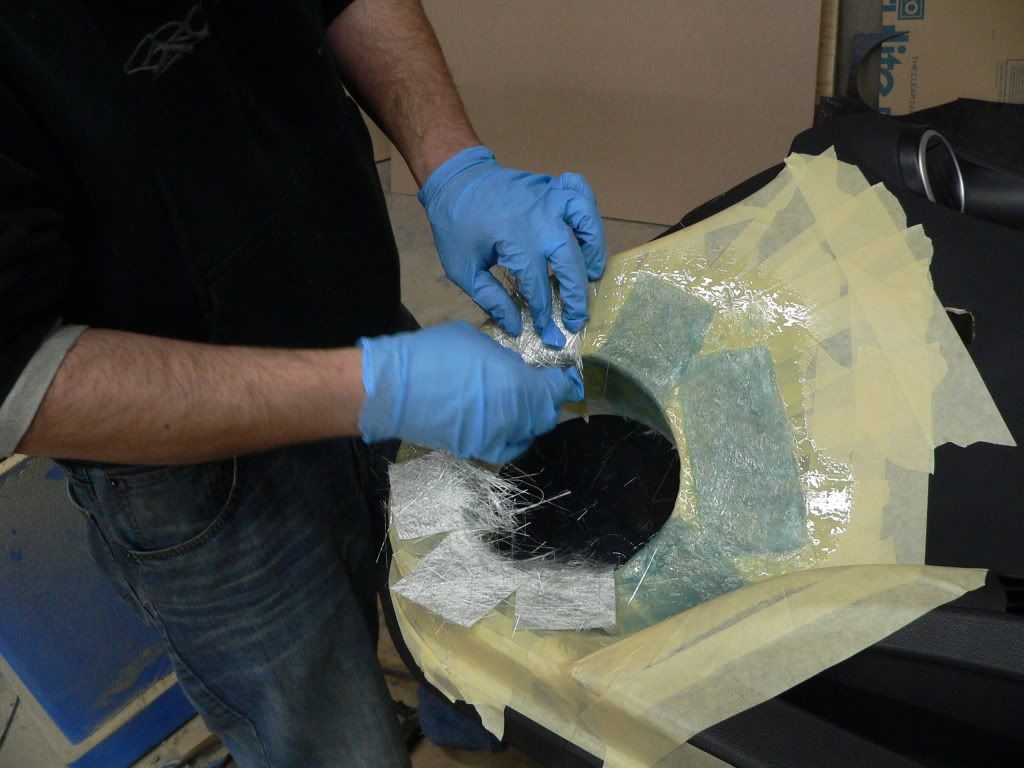
Mmmm...tasty fibreglass!
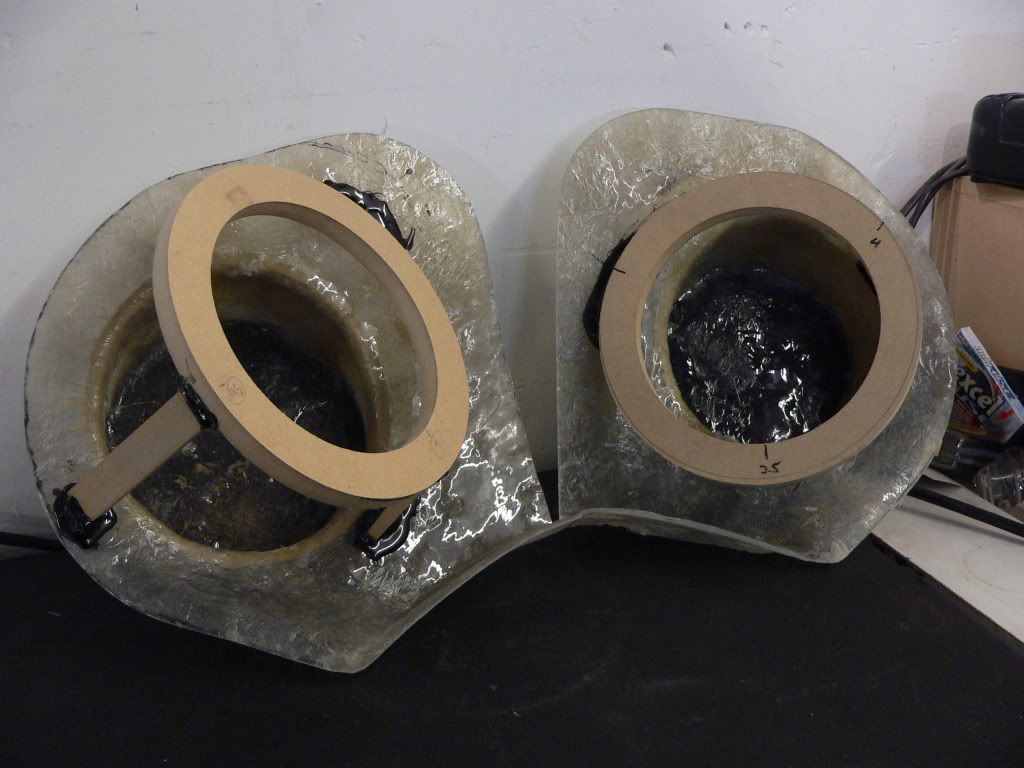
After two layers of fibreglass and resin I removed the pods and cut them down to a managable size and shape. Here is one of the bases cut to size:
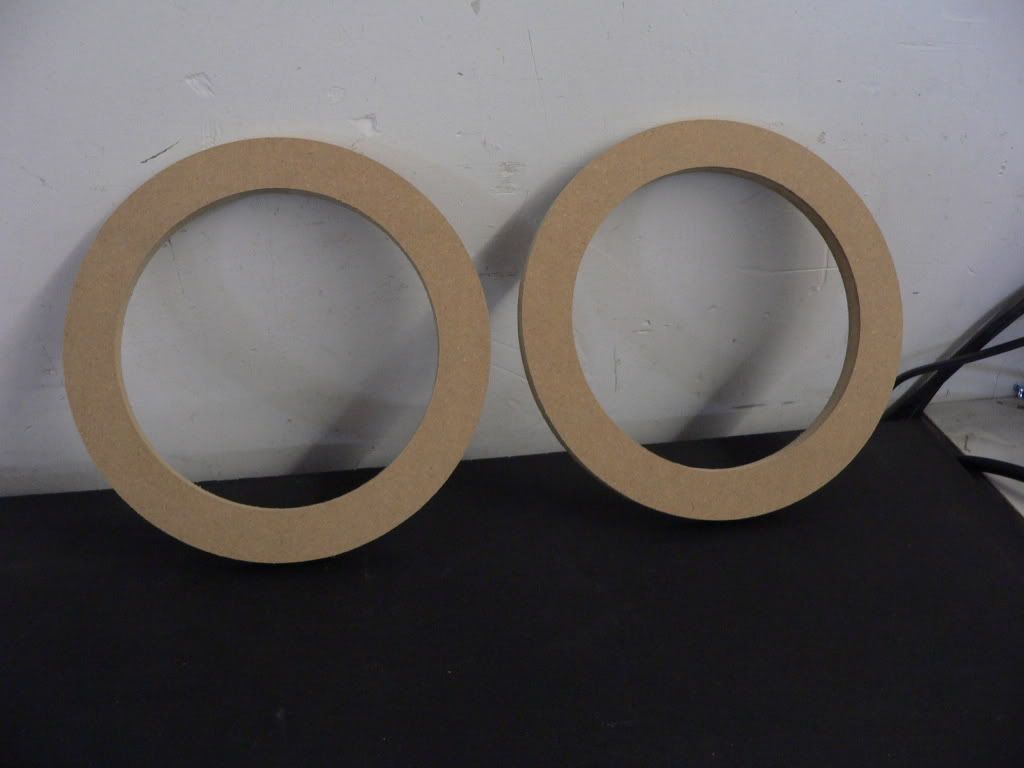
Now its time for some 6.5" rings! Thanks to my new Jasper router jig...
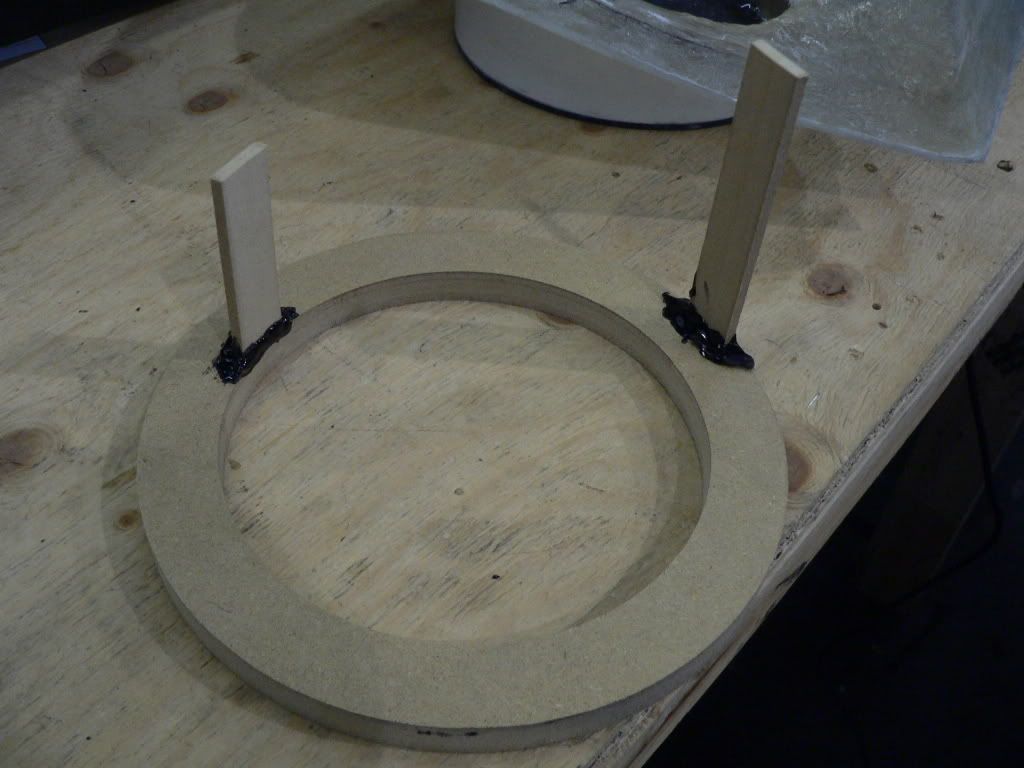
Some MDF stilts hot glued onto the rings
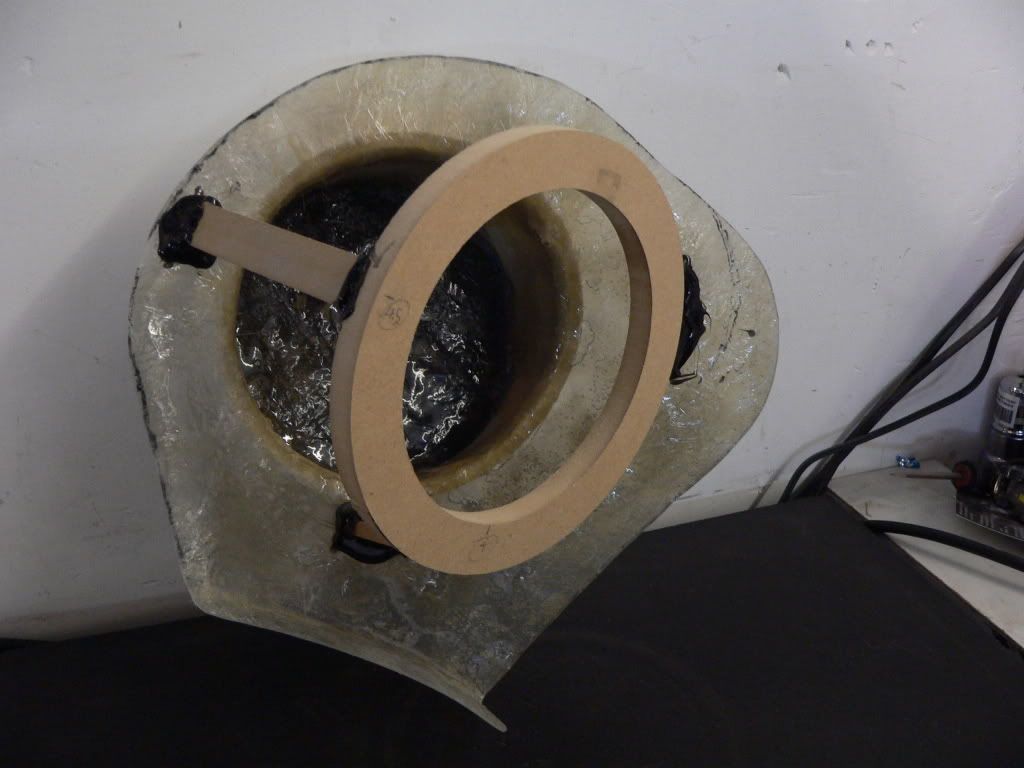
After some very careful aiming and positioning I found an acceptable location for the rings to face off of the base
Speaker fitment:

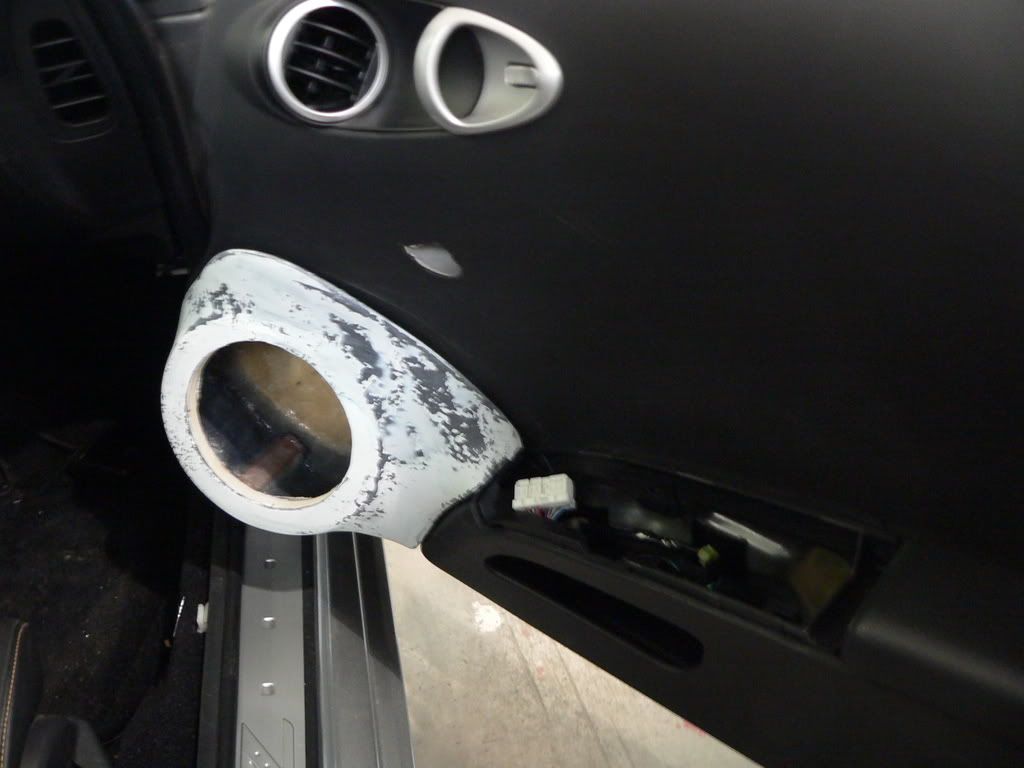
Now a test fit on the car:
First of all I had to find the perfect 6" pipe to insert through the factory grille hole. I did not have to cut any of the grille or grille hole at all so I can put it back to stock at any time.
This 6" sewer pipe was cut to follow the contour of the door and lay flush against the metal door inard.
Time to tape this stuff up!
Fibreglassing the inside of my pod
Mmmm...tasty fibreglass!
After two layers of fibreglass and resin I removed the pods and cut them down to a managable size and shape. Here is one of the bases cut to size:
Now its time for some 6.5" rings! Thanks to my new Jasper router jig...
Some MDF stilts hot glued onto the rings
After some very careful aiming and positioning I found an acceptable location for the rings to face off of the base
Speaker fitment:
Now a test fit on the car:
Last edited by orgasm_donor; Dec 18, 2008 at 10:15 PM.
Thread Starter
Registered User
iTrader: (4)
Joined: Jul 2004
Posts: 515
Likes: 0
From: Vancouver, BC
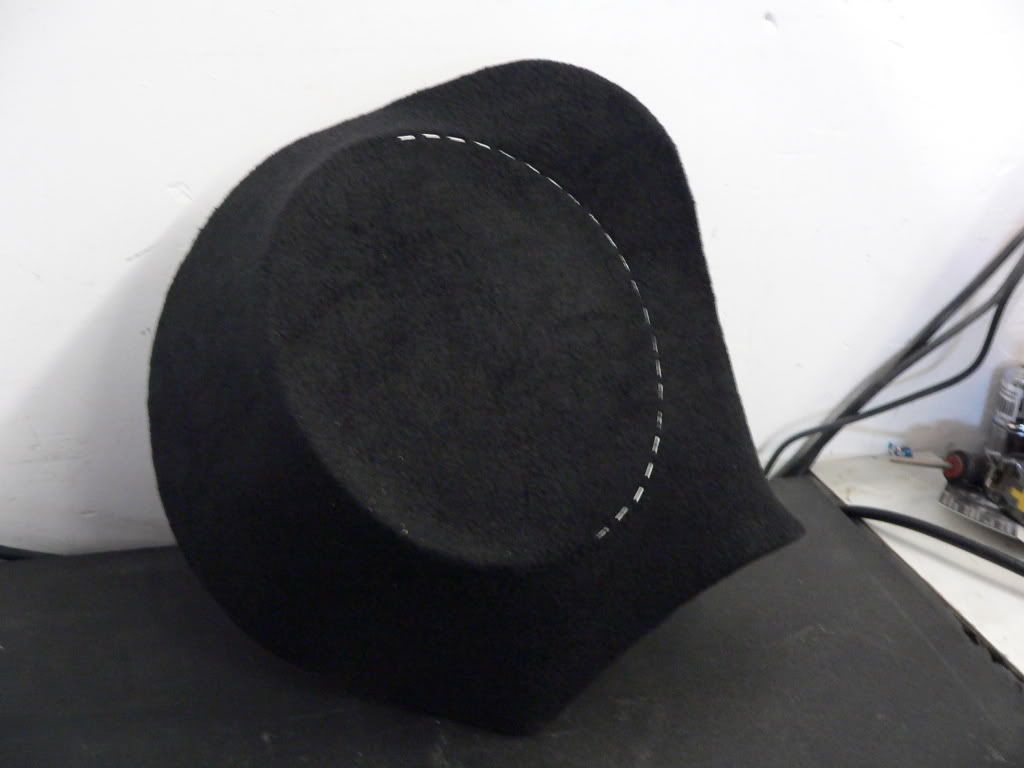
Both Pod bases set up after positioning and placement
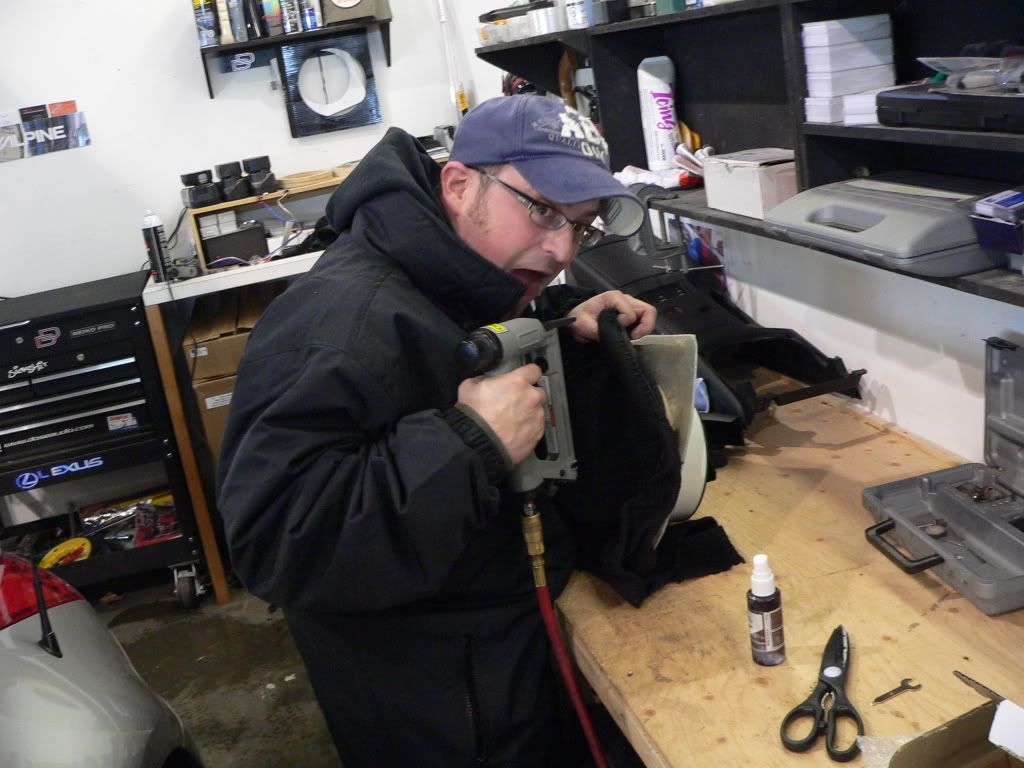
Stapling the fleece to the ring...then glueing it to the outside of the pod.
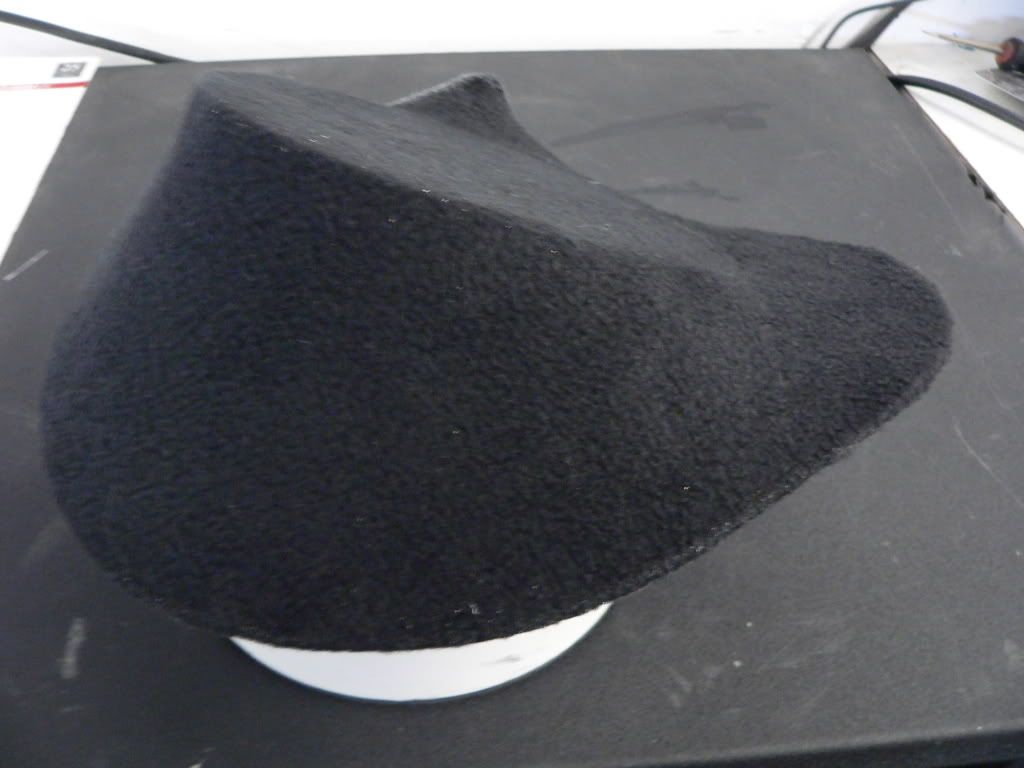
Stapled, stretched and ready to go!
One down one to go!
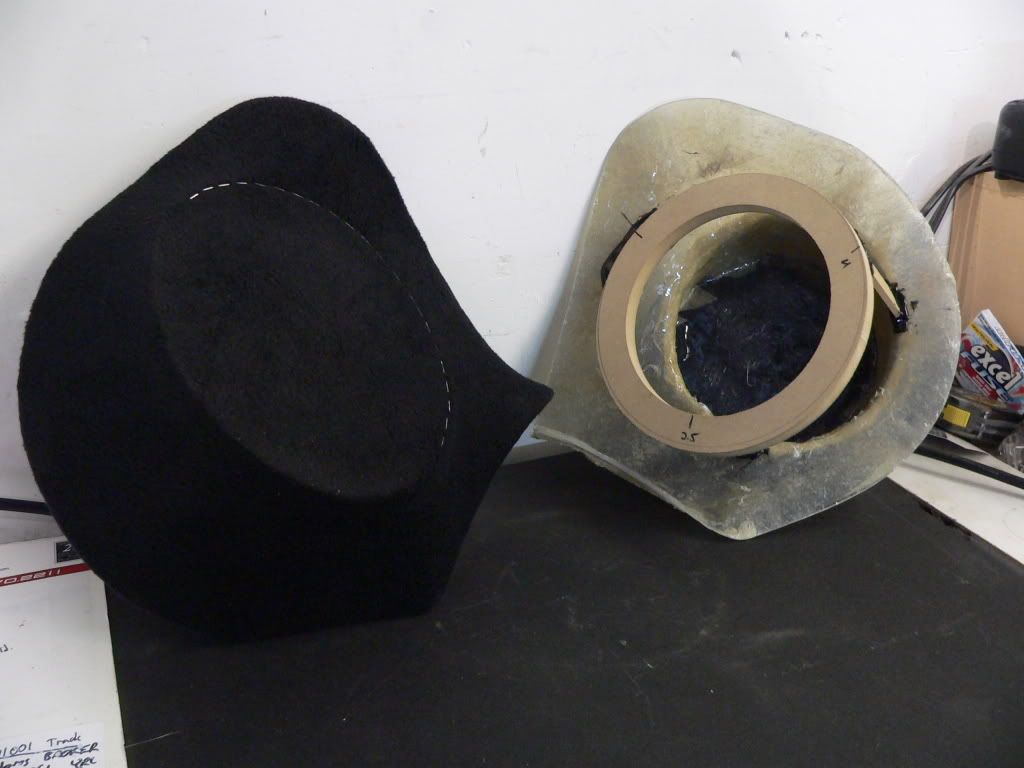
One more shot of the pod ready for a nice coat of fibreglass resin and catalyst.
I did some fibreglass resin work on both pods this evening so they should be ready and hard by tomorrow. Next I will be strengthening the pod by adding fibreglass matting to the inside of the pod. I will leave the outside alone because its got a great shape and just needs a nice coat of icing and a sanding.
I hope you liked the pics!
Stapling the fleece to the ring...then glueing it to the outside of the pod.
Stapled, stretched and ready to go!
One down one to go!
One more shot of the pod ready for a nice coat of fibreglass resin and catalyst.
I did some fibreglass resin work on both pods this evening so they should be ready and hard by tomorrow. Next I will be strengthening the pod by adding fibreglass matting to the inside of the pod. I will leave the outside alone because its got a great shape and just needs a nice coat of icing and a sanding.
I hope you liked the pics!


Thread Starter
Registered User
iTrader: (4)
Joined: Jul 2004
Posts: 515
Likes: 0
From: Vancouver, BC
Well, it is a completely different part of my install. Mods can close this thread if they feel that I have violated any rules. Remember, I am not trying to 'show off' but I am just trying to share some of my advice and experience with other members.
No one is accusing you of trying to show off and I personally don't think anything is wrong with showing off if whatever it is you are displaying is different from the norm. I just thing your install progress would be much easier to follow if everything was shown in one place. This is just my opinion.

No one is accusing you of trying to show off and I personally don't think anything is wrong with showing off if whatever it is you are displaying is different from the norm. I just thing your install progress would be much easier to follow if everything was shown in one place. This is just my opinion.
Doesn't matter much though, whatever works, but I think it's better organized. Just my 0.02.
Trending Topics

Thread Starter
Registered User
iTrader: (4)
Joined: Jul 2004
Posts: 515
Likes: 0
From: Vancouver, BC
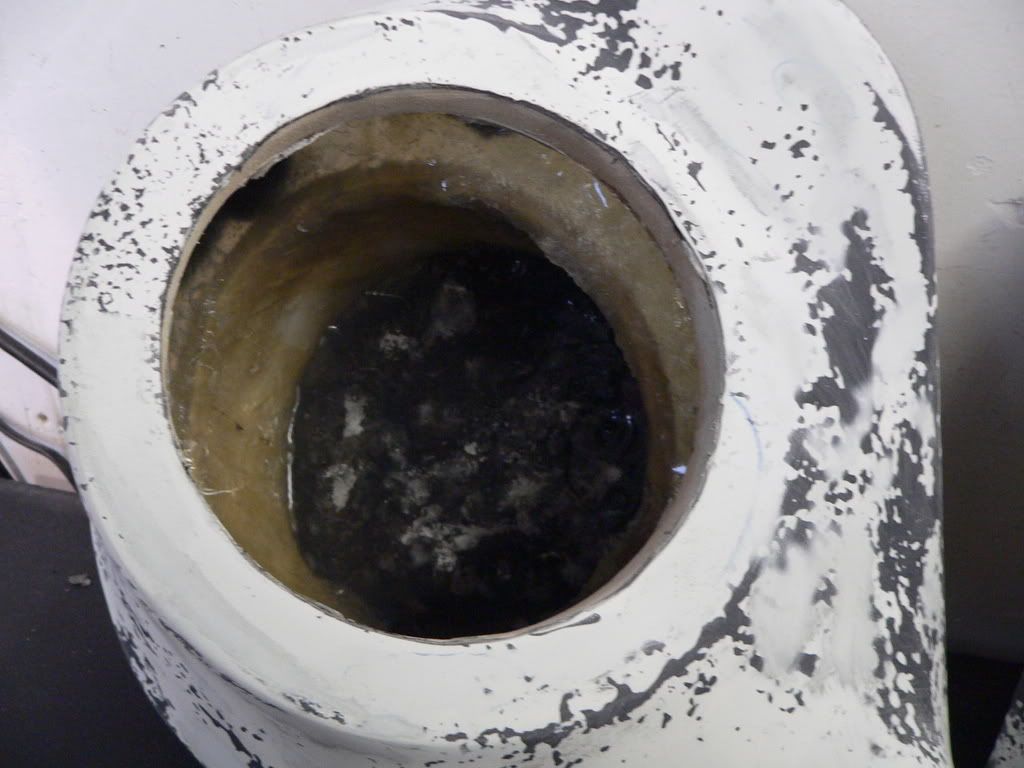
Where the bottom of the pod is (the black ABS plastic I used) I will be screwing that to the metal skin of the door in two places. Once you take that grille out you can see lots of metal to attach to. I will also be adding some sound deadener to the back of the pod as a damping layer between it and the metal. The door panel will not be attached to the pod. There will be zero door rattles!
EDIT: If you look at the first picture, you can see where the metal is behind the pipe that I test fitted in there.
EDIT: If you look at the first picture, you can see where the metal is behind the pipe that I test fitted in there.
Last edited by orgasm_donor; Jan 2, 2009 at 08:13 PM.

Thread Starter
Registered User
iTrader: (4)
Joined: Jul 2004
Posts: 515
Likes: 0
From: Vancouver, BC
Updated!
I put two full coats of resin on the pods to seap through the fabric to thicken it up. Got pretty hard and started to take shape!
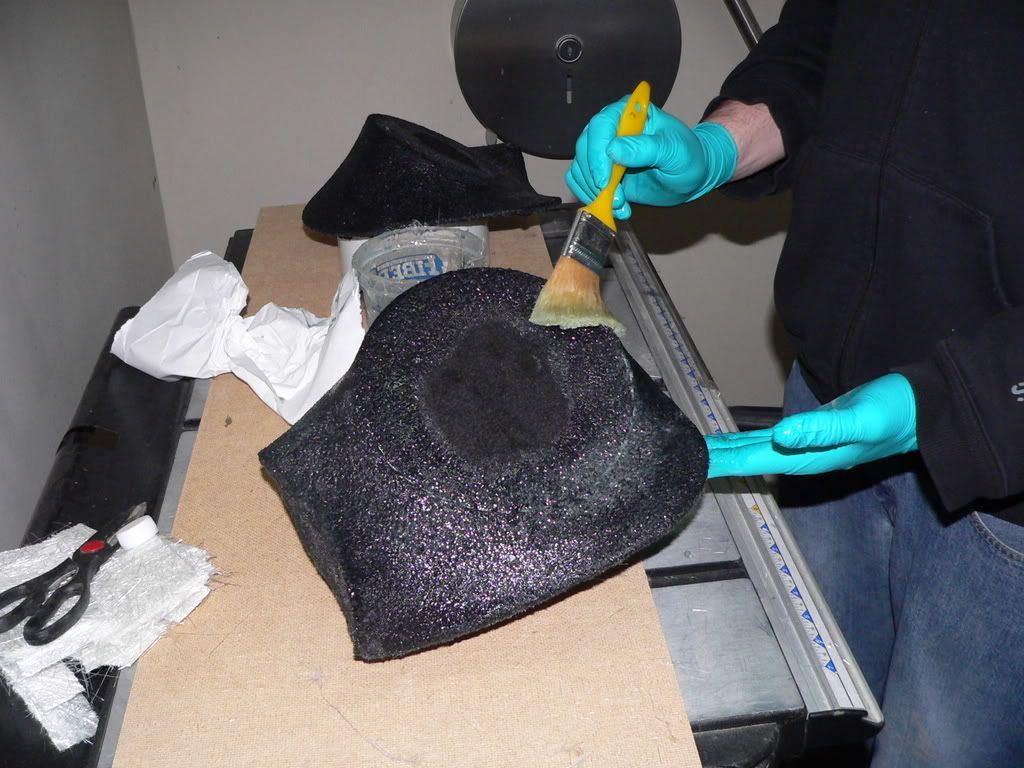
Fast forward a bit. After the resin had fully dried and hardened (2 full days with the two coats) I wanted to make the pod stronger. Not so much for the speaker but rather so it can put up with a kick or two from passengers. It had to be pretty tough so I made sure I put two full layers of fibreglass mat as well as plenty of resin to get into all the nooks and crannies!
I used a great product called 'Icing' which has similar properties to bondo but its much smoother, lighter and way easier to spread and sand. Its awesome stuff! I did a skim coat to remove the bumpiness of the resined fabric adn sanded it smooth. I found that this way takes waaay less time that just doing all my matting on the outside and filling in perfections that way.
Test fit:
The pods are nearly perfect for paint but I won't be painting them. I was going to do suede but I have decided on a very high grade black 'greesy finish' vinyl. It looks and feels just like premium leather and matches the seats beautifully. I am also going to use the same vinyl on the door panel itself with proper stitching.

I put two full coats of resin on the pods to seap through the fabric to thicken it up. Got pretty hard and started to take shape!
Fast forward a bit. After the resin had fully dried and hardened (2 full days with the two coats) I wanted to make the pod stronger. Not so much for the speaker but rather so it can put up with a kick or two from passengers. It had to be pretty tough so I made sure I put two full layers of fibreglass mat as well as plenty of resin to get into all the nooks and crannies!
I used a great product called 'Icing' which has similar properties to bondo but its much smoother, lighter and way easier to spread and sand. Its awesome stuff! I did a skim coat to remove the bumpiness of the resined fabric adn sanded it smooth. I found that this way takes waaay less time that just doing all my matting on the outside and filling in perfections that way.
Test fit:
The pods are nearly perfect for paint but I won't be painting them. I was going to do suede but I have decided on a very high grade black 'greesy finish' vinyl. It looks and feels just like premium leather and matches the seats beautifully. I am also going to use the same vinyl on the door panel itself with proper stitching.
looks good but are you going to keep it fully sealed? from my experinece, most speakrs with a sealed pod that size, you are going to get a lot of build up 125-300hz...thats why i build mine open backed, still good midbass impact but less build up
but are you going to keep it fully sealed? from my experinece, most speakrs with a sealed pod that size, you are going to get a lot of build up 125-300hz...thats why i build mine open backed, still good midbass impact but less build up
Thread Starter
Registered User
iTrader: (4)
Joined: Jul 2004
Posts: 515
Likes: 0
From: Vancouver, BC
Going to try it sealed at first, then maybe knock a very small port in there.
sounds like a plan, it looks decent sized, but even on my big kicks and door pods, i have been doing a vent in the back as it really halps to tame the build up, it could be that hte DD isnt too bad but i would venture to guess...i also use modeling clay and dampening to kill more resonance sinec i find that even super thick biuld up of glass will resonate in the lower midbass octaves..
cant wait to see the result
cant wait to see the result

